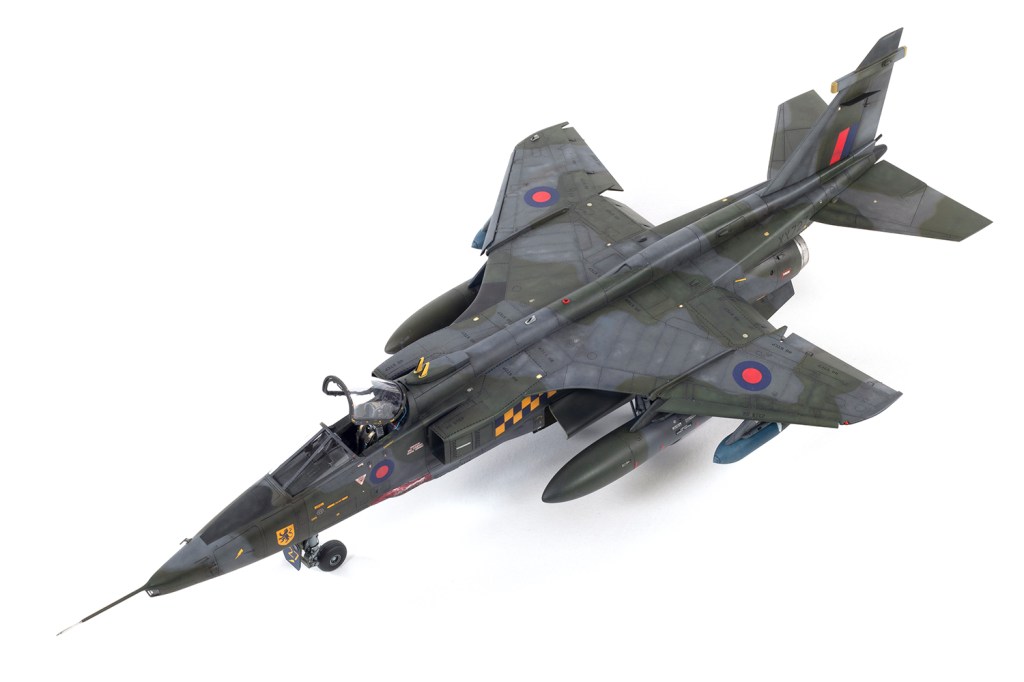
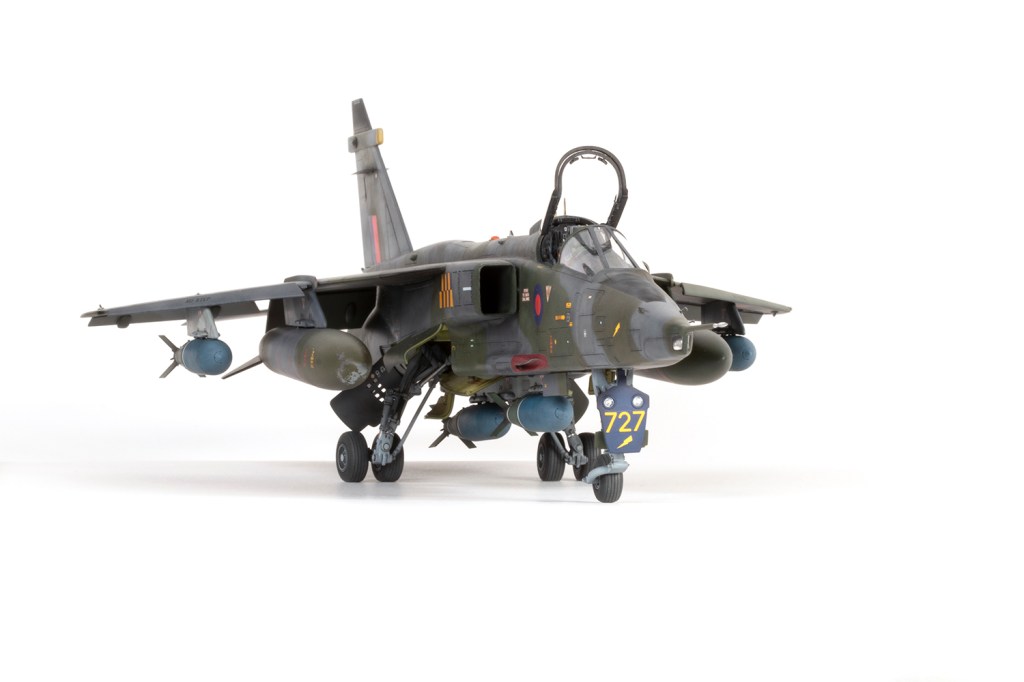
with Eduard resin cockpit, wheels and exhausts, Aires resin pylons, seat and airbrake wells, Matters of Scale resin intakes, ITA3 resin undercarriage, Master metal pitot, Quickboost resin flap fairings, aerials, lights, air scoops and sensors, ResKit resin bombs, Mini Craft Collection resin canopy details and Wingman Models decals
54 Squadron, Royal Air Force, West Germany 1979

The Airfix Jaguar has always held a special place in my modelling collection. Although long-since disposed of, I made the original boxing as a Desert Storm GR.1A back in 1994 and it was my first experience of aftermarket: resin and PE from Xtraparts (the precursor to Paragon Designs), which set a suitably high standard for subsequent expectations.
However good the aftermarket may have been, it could not disguise the fact the old kit was a bit of a pain, and thus calls over the years for a better moulding were understandable. Kitty Hawk took a swing at it and, as I understand it, missed, so Airfix’s 2025 release made a lot of 1/48 modellers happy. Towards the end of the year I was asked to build it for a client with a ton of aftermarket and a request to add bombs, an open cockpit and on a base. This broke loads of my self-imposed rules, but they say a change is as good as a rest, and it would be nice to return to some areas of aircraft modelling I’ve neglected for a while and it wasn’t going to sit in my display cabinet anyway.
Enough has been written about constructing this kit that I’m not going to do that here, except to highlight an issue I came across which I’ve not seen covered elsewhere: a severely warped wing. So below are plenty of captioned photos of various bits of the project, but jump to about midway down to pick up the story.


Airfix designed the wing in three main pieces: one full-span part across the top of the fuselage, and two lower wing parts. Given how wide the fuselage is, and how well the kit part seated into it, I wasn’t really thinking there were any problems when I joined the wing to it, and proceeded to eliminate all the seams (even though they generally fall on panel lines) and rescribe them. Under some primer, I was very happy with the result. I now had an almost complete airframe.


However, as I was handling the model I got the feeling all was not quite right, and so I propped the kit on a little tattoo ink pot (my favoured paint mixing receptacle) and took a look head-on. To say I was horrified was an understatement: the right wing had no anhedral at all.

At this stage, I was prepared to think the problem was me, although I couldn’t understand how the wing had fitted so well across the fuselage. My first instinct was to try and rectify the problem with heat, which I knew was high risk, but I couldn’t figure out a better option. Using a hairdryer, I set about heating the wing and trying to bend it down to match the left side.


Unsurprisingly, this didn’t get me very far, so I upped the heat. I was paying a lot of attention to the anhedral, and definitely got the wing looking better, but as the plastic cooled it would return to the incorrect shape. In fact, I was paying so much attention to this that I completely neglected to see that I’d melted the wing trailing edge and one of the wing fences. The plastic was wavier than my wife’s hair in high humidity.

My stress levels were now heading through the roof – someone was paying me for this, so I’d better damn well deliver it! I considered buying another kit, but with all the work sunk into this one – not to mention all the aftermarket I’d already added – I was reluctant to do that. I therefore appealed to Airfix for help.
Amazingly, they responded super quick. I emailed them on a Saturday evening, they replied first thing Monday, and by Friday I had replacement sprues. Wonderful service, except…hang on…the new wing is warped too! Argh!
Whilst waiting for the wing, I’d hacked off the original, which had been attached with a combination of Tamiya Extra Thin and super glue. More Extra Thin helped weaken those joints, and various scribers, saws and scalpel blades were used elsewhere. It was depressing work – the very definition of ‘negative modelling’ – but it had to be done. With patience, I eventually had a pile of old wing bits and a still-intact fuselage.


I emailed Airfix again, to inform them their replacement wing wasn’t any better than the original, but I didn’t have time to wait for a response. I needed to figure out how to attach my new, warped wing. Test-fitting it in place showed I’d done a reasonable job in removing the previous one, but that the starboard wing still had no anhedral. I had a go at using brute force to bend the wing at the fuselage join, which caused a nice pale stress mark along the upper surface, but it did help a lot. More brute force applied along the groove for the wing fence caused more stress marks, but actually appeared to fix the problem. To ensure the plastic remained plastically deformed, I scribed some grooves on the inner surface of the upper wing along these stress marks, and then joined the lower wing surfaces. I now had what I thought was a reasonably symmetrical wing.


However, in faffing about with all this, I completely forgot about the holes for the pylons, and neglected to drill them out. Fortunately, I still had the old wing, and could precisely triangulate where I needed to drill using the moulded rivets. Another disaster averted, but only just!

With the wing in place, I mocked up the undercarriage and started measuring to see if it was level. The good news is that it was, and so it was time for round two of filling, priming and rescribing the wing to fuselage joints. And after all that was done, a third wing arrived from Airfix, this time perfectly symmetrical in shape.


Having asked around on Facebook, it seems that it’s not uncommon for Airfix Jaguar kits to have warped wing parts. I hope that if you’ve got this kit yours is unaffected, but if you’re one of the unlucky ones, maybe this article has highlighted the issue and provided one possible fix.




Year bought: 2025 (Commission)
Year built: 2026 (New Addington, Croydon)
Back to home.

