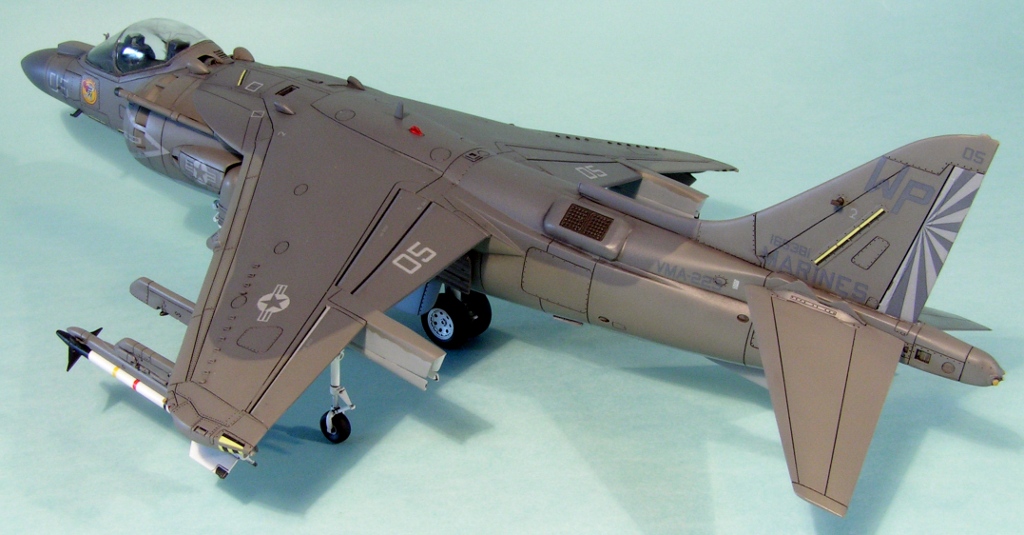
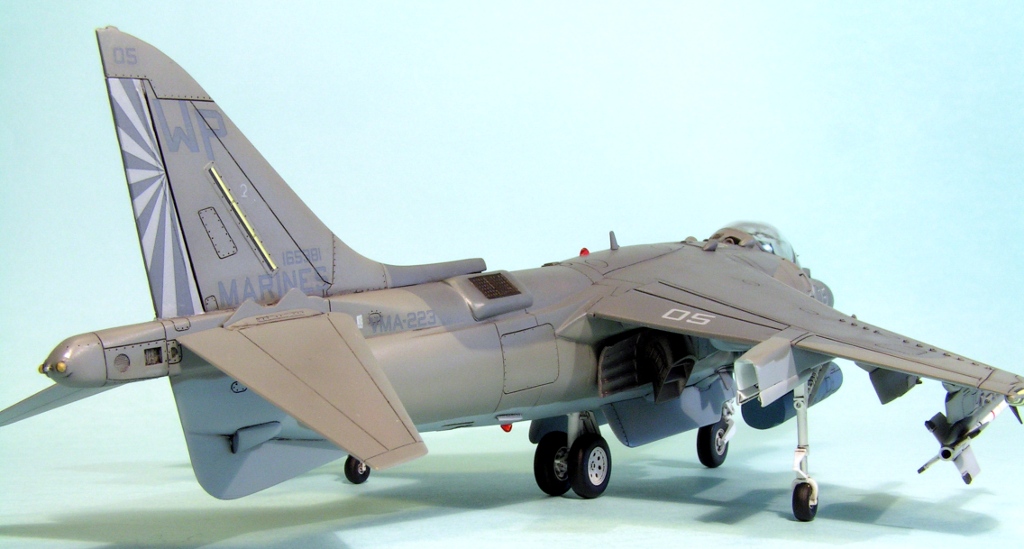
VMA-223 ‘Bulldogs’, US Marines Corps, USA

This is part of another twin build, done at the same time as Hasegawa’s AV-8B. Much has been written about Hasegawa’s Harriers, and opinions on the the fit of these kits seem to vary from ‘awful’ to ‘great’. I am firmly in the latter camp. For sure, there are weaknesses (maybe the wing kink is too severe; maybe not), the greatest, in my opinion, being the instructions. If the modeller follows the instructions then the fit will appear to be poor. As I’ve learned with many Hasegawa kits (their Tomcats being a prime example), it pays to dry fit and try alternative construction sequences. One minus point is that I found the scribing to be quite shallow and indistinct in places, so I rescribed both Harrier models completely before commencing construction (that took a while…).
The ‘problem’ with Hasegawa’s Harriers is that they are tooled for so many different variants. So we have inserts for different noses, wing LERXs, fin intakes, tail parts, wingtips, etc. Combine this with the inherently complex shape of the Harrier II (shoulder wing, four exhausts, complex undercarriage) and you have a complex kit that demands time and patience. Time and patience are rewarded with an extremely well-fitting kit that left me marvelling at the quality of the engineering. It took me about six months to build this pair (but then, I had just moved country!). My suggestion for general construction of these kits is as follows:
- Attach the rear fuselage halves (A1 & B1) together and insert the lower fuselage (B4); I found the fit to be excellent here. I did not bother with the polycaps to make the exhausts rotate, but I did install parts X1-X5 to give the rear fuselage some rigidity. At the same time, I joined the front nose halves to the rear nose halves, and then sandwiched the cockpit between them, resulting in a complete nose unit. Again, the fit was perfect. The engine fan (A5) was attached to the rear of the nose, not the front of the rear fuselage.
- Next, I attached the lower wings (E2 & E3) to the rear fuselage. Some small gaps were easily filled. Then I attached the wingtips to the upper wing (D3) to get perfect alignment on the upper surface. I also attached the upper LERX part to the upper wing for the same reason.
- Part B3 (the rear cockpit decking) was inserted (but not glued) in place at the front of the rear fuselage (note that the nose unit is still separate). This ensures the fuselage is the correct width. Then I glued in place the lower LERX insert. I found the fit to the fuselage to be very good, but less good with the lower wing. The gaps here are easily filled, but there is some scribing that doesn’t match between the lower wing and LERX, and this is harder to deal with (I didn’t do very well – the panel line on my finished build has a kink in it). Once all that was set, I installed the upper wing assembly.
- Now the nose unit needs attaching to the rear fuselage. I Installed B3 in place on the nose unit and then attached the whole assembly to the rear fuselage. Perfect. On my future Harrier builds I may try permanently attaching B3 to the rear fuselage and then adding the nose.
The last step is critical. If you follow the instructions, what is most likely to happen is this: the nose unit will be attached at an angle ill-constrained by the pieces; that is, it is easy to stick the nose on the fuselage at a nose-high or nose-down angle. This will result in the space for B3 being too small or too big, and then lots of people will throw their hands in the air and say this is a poor fitting kit. It is nothing of the sort; it is critical that the nose is added at the correct angle, and this is easily ensured by attaching B3 to the nose or fuselage before bringing them together. Using my method for constructing the wings will also result in very few fit issues. I would say the general fit of this kit is considerably better than Hasegawa’s F-14s and F/A-18s, about the same as the F-8s, and not quite as good as the A-4s or F-104s.
With the basic airframe complete, all the other little bits and pieces, such as the fin, intakes, lower fin, chaff dispensers, fin intake, can be installed. These all fit extremely well, with the exception of the internal intake joints. These took some effort to try and hide, and I wasn’t terribly successful at it. I installed the strakes on this model, and their fit was only so-so. The fit of the canopy was excellent.
Off to the paint shop. I primed the model using Gunze Mr Basic White. I found this to be essential for the later Mr Color paints. The Mr Color did not bond to areas that I didn’t prime (like the tail planes) and peeled off under Tamiya masking tape (and was generally very fragile). The white was useful for touching up the insides of the intakes and the undercarriage bays anyway. Painting, using Gunze Mr Color laquer acrylics for the first time was uneventful. The paint is wonderfully opaque (and needs to be thinned by about 50-70%; I used Gunze Mr Levelling Thinner) and dries very fast. I have concerns about its durability when handled and masked, as there was some subsequent chipping on places like the wing leading edge. I did not use Hasegawa’s paint recommendations, instead using the correct colours (307 underneath, 317 for the mid-grey, and 305 for the upper surfaces). I overcoated with Johnson’s Klear (sent from the UK!) and applied my usual oil wash. The decals are from the kit and were okay. I usedGunze Mr Mark Softer which, even when applied sparingly, made some decals permanently wrinkle. Because I used the correct undersurface colour (although it looks rather blue), some stencils were not visible. In addition, some markings were out of register making them illegible (the rescue stencilling, for example).
I next installed all the small bits and pieces and the undercarriage. I had heard that the rear main undercarriage unit was too short, and the wheels sat off the ground. Again, this is the result of people glueing in the part without test fitting! The secret here is to unstall the undercarriage door (G8) first. There is a notch cut in this door to attach the undercarriage leg. If you do this, all 5 wheels sit square on the floor (at least they did on both of my Harriers!) with no fuss or adjustment. It is true that the peg is not then pushed all the way home, so if you install the unit first, you will find that the wheels don’t reach the ground. Again, I admire Hasegawa for engineering a Harrier that got all 5 wheels on the ground with no effort from me at all.
The final coat was a mix of Pollyscale Matt and Satin finishes, and the plane was just about finished. The pod was painted using Hasegawa’s recommendation, but I suspect it’s too blue. I am quite pleased with the finished article. As always, there are glaring errors and problems. In this case, inattention meant I glued one of the Sidewinder rails on backwards. The detonator cord in the canopy is from the kit, since I had no other option, and I always knew the carrier film would be all too visible. The only addition I made to this model was seatbelts. I had bought an Aires seat to replace the kit example, at some expense having two of them shipped from the US. I was very disappointed to find the seat didn’t begin to even fit in the cockpit tub, so could only use the seatbelts – a very expensive way of adding them! The other disappointment to me is that, since I have to do all my modelling in a very dusty, polluted city, and in our laundry room, keeping dust and hair out of the paint was a nightmare. I managed to keep it pretty clean, but I wish I had a dust-free room and a spray booth!
These kits take time and effort, just like the Tomcats and Hornets, which are also very complex. I enjoyed making them immensely, but will probably wait a while before tackling the GR.5 and GR.7 I have in the stash!


Year bought: 2004 (R&D Models, Cambridge)
Year built: 2007 (Caiyuan, Zhengzhou, China)
Back to home.
