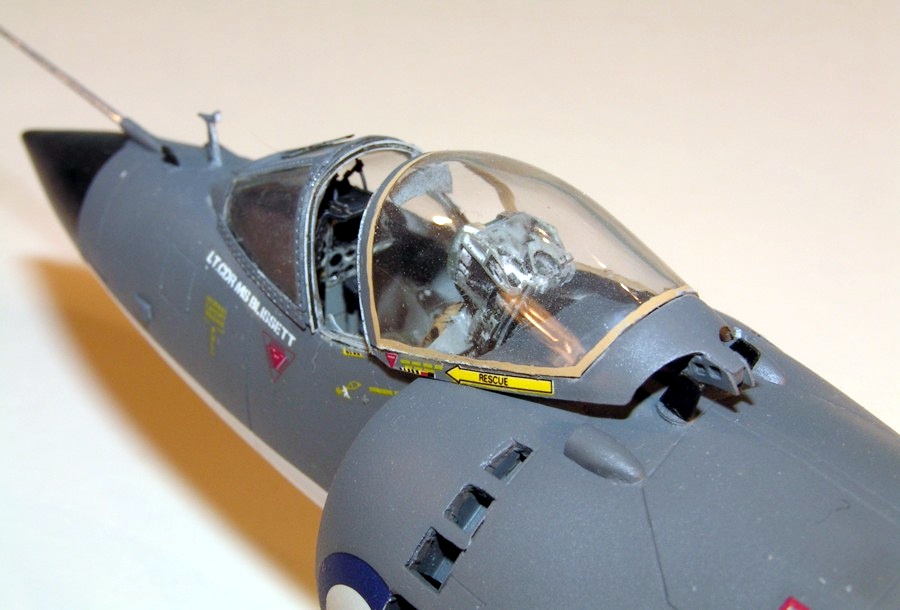
with Flightpath photo-etched detail set and Paragon resin seat
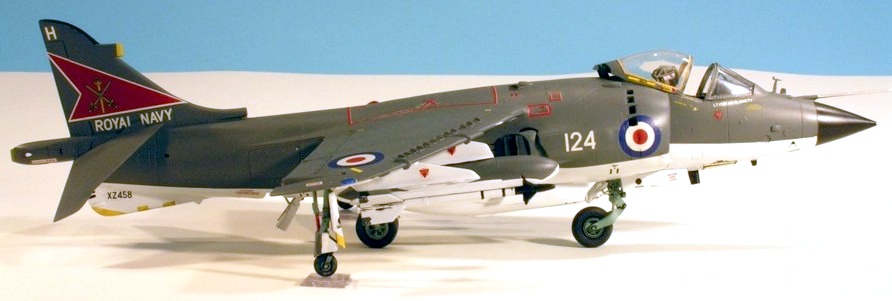
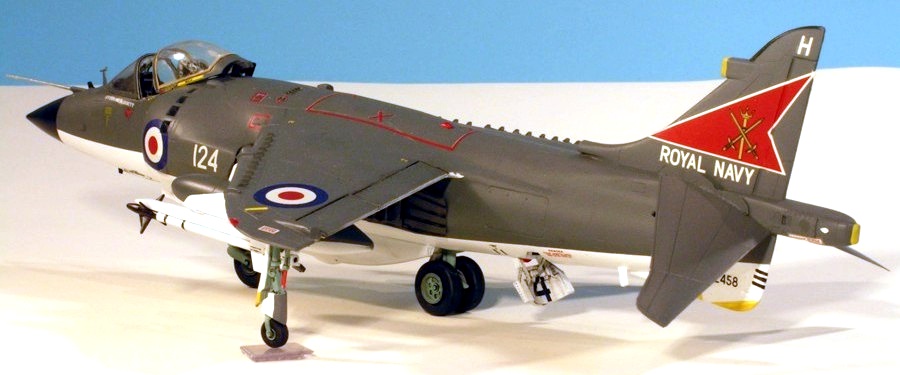
800 Naval Air Squadron, Royal Navy, HMS Hermes 1980

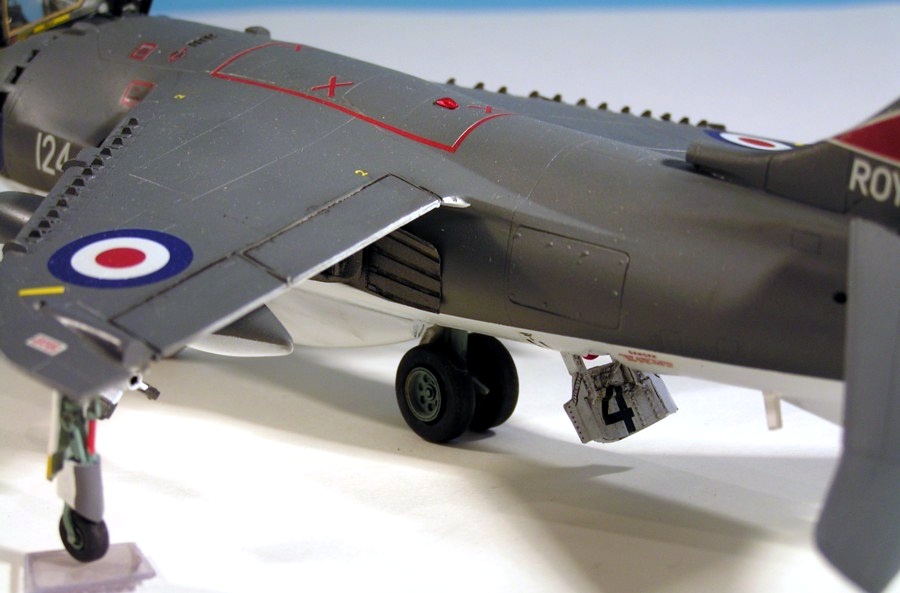
This is an example of a kit which I tried to improve by adding aftermarket parts, but thought that would be enough and so neglected the finish. This was a mistake! It doesn’t matter what you add, the basic construction and finish need to be up to scratch to produce a nice looking model. Tamiya’s Sea Harrier FRS.1 is not a good kit, but I was inspired by Bill Clarke’s article in Scale Aviation Modeller International to add the Flightpath resin and photo-etch upgrade set to this kit. The upgrade set was very expensive and I was ambivalent about Flightpath generally. The set was missing parts, which were provided after a phone call (although they seemed unhappy to have to do so), and the white metal Sidewinder bodies were unusable due to poor moulding. The photo-etch was, however, extremely nice and does add a lot to the kit. It includes a huge amount of stuff and I didn’t use all of it: Canopy and cockpit details (although no seat, so I used a Paragon resin item); access ladder (not used); intake doors; FOD covers (not used); exhaust vanes; undercarriage details; four complete Sidewinders (I used Hasegawa’s instead); new airbrake (the kit item is too big); ventral strakes (I used the kit gun pods instead); lots of antennae; lots of airframe details (including wing vortex generators); CBLS.100 pod and bombs (not used); 1000lb bomb (not used); and RBF tags (not used). Overall, it is a necessary addition to the kit to make it acceptably accurate, although I believe the intakes of Tamiya’s Sea Harrier are mis-shapen, and I didn’t bother to correct that. Having gone to all the effort to add this stuff I dropped the ball on basic construction and finish. I made a half-hearted attempt to rescribe the raised lines of the original kit. I neglected to check the wing-fuselage angle and as a consequence the outrigger wheels don’t touch the ground (a common mistake on Harrier models, and one I won’t repeat with my Hasegawa Harriers!). The finish is Halfords White Primer for the undersides and Humbrol enamel for the upper surfaces. The decals from the kit were used and were okay. The model was coated with Klear and Humbrol Matt Cote.


Year bought: 1996 (Antics, Guildford)
Year built: 1997 (Send Marsh, Surrey, UK)
Back to home.

Nice detaiteld story of the build of this harrier kit. I’m building this on right now. And yes I agry, it’s not a realy goog kit from Tamiya. But I wil finish this kit. You pictures can help me with some details. You made a nice improvement with the air intakes of this kit. Good job!! I wish I had done that. I’me already painting the kit .. You can see my build on insta (airplanemodel148).
LikeLike