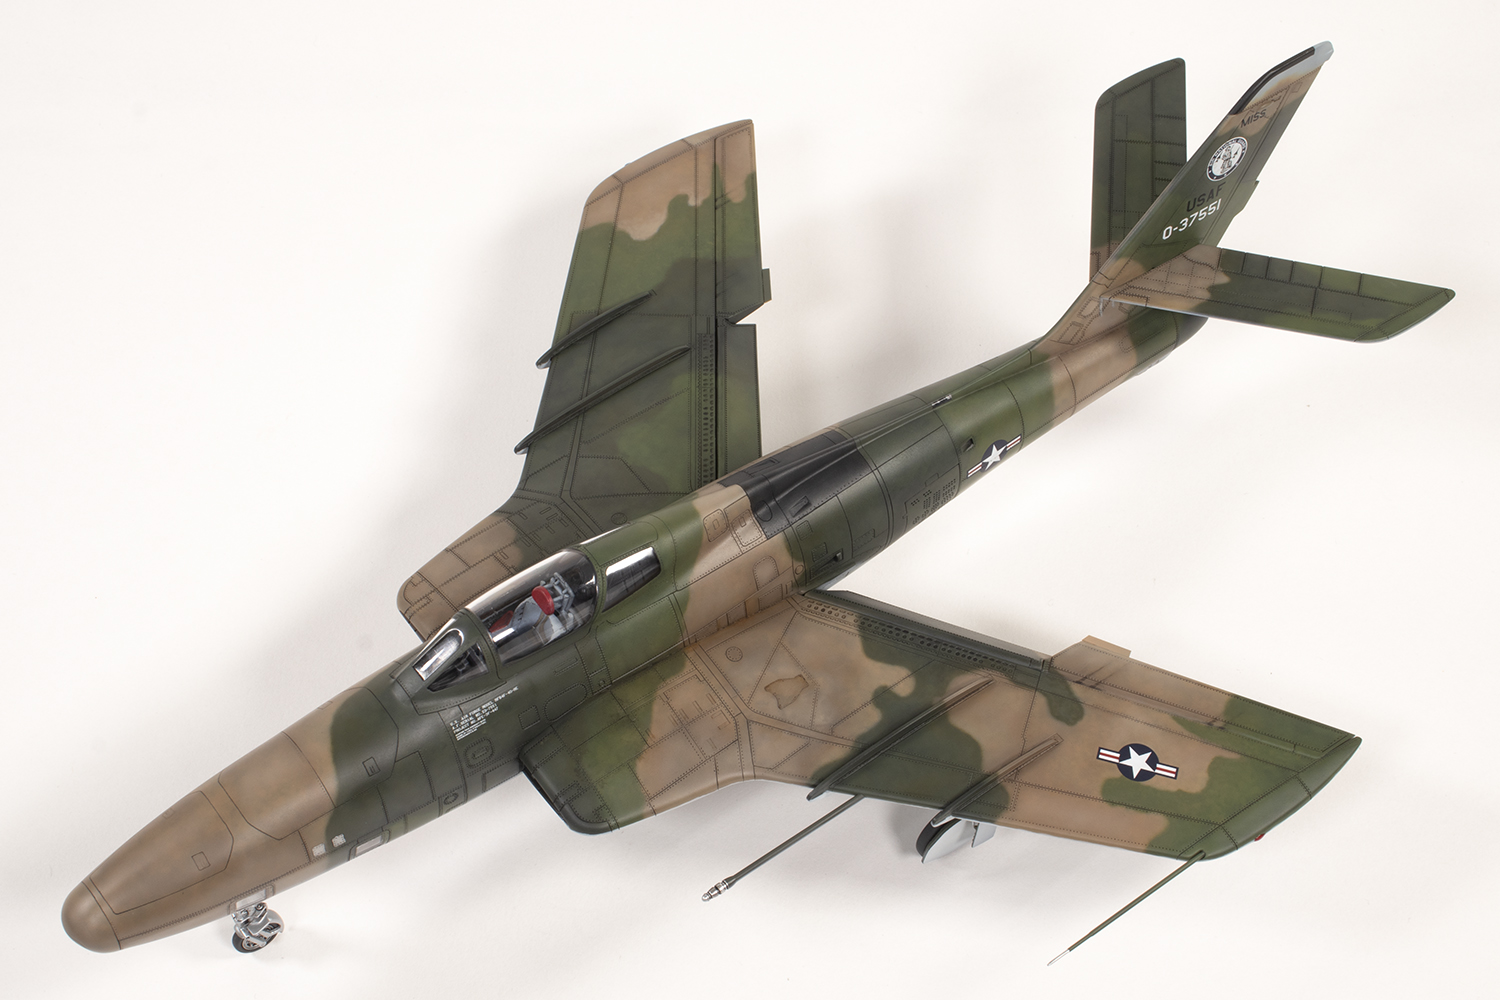
with CMK resin flaps and ailerons and Caracal Models decals
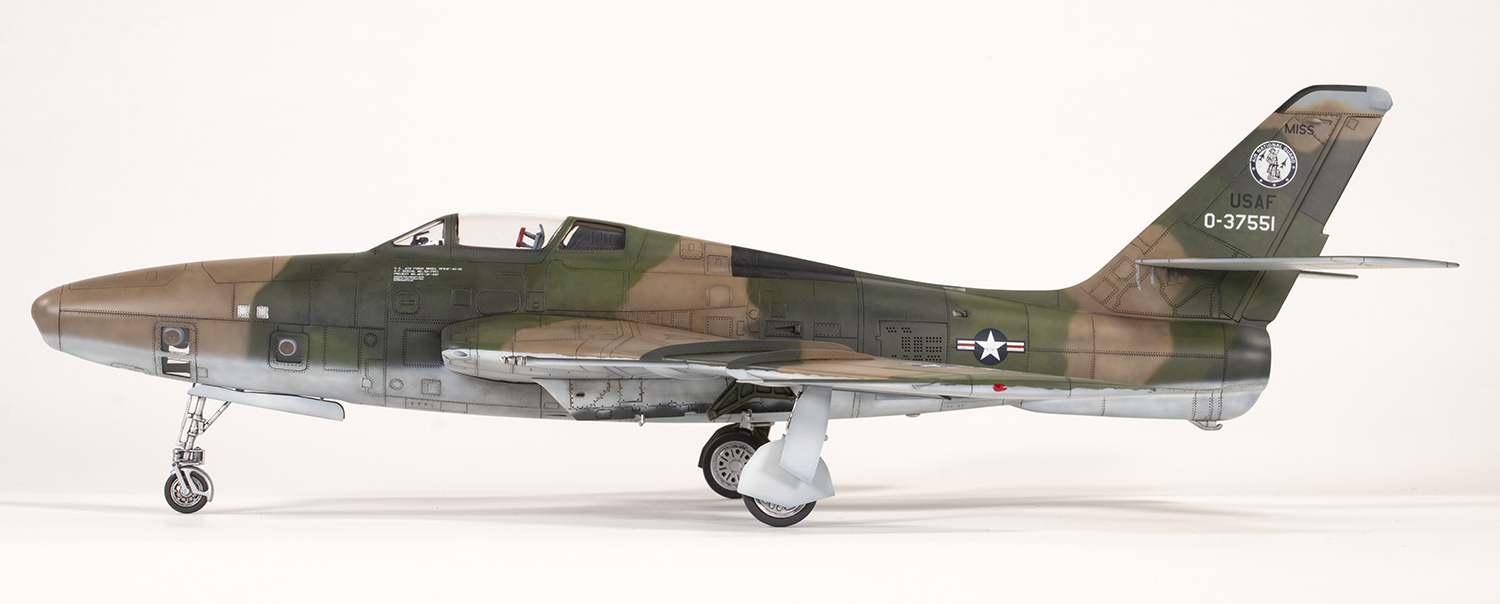
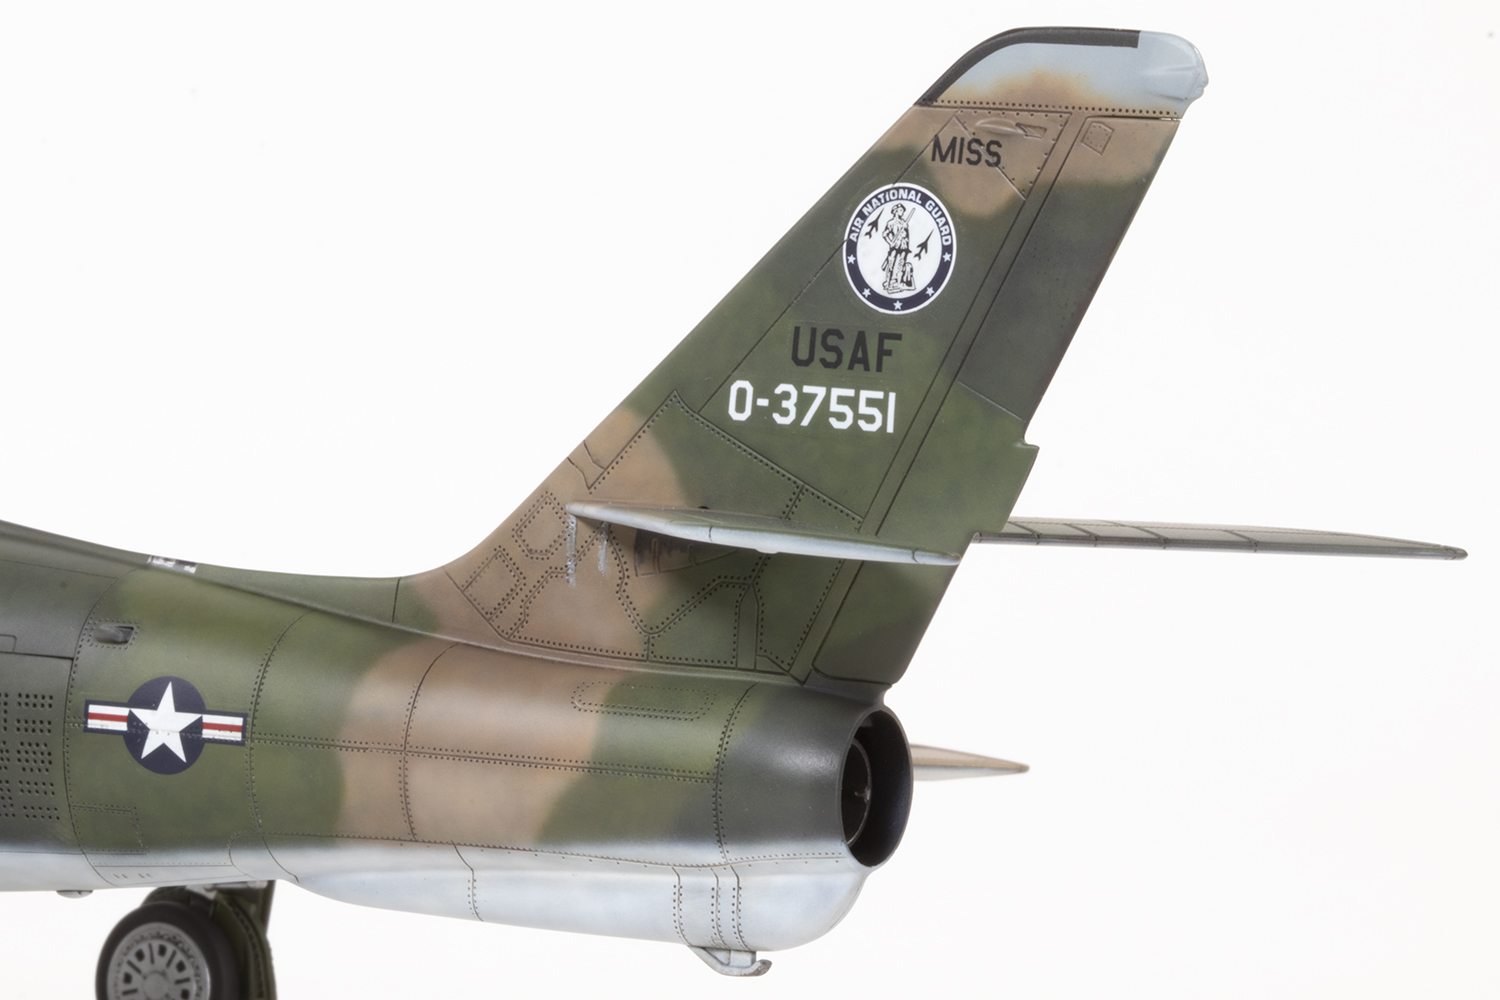
153rd TRS, 186th TRG, Mississippi Air National Guard, USA

Due to a quirk of personality, I’m a one-kit-at-a-time kind of modeller, and if what I read on the internet is true, it turns out this is somewhat unusual. At least it means I finish stuff regularly, but it does raise the question at the end of each project: what should I build next? In recent years I’ve taken to making series of related aircraft as this plots quite an interesting journey through my stash. Tanmodel’s 1/48 Thunderflash, released in 2015, marks the completion of all the F-84s that were stored in the loft, by way of Revell’s F-84E (2001) and Kinetic’s F-84F (2007). One hopes the models get better as they get newer. Sadly, this is not always the case.
I think the Thunderflash development of the Thunderstreak looks fantastic and was delighted to acquire the second boxing of this kit. It was advertised as being better than the first, containing die-cut masks, improved decals and reworked moulds, and it certainly is an attractive package. The instructions are clear, the decal options are gloriously illustrated, and the detail in the kit appears to be impressive, not least the comprehensive camera fit and nice options such as separate clear parts for an open or closed canopy.
One’s enthusiasm is dampened slightly once the plastic is examined. The plastic has that rough, grainy texture all too common these days, and the surface detail fades very badly towards the edges of the main parts. The panel lines themselves are quite wide and generally inconsistent in depth. Whilst Tanmodel are to be commended for re-polishing the moulds to improve the surface smoothness, this has led to a lot of weird artefacts in the surface detail. I would suggest you may be better off with the first boxing, even if it might mean more work to get a smooth finish.


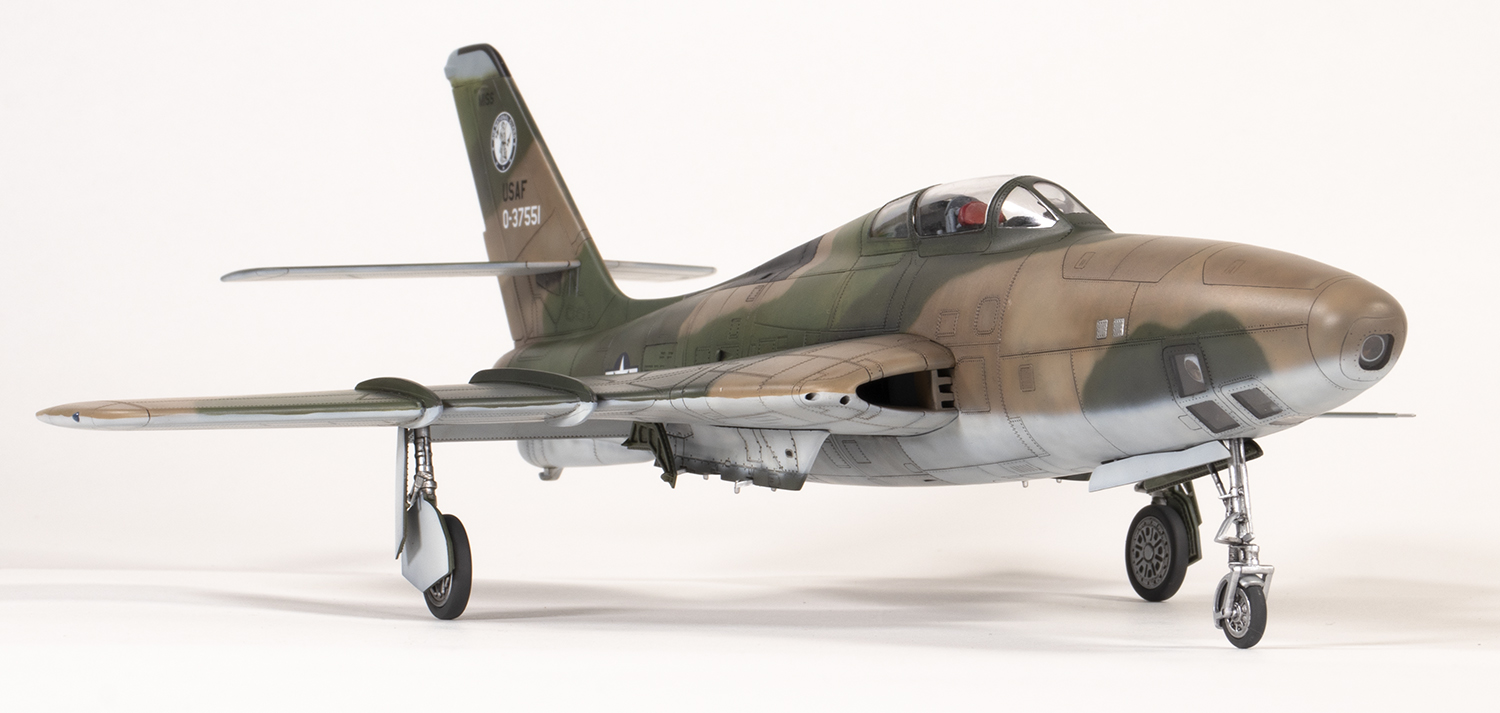
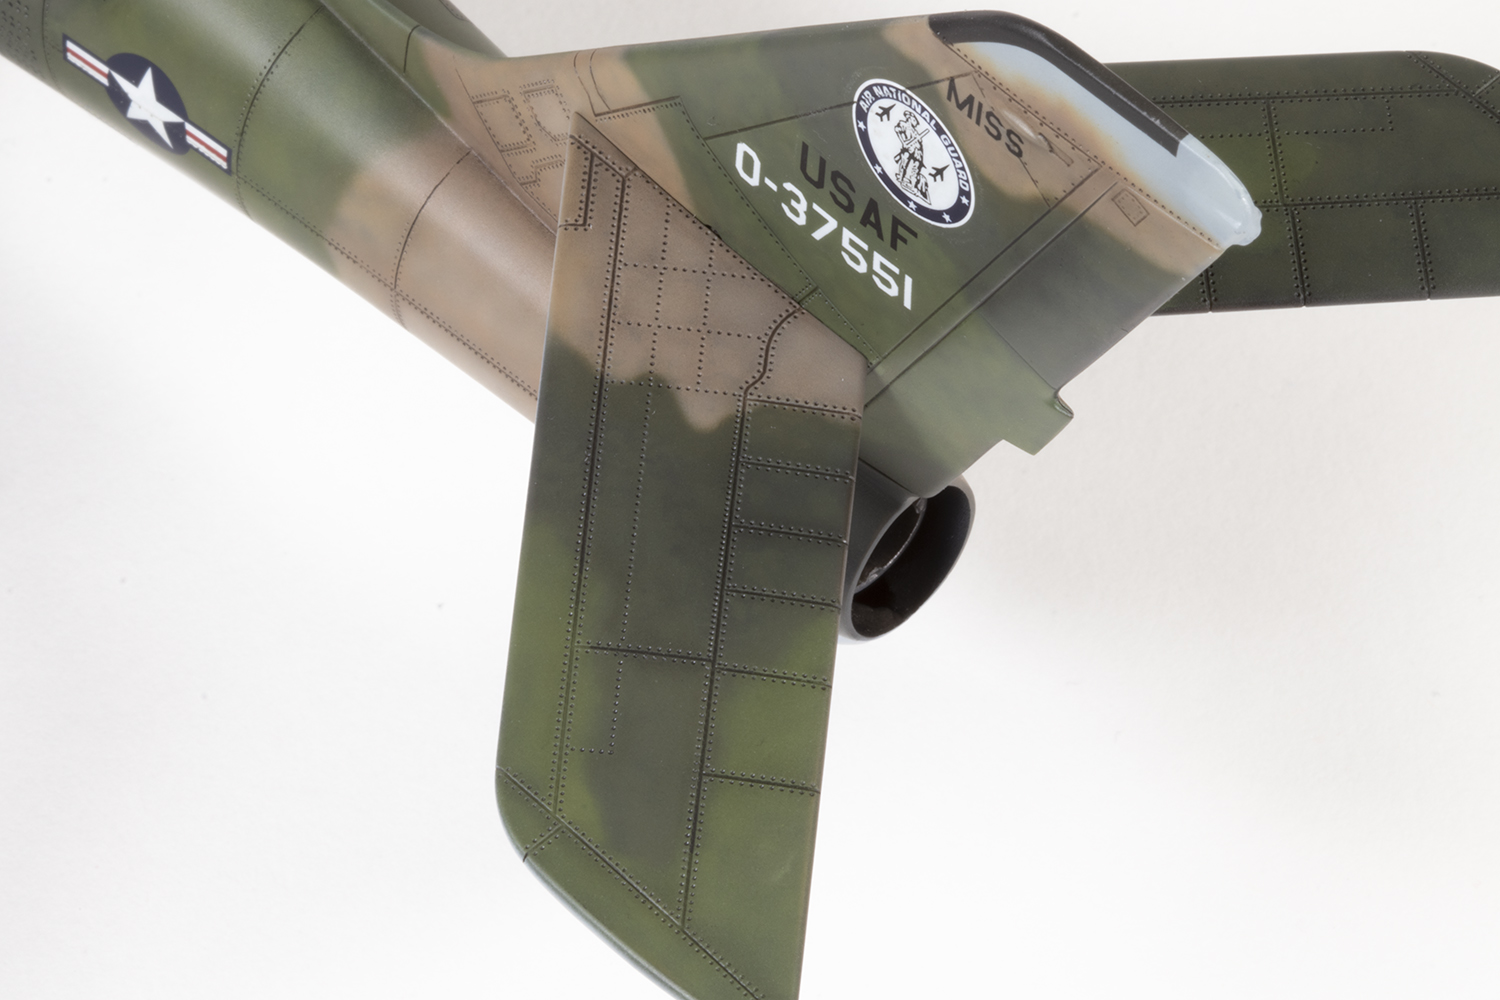
At some point I acquired CMK’s corrected ailerons and flaps in resin from Hannants when they were on sale. In truth they are almost identical to the kit parts as far as I can tell, the main difference being the more accurate tabs on the ailerons. I would not bother if I were you, especially given how fragile said tabs are (I had to replace them both) and how difficult the flaps are to fit dropped. The only other aftermarket I purchased was a decal sheet by Caracal. I had initially hoped to do a beautiful natural metal airframe with a blue nose and tail with white polka dots, but sadly this is for an earlier block aircraft without the large parachute housing under the rear fuselage. Whilst I had been happy to scratch build one of these for Kinetic’s F-84F, I did not fancy doing it again, and settled for a plain SEA camouflaged ANG aircraft. This would turn out to be fortuitous as doing a NMF would have required an awful lot of surface preparation. I recommend you research exactly which aircraft you are making as there are plenty of changes during the RF-84F’s life, not least the absence or presence of said parachute housing. Thunderstreaks.com has plenty of excellent photos of Thunderflashes that would prove very helpful in figuring out details later on.
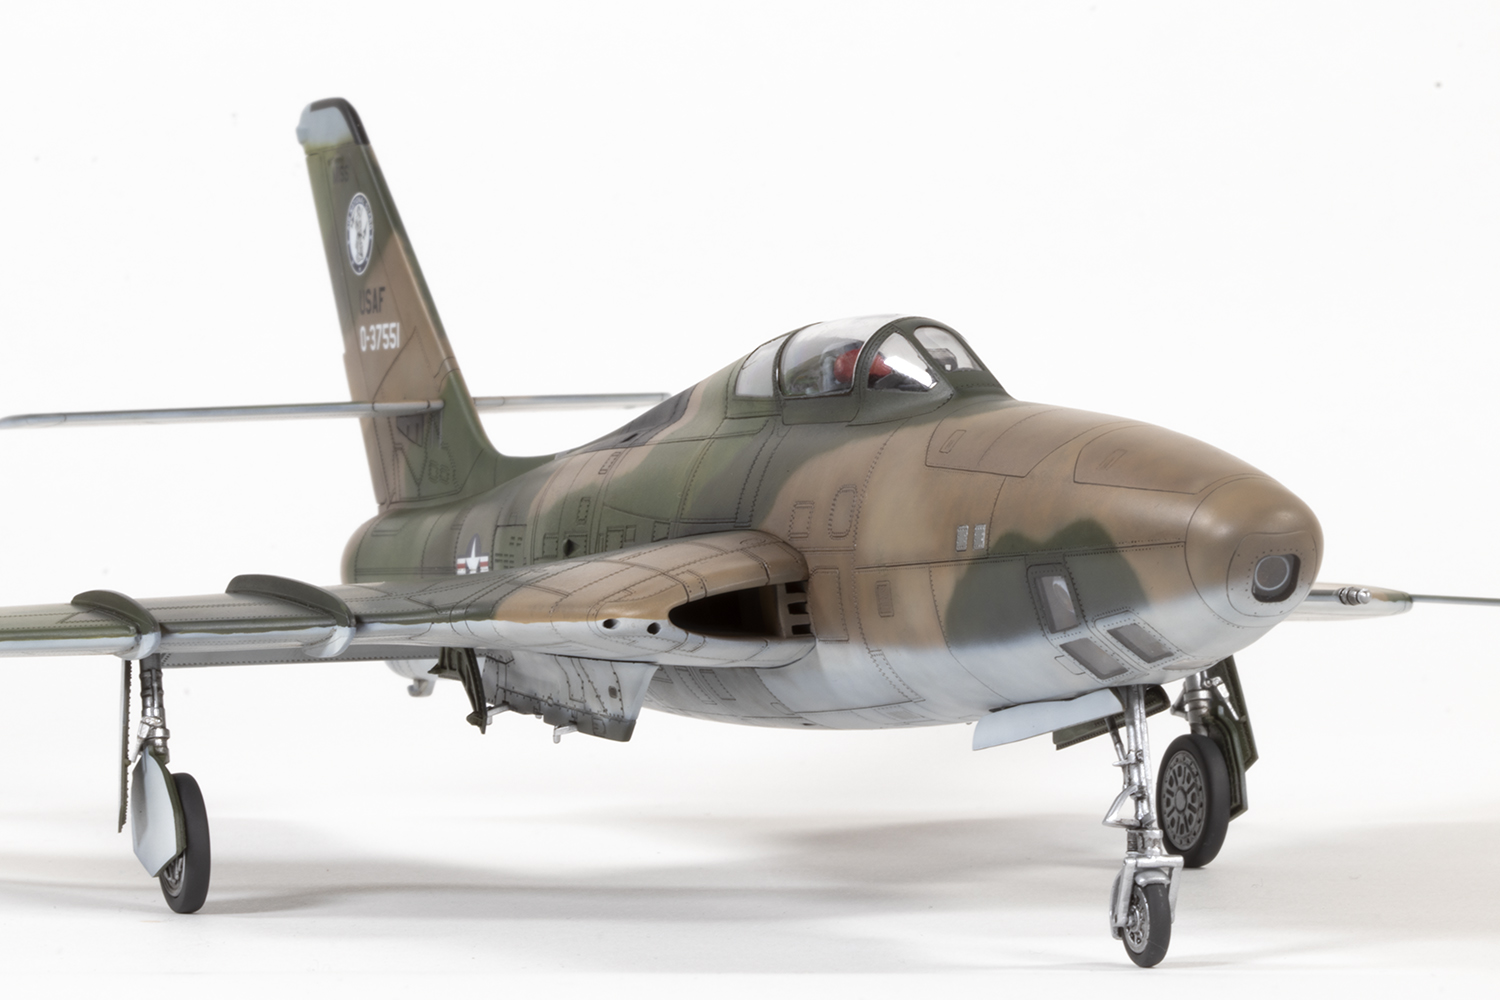
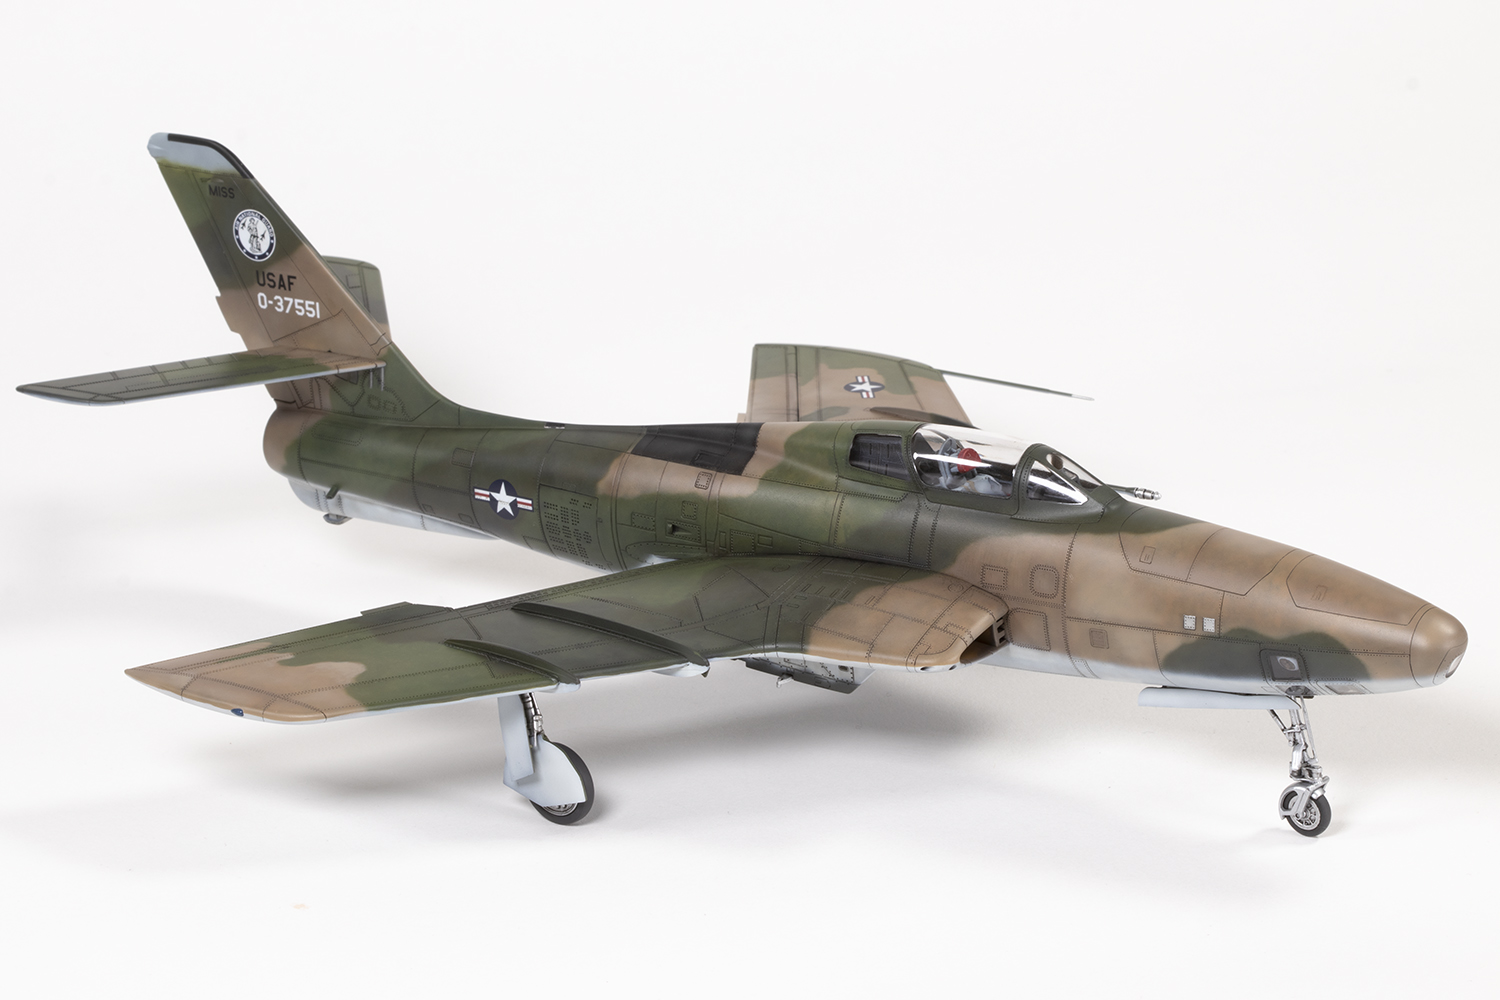
Once I had found a photograph of the plane I was making, I discovered a few other additions and corrections I would need to make. First, it had an inflight refuelling probe attached to the port wing. I simply drilled a hole and plugged in a spare from a Hasegawa 1/48 A-4 kit. Second, the kit is missing the fuel dump pipe in the rear lower starboard fuselage. The location of this changed over time, somewhere between block 25 and 30 aircraft maybe. I was modelling a block 40 Thunderflash and surmised the fuel dump was in the further aft position and I fabricated an approximation from the spares box. Third, the clear lens for the anti-collision beacon in the spine is not provided, so I cut out a slot and filled it with clear UV resin later sanded and polished to shape. Fourth, the airbrake hinges are way too large, so these were filled with CA and filler powder and new, smaller hinges scribed in place. Additionally, the holes in the airbrakes were drilled out using a 0.35mm bit.


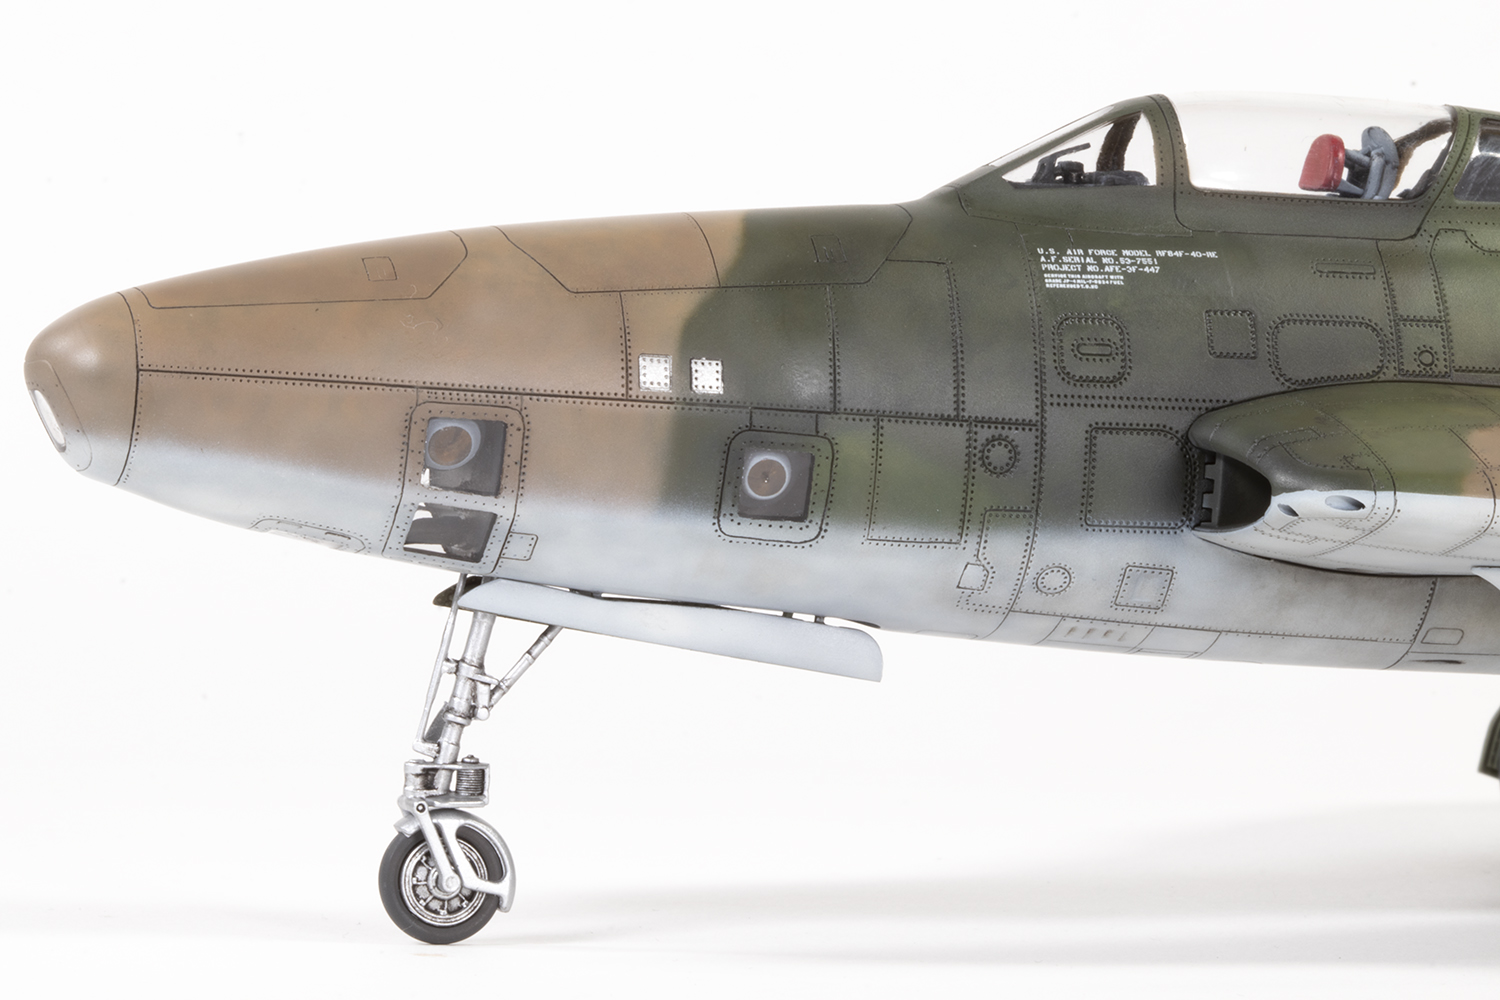
Tanmodel provide options to display the camera bays open with all the internals visible. This means there are an awful lot of parts to fit in the nose, and unfortunately there are no locating devices. Since I was modelling it all closed up, all I needed to do was make sure the cameras lined up with the windows and get all the parts in there to avoid needing nose weight. This is far easier said than done. Life was made slightly easier by the rearmost camera window being covered over, so I didn’t need to worry about that as it would be invisible. The other five cameras are more problematic, especially the three that are joined together.
My initial strategy was to trust the engineering of the kit and glue them all together prior to installation. This was a mistake as they didn’t line up with the windows at all. After loosening all the joints with Tamiya Extra Thin, I disassembled them and started again. What eventually worked was to start with the large parts that had a fairly definite location, like the bulkheads, and then add each internal piece step by step. After each step I would tape the fuselage halves together to ensure the alignment was good. When the part was set, I’d take the halves apart, move to the next component and repeat. Even the nose wheel well is difficult to locate correctly and will leave an odd gap towards the front as it’s not quite long enough. Eventually I had all the internals added and everything lined up. If you decide to open the camera doors your life will be much easier as you can access everything from above, but I don’t like the aesthetic of open panels.

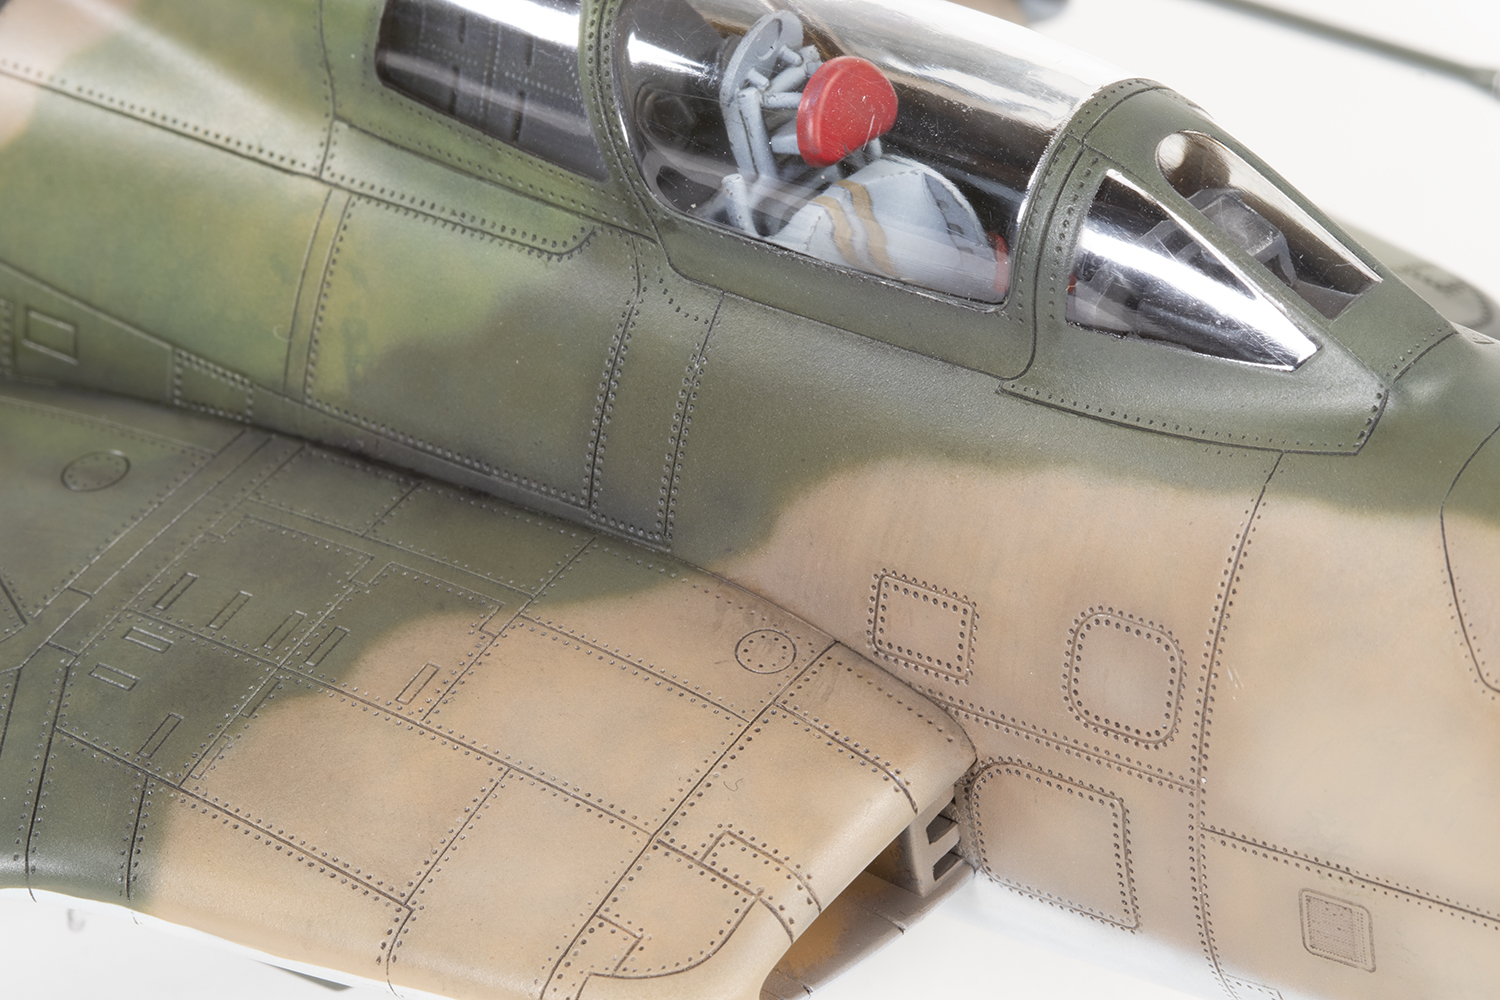
Cockpit detail is adequate for a closed canopy, although it would turn out more is visible than I anticipated once the clear plastic was attached. My only additions were some seatbelts created with strips of Tamiya tape and PE buckles by ANYZ and Reheat. I wasn’t very confident in the correct colour and went with a pale grey mixed from MRP Traffic Gray and AMT-4 Faded Gray, which is probably a bit light. I only wish I had removed the giant ejector pin mark in the plate behind the seat head rest; I’d assumed it wouldn’t be easily seen, and I was wrong.


Once the cockpit was done it was added to the starboard fuselage half along with the camera bay internals, exhaust pipe, separate rudder (a very nice fit) and engine turbine face and intakes. The latter are, for all intents and purposes, invisible and not worth spending any time on. Similarly, I didn’t paint the cameras to any great standard – just well enough given what can be seen through the windows. Fuselage fit is pretty good and I used plenty of tape and clamping to ensure the mating surfaces made good contact while the superglue went off.
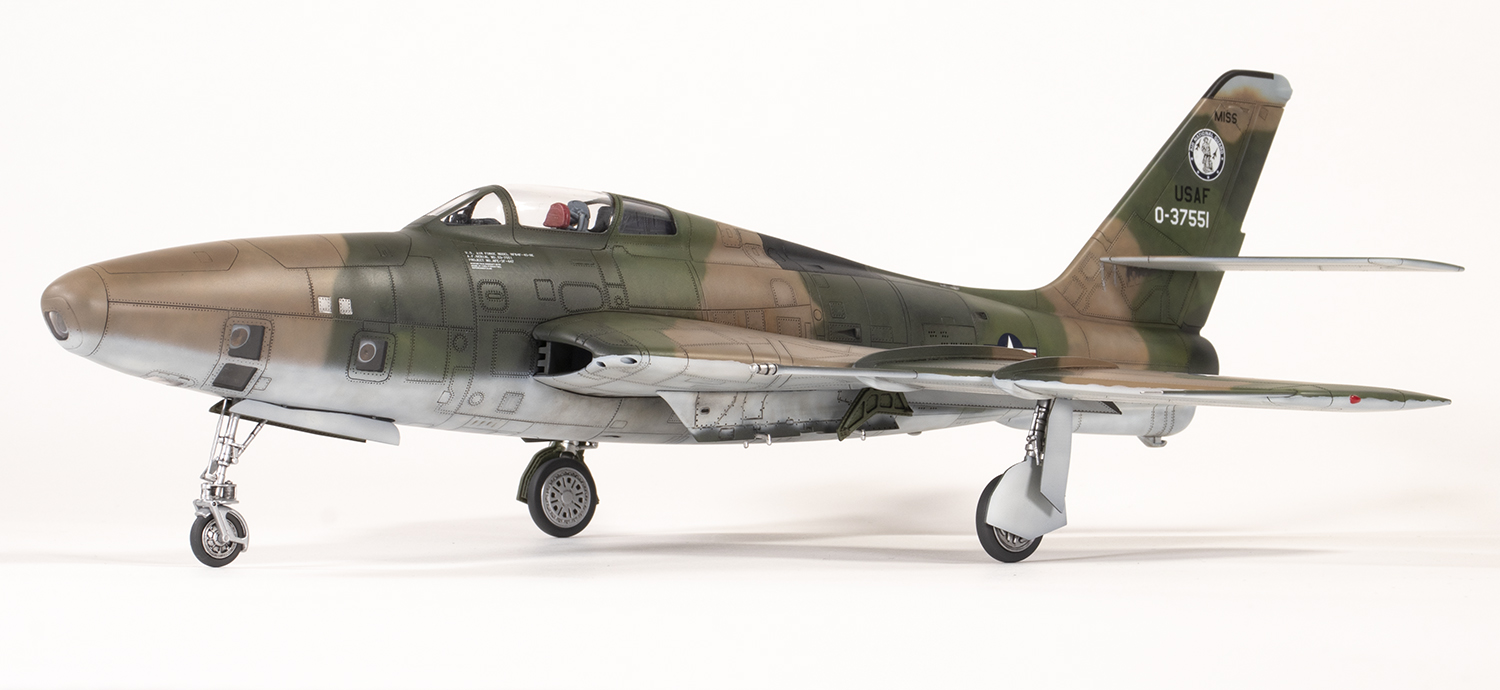
After attaching the wings together, which were quite gappy but nicely engineered to have the seam on the underside rather than the leading edge, the real graft of the build began: fixing the surface detail Most of that on the underside had to be removed completely and rescribed, which is a tortuous process best forgotten. I’m no great master of this dark art, but do find my way smoothed by some sharp needle-pointed scribers (and sometimes, just a needle) along with HIQ Carving Tape. Where this tape is too stiff, I use Tamiya vinyl tape for curves, which is good because it’s flexible, and also bad…because it’s flexible! The result isn’t as pretty as envisaged. Gaps were filled where necessary with black AMMO of MiG CA and VMS CA Filler Powder, which is nicer to scribe through than neat superglue.


Eventually I had enough of rescribing and fitted the numerous camera windows. As with pretty much everything else they fitted ‘quite’ well; it’s that last 10% which is so time-consuming to sort out. In this case it was sorted out with ample superglue and careful pre-scribing to try and retain the detail as the plastic was sanded down. Inevitably the result was less neat than hoped for, but adequate for normal viewing distances. Clarity to the clear parts was restored with Tamiya polishing compounds applied via polishing wheels in a Proxxon motor tool.


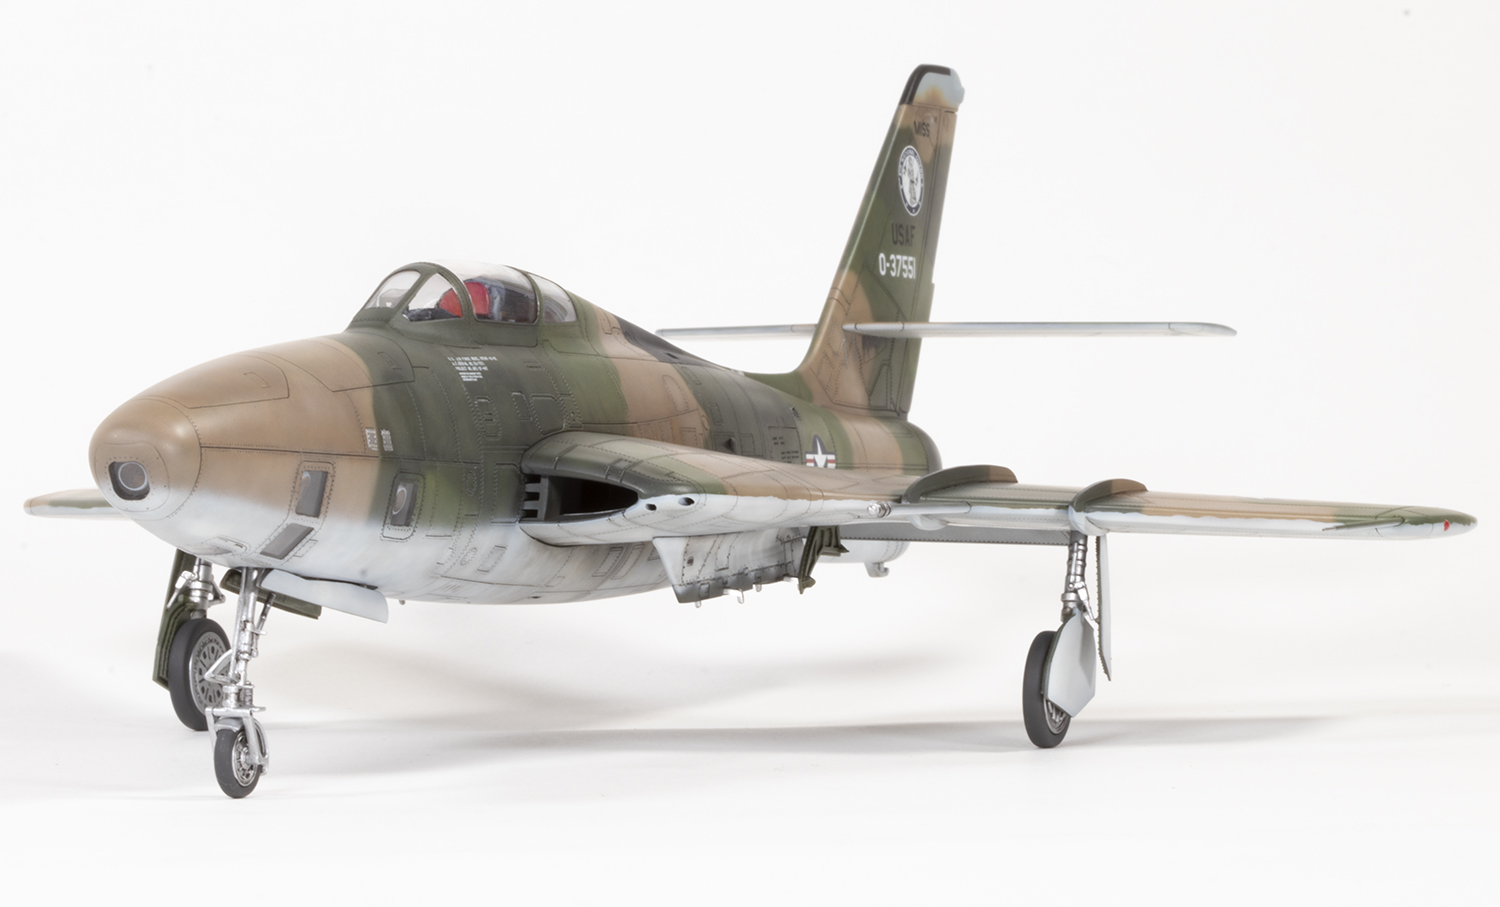
There are several aesthetic rules I follow when making aircraft, although not slavishly, and one of them is to ignore all stores. It has the twin benefits of saving time and preserving the lines of the airframe. In this case that meant leaving off the ubiquitous drop tanks fitted to pretty much every operational USAF Thunderflash I could find a photo of. The inner pylons, however, were going to be used, and unfortunately did not fit at all well. I tried a method to improve things I’d only ever read about. A layer of vinyl masking film was placed where the pylon was to go and holes punched for the locating pins. The pylon was then put in place and orientated correctly before the gaps around the edge were filled with a thick mixture of CA and filler powder and set with accelerator. The pylons could then be removed and the vinyl film peeled away from the cured superglue. After tidying the edges up with abrasives and restoring the missing panel line detail, I had a much better fit. I think you can also do this with Bare Metal Foil in lieu of the vinyl film, which is much thinner, but I was anxious it might be hard to remove the pylon as the foil is very sticky. Maybe one to try next time.


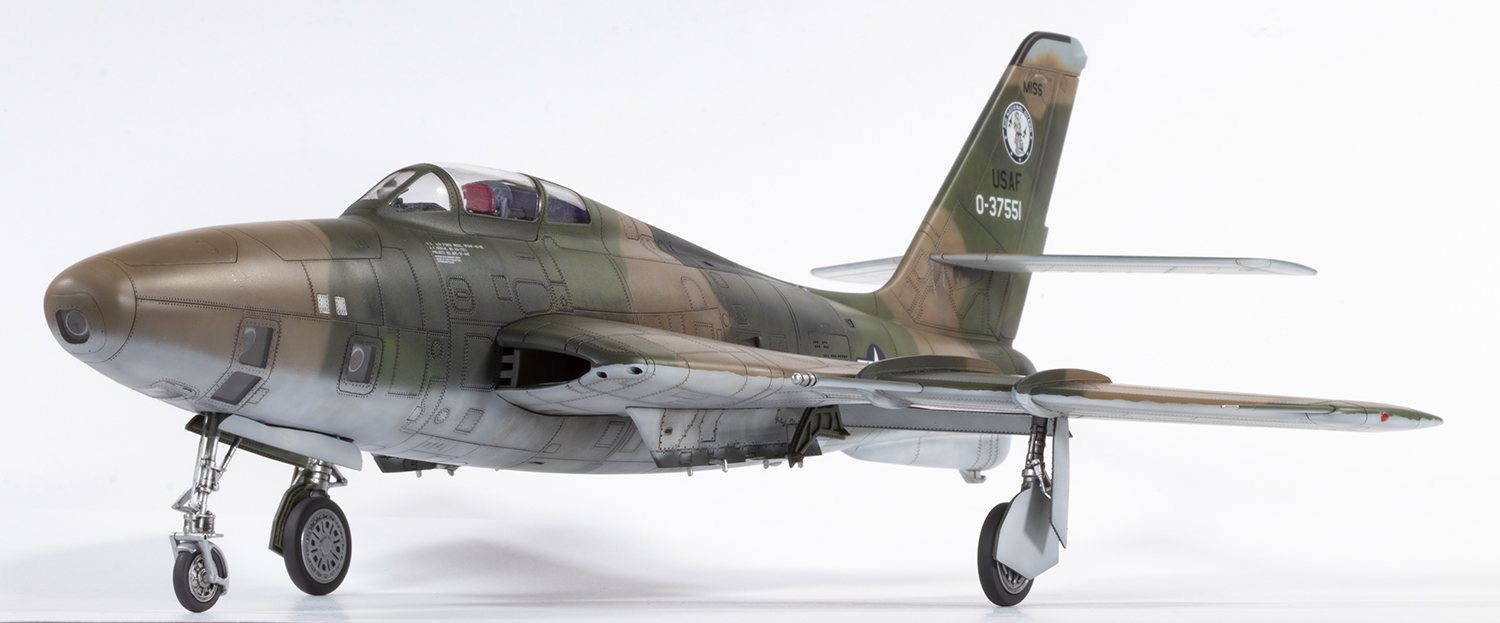
Tanmodel have used the tongue-and-groove method for the wing to fuselage attachment, which works well enough but the tolerances are too tight for the wings to plug home fully. What was more problematic was fitting the dropped flaps as per photos of the original. I have no idea whether the problem was me, Tanmodel, CMK or just the fact they must be fitted prior to the wings being stuck to the fuselage, but I could not get them in at all and resorted to butchery on the underside where the worst is hidden. When will I learn the importance of dry-fitting? Also noted at this time were the massively thick intake splitter plates, which would be ripe for aftermarket replacement, ideally in something like PE. To close off the wings, I also added the wing fences. These, too, are extremely thick, but at least they’re robust, although they don’t slide over the wings very well at all. This is another area best not look at too closely on the finished model…
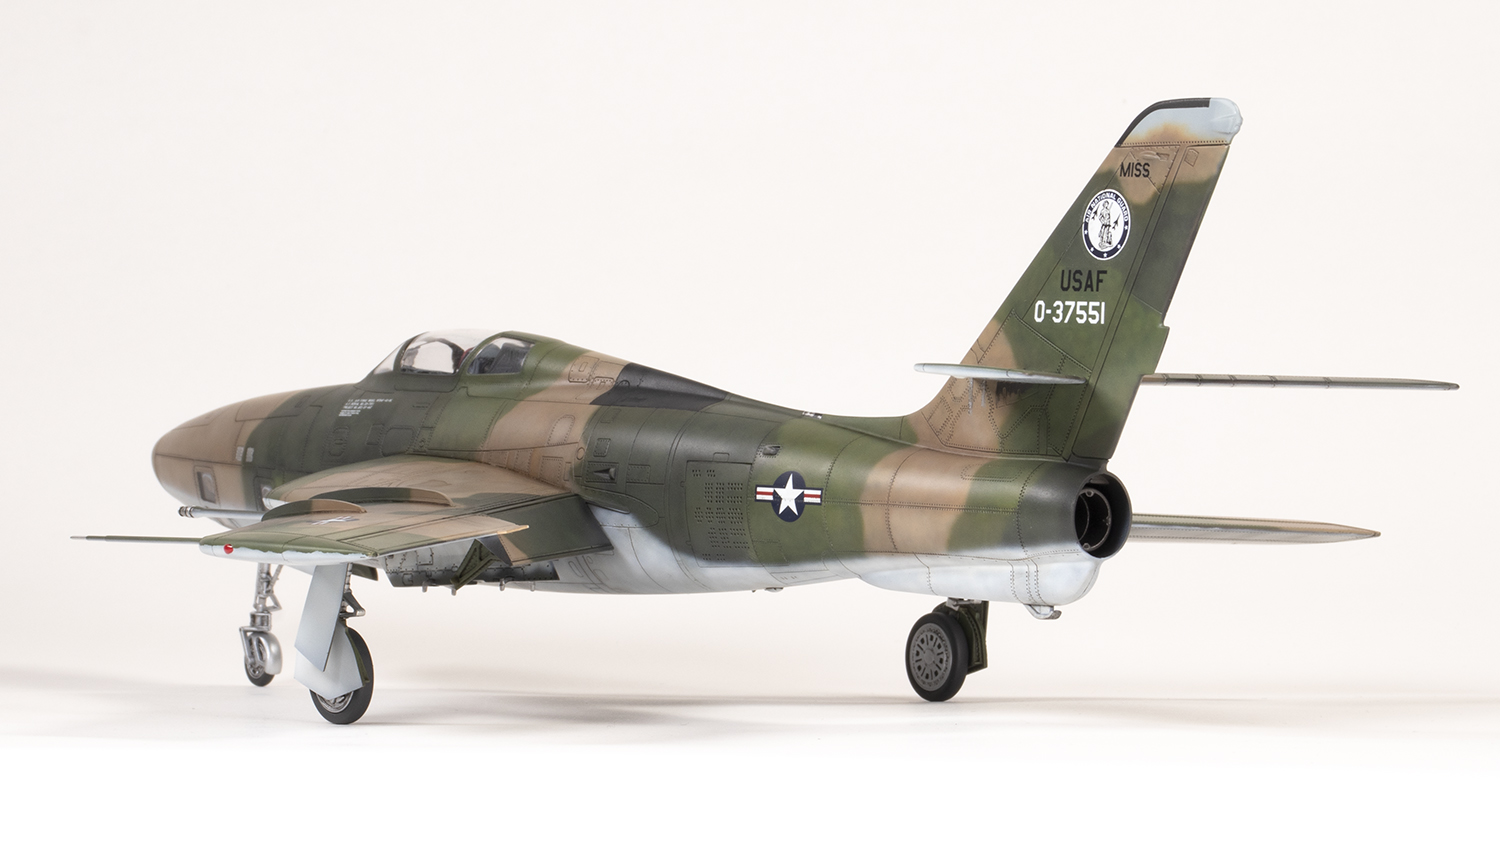
In contrast to the nice fit of the wings, the tailplanes flop about all over the place as the round locating pegs are way smaller than the corresponding holes. I made a decision to attach them midway through painting, once the main scheme was done and could be touched up if necessary. Getting them aligned and square was very difficult.

The project trundled on towards painting via attaching the canopy. Good and bad news here. On the good side, Tanmodel have moulded a good chunk of the fuselage with the canopy, meaning no difficult shut lines to preserve and the seam between clear and opaque plastic can just be eliminated. Not so good is the moulding mismatch in the shut line between the canopy and the windscreen. I filed that in the ‘too-difficult-to-bother-with’ tray and pretended it was all okay. I’ve spent a lot of time looking at the rear of the canopy and have convinced myself the framing is much too narrow. This means it’s not possible to add any canopy lining (which on this airframe I think should be dark red). I might be wrong.


A nice touch from Tanmodel is the provided canopy masking in this second edition. It would be nicer if the masks fitted. Those for the camera windows are pretty good and were utilised, but the canopy masks were all over the place, especially one of the front 3/4 panels, which was massively oversized. I scanned the masks into Inkscape and made my own from Tamiya masking sheet using a Silhouette cutter.


In order to preserve the surface detail, I decided to prime with MRP rather than a dedicated primer, and wanted a warm brown base for the greens, brown and grey of the SEA camouflage. A suitable shade was mixed from MRP Black and Special Brown and delicately airbrushed over the entire airframe. A light sanding revealed some surface texture that was fine for a camouflage finish, but would have been a problem were I going for natural metal.


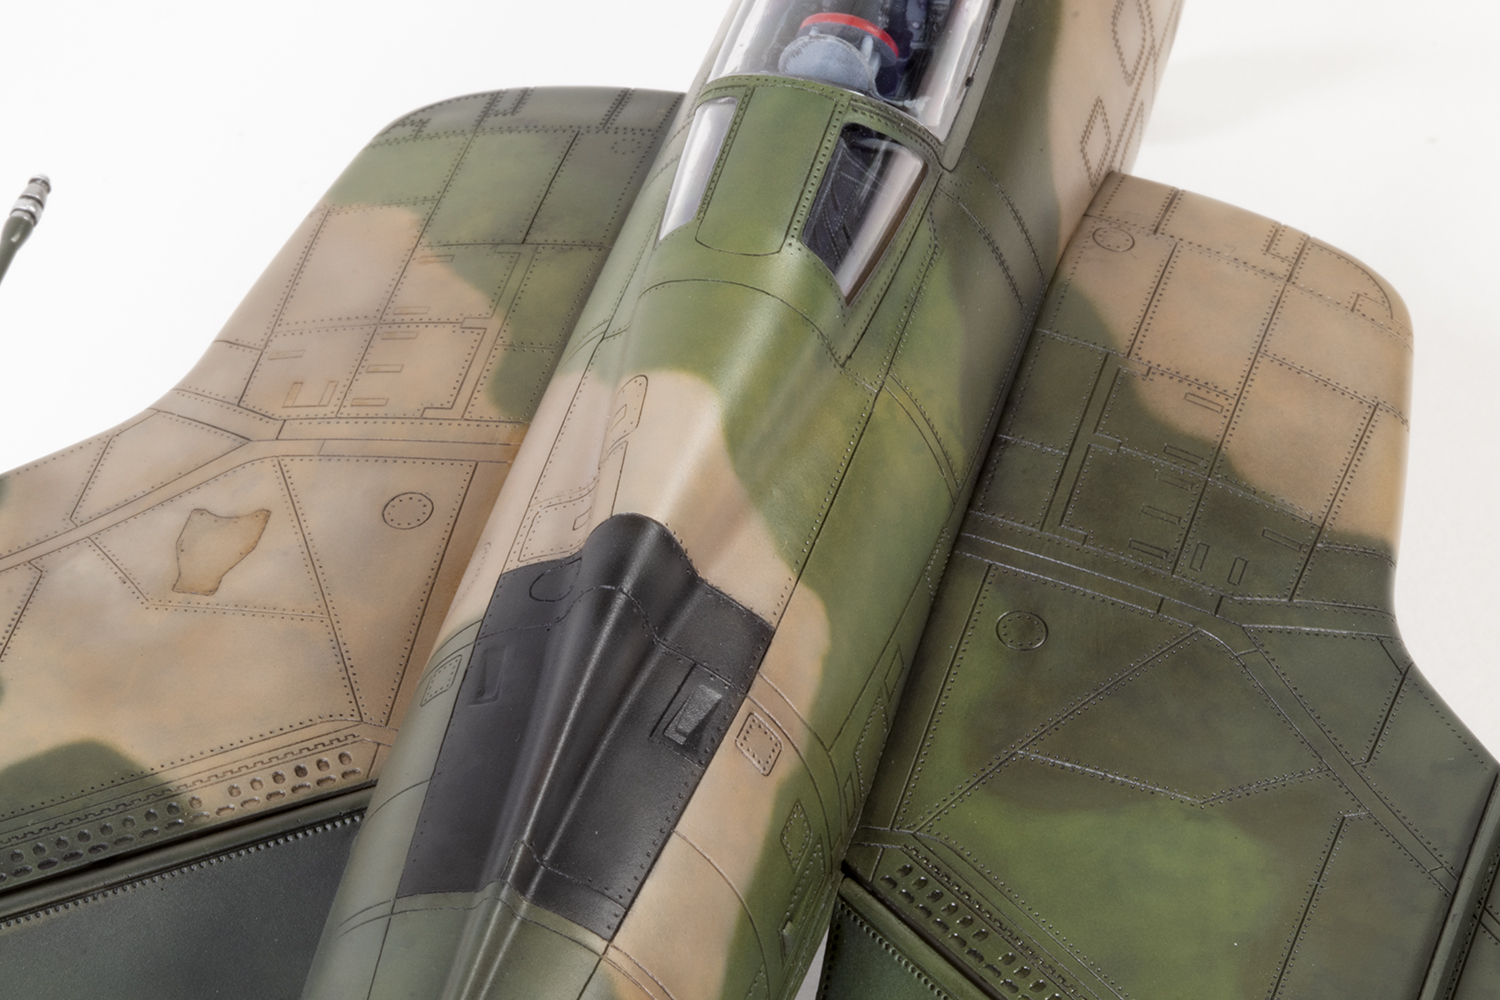
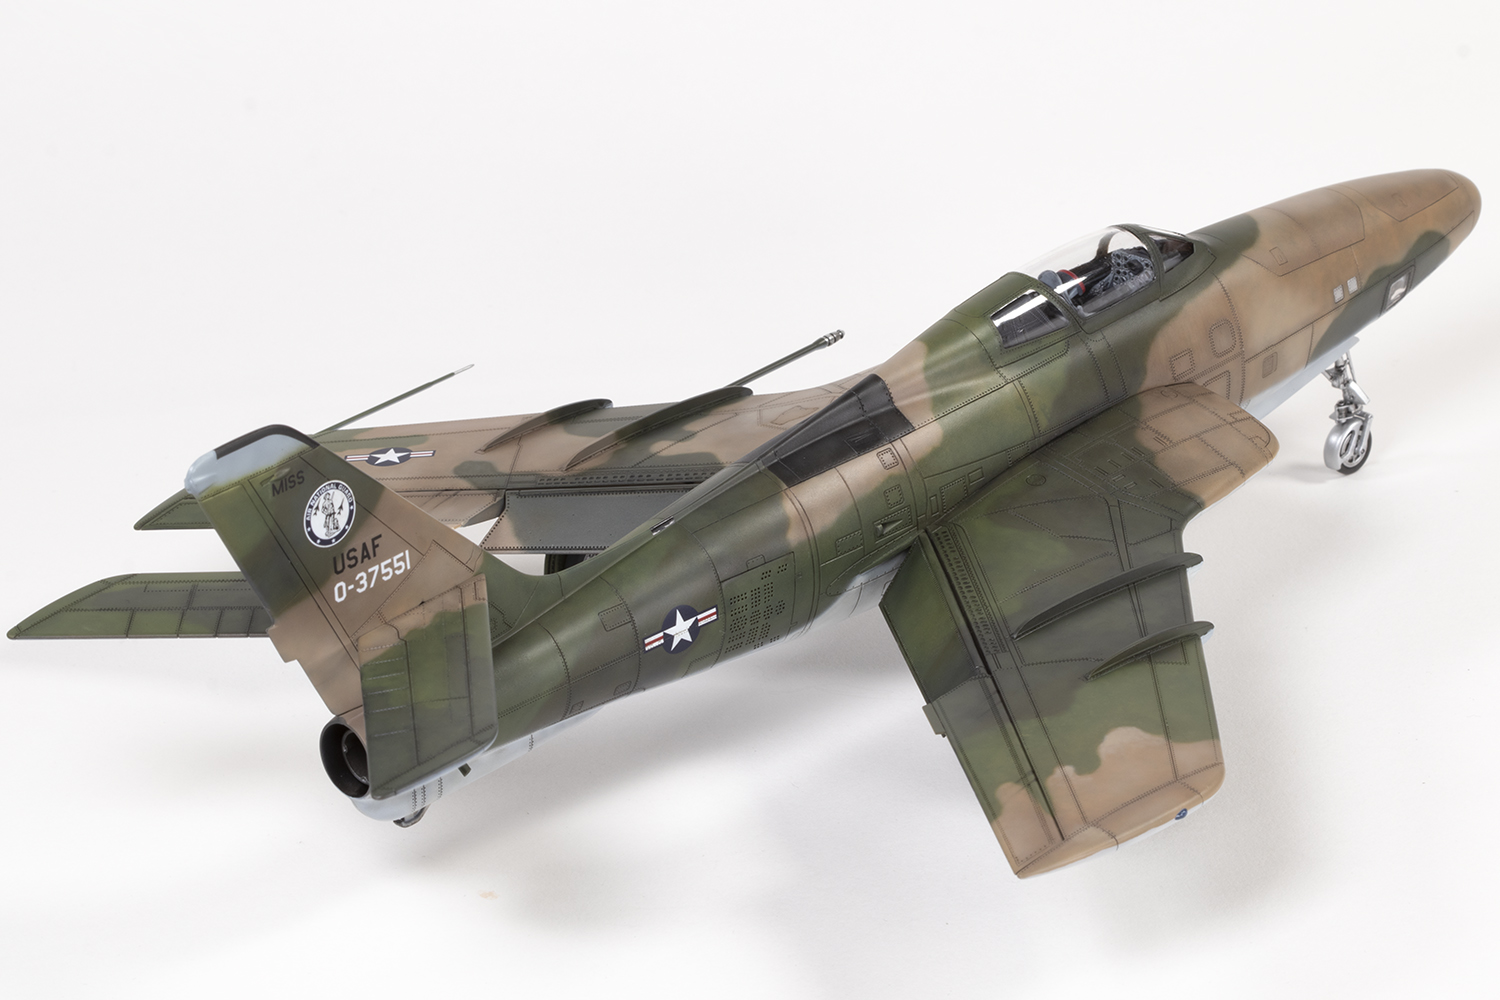
Many a happy hour was then passed slowly noodling away with my Iwata Custom Micron B filling in the green and brown parts of the scheme. My plan was to have lots of tonal variation by spraying inconsistently and through various mottle masks. I also made use of both Hataka and Mr Color shades of FS30219 sand, FS34102 green and FS34079 dark green to get more variety. Many photos showed quite a desaturated tone for the tan brown, so I added varying amounts of MRP A-14 Grey and US Desert Sand to apply a variety of shades. The actual pattern was very difficult to pin down since I only had a photo of the port side and the scheme varied a lot between aircraft. Caracal only provide a port profile (which isn’t very accurate) and thus the starboard side is a best-guess.
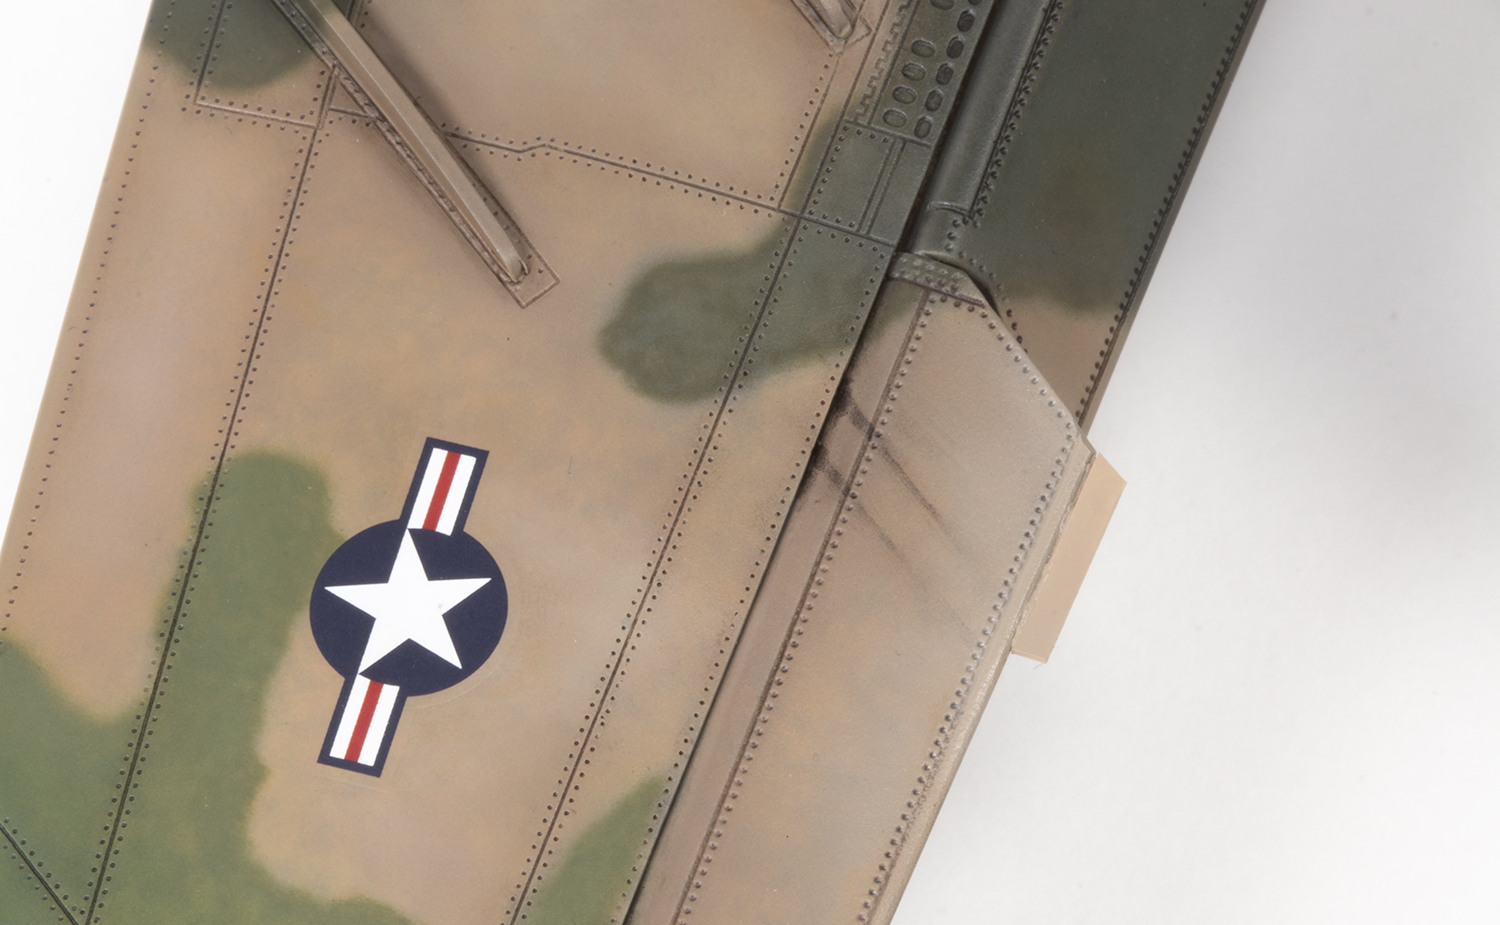
One of the most appealing aspects of this scheme was just how badly it was applied. The demarcations between colours vary from very tight (such as on the wing leading edges), to very, very soft, such as between the pale camouflage grey and the three upper colours on the nose. There’s even overspray at the tip of the tail fin onto the grey. This was delicious and I had much more fun painting this model than building it, which is the reverse of how it usually goes. Aside from the leading edges, all the colours were applied freehand.


Apparent disaster struck when I unknowingly spilled green paint onto my gloved left hand and then handled the model, but this was an opportunity in disguise. Once the paint had hardened and been polished off using fine Infini sanding films, I returned with yet more variations of the base colours to increase the contrast. I think a lot of my models get some criticism for being a bit bland and I seized the chance to ramp up the contrast in the paint finish. It some ways it’s more cartoonish, but also more interesting to look at. In my opinion.


Cartograf printed the Caracal Decals, which means the colour and register are superb, but also that they’re quite thick and don’t settle into the surface detail too well. There are very few for this scheme and I mashed them down directly onto the paint with various combinations of setting solutions and solvents. I’ve generally given up on glossing before decals, but since that’s probably the most contentious topic in aircraft modelling in recent years, best move on… I think Caracal’s ANG badge on the tail is too small and the blue is too light, so I used the kit version, which is bigger and darker. Also note that the Caracal profile puts the USAF marking in the wrong place – it should be further aft, as I have modelled it.
Next was the pin wash, made from various shades of ABT502 oils mixed with AK Interactive Matt Effects Thinner. I tended towards the browner shades – Sepia, Dark Mud, Raw and Burnt Umber, Engine Grease and Starship Filth, along with other colours. Again, this was directly on the paint and made a bit more challenging by the shallow surface detail. Further tonal variation was added by using some AK Interactive pencils (best applied wet in my experience, and then manipulated with a damp brush) and brown and black Gundam Real Touch marker pens. This latter product is new to me and I think is enamel based as it can be removed with white spirit. The pack comes with a blender pen to manipulate the marker pen once it’s applied. I used it for some of the streaking on the flaps and ailerons and will get some of the other shades of grey to use in the future.


Once I was bored with ‘weathering’, final construction ensued. For some reason the main wheels are slightly different from each other and the main legs did not seat properly into their locating holes. I did my best to get them correctly aligned, but failed with the port strut and it cants inward slightly. The nose leg is okay, but the moulding tolerances are just not quite there for it to work properly. Given that my hands shake, adding the undercarriage doors was a trial as there are no indications on where the locating tabs go, and it’s very easy to install the nose doors too far forward or aft (or out of alignment with each other).
Lastly, since they had both been broken off during construction, the aileron tabs had to be made from thin plastic card, attached and then painted.

It is inevitable that great oaks come from tiny acorns: many of the present day giants of scale modelling started thus. Kinetic and Eduard’s first attempts at jets in 1/48 were indifferent efforts at best, where ambition could not live up to execution, and now they are among the leaders of the pack. So it might have been with Tanmodel. There are real signs of talent with this model, shown in the generally excellent fit, sporadic examples of excellent engineering, good overall accuracy and a beautifully packaged product. But the evidence of inexperience is also apparent, not least in the substandard moulding. Tanmodel had ambitious plans in 1/48, but they have been quiet for a long time; whether they improve on what they started with remains to be seen. In any case, the Thunderflash is a fantastic looking aircraft and I’m very glad to have this finished, but I have to confess it wasn’t much fun getting there.


Year bought: 2016 (UMP)
Year built: 2023 (New Addington, Croydon)
Back to home.
