with Eduard photo-etched interior, exterior and seat belts, Quickboost resin navigation lights and Vector resin engine
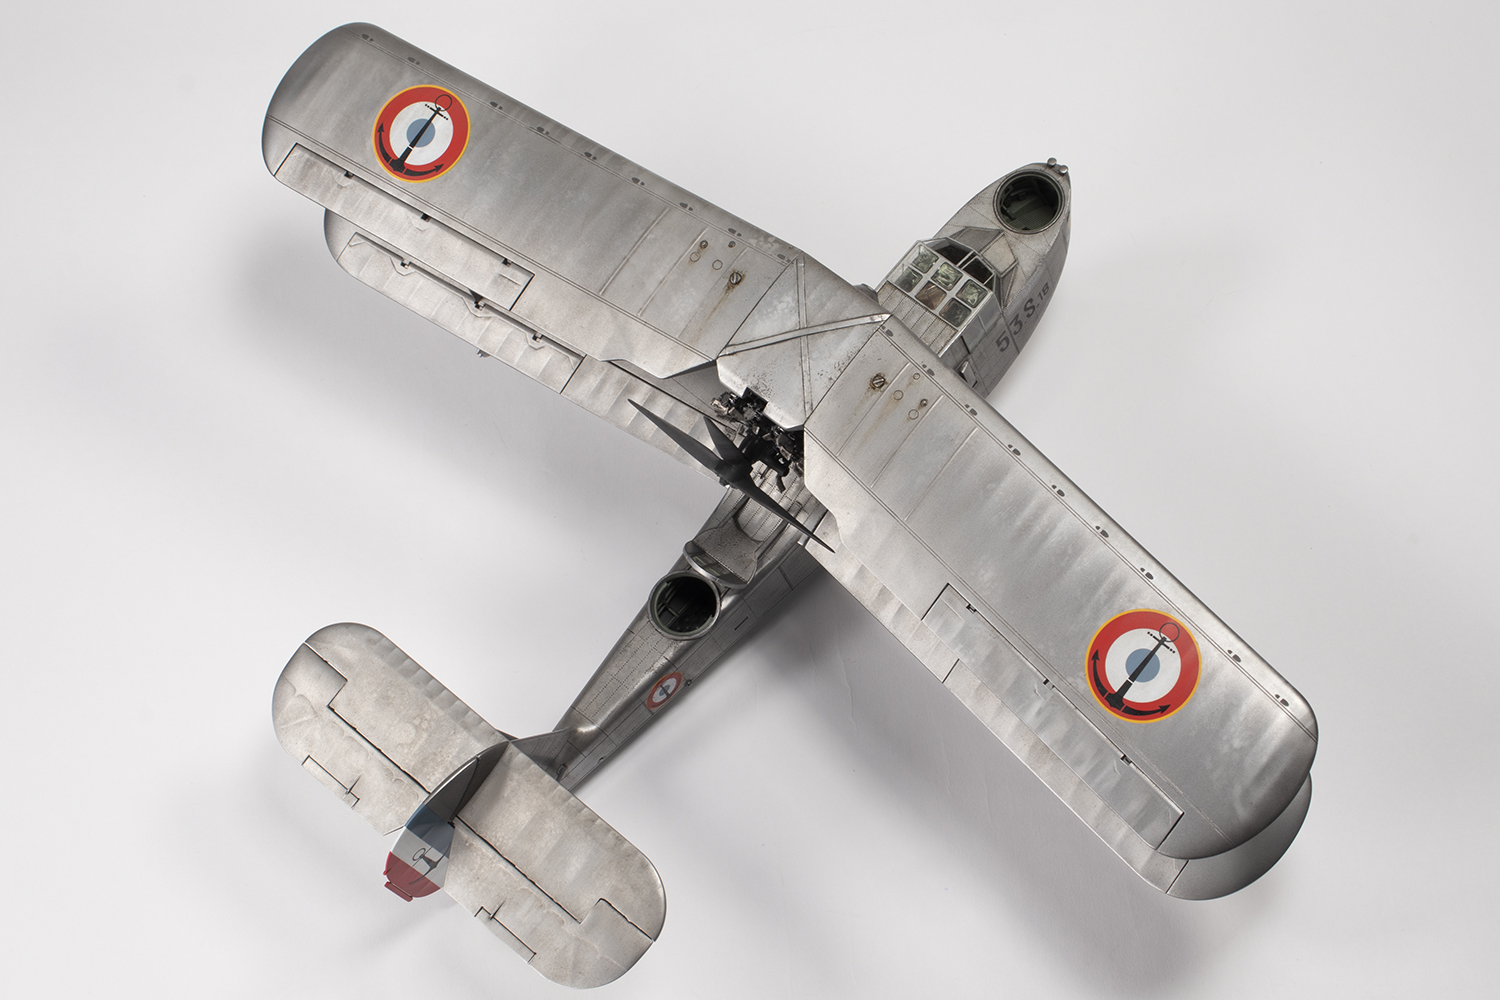
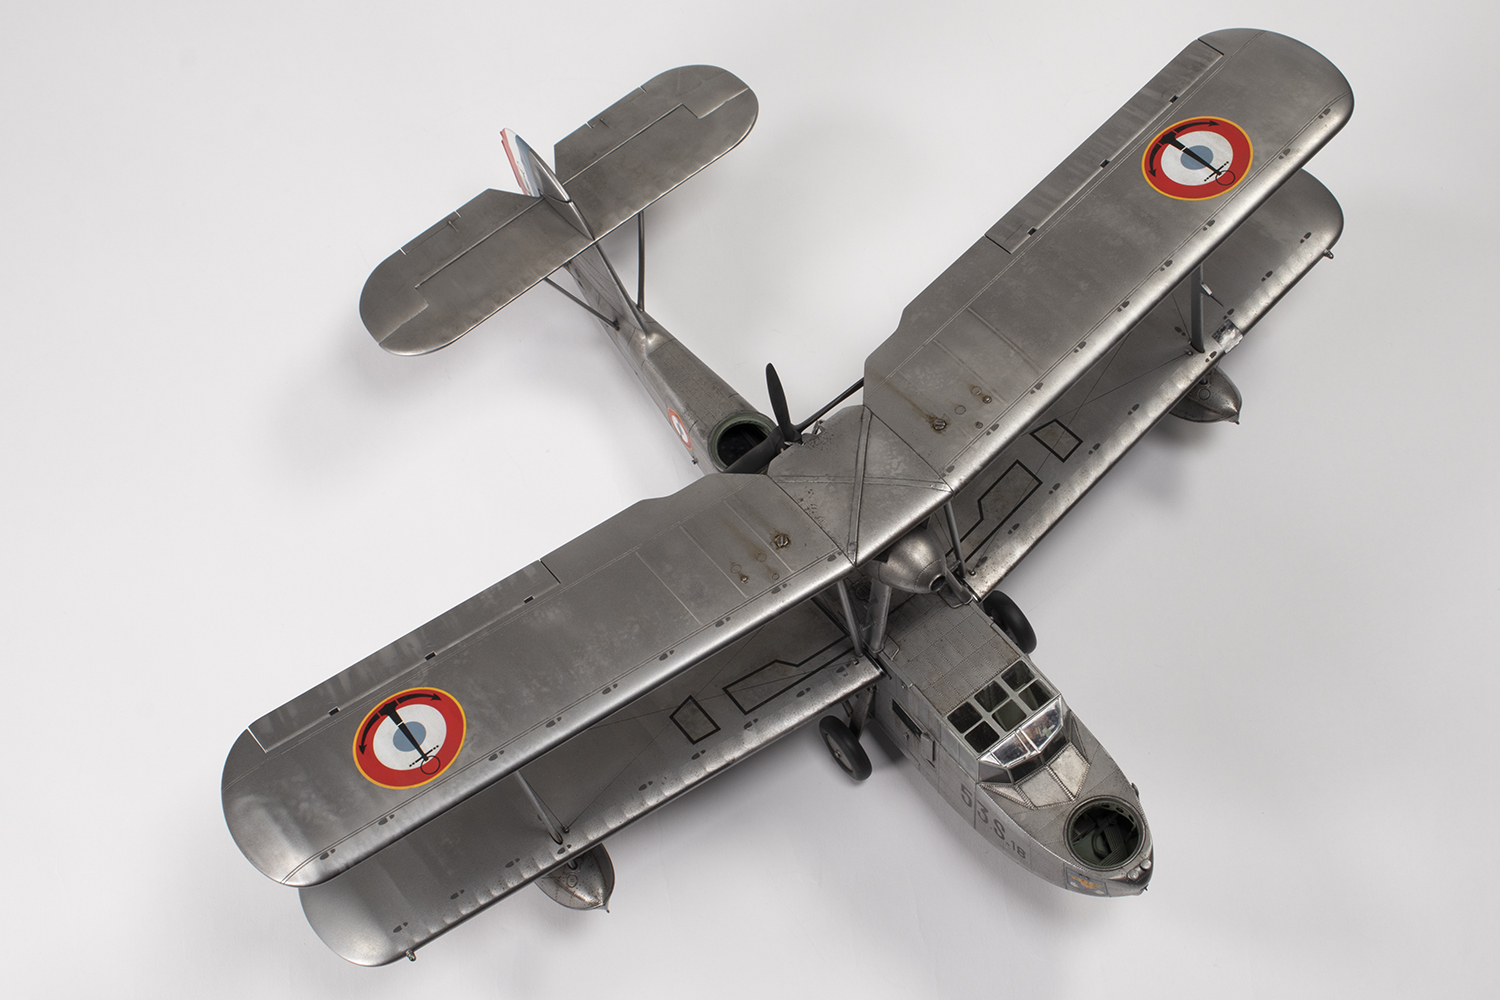
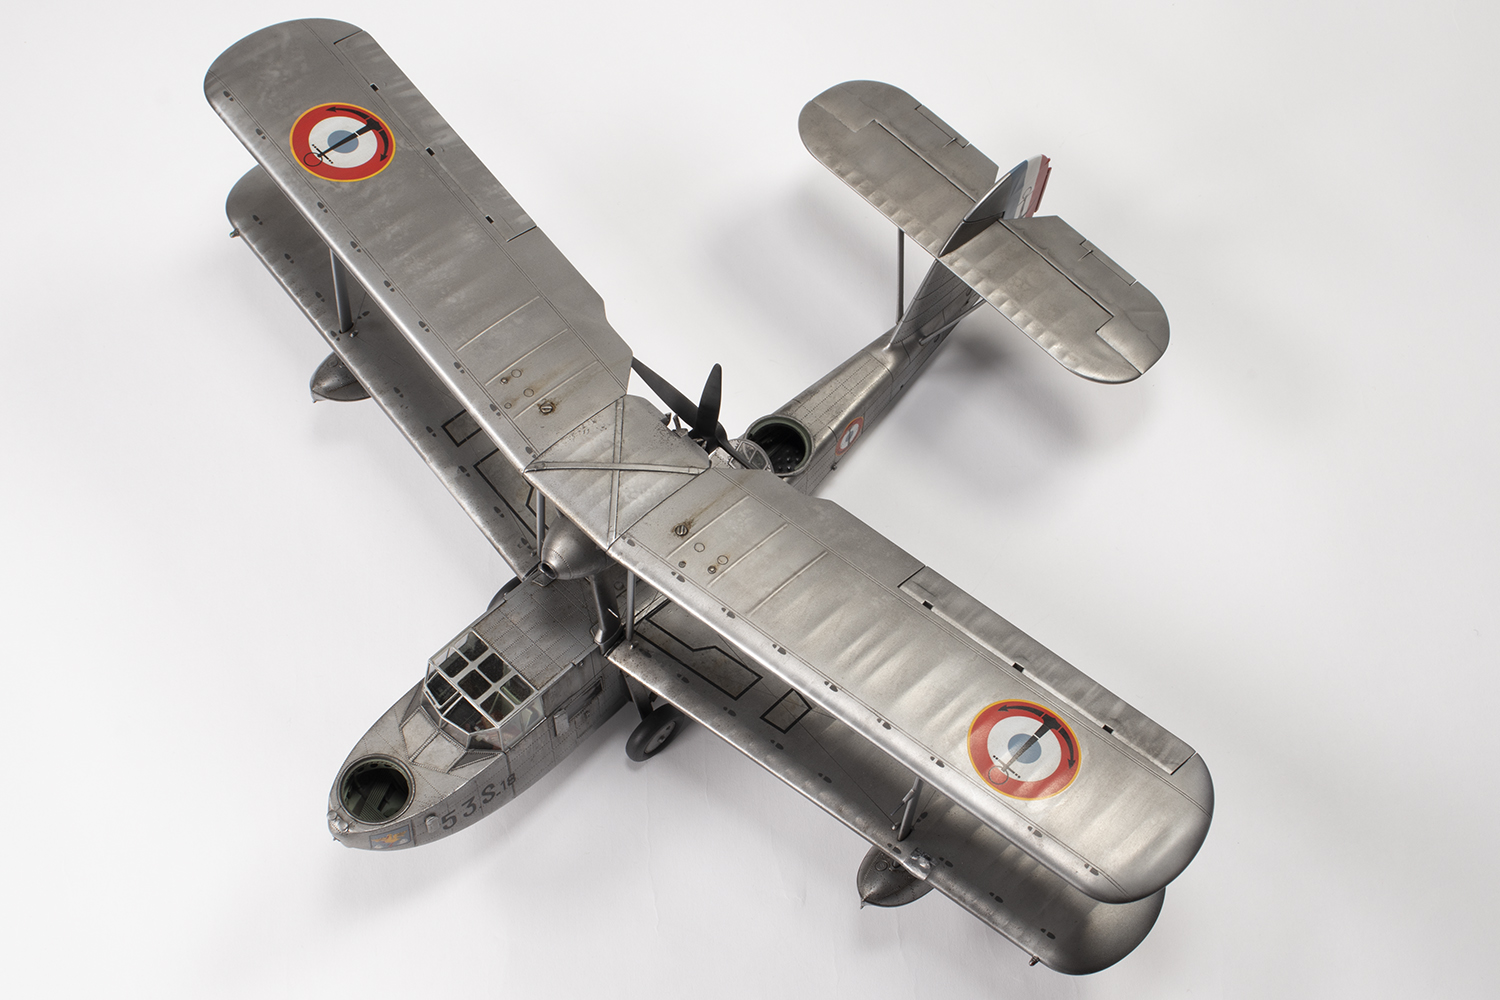
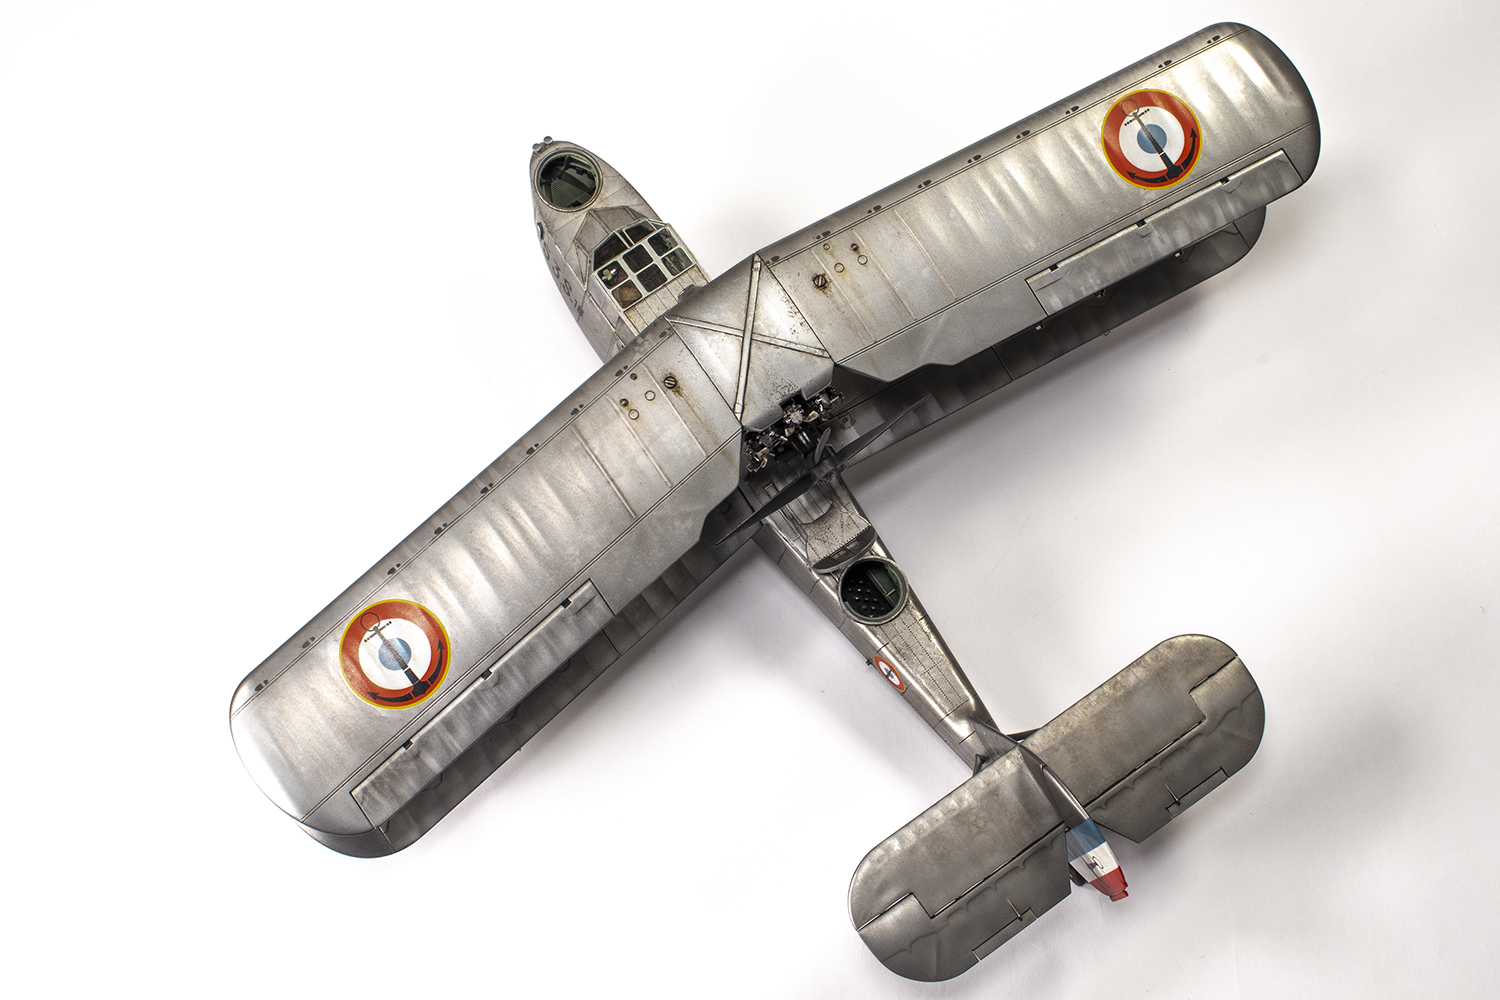
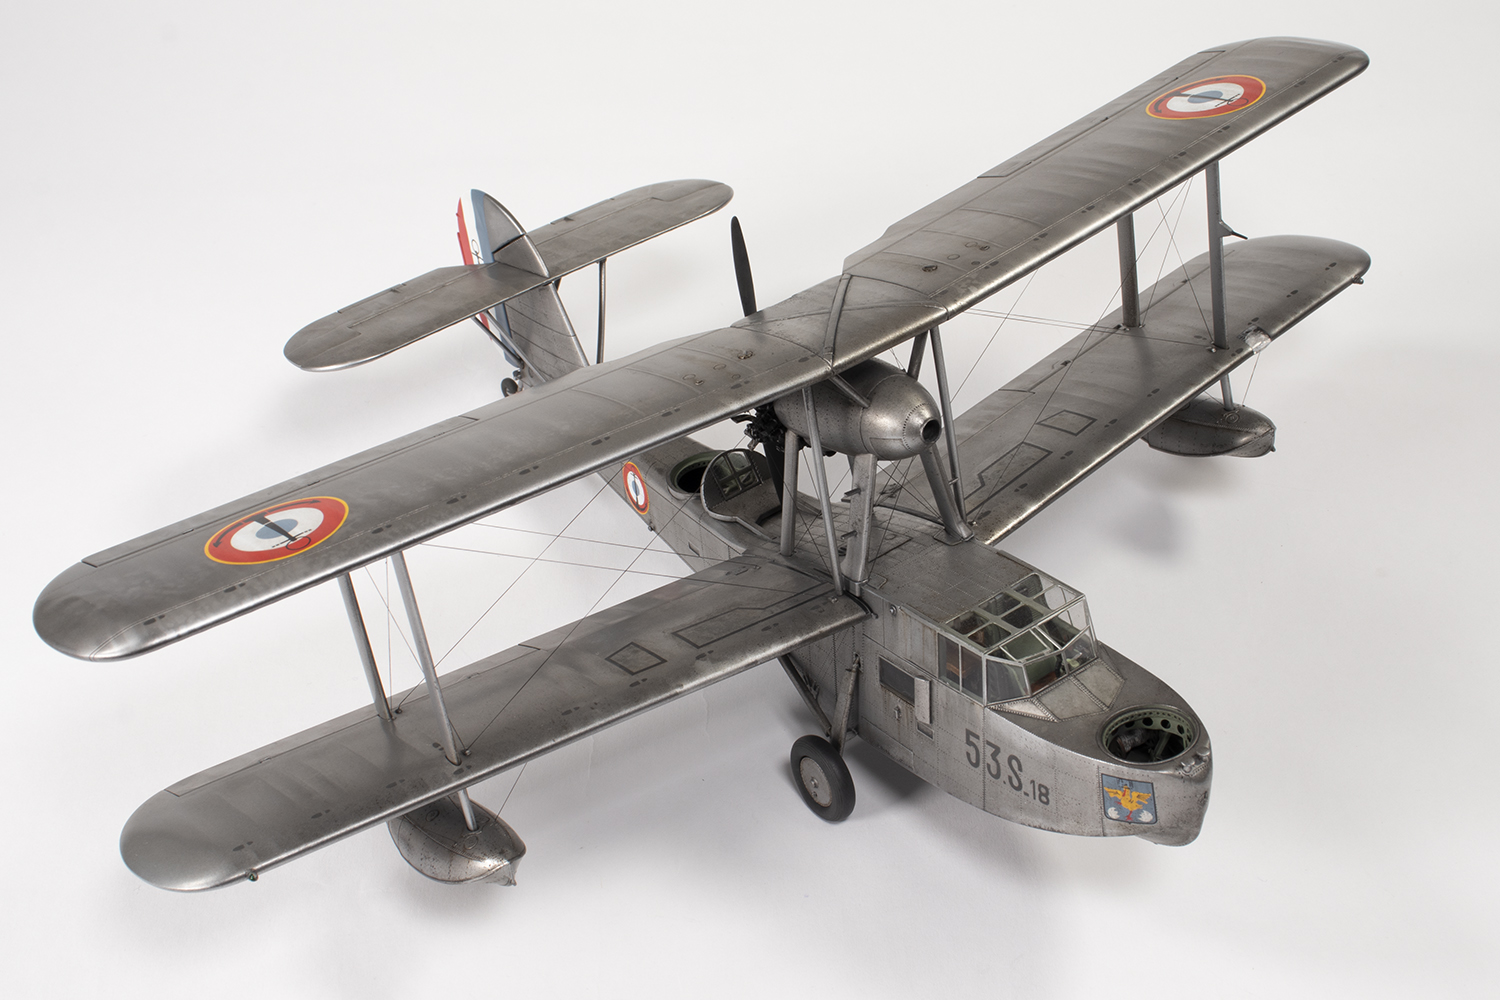
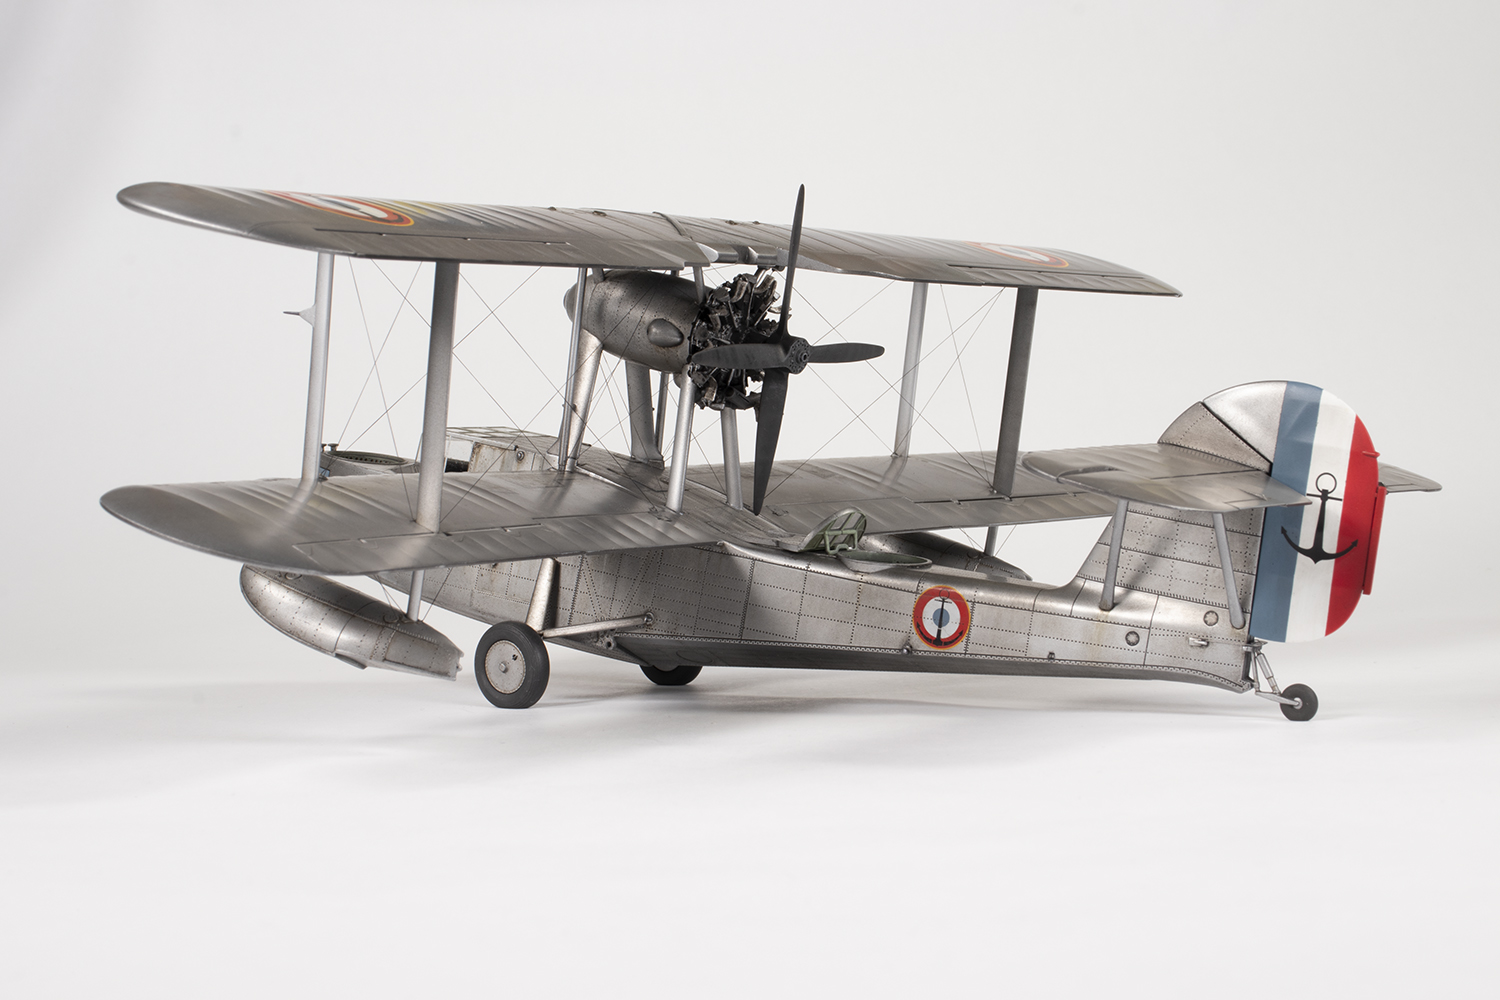
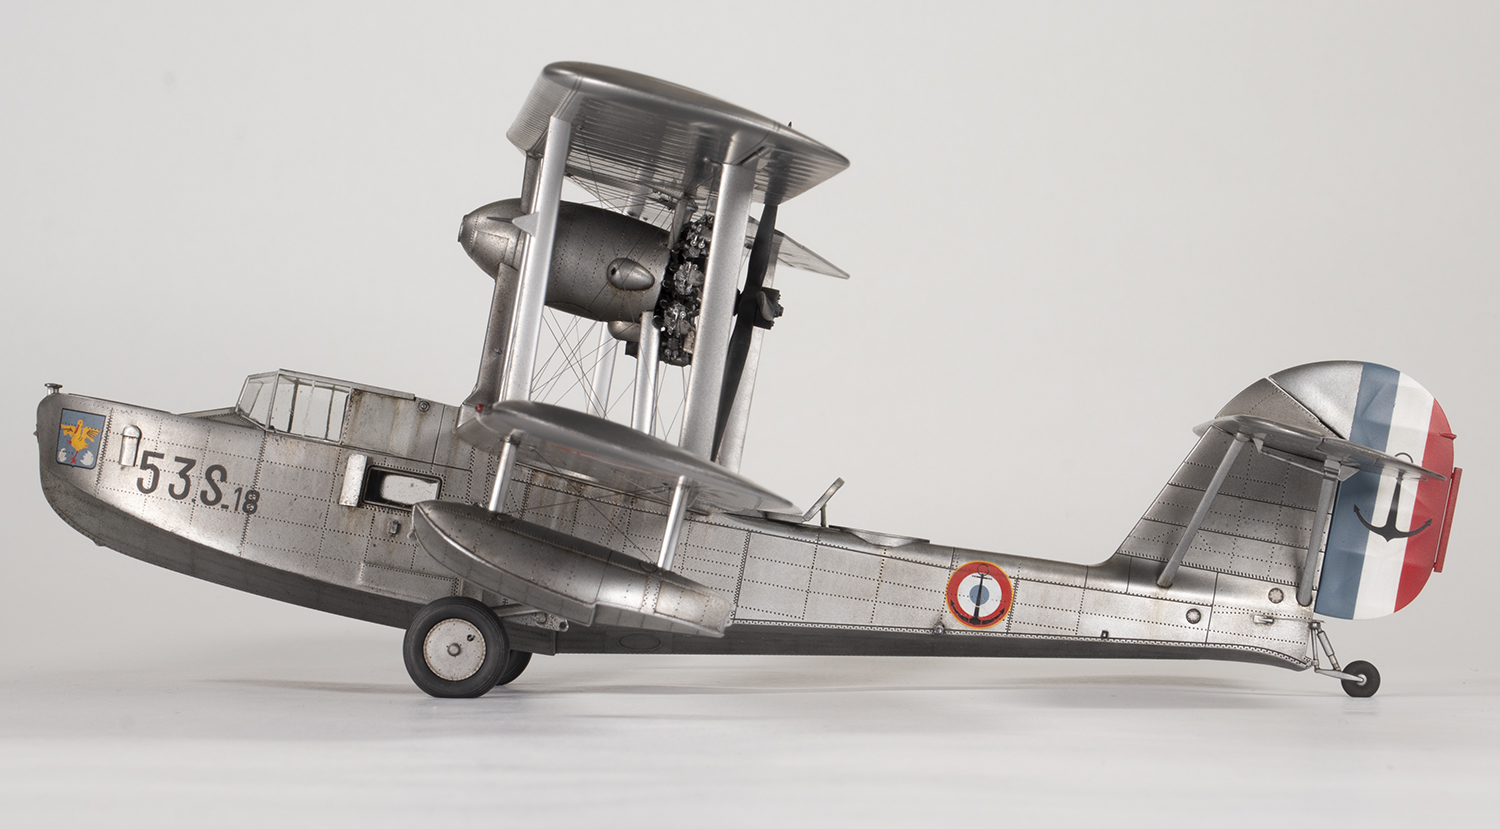
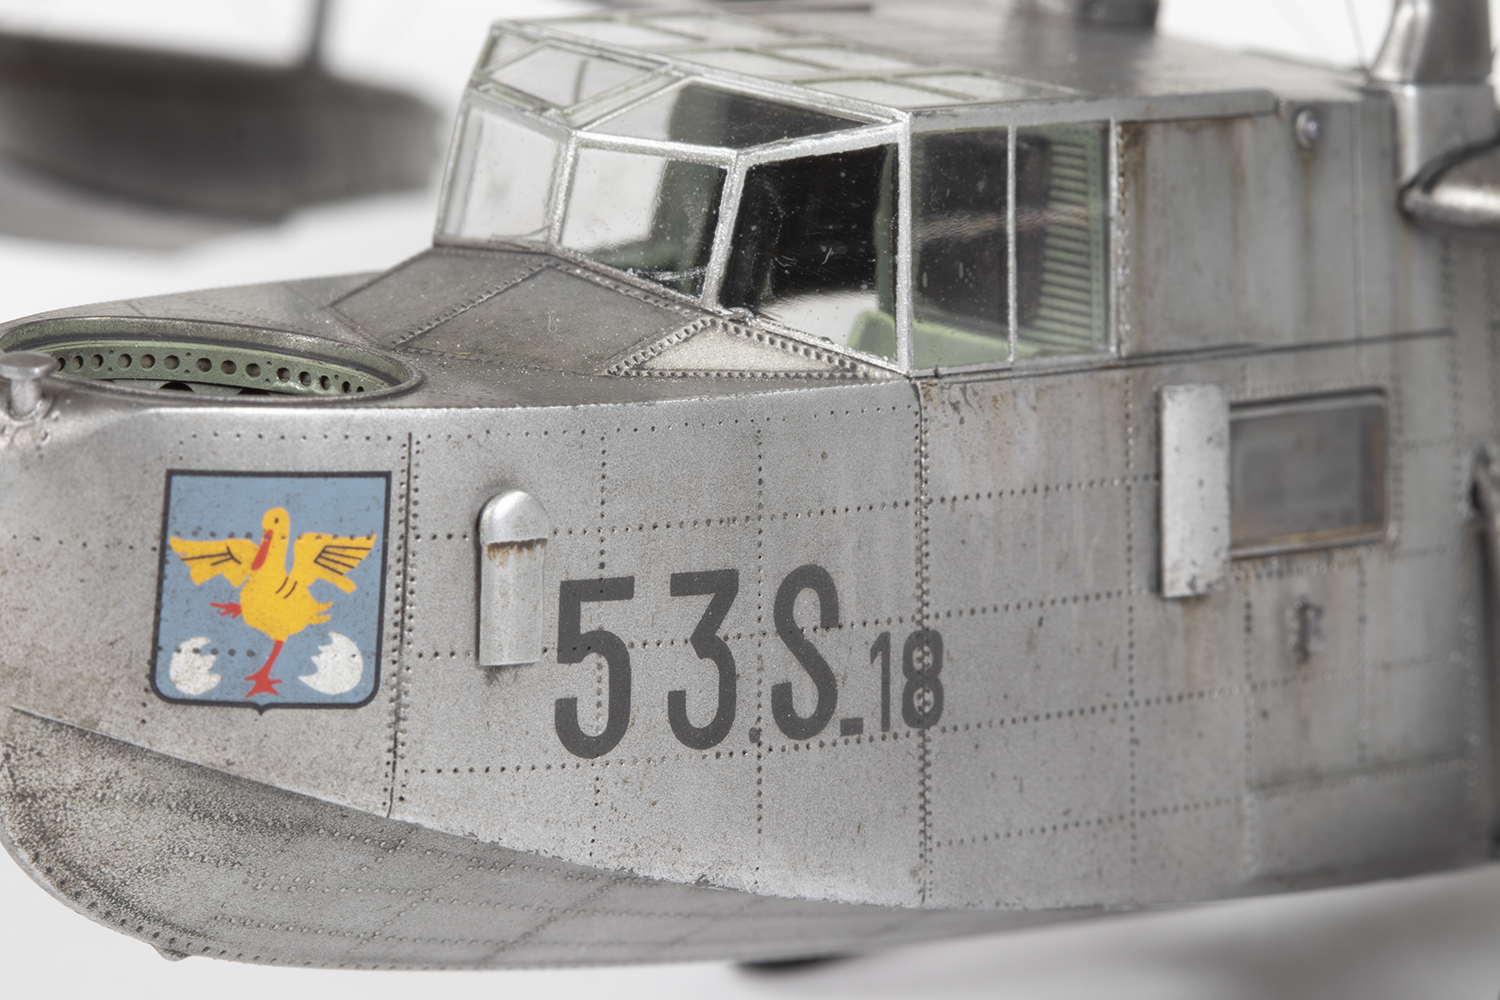
Flotille 53S, Aéronavale, France 1948

It’s hard to believe that an aircraft as agricultural in appearance and reportedly unpleasant to fly as the Supermarine Walrus stemmed from the same pen as the designer of the Spitfire, R J Mitchell. Originally designed as the Seagull, the Walrus was a pre-war seaplane that staggered into post-war service with the French Aéronavale as modelled here.
This is Airfix’s second boxing of their 2017 mould of the Shagbat, and comes with decals for Irish, Royal Navy and French naval machines. The kit has a good reputation and I embarked on the project with high expectations. I added an Eduard Big Ed set, which came with PE for the bomb bays (unused), the exterior (barely used), interior (almost all used) and seat belts, in addition to the very useful mask set. Further detail was provided via a Vector resin engine and some Quickboost resin navigation lights.
On first inspection the kit looks great, but closer examination was disappointing. On the plus side, the recessed detail was more restrained than I’ve become used to from Airfix. On the downside, the plastic surface was very grainy, with an especially gritty texture on the lower hull, and the edges of the parts were poorly defined with mould lines absolutely everywhere. The plastic was still the same soft, bluish styrene that Airfix typically use. In short, this is a well-designed kit let down by poor manufacturing.


Airfix provide plenty of detail for the interior, most of which won’t be seen. The sides and floor are afflicted by a rash of ejector pin marks which I left alone, but some are visible through the nose hatch. Nearly all of the parts were replaced or enhanced by the Eduard set, and even though I knew most of it would be hidden, I considered it a good opportunity to practise working with PE.
Because it would be hard to see, I decided to go for a high-contrast finish for the innards. The base coat is Mr Mahogany Surfacer 1000 oversprayed with lightened Mr Color 364 Aircraft Grey Green from above, and a darkened shade from below. I picked out all the raised detail with a mix of Vallejo acrylic paint for a highlight. It all looks a bit over the top, but it means some of the features are visible once the fuselage is all closed up.
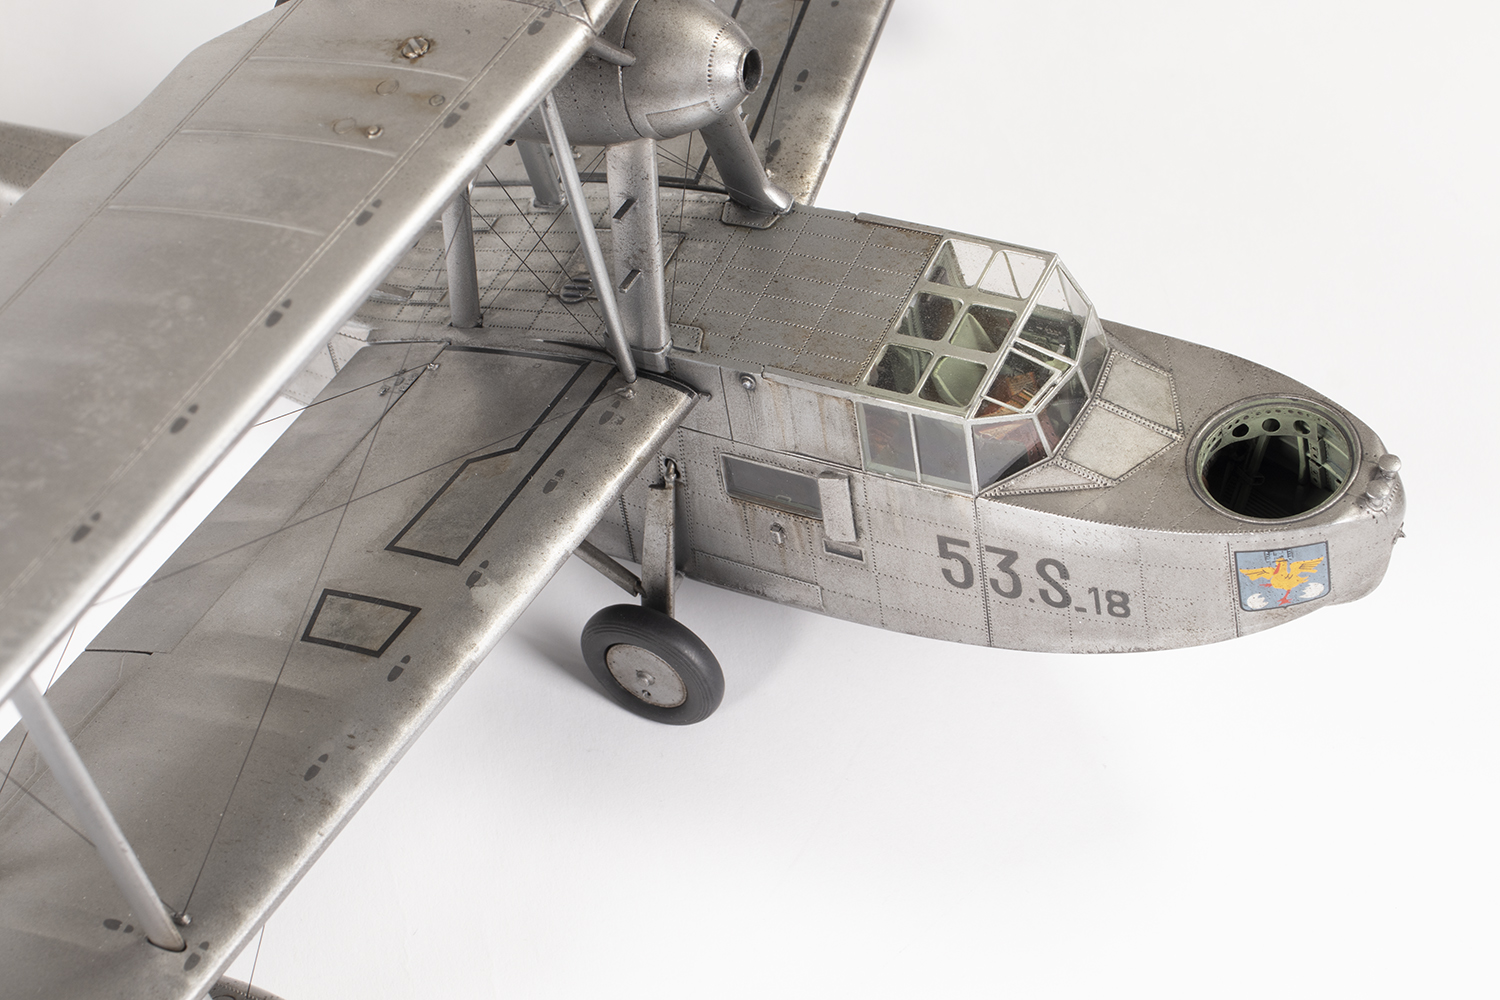
It took several weeks to get the interior finished as a lot of the PE is rather complex. Highlights are the folding seat for the second pilot, which is completely rebuilt out of photo-etched metal and soldered together for strength, and the inner side window surrounds. These allow the side windows to be realistically opened if desired. I like to have my models all buttoned up, although in this case I made an exception for the rear hatch so that some of the interior would remain on view. I missed off the guns as it seemed unlikely they would be fitted to a training aircraft and I could not see any on the photos I had of French Walruses.


The Eduard seat belts caused me no end of consternation. They are very, very wide – a scale six inches! I could not find any references that matched what Eduard provided. On the assumption they had access to material I didn’t, I used them anyway, but they do look very overscale.


Piecing all the parts together to get the fuselage closed was a challenge. It’s been said that Airfix kits are produced to tight tolerances such that even a coat of paint can throw the fit off. Well, I was careful to keep all mating surfaces free of paint, and the fit was still way too tight. In reality, every single piece needed extensive clean up because of those pesky moulding lines and the edges of many parts, such as the window openings, are not well defined. I worked slowly, fitting the bulkheads to the port fuselage half and the floor, then adding the starboard half, and finally the top fuselage. This latter part took several days to apply working from the tail towards the cockpit using Tamiya Extra Thin and a lot of clamping.


The fit of these parts, along with the upper nose, was not brilliant and I wanted to eliminate any trace of the seams. This meant the surface detail would look a bit odd as panel lines terminated in unusual places. The actual aircraft had positive rivets and the panel lines are very subtle. I went for neatness rather than realism, deepened all the surface detail that Airfix moulded, and then eliminated all the joints using superglue. The worst fitting part was the nose, which protruded significantly over the lower fuselage. This was carefully eliminated with more superglue and sanding with the superlative sanding tools made by Infini.


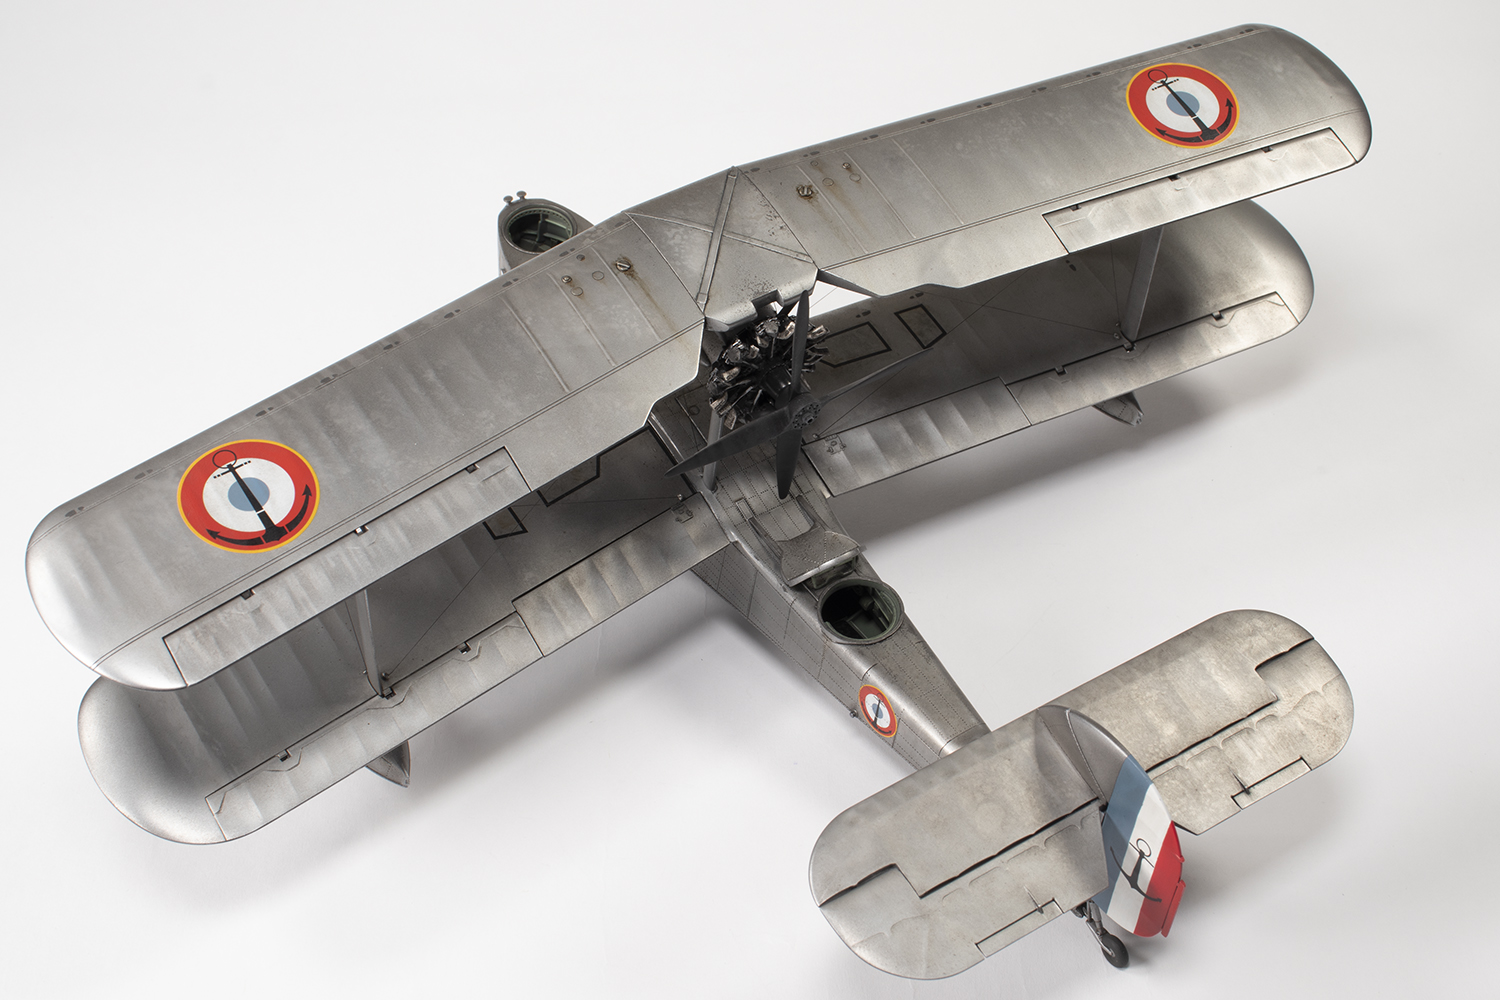
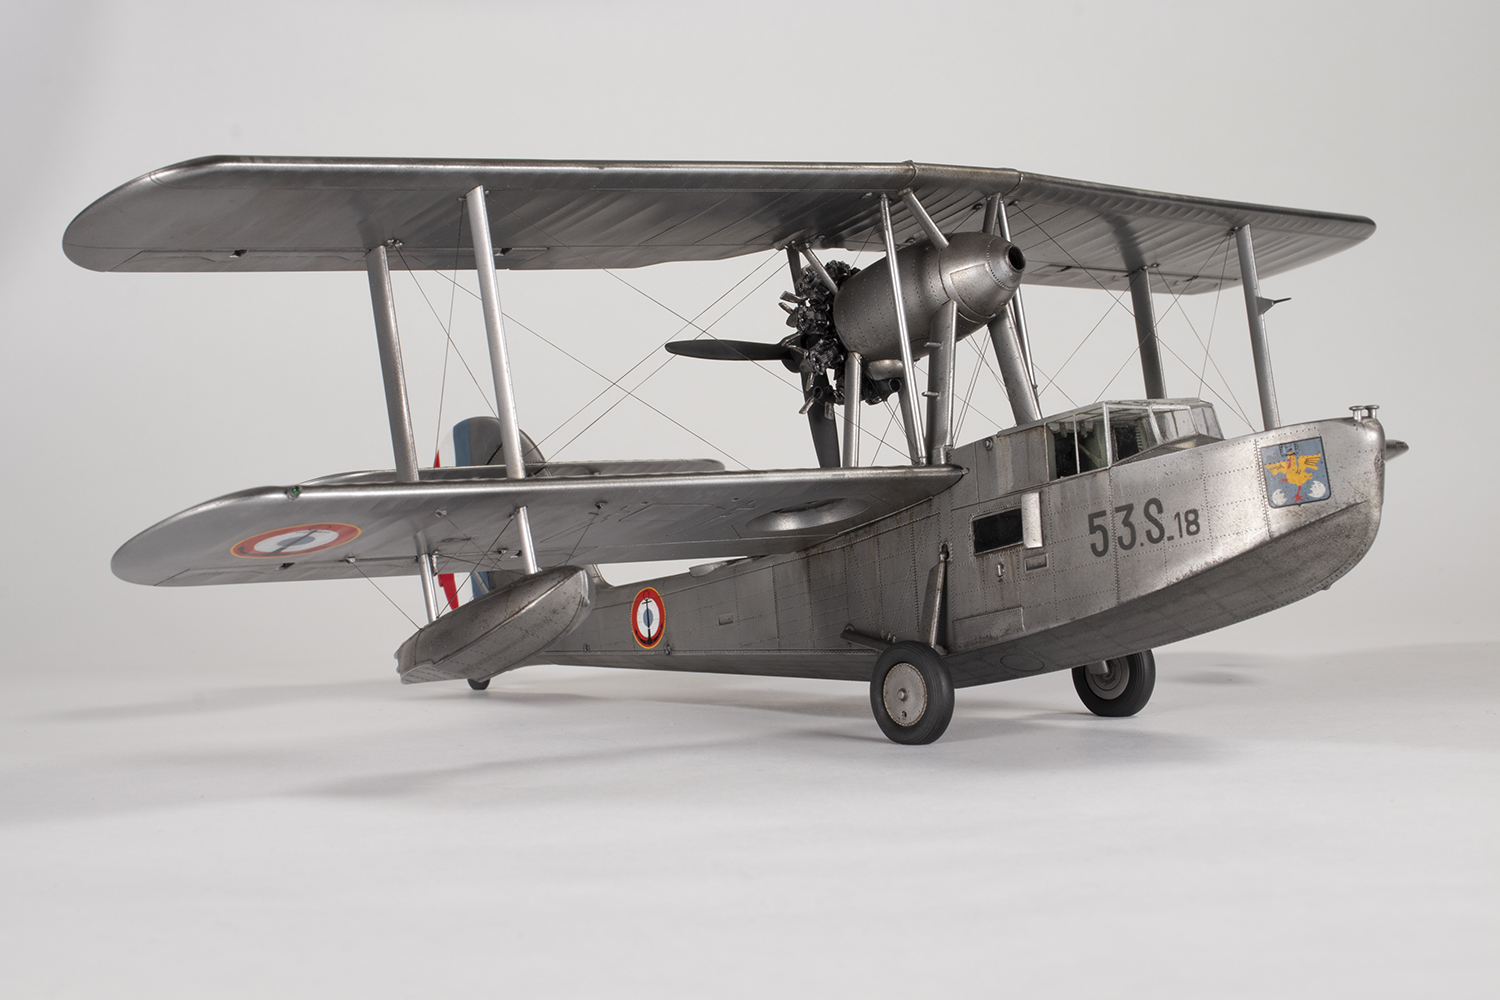
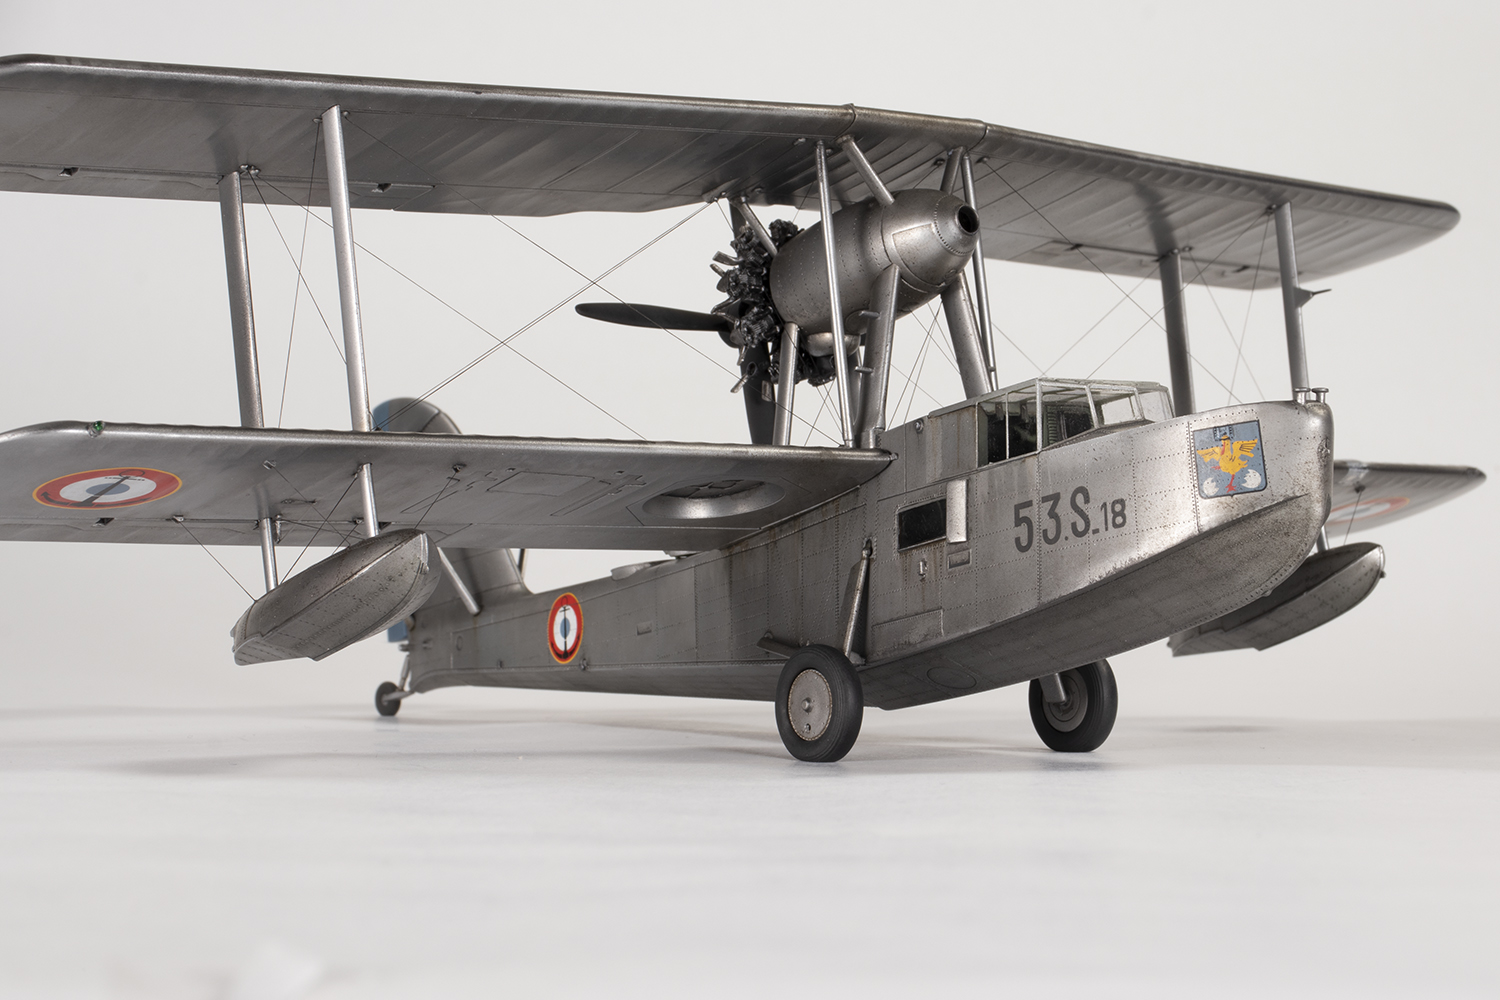
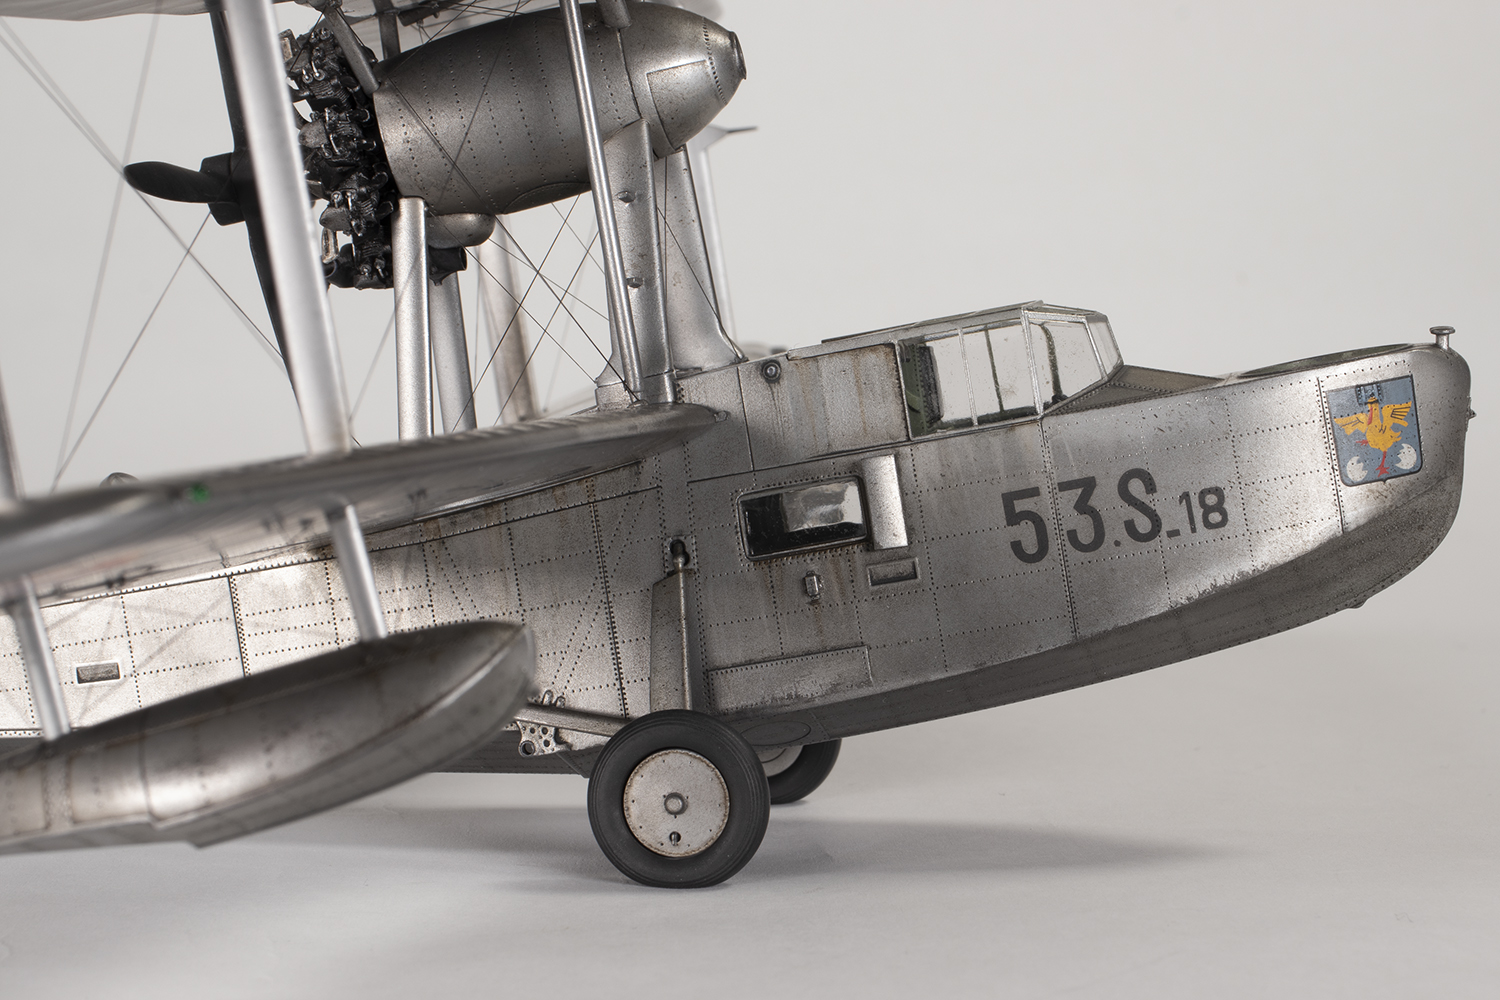
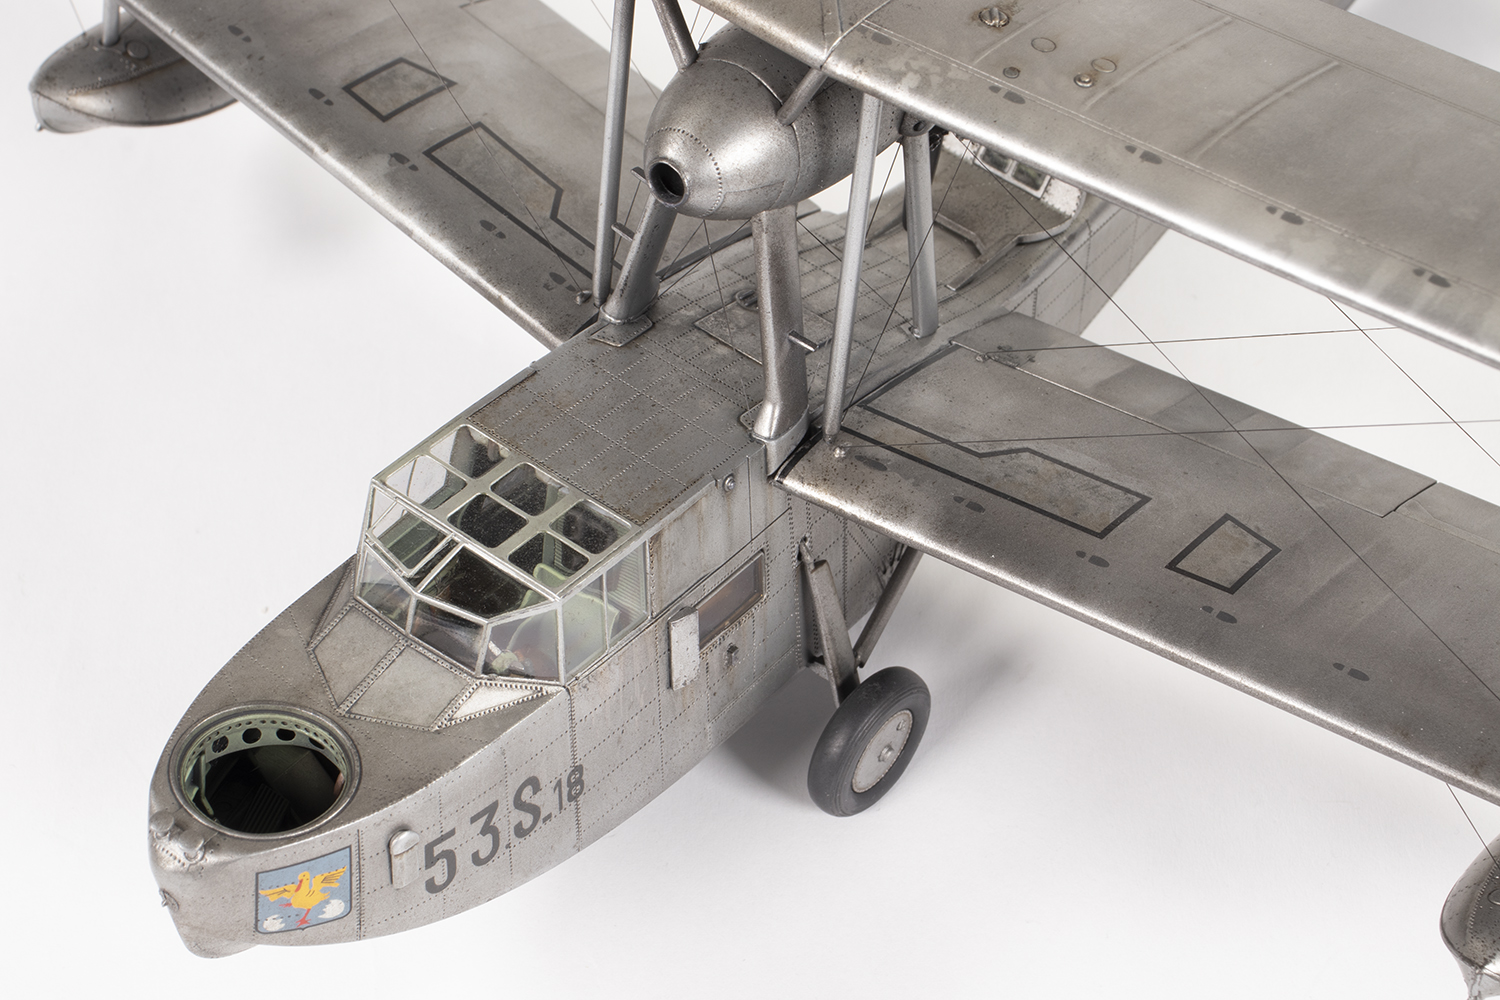
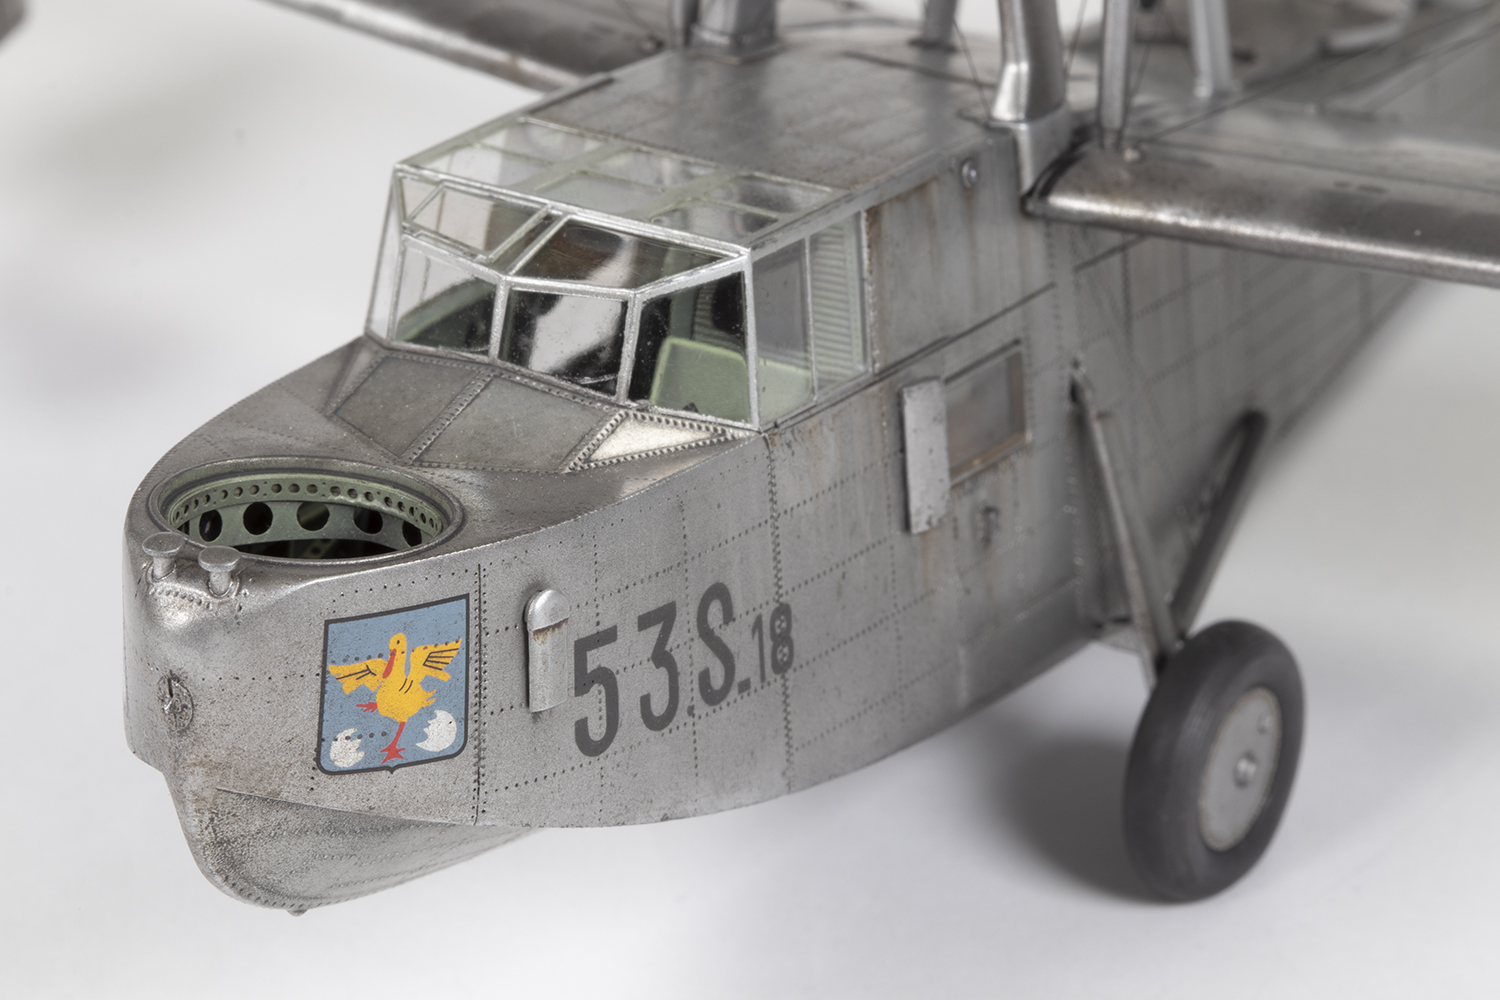
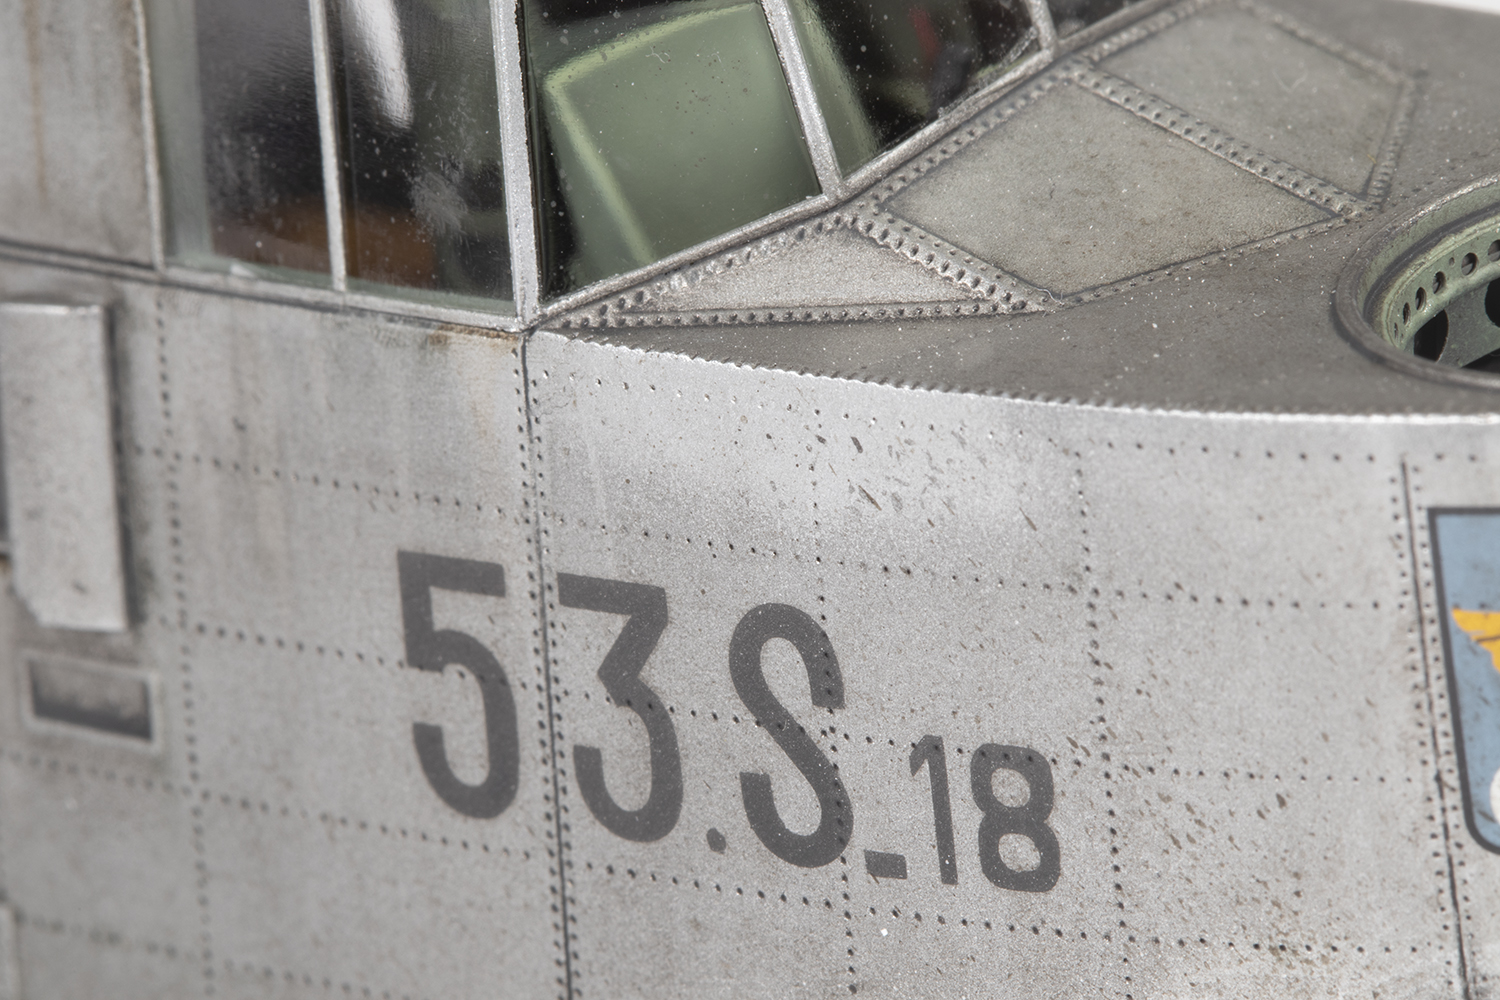
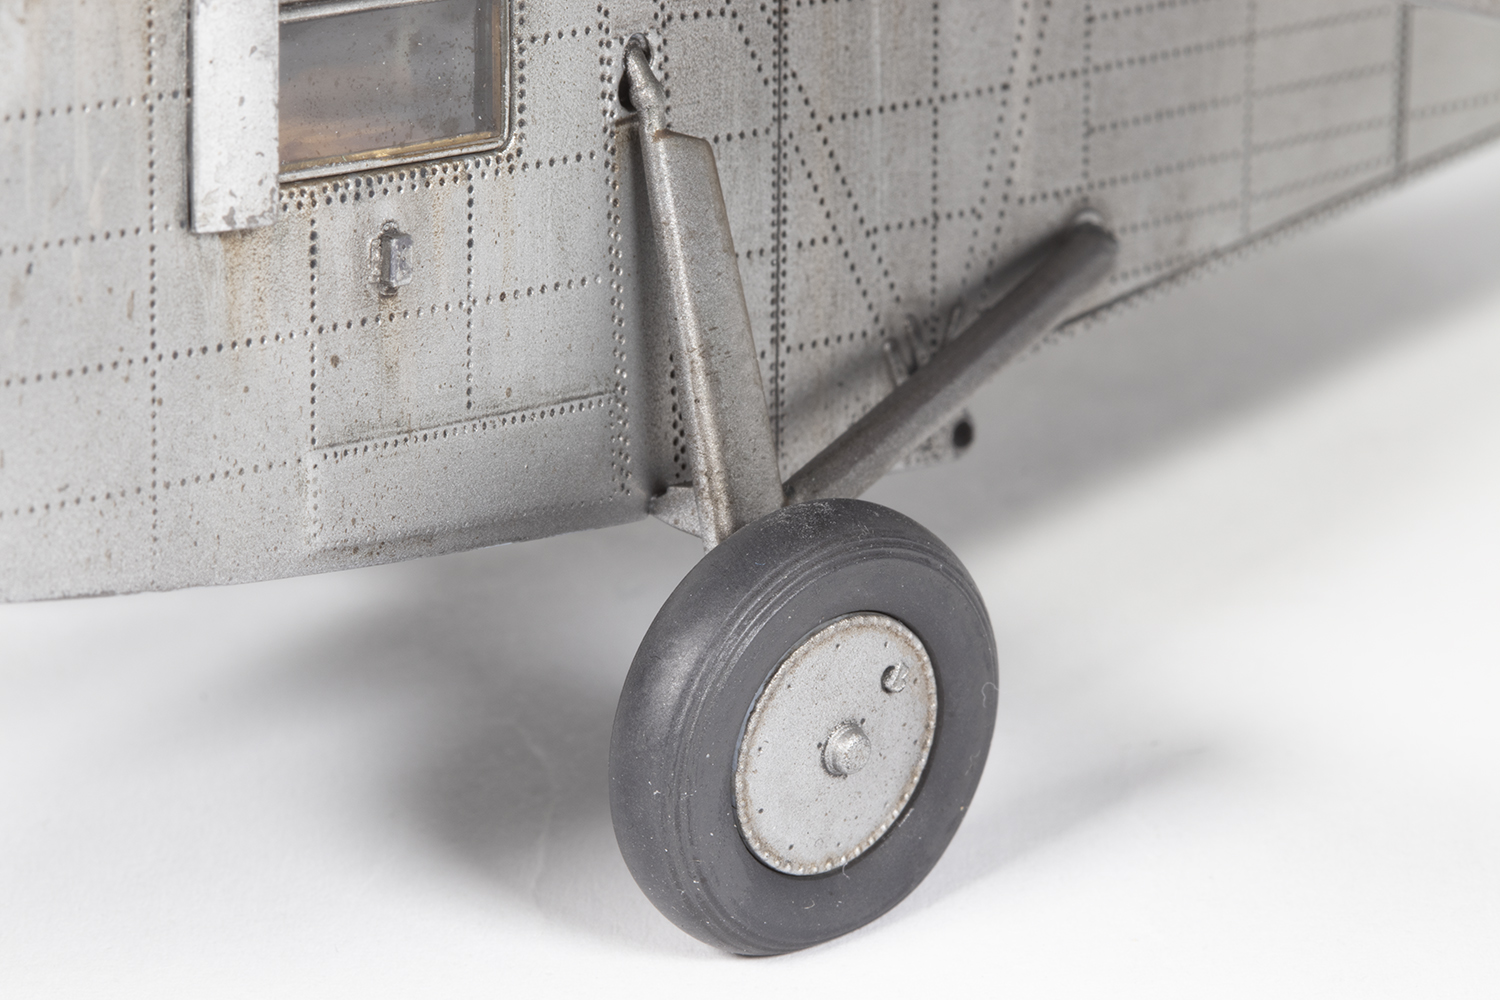
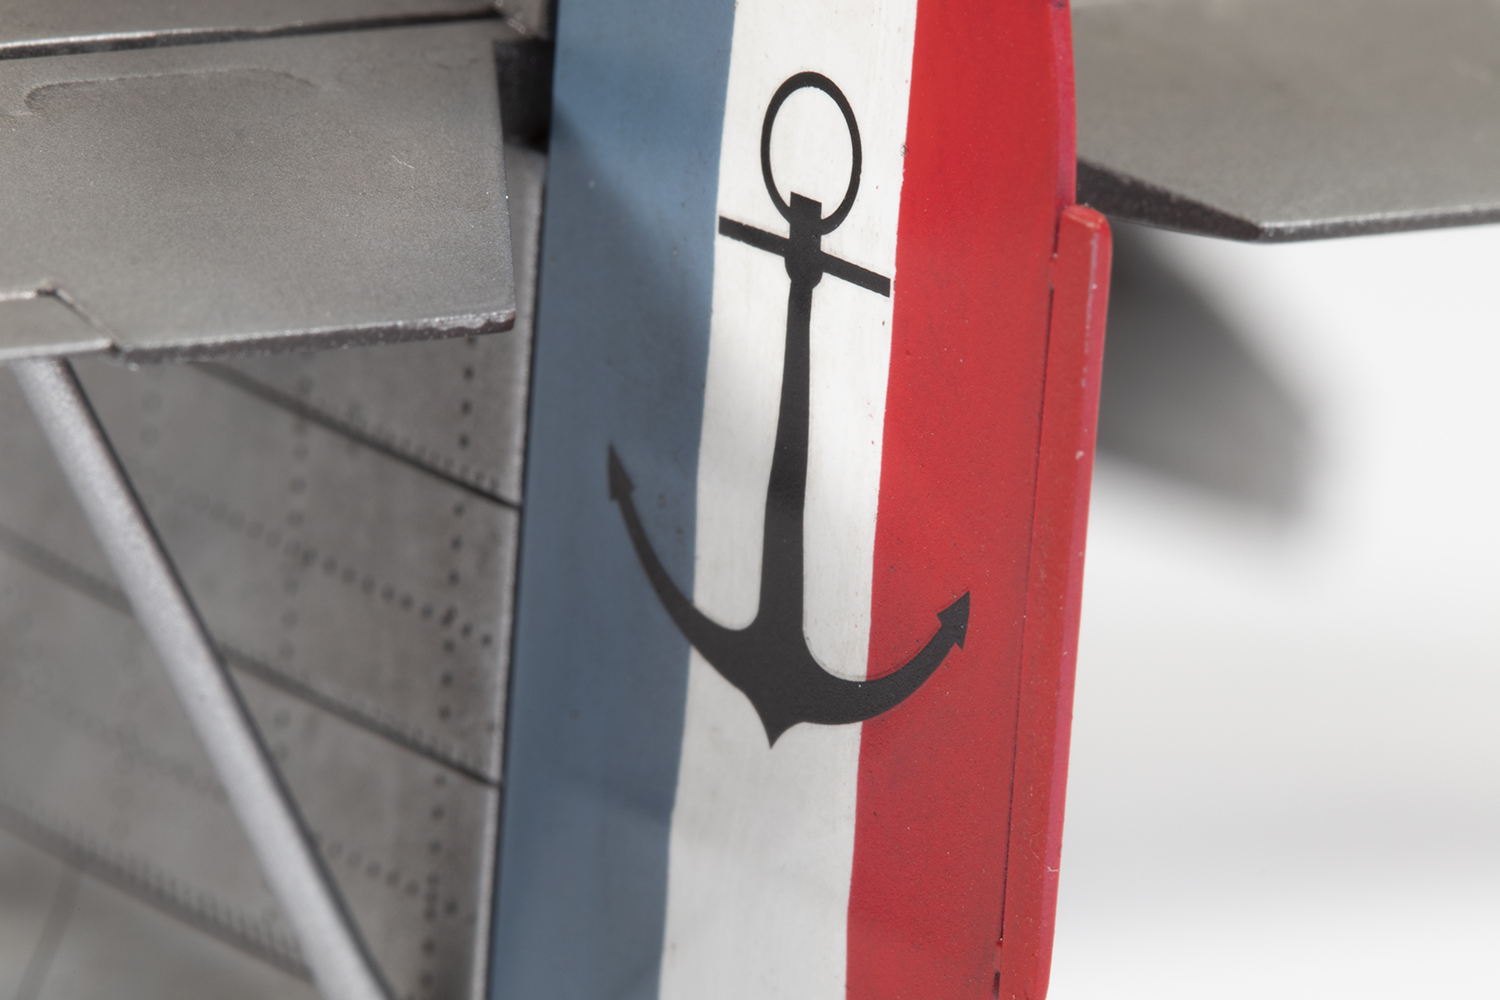
Once the fuselage was together I began to take stock of what I had compared to the few photos that are kicking around on the internet of French Walruses. Airfix provide decals for aircraft 53.S.16. There are a couple of problems with this: 1) the Airfix roundels have anchors on them, whereas the photos of this aircraft I could find showed they were not present, at least on the underside of the wings, and 2) this particular aircraft had splash guards fitted in front of the side windows and these are not included in the kit.
Some more googling produced a couple of options. I could invert the ‘6’ on the decal sheet to make 53.S.19 which didn’t have the guards and did have the anchors, or I could make my own fuselage number and do 53.S.18 which did have both the guards and the anchors on the roundels. Since I wanted to make my Walrus a little different, I decided to model 53.S.18.

This meant I needed to make some splash guards. After rooting around in my spares box for a while and a couple of abortive attempts, I found something that would work from an old drop tank, I believe from a 1/48 F-15 kit. A length was cut out, chopped in half and cleaned up and worked perfectly.
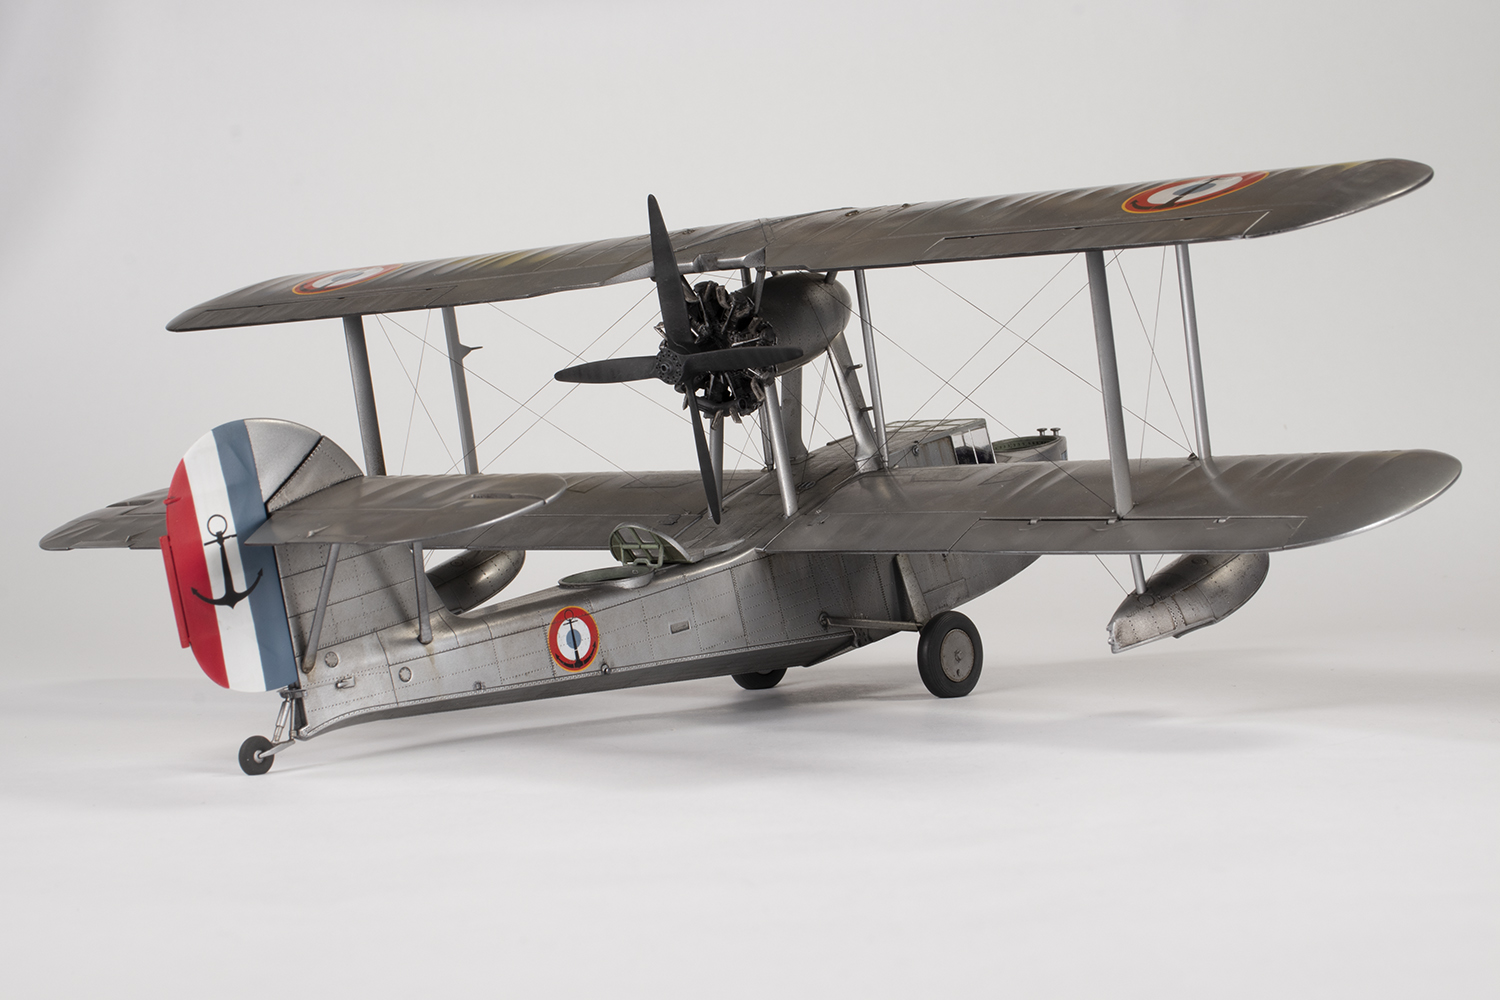
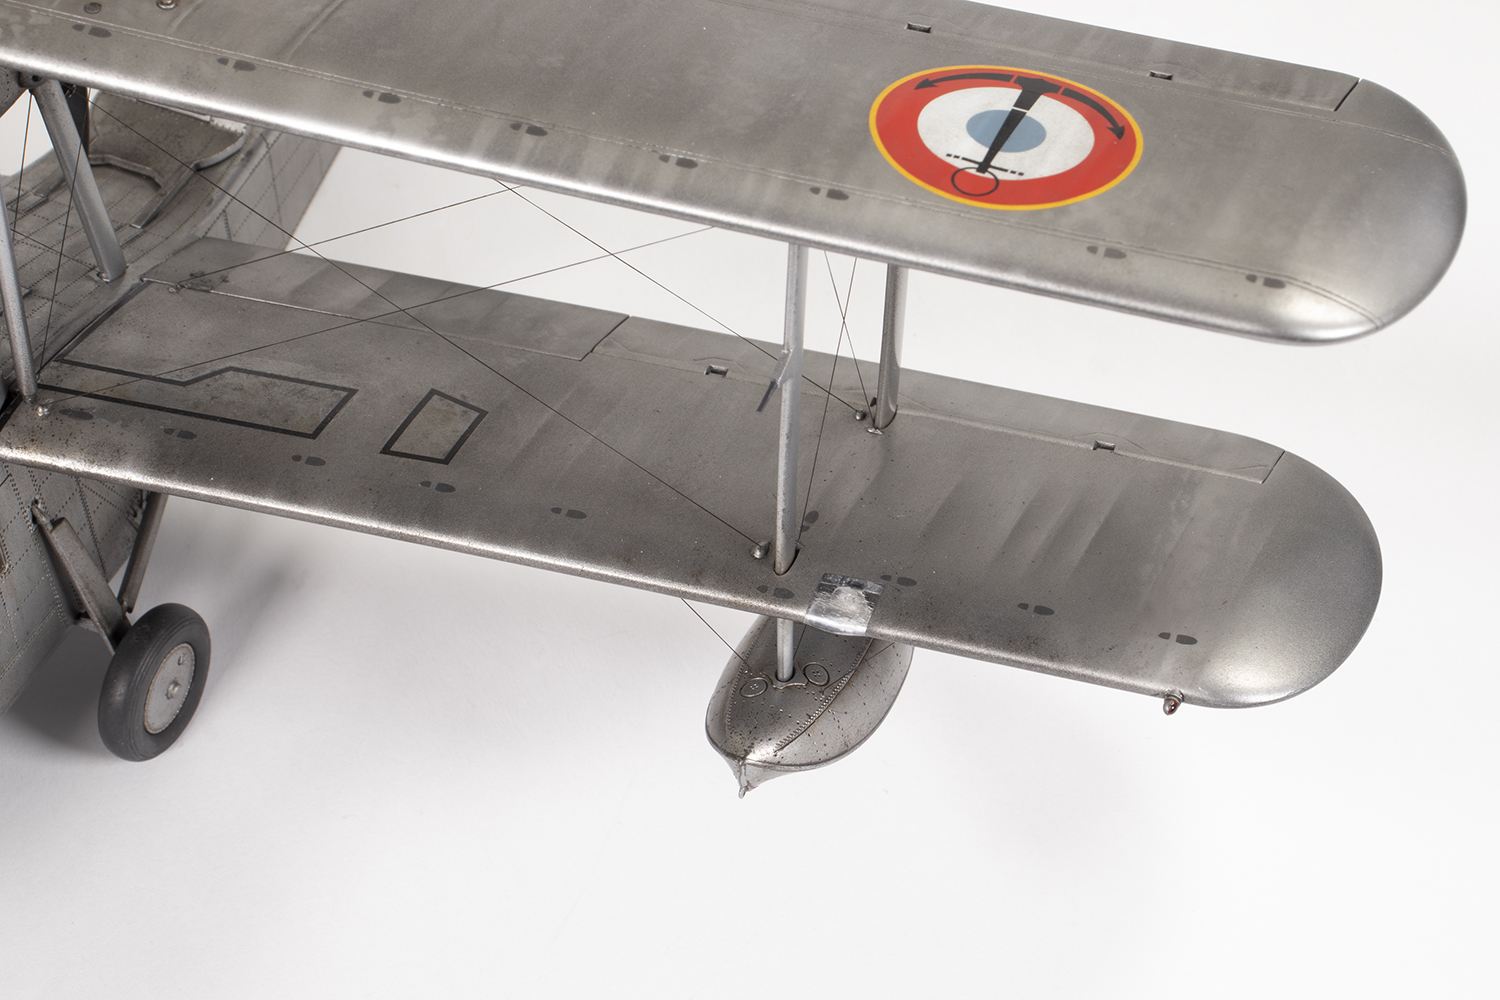
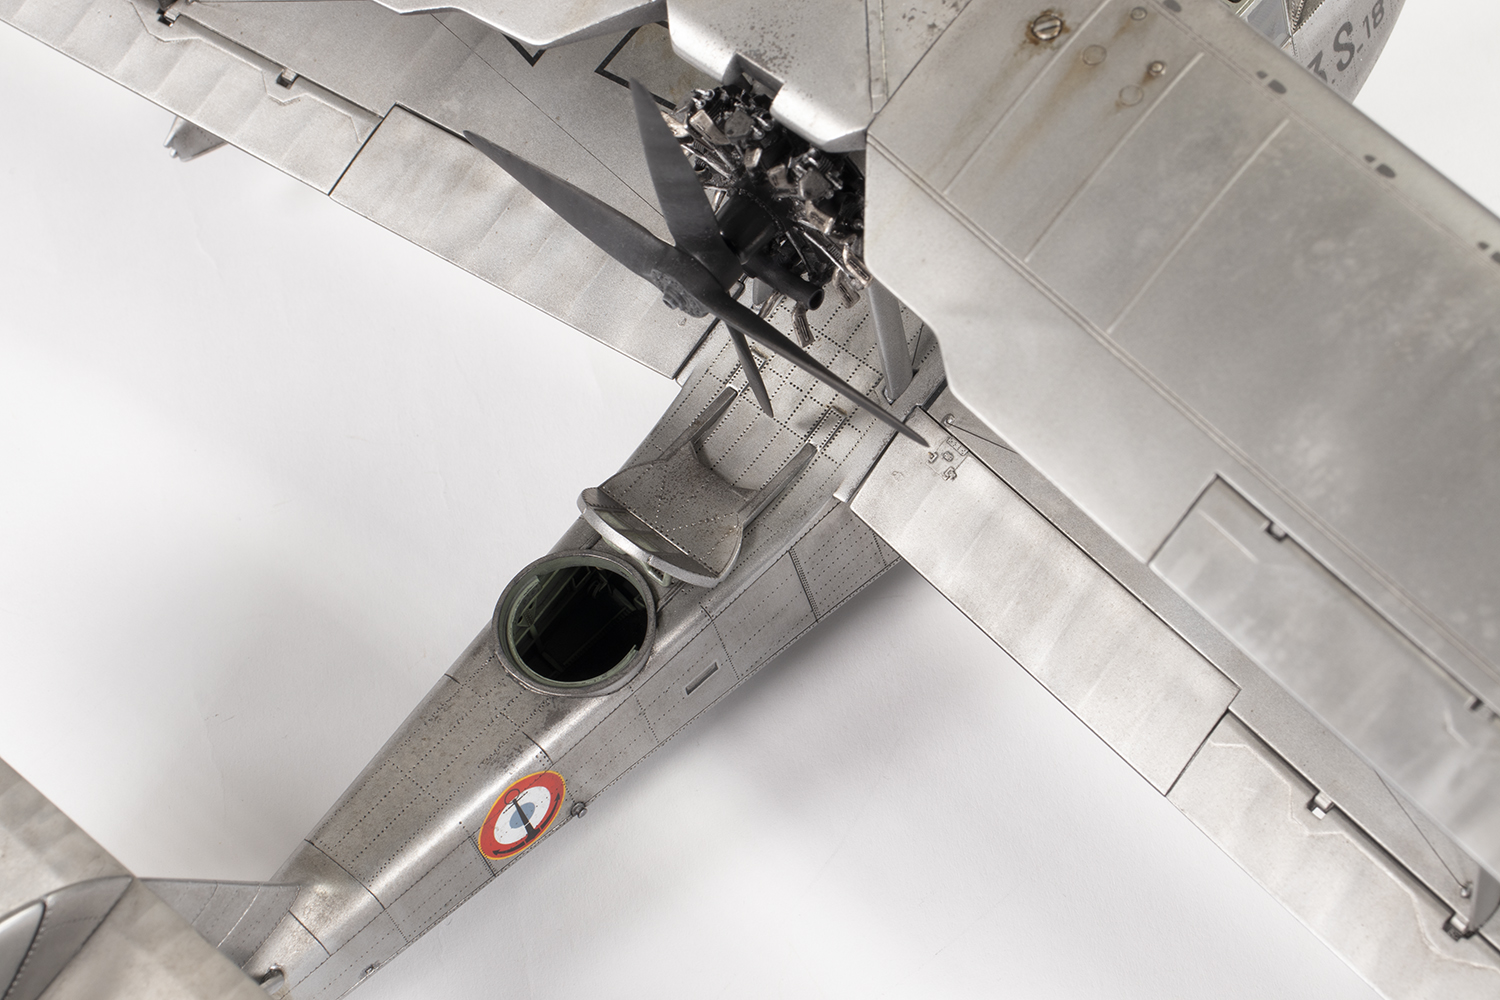
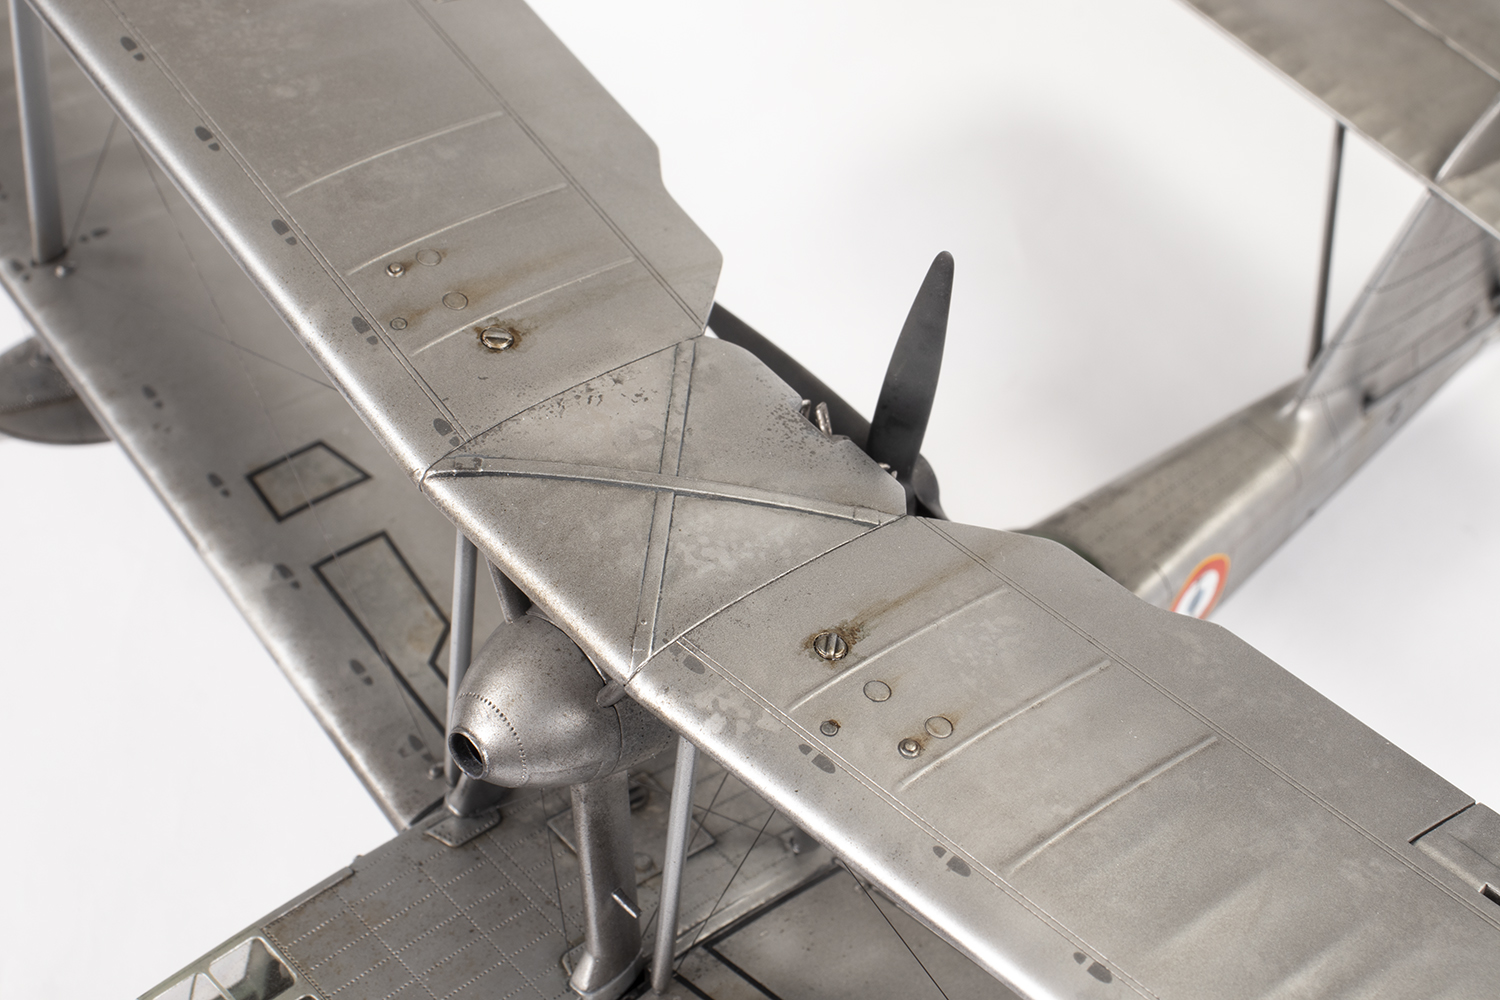
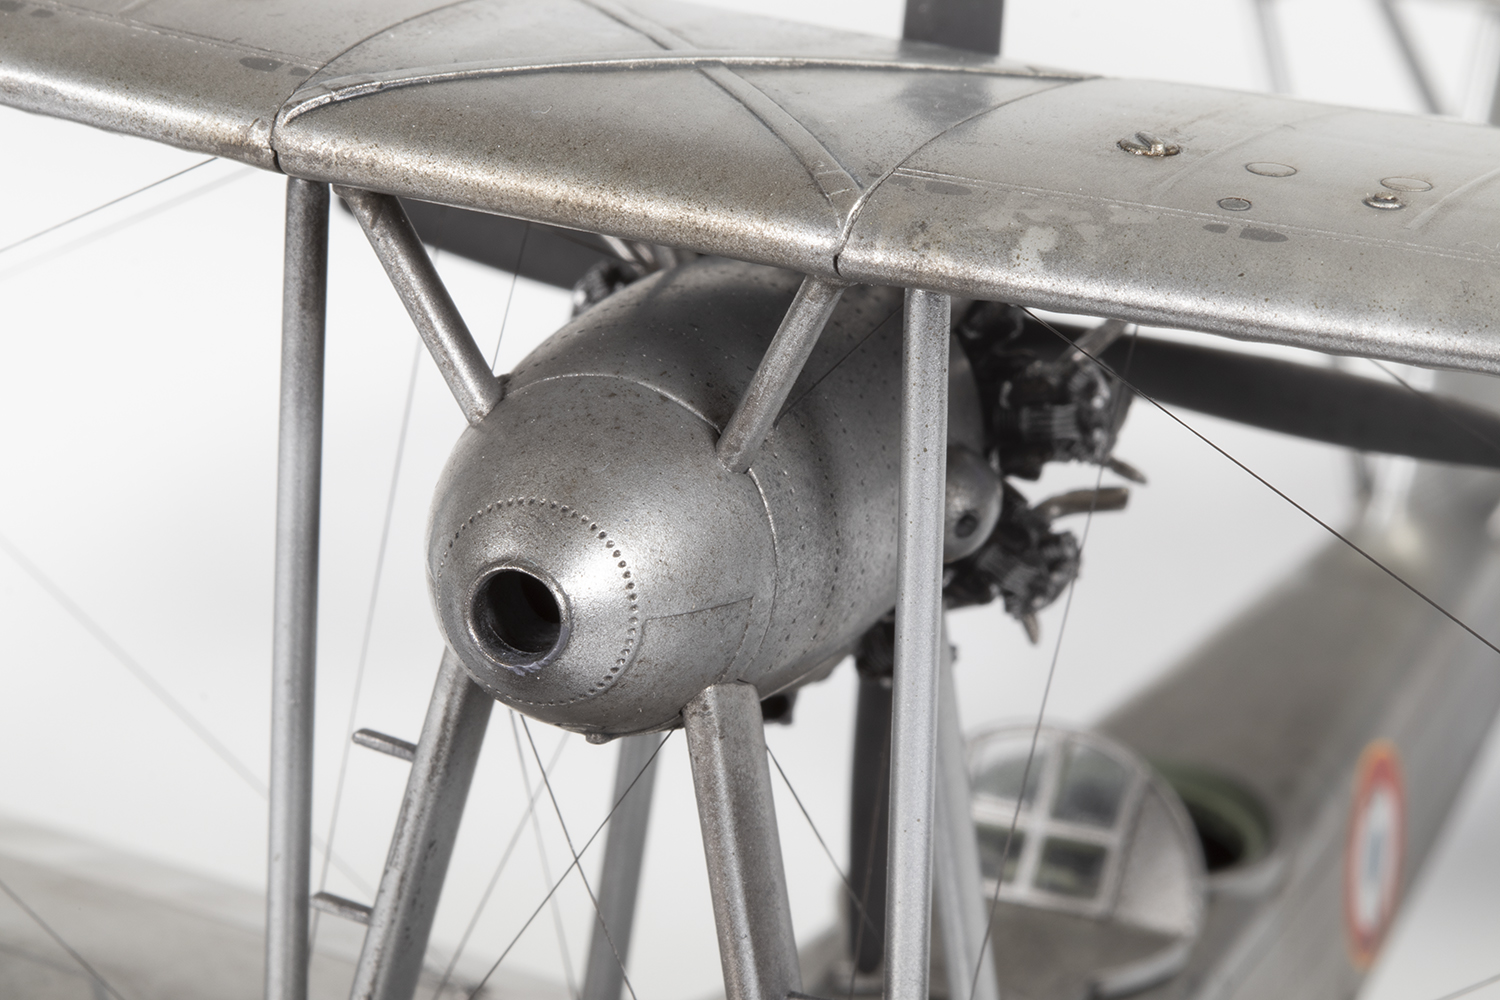
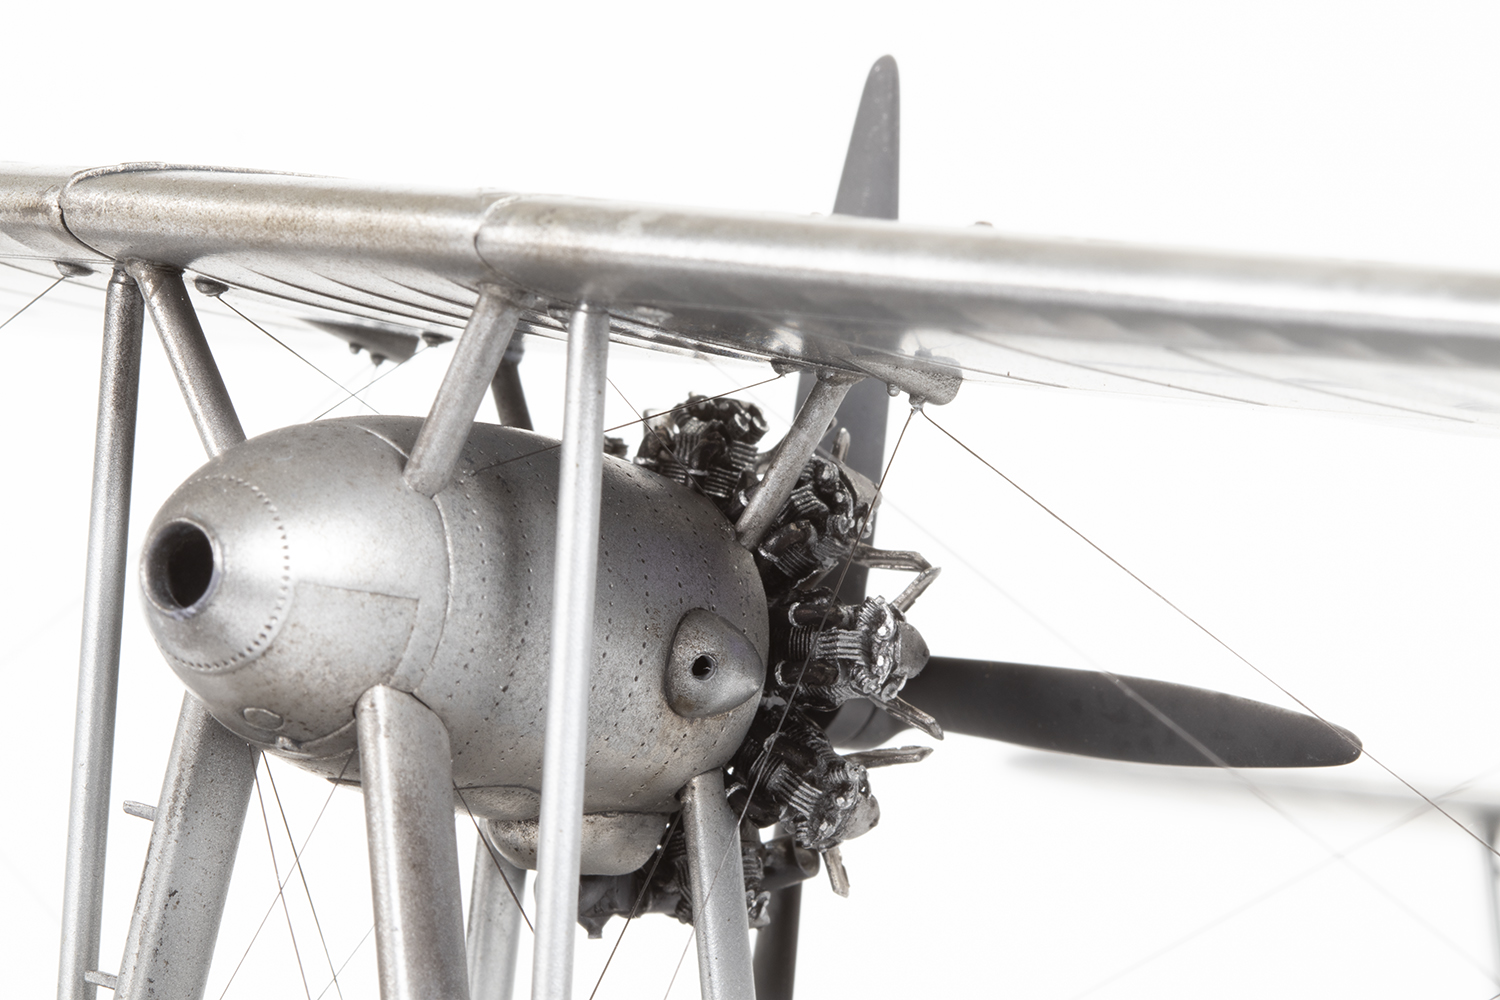
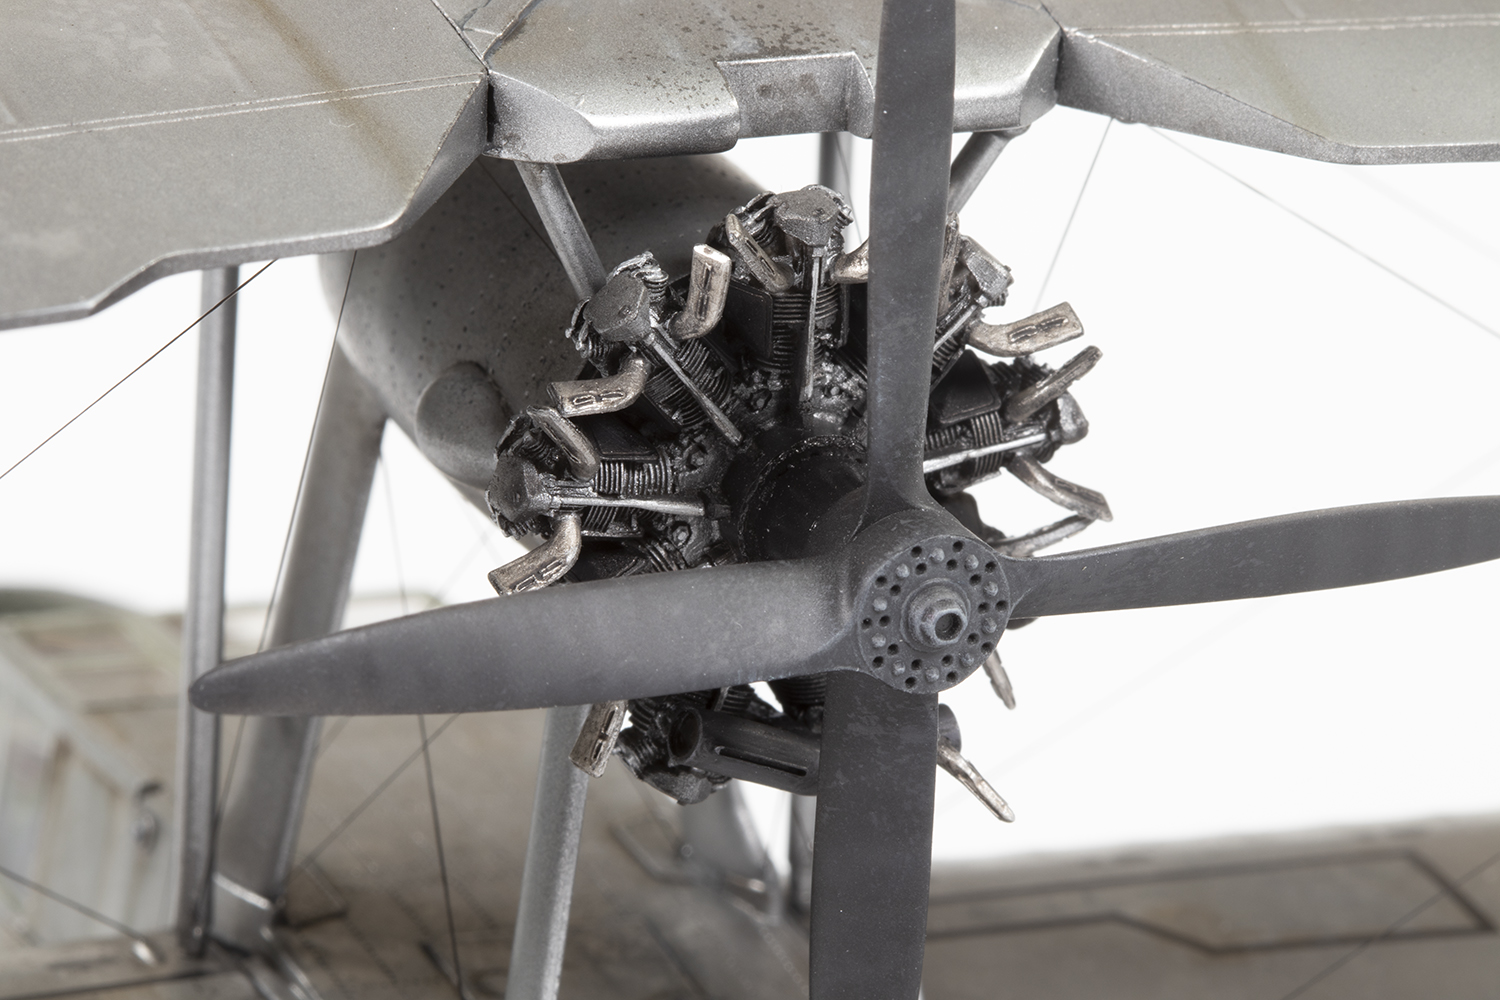
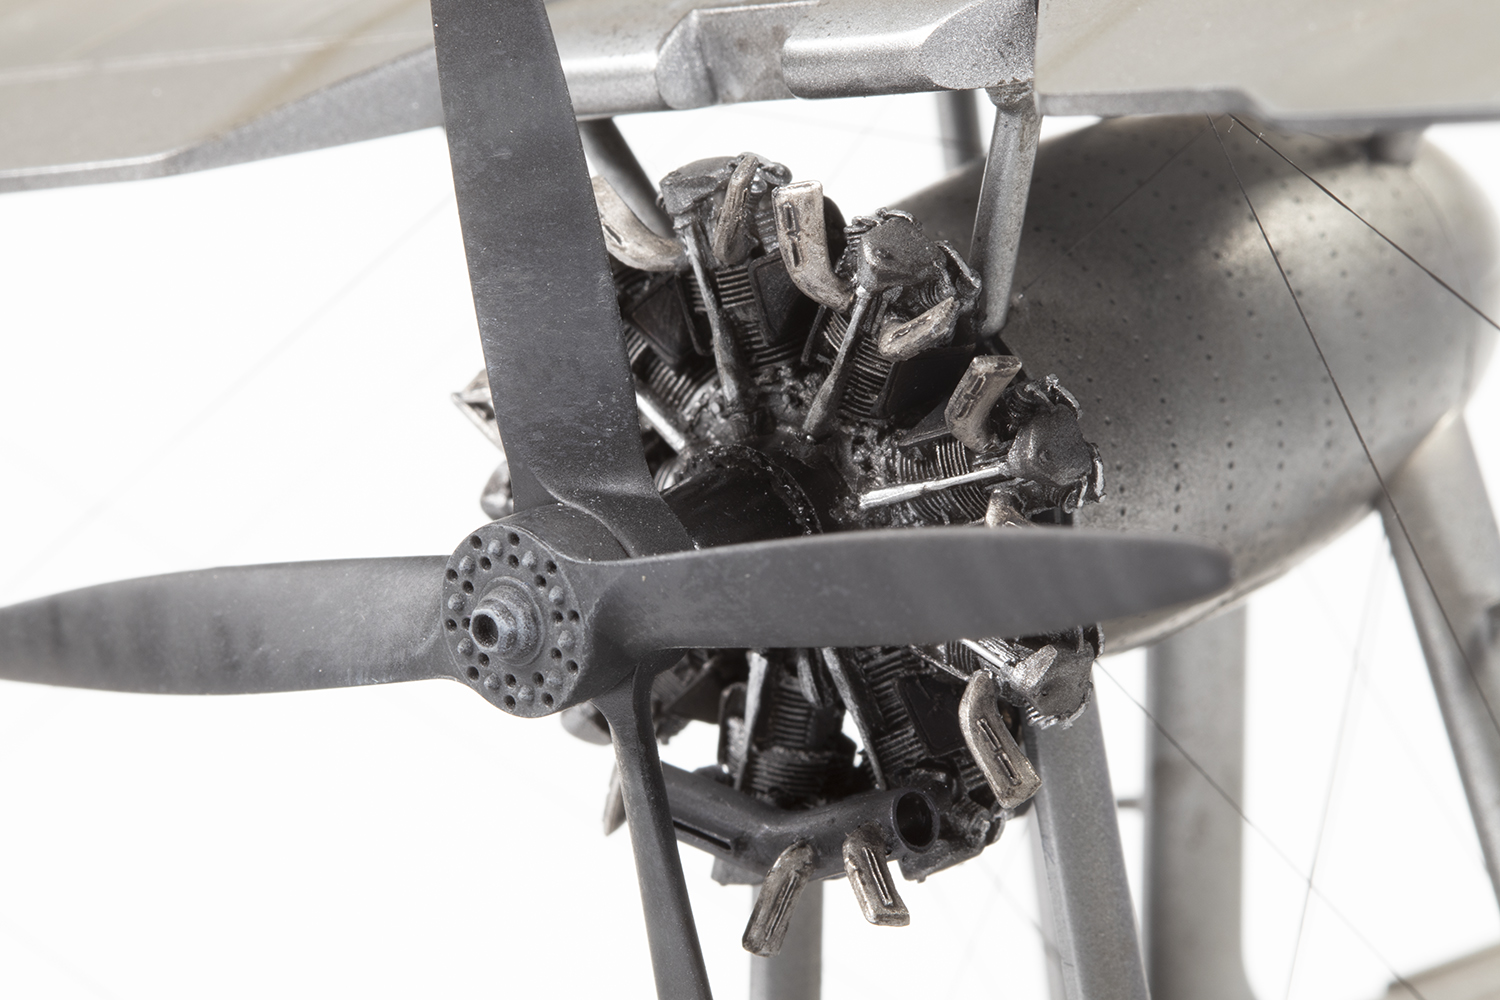
Looking at photos made me consider a few other areas. Airfix do not provide the tail mast for the aerial wire which seems to have been fitted to the vast majority of Walruses. I couldn’t see this on the silver French machines, nor the wing aerial masts, and concluded the aerial wires simply weren’t fitted. I plugged the holes on the upper wing surface with the kit parts and superglue before rescribing in the detail. I also had to make a call on whether the prop had a spinner fitted or not, and convinced myself I couldn’t see one in the pictures, so left it off.


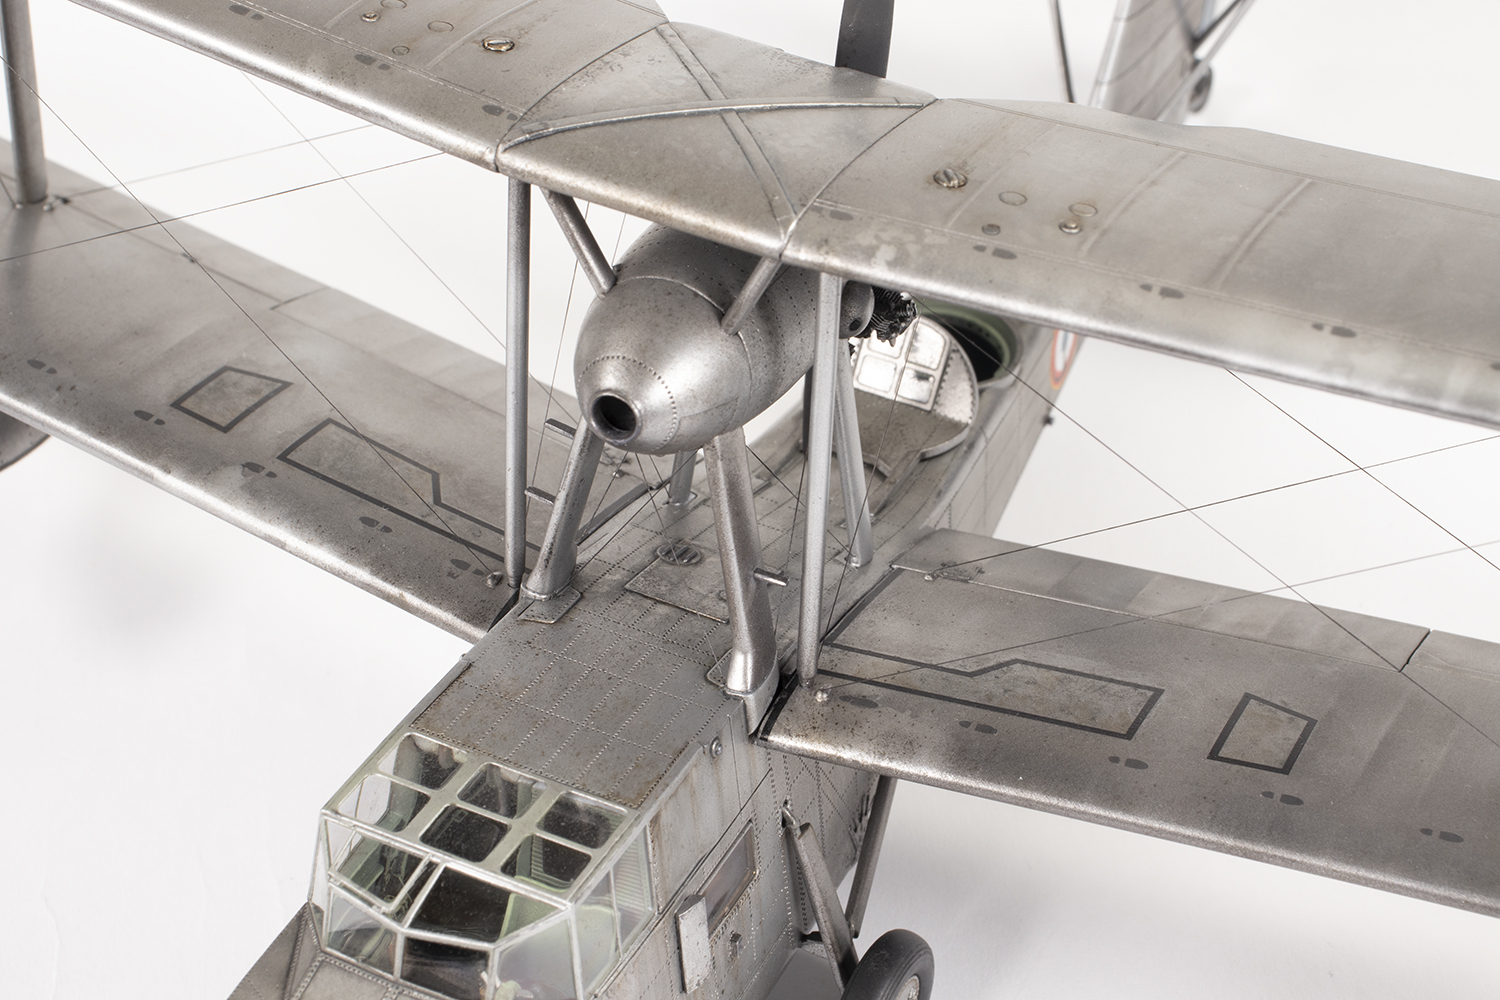
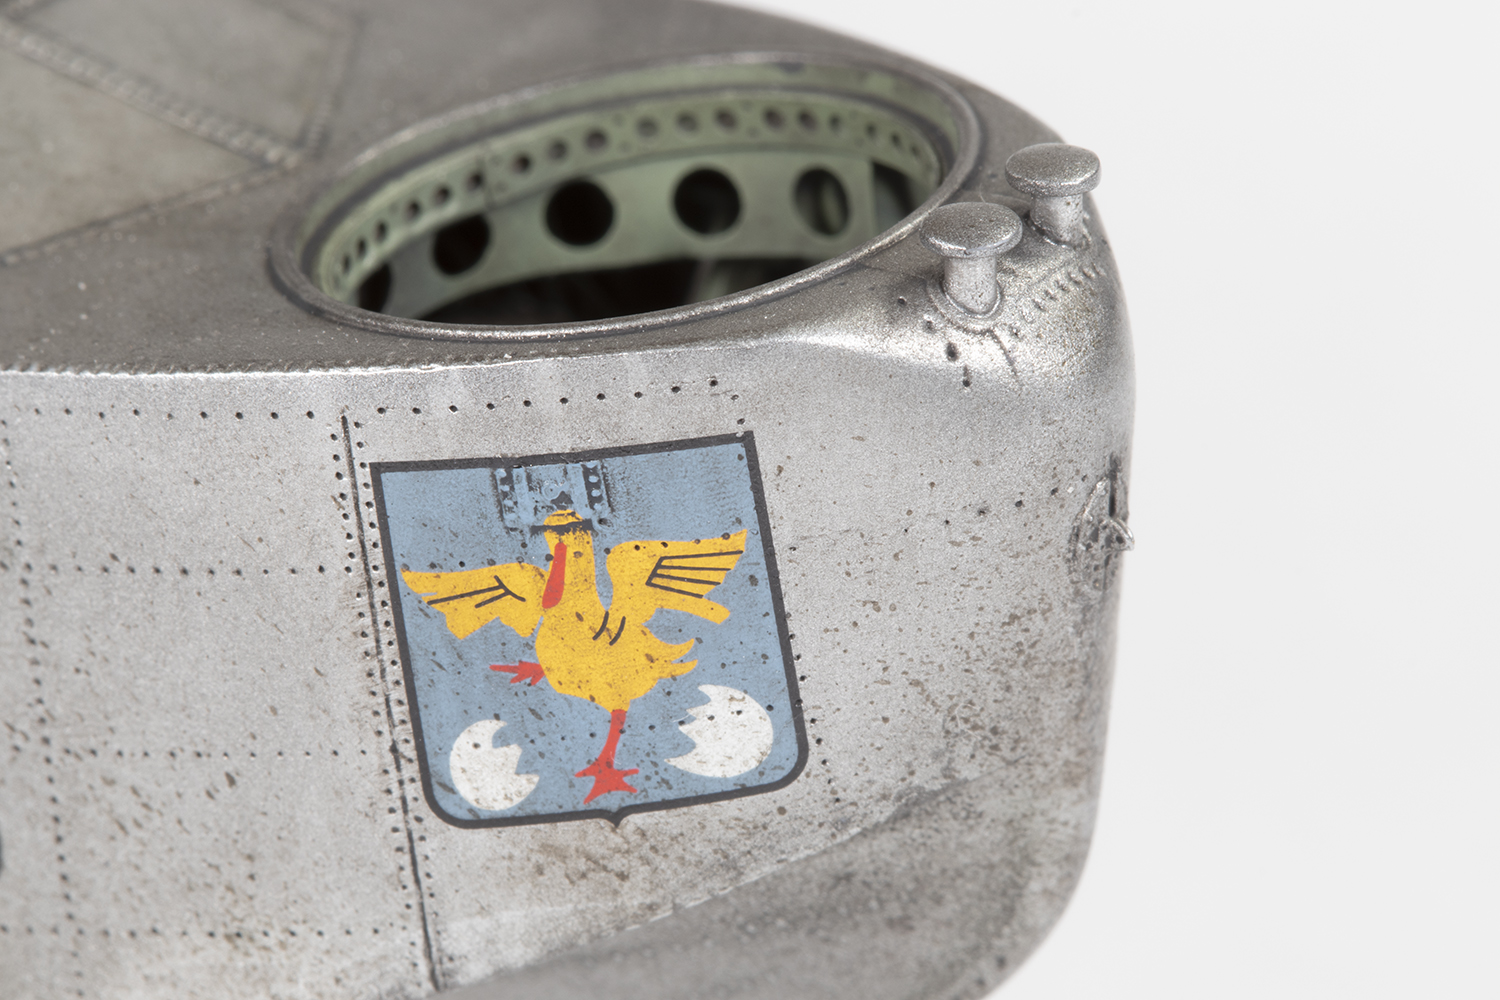
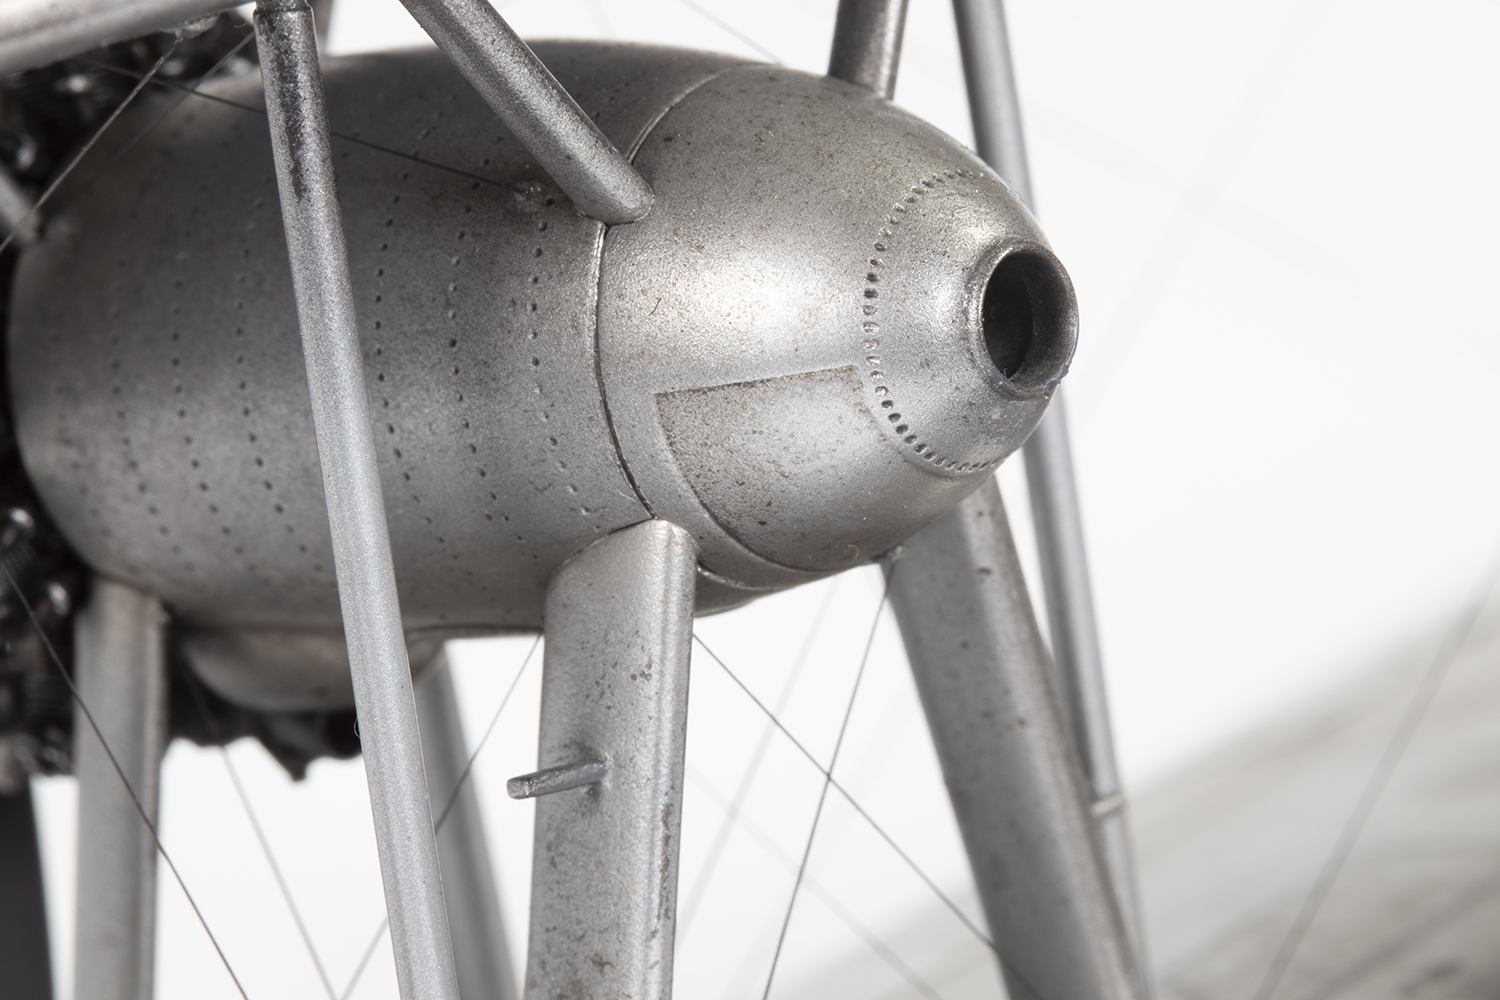
On the engine pod, Airfix would have you fit part D12 but it should be part D19. This is quite clear on the photos. I drilled a hole in this part to make it slightly more reflective of reality.
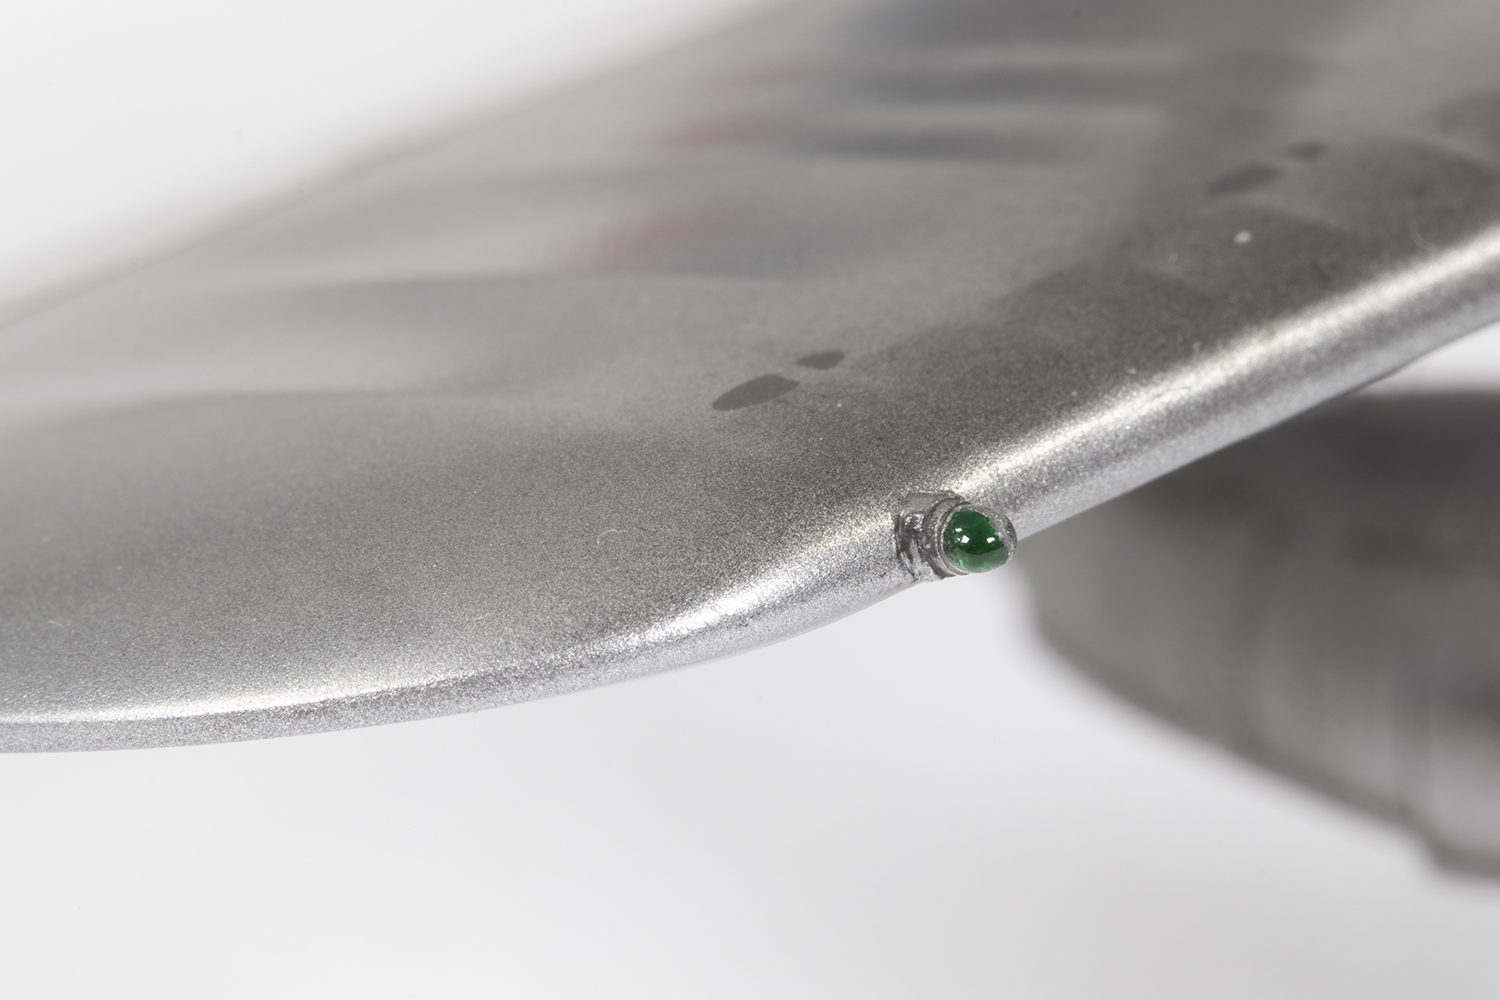
I had purchased the Quickboost resin navigation light set prior to doing any research, and subsequently discovered the very nicely moulded item they provide for under the wing is suitable only for an early Walrus, and thus probably not for this model. I therefore did not fit it, but the little navigation lights are exquisite with separately provided lenses in clear coloured resin. I actually did not fit the latter parts as using UV-setting clear resin was just easier.
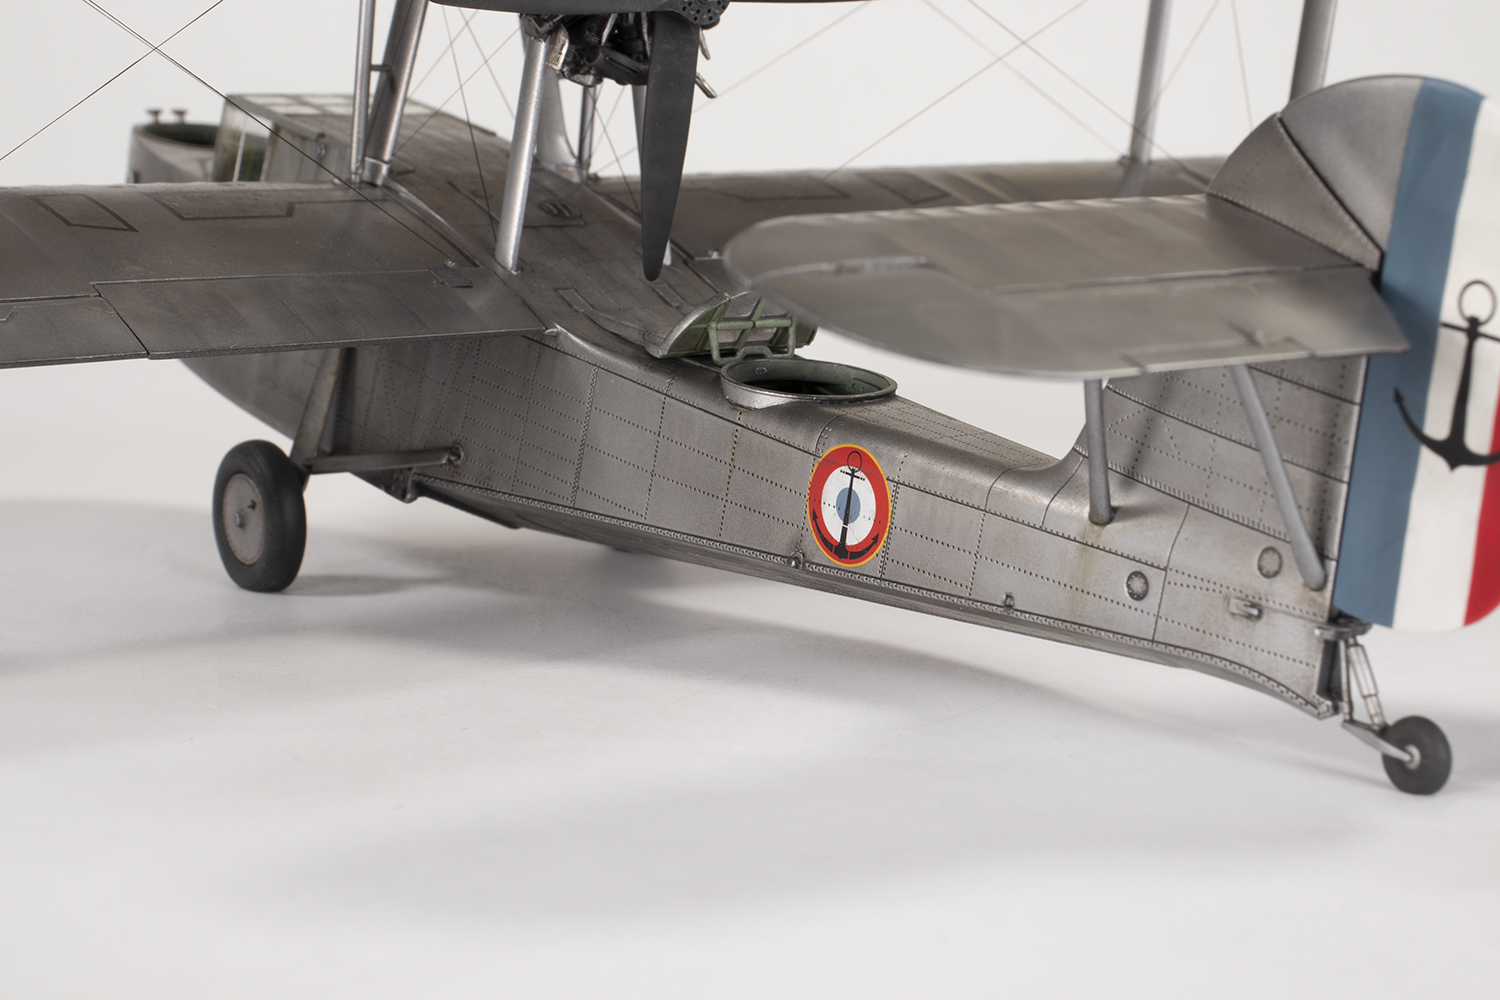
Frustrations with Airfix’s moulding continued when it came to the tail. The struts were very bendy and not straight as they should be. Fortunately, the plastic responds well to hot water, and I clamped them to a steel ruler before pouring boiling water over them. This straightened the parts out quite nicely. The struts were a very clunky fit into the horizontal stabiliser and it took a lot of fettling to get this to sit level.
To close off issues of accuracy, Airfix clearly used the Walrus at Yeovilton as a reference. Unfortunately, this example has forward struts that are much wider than those typically used. I cut those in the kit down, but even then they are not as narrow as they should be. Someone pointed this out to me on Facebook quite late in construction and once you see the difference, you can’t unsee it!


I had planned to take a modular approach with this model. The wings were folding, so I didn’t need to worry too much about the seam there, and the upper wing could again be kept separate along with the engine pod and tail. All of these were constructed, painted, decalled and weathered prior to bringing them together at the end.
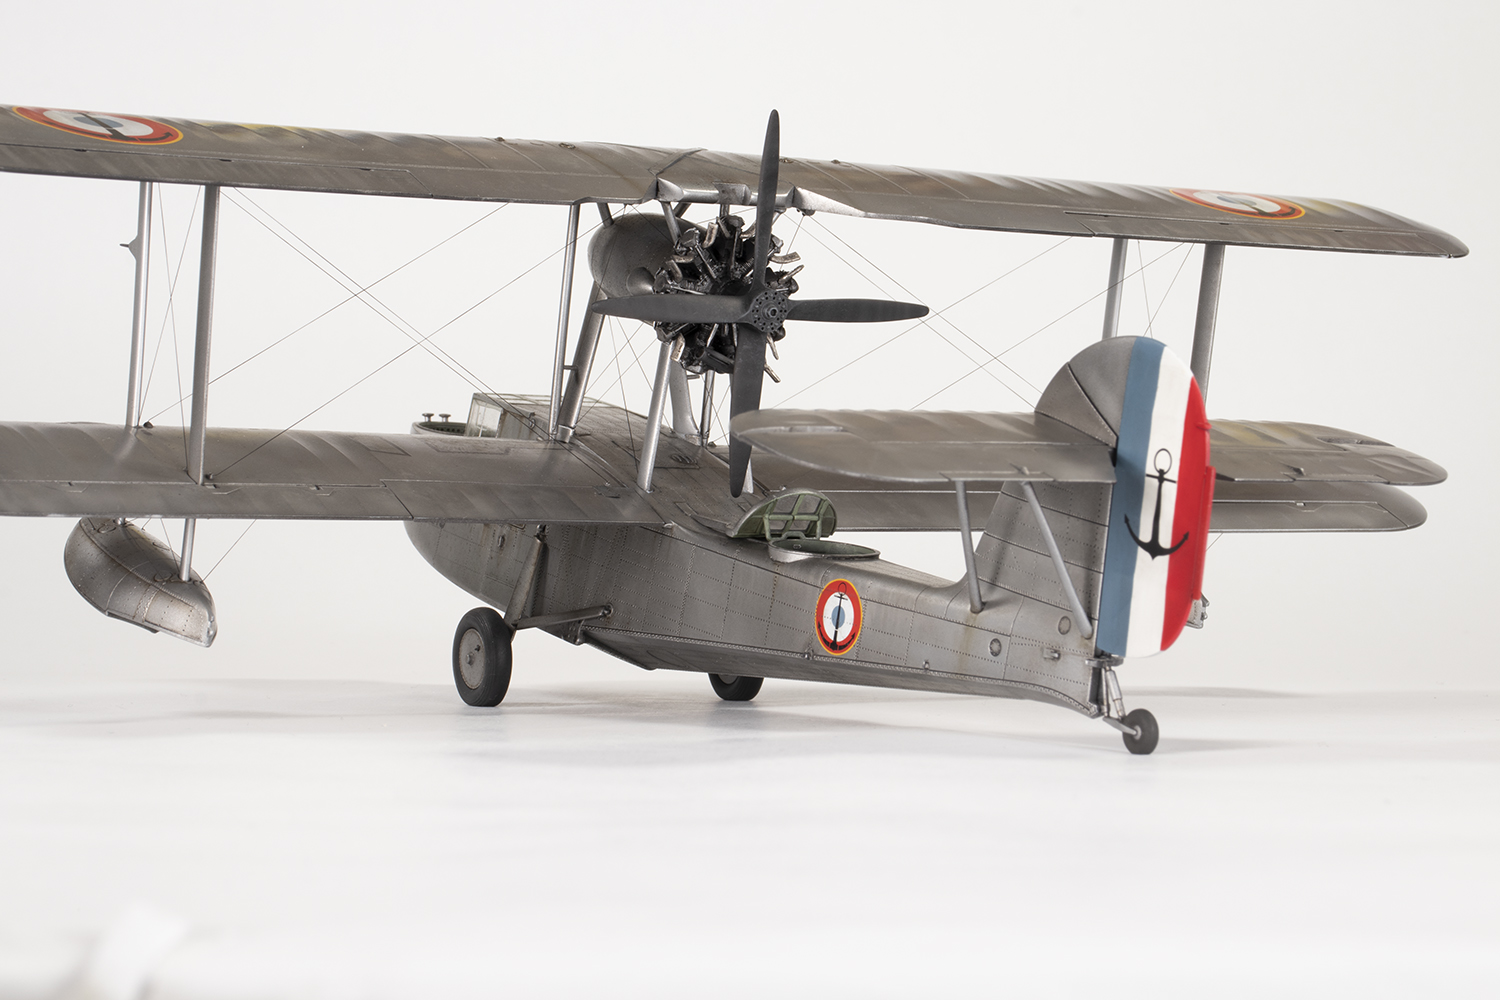
The engine set from Vector included a resin lower panel which was beautifully moulded and fitted very well against the kit parts. The engine itself was complex and comprised 38 resin pieces, some of them pretty small. The instruction sheet was tiny and I misread it: there are two different types of cylinder and it’s critical you get them in the right place. I didn’t and had to snap them off and rebuild it all. The mouldings are a little tired and the detail is not as sharp as you can tell it once was, but overall the effect is a big improvement on what Airfix provide.


The last major construction step prior to painting was to fit the canopy. This is a superb piece of moulding as it’s very clear and very thin, although it’s a shame the sprue gates impinge on the clear panels. The rest of the clear parts are on a different sprue and are not so fine; the rear hatch transparencies have a wavy texture, for example, and are very thick. When I attached the landing light lens in the wing leading edge loads of stress fractures unfortunately appeared in it. I did not have the heart to fix this and left it alone.
Many of the Eduard masks are slightly too big and benefit from being quartered. They also don’t cater for the hatch in the upper starboard side of the canopy, so you’re on your own there, which is a shame as it’s a complex shape.

I applied several coats of different colours of Mr Finishing Surfacer 1500 as a primer, sometimes mixing black and white to get a grey shade. The gritty texture to the plastic was a real problem and I did polish the primer several times with 2500 grit Infini sponge, but I never managed to completely get rid of it. The lower forward hull was the worst affected area, but the positively moulded rivets in this area meant I did not sand the texture down. In retrospect I wish I’d polished the lower hull and replaced the detail with Archer resin decal rivets.


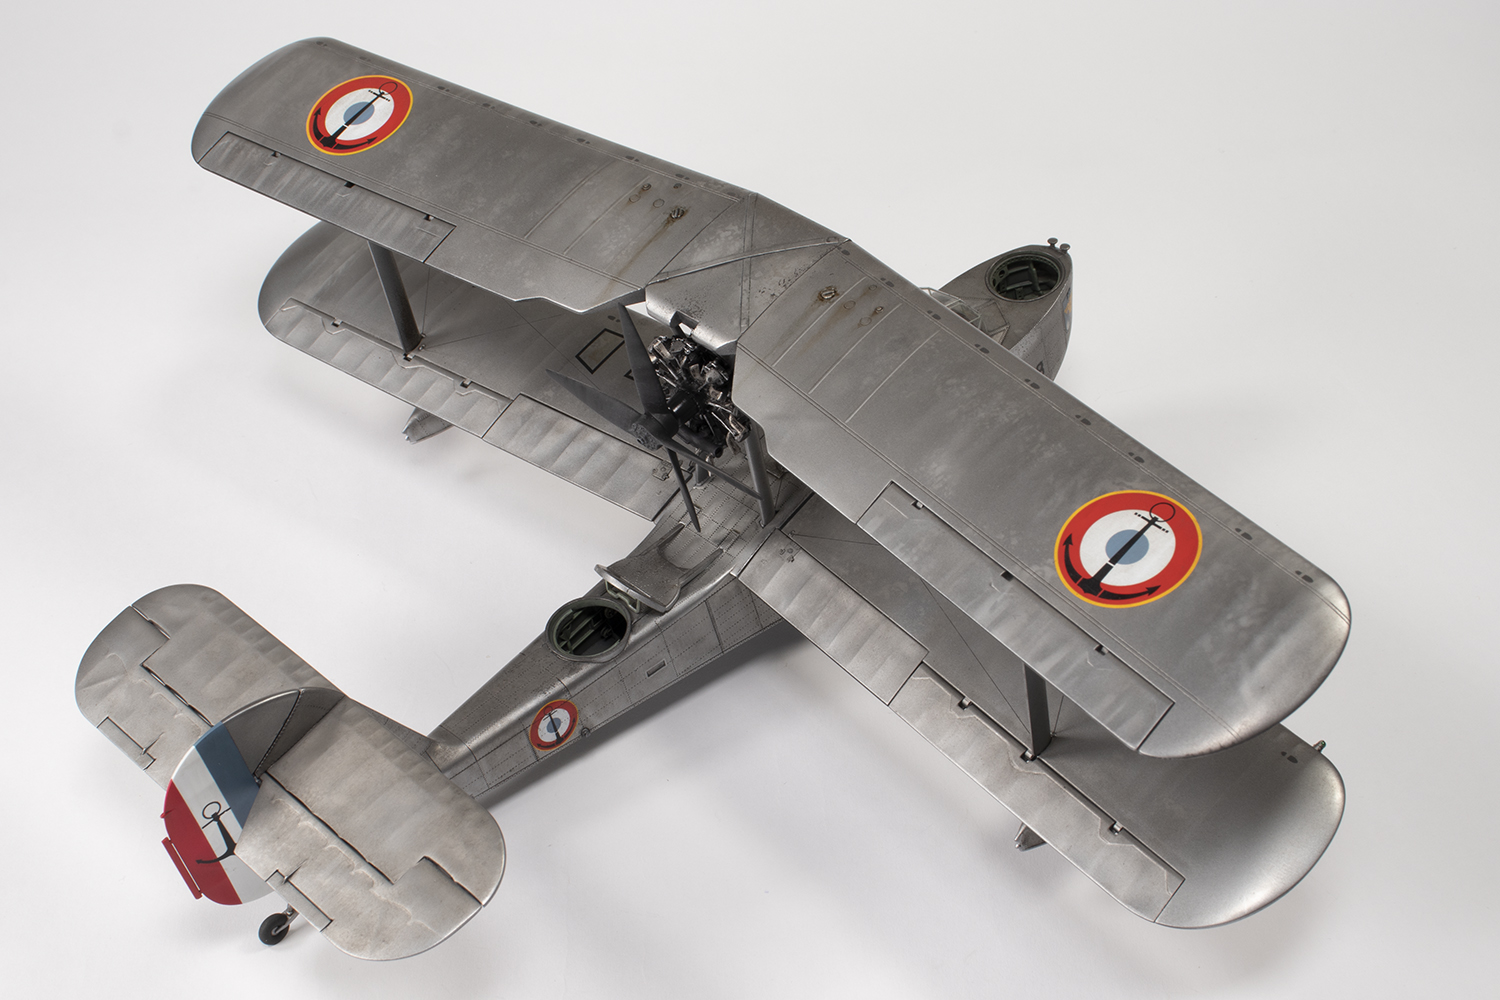
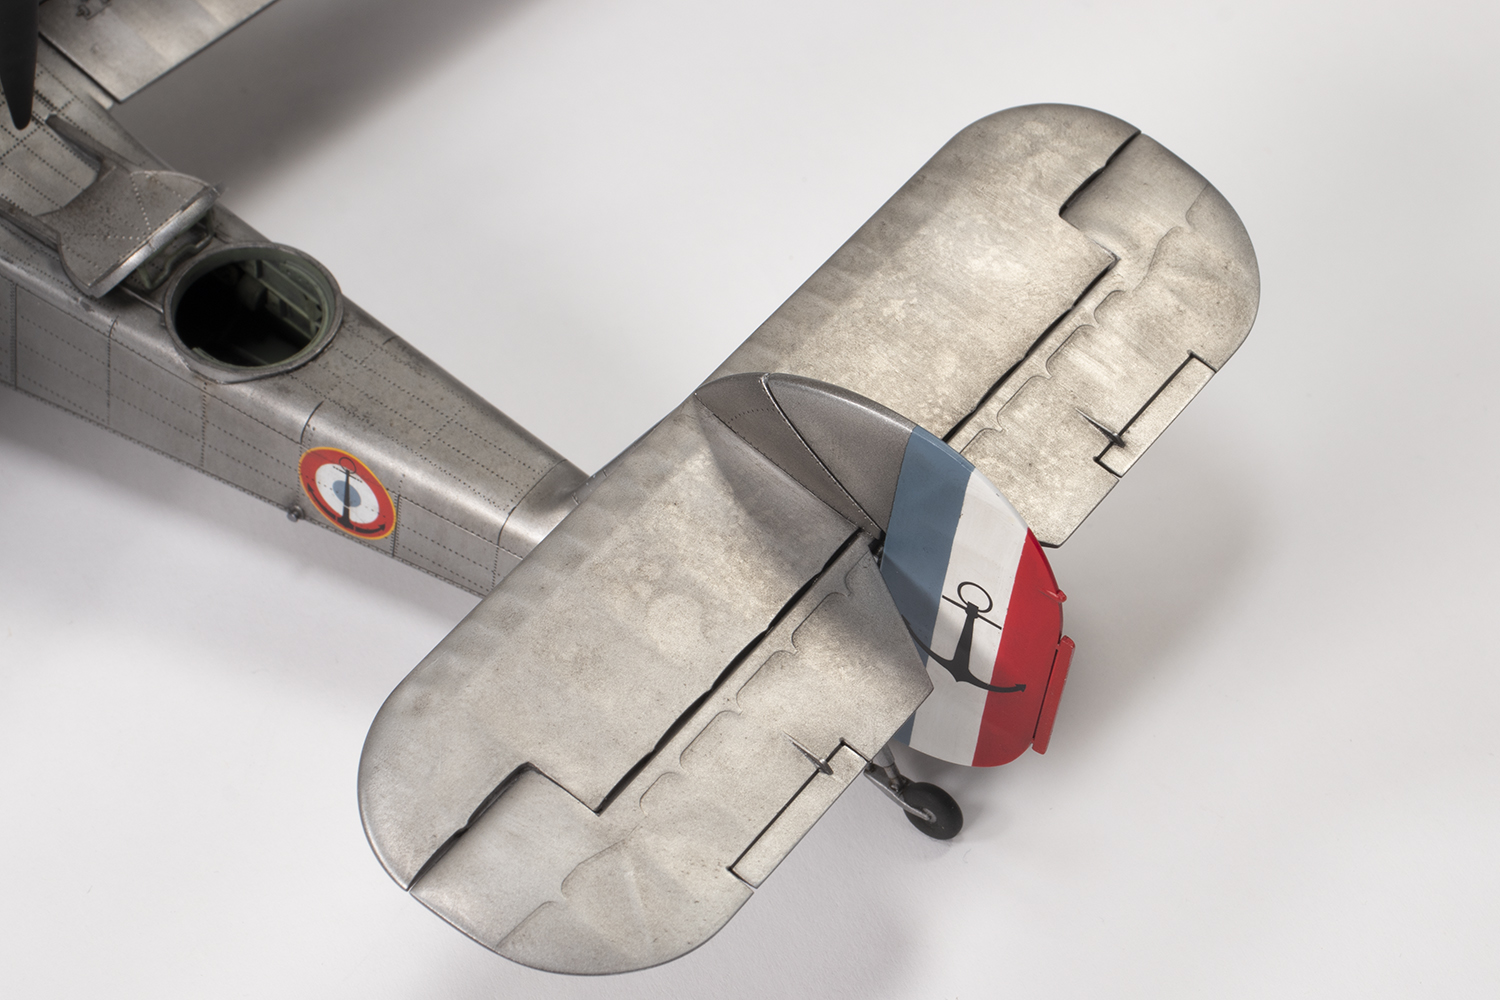
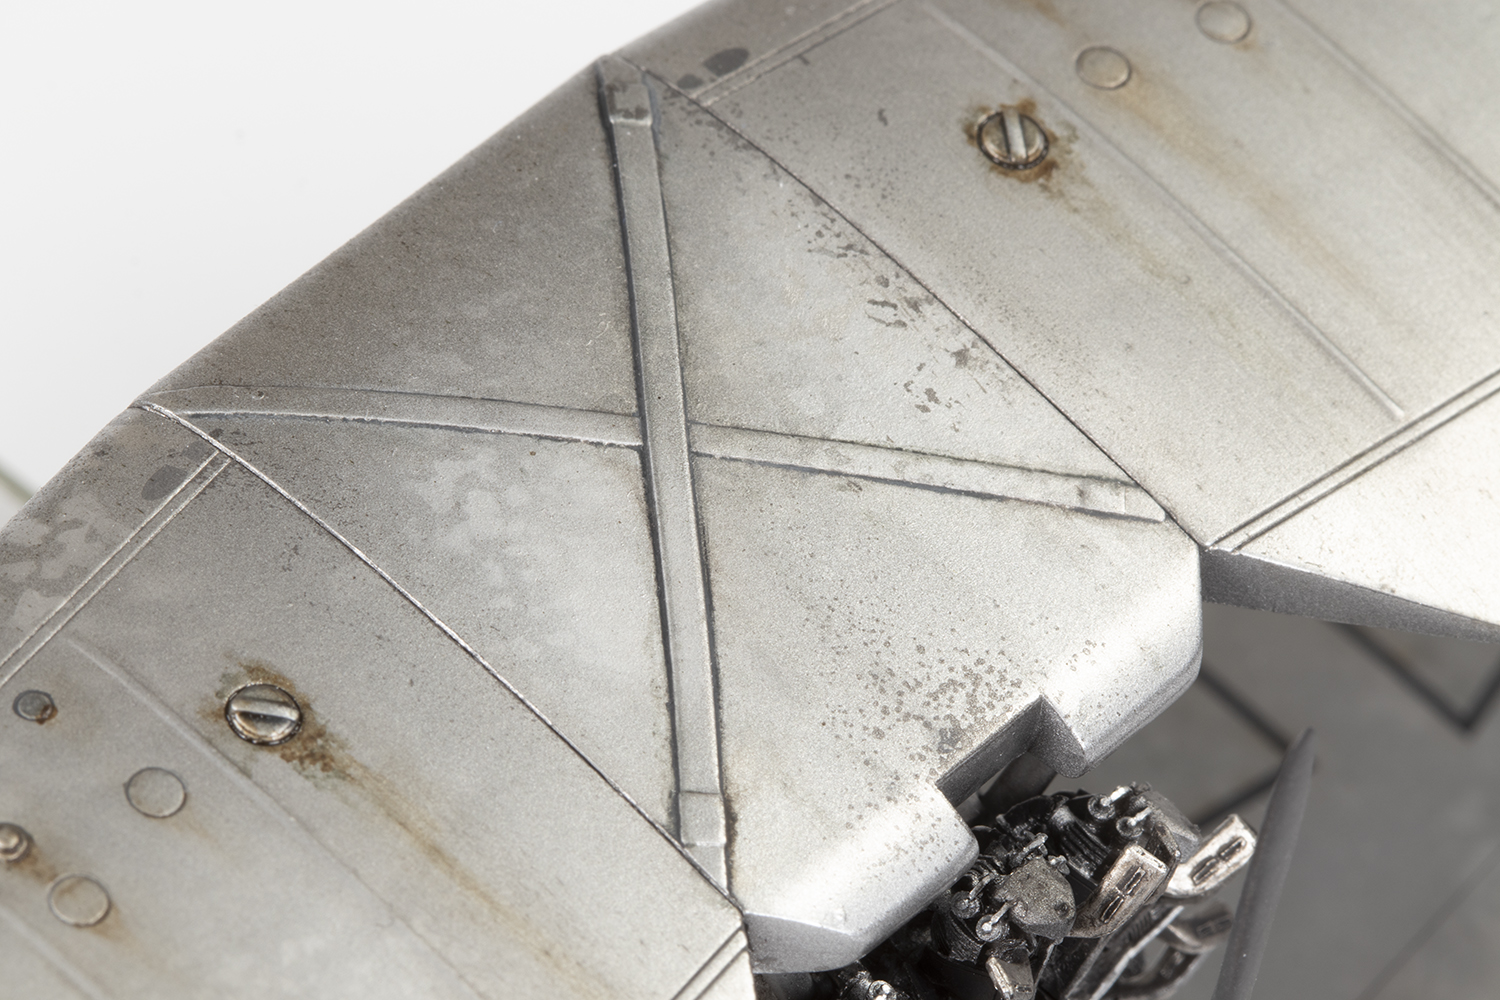
These aircraft were painted silver, so I wasn’t interested in trying to get a metallic finish. In my mind they would have been quite battered by 1948 so I aimed for a somewhat tired patina. I started with some Alclad Steel in areas where I expected there to be chipping, like the corners of the hull and leading edges of various components. Over this I airbrushed a layer of TRESemmé hairspray. I don’t know what colour is likely to have been underneath the silver so was just aiming for a dark contrast with the silver that would follow.
I decided to use Mr Color 104 Gun Chrome as the basic silver paint. This was textured a bit using some mottle masks with Mr Color 8 Silver and Alclad White Aluminium. Before the paint had too long to cure I set at the areas with hairspray underneath with some stiff brushes to get some minor chipping.


I was feeling pretty pleased with this until disaster struck. Hairspray introduces a weak layer into the finish which makes masking risky. I was well aware of this, but underestimated just how weak. To get the ‘53.S.18’ marking on the nose I had created some masks using my Silhouette cutter and surrounded the mask with Tamiya tape to prevent overspray. I’d done the same for all the footprint markings on the wings (which I do not know were present on the real thing, but added interest). Once I’d airbrushed these markings with Tamiya NATO black I removed the tape and most of the silver paint with it. Some awkward touch up with the silver colours then ensued.
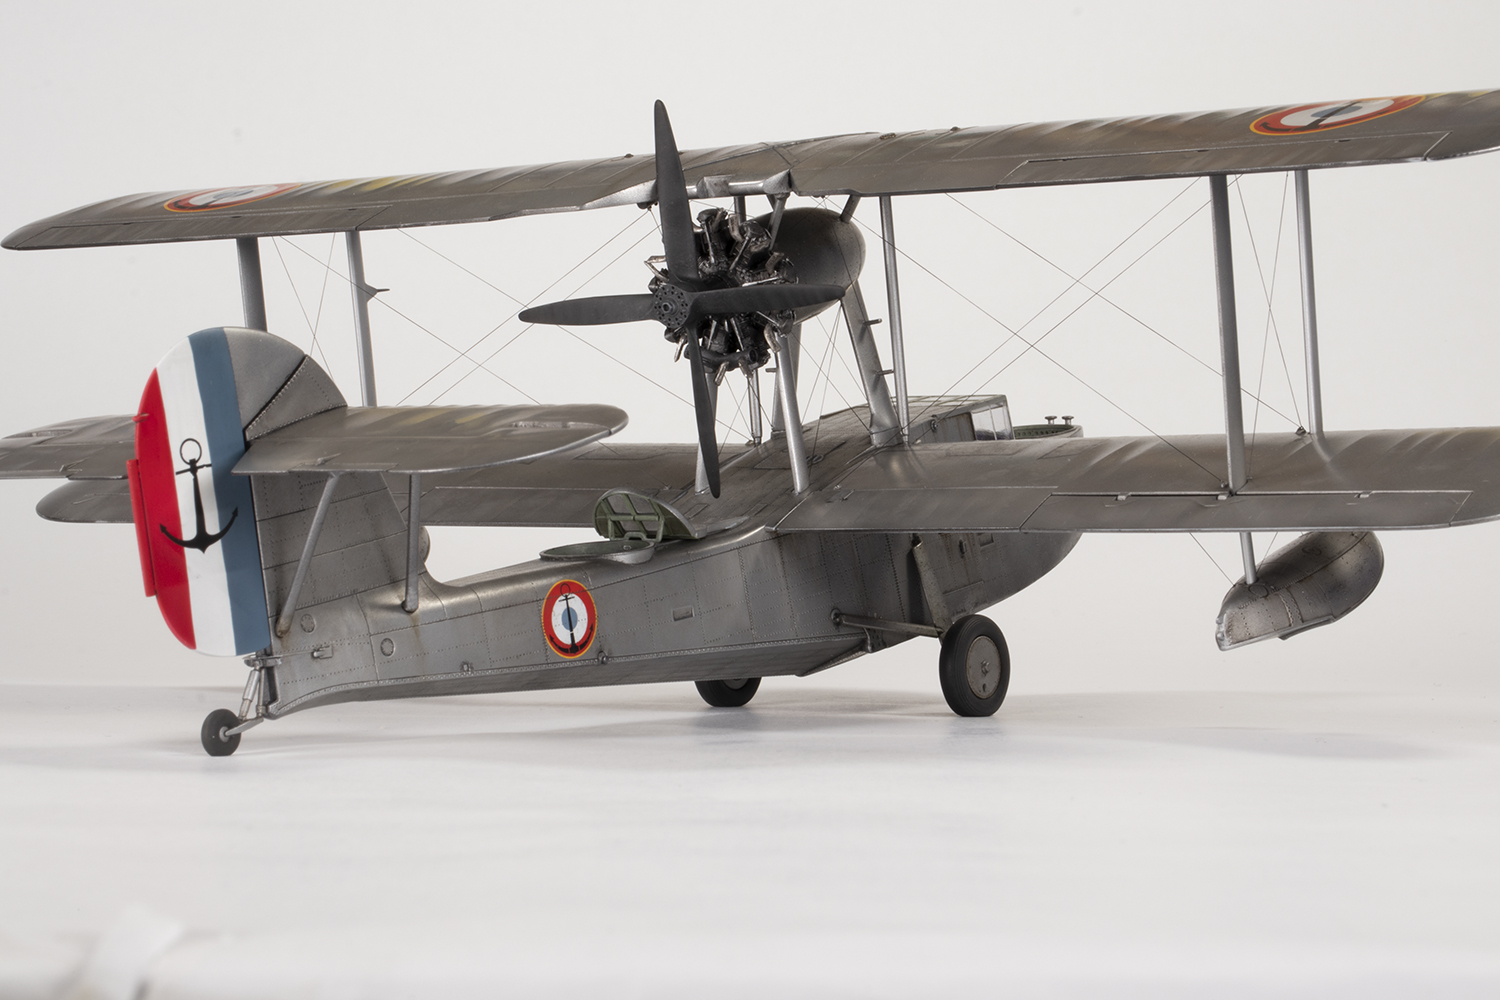
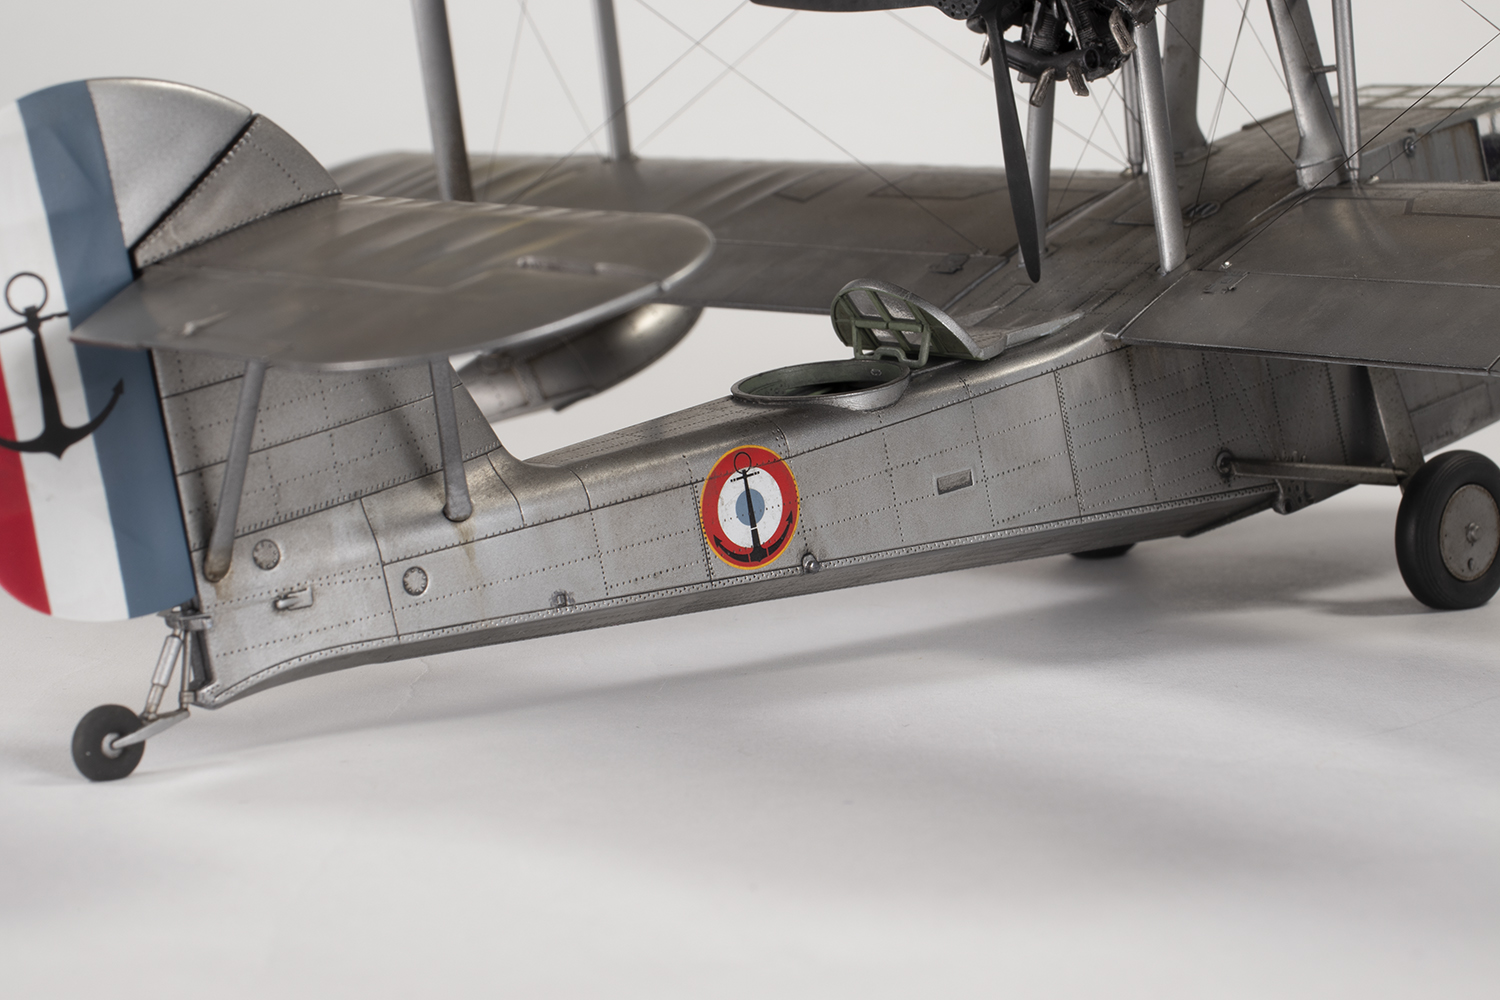
The rudder also needed to be masked and painted as the decal would be tricky to fit. The hardest colour to match was the blue, which was mostly Mr Color 74 Air Superiority Blue with a touch of 72 Intermediate Blue and 337 Grayish Blue. This ended up quite close to the roundels, whereas the Mr Color 3 Red I used was not as bright as it should have been.

Decals from the kit were used for the remaining markings, which were few. These Cartograf-printed decals were some of the best I’ve ever used and conformed beautifully to the surface detail over a bit of Mr Mark Setter and under several coats of UMP’s Extra Strong solution.

Weathering commenced with a filter/wash of Abteilung 502 oil paints, mainly Starship Filth, Paynes Grey and Field Grey. This was an iterative process, adding and removing the oil paints until I was left with something I was happy with. I thin them with white spirit or lighter fluid depending on my fancy; the latter evaporates much quicker. Working over a very smooth surface is difficult as the oil paint is so easily removed, but I wanted to retain the fairly shiny patina I had created with the base colours. After playing around with the washes for a while, I switched to splattering thinned oil paint by flicking a partly-loaded brush over a cocktail stick. I imagined these aircraft would get fairly mucky from their aquatic environment.

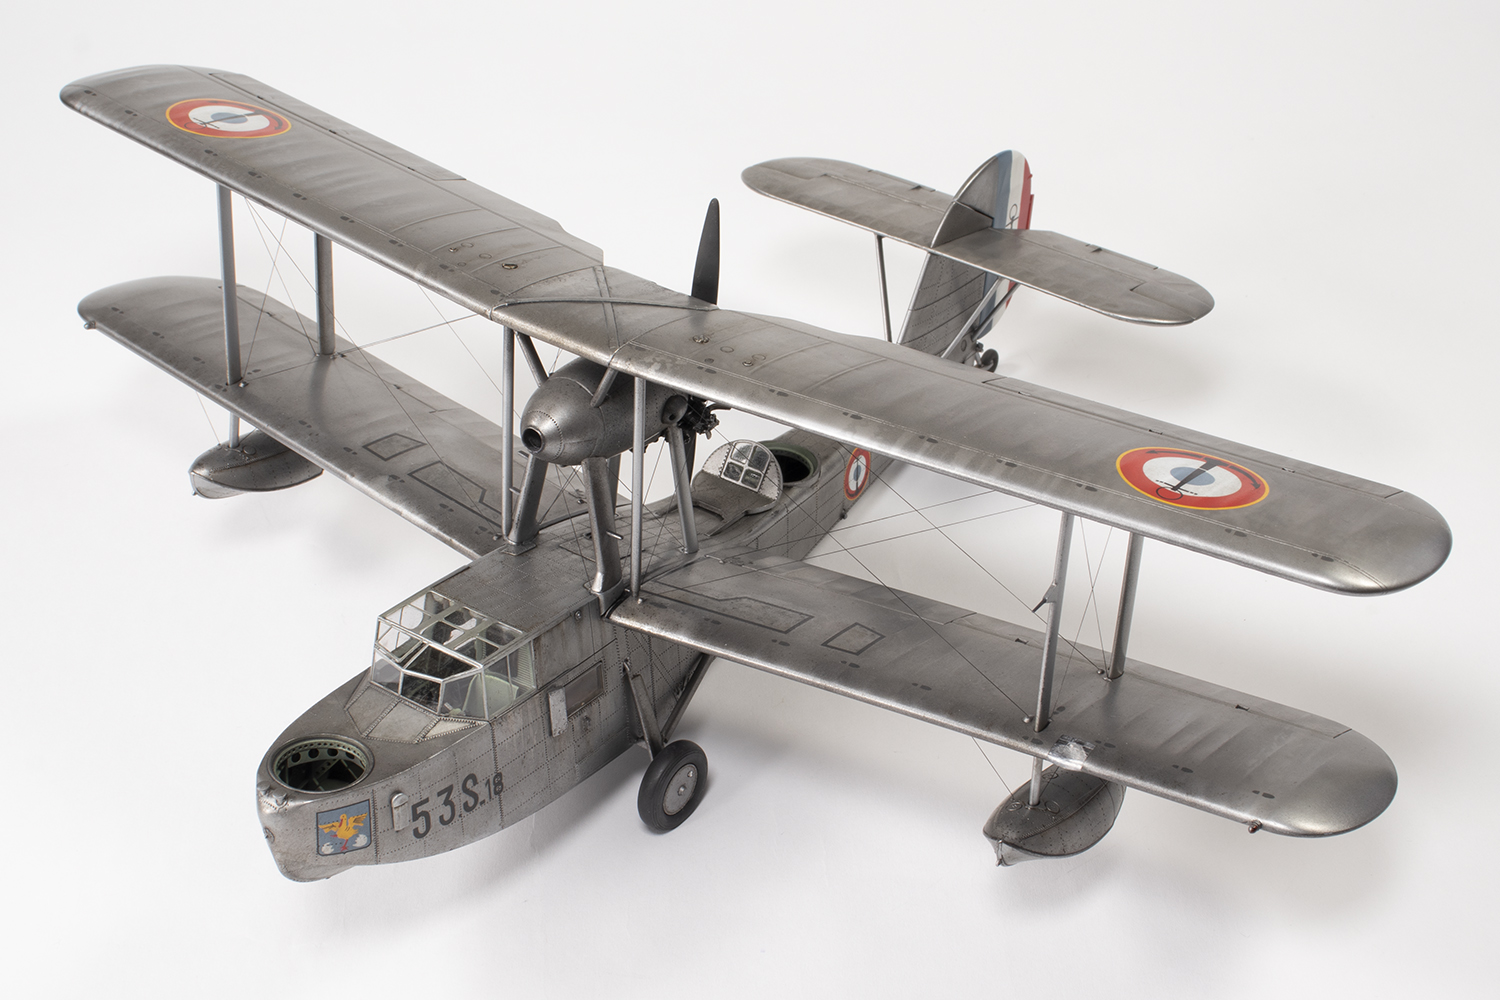
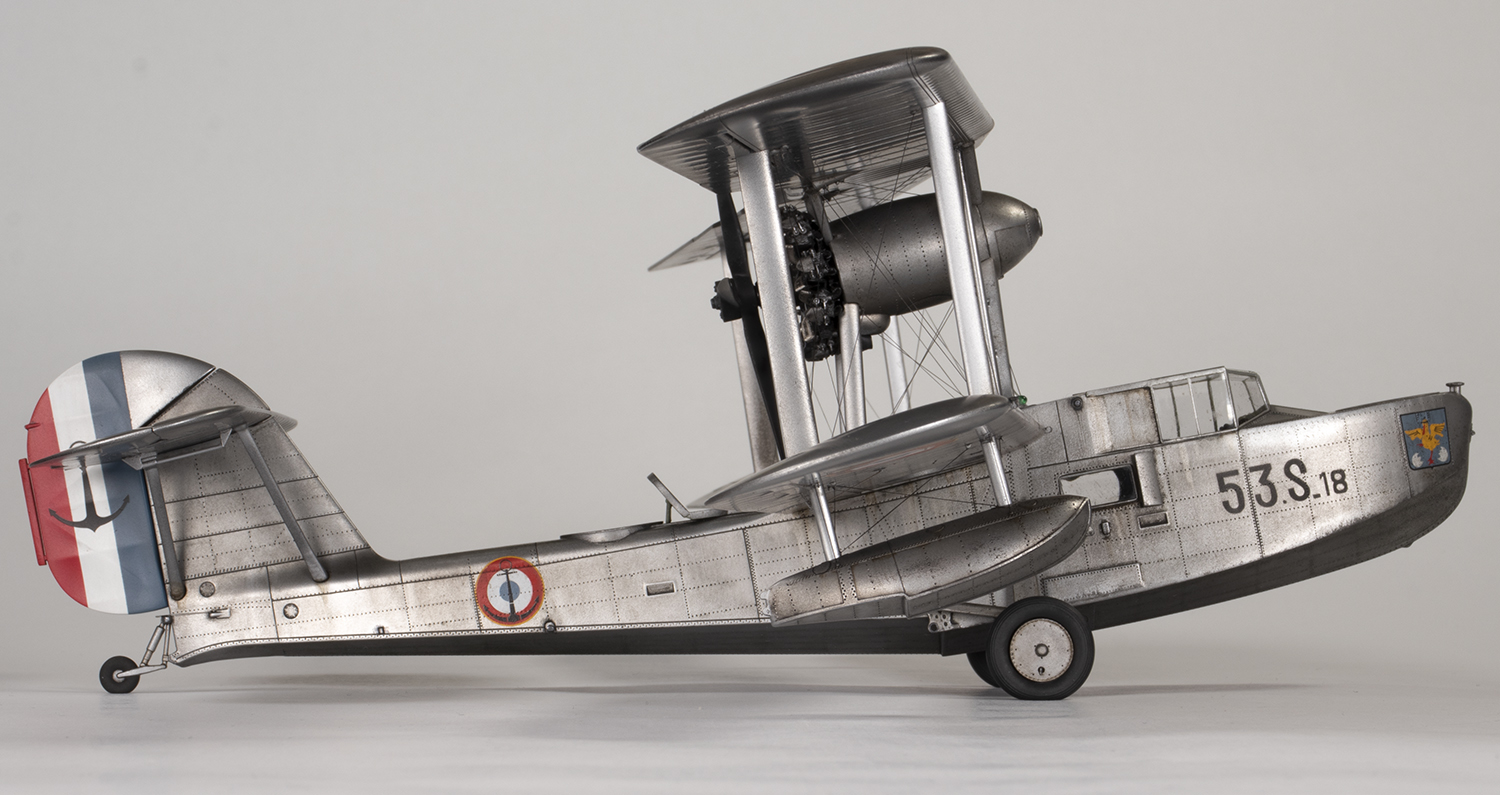
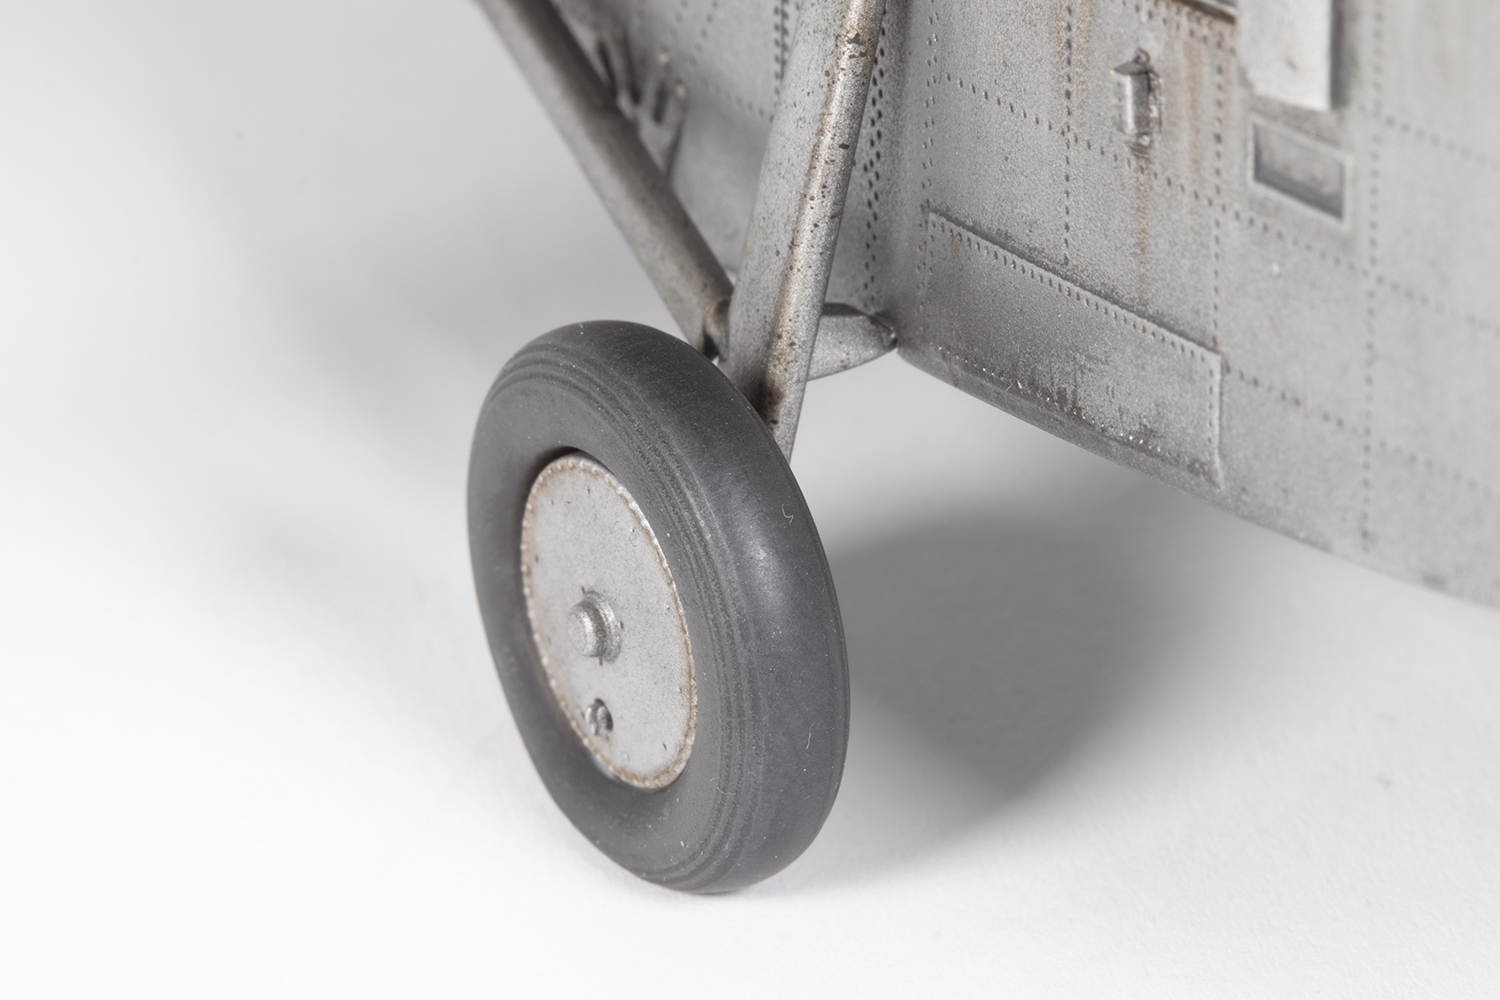
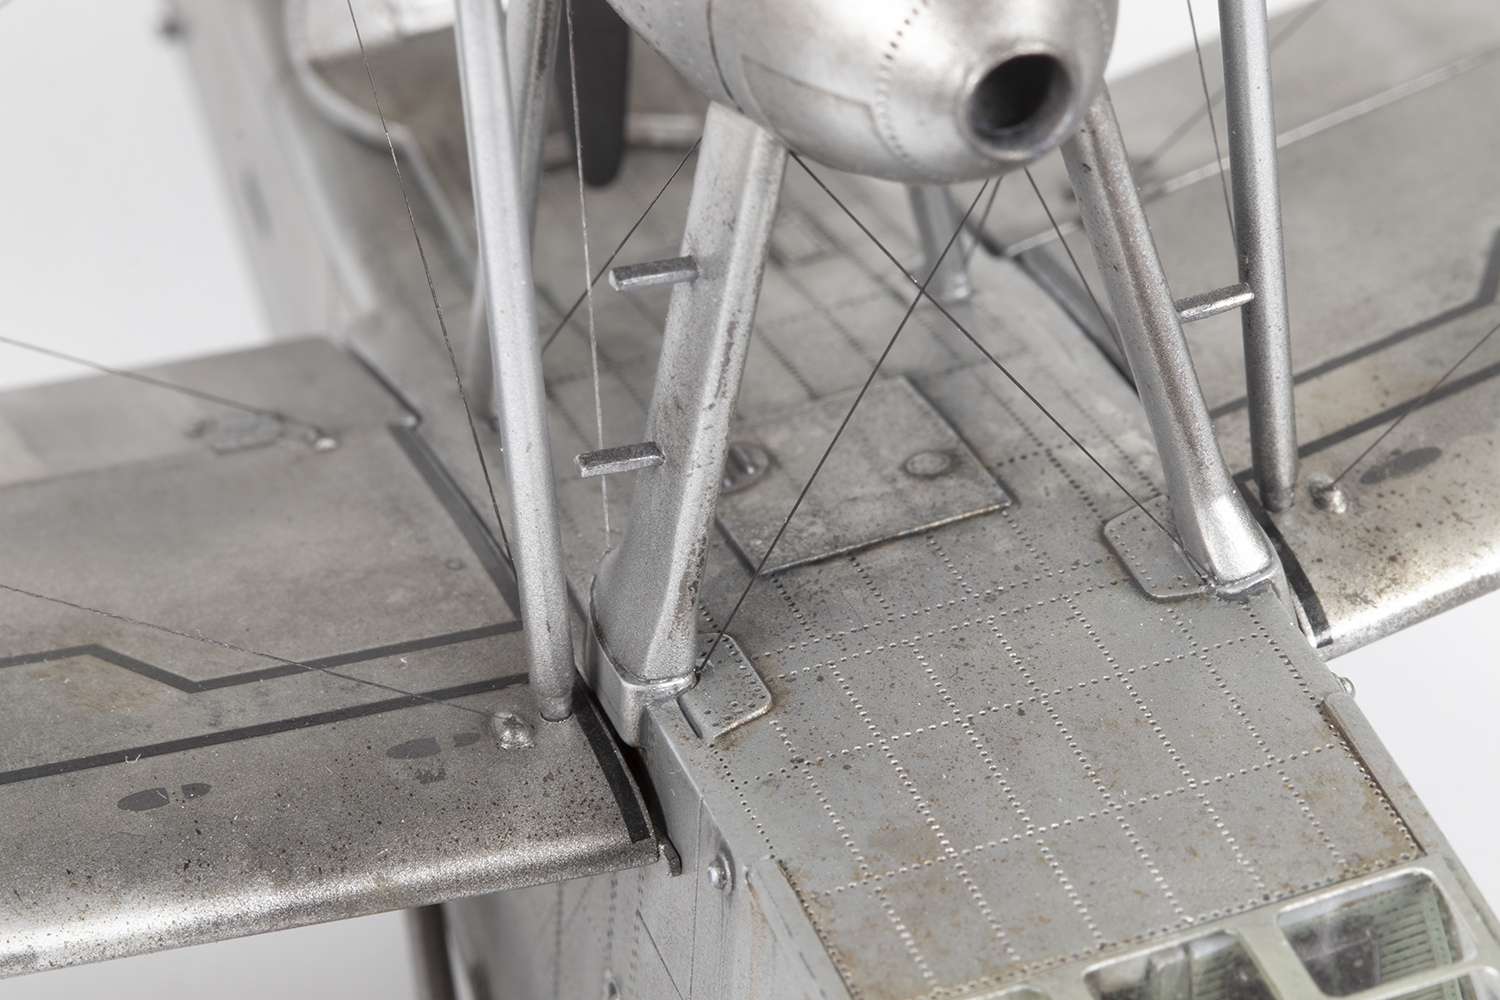
Bringing all the components together was a challenge. I attached the engine pod to the fuselage first, which took a lot of shaving of plastic from the pegs. Eventually it seated quite well. I rigged the pylons as access would be more difficult later and discovered Airfix’s rigging diagram is incomplete. There should be more rigging around the engine, and whilst I added that at the front, I realised too late I should have rigged between the rear legs as well, both top and bottom. For the rigging wire I used Uschi van der Rosten’s standard gauge elastic rigging thread. This is underscale compared to the real thing, but I like the rigging to look quite subtle. I do wish, however, there was a good turnbuckle set as that would improve the look greatly and making my own is currently a bit beyond me.

The lower wings did not want to plug properly into the fuselage, and when I enlarged the holes slightly, they sagged. A test fit of the upper wing to the engine pod was not encouraging and the attachment pegs took a lot of fettling before I obtained anything approaching a good fit. The main wing struts have a very positive location and fit and this brought the lower wing to the correct dihedral. Unfortunately, getting the top and lower wings to line up with each other along their length was more difficult as the engine pod struts seemed to introduce a twist. Plenty of Tamiya Extra Thin and a jig made up of various bottles lying around the workbench resolved most of the problem, although not completely.

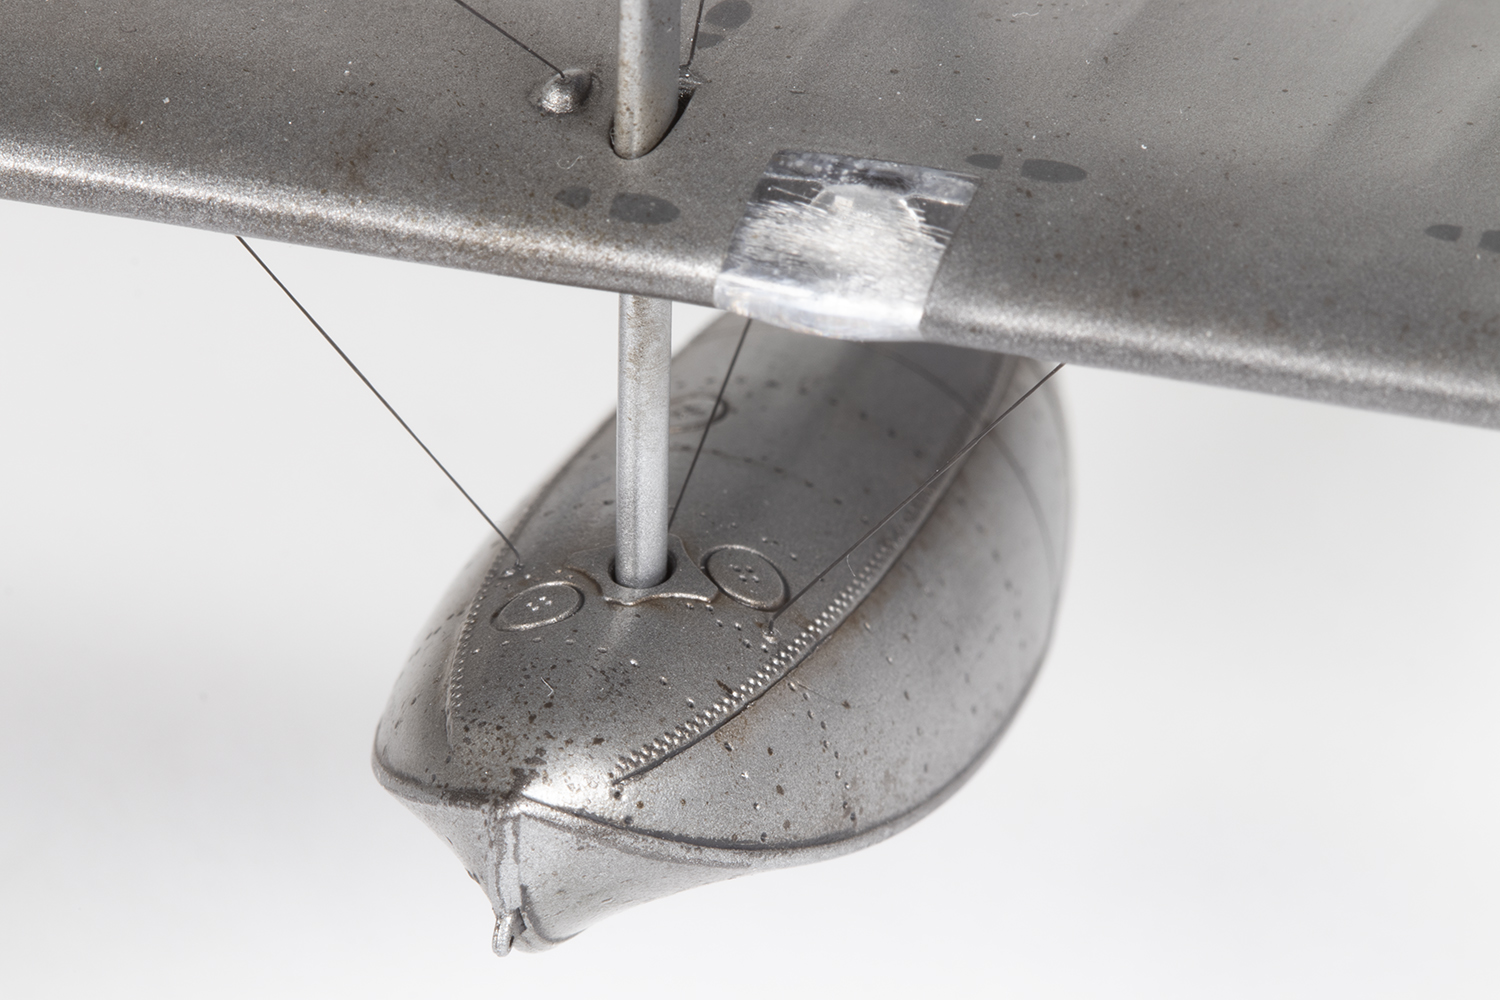
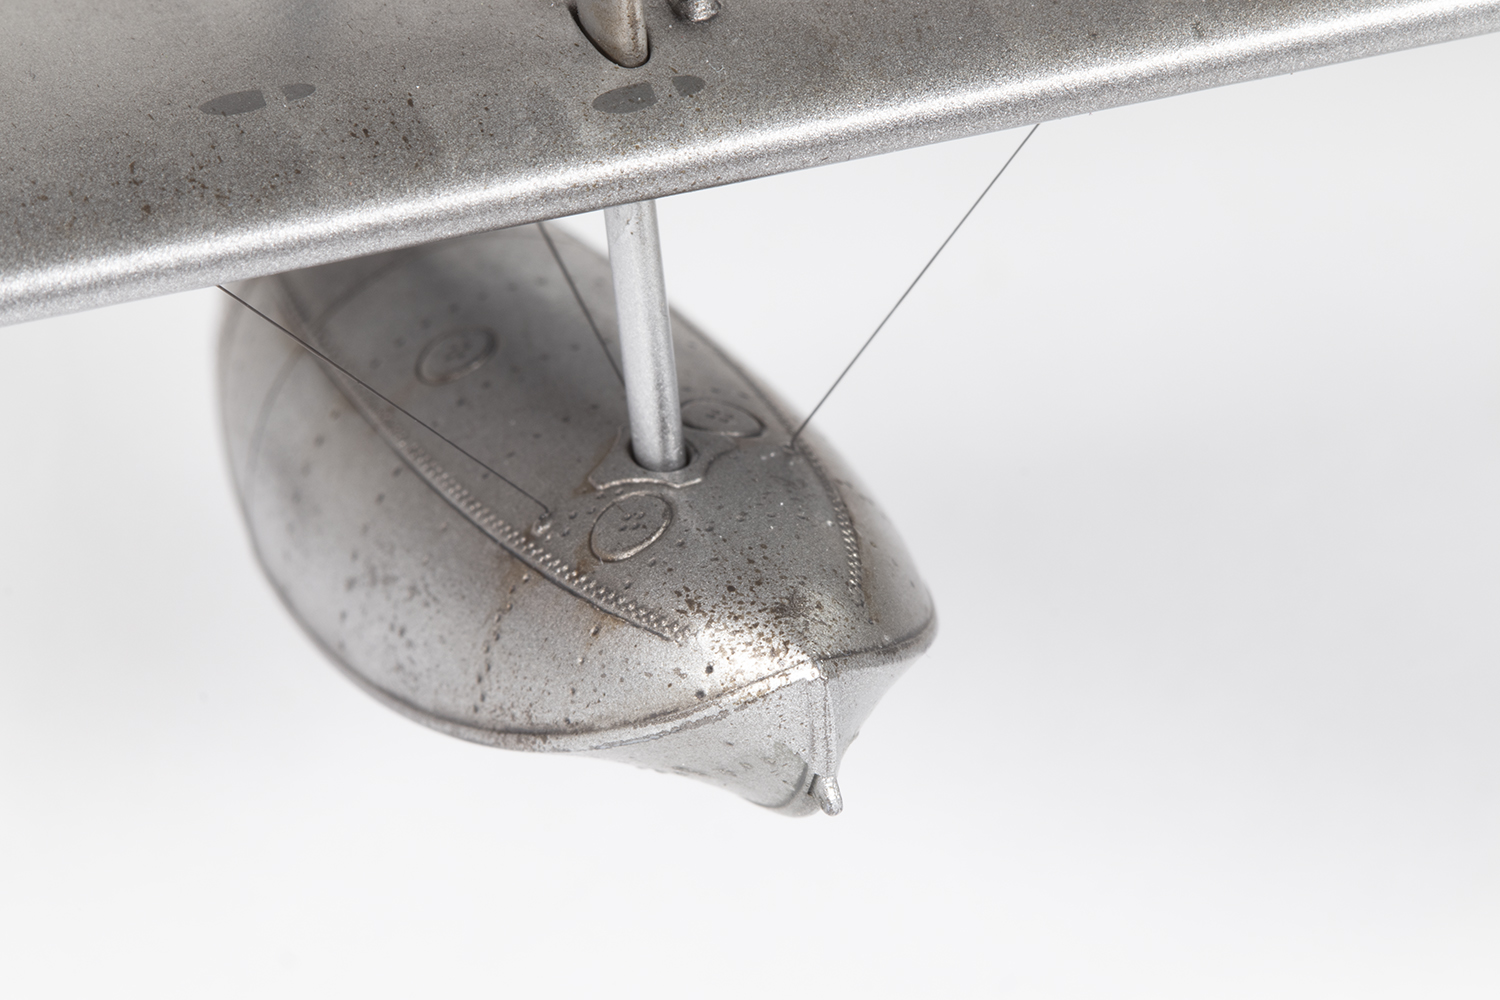
Access to the rigging points for the wings was limited which made the process somewhat difficult, although thankfully Airfix provide nicely moulded location points. I do find this an infuriating process and I’m glad I don’t make many biplanes. Once done, the last thing was to attach the wing floats and rig them – eight lines per side!


After the initial frustration of having to clean all the kit parts up, this kit grew on me. I wish the plastic were smoother, but overall it’s an impressive model in quite a striking scheme and brought a great deal of enjoyment. The Eduard interior set and Vector engine were worthwhile additions, but what Airfix provide in the box is more than adequate for those wanting a simpler build.


Year bought: 2018 (Antics, Scale Model World, Telford)
Year built: 2022 (New Addington, Croydon)
Back to home.
