with DXM decals
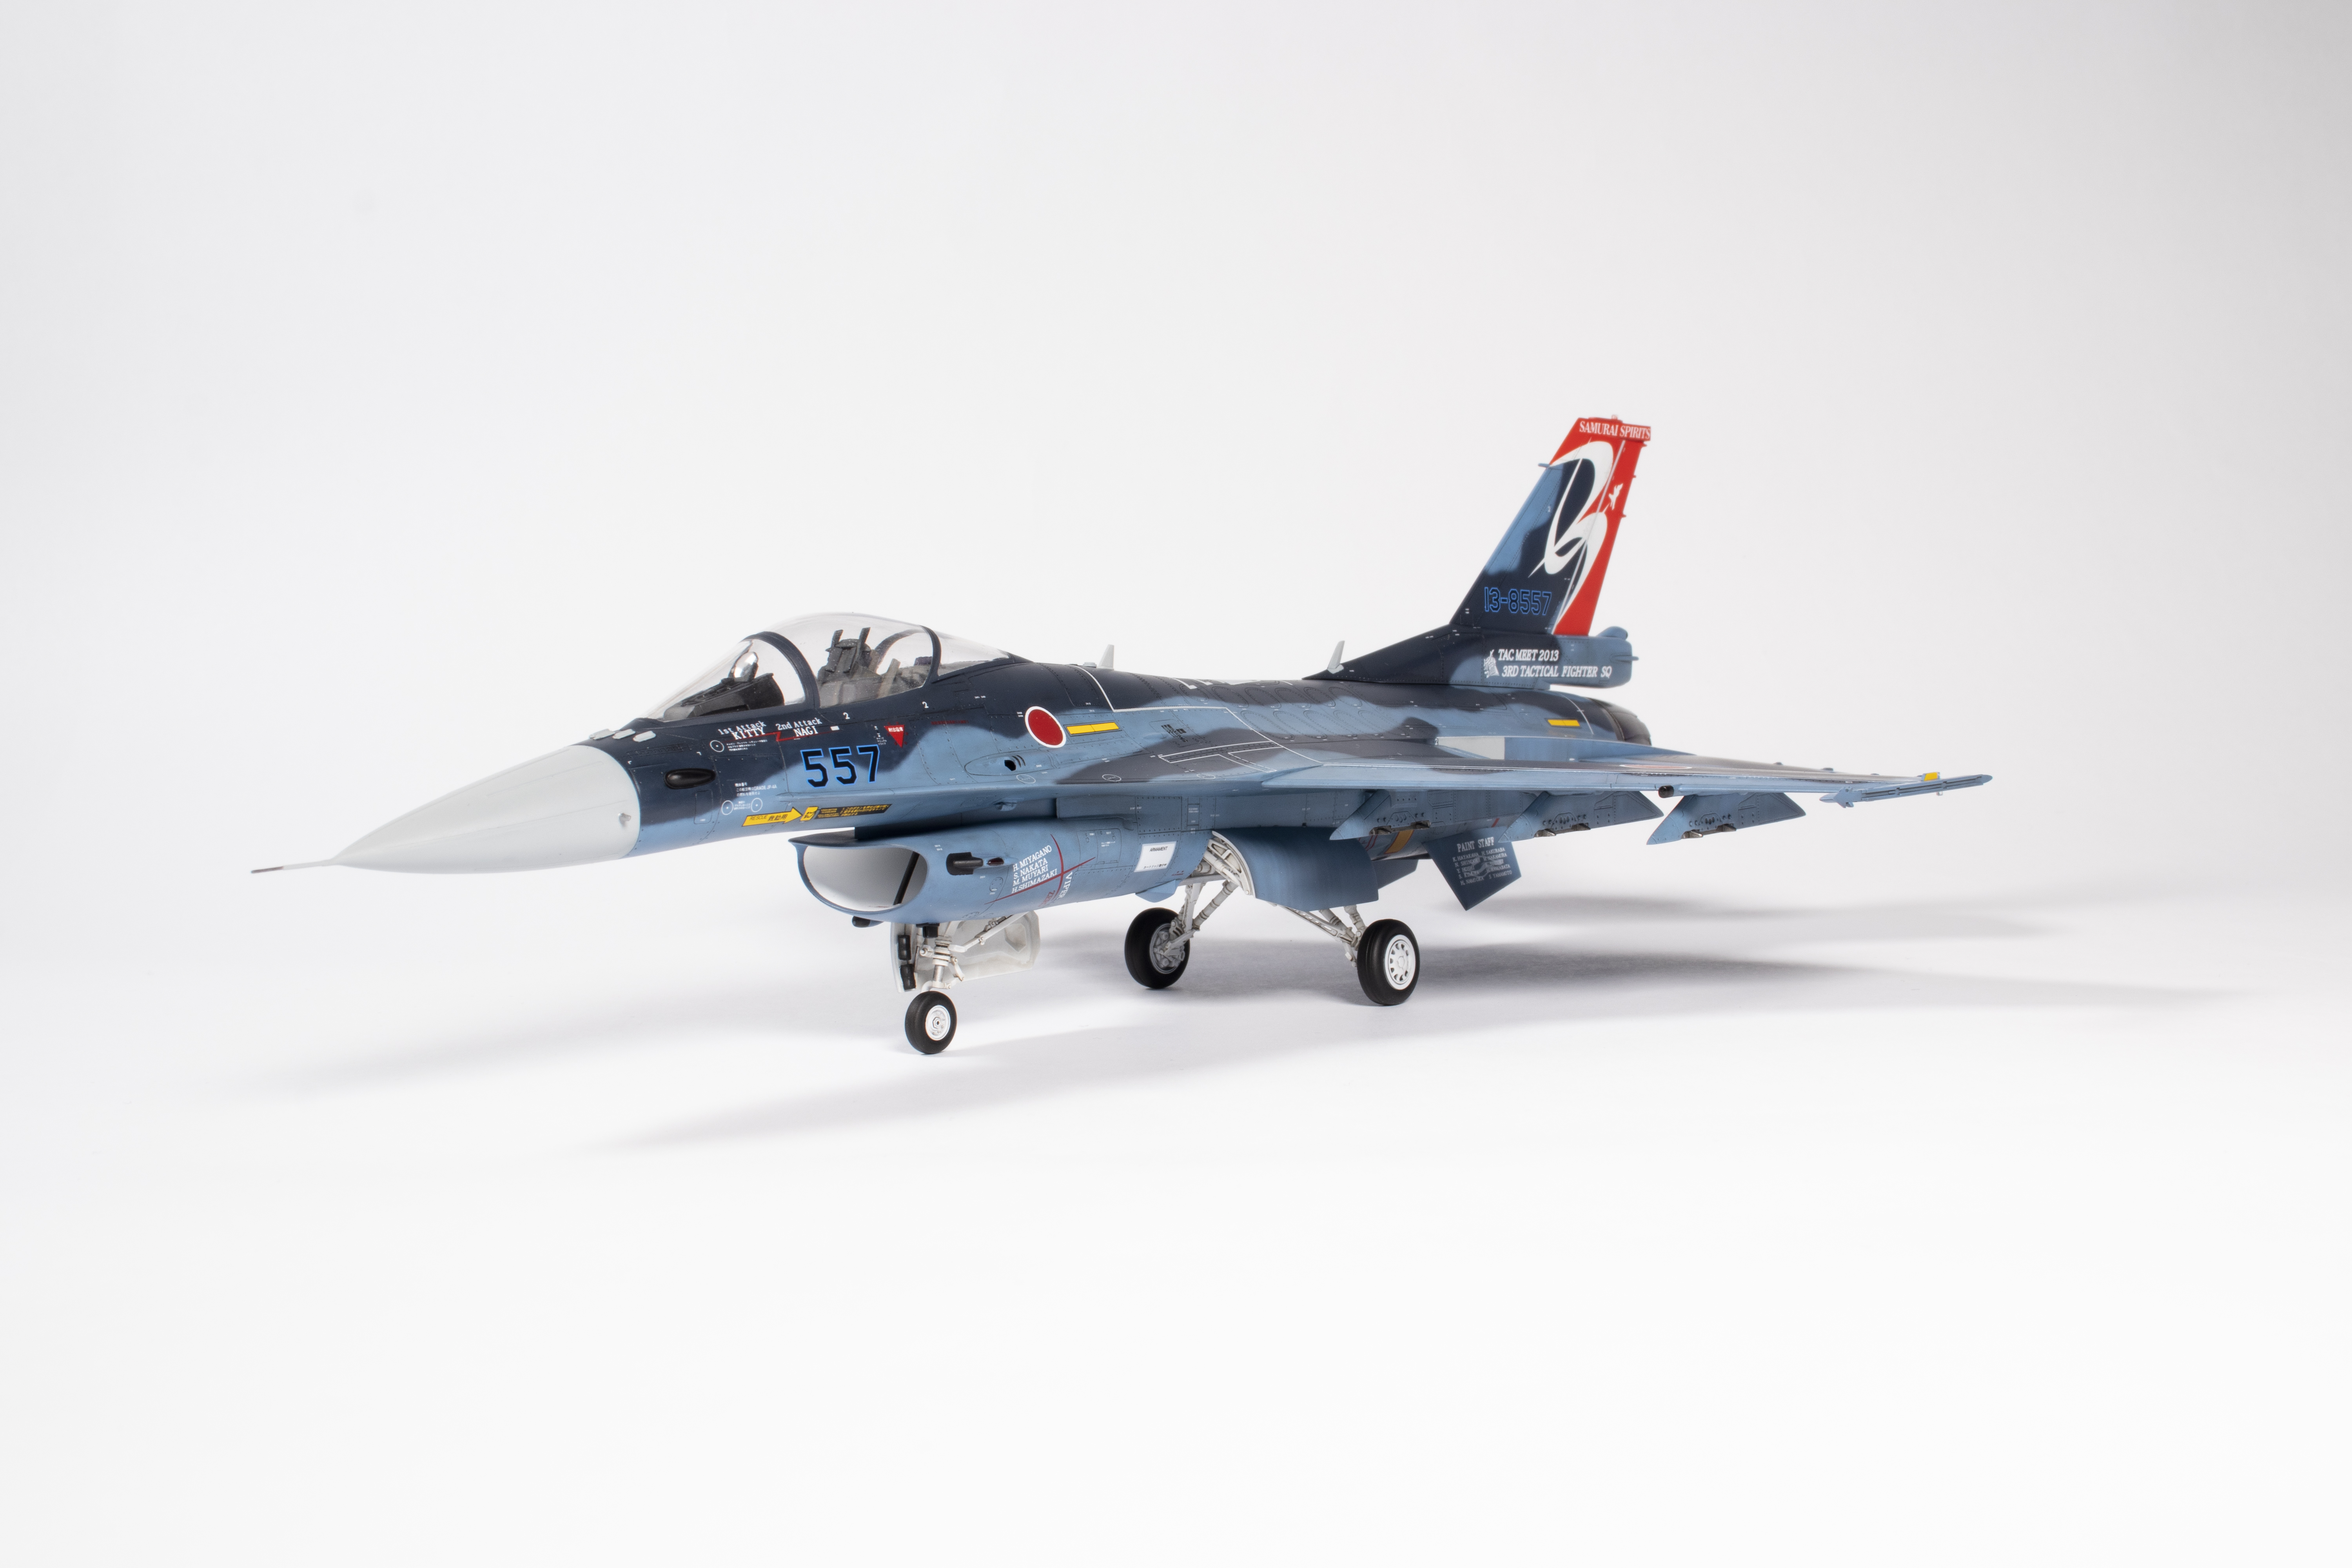
3rd Squadron, Japanese Air Self Defence Force, Japan 2013

So this kit sees me halfway through a series of ‘F-16 and children’ models. I’ve built a Hasegawa F-16A, a Kinetic F-16B, and now I am veering into the more exotic world of Asian F-16 derivatives. This is the first: Mitsubishi’s F-2A in 1/48 by Hasegawa.
I bought this kit when it came out in 2003, exactly 20 years after Hasegawa released their first 1/48 F-16 kit. A glance at the instructions shows the heritage this kit owes to its older American cousin, just like the real thing. At first, this was a little concerning, as by modern standards the Hasegawa F-16 kit is rather basic and lacking in details. However, one need not fear: this kit is way better than what came before and reflects two decades’ worth of advances in injection-moulding and design.
Nevertheless, the build sequence of this kit is very similar to the F-16 and thus I had a pretty good idea of how I was going to build the model before I started. It used to be that I had a very rigid sequence when making kits: stick the parts together, get rid of all the seams, do the canopy, prime, paint, decal, weather, finish. In recent years one of the modelling revolutions I’ve experienced is to blur the boundaries of these stages and overlap them as appropriate to make for a better and more efficient finish. You’ll see what I mean in a minute when it comes to the intake.
The plastic is typical Hasegawa, hard and with petit surface detail. Limited ordnance is provided, which doesn’t bother me as I like to leave it off – it slows me down in my mission to build my stash. My only concession to aftermarket would be the decals.
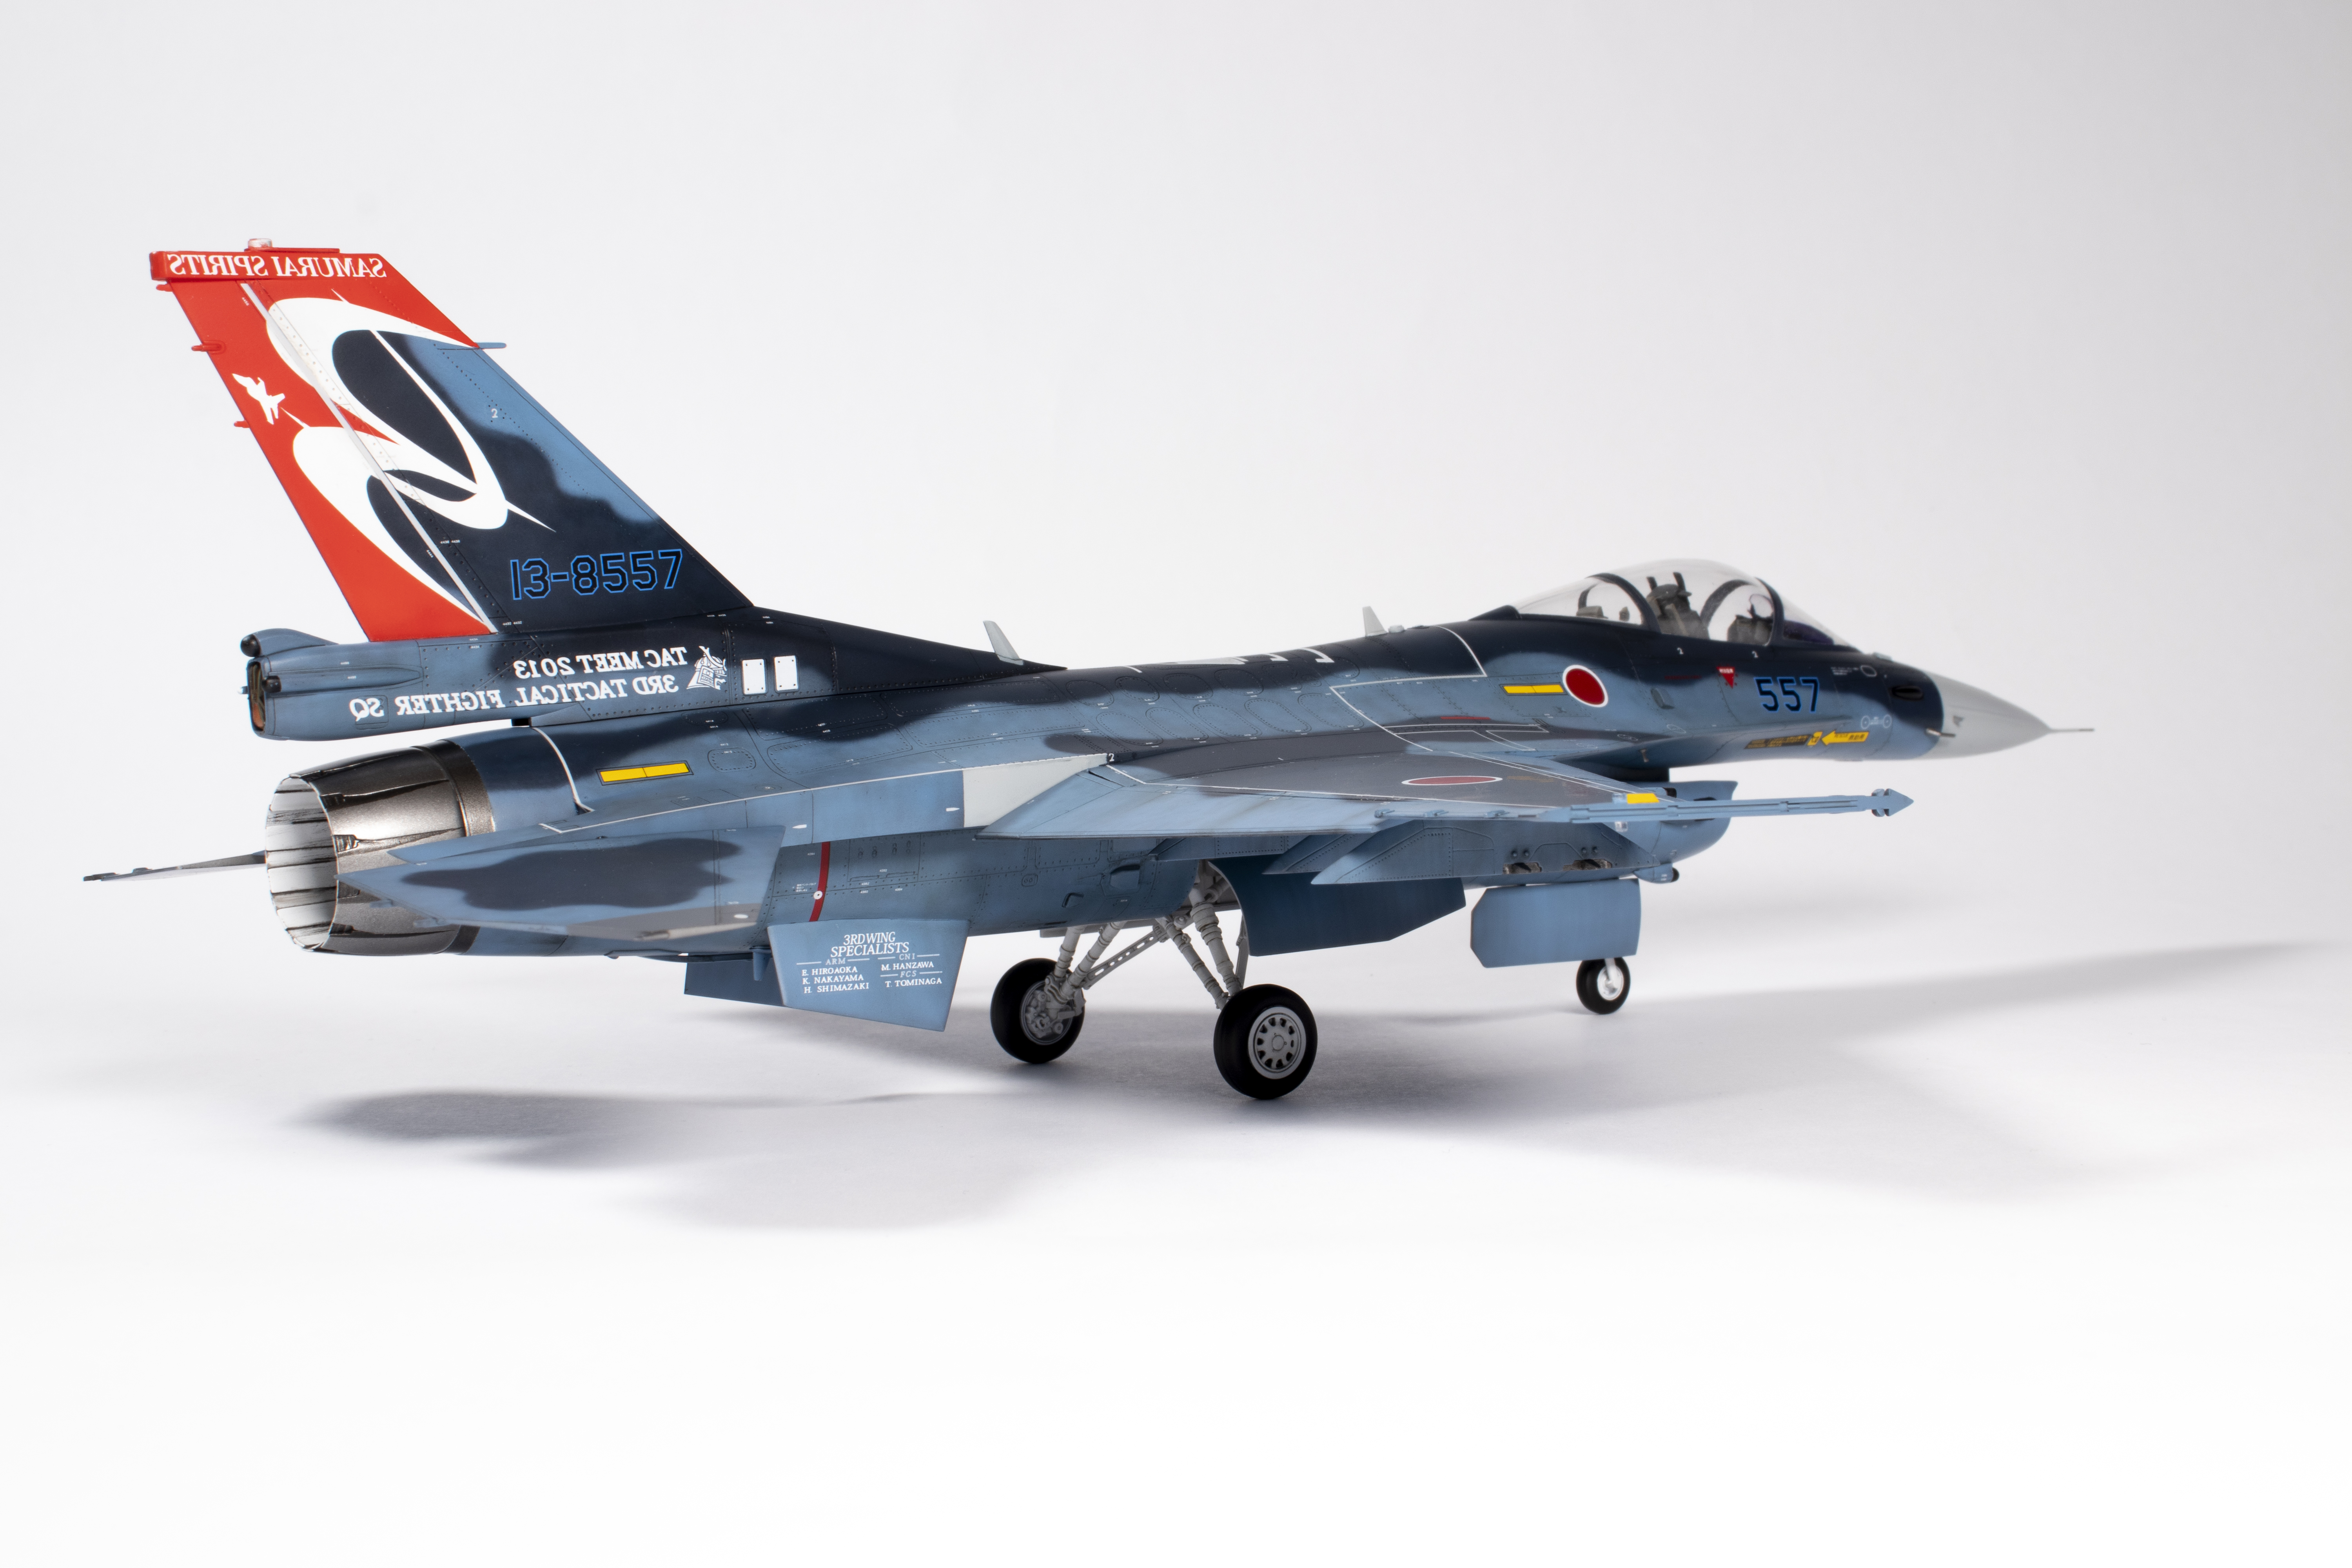
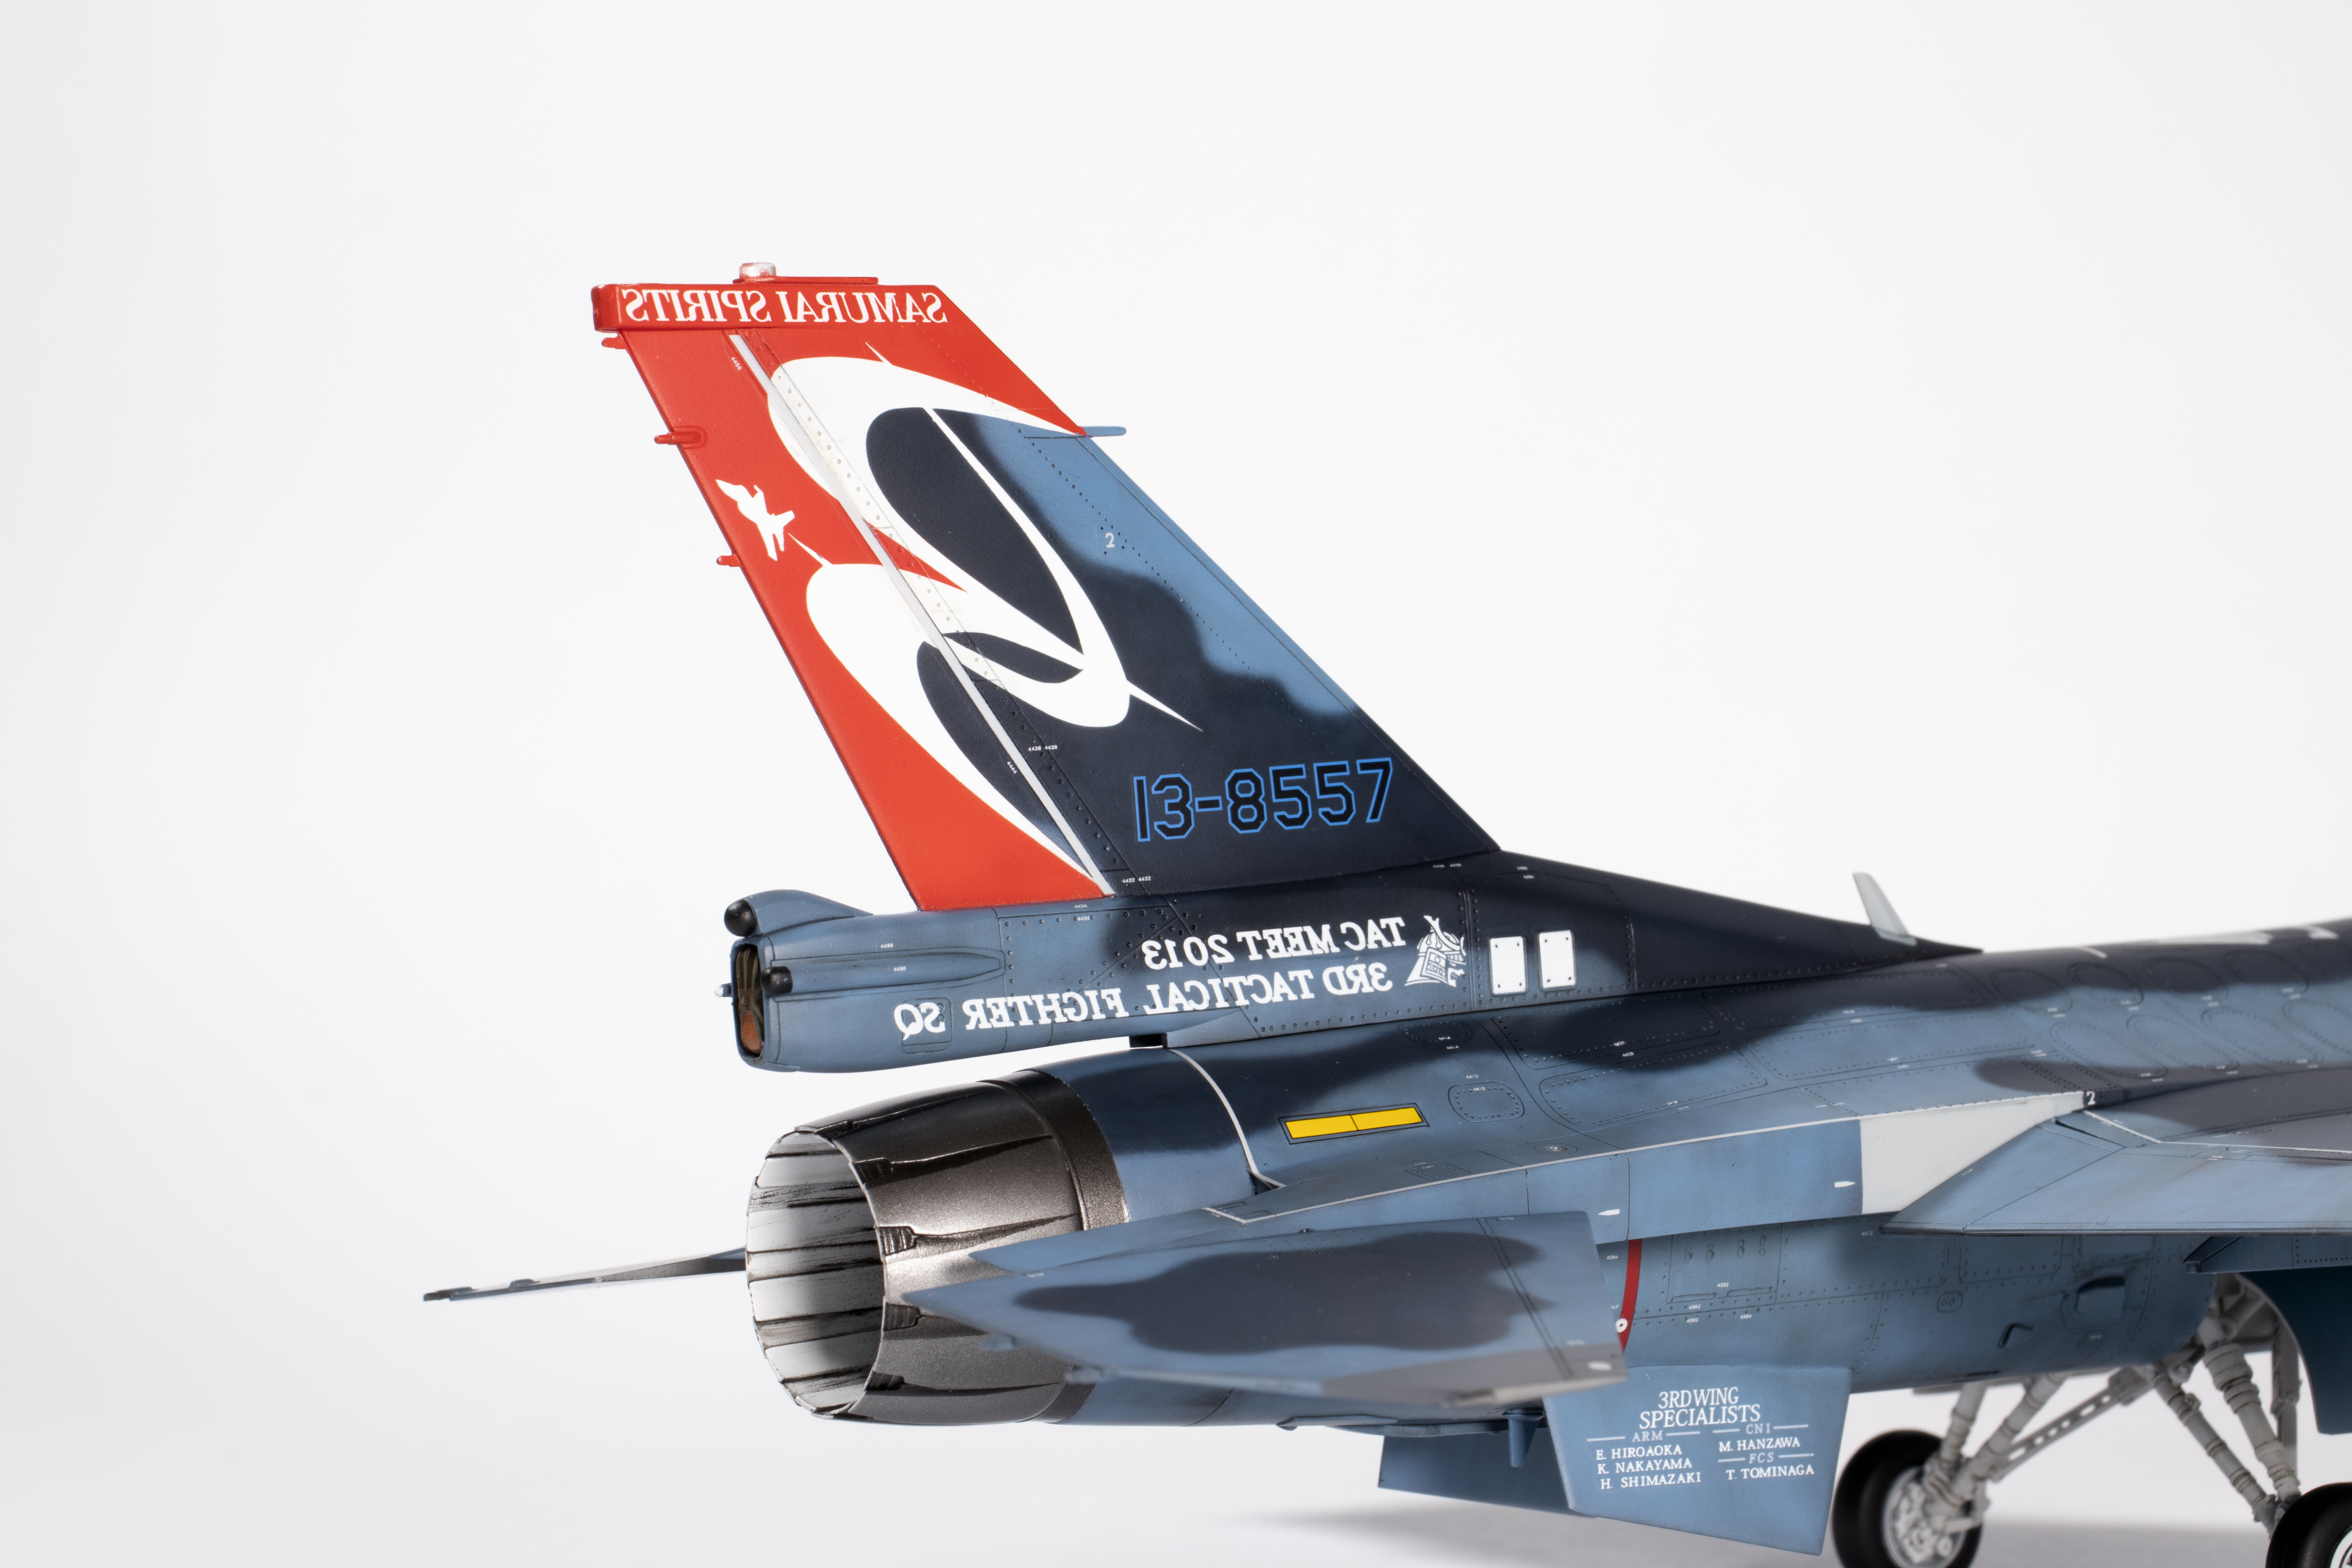
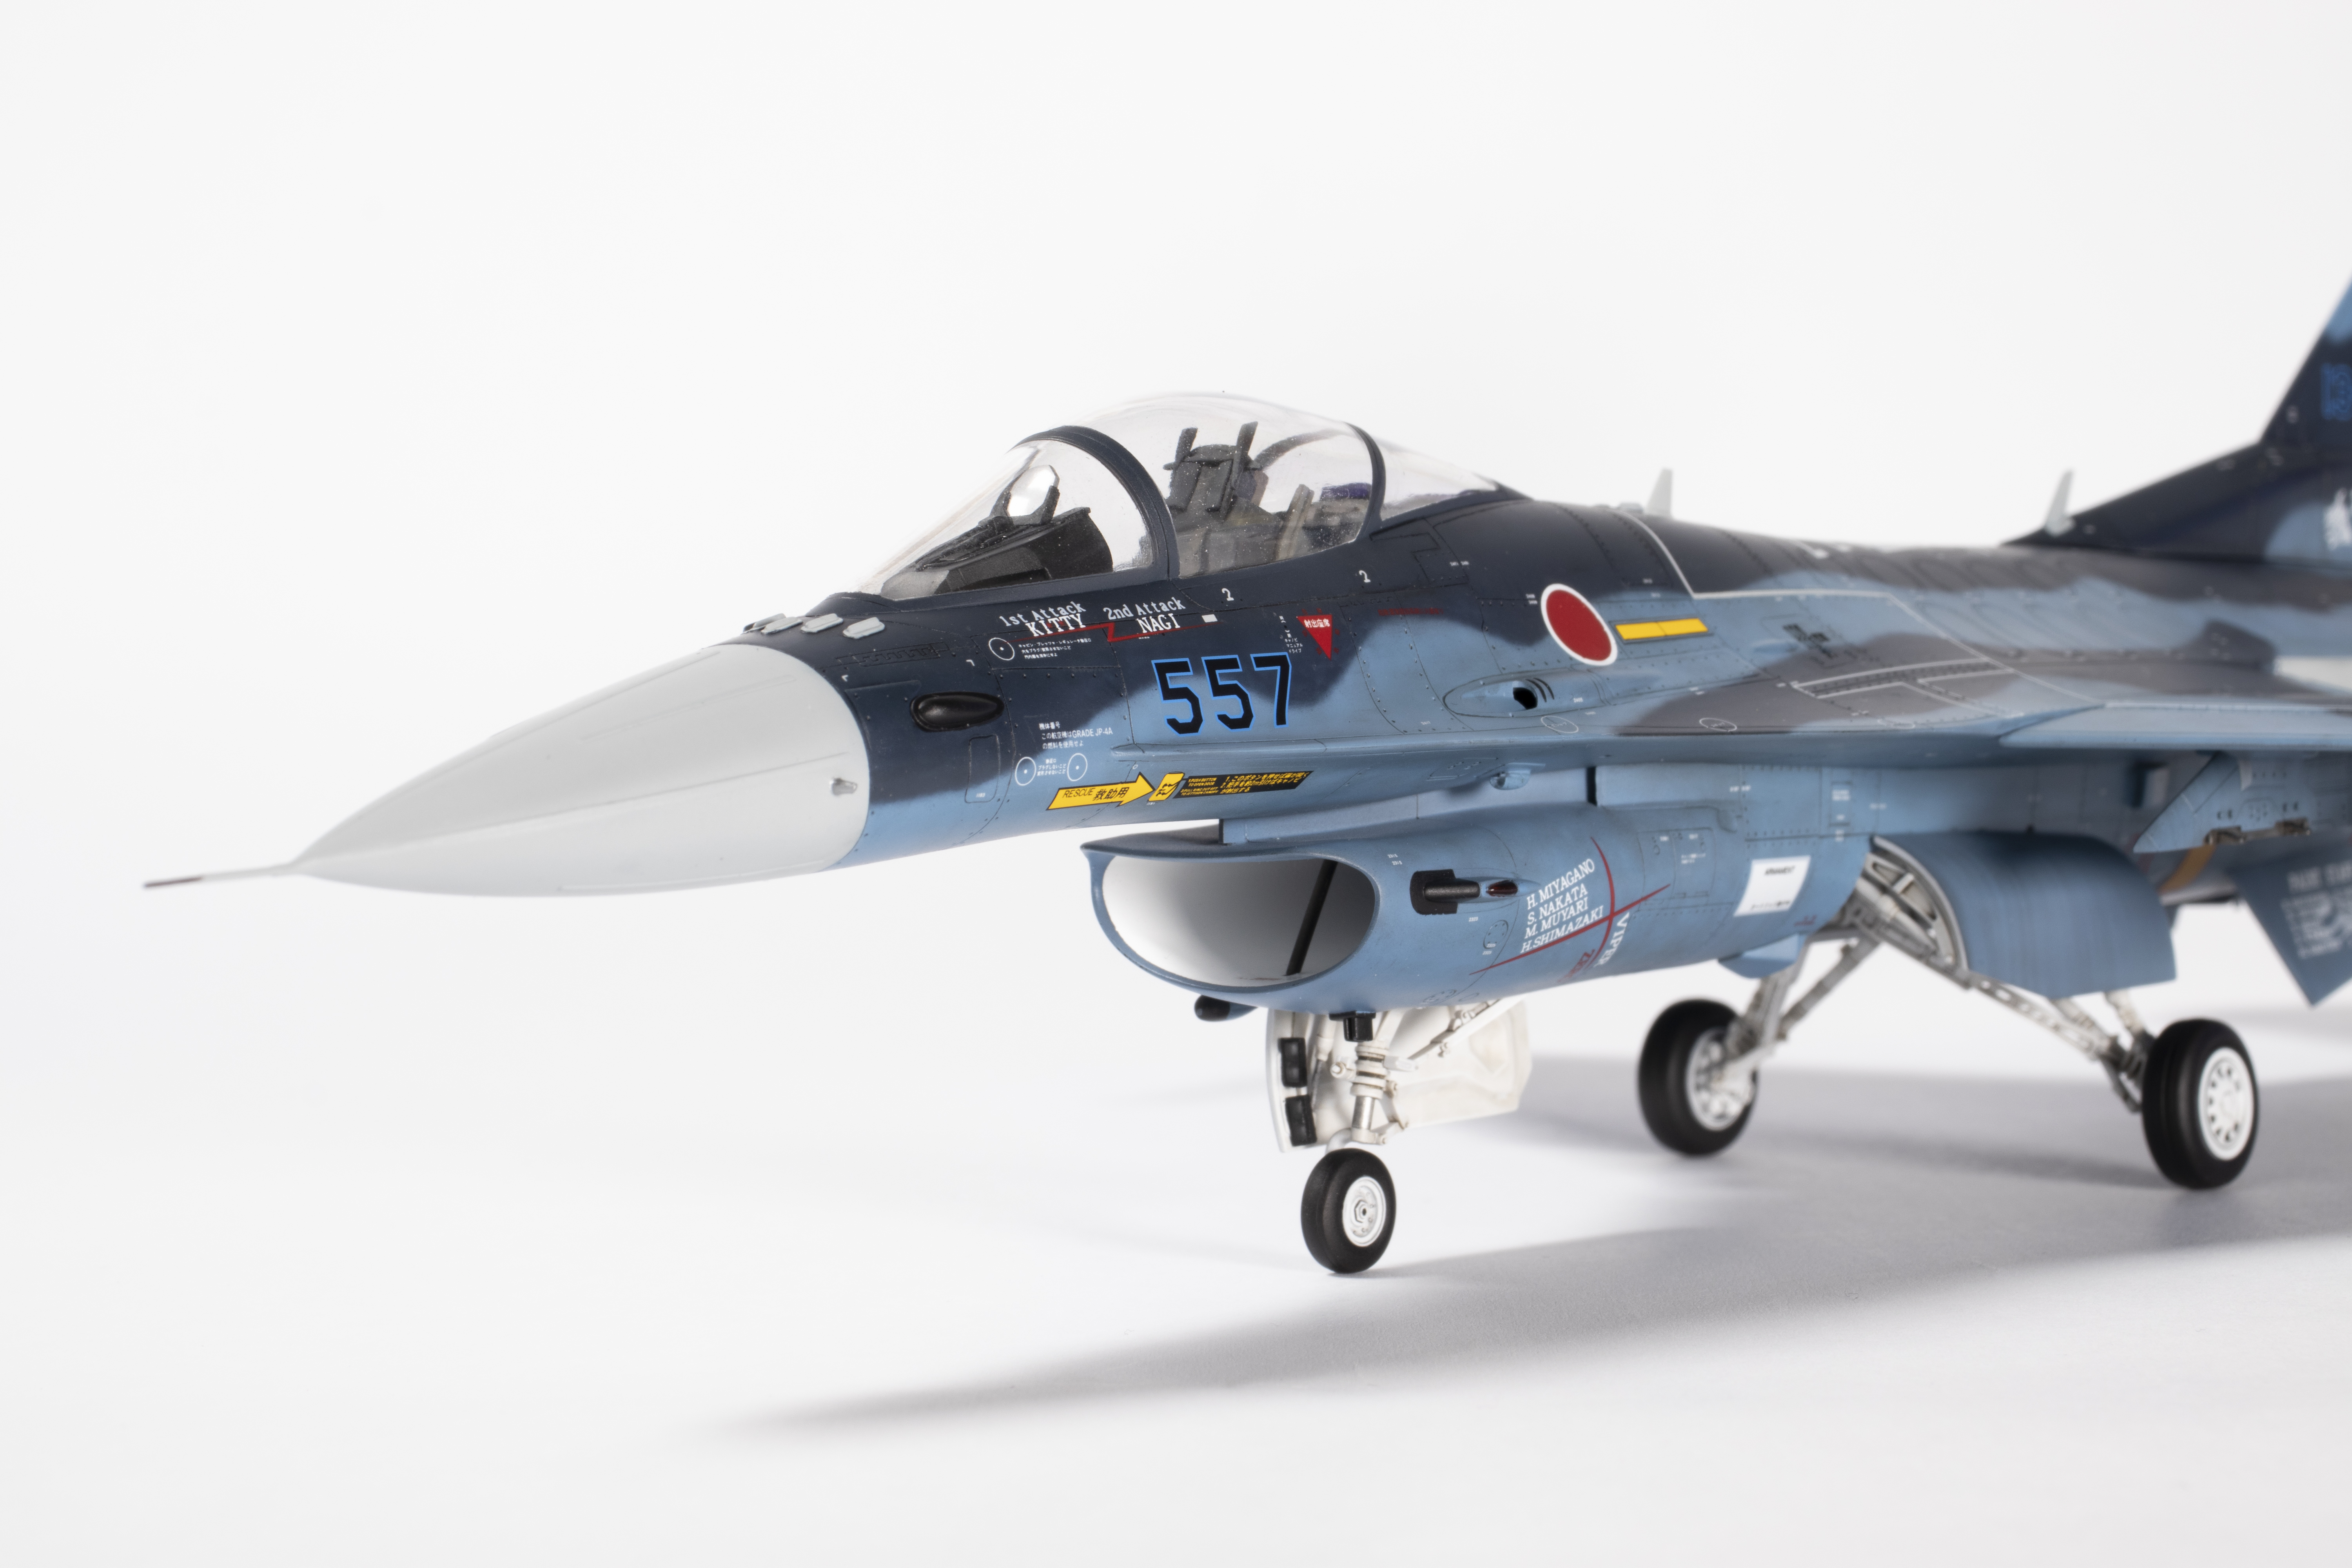
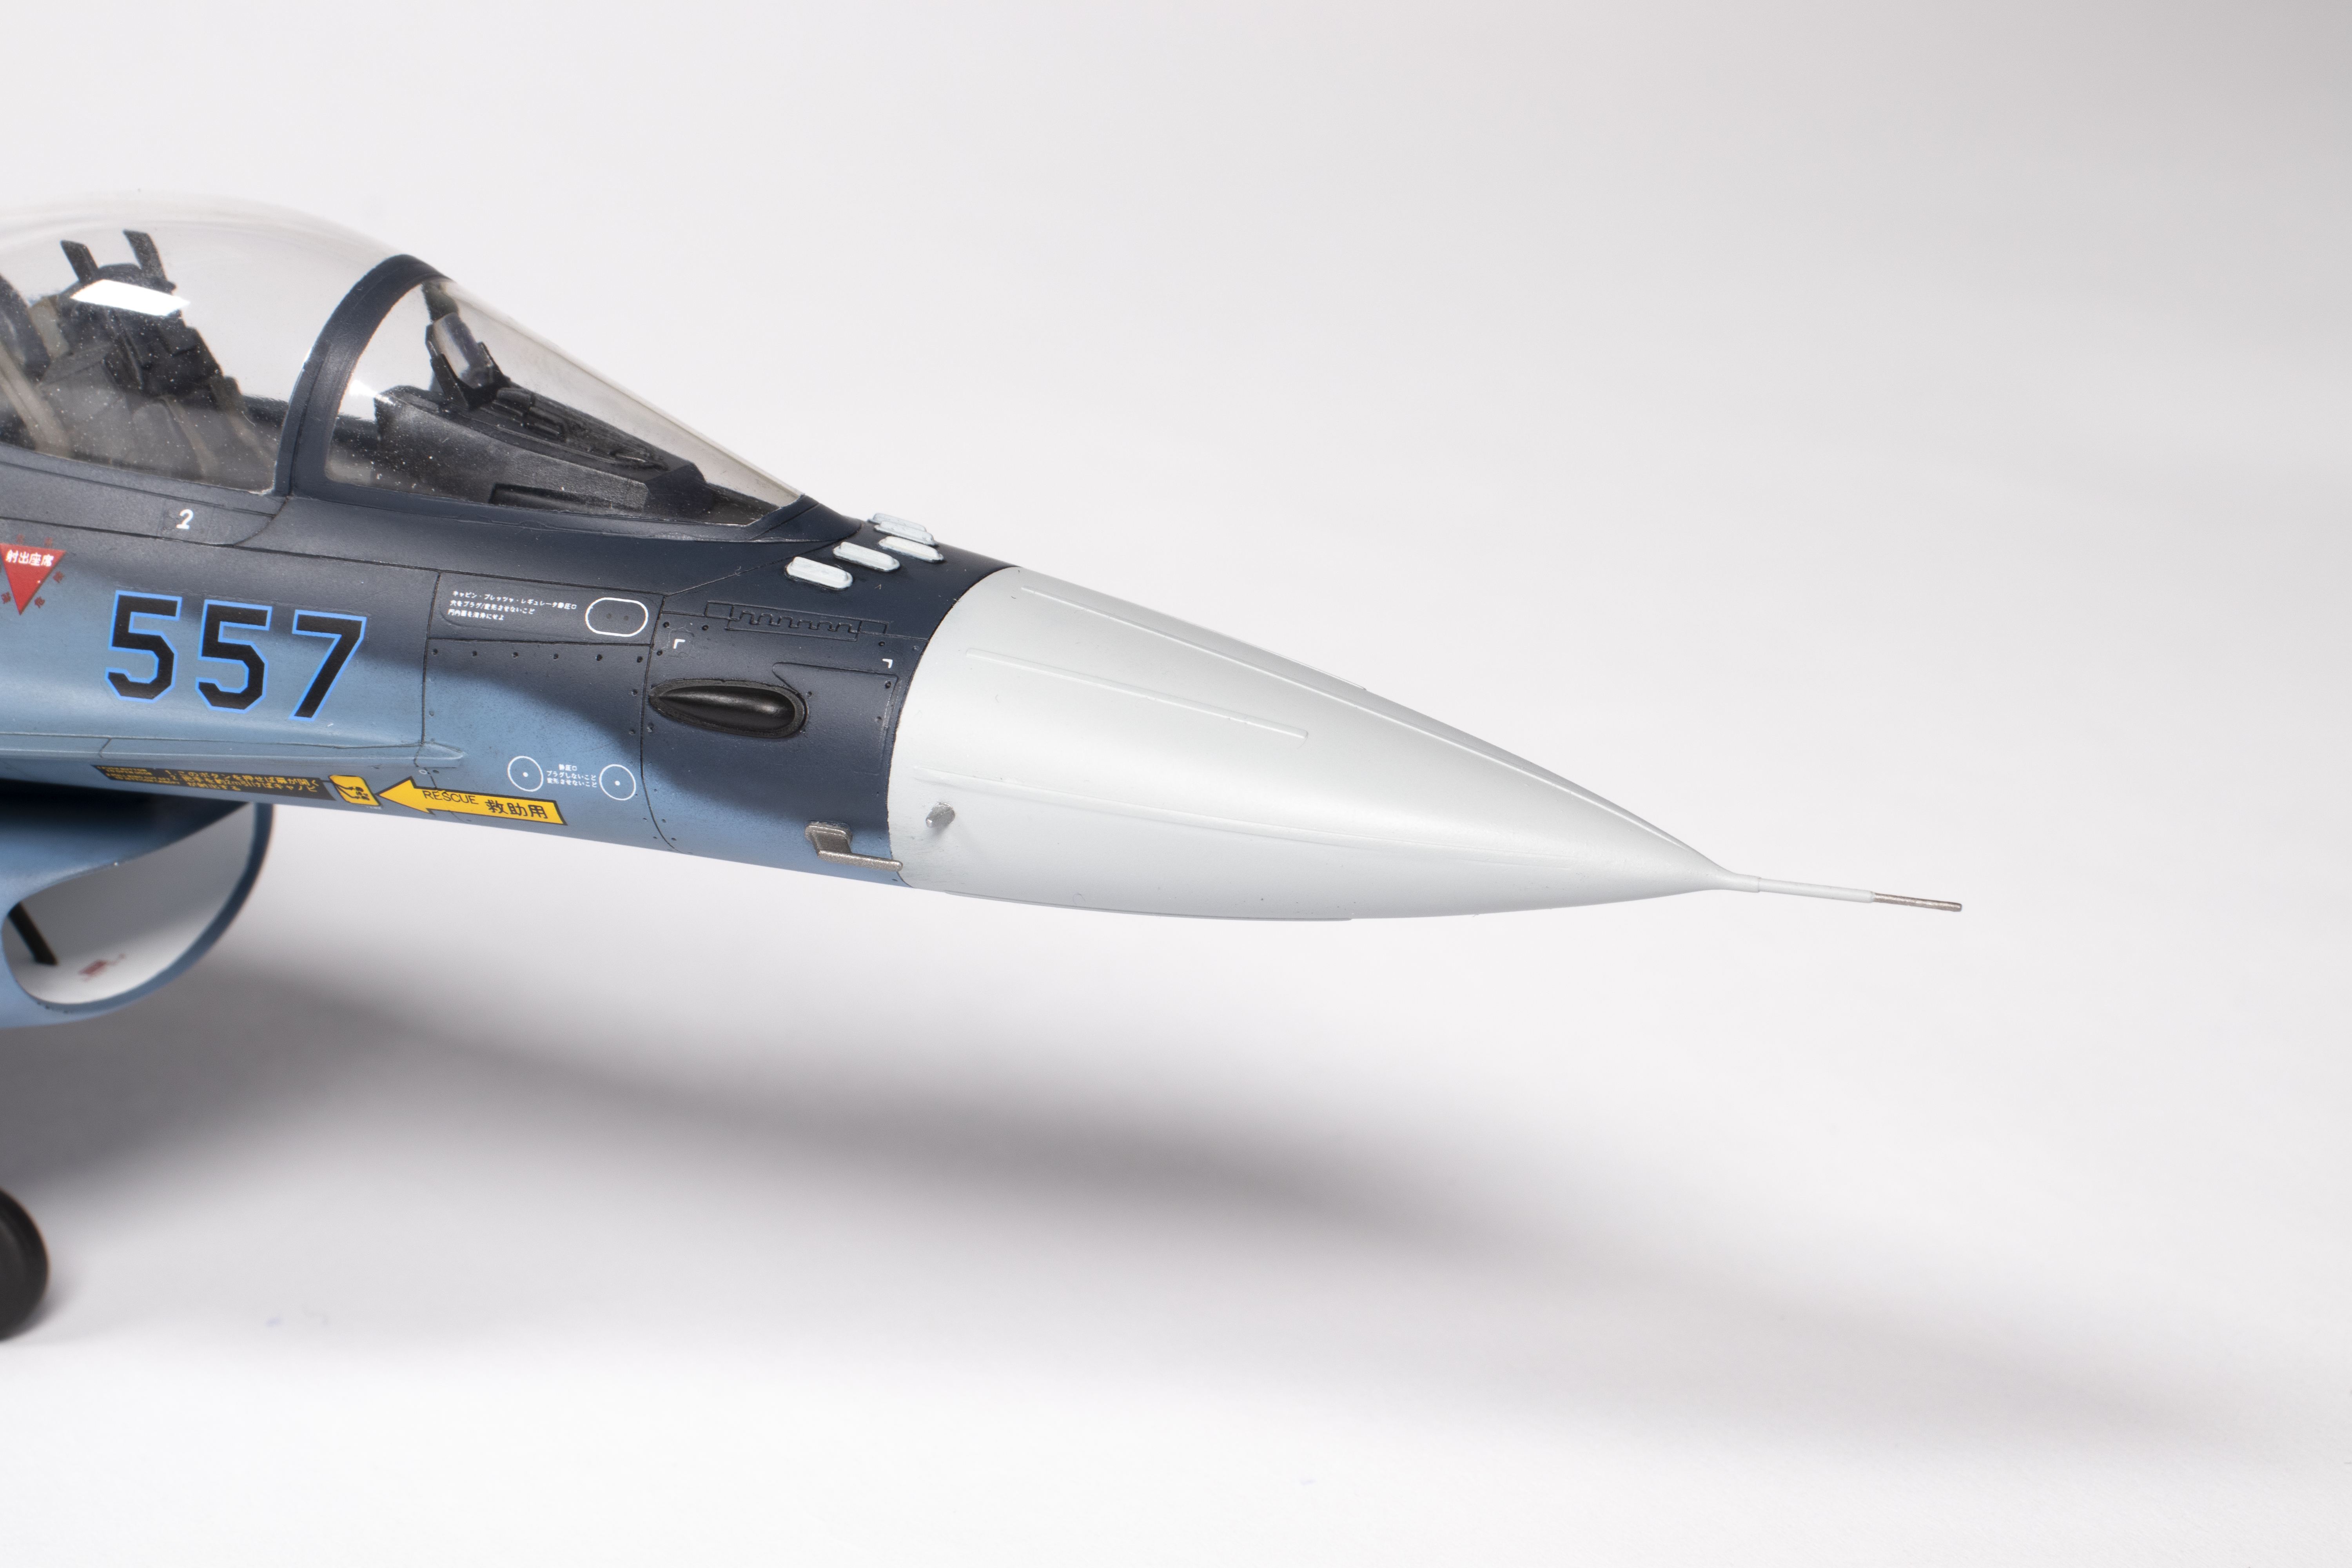
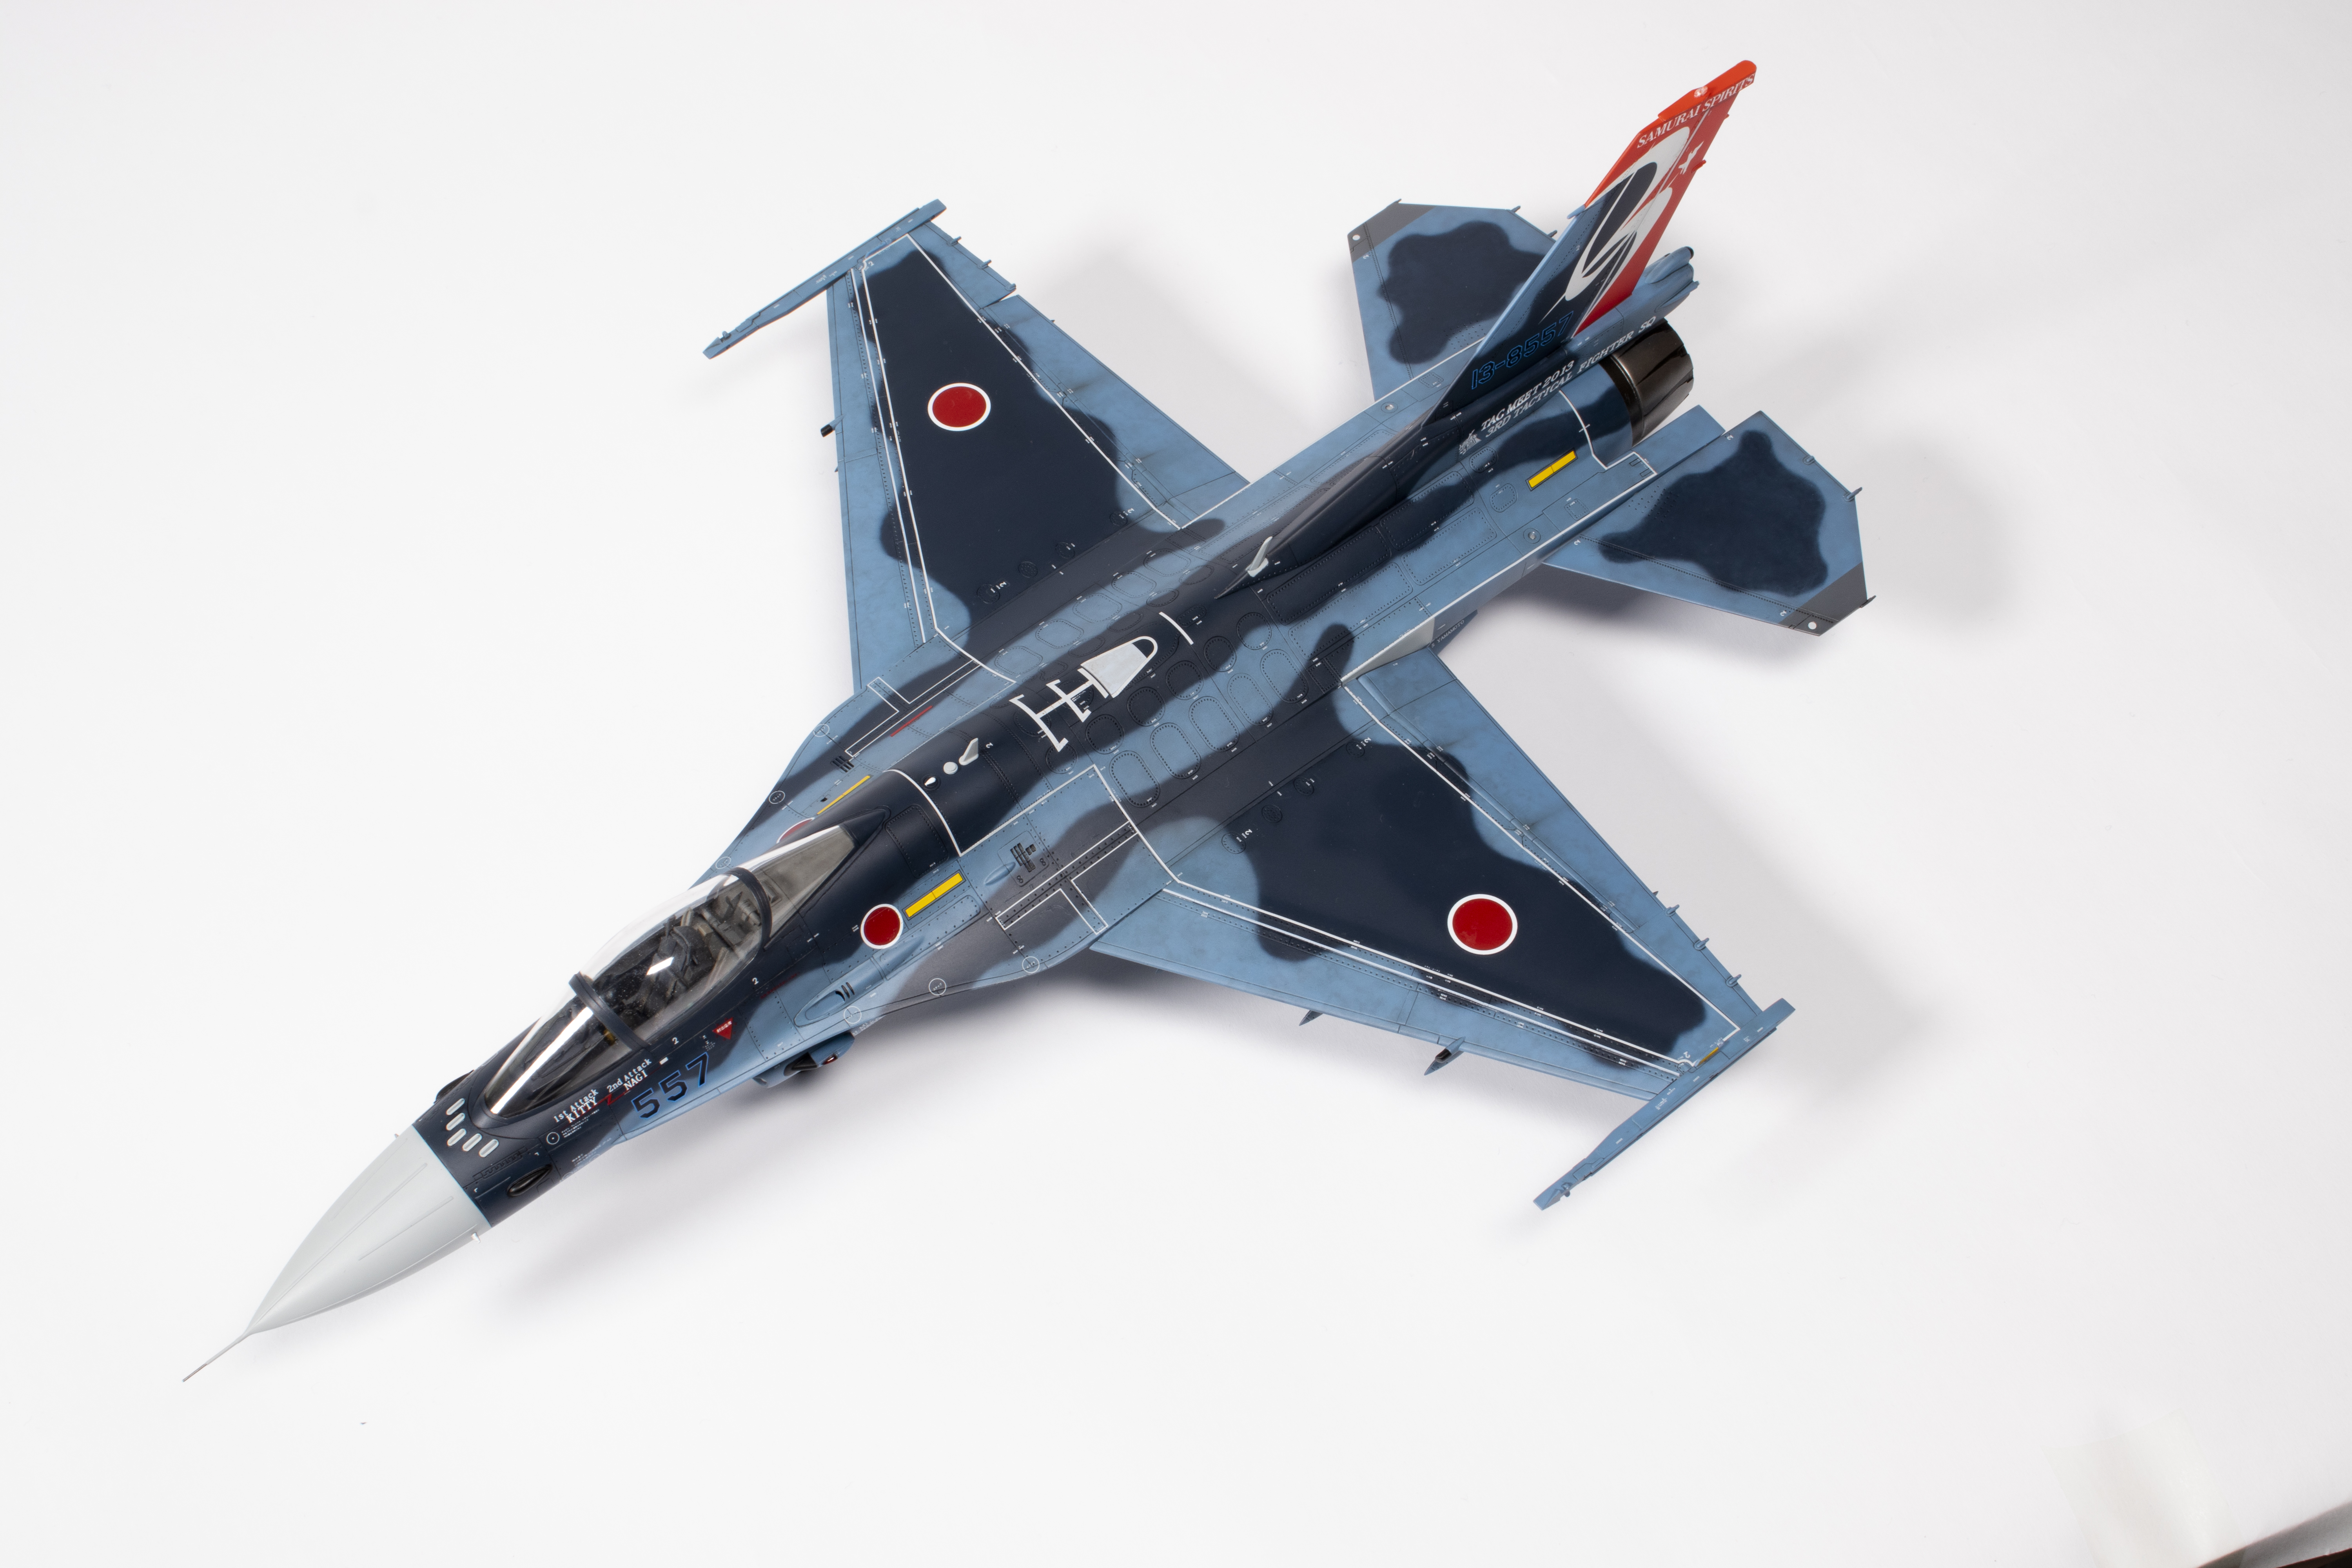
I had no particular plans to use aftermarket decals until I stumbled across some by DXM. These showed the text on the starboard side of the aircraft as a mirror image. I’ve spent many years living in southeast Asia and I am well-used to English being displayed in all kinds of weird and wonderful ways, and so I confess that initially I rather uncharitably assumed the decal designers had made a mistake. I did give them enough benefit of the doubt to actually look at some photos of the real aircraft, and sure enough DXM are completely correct: the text on the real aeroplanes was reversed on the starboard side. I have no idea why, but I think it looks quirky and so of course I *had* to get these markings.
The bane of all F-16-style kits is the intake, and so I decided to get that out of the way first. Unlike some of their older 1/48 jets, Hasegawa supply intake trunking all the way to the turbine face. The downside is that the joints are several, long, hard to reach and complicated by the air heating strut in the middle. My basic strategy was to build up the front intake in its entirety and then join it to the rear. There would be a large vertical seam halfway back, but it’s difficult to see unless you’re really looking.


The inner seams were dealt with using Milliput Silver-Grey followed by applications of thickened Mr Surfacer 500 and super glue where required. This was an iterative process with multiple rounds of filling, sanding and painting until I was happy. For sanding the difficult-to-reach seams I used various sanding implements, most important of which were some butchered Infini sanding sponges. These can be gripped in reverse tweezers for access and are flexible enough to conform to the intake shape. It’s slow and tedious work, but necessary for such a focal point of the aircraft.


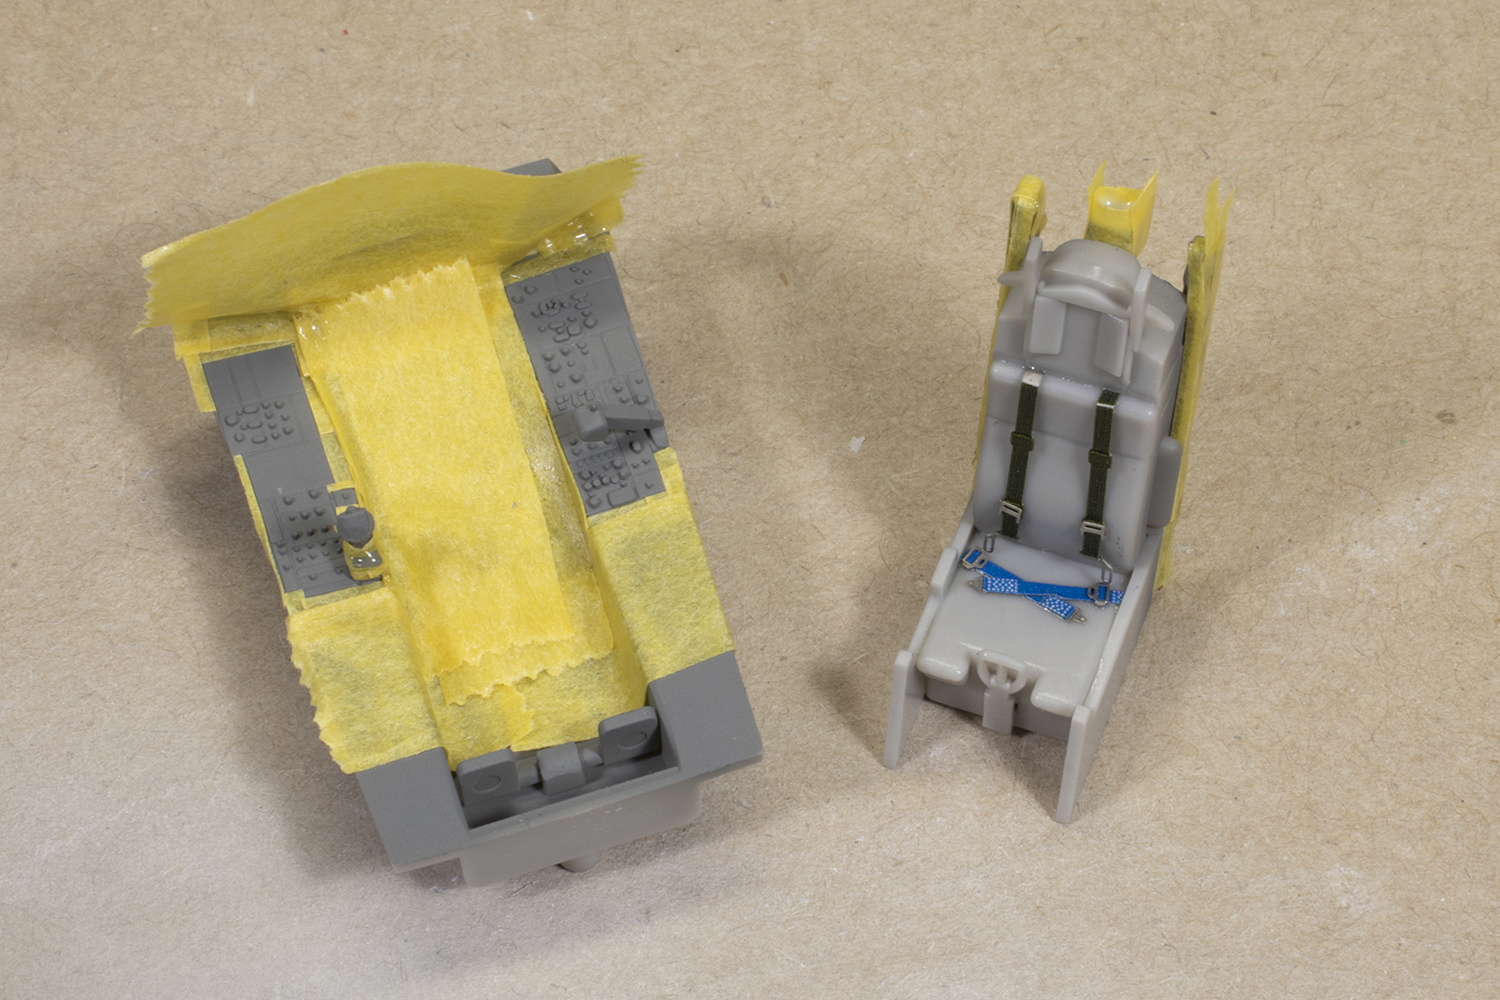
Along with my disregard for weapons, I similarly am slapdash with cockpits. I like the aesthetics of a closed canopy, and since my models sit in a display case where no one can possibly see inside, all I need is something passable from distance. I am definitely not one of the ‘at least I know it’s there’ crowd; life’s too short!
The cockpit is therefore as supplied by the big H, with only some seatbelts added from a spare Eduard etched set I had lying around. I used Mr Color 317 for the tub and back of the seat and masked it off before spraying the panels and rest of the seat in black. Mr Color is my staple paint, partly because I acquired most of the range when I lived in China, but also because it can be thinned heavily with Mr Color Leveling Thinners and therefore lasts for ages, sprays beautifully, and dries quickly and hard. Long gone are the days of waiting for enamels to dry – this stuff can be handled and masked in minutes.
I tried to do some weathering with grey shades of oil paint on the seat and cockpit coaming, but it all ended up a rather indistinct mess. I have a plan next time I’m modelling a black ejection seat for a sharper finish, but since I hate redoing stuff (it slows you down!) I pressed on with what I had.
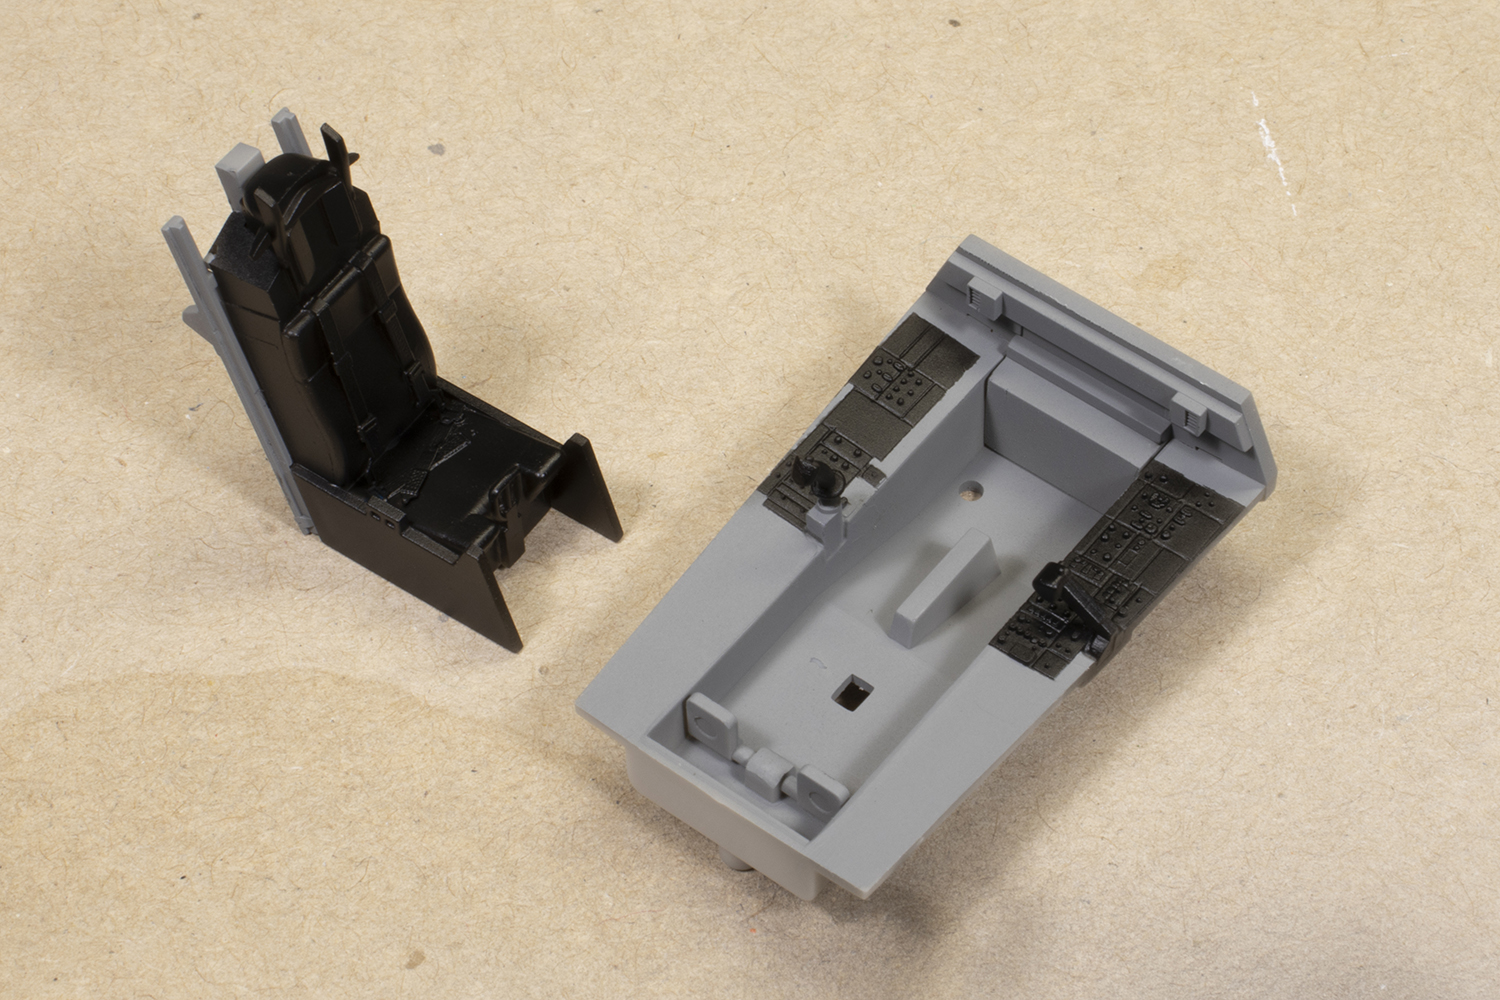


The cockpit and landing gear bay need to be added to the lower fuselage half before the upper half is added. Since becoming frustrated with ghost seams about 10 years ago, I have taken to gluing all parts that need seams removed with super glue. I generally just buy whatever is available on Amazon, and for a few years now have been using Everbuild High Viscosity CA. Using super glue is a high-risk strategy: you get no working time and mistakes are hard to correct. It is also difficult to scribe. However, the pay-off is a very stable joint that will not change over time and the CA acts as an excellent filler. It’s also very quick, and thus speeds up construction.


The overall fit is excellent. The nose joint is a pain to deal with as it runs just below some raised detail and so requires a lot of care to clean up. The scribed detail does not meet very well across the fuselage halves around the nose and I hemmed and hawed about fixing this. In the end, I decided that as the paint in this area would be very dark I could get away with the wonky transition.


Unfortunately, Hasegawa moulded the pylon attaching holes flashed over for the inner three pylons, which I needed to open up, but not for the outer pylon, which I needed to plug. I did so using more super glue. The wings are a pretty good fit, but it took some time to clean up the seam on the underneath. The fit of the wings to the fuselage was not great and required smoothing with some more Milliput. The rear of the fuselage (parts A8 and A9) can be joined at this time – also a good fit – without attaching the jet exhaust. This left me with an essentially complete fuselage minus the intake and tail surfaces.

In order to avoid gritty paint in the deep recess between the intake and the lower fuselage, I finished and painted up the intake first, and also the lower fuselage around the nose. I could then attach the intake without having to worry about painting this area later.
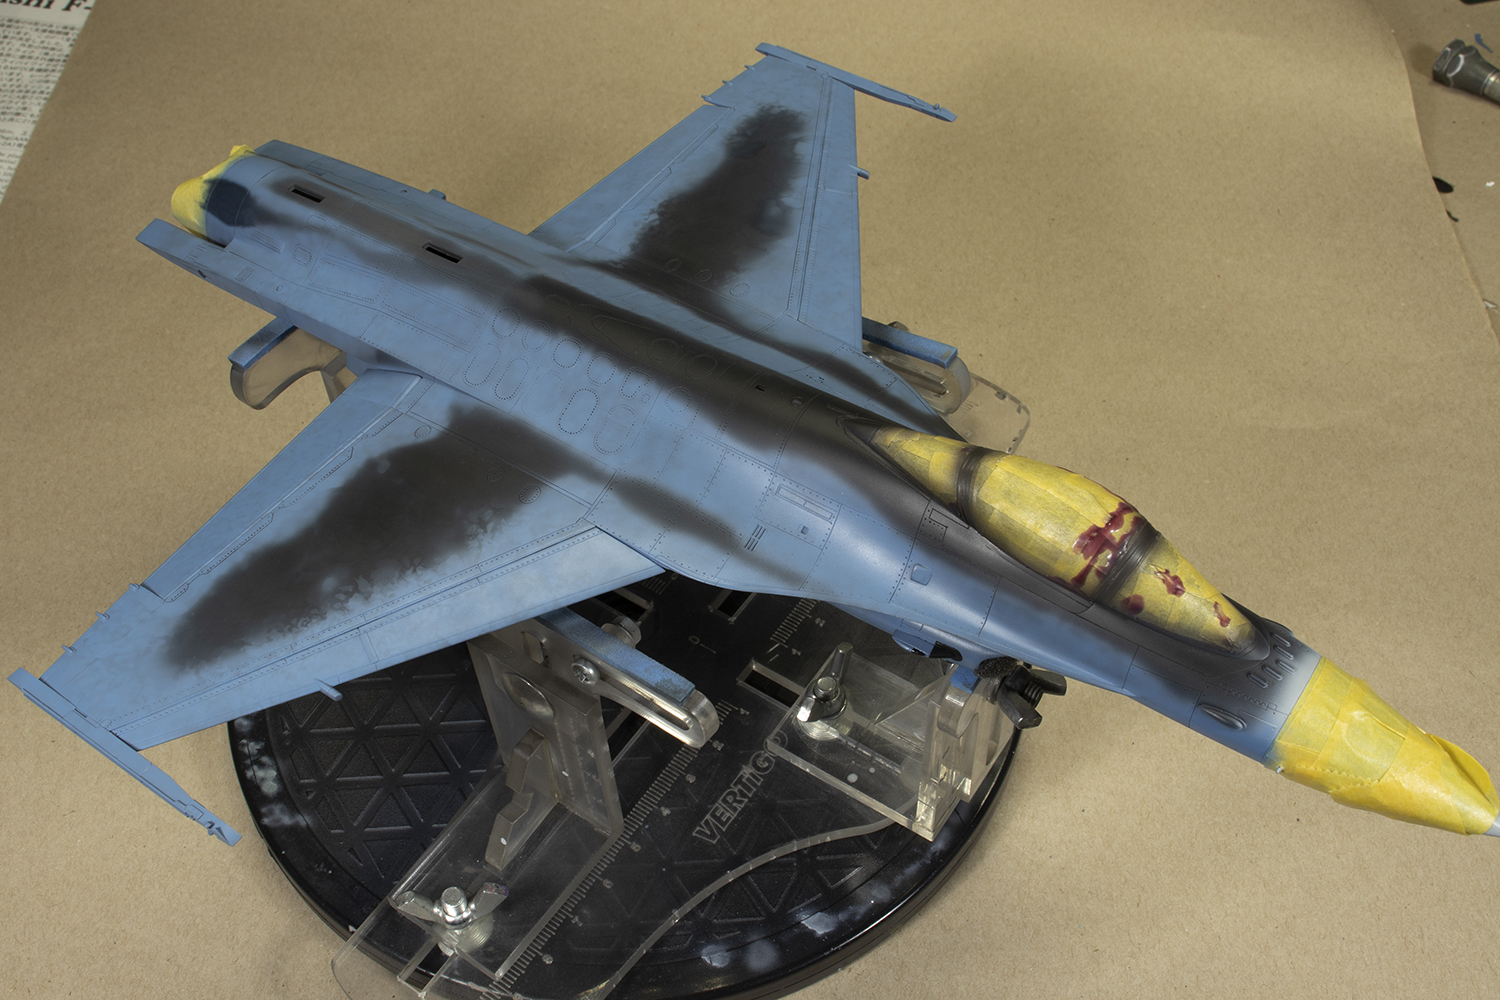
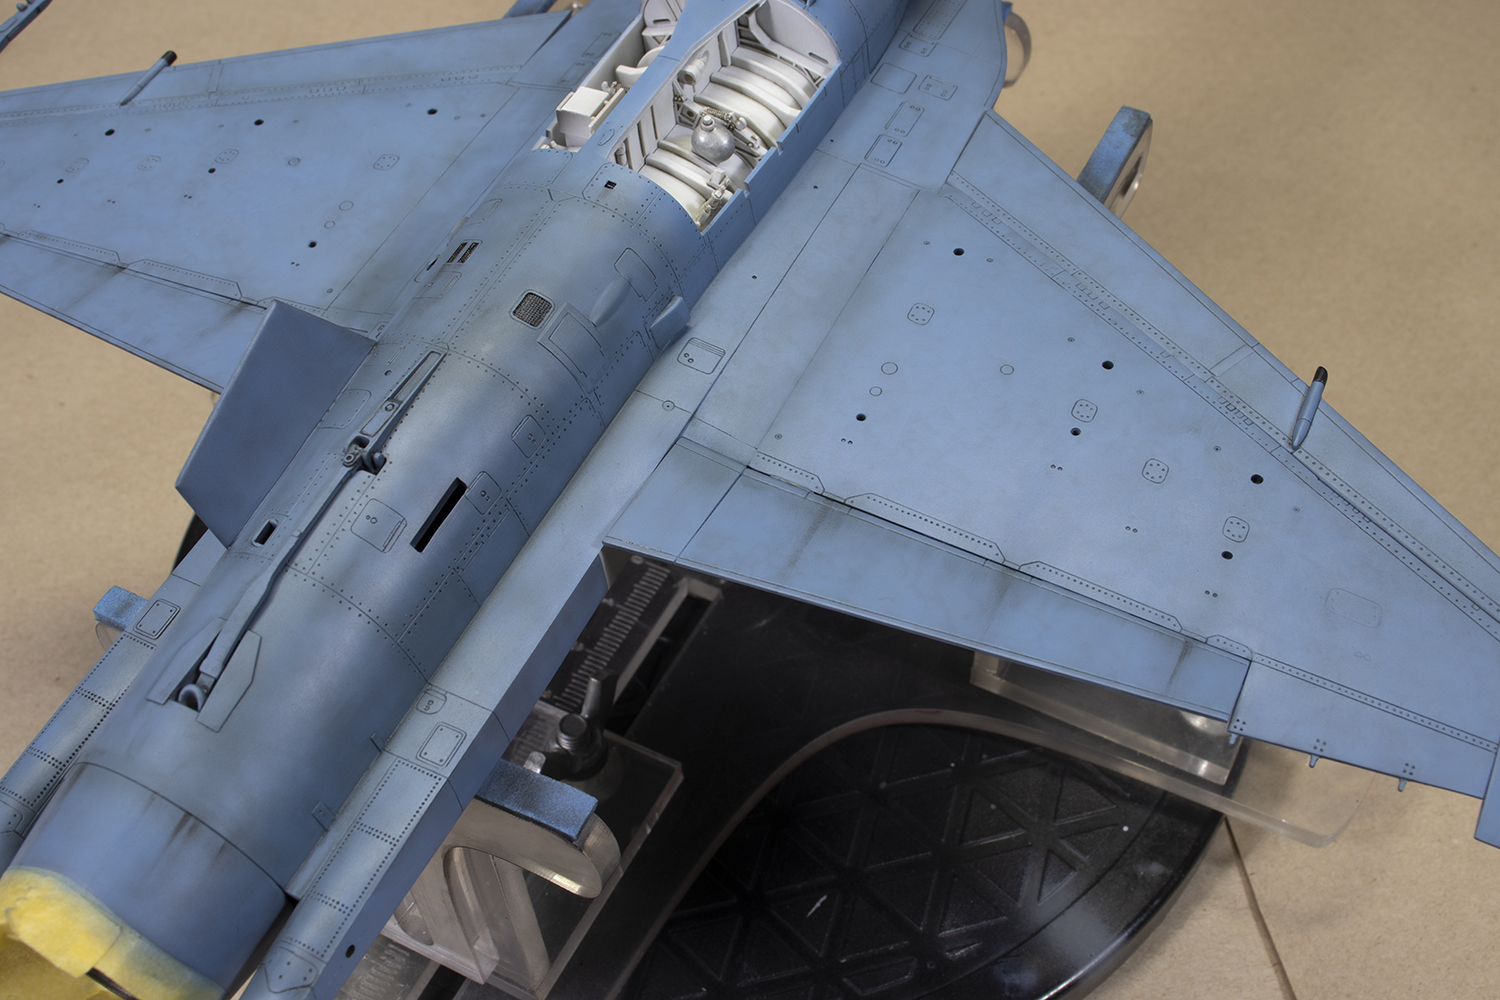
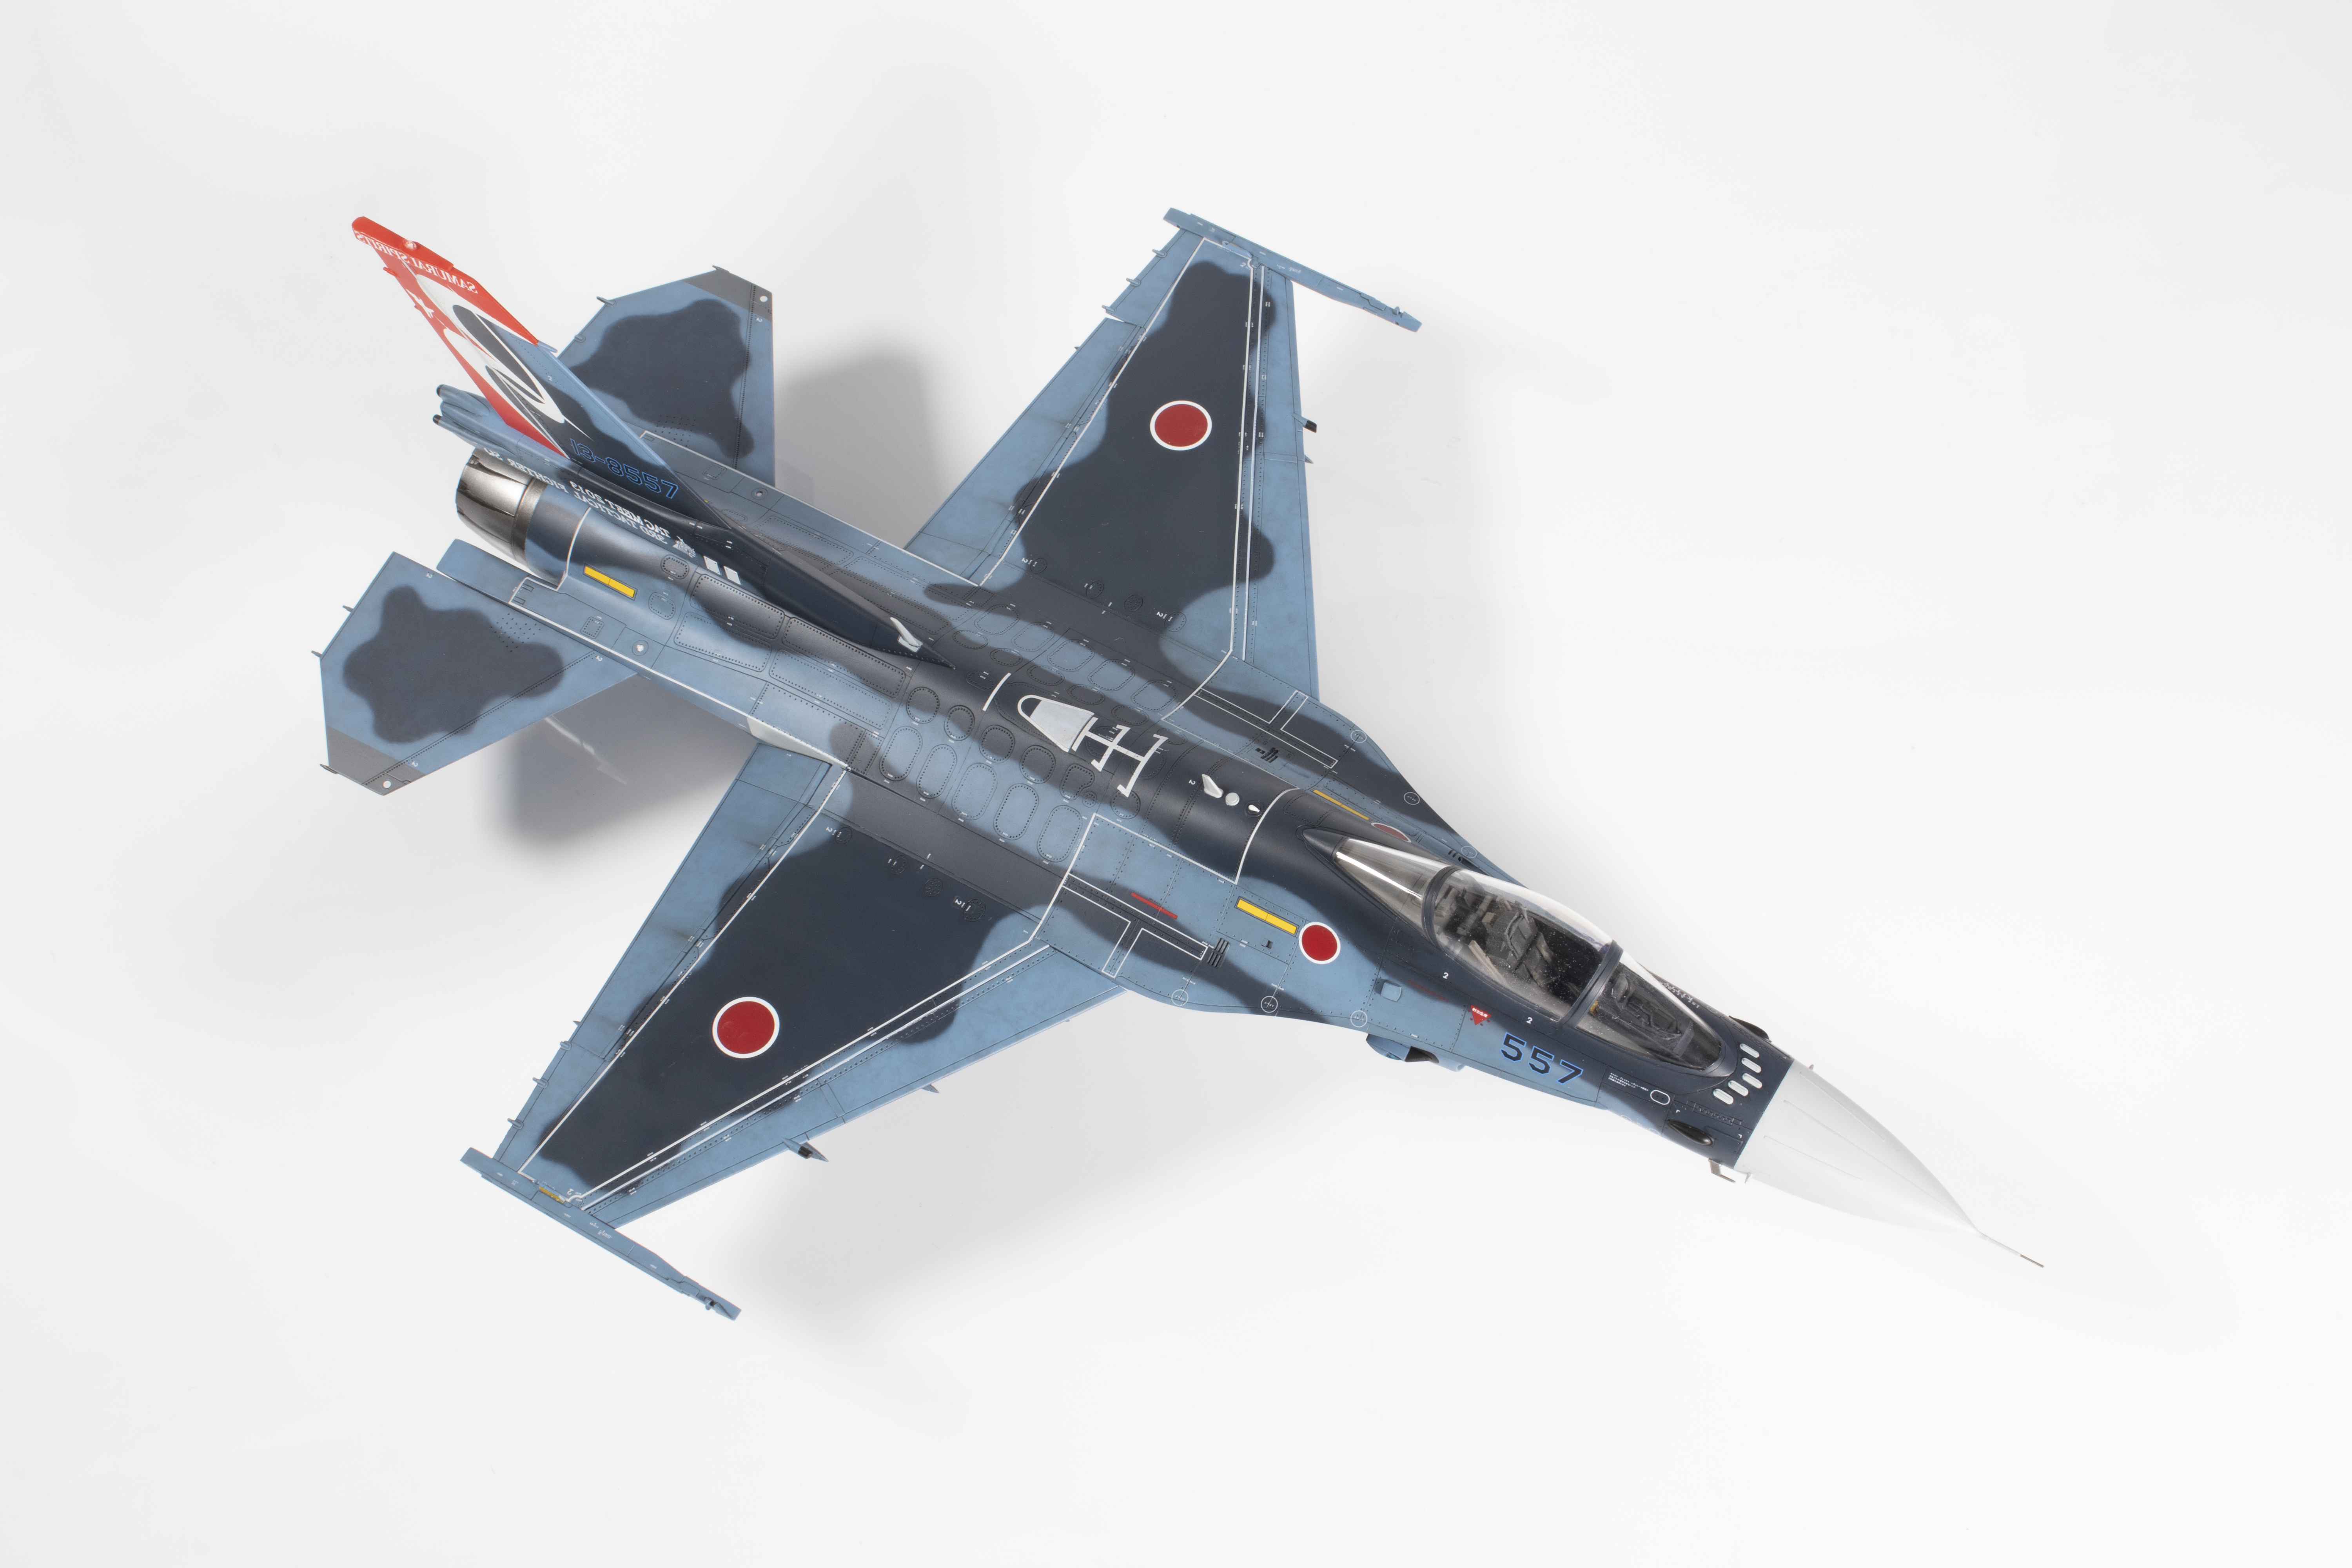
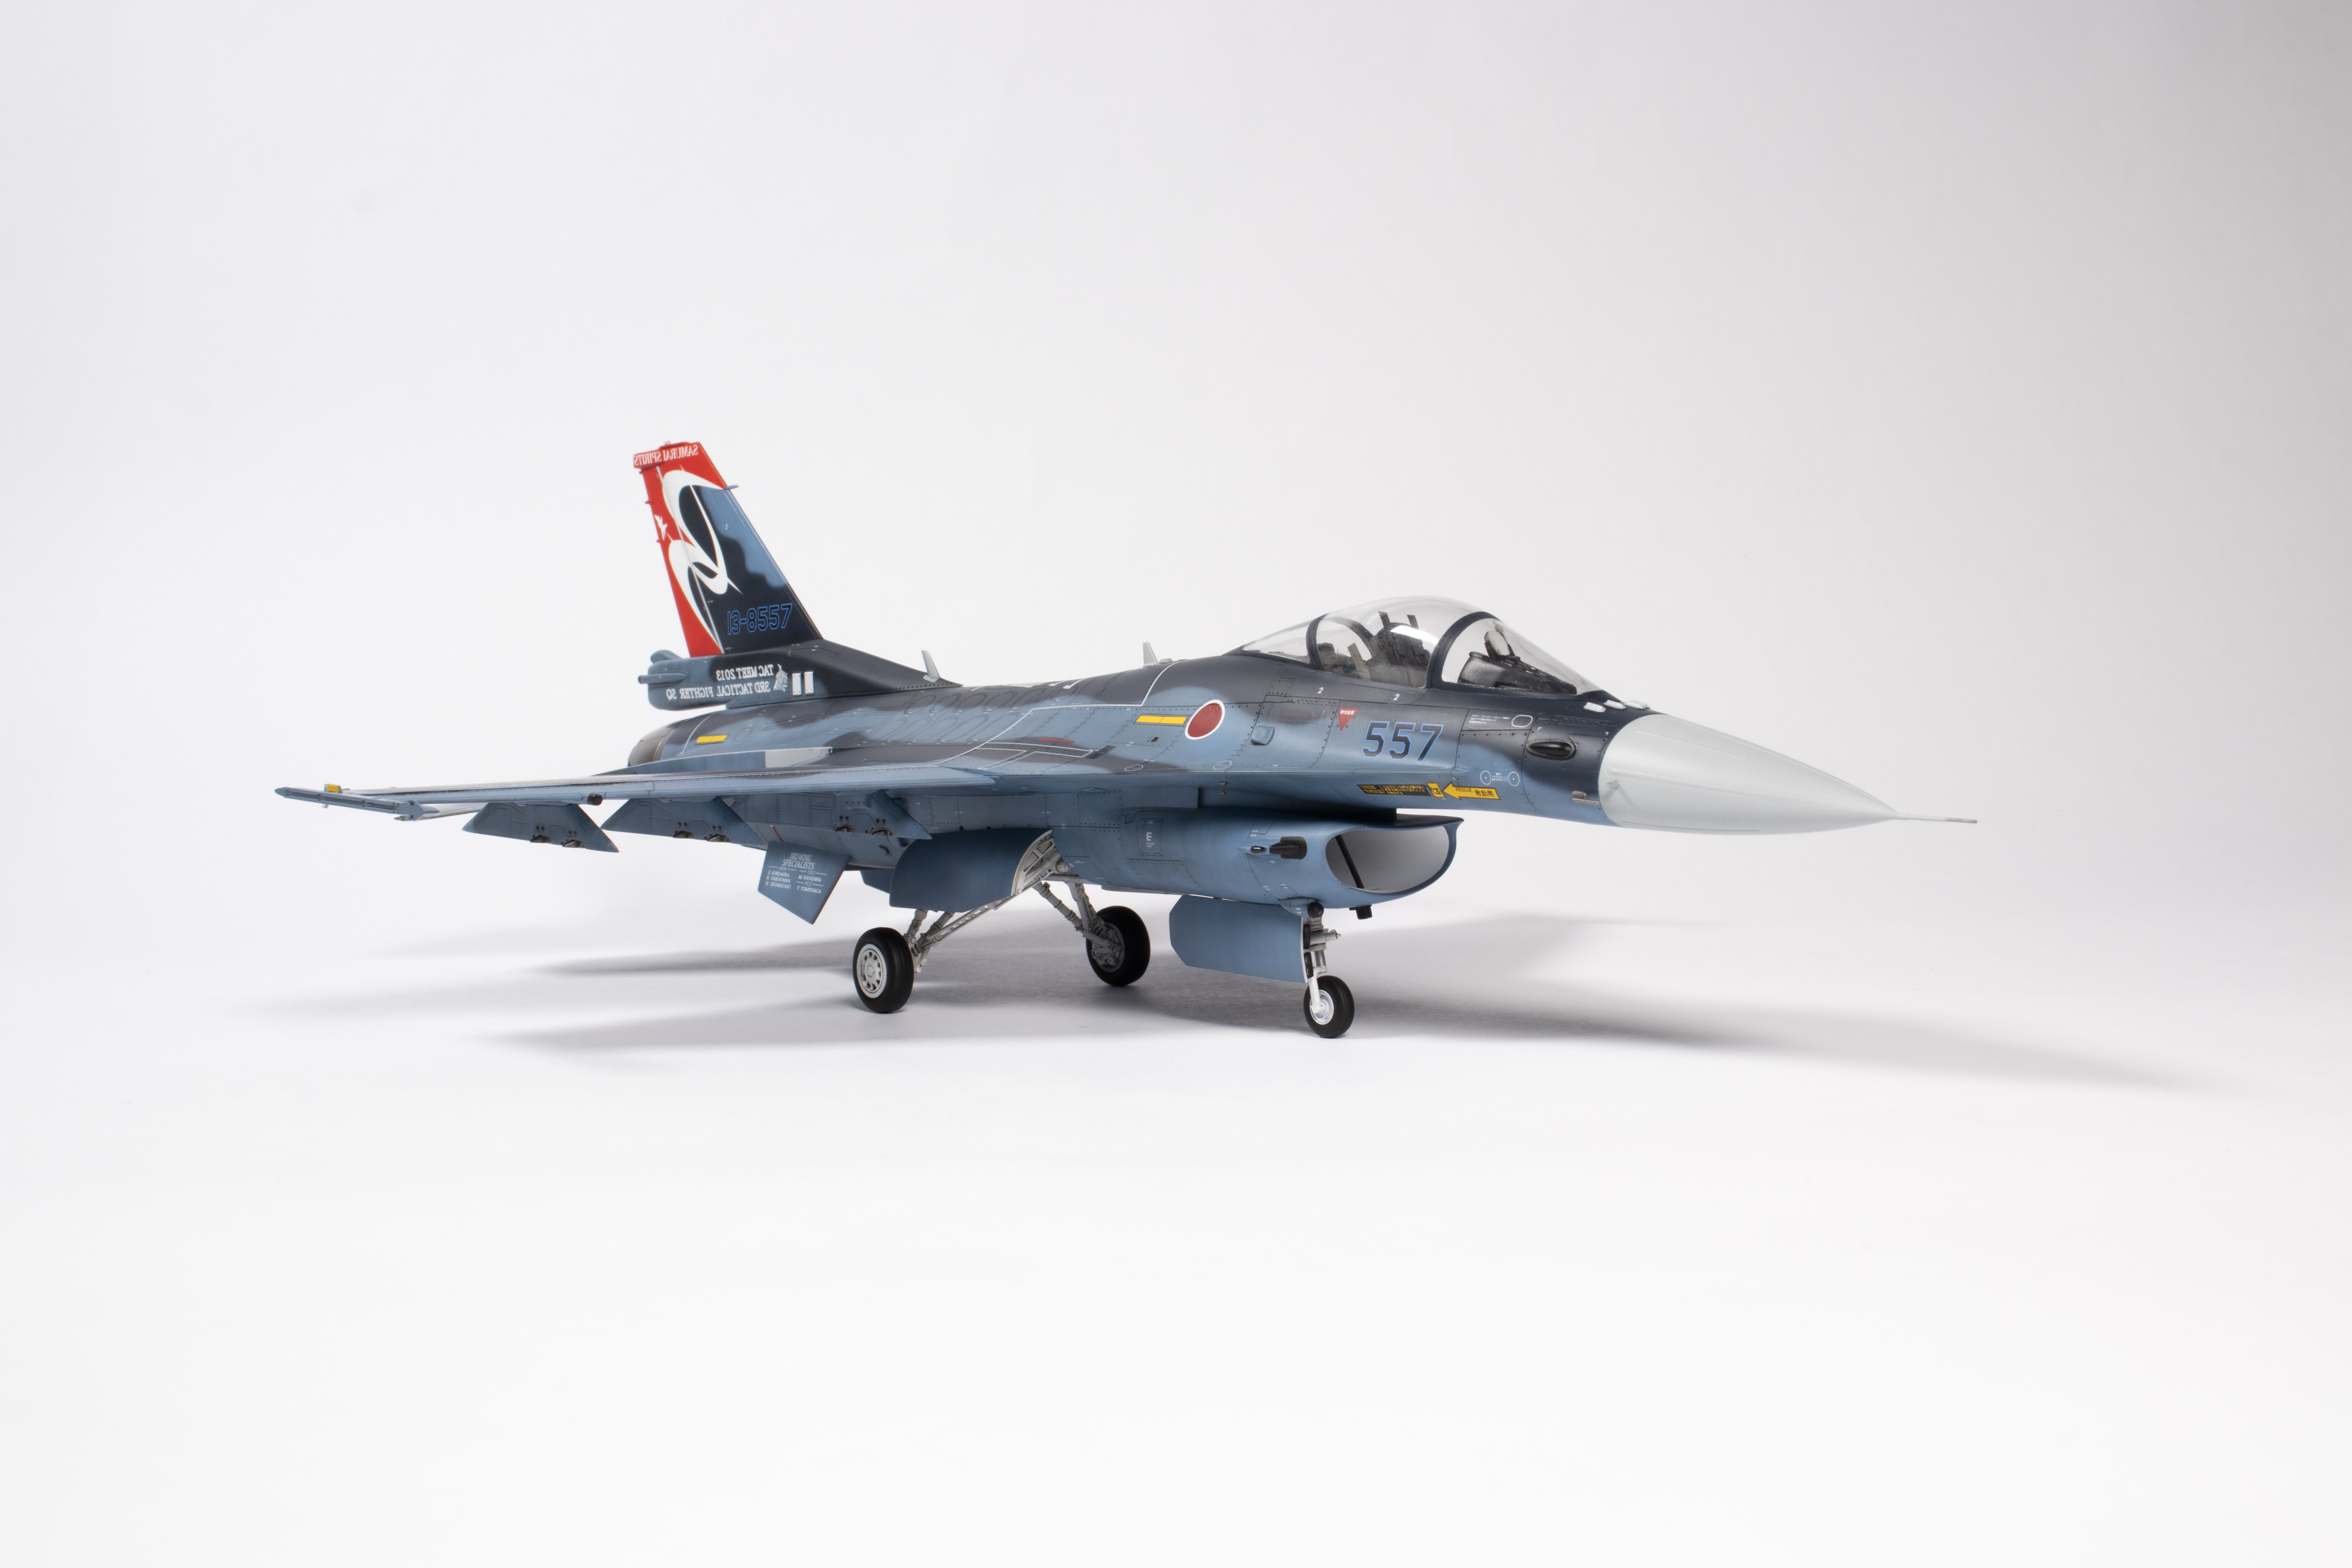
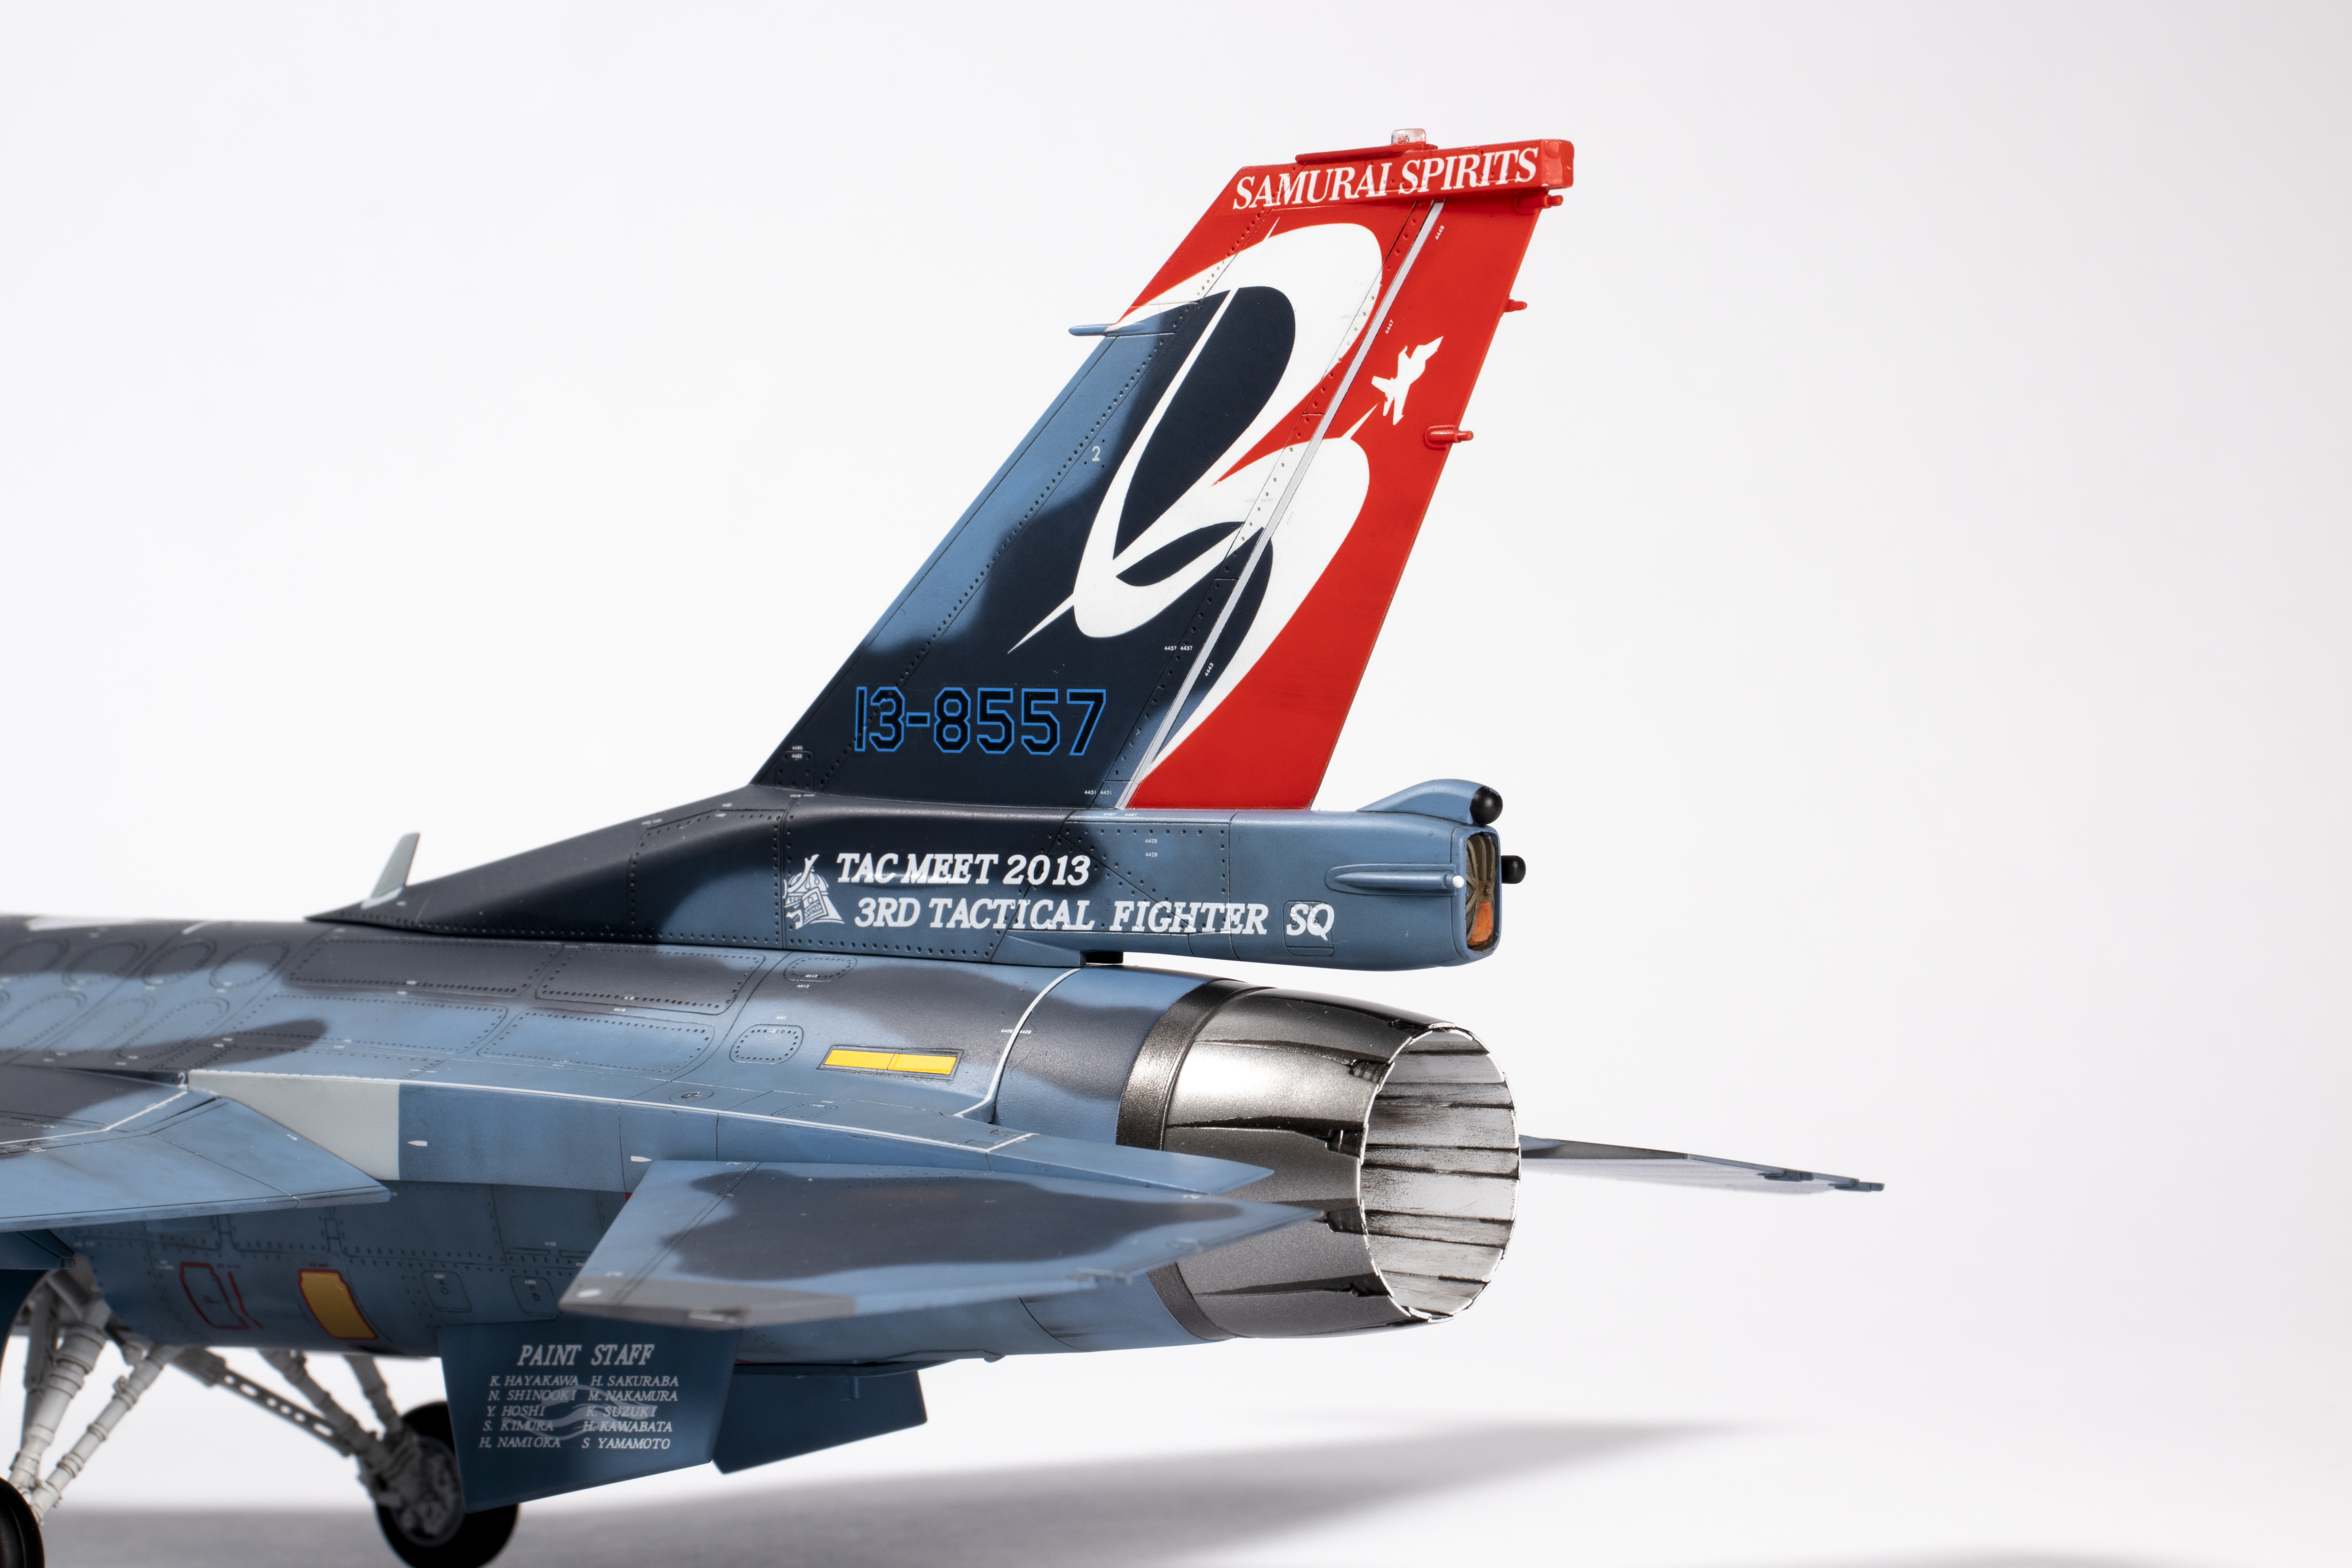
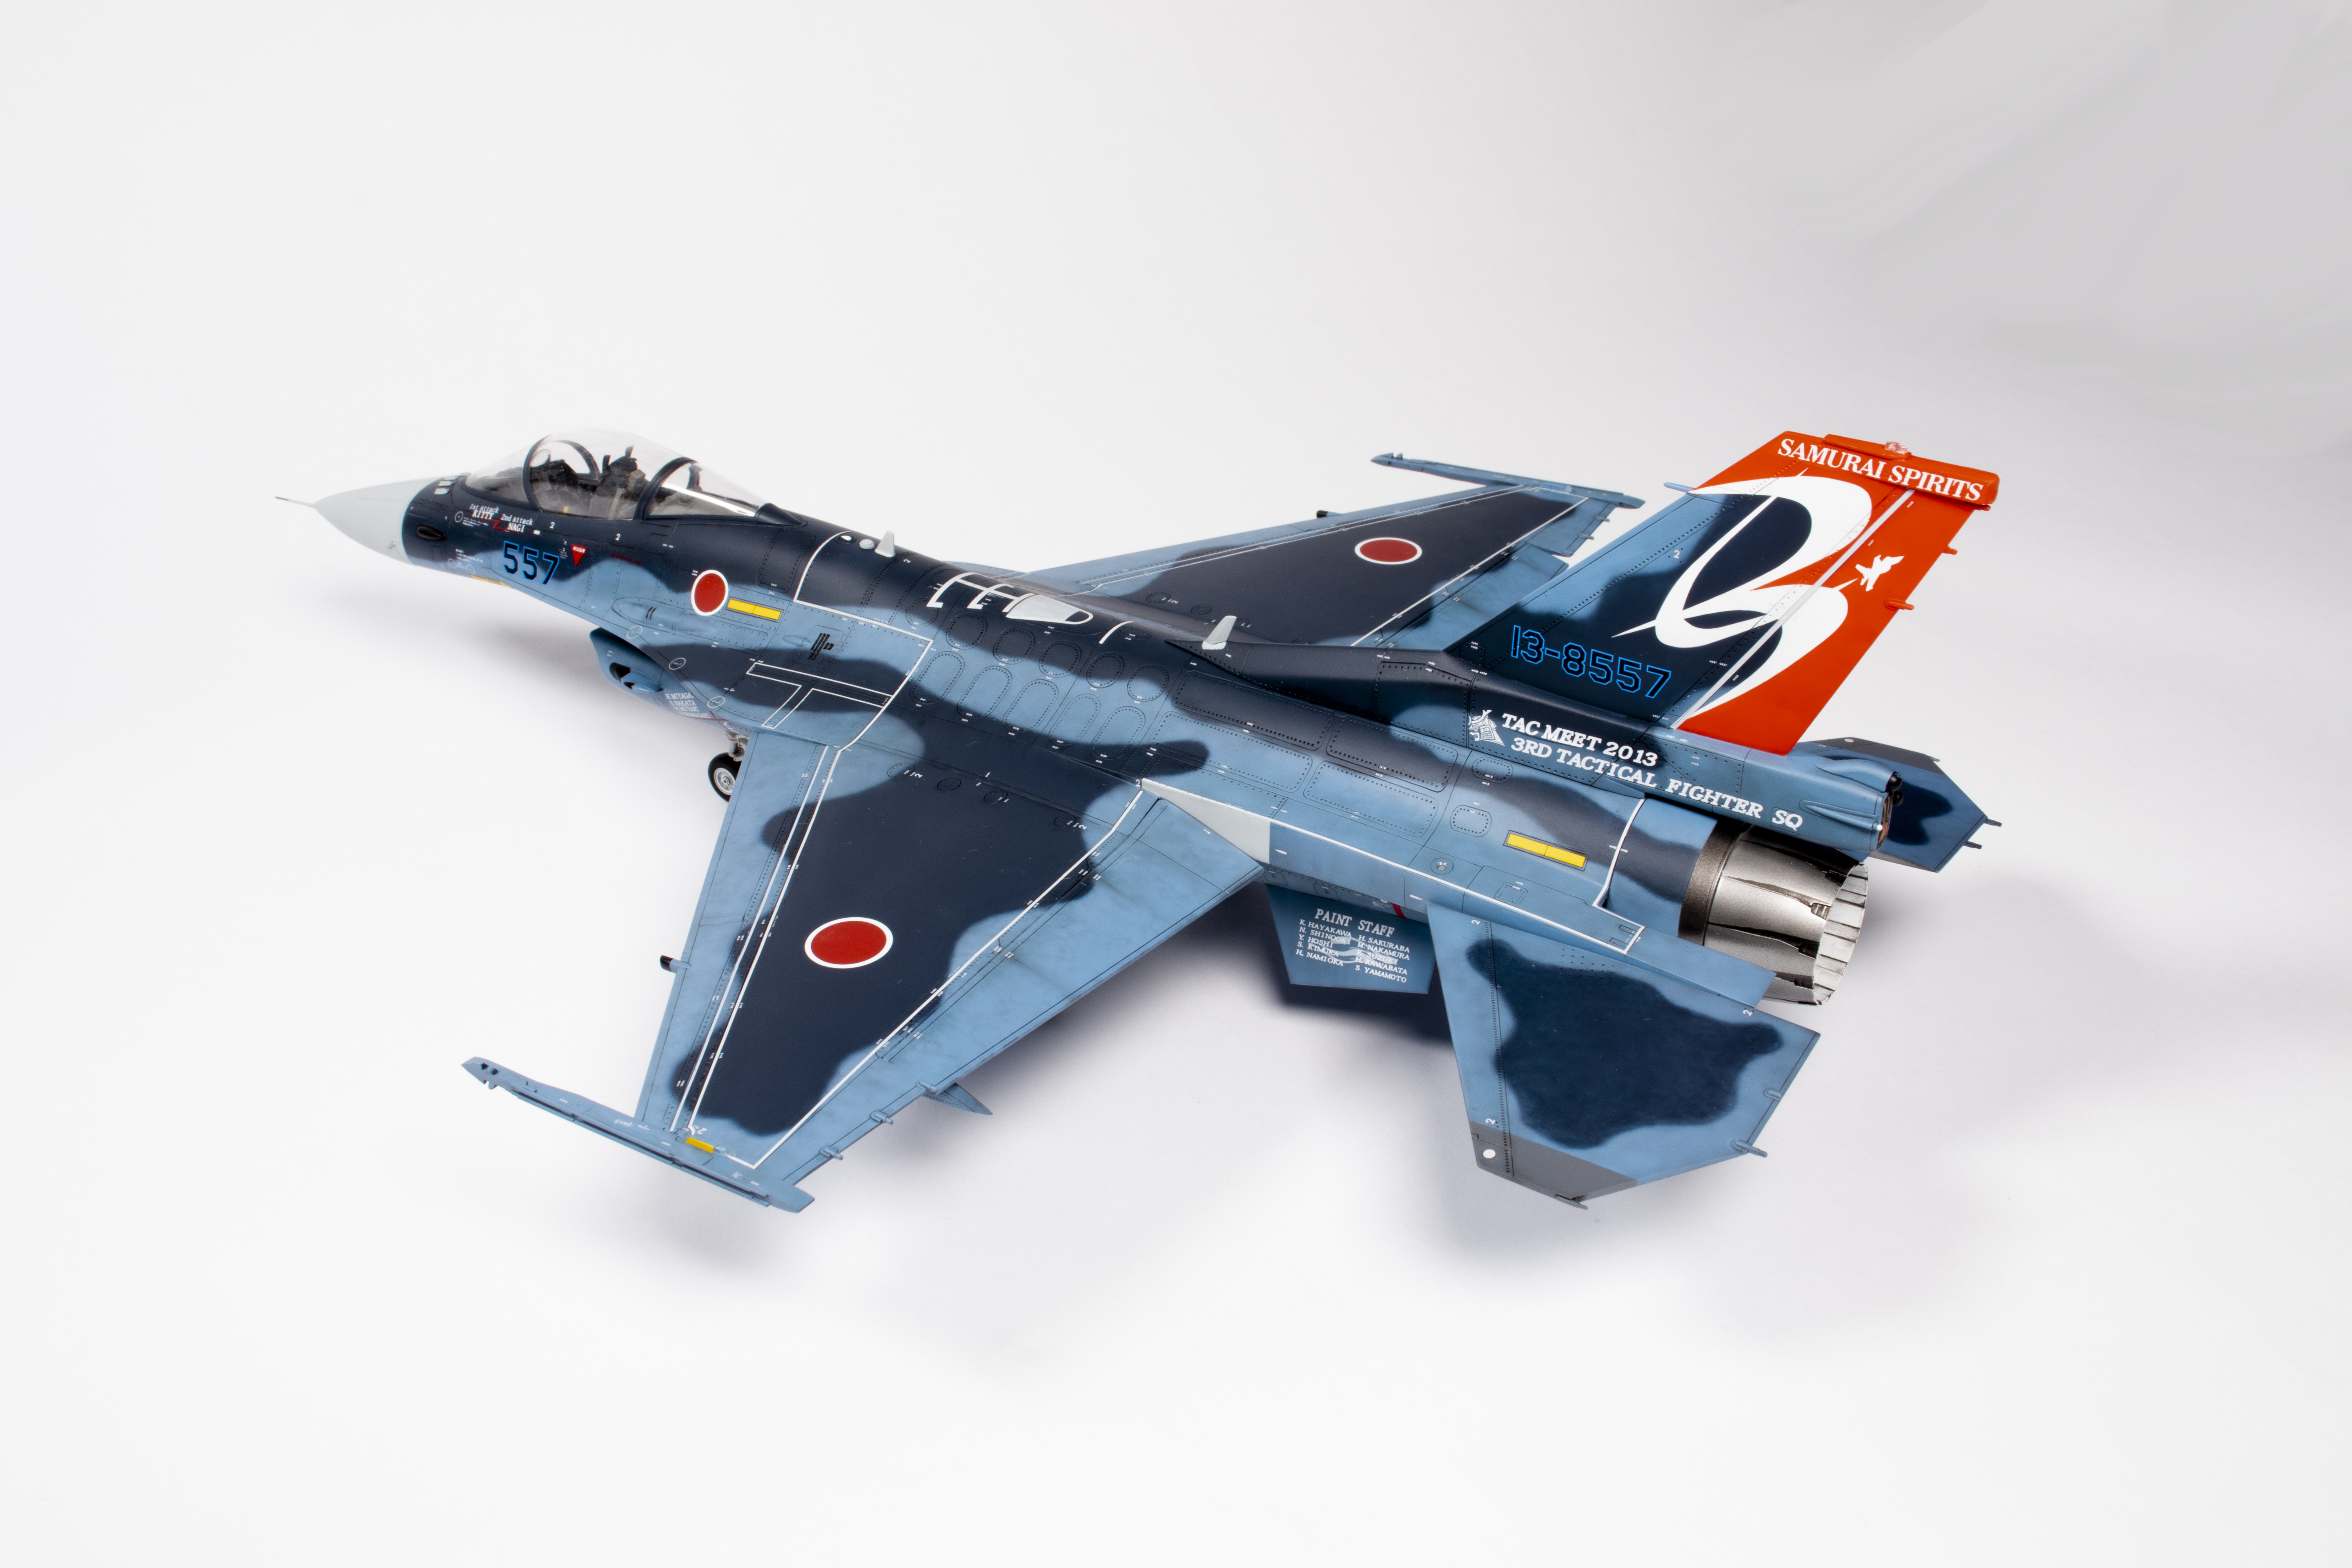
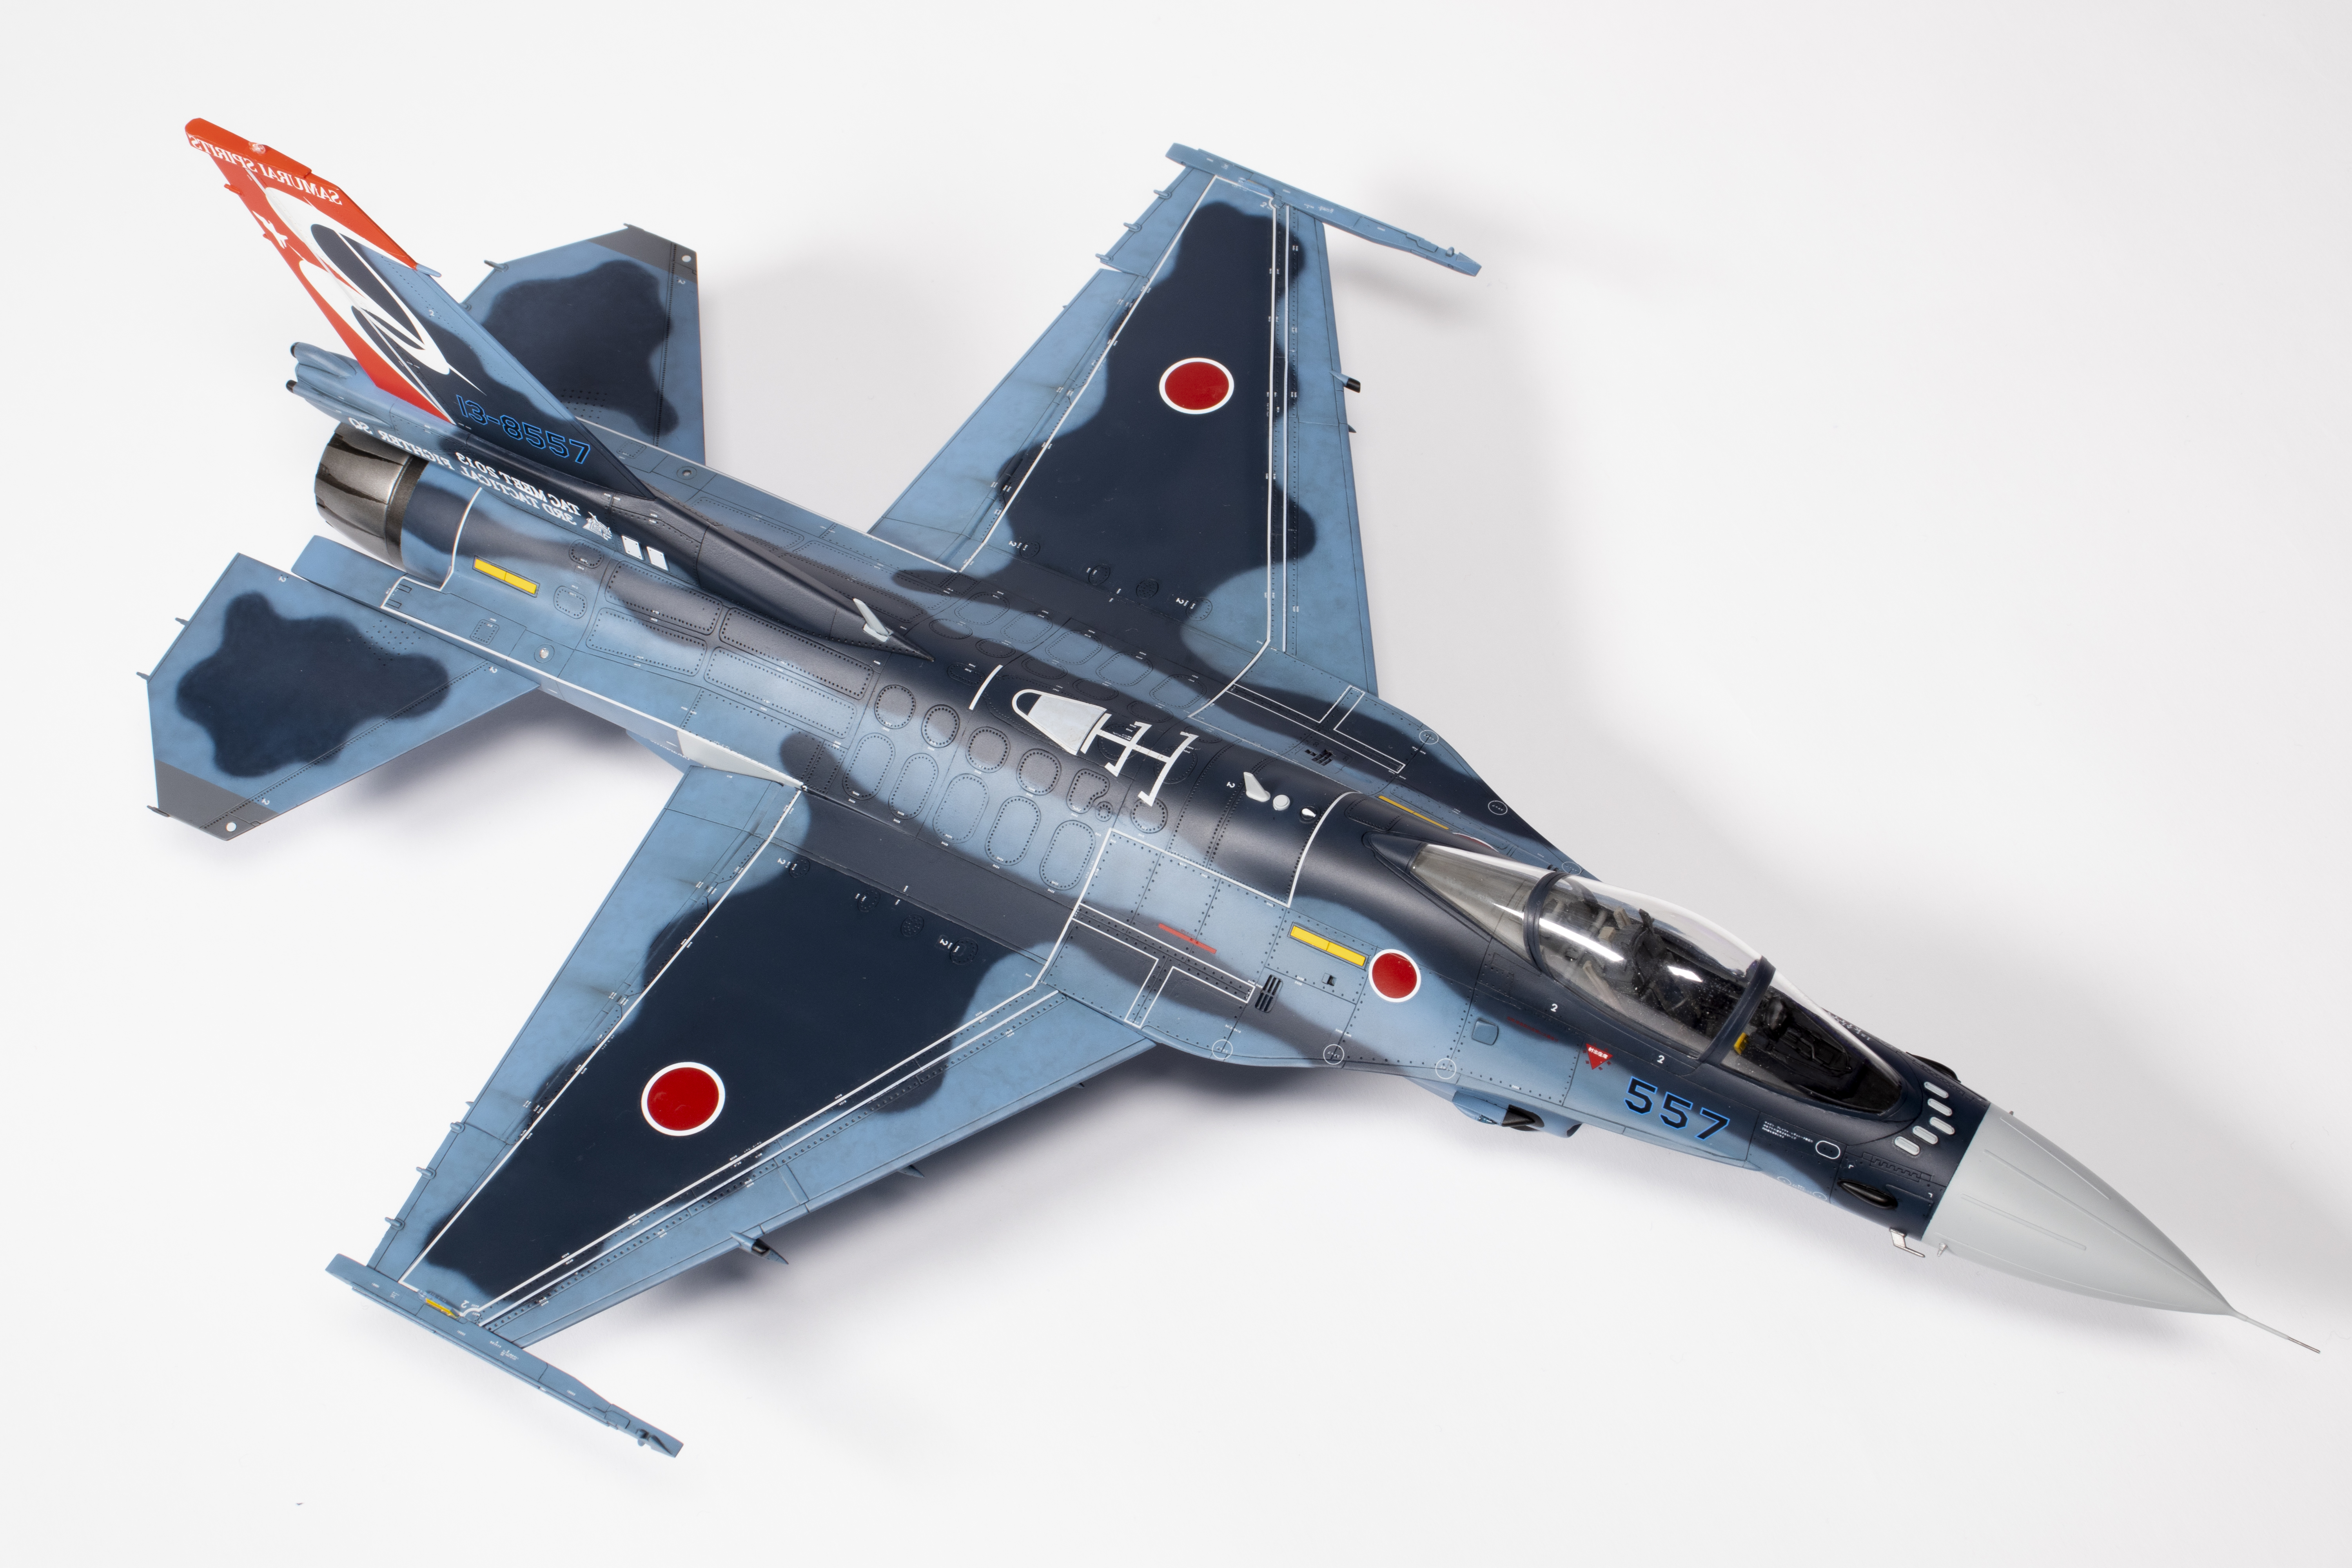
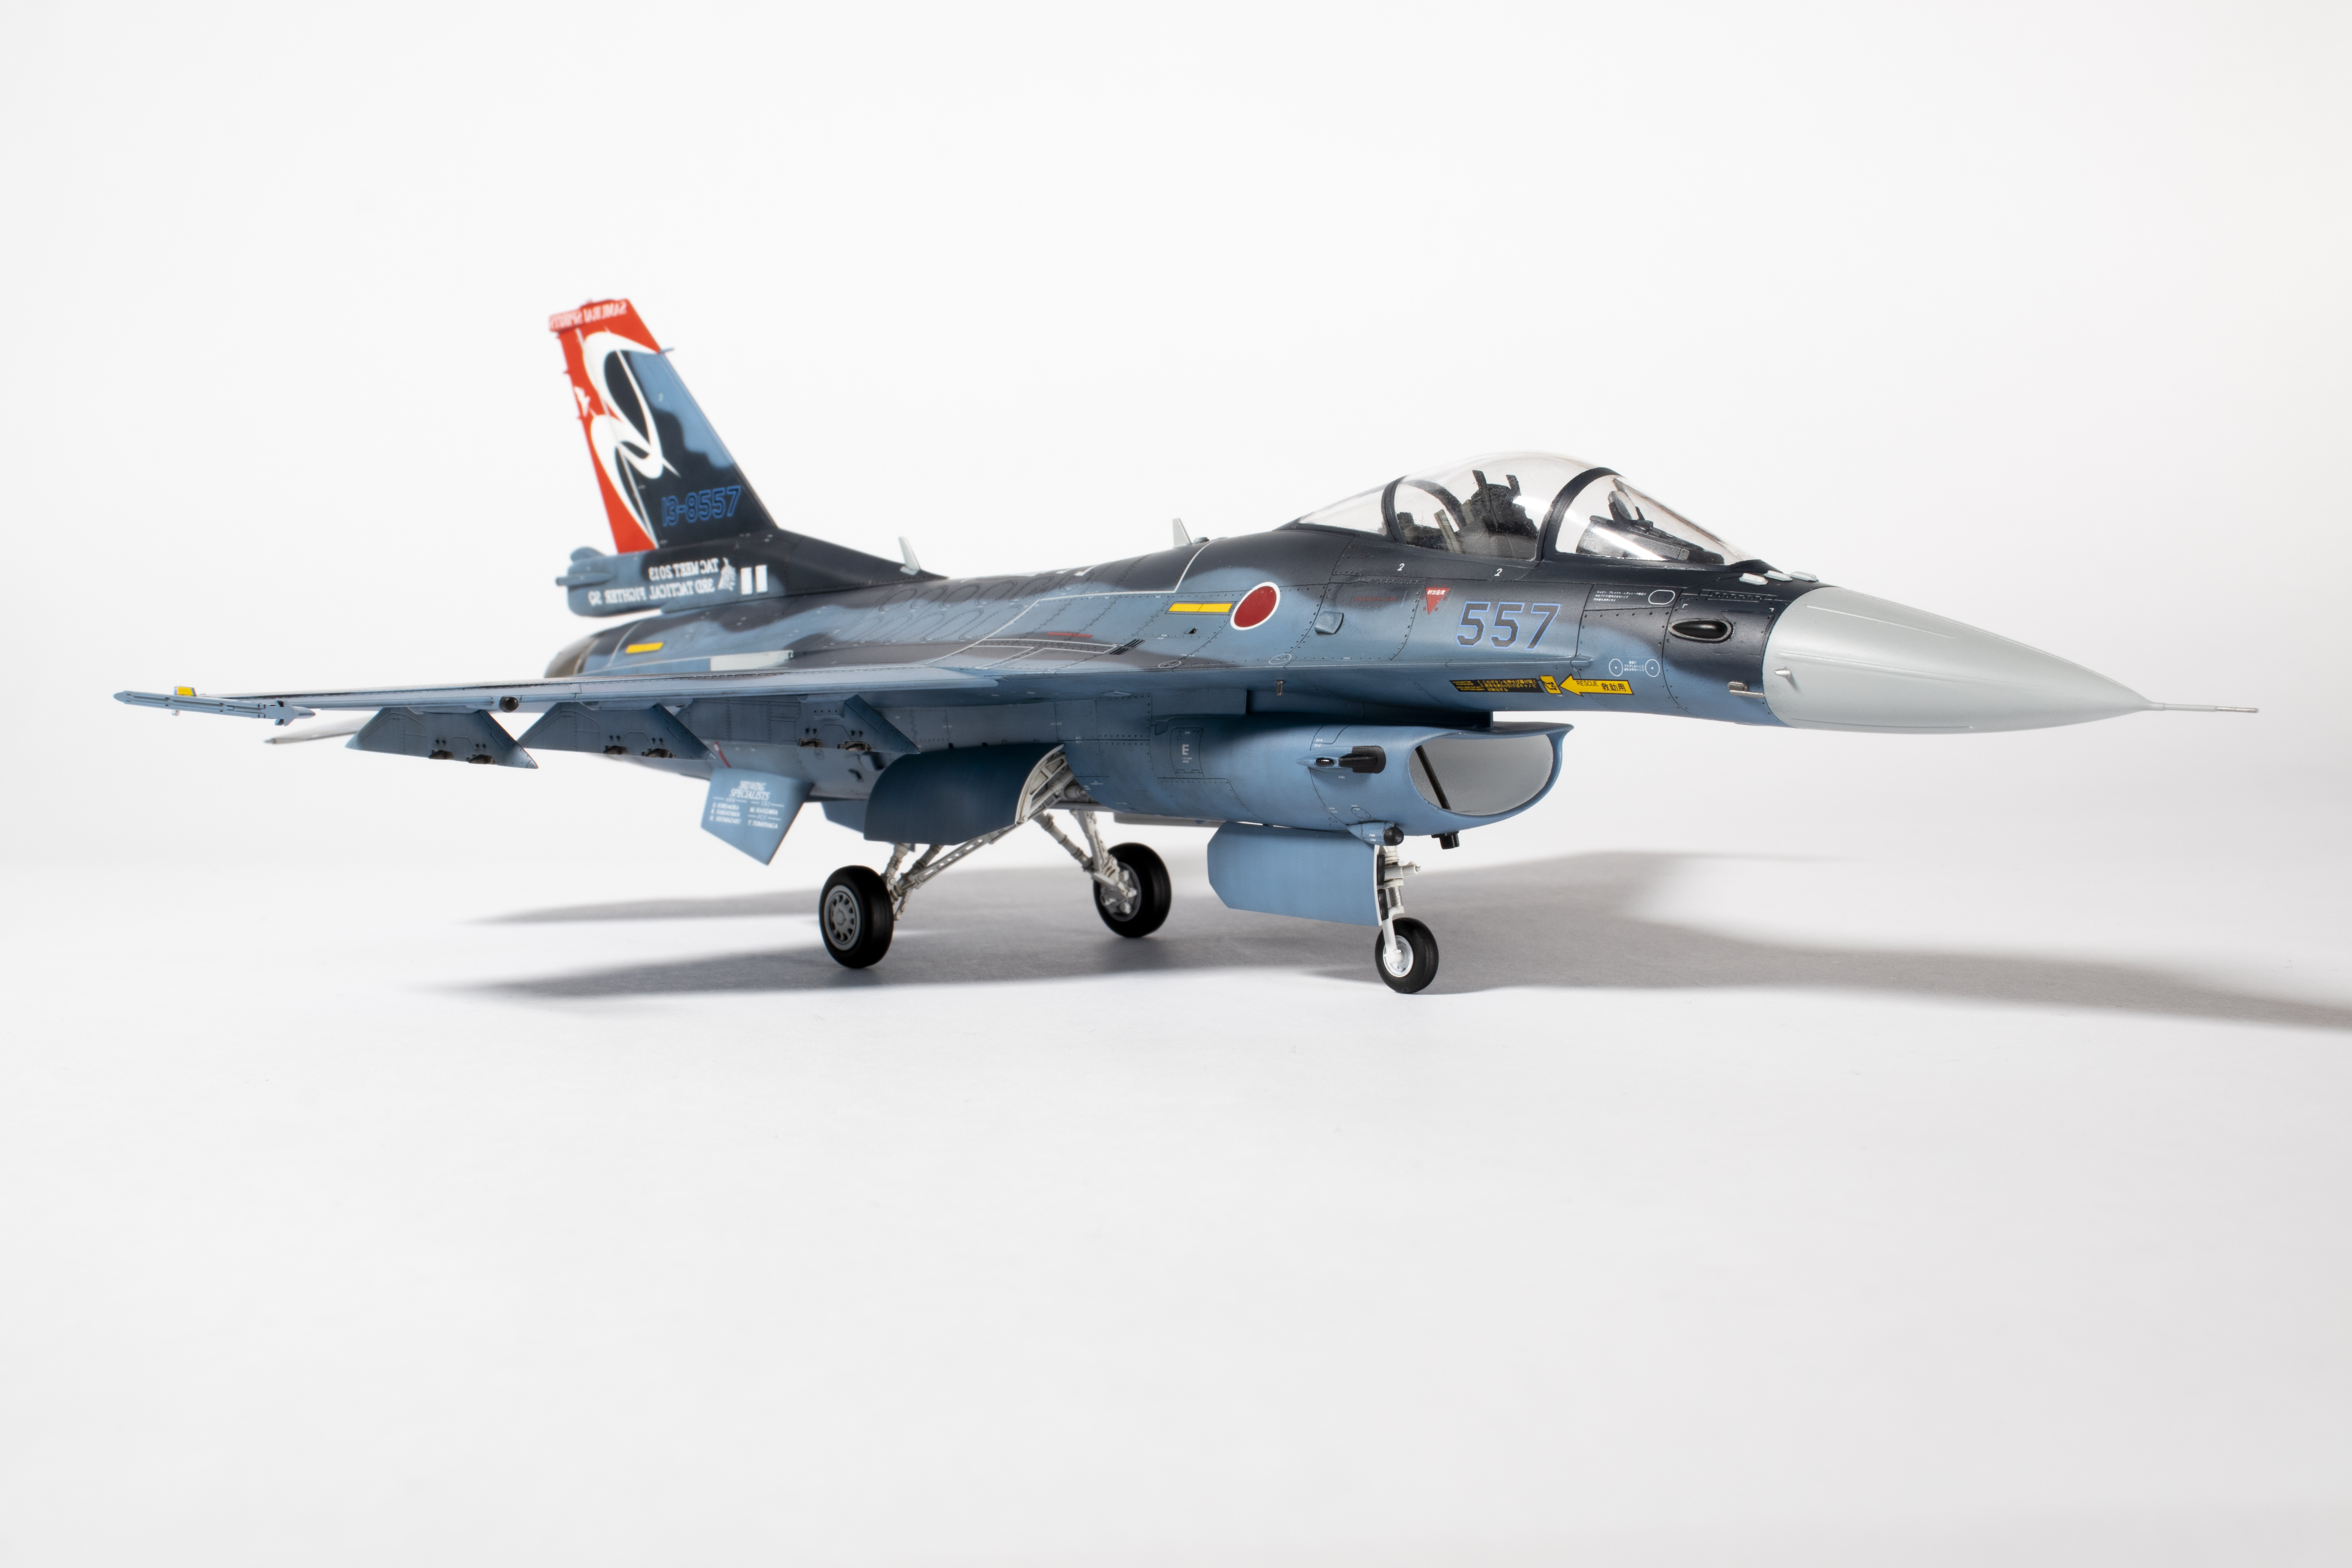
We might as well, then, talk about paint now. The F-2 only comes in one colour scheme, but what a scheme it is: two beautiful shades of blue offset by a smart grey radome. In recent years GSI Creos have come out with a dedicated set of Mr Color paint for this aircraft comprising two blues (C374 and C375) and light grey (C376) and the colours look excellent.
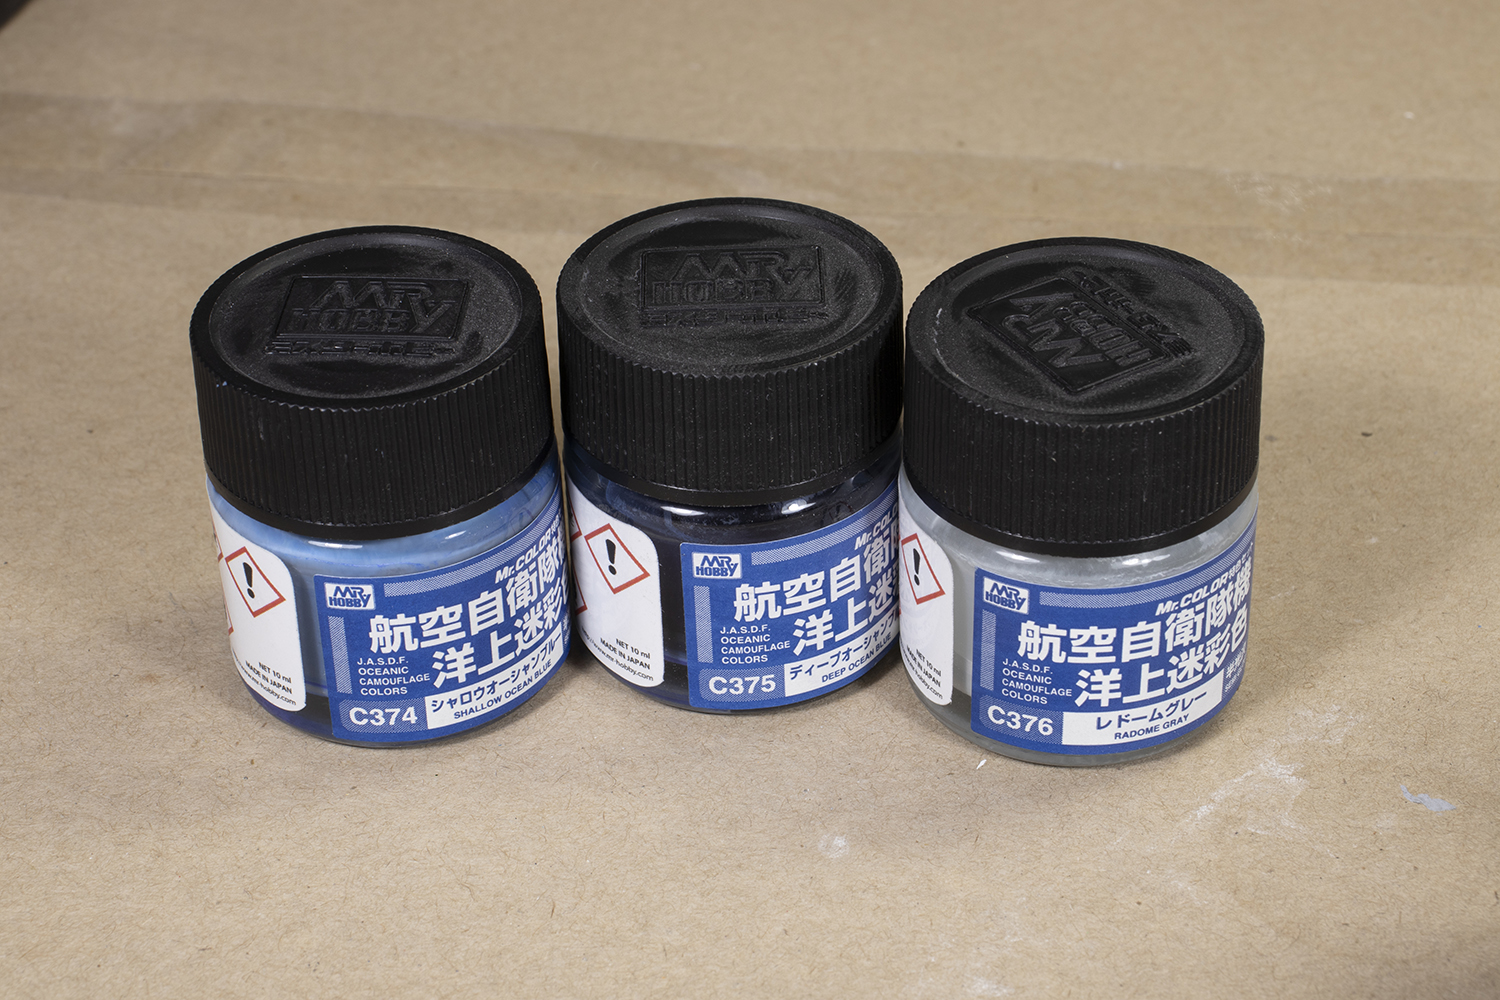
I thin them heavily with either Mr Leveling Thinner (MLT) or Mr Rapid Thinner, depending on how quickly I want them to flash off. Sometimes, as was the case here, I add some Mr Mild Retarder (about 10%) to paint thinned with MLT to increase the drying time and reduce tip dry on the airbrush. It doesn’t make much sense to talk about thinning ratios for Mr Color paint because they thicken up a lot in the bottle over time. The critical thing is that they should be highly thinned and the opacity built up with multiple layers.

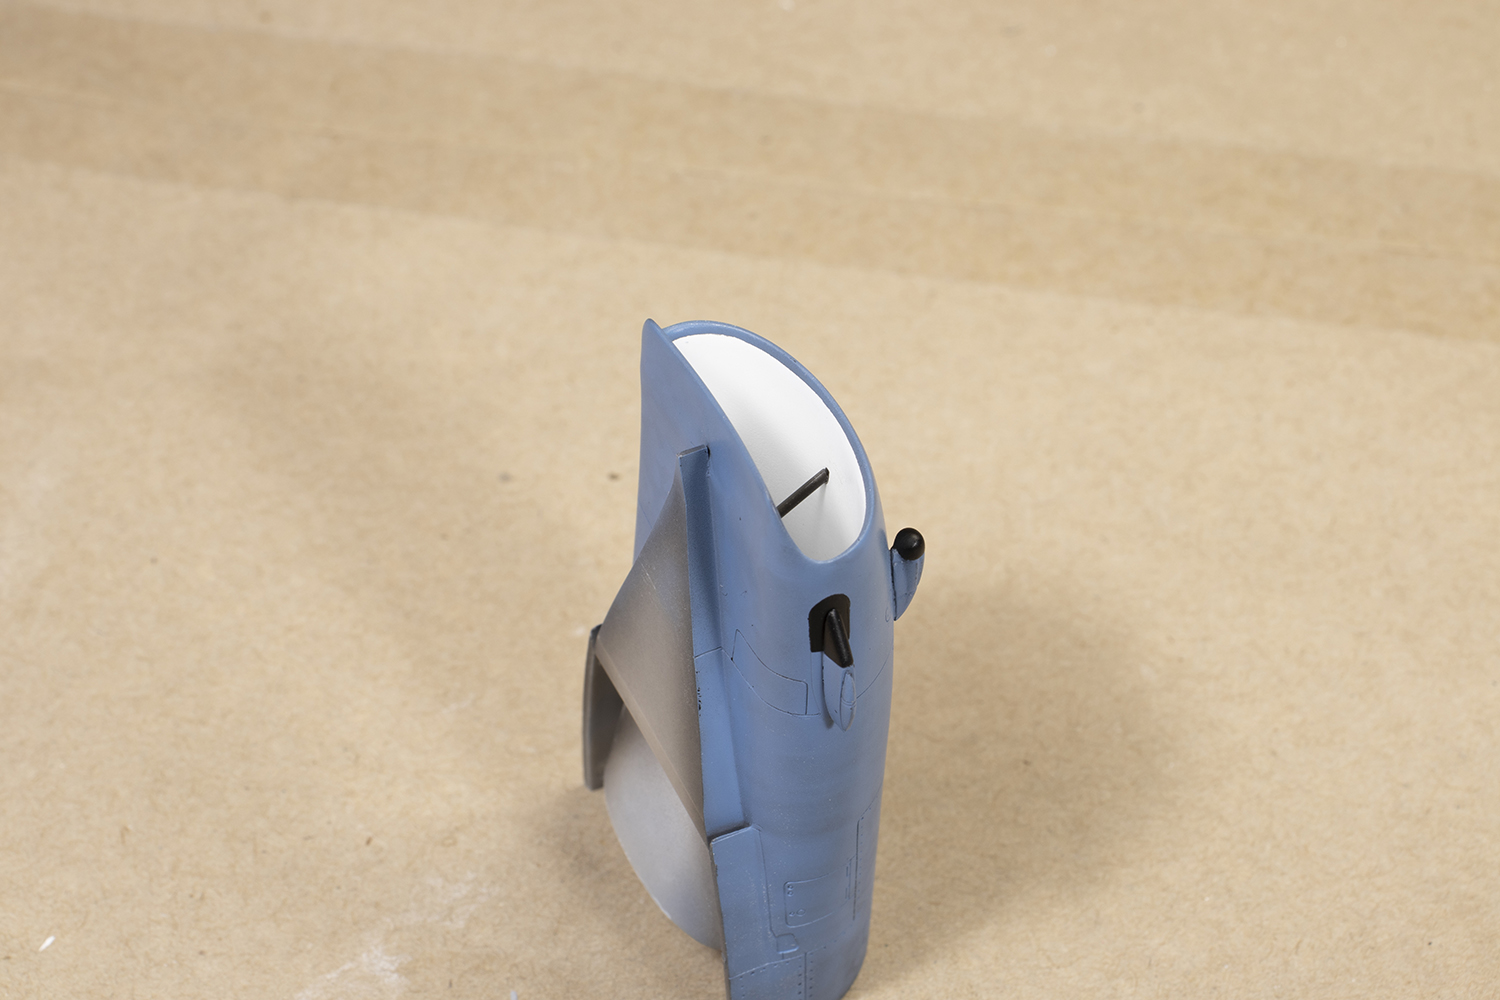

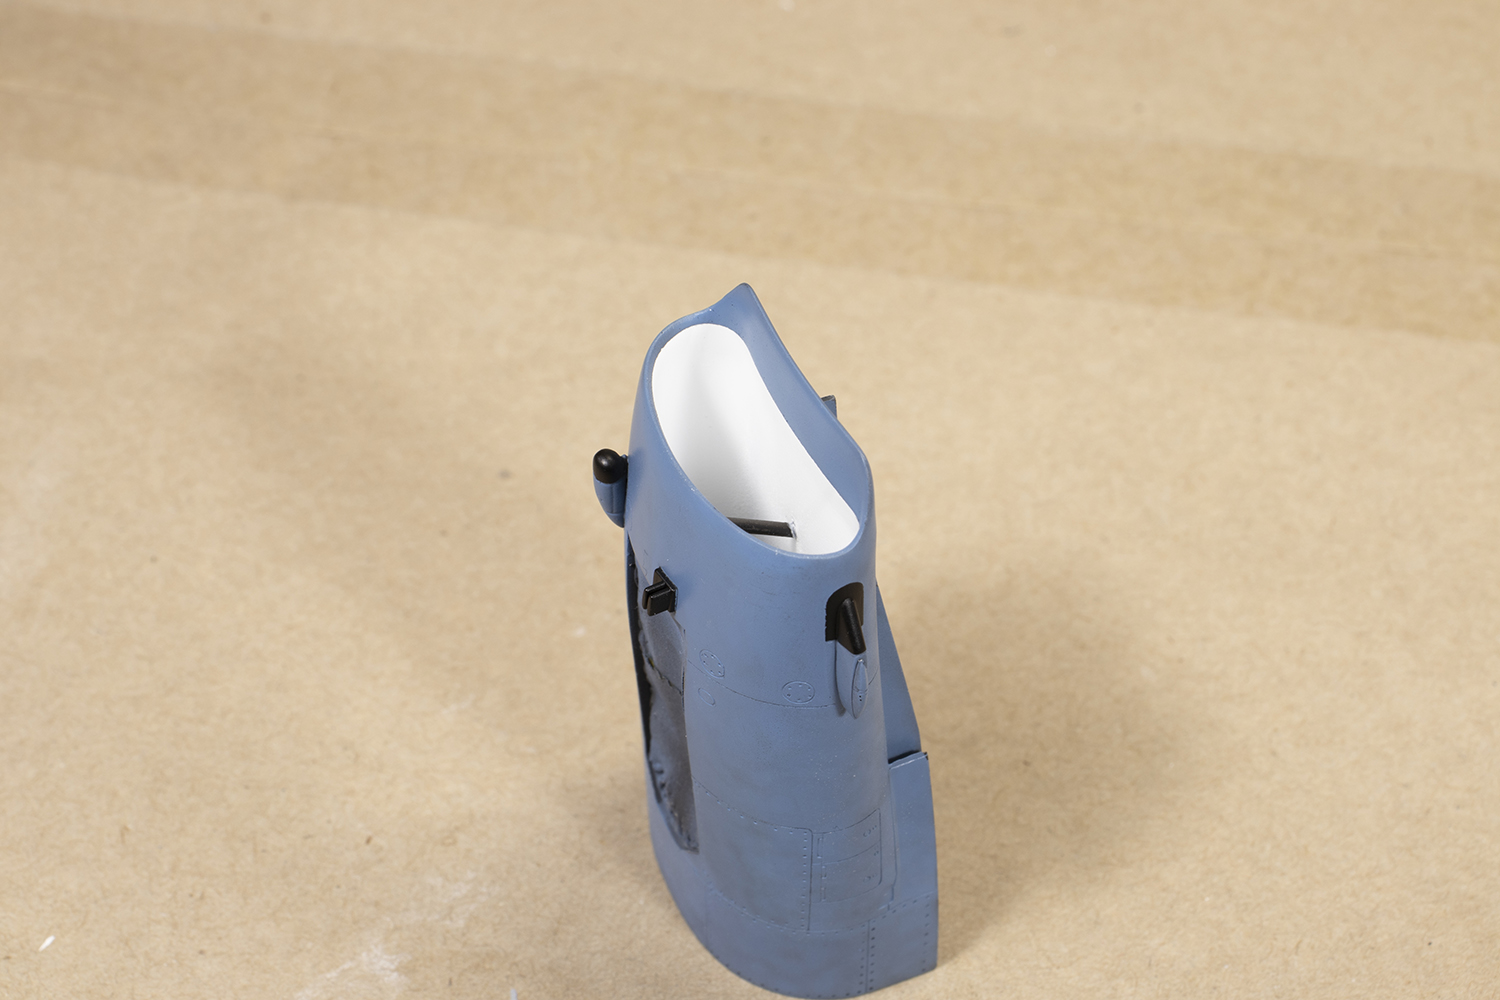
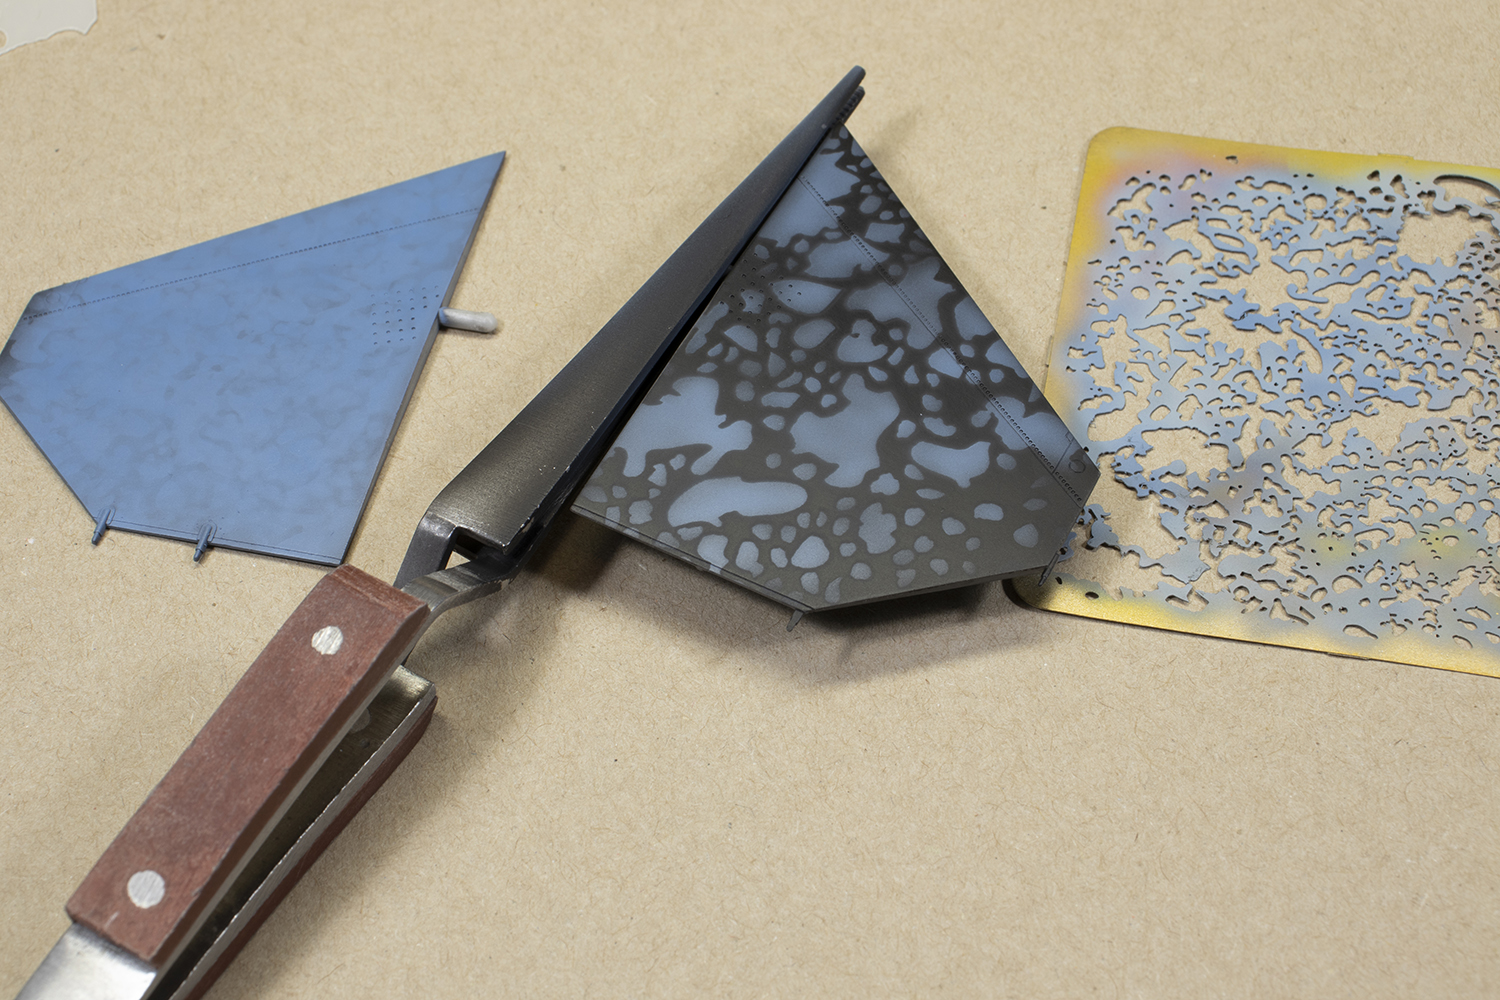
After very carefully masking the white intake trunking using some 0.4mm Aizu tape, the intake was painted in the same manner that the rest of the model would be later. First is a good wipe down with 100% Isopropyl Alcohol. I find that if I don’t do this, the paint is liable to lift when masked. I must have particularly oily fingers! Second, a layer of Mr Black Finishing Surfacer 1500 is airbrushed, also heavily thinned with MLT. I often then polish this out with some worn Infini 2500 sanding sponge. Next are multiple layers of the paint (in this case C374) sprayed with a freehand mottle or through a mask. I have several from Artoolfx, Uschi van der Rosten, AK Interactive and CAT4 models. Over this goes more very thin C374 airbrushed in a much broader pattern to blend the mottle together. The idea is to get some tonal variation by not completely covering the black undercoat. Various panels and antenna were masked off and sprayed with black.
To protect the paint from being battered as construction continued on the rest of the airframe, I airbrushed on some Tamiya X-22 Gloss (also heavily thinned with MLT) and then a semi-gloss coat so the oil weathering would stick.
The completed intake could then be attached to the fuselage. It needed to be blended in with fine Infini sanding sticks. This removed a little of the paint I had just laid down, but I was expecting it and the beauty of the Mr Color lacquer is that it feathers very well when sanded, as long as you allow it to dry, and is easily retouched.


The horizontal and vertical tail surfaces remained separate to facilitate a smoother paint finish and easier decalling.
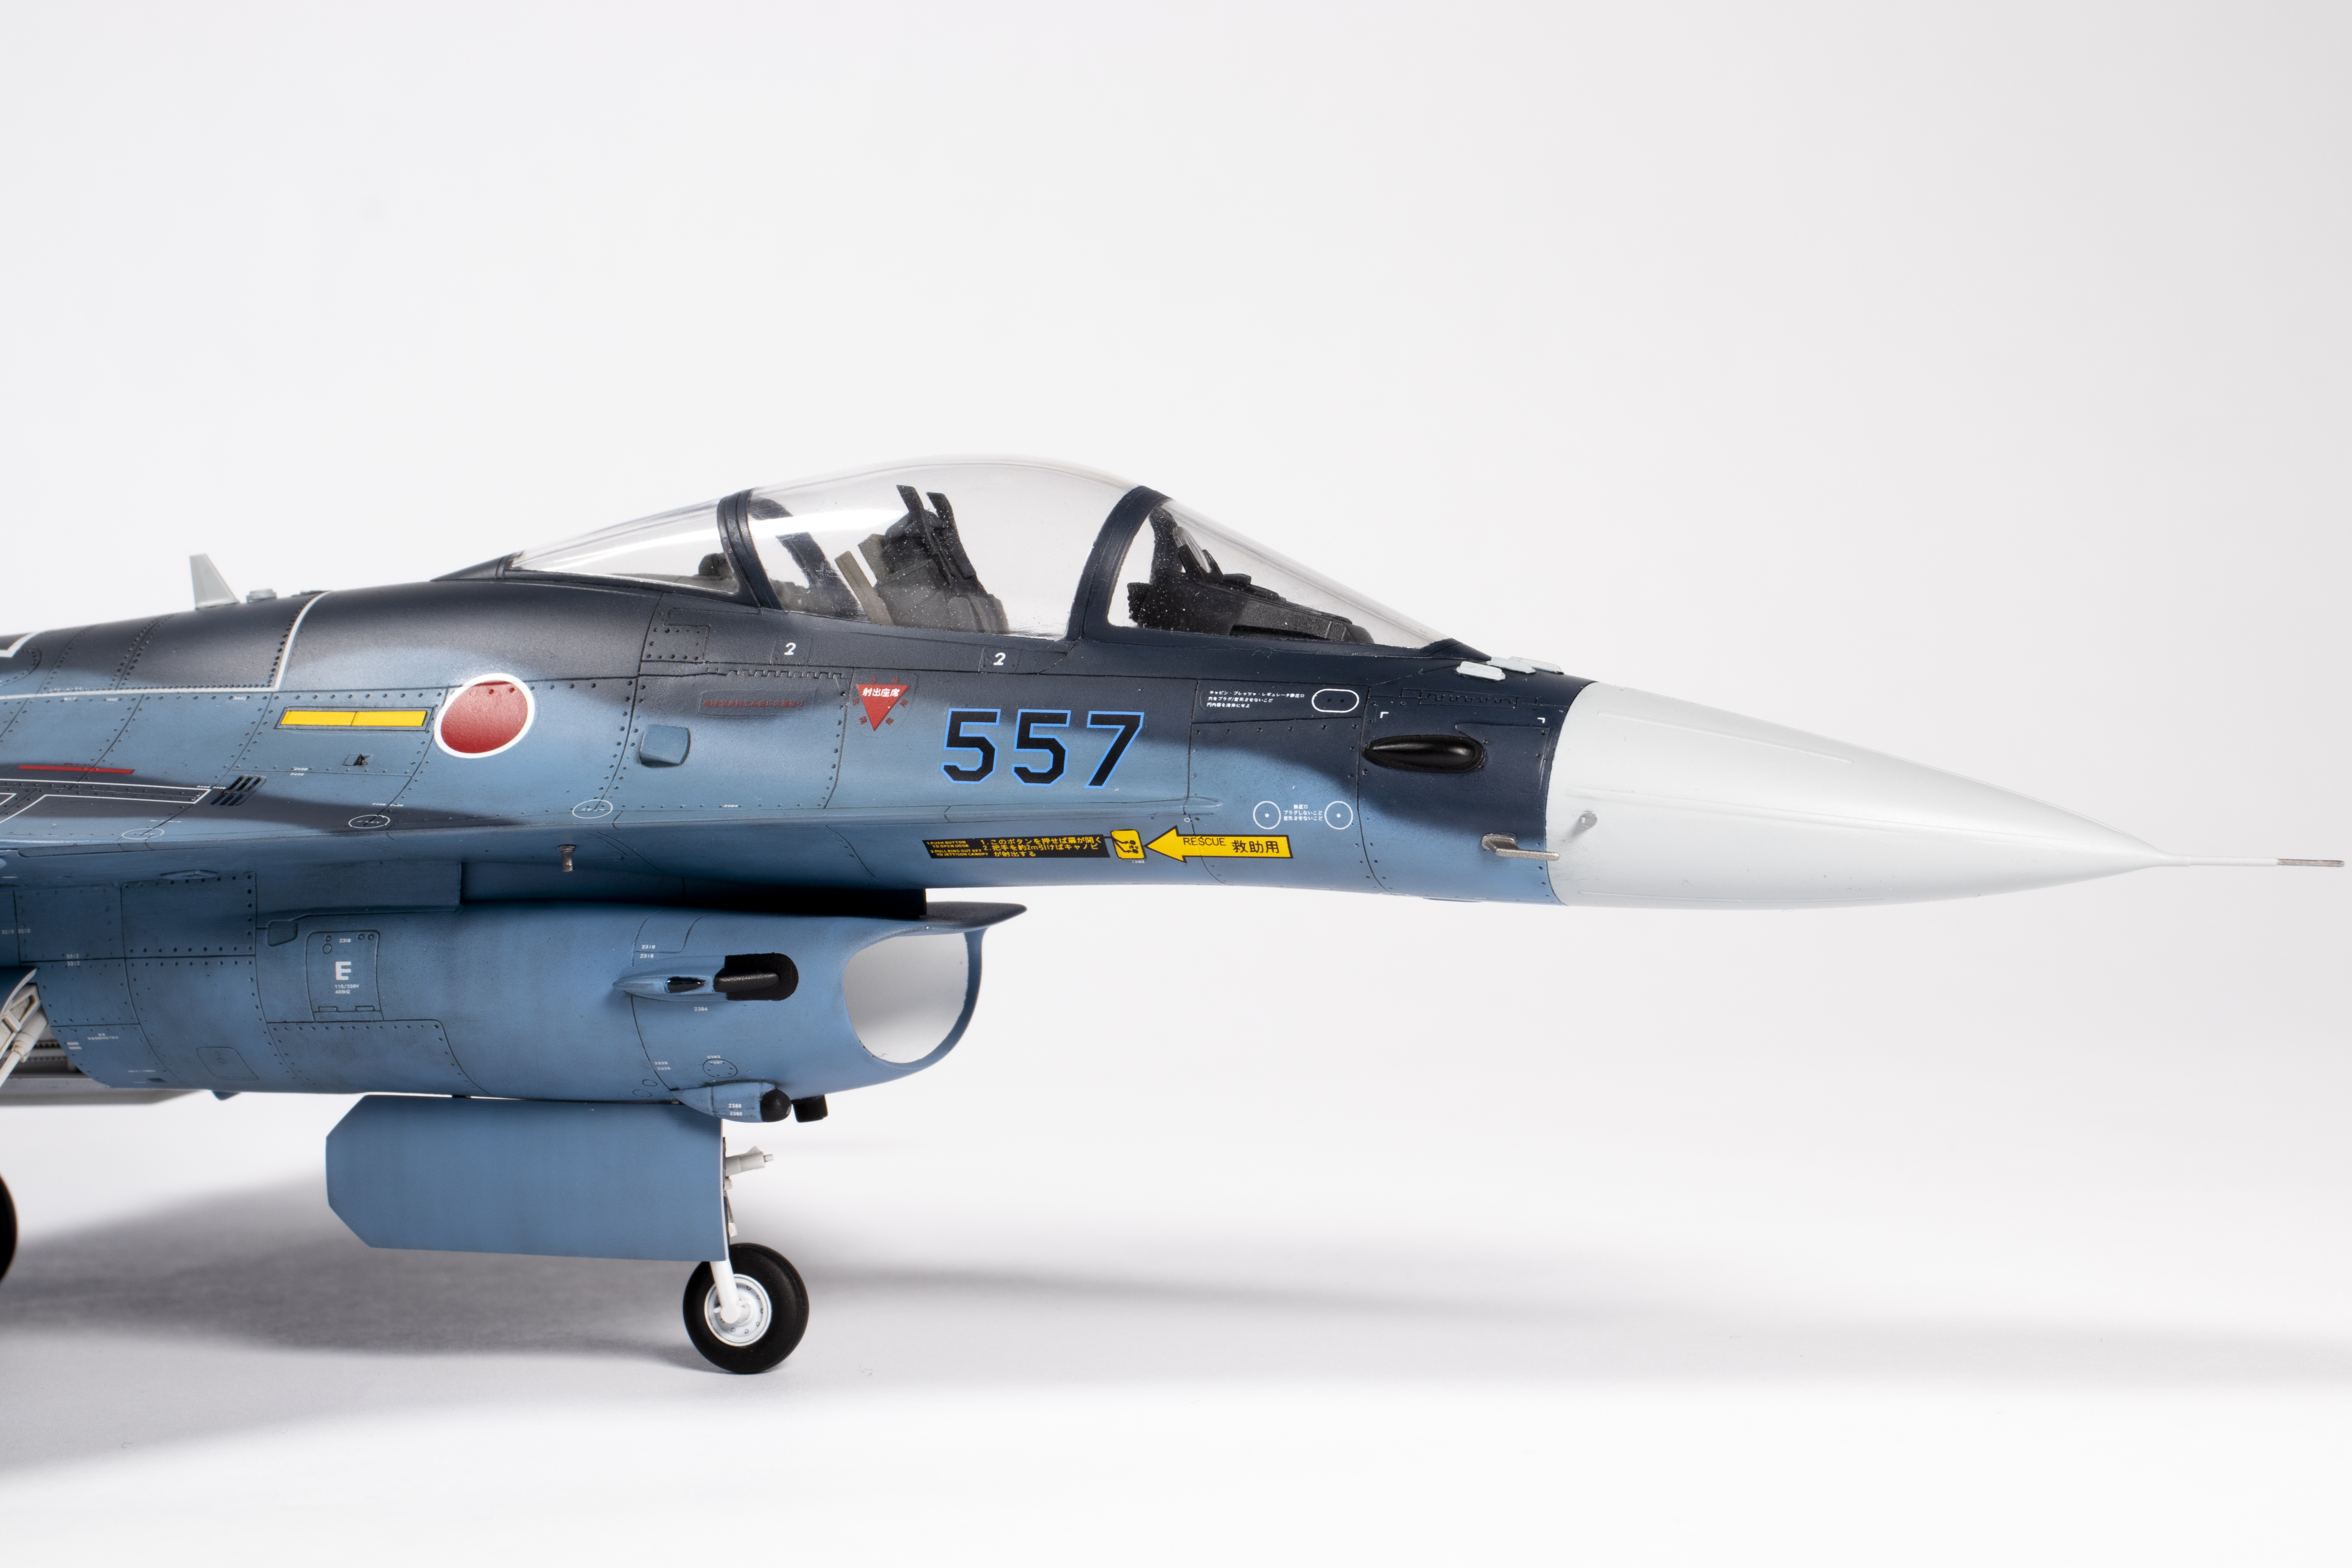
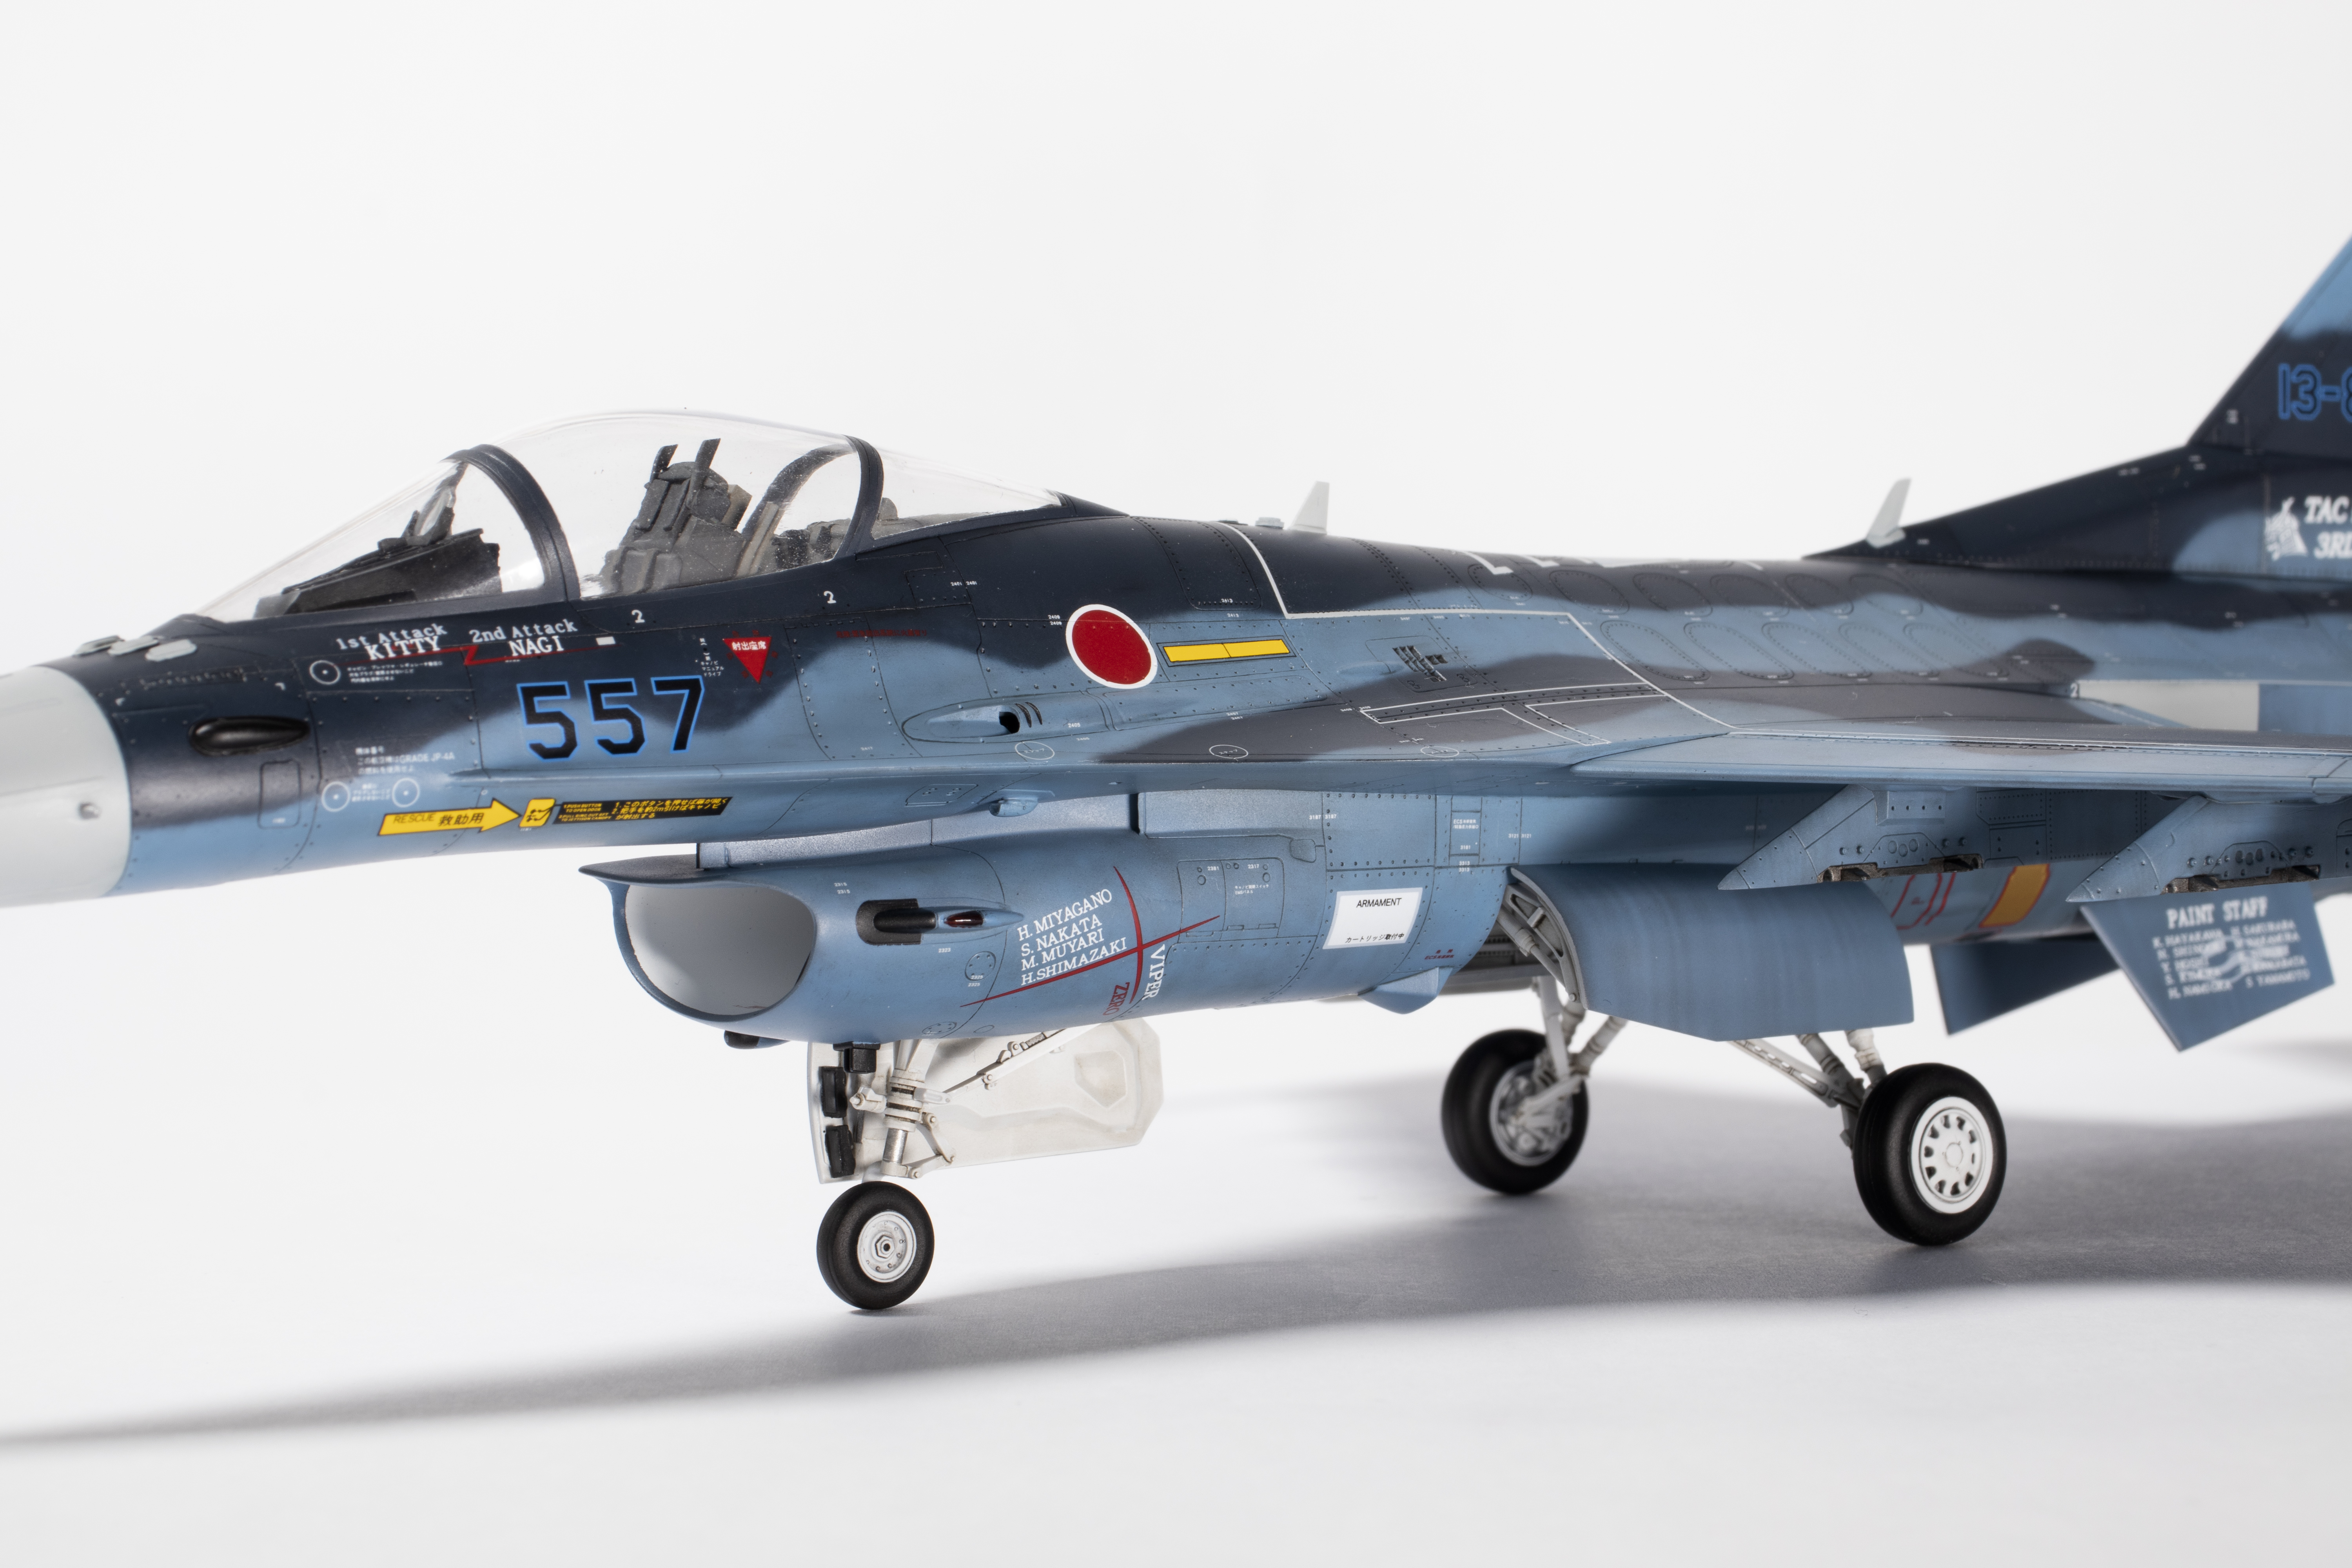
Before I could paint the rest of the airframe, I needed to fit the canopy. I messed up here and misaligned the joint between the windscreen and the opening section, which is a shame. The fit is actually rather good, but I decided the shut lines were too wide, and so I filled them with super glue and rescribed them and the hinges using a needle in a pin vise. This resulted in much neater panel lines.

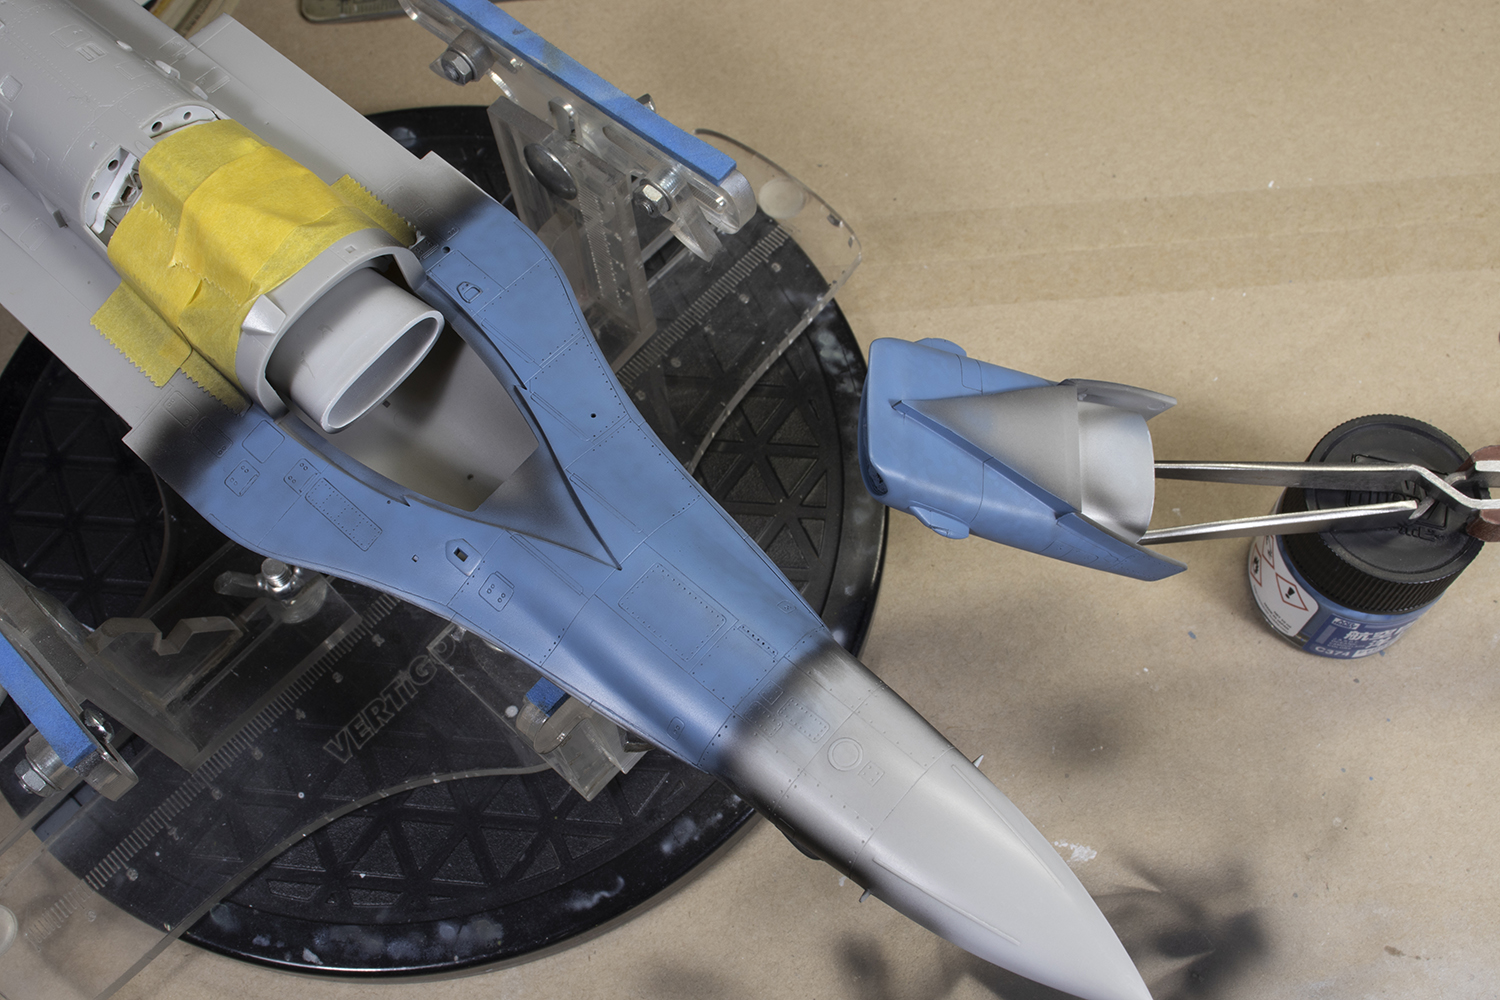
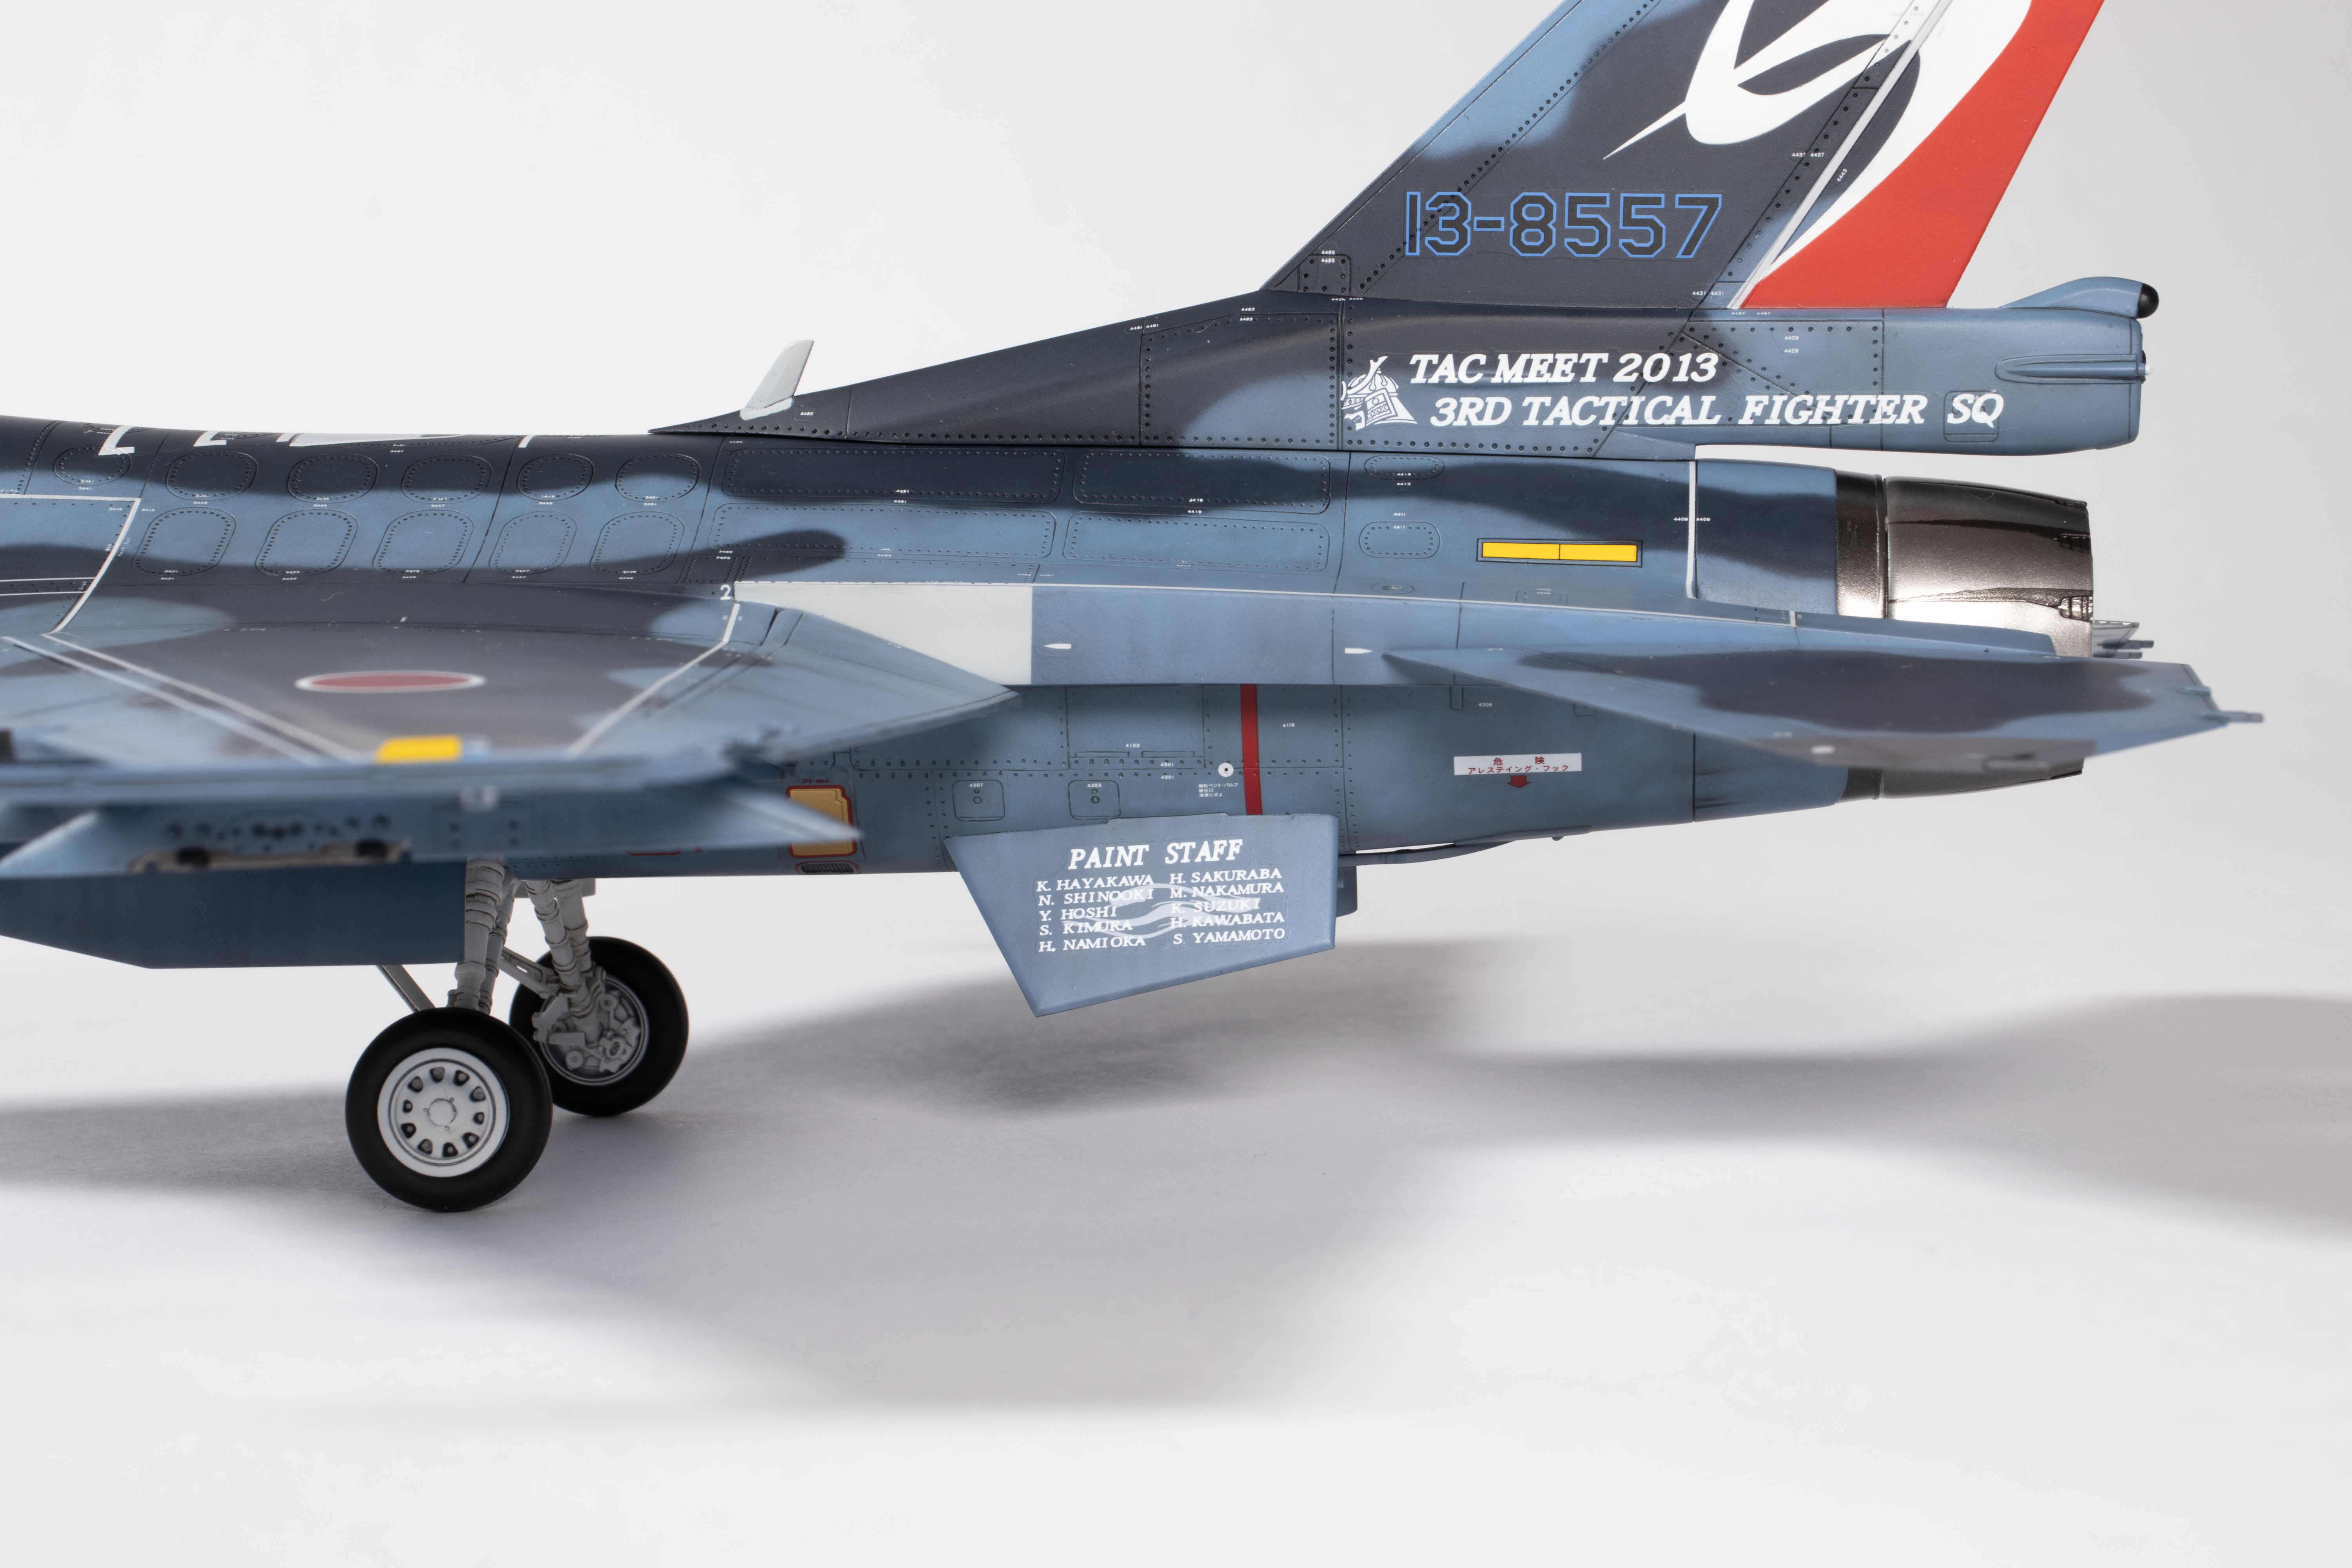
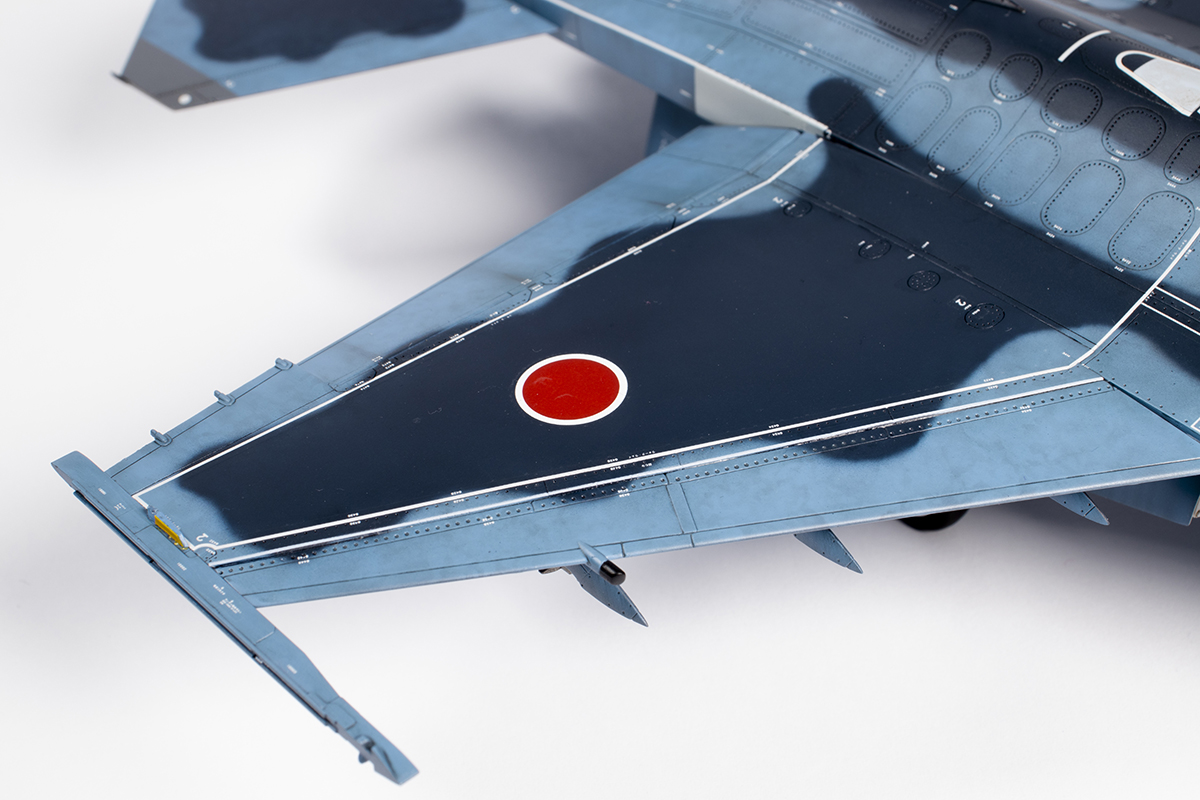
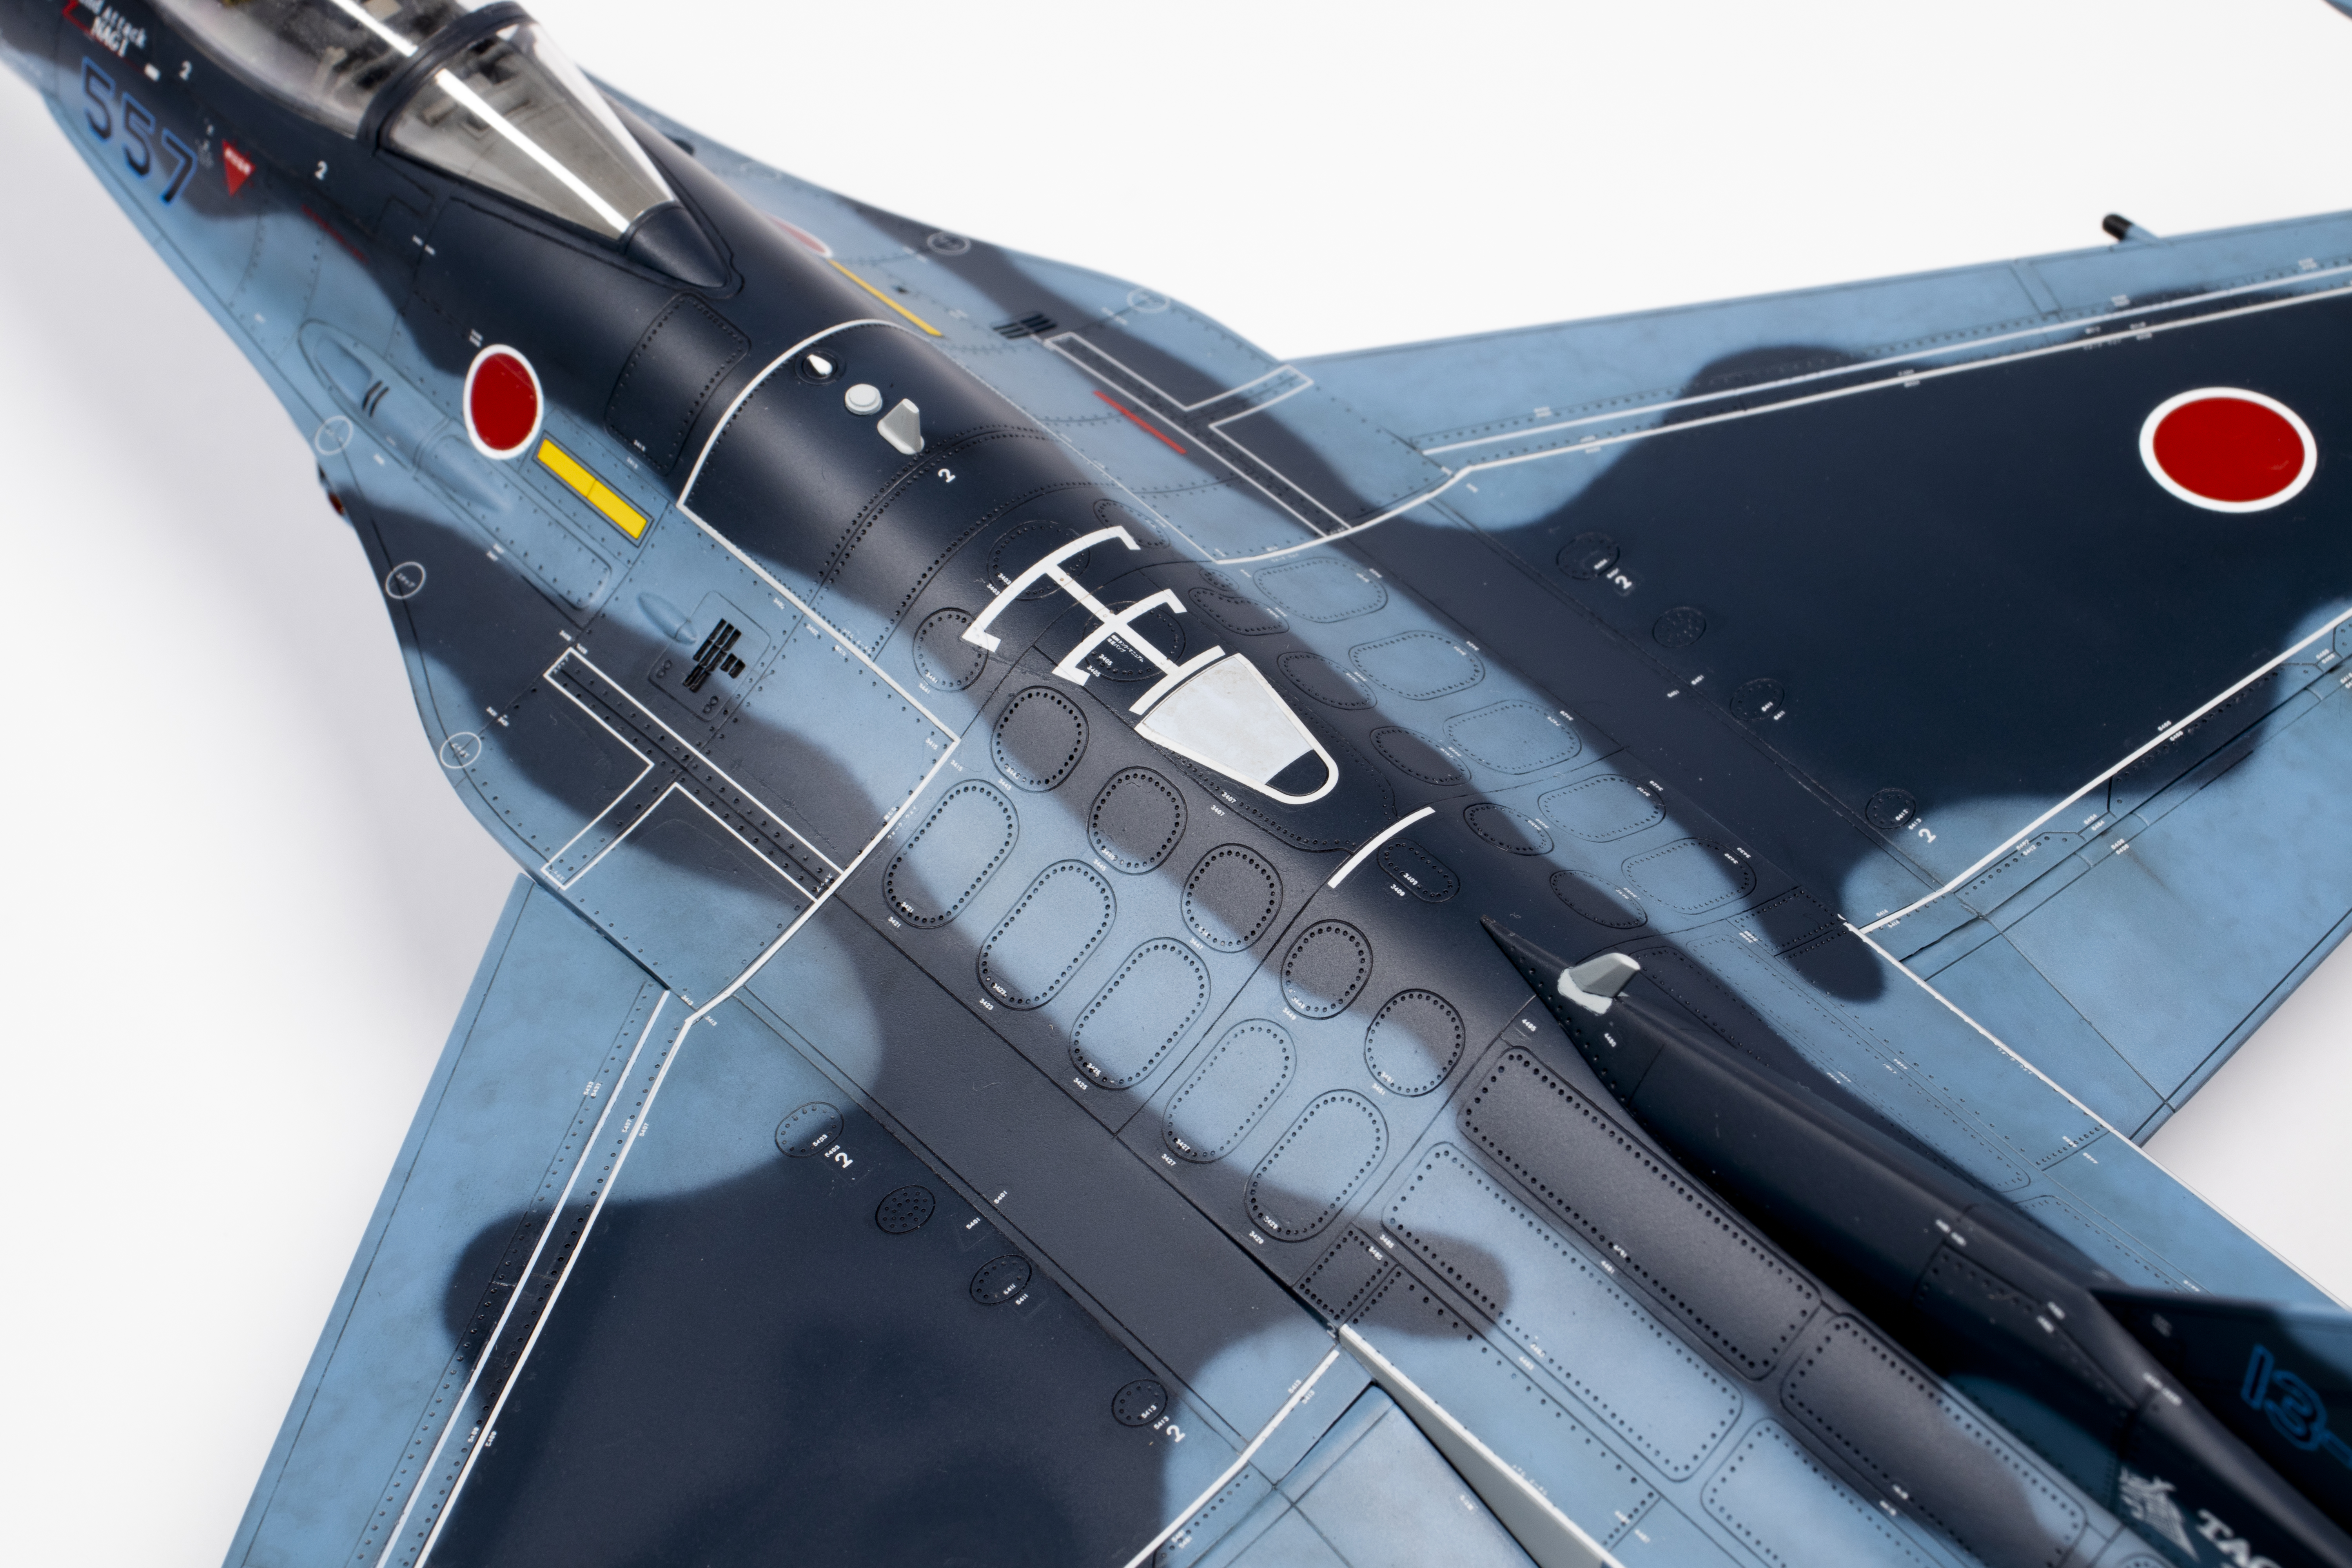
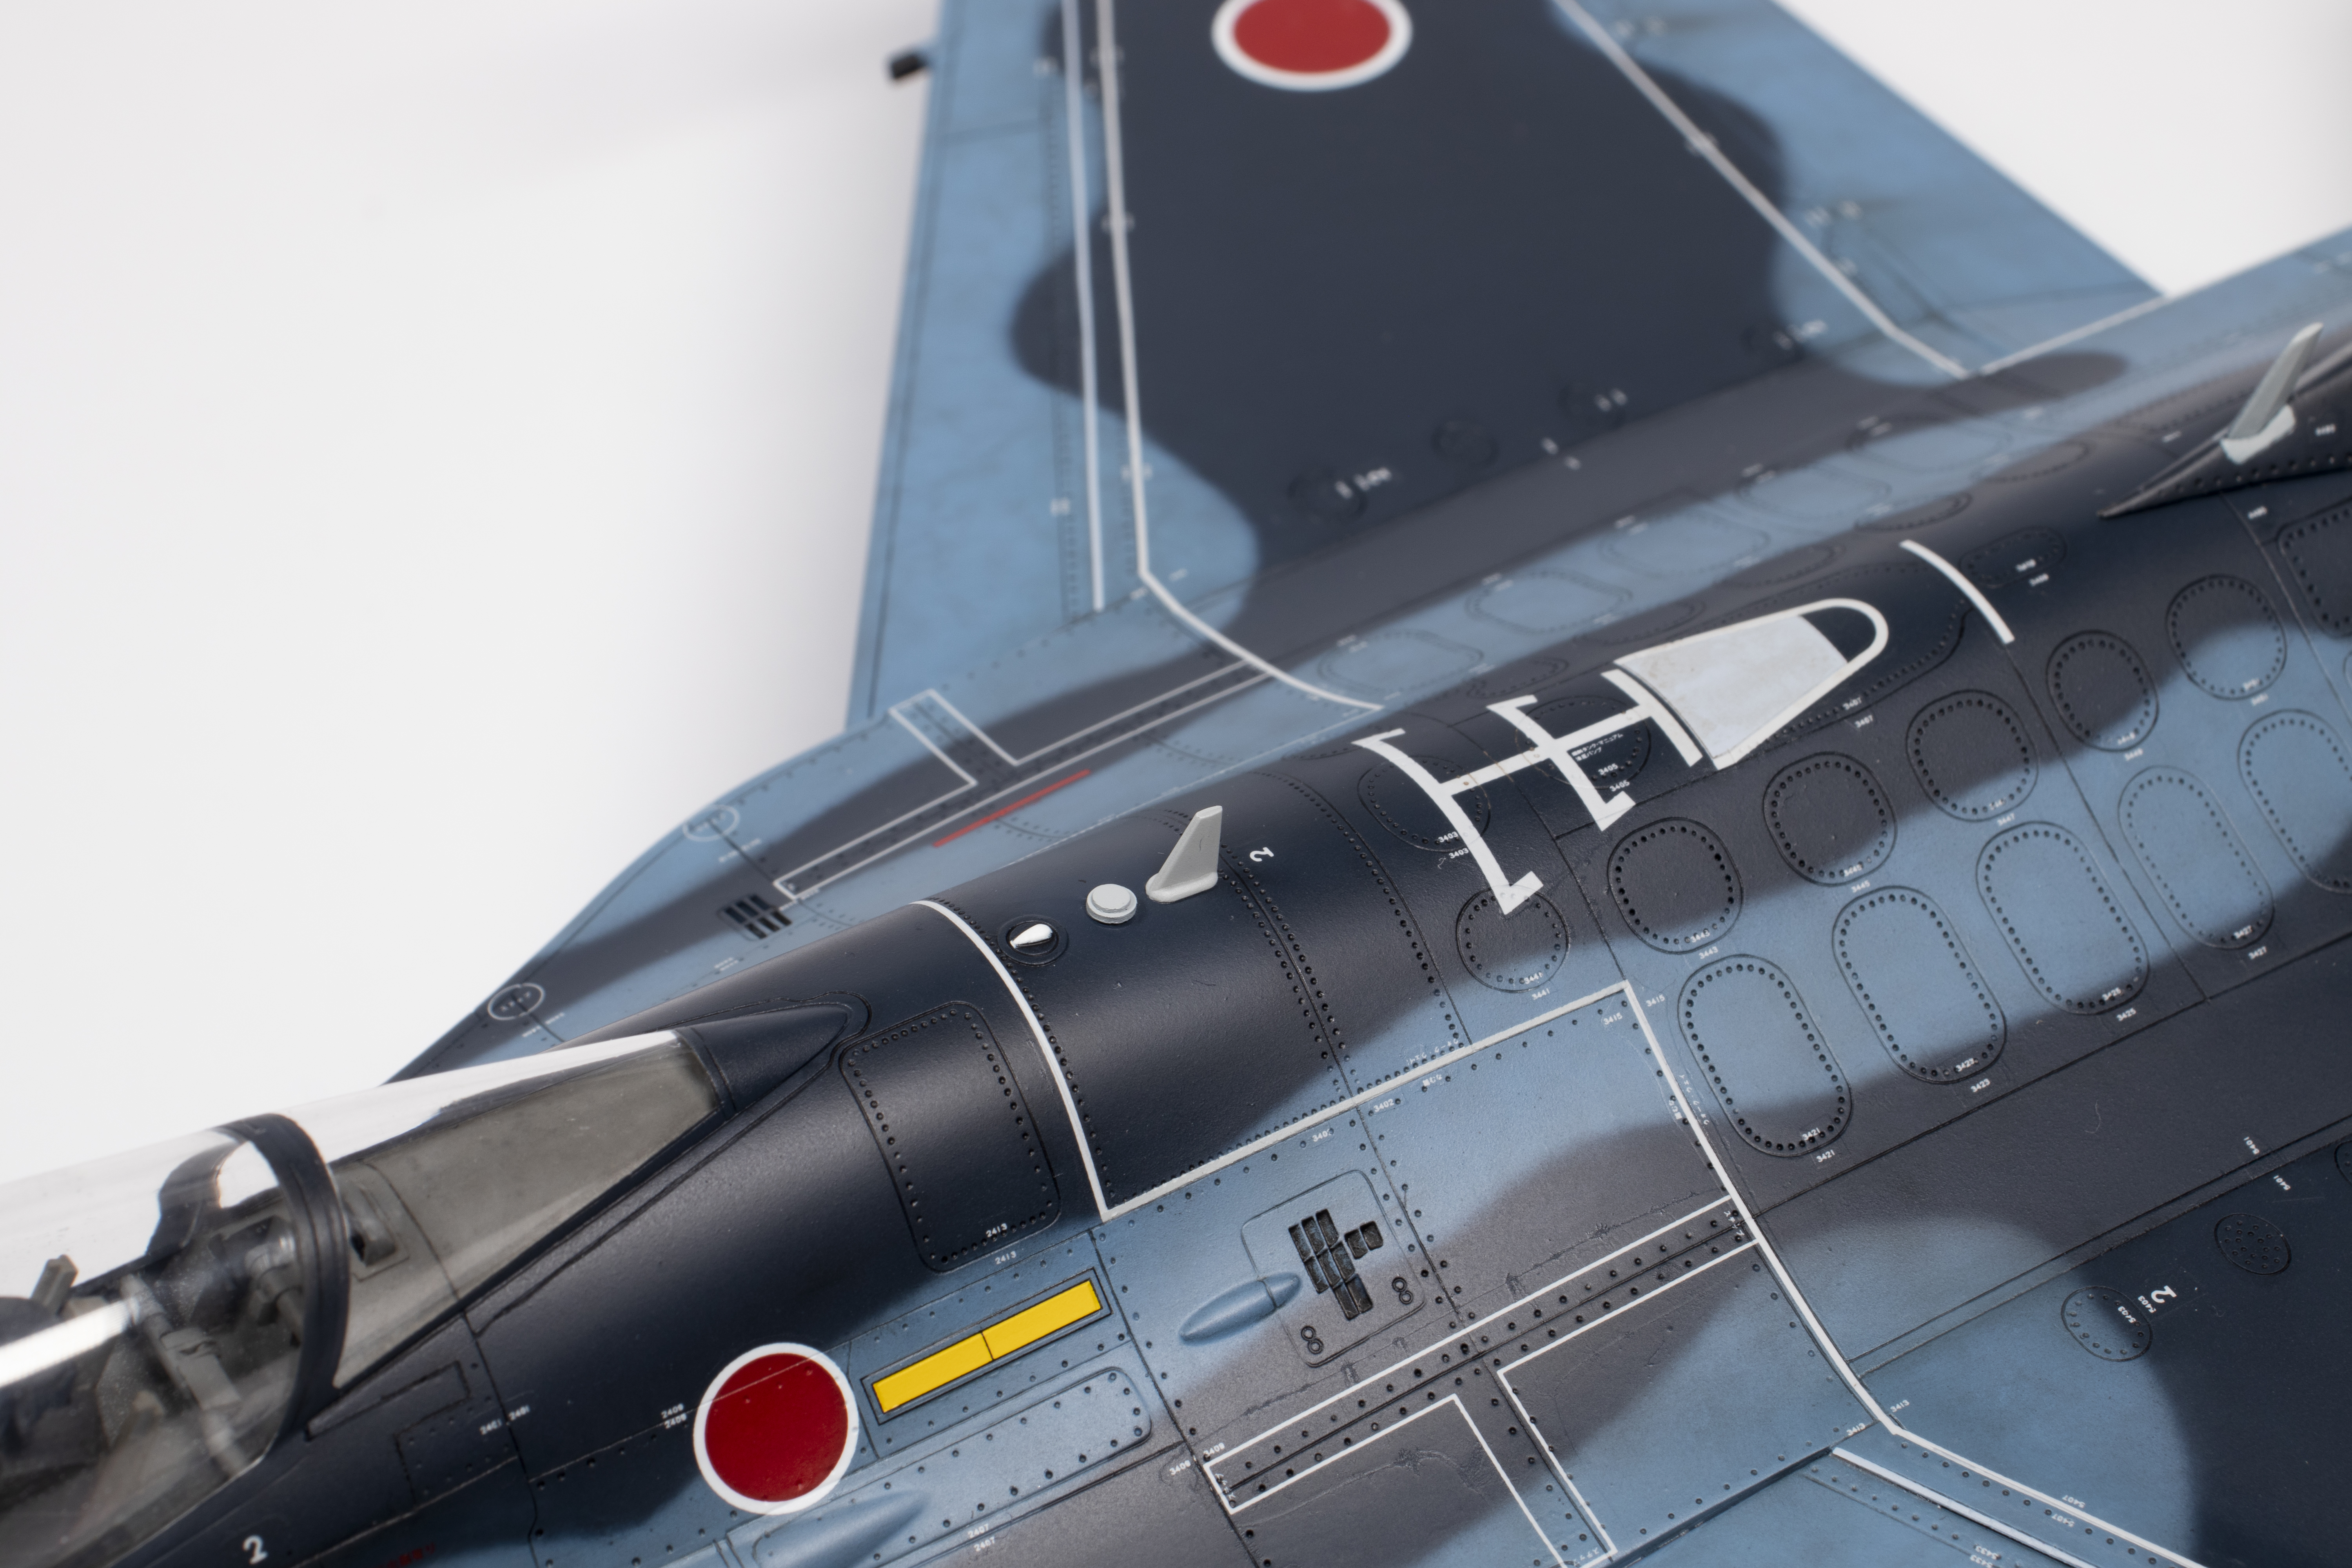
Once the clear areas and intake had been masked with Tamiya tape, I commenced painting in earnest. The basic pattern was exactly as I described above, starting with the light blue lower and upper surfaces. I noted from photos that the demarcation between the light and dark blue is quite soft and in the past I would have used rolls of Blu-Tac to mask this. However, in recent years I’ve been trying freehand painting, just to see what I can do. For this I used the C375 Deep Ocean Blue, very heavily thinned with MLT and some retarder, and airbrushed at very low pressure through an Iwata Custom Micron B. This requires multiple layers to get a decent layer of colour and my hand is pretty unsteady, which made getting a nice defined edge difficult. I’m not displeased with the finished result, but it is a little more diffuse than I would like.

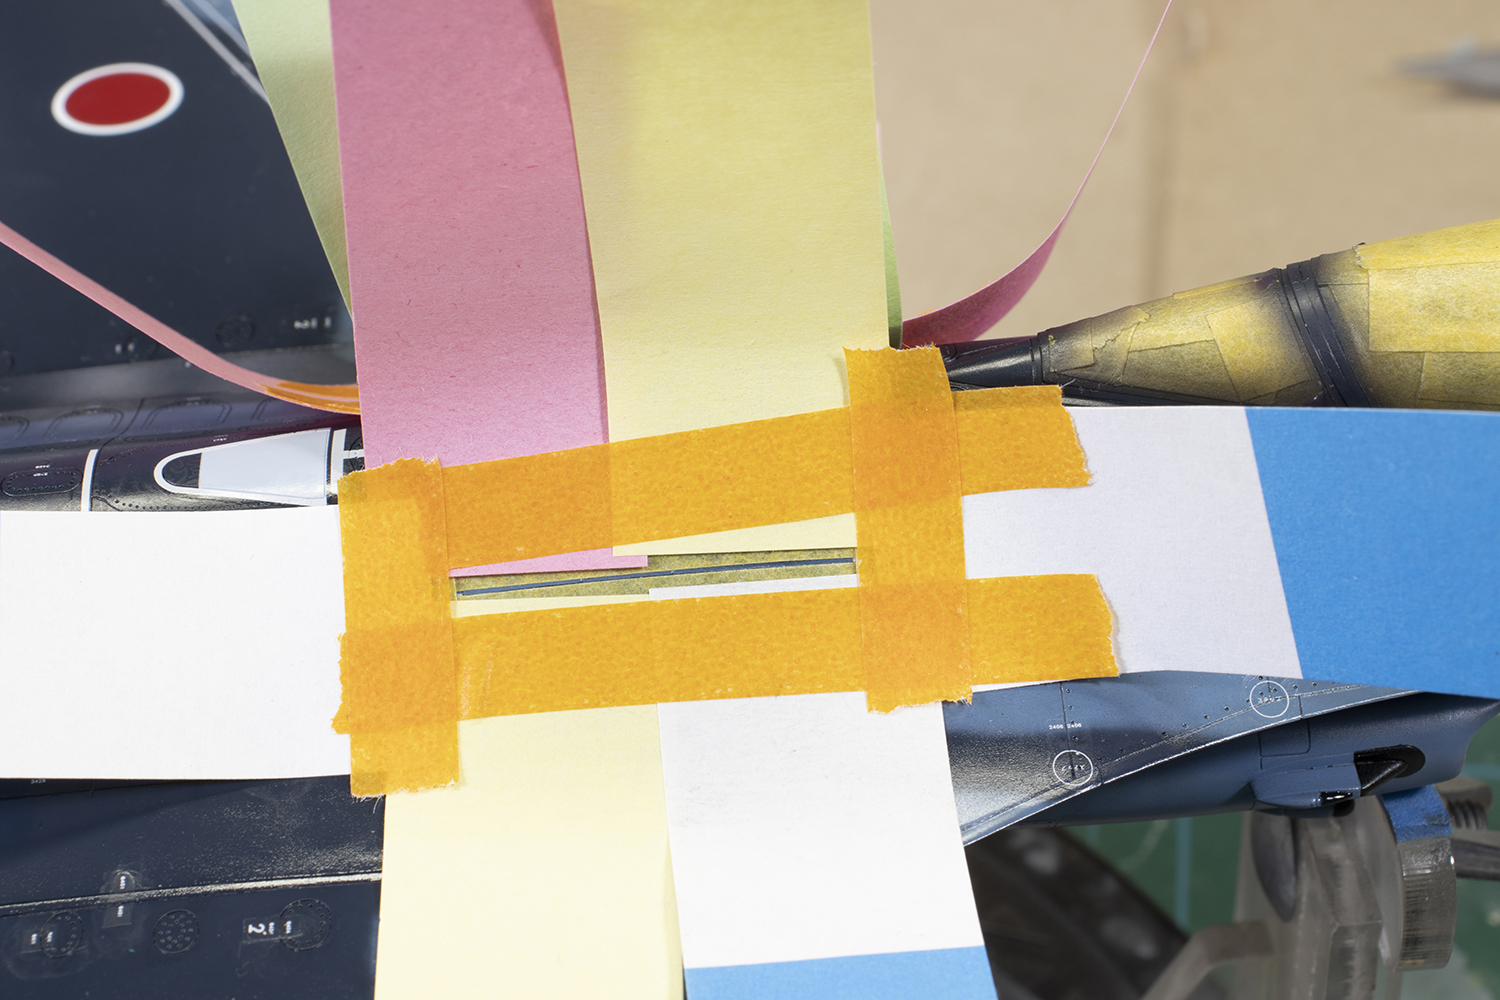
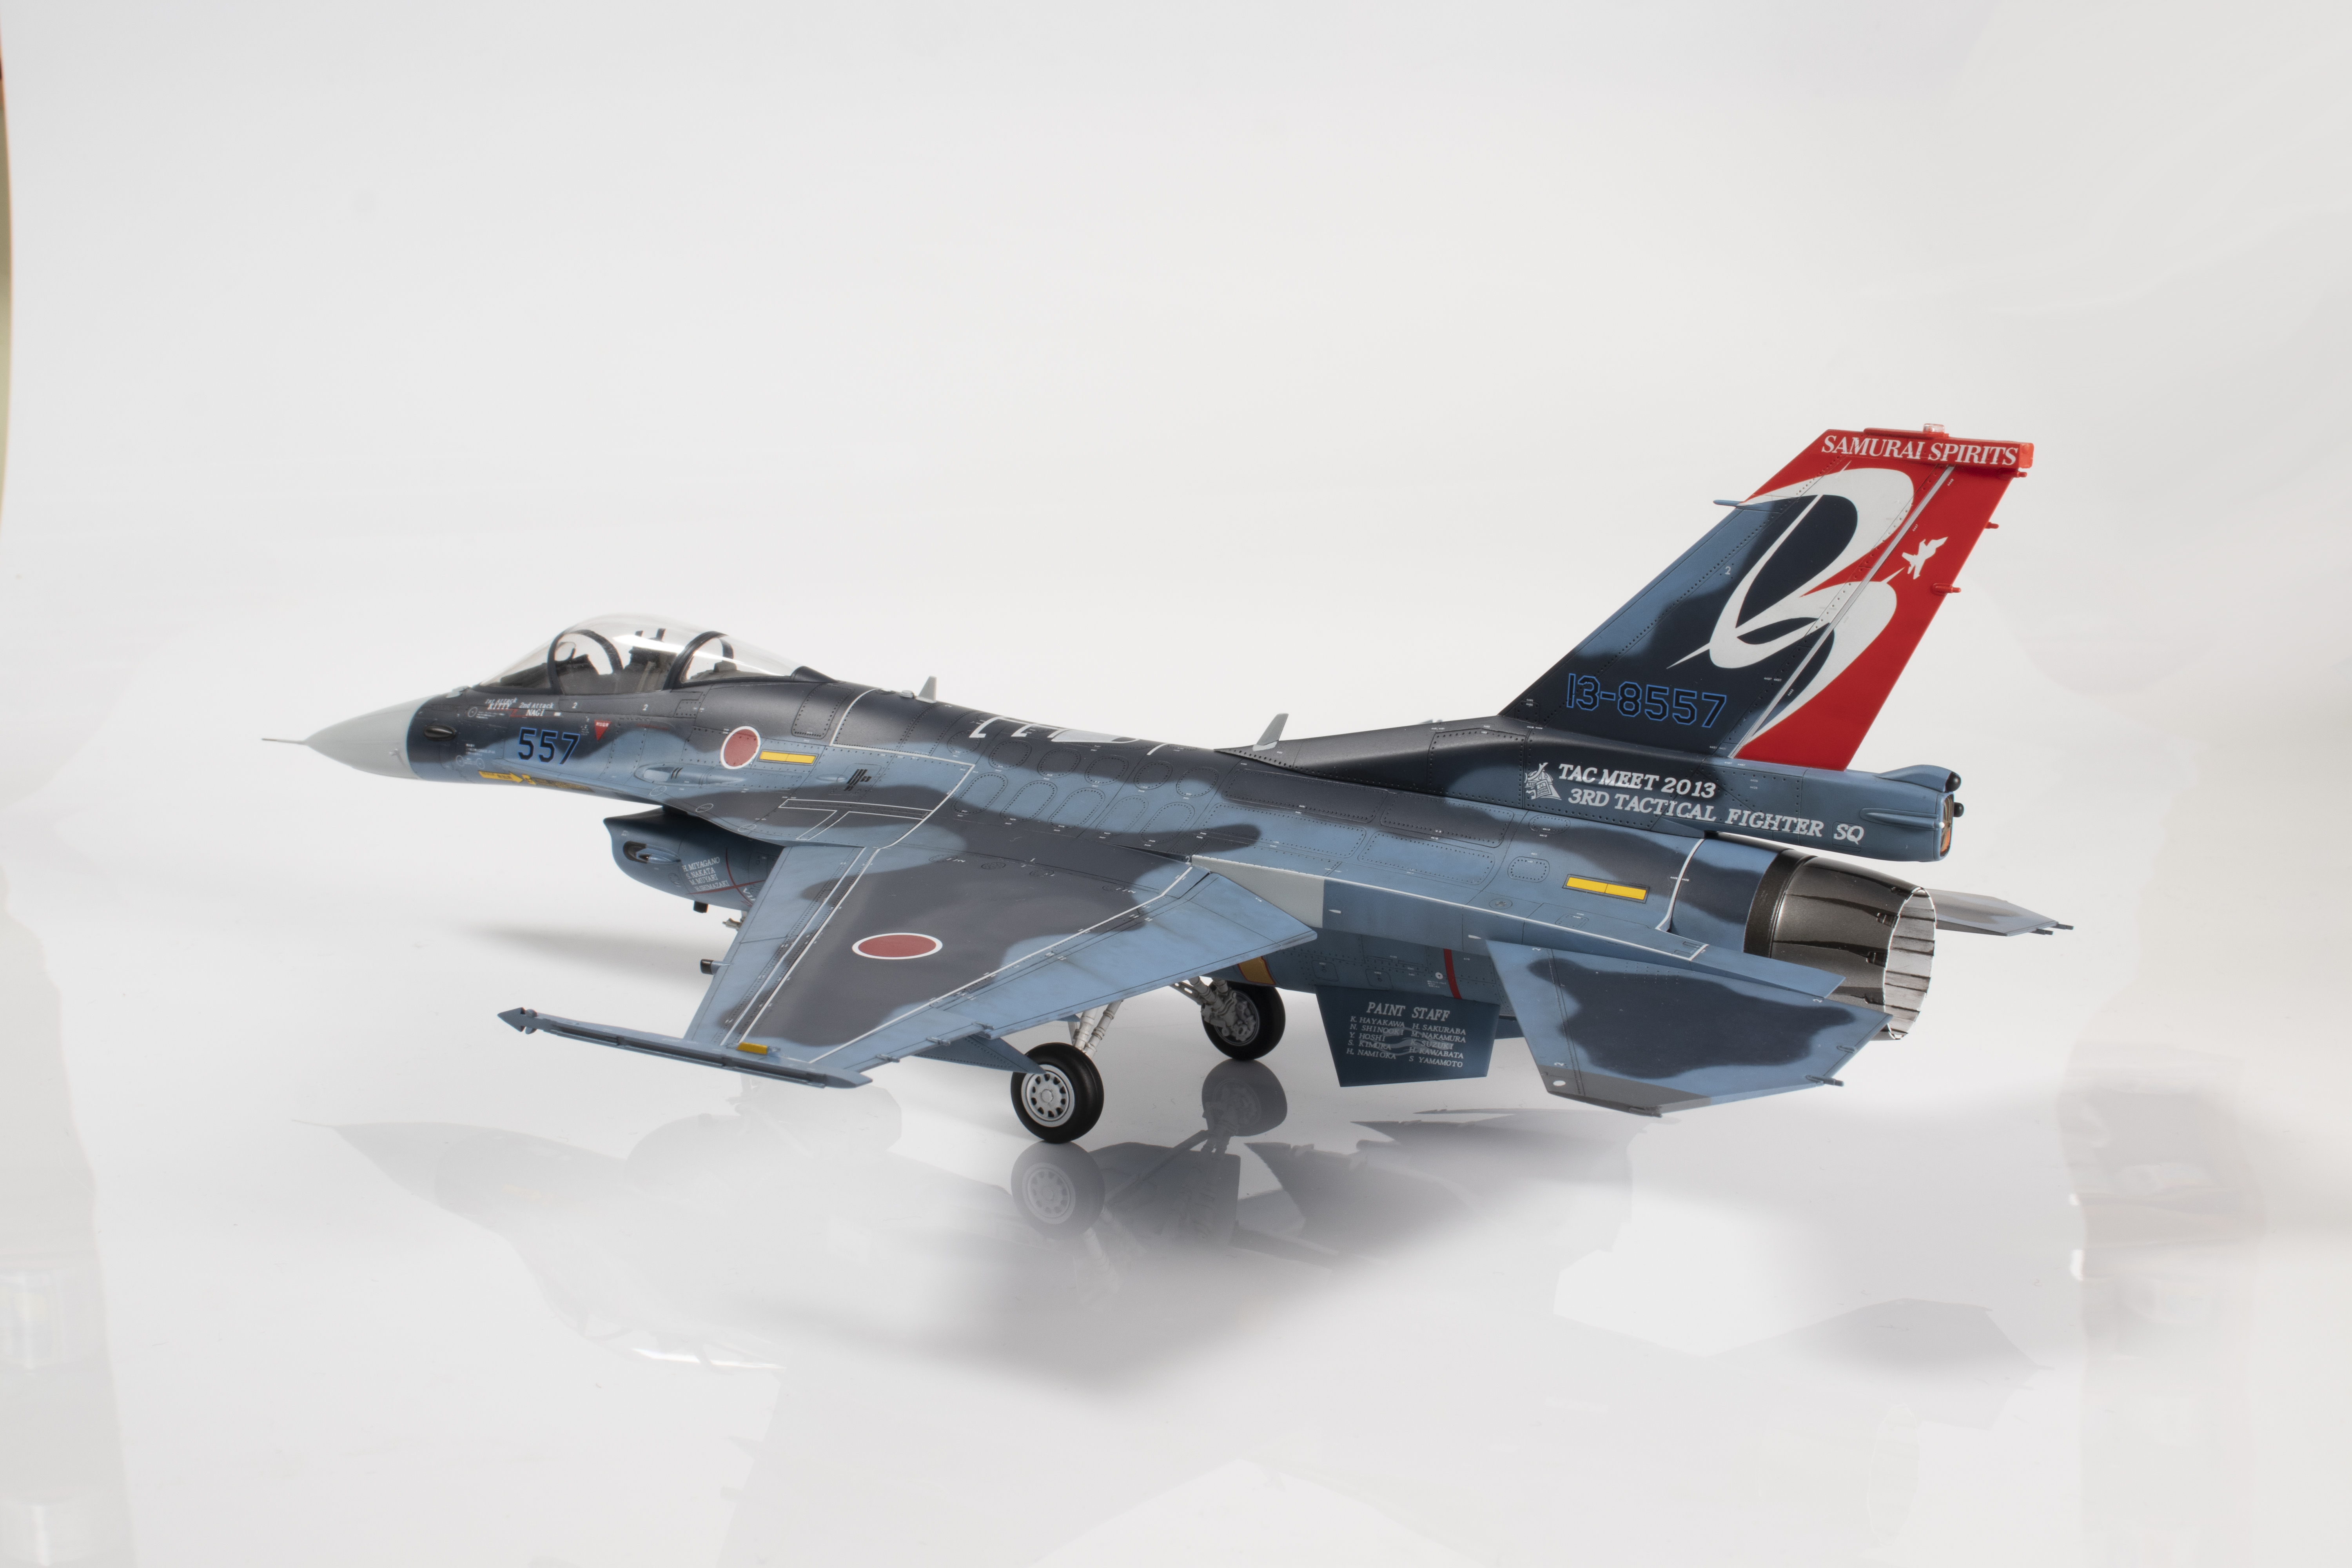
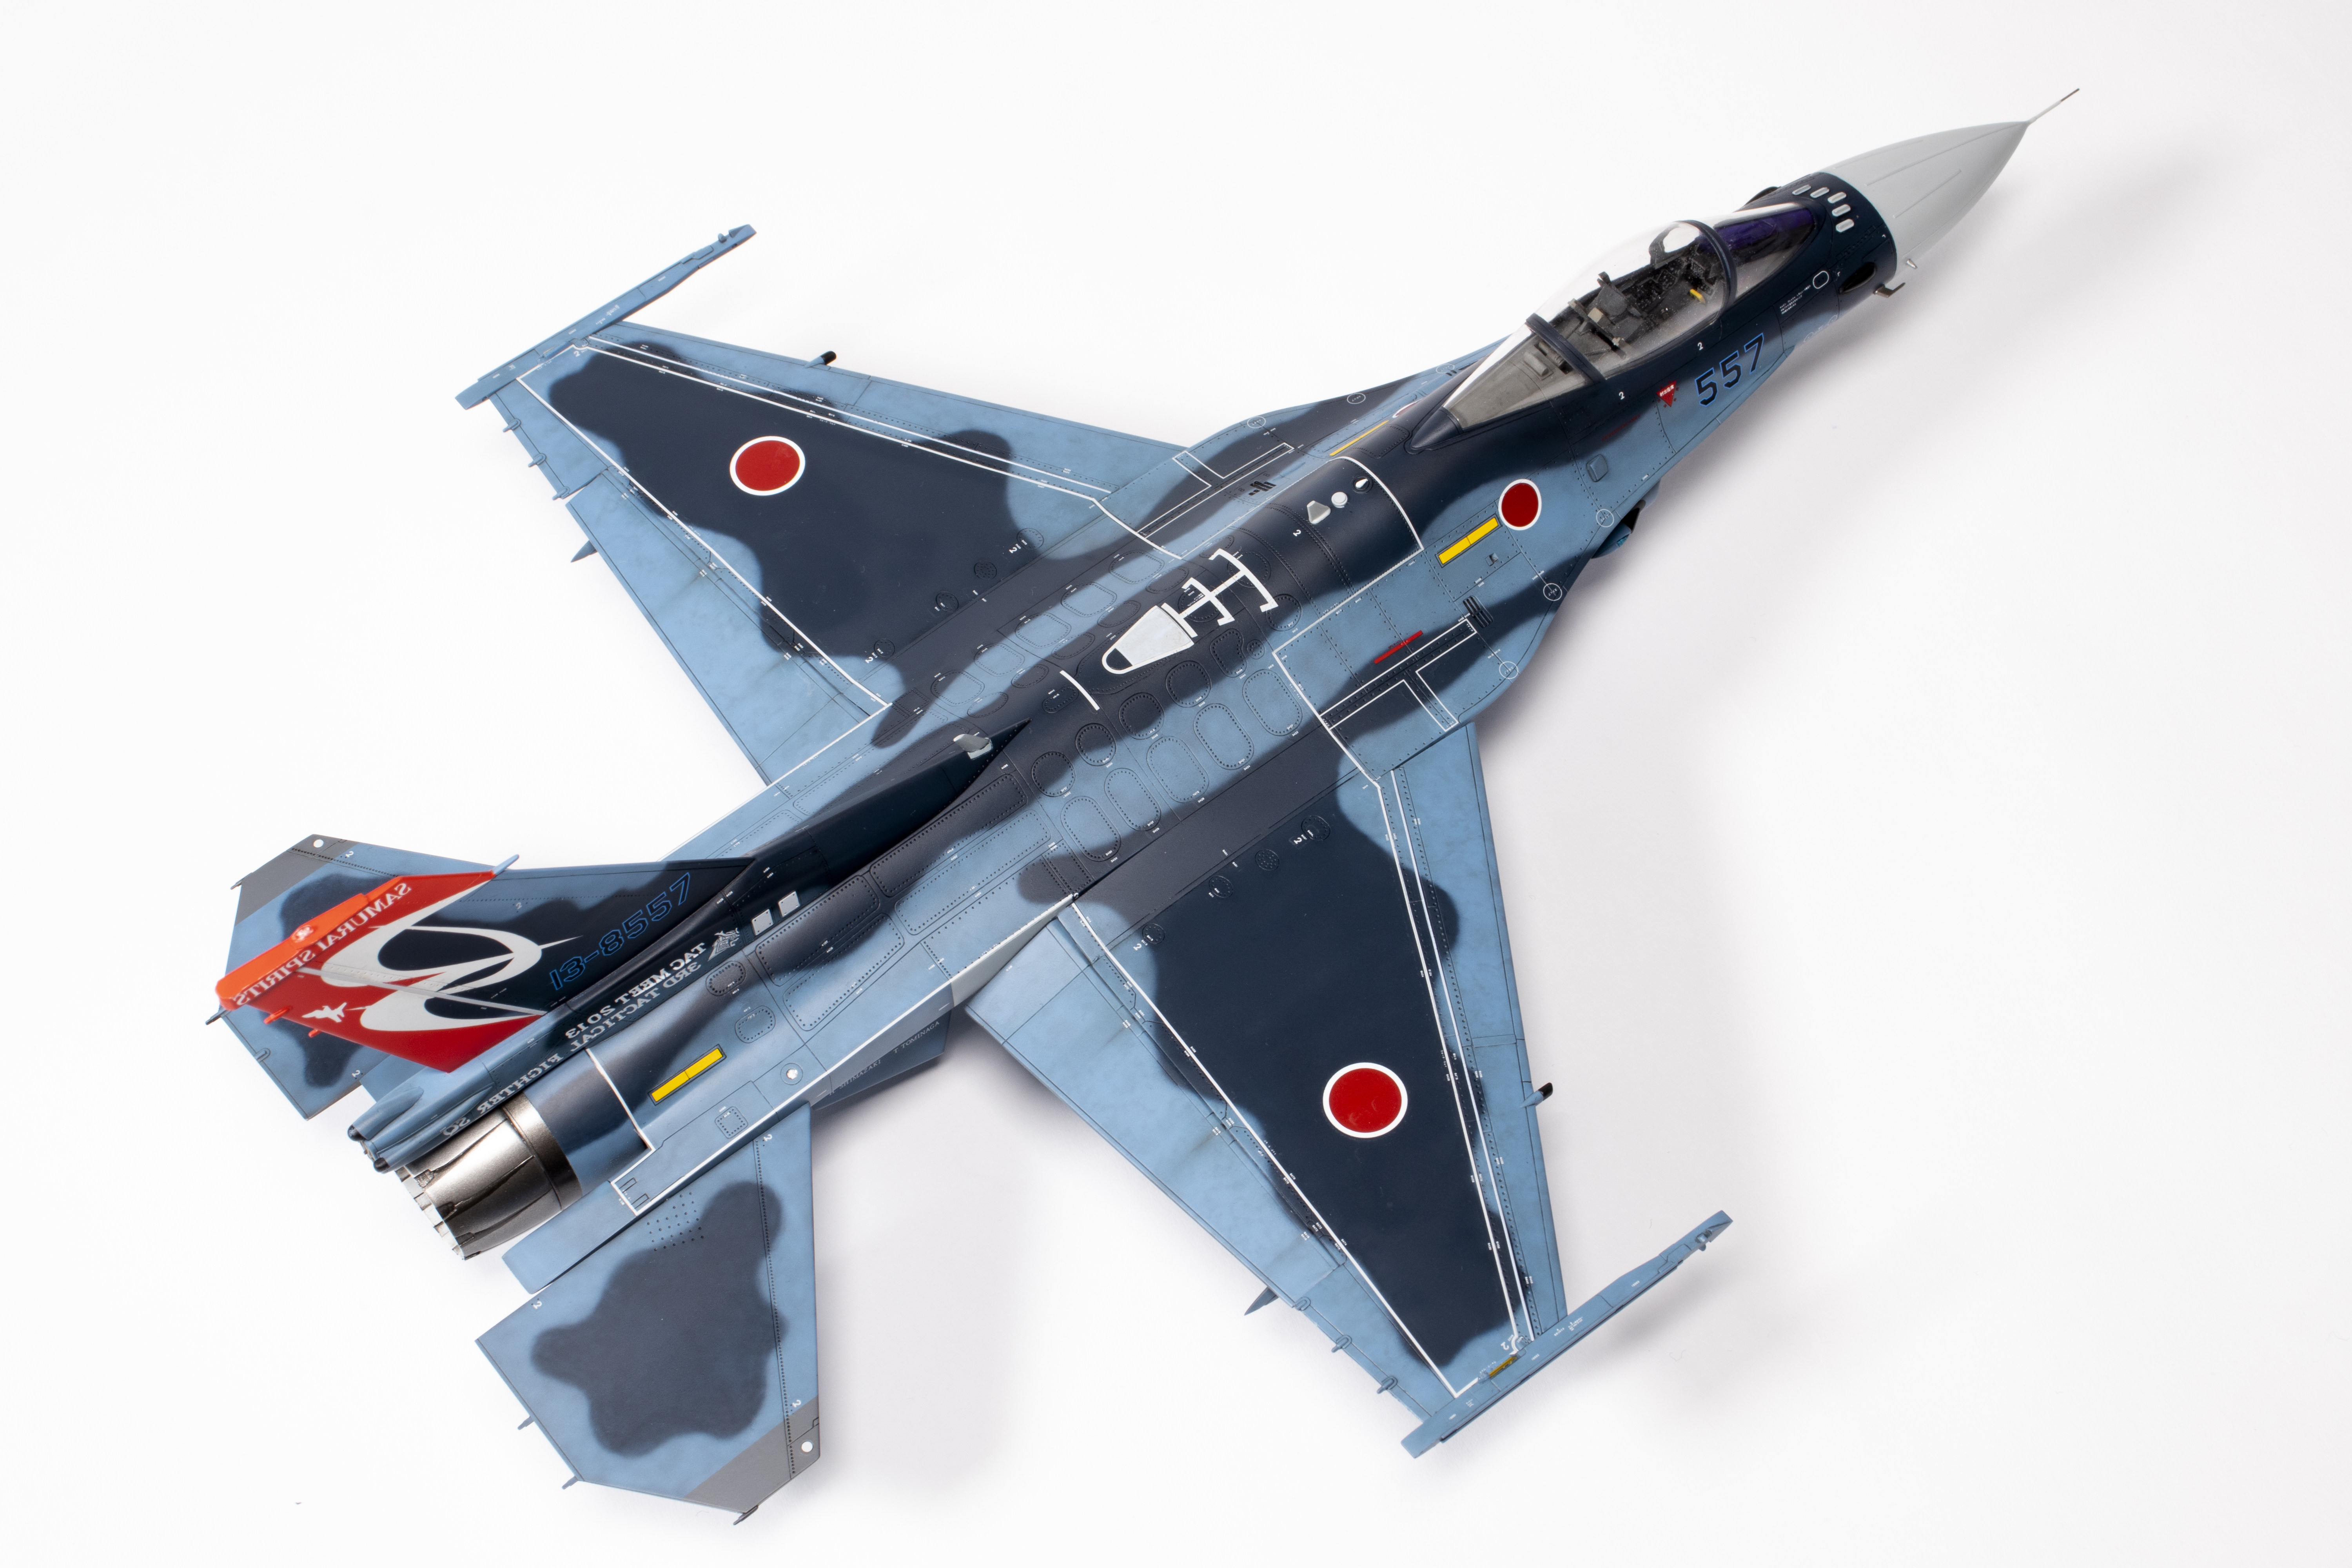
I dealt with the vertical tail in a completely different manner. The artwork is striking and supplied as a large decal. Such decals can be fraught with problems, not least the question of whether it would fit. I therefore decided to see if I could cut my own masks for the red and white areas. This would be a real challenge as the white silhouette of the F-2 in the image is pretty tiny. Nevertheless, I scanned the decals into Inkscape (a free vector graphics package) and traced the outlines. I then exported it as a .dxf file in the supplied program with my Silhouette Portrait 2 cutter. Using this machine, I cut the masks into vinyl. I was surprised at how well they came out, and the detail around the F-2 image was good enough. For those who are interested, the settings were Depth 2, Force 2, Speed 1, Overcut 0.01mm. I started with the white (Mr Color 1), masked this, then airbrushed the red. The problem was, I needed this to match the decals because I would be forced to use the red and white ‘SAMURAI SPIRITS’ logo at the top of the tail. I experimented with Tamiya X-7 Red and Mr Hobby Aqueous 14 Orange, eventually settling on a mix of about 75% red to 25% orange to match the vivid shade used by DXM. Last were the two shades of blue for the underlying finish.


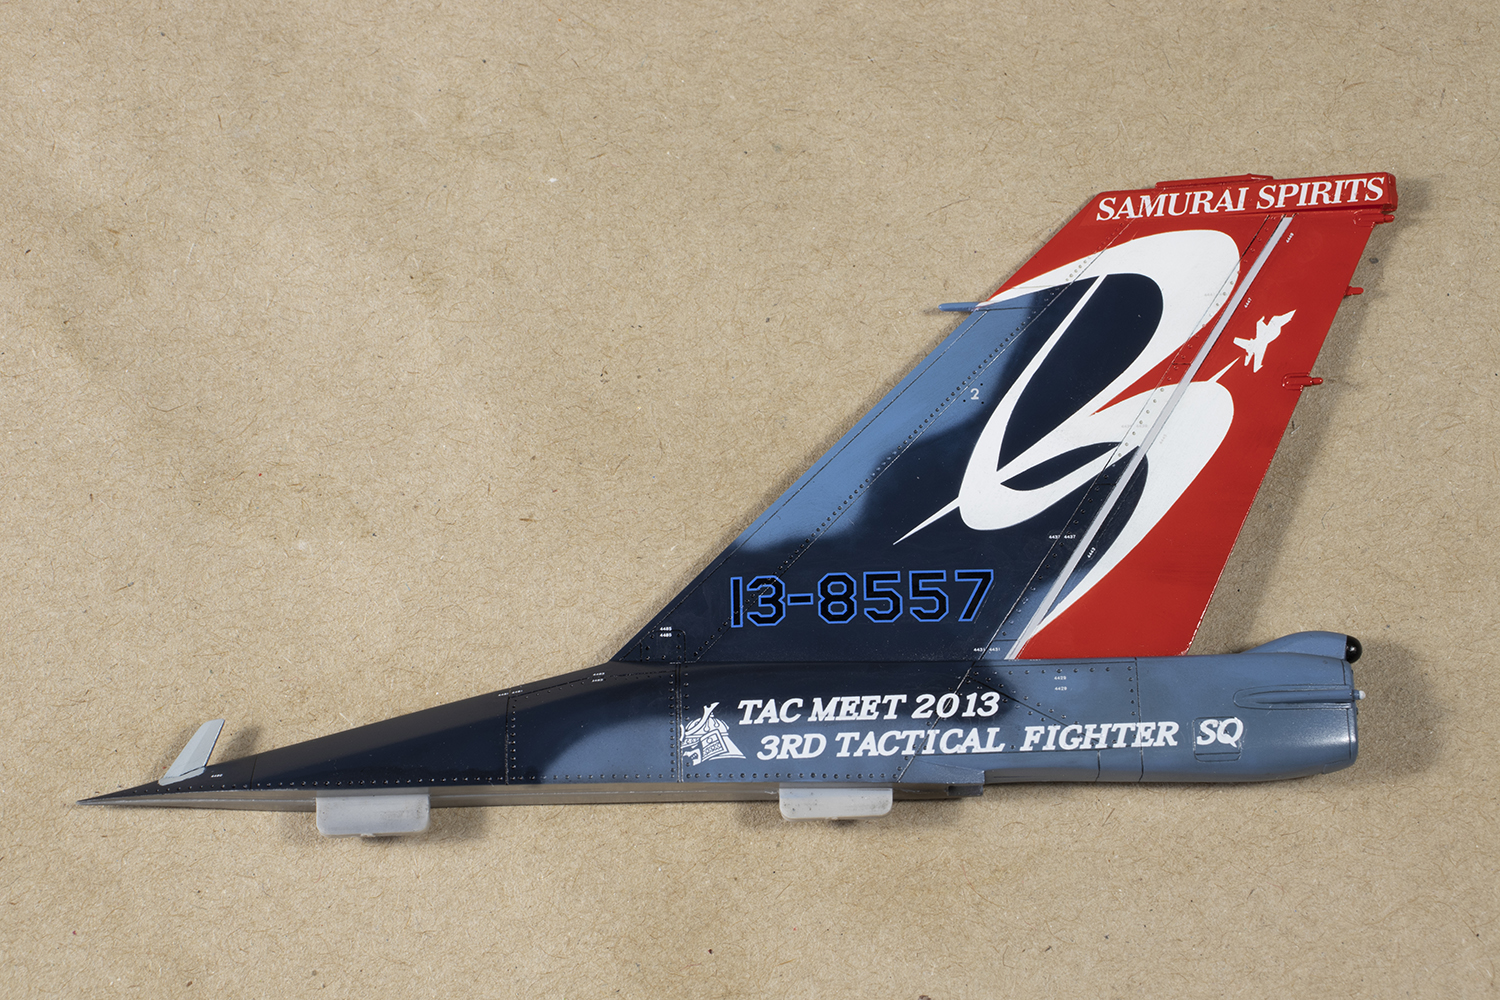
I regarded this experiment as a success, although there were two problems. The first is that the .dxf file was not interpreted very well by the Silhouette Basic software, and so the curves of the stylised ‘3’ are not as smooth as the should be. I’ve fixed this by upgrading the Silhouette software, but I did not fancy re-doing the tail markings, so they have been left as they are.
The second problem was that the very tip of the white marking was too fine to be cut into the mask. I fixed this using a bit of the supplied decal suitably cut up.
The light grey is all C376 and the most difficult bits to deal with were the bird-slicer IFF aerials in front of the windscreen. For this sort of job, I love the HiQ die-cut masking tape circles. These are very well cut and come in a wide variety of sizes. By using the hole, rather than the circle, the circular ends of the aerials can be masked off accurately to provide a neat result.


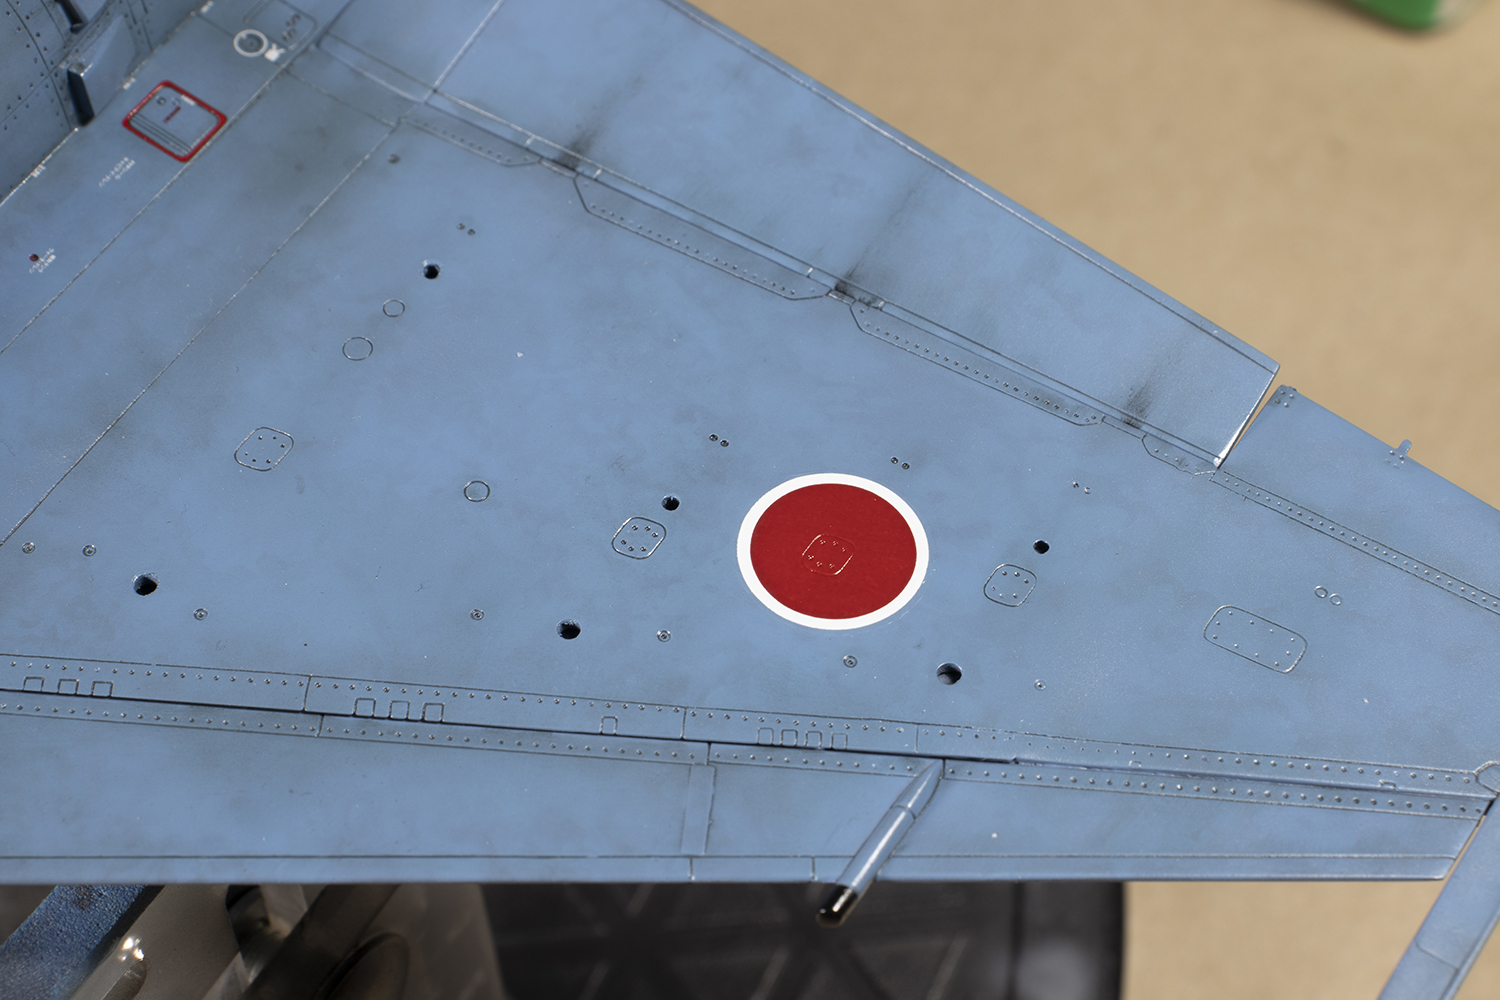
Next was some weathering. Many people love this stage of modelling; I don’t. I want it done and out of the way as soon as possible. I reasoned that as this was a specially painted airframe, it would be pretty clean, unlike many examples of quite dirty F-2As that I found online.
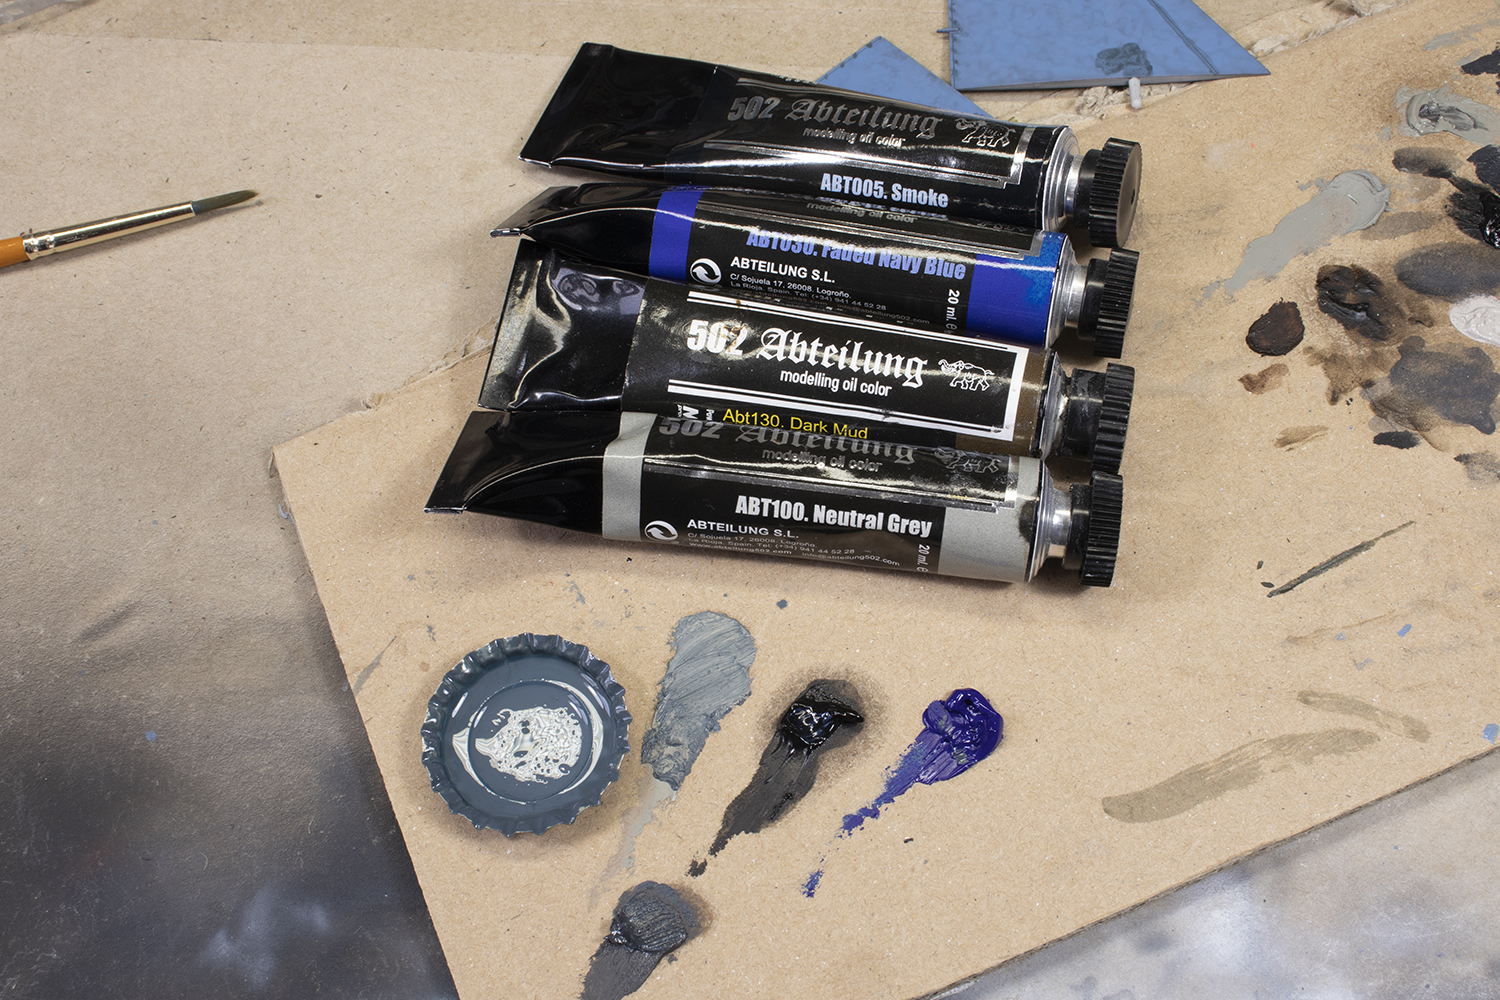
A lot of my weathering is oil-based. I like Abteilung 502 oil paints and used a variety of shades to mix some desaturated blues as a pin wash. I apply this directly on top of the paint, and thin the oils with Zippo lighter fluid. This evaporates very quickly, which is something I appreciate. Rather than use cotton buds to remove the excess, which tend to leave fibres everywhere, I do a lot of the work using some foam-tipped cleaning swabs. I rarely use any thinner on the swab. Once the basic wash was down, I focussed on some areas, like the flap hinges, to add some streaking and mottling.


I would usually put the decals on top of this next, but this time I was worried about damaging the paint as I manipulated the model, and so put down a generous protective coat of Tamiya X-22. Once this had cured, I started with the decals.
There is quite a lot to say about the decals. There are a lot of them. It doesn’t look like it at first, but once you get started you realise just how many stencils there are, and just how tiny many of them are. DXM try to help the modeller out by lumping stencils together in groups. I don’t like this for two reasons: it means more carrier film, and they did not get their sizing quite right, so the stencils don’t end up in quite the right place. This meant I decided to cut the groups up into their constituent parts.
The decals are printed by Cartograf, and whilst they are not the best decal printer in my opinion, these are probably the best I’ve used printed by them. The carrier film is thin and the decals are very well printed and strong.
My method for applying decals is highly unconventional and runs against decades of modelling orthodoxy. It works for me; it may not do so for you. The essential difference is that I never touch the decal after it has been floated into position. I start by using quite warm water to soak the decal. A USB-powered coffee mug heater keeps the water warm and in this case, the decals came off after 1-2 seconds in the water. I exclusively use Mr Mark Setter as my decal solution and brush a generous puddle at the place where the decal will go. The decal is then floated (usually using a brush) onto the puddle and positioned using the brush. I then leave the decal and never touch it again: no cotton bud, no wicking excess water or solution away, and no tamping. The solution then evaporates and the decals wrinkles. About 12 hours later, all being well, the decal will be well and truly stuck down and sucked into the recessed detail. In some cases a decal softener, like Mr Mark Softer, might need to be added, but for these decals none was required. The Mr Mark Setter does leave marks; these will disappear under the subsequent clear coats. The other factor to not neglect is the power of gravity: I always make some jig (usually of Lego) to try and get the surface I’m decalling as horizontal as possible. This assists with the decals settling into the detail and prevents the decal solution from draining away.

The decals were not without their problems. Some, like the walkway lines, were not correctly sized (being too long) and so I cut them up and applied in them in sections. I did consider masking and painting them, but there are a lot of small stencils attached to them that I did not want to separate. However, DXM made a mistake and mis-printed a couple of the walkway lines. I was forced to mask and airbrush these, which is always stressful as it involved masking over decals I’d already applied. It was a nice surprise that the C376 was an exact match for the decals, so my repair was not too noticeable. I contacted DXM who told me they were aware of this printing problem and had put supplementary correction sheets in all but the earliest releases. I must have had one of these early sets, and to their credit, DXM offered to send me replacements from Taiwan.

The Hasegawa kit is basically pretty well detailed, but there are a few shortcomings. There is a grey circular antenna missing from the spine, which looks like an addition since the kit was moulded. I made a replacement from a spare part. The nose pitot is always a point of fragility, and I made my own using Albion Alloys telescoping brass rod, sweat soldered together for strength. I added this after the decals and made the joint good with super glue sanded to shape before touching up with airbrushed C376. Many of the detail parts, like the various intakes dotted around the airframe, are surprisingly clunky and would be ripe for replacement with some resin hollowed out examples.

When test fitting the horizontal stabilisers, I managed to snap one of the attachment points off in the hole. This was a pain, but rectified easily enough by using some more Albion Alloys brass rod and making good the attachment with Infini abrasives and a re-spray.
My new favourite clear coat is VMS semi-gloss varnish, which I airbrushed as recommended: thick and wet through a 0.6mm needle and then left for two hours. I removed the canopy masking and was met with the inevitable disappointment: dust on the inside.
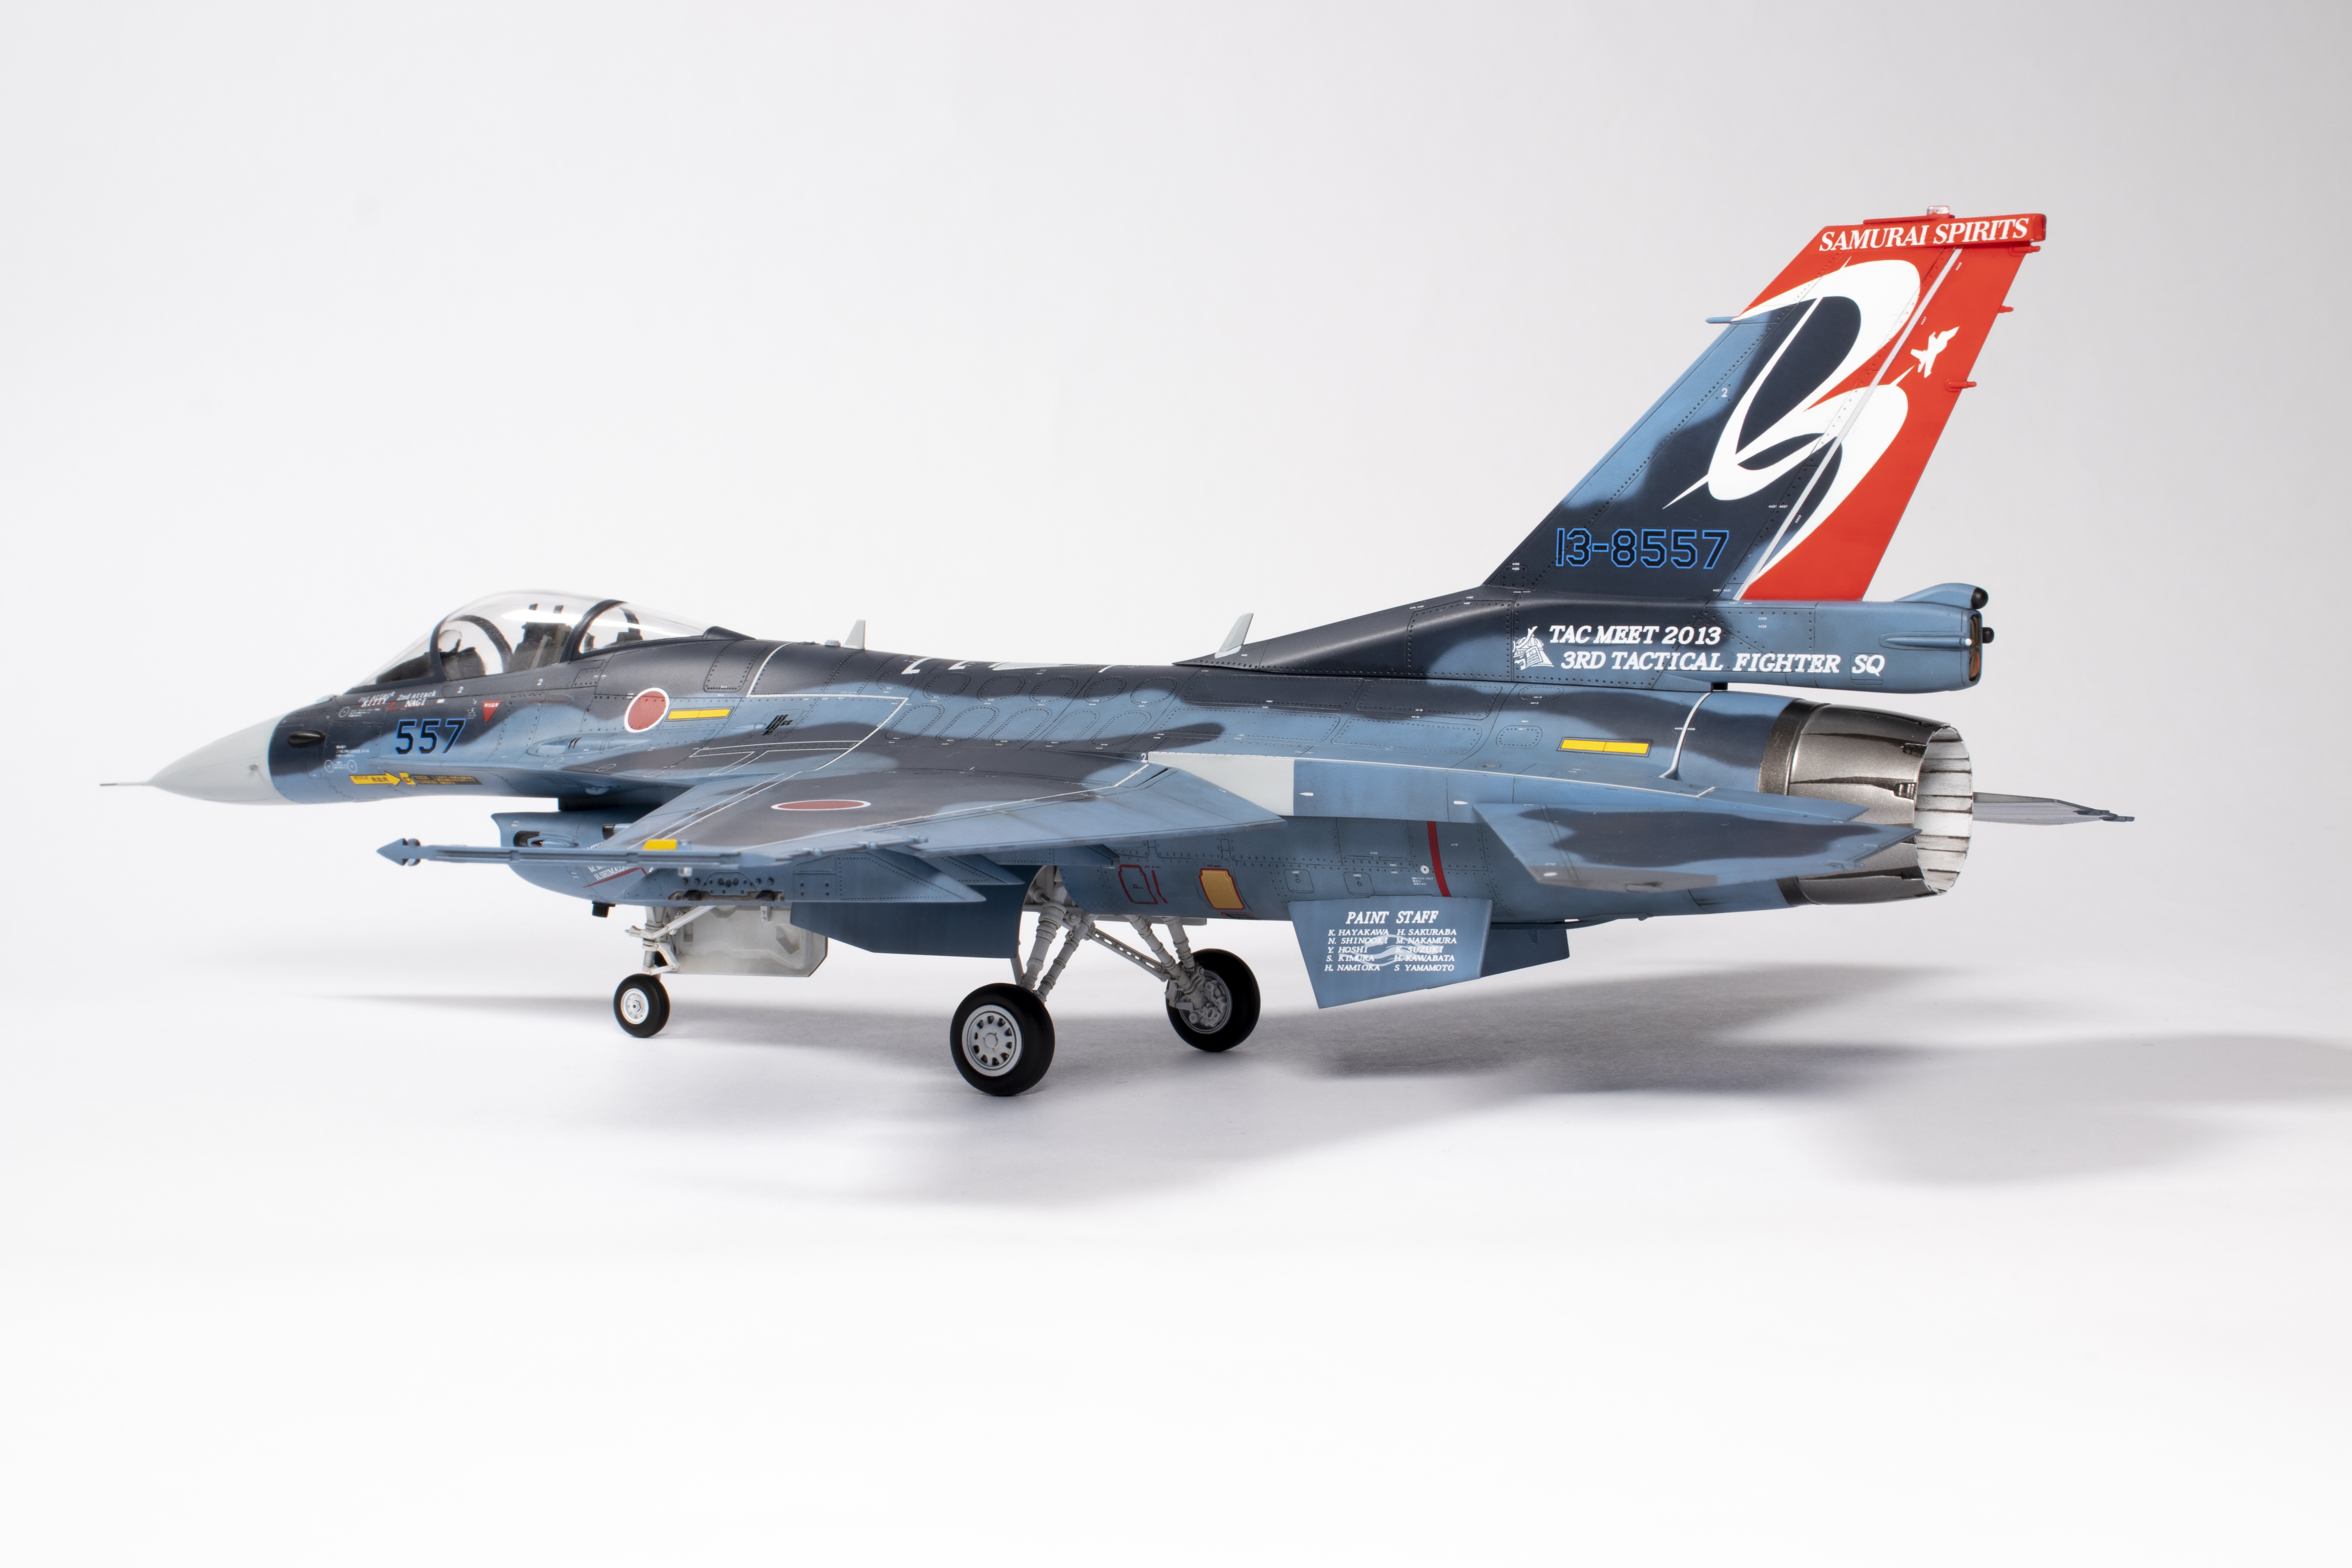
I’m pretty happy with the final result. It’s a very striking aircraft, and the more poised canopy shape and significantly larger wing make it the F-16’s more attractive younger sister. The kit is easy enough to put together and holds up well for a mould approaching adulthood in 2021. Given how thick and yellow the kit decals had become, I’d regard aftermarket markings as essential, and there are certainly many more attractive options than those in the box. My main disappointments with the finished article are the dust inside the canopy, the inaccurate shape of the white ‘3’ on the tail and some ragged edges to decal film that I really should have sanded out. It’s not the perfect model, but maybe the next one will be. You never know!
A version of this article was published in the September 2021 issue (43-07) of Scale Aircraft Modelling (SAM) as a five-page build article and is available here.


Year bought: 2003 (Hannants, London)
Year built: 2021 (New Addington, Croydon)
Back to home.
