with Eduard interior, exterior and seat belt photo-etched sets, ResKit resin wheels and AOA decals
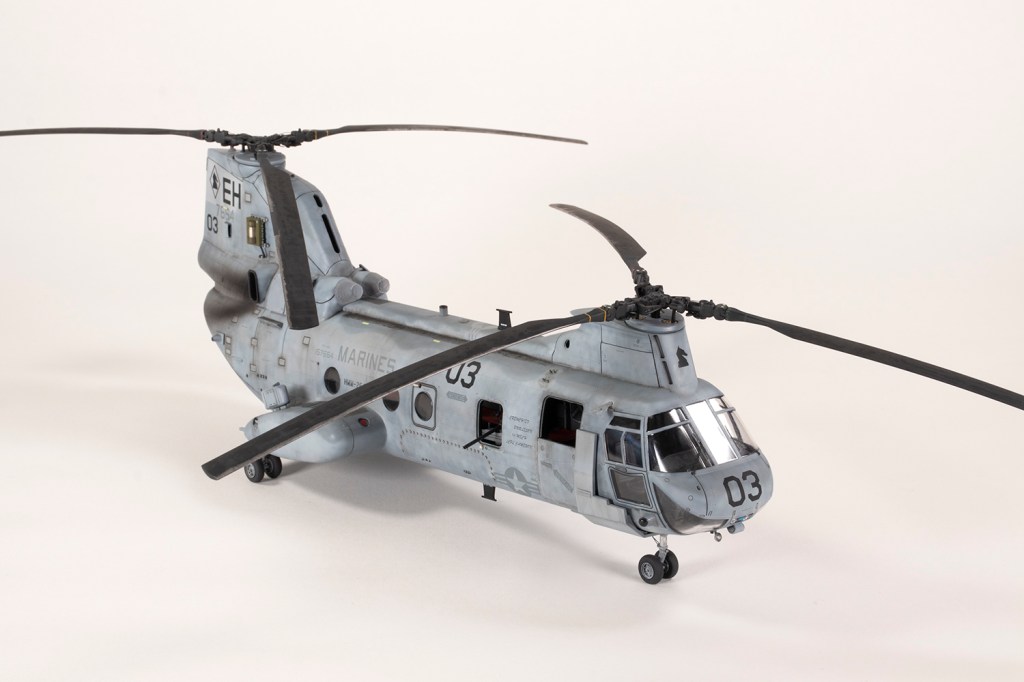
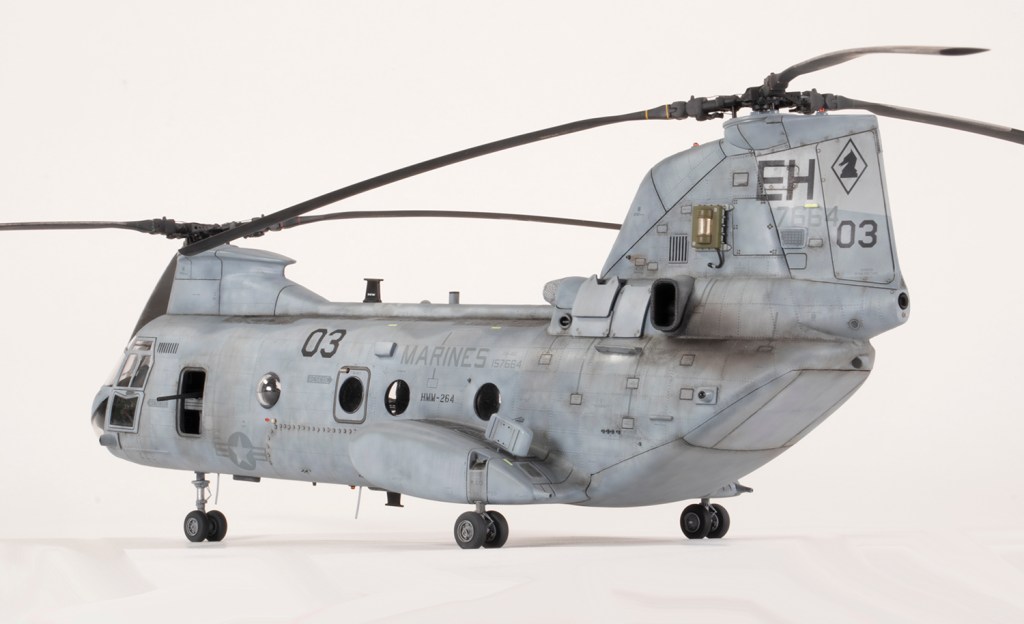
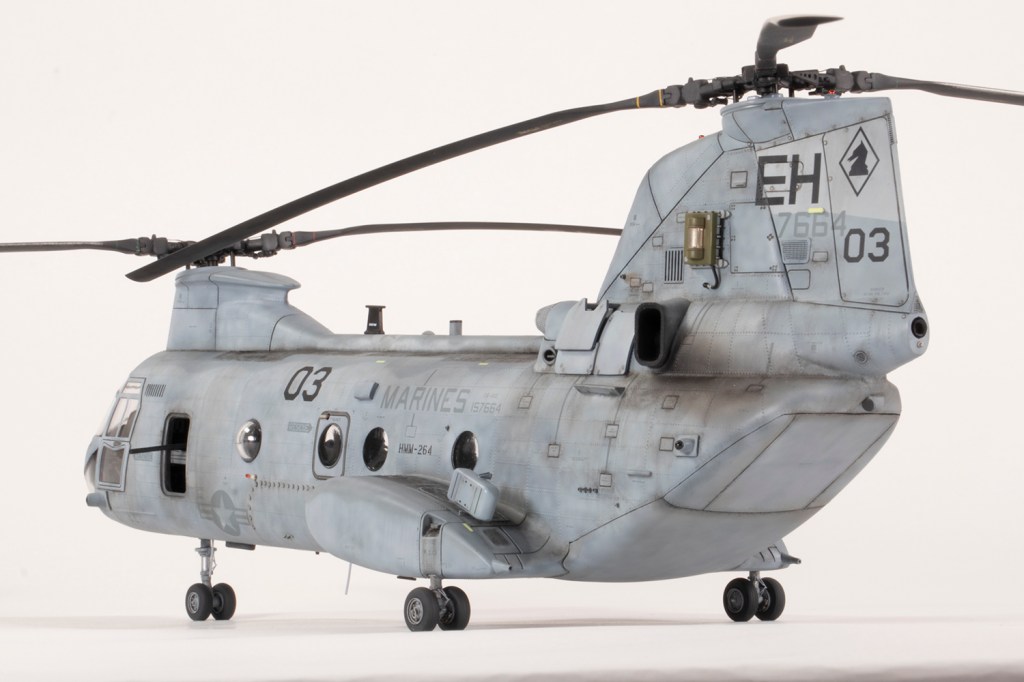
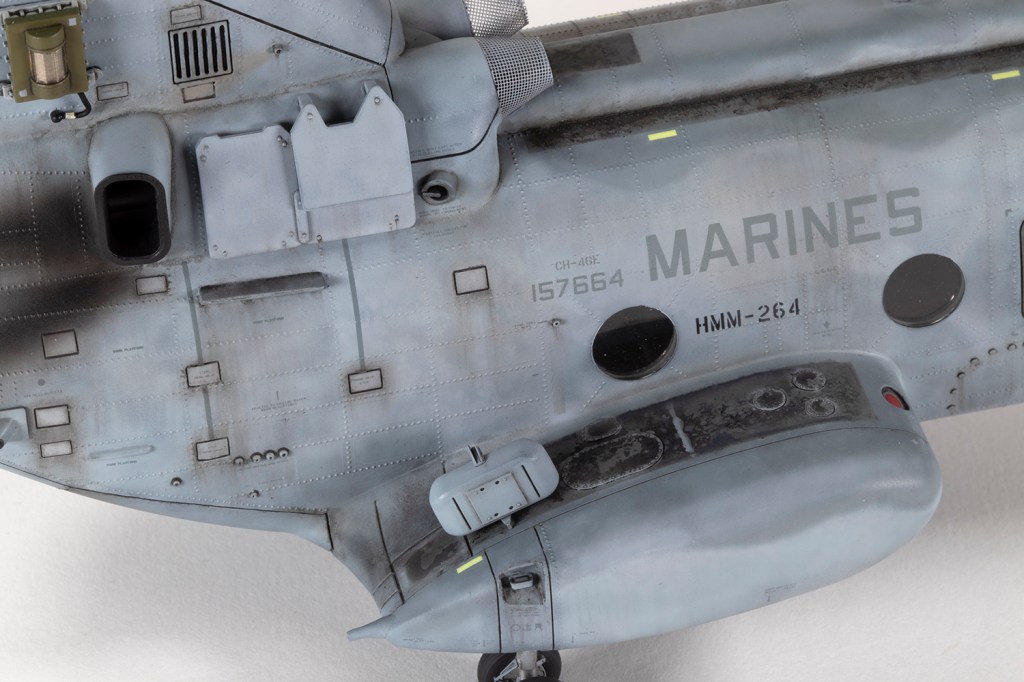
HMM-264 ‘Black Knights’, US Marines Corps, USS Bataan 2006

Modellers of 1/48 rotorcraft are fortunate that the range of operational US tandem designs by the pioneering Piasecki company (subsequently Vertol and then Boeing Vertol) can now be made in this scale, ranging from the H-21 Workhorse through the HUP Retriever, the H-46 Sea Knight and the almighty CH-47 Chinook. In 2004, Academy tooled the first of multiple versions of the H-46, starting with this boxing of the USMC CH-46E. At the time it was widely hailed as accurate and a pleasure to build, but (frighteningly) 2004 is 19 years ago, and things have moved on.
I have decided to try and make at least one helicopter a year, and since this kit is the oldest in my stash, its turn to be built arrived. Over the years I had acquired an Eduard BigEd PE set, comprising interior, exterior and seat belt sets, and the ever-useful masks, some ResKit resin wheels and a set of markings by AOA Decals. The latter are unusual in that they cover the CH-46, CH-53 and AV-8B from HMM-264 ‘Black Knights’ when deployed on the USS Bataan in 2006, and thus only provide the main and unique markings. Stencils and national insignia would need to come from the kit.
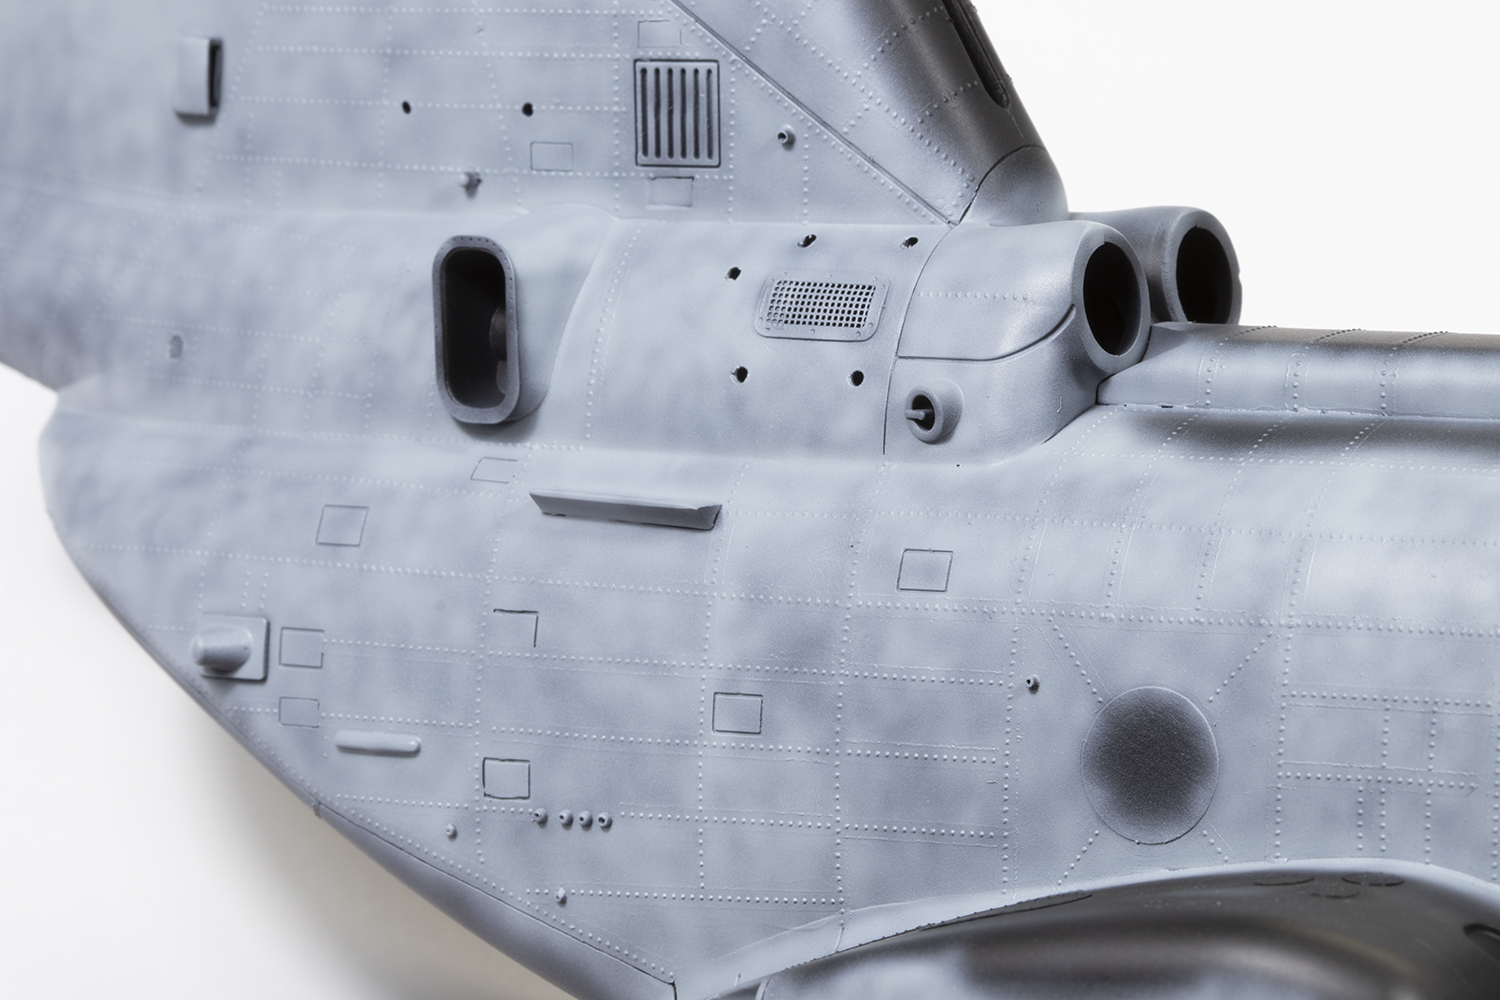
If I can, I like to centre a project around a particular feature that’s a bit different. When perusing reference photos and comparing them to the plastic in the kit, what became obvious was the fictional surface detail moulded by Academy. The real thing is festooned with positive rivets, often somewhat wonky, with almost no panel lines. The kit, on the other hand, provides deep and wide recessed panel lines. An early decision was to fill all that and represent the rivets with resin decals made by Archer Fine Transfers. I knew they would be out of scale and that I could never replicate the pattern closely, but I hoped they would give the flavour of what they look like. At the time, Archer rivets were what was mainly available, and so £80 later, I had enough to do this aircraft. Quinta and HGW have since released similar, and probably better, products at a quarter of the price.
Unsurprisingly, Academy’s plastic is very well moulded, but the detail is chunky compared to present expectations. I can live with that, but what I couldn’t live with were all the numerous ways in which the kit did not match reality. Some of this is not Academy’s fault – there were lots of changes made to the E during its lifetime and I wouldn’t expect all of them to be included. But others are less excusable – the box art and painting instructions, for example, are more representative of what should be in the box. I was fortunate enough to have access to some walkaround photos of this particular airframe during the same cruise, and some Googling produced more, which gave me a great basis for the changes I would need to make.


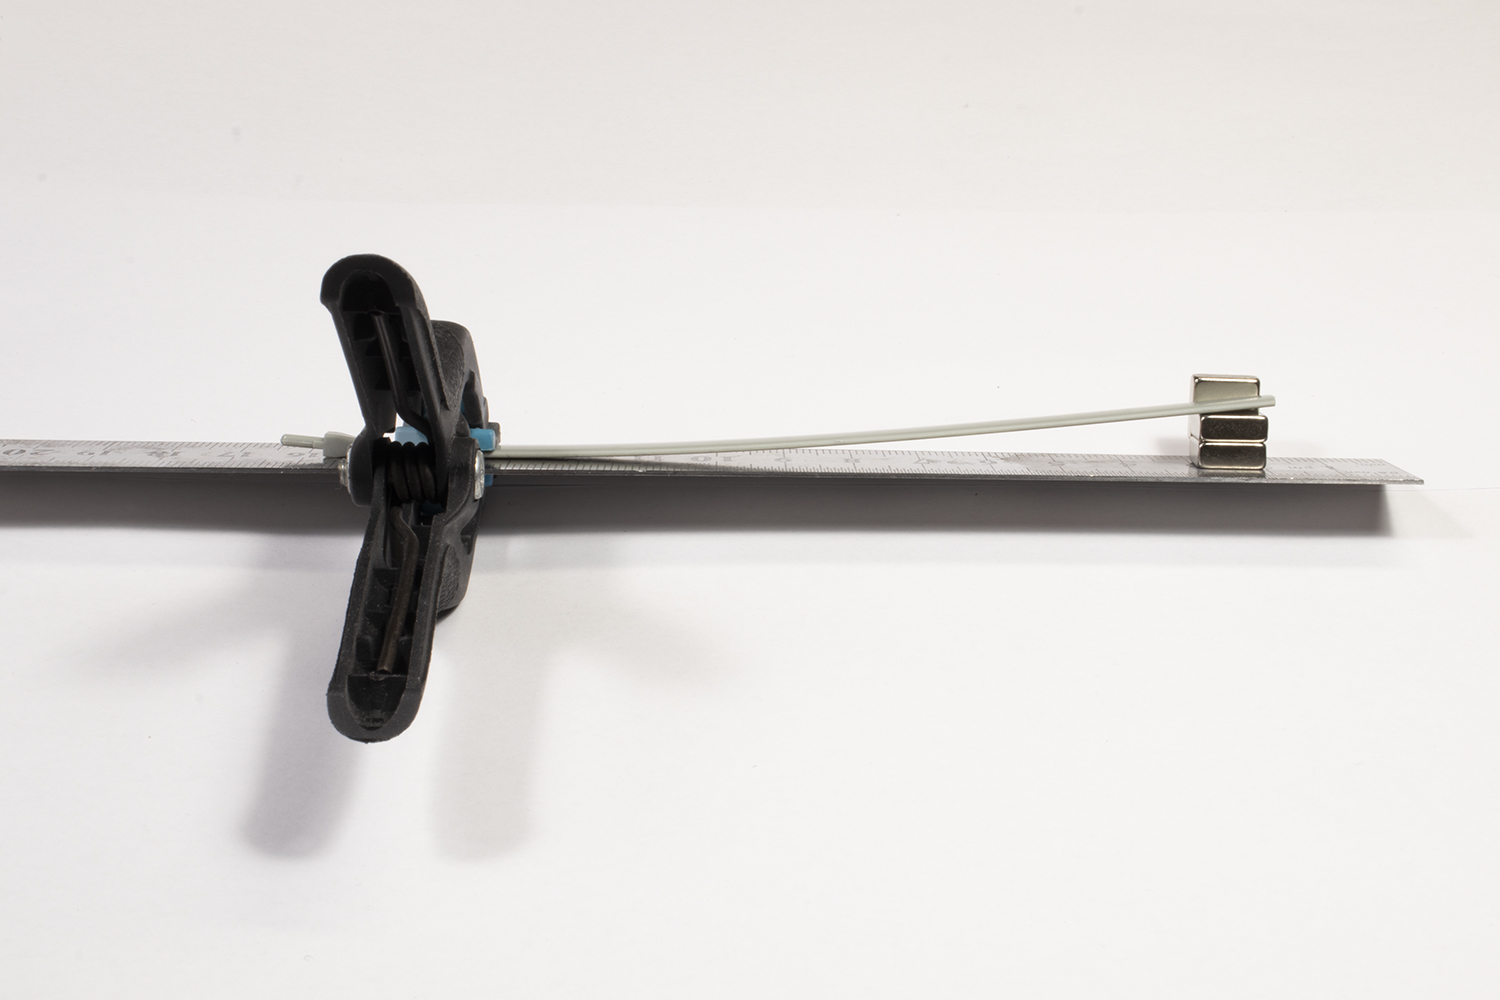
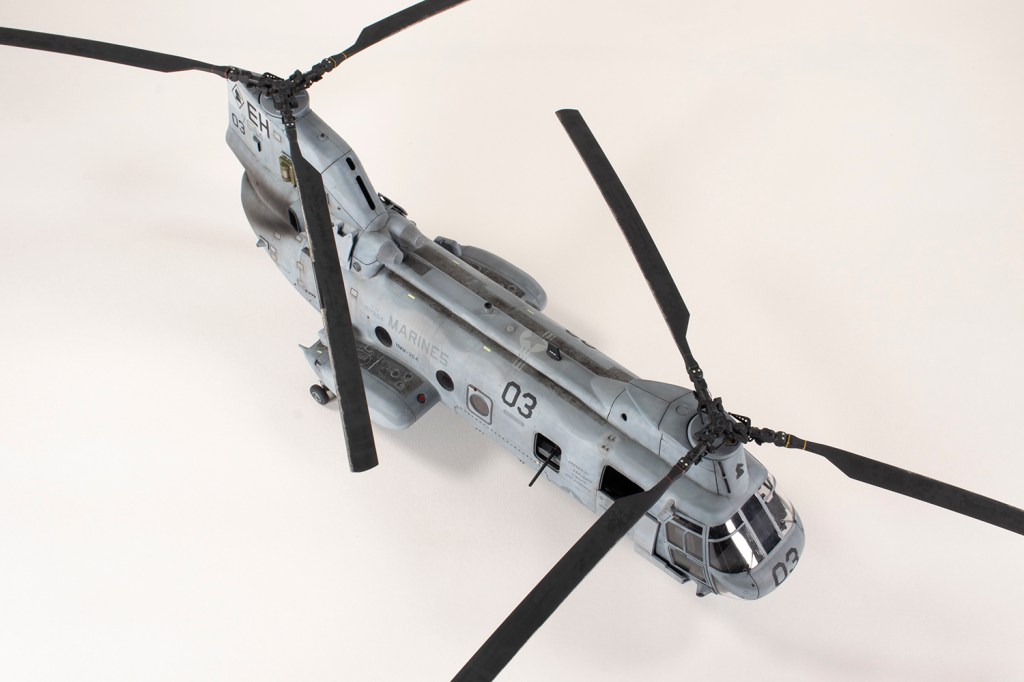
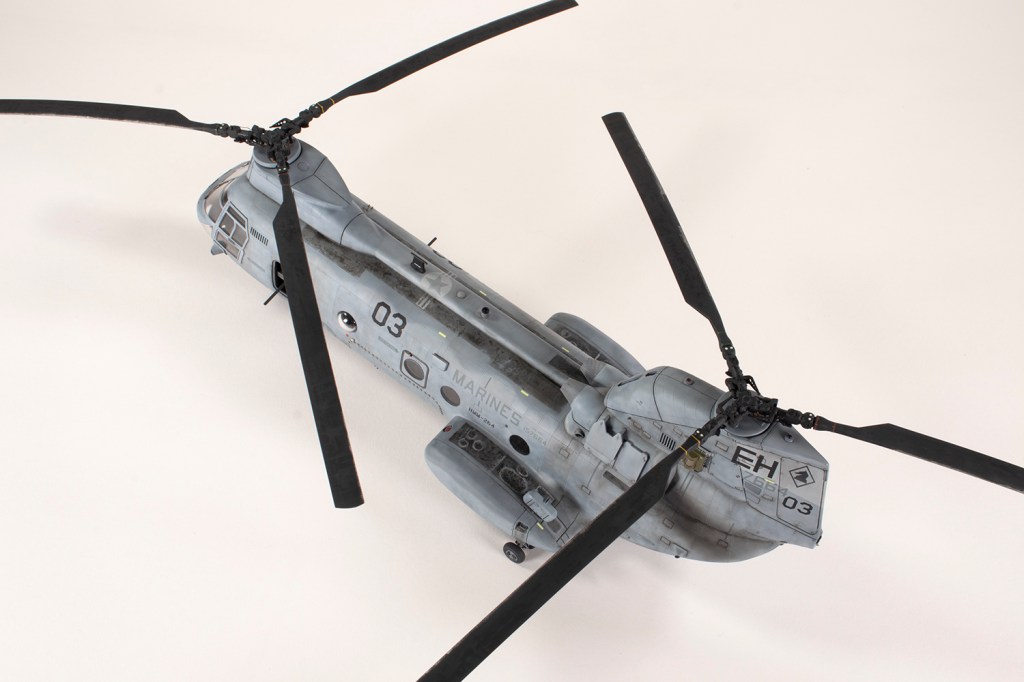
The first point of order was to start with the surface detail. Aside from some prominent panel lines around the rotor pylons, the rest were all filled with thick super glue mixed with VMS CA powder. Second was to address the rotor blades, which should be drooped a little. Using a jig made from a steel rule and a clamp I dunked them in boiling water for 30-40 seconds before quenching in cold water. Unfortunately, I was a little over-enthusiastic and the droop is somewhat over-pronounced.


Painting rotor blades is boring and yet those on this CH-46 weathered in a very interesting pattern. I decided to paint them early to get them out of the way. I couldn’t interpret the photos I had clearly, so engaged in conversation with several Sea Knight mechs online. Apparently, those used on this deployment would have had a metal leading edge added to the blades to protect them from sand, but the sand caused the paint to wear away, leaving the metal exposed. A protective black tape was also applied that would flake away. My strategy for replicating this was to base coat the blades in shades of black using a lacquer paint with an aluminium leading edge. I sealed this with VMS Satin Varnish and then overlaid it with various shades of Tamiya acrylic airbrushed through a mottle mask. I could then use a brush dampened with X-20A thinner to gently abrade the leading edges to reveal the metallic shades.


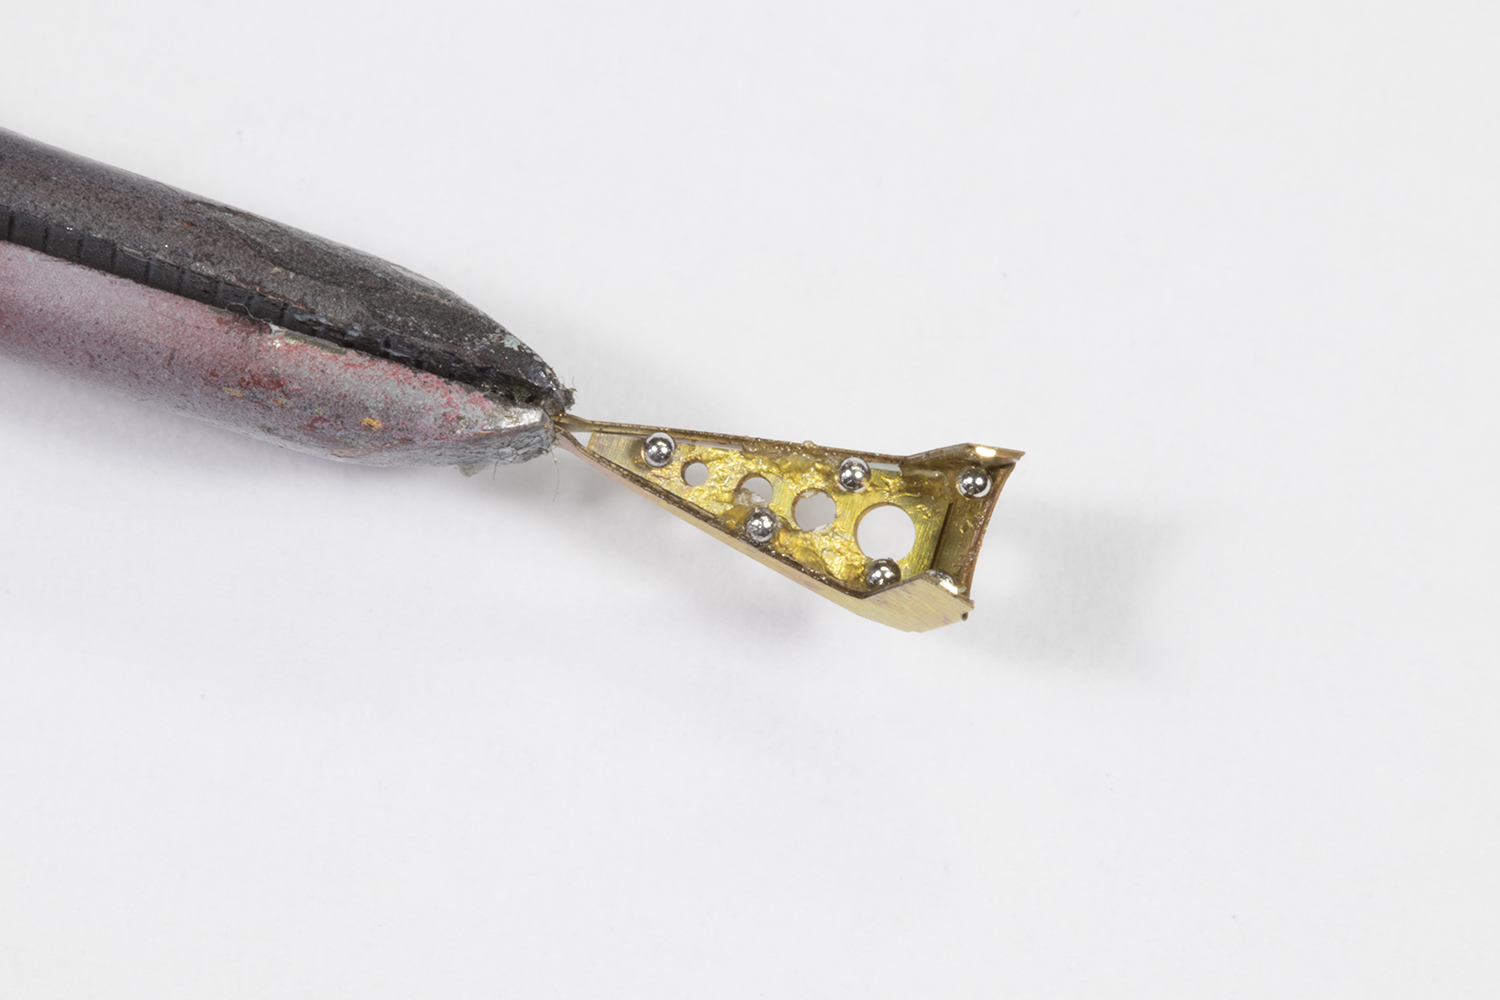
The rotor hubs themselves are much less complex than reality and do not stand up to close scrutiny. Aside from adding the PE Eduard provide (initially backwards!), I did not enhance them any further. When they were added at the end, I could not get the vertical linkages to meet the rotor arms in the correct place, and so mine are a fudge. Don’t look too closely!


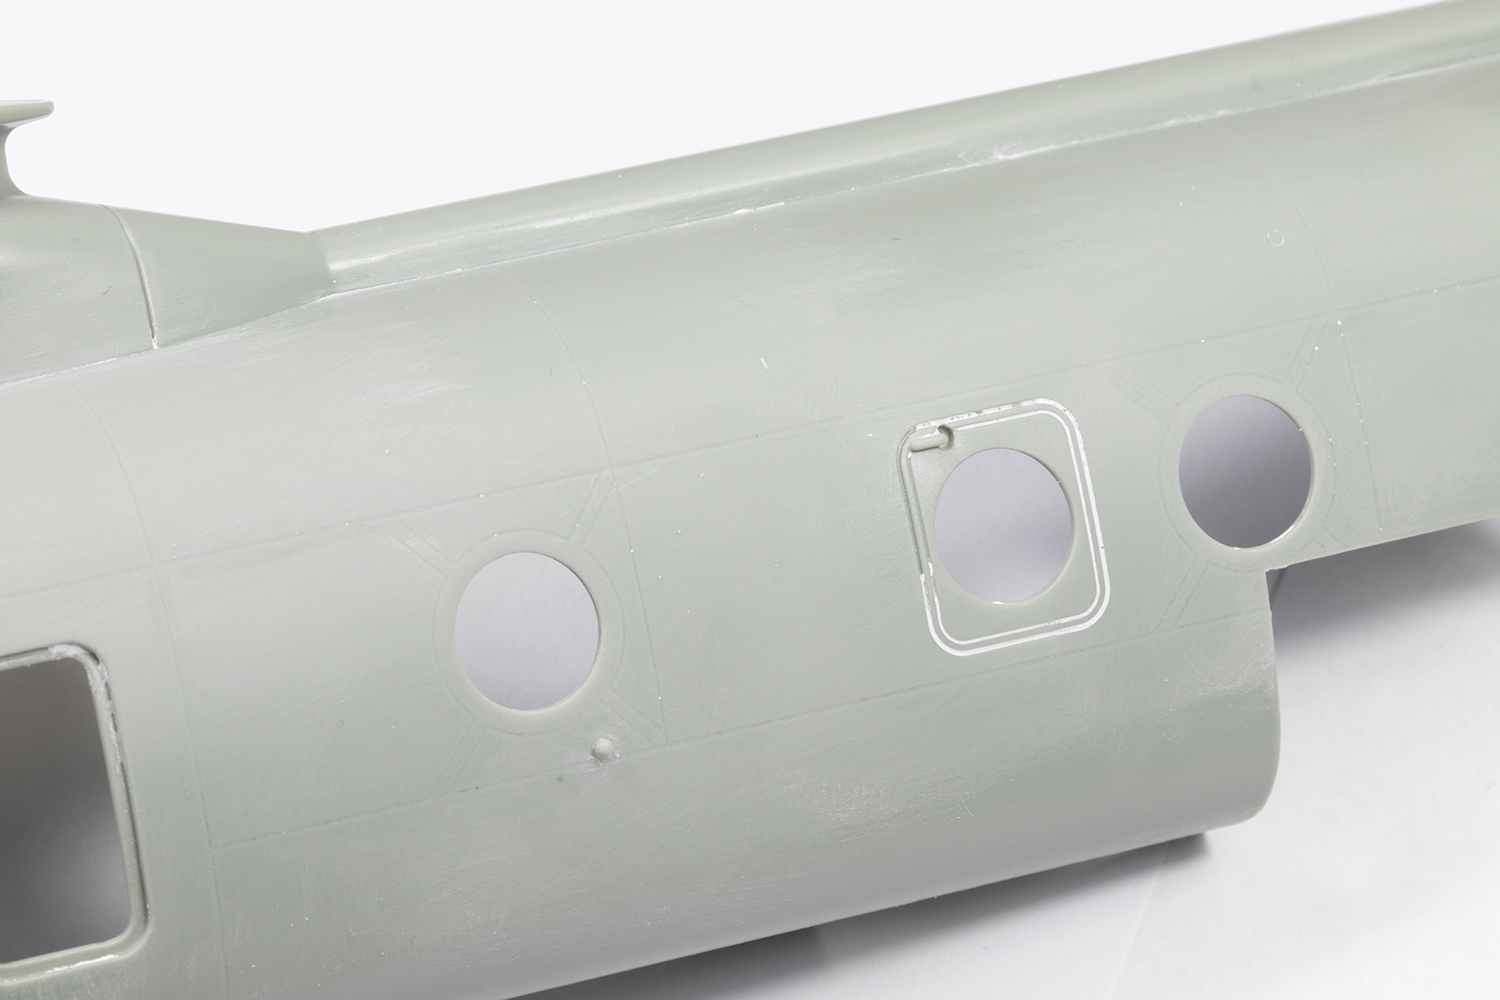
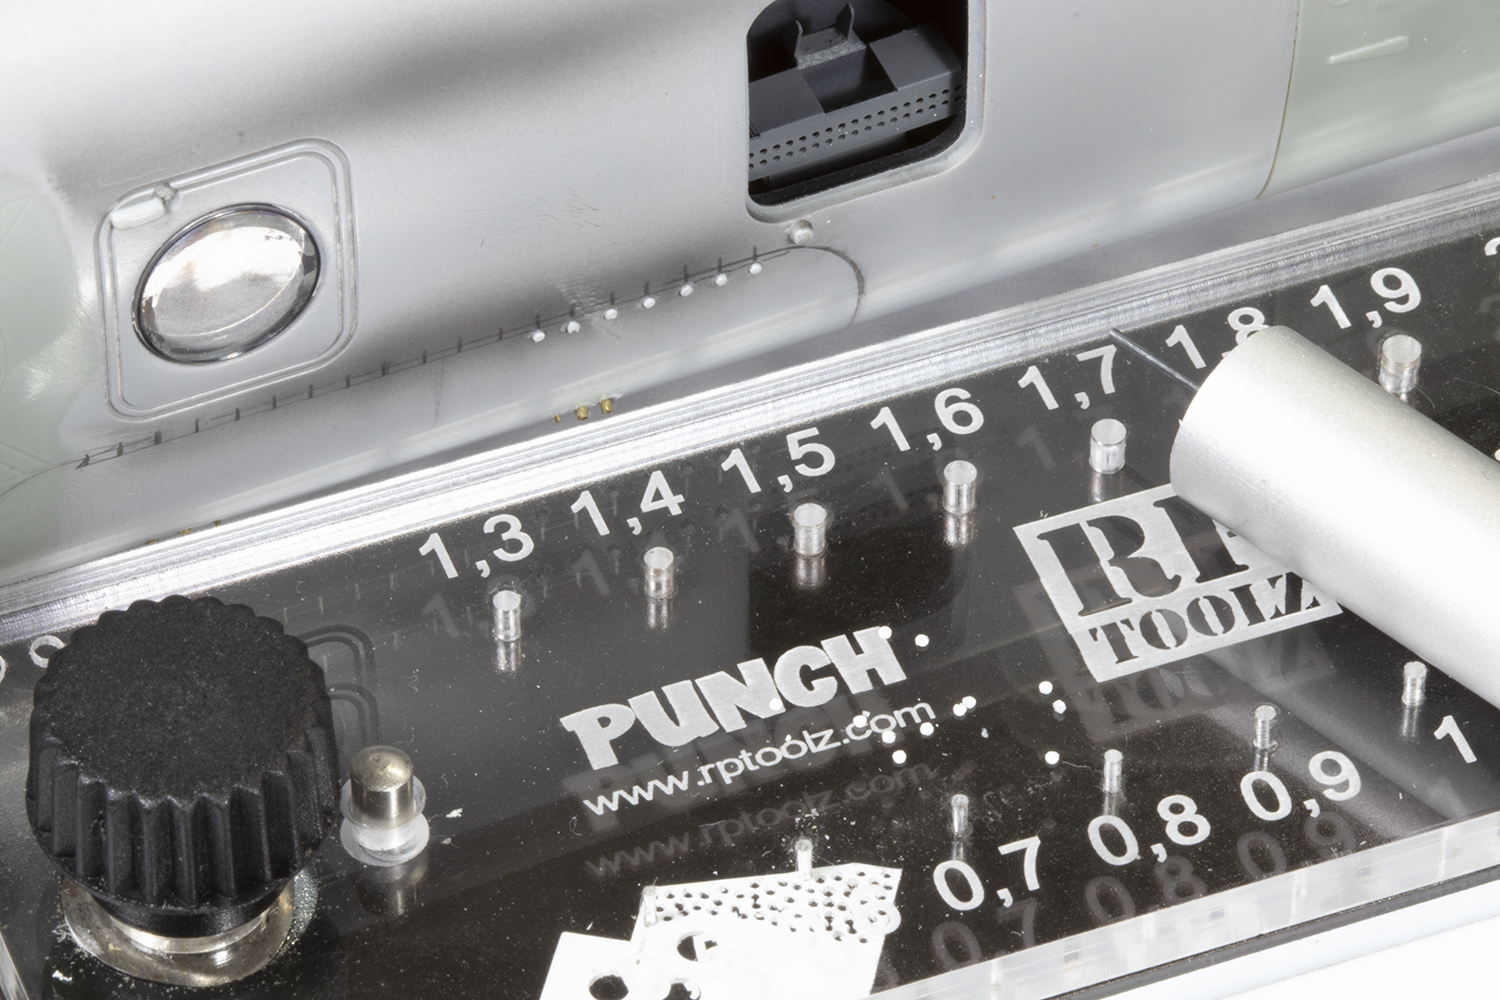
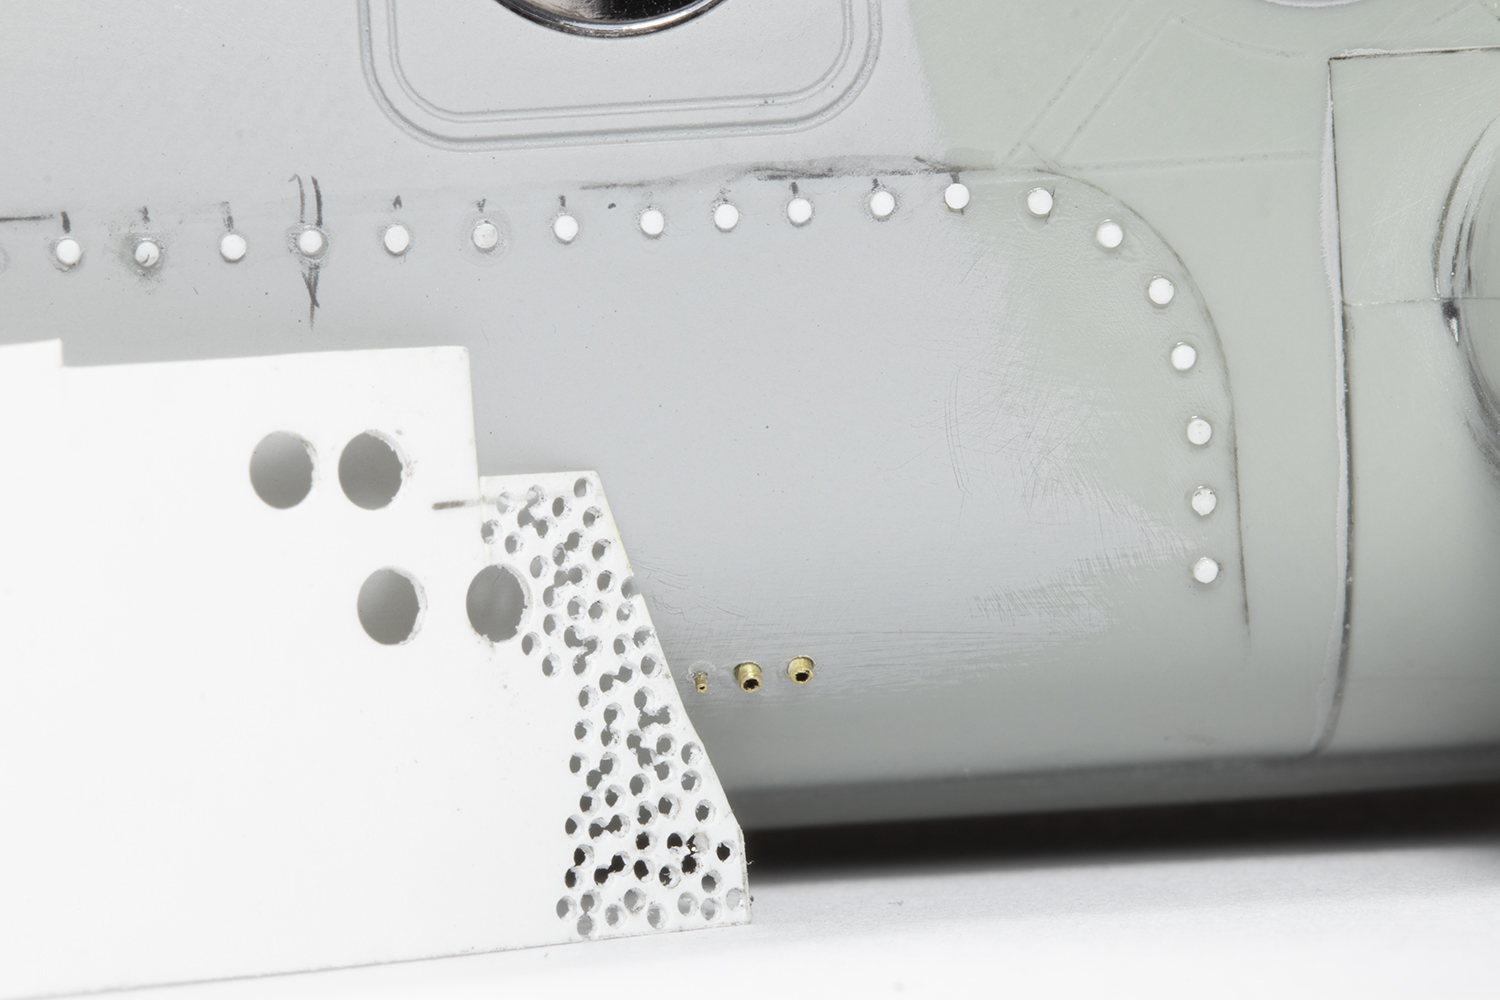
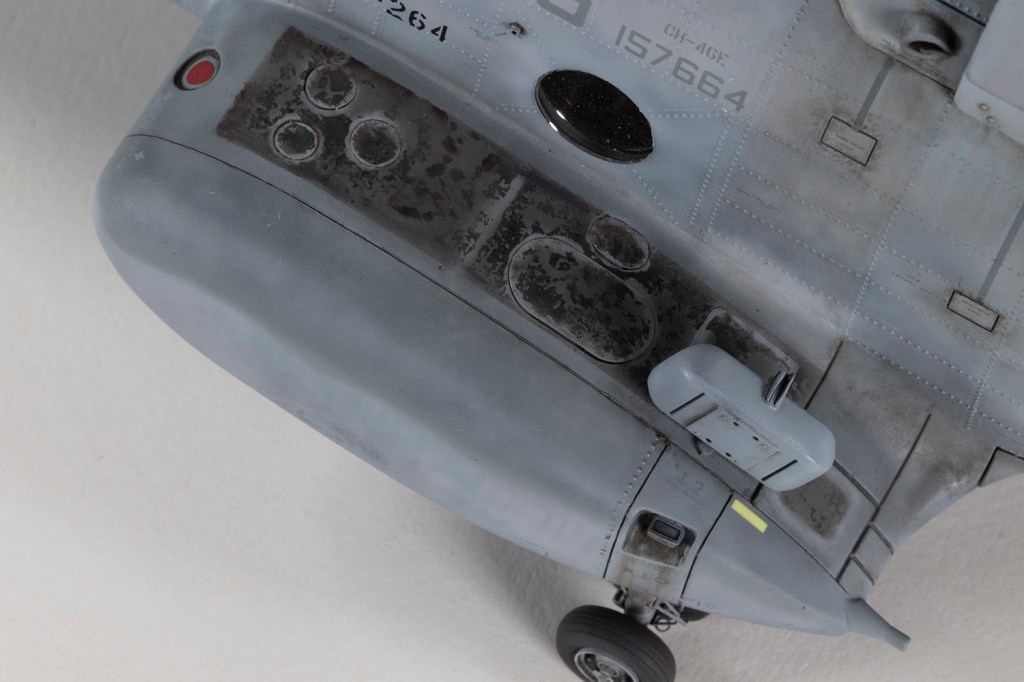
Lots of other changes needed to be made early on. This particular Sea Knight didn’t have the winch fitted, but there are some bolts where it should be. These were represented by some very fine spare parts from Hasegawa A-4 kits. The flotation bags the instructions have you fit to the sides should be omitted, but there’s a lot of prominent raised detail to add where they should go. I punched 0.6mm discs from very thin plastic card; they’re a bit overscale but close enough for me. That would turn out to be true for most of the detail I would add.
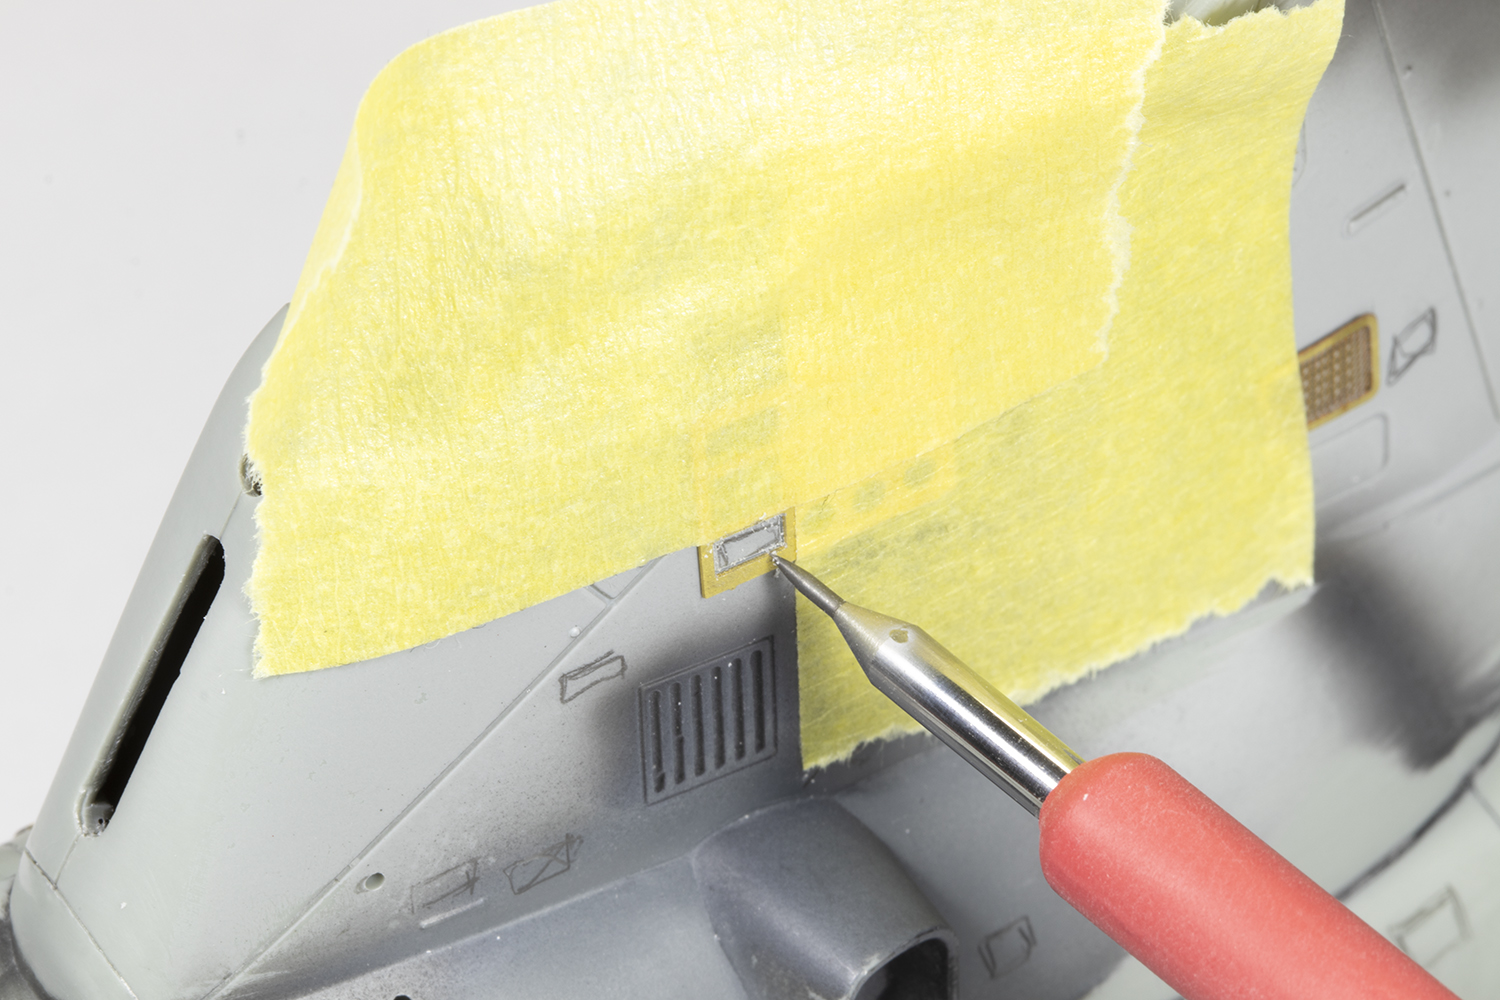
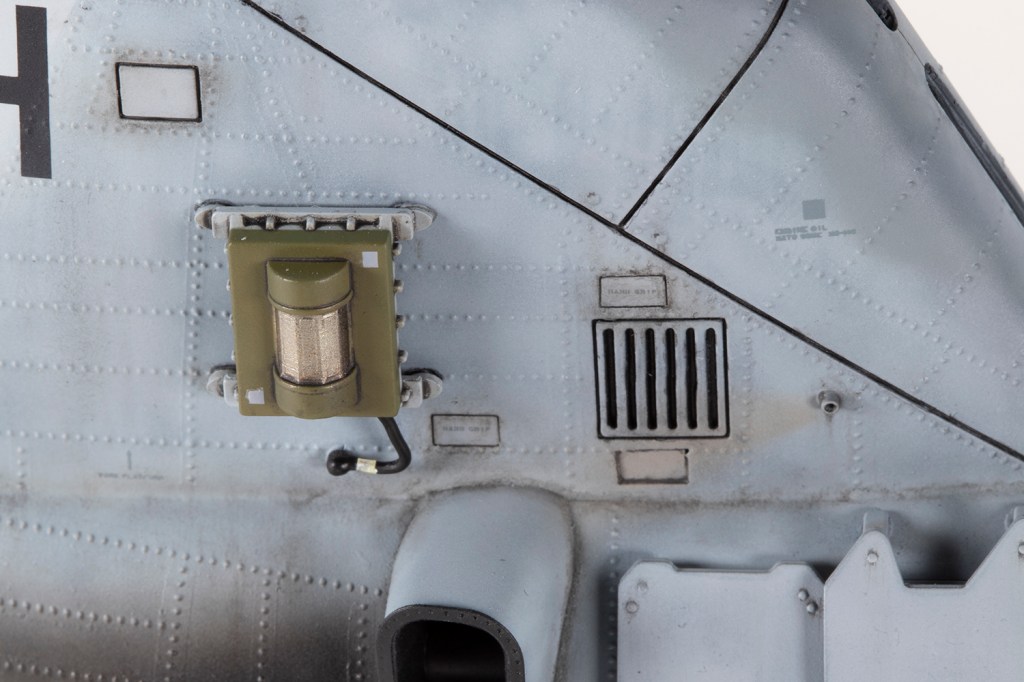
There should be a boxy intake on the port fuselage side, above the windows. This was fashioned from a part from the spares box. Similarly, the GPS dome on the spine needed to be added, along with a pipe-like feature in the same place. The large black antennae above and below the fuselage are the wrong shape and I corrected them using plastic rod and a little fillet of super glue. The list of these minor changes was only to grow.
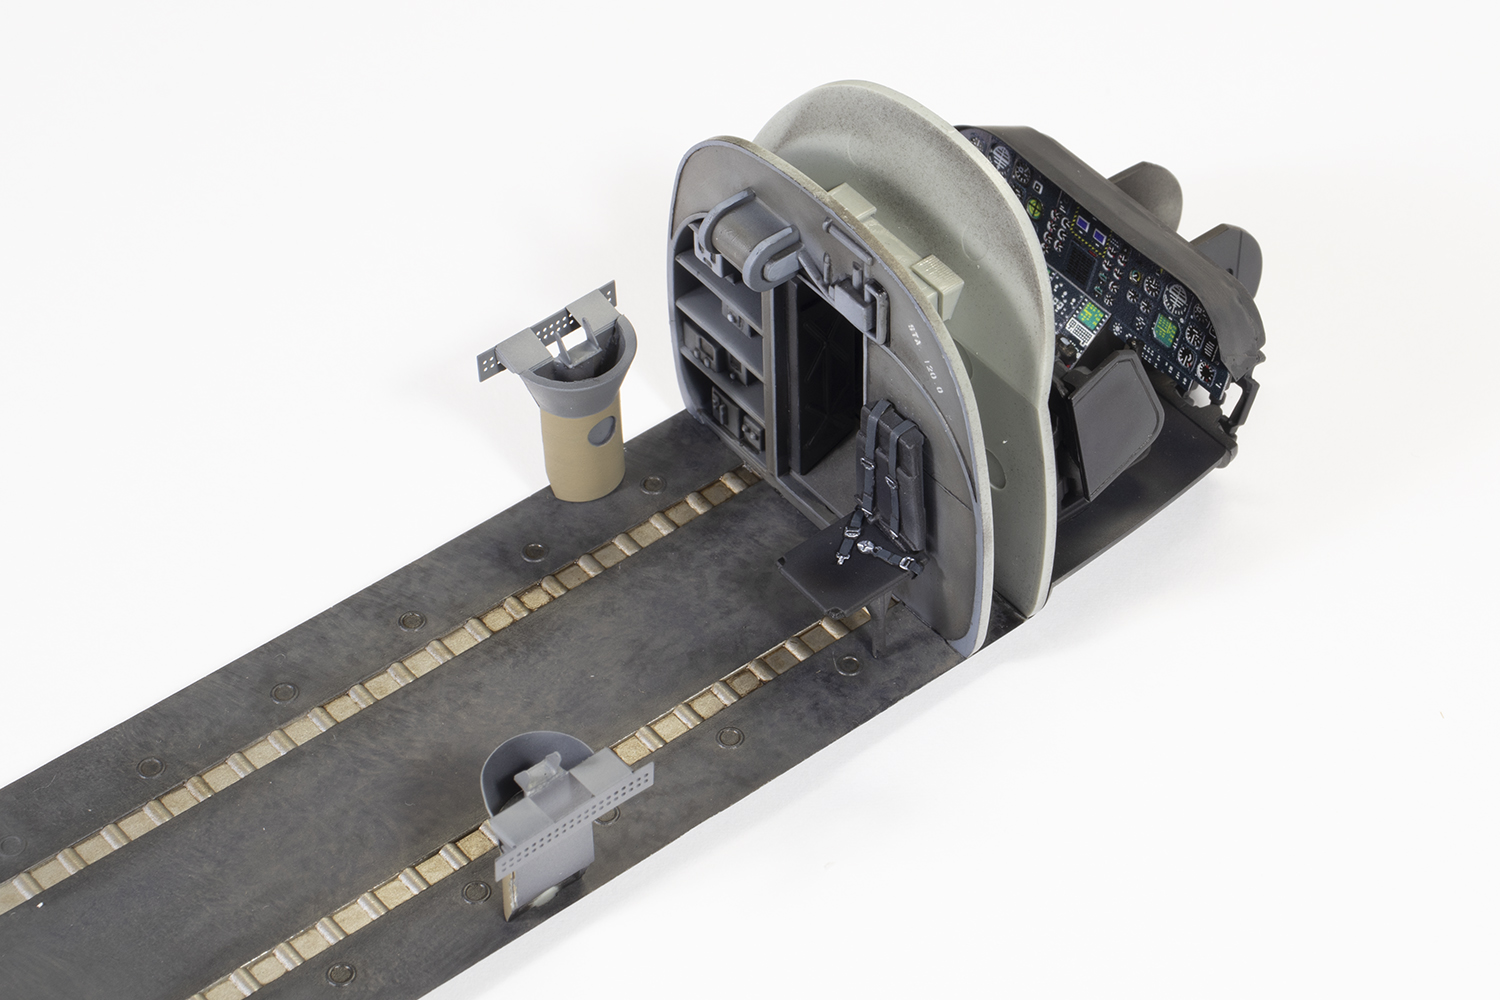
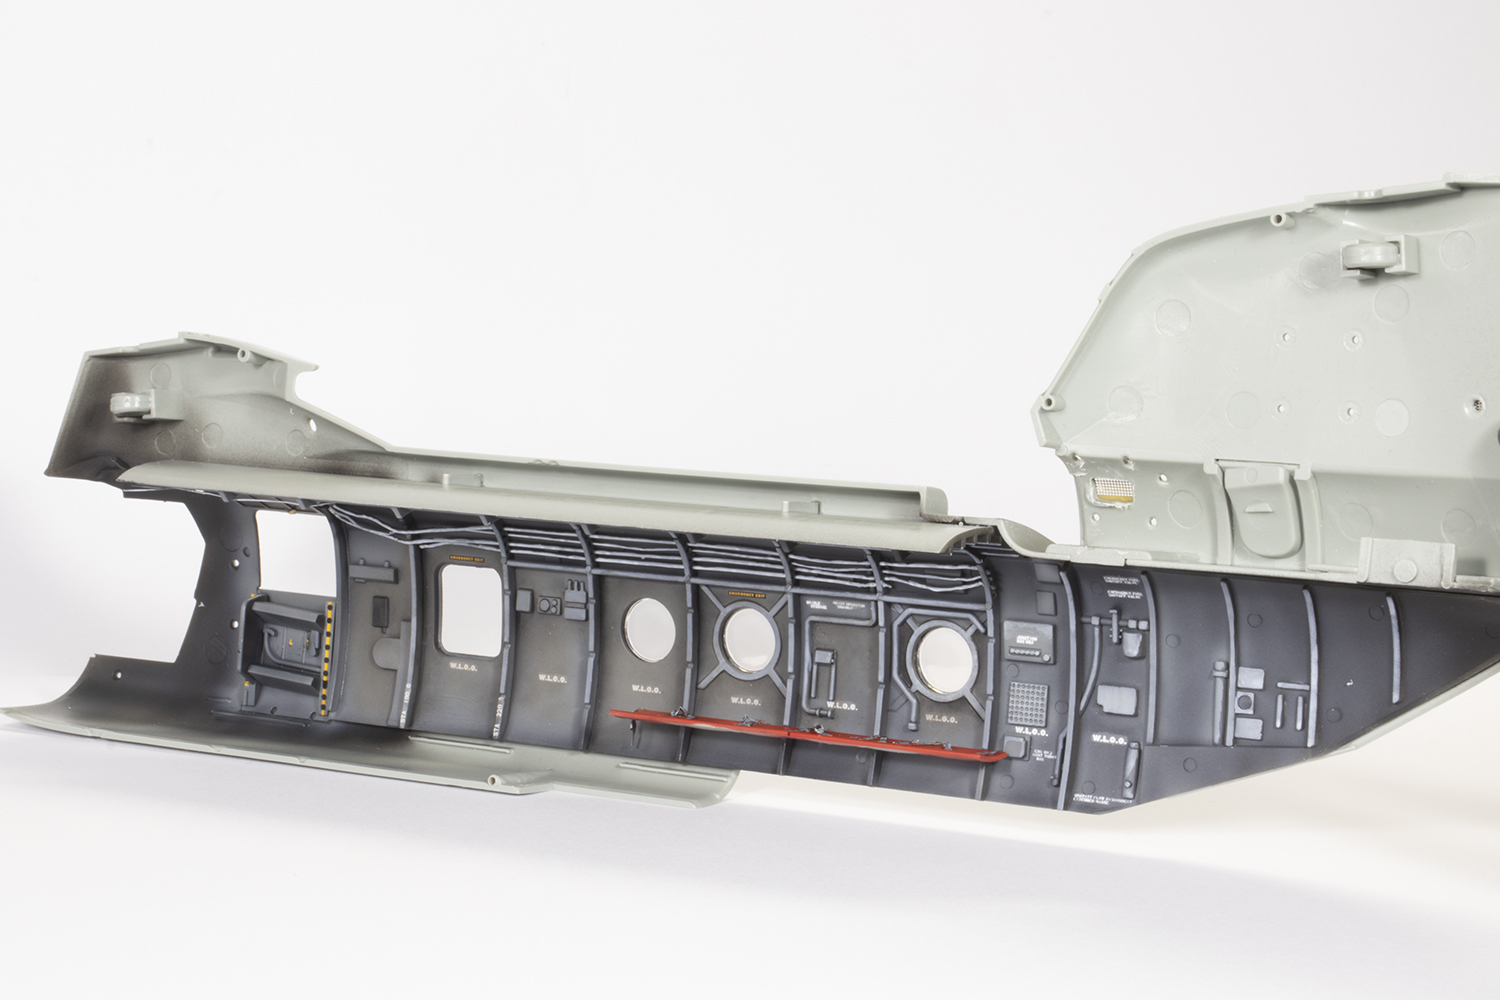
Initially I was quite pleased with the interior provided by the kit, but then I started looking at photos, and realised how much detail was missing. In a fit of stupidity, I thought I’d give scratchbuilding the masses and masses of wiring and pipework that line the interior a go. A couple of hours later I had added a very small amount of badly executed detail and decided to call it a day. I’ve learned that scratchbuilding interior detail is something I just cannot get motivated to do well. Since I planned to close the tail door anyway, fortunately not much would be visible past the guns. This also meant I didn’t need to remove all the ejection pin marks as most of them would be invisible.

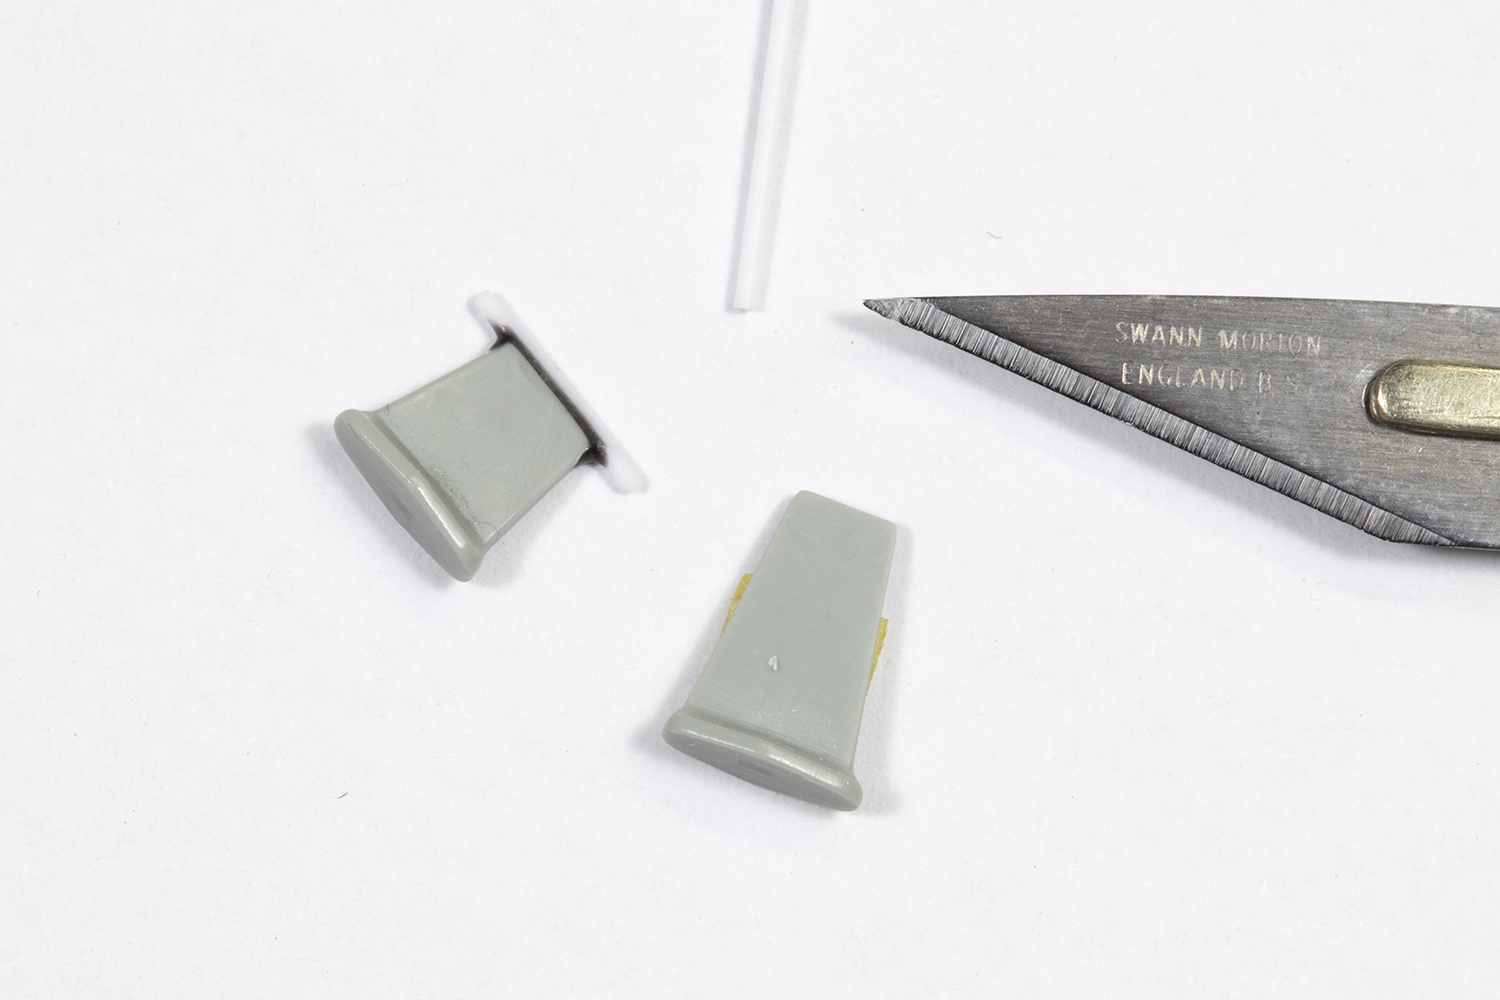
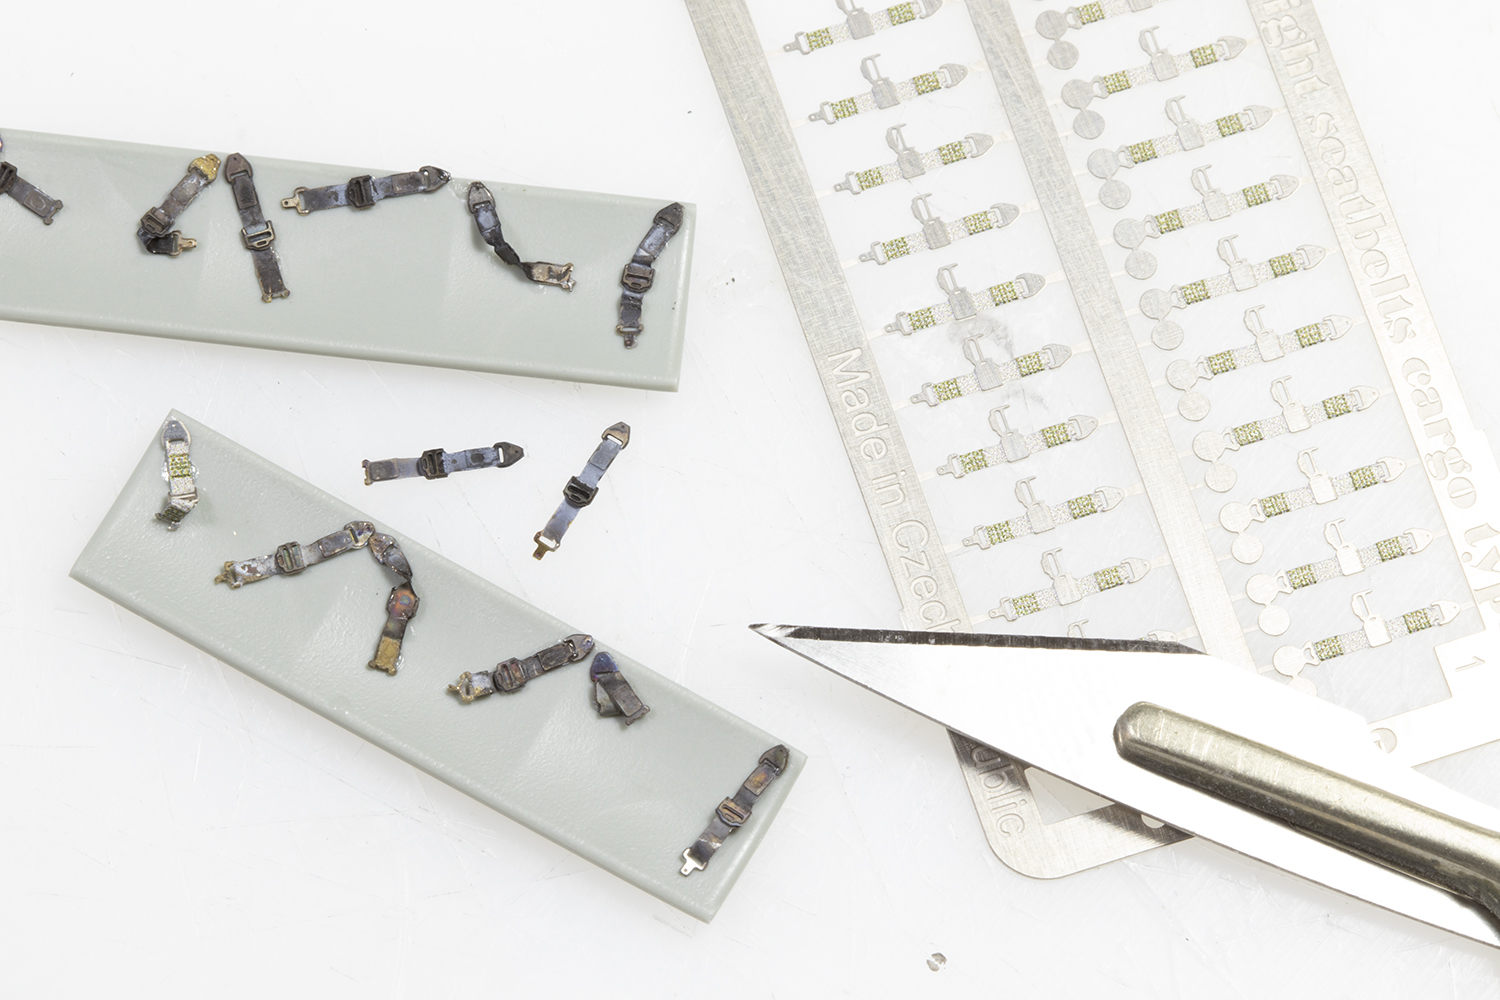
The seats, on the other hand, remained exposed, and a happy few hours were spent adding all the etched belts. The red canvas adds a nice splash of colour, and I could ignore most of the seat legs as, again, they could not be seen. Those that could were replaced by thinner plastic rod. A missing jump seat behind the cockpit was added using a UH-60 part.


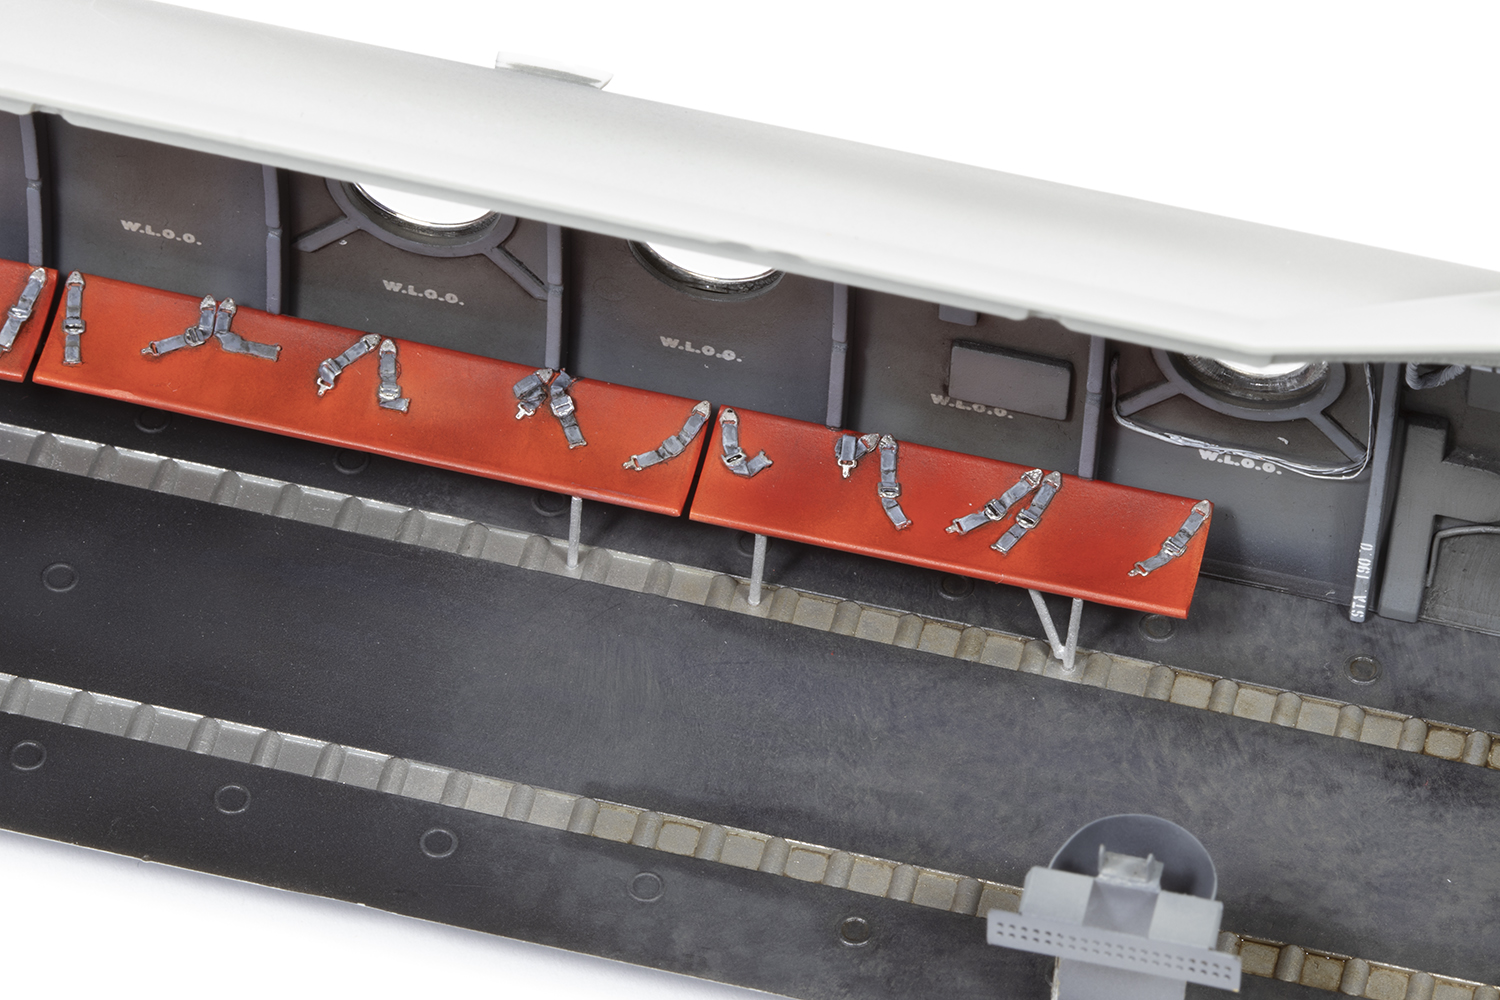

A further detail added at this stage were at least 19 little vents around the fuselage, made from 0.6mm and 0.3mm Albion Alloys brass tubing. These litter the fuselage and are quite visible in photos once you see them. They are also noticeable for how badly installed they are on the real thing! There are definitely more that I could have added, especially on the underside of the fuselage.
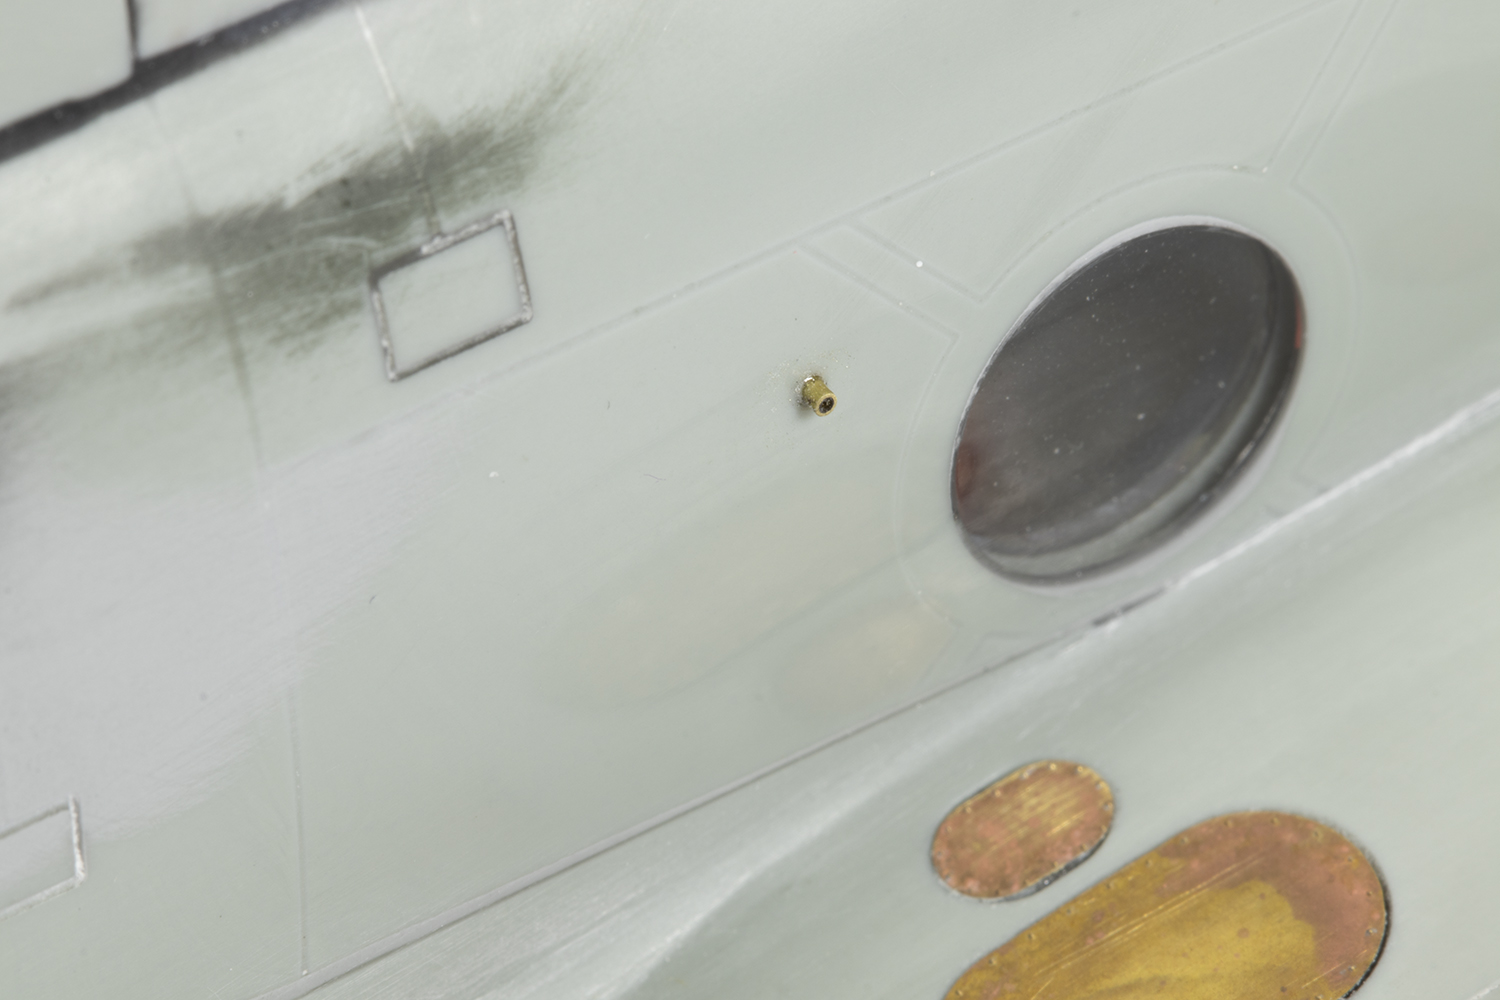
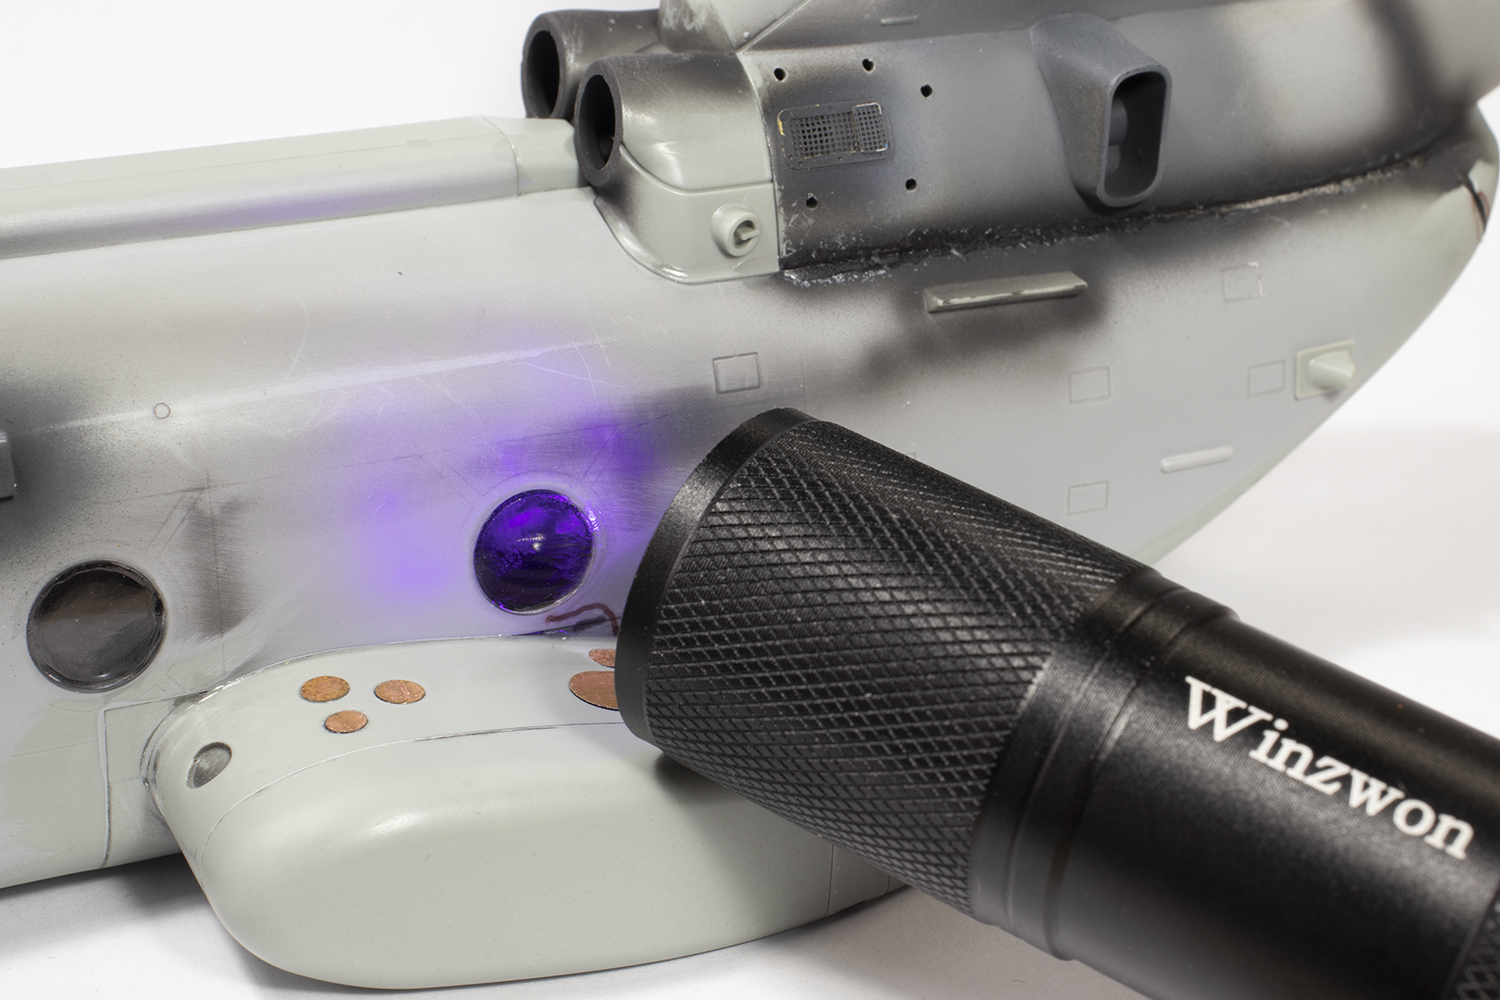
The clear porthole windows fit pretty well, but are a little proud. Several of them I filled with UV-setting clear resin and sanded and polished them down, which improved their appearance somewhat.
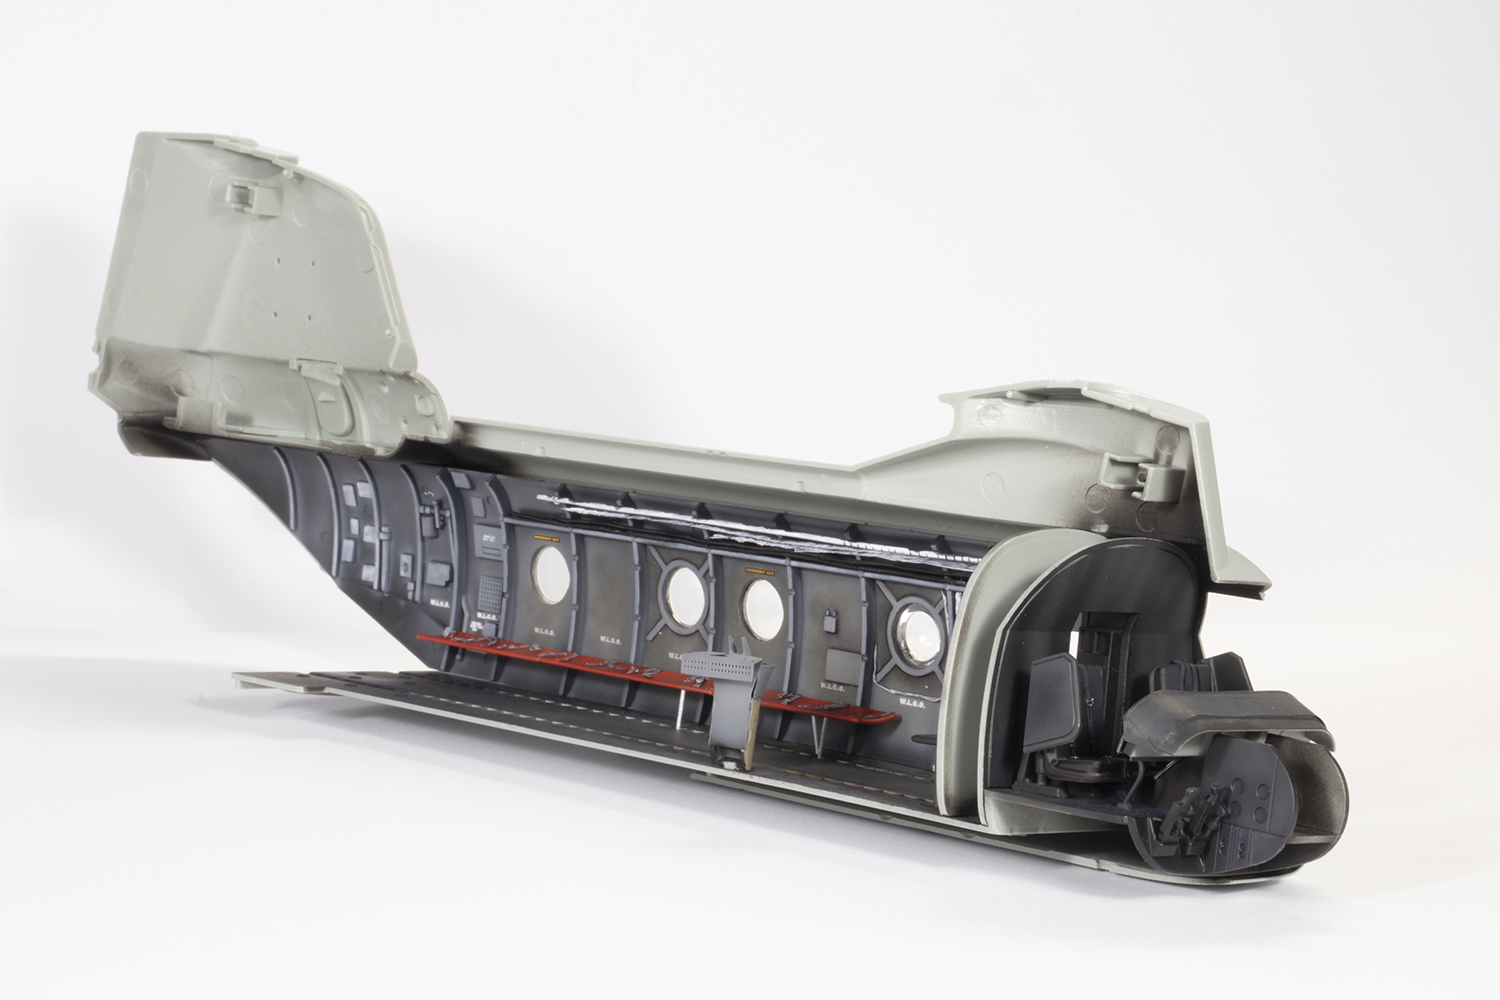
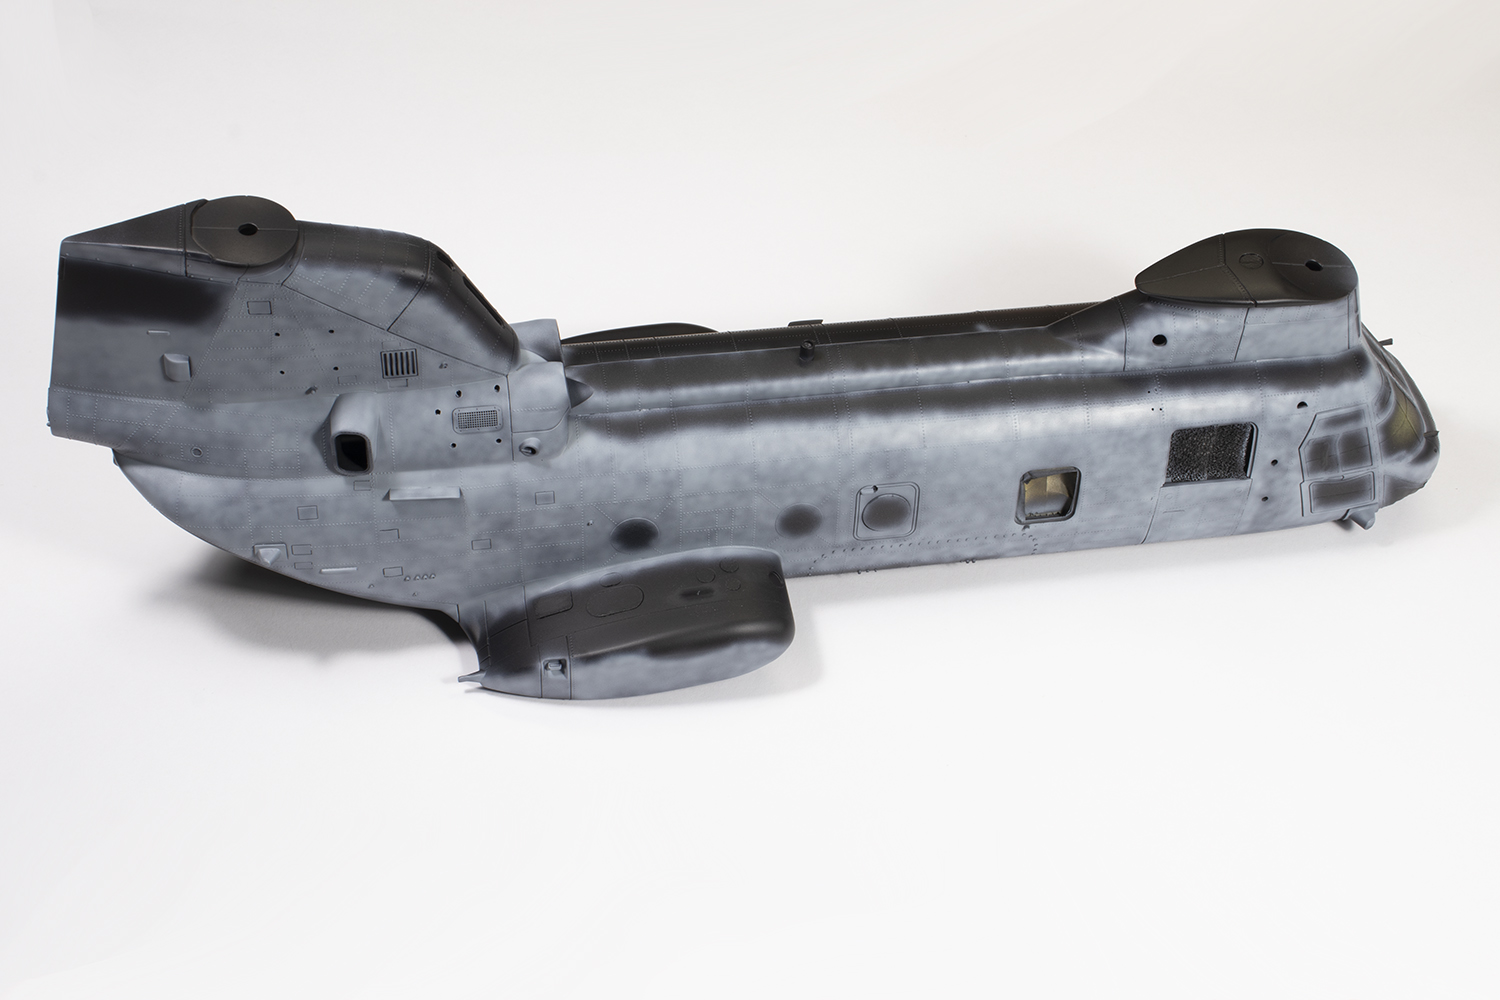
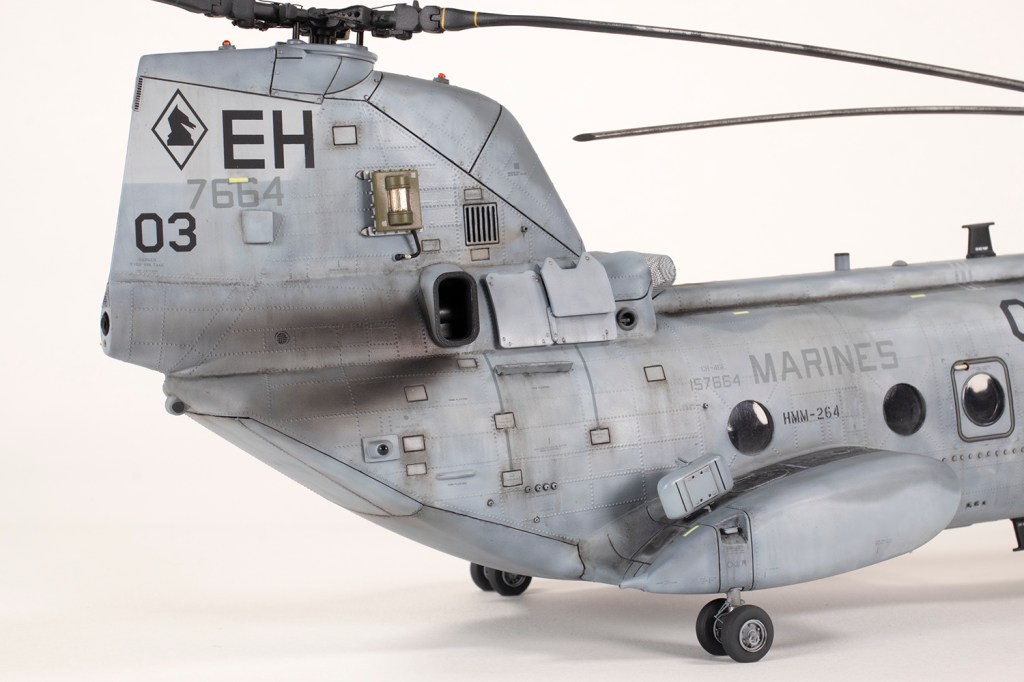
It then came time for the interior to be trapped in between the fuselage halves. As advertised back when the kit was first released, the fit was quite good and I used super glue for all the major joins. The openings at the front of the rear rotor pylon were cut out and filed to shape as this is quite distinctive in photographs. The panels here open outwards, so there should be a panel line along the fuselage seam in several places. Also added to the tail were several handhold panels that were missing; I scribed several but missed a few.

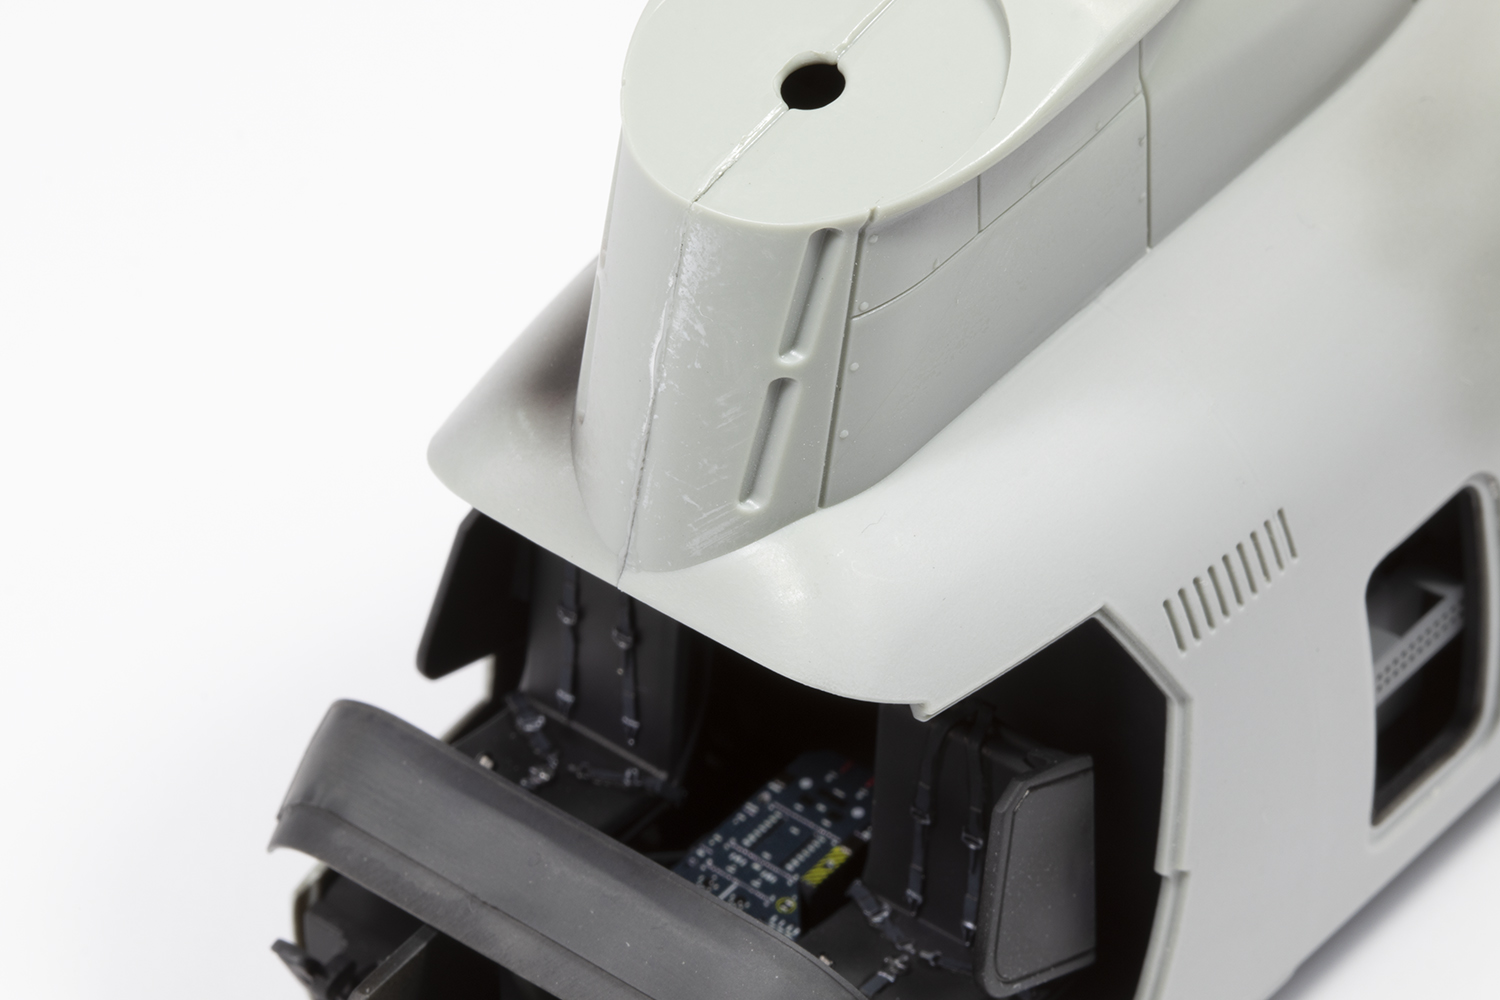
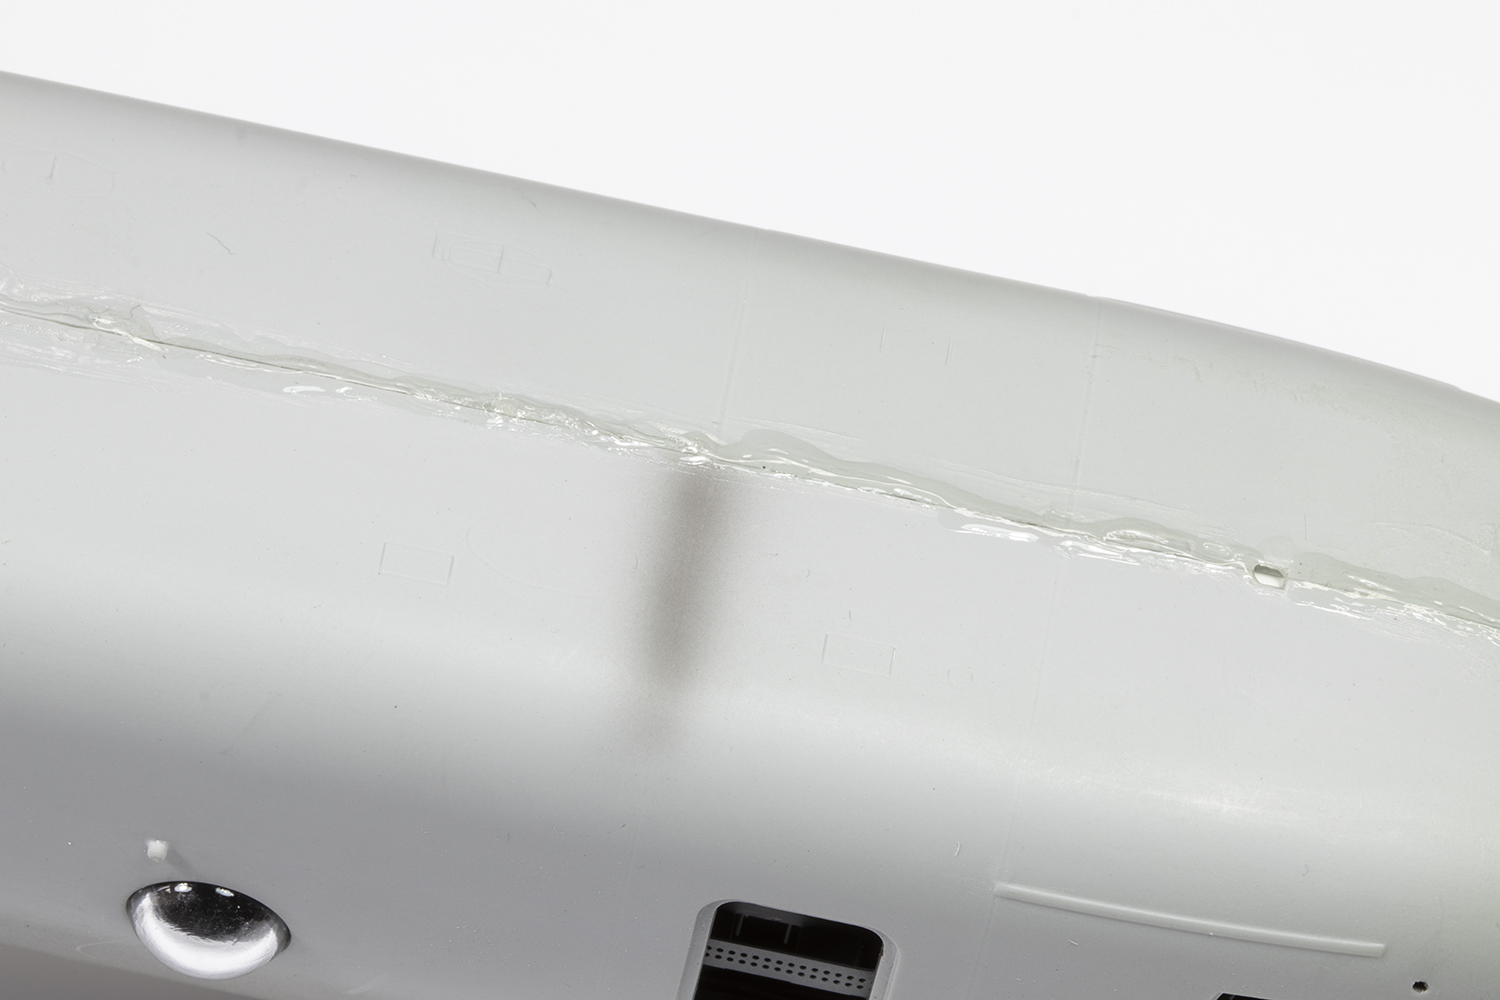
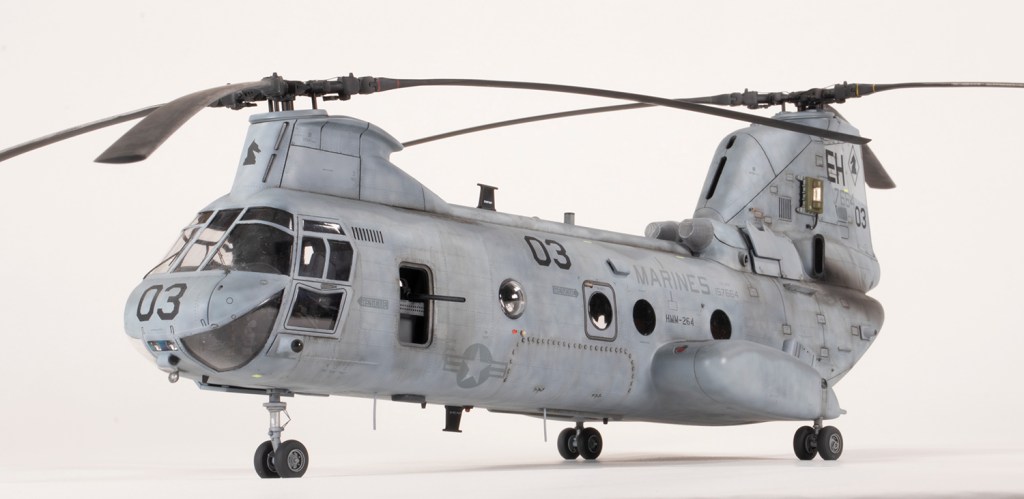
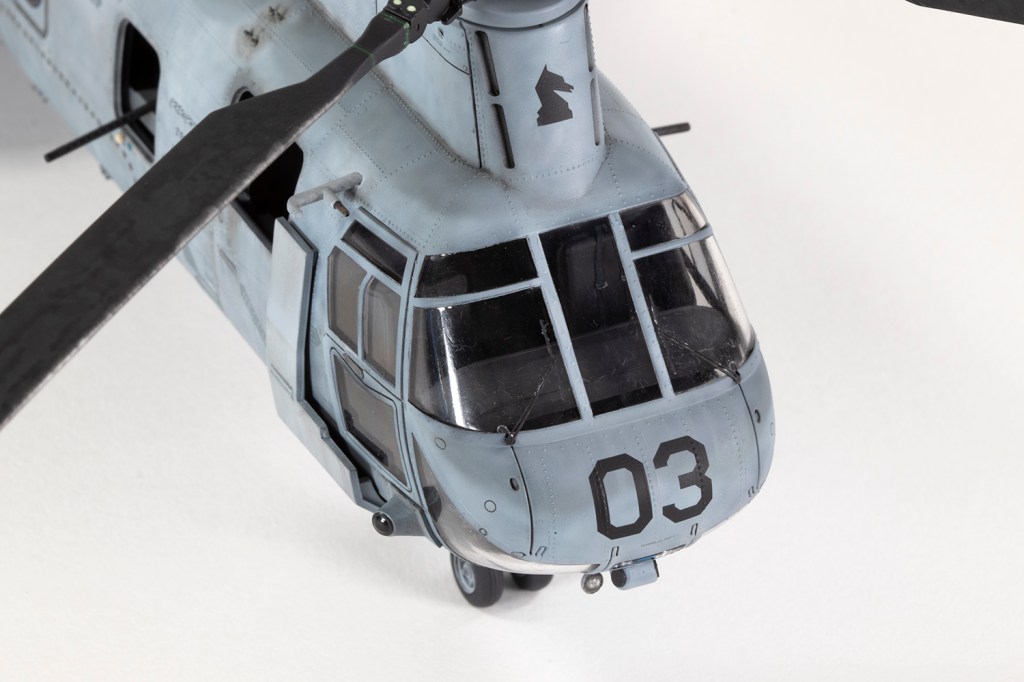
Fitting the clear windscreen parts was surprisingly easy, but the framing is way too thick. I tried to ameliorate this by blending the clear parts into the fuselage with two-part polyester filler, which is super smelly but sets super fast and sands very smoothly.


With the fuselage together I needed a decent layer of light-coloured primer to begin the tedious task of adding the rivets. These come on a continuous layer of decal film and needed to be cut into strips. I started with a sheet about five years old and found the decal film quite rough and the adhesive less effective. The newer sheets I had were better, but no matter what I did, I could not eliminate the step at the edge of the film, and this is a flaw that dogs the finished model. Nevertheless, I pressed on, spending about two weeks just adding line upon line of resin rivets. They are overscale, but I still think the final effect is worth it compared to what comes in the box. I settled upon using Mr Mark Setter Neo as the main decal solution, applied under the rivets. The resultant finish is fragile – the rivets are liable to come adrift or flake off in places – but in other areas I managed to get away with some masking over them. They did mean, however, that dealing with any paint flaws by sanding or polishing would be impossible. I do not claim the pattern is accurate, and especially around the circular windows it should be considerably different; I just couldn’t think of a way of getting the circular pattern of rivets required other than by placing them one by one, and I certainly wasn’t going to do that!


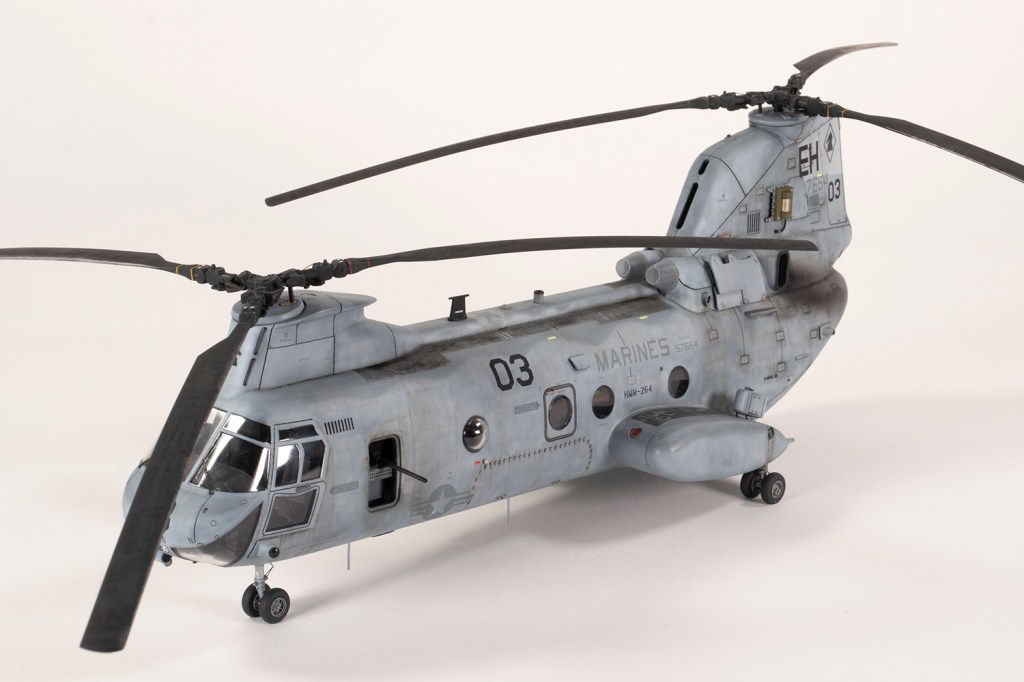
Eventually they were added and I could push on with paint proper, starting with a generous coat of Mr Finishing Surfacer 1500 Black. The two-tone grey scheme shows lots of tonal variation and painting over black would help with this, as would using different interpretations of the same shades by Mr Color, MRP, SMS, Hataka and AK Real Color: eight different bottles for the FS36375 and FS35237 were used in the end. The demarcation between the two greys was done freehand to try and reduce the contrast between the lighter and darker shades. From some angles, they appear very distinct, and from others they merge into one. The walkways are provided by Academy as decals, but I preferred to use these as templates and paint them. On this aircraft they were extremely worn and patchy, so I used a wide variety of colours airbrushed on and then overlaid later with some oil paints and dark shades of AK Interactive weathering pencils.


I had discovered when applying decals to the interior that the kit decals were not very sticky and rather stiff. This is a common problem for Academy decals of the era. To improve adhesion I applied a generous layer of X-22 Clear and used Mr Mark Setter (essentially a diluted PVA) under each decal. This did not fix the problem entirely and getting the kit decals to settle over the rivets was a lost cause. The AOA decals, on the other hand, were printed by Microscale and were incredible. Under a layer of Mr Color GX113 Matt there was no silvering at all.
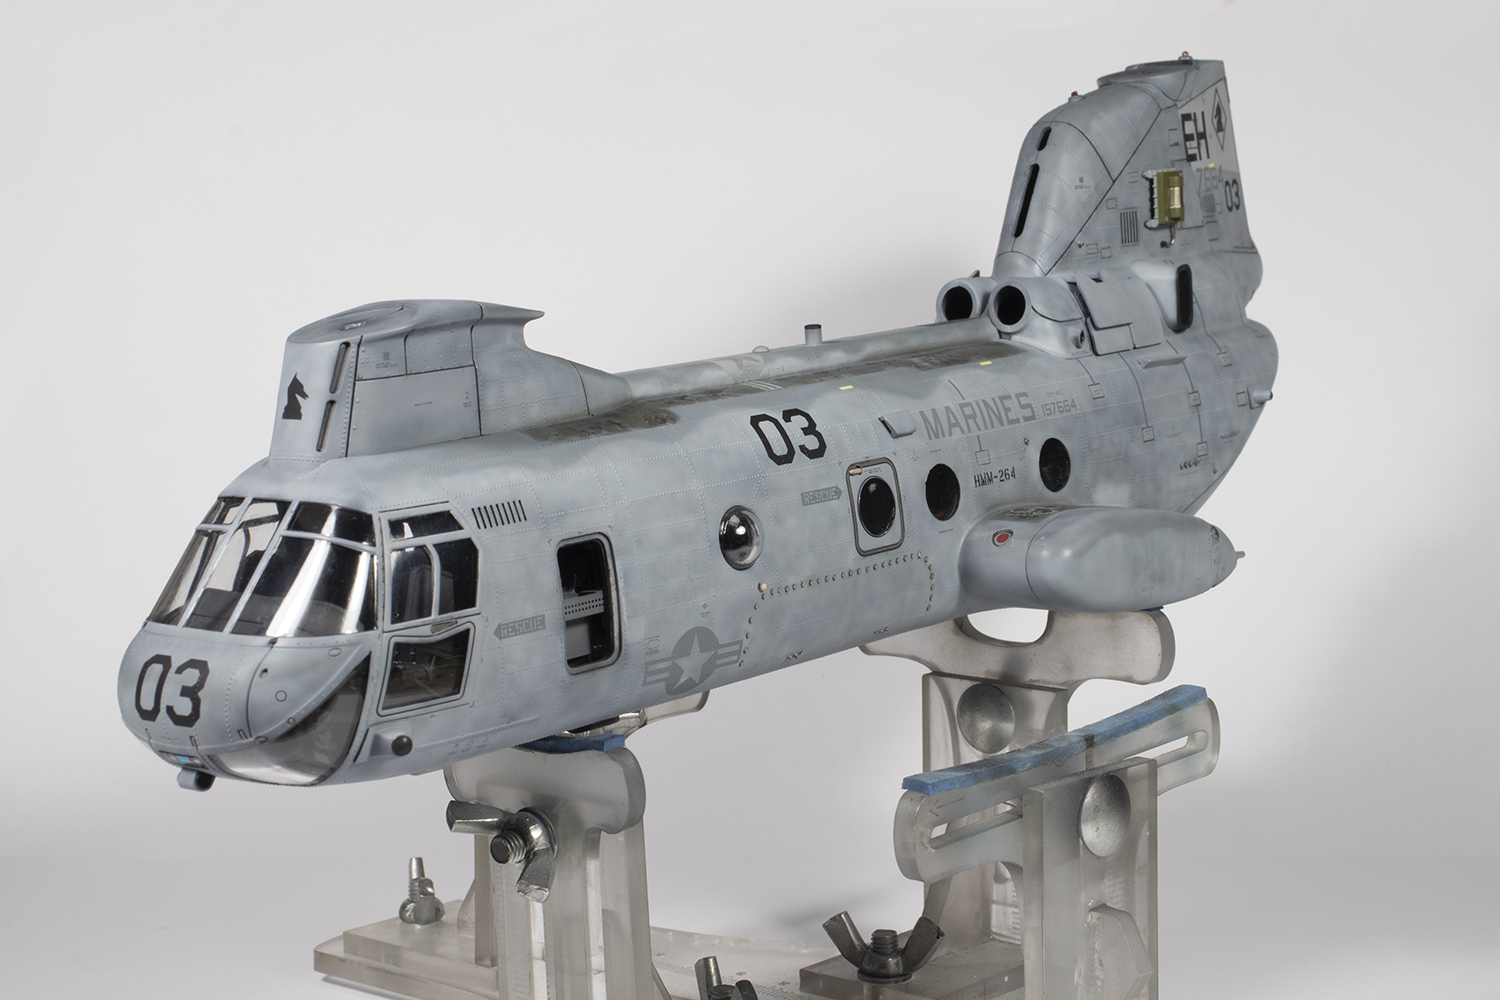


Exhaust stains from the rear exhausts are a very distinctive feature of the CH-46 and the pattern is not the same on either side. In fact, the fuselage is pretty asymmetric in general, and Academy did a good job of capturing this. The stains were airbrushed on using MRP NATO Black mixed with some Desert Sand to shift the tone to brown. Further subtle staining was added over the airframe with different shades of oil paint.
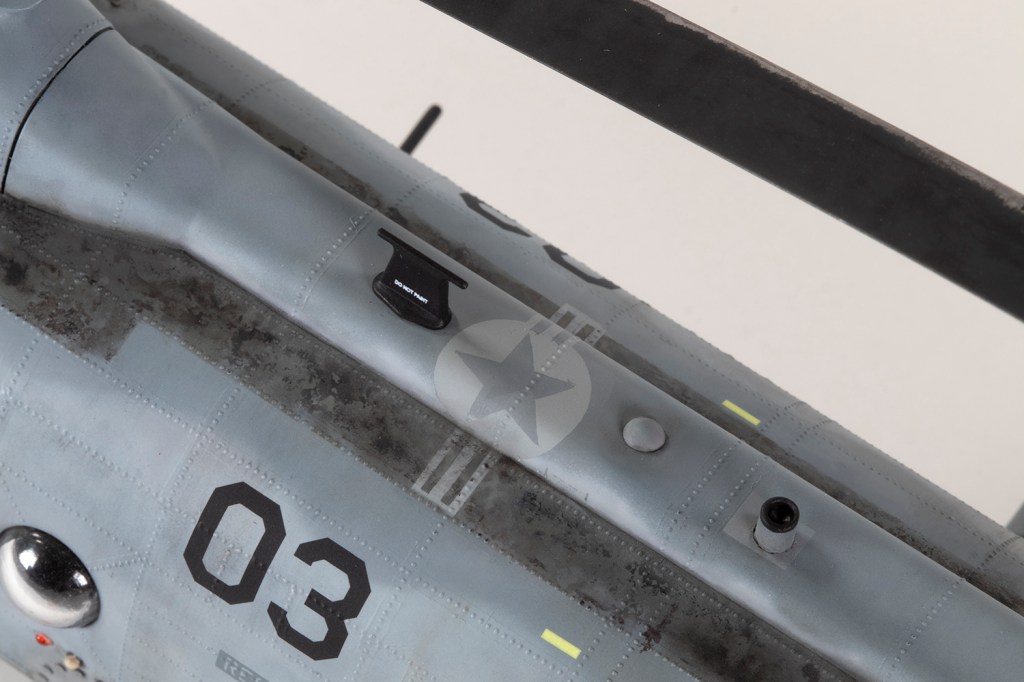
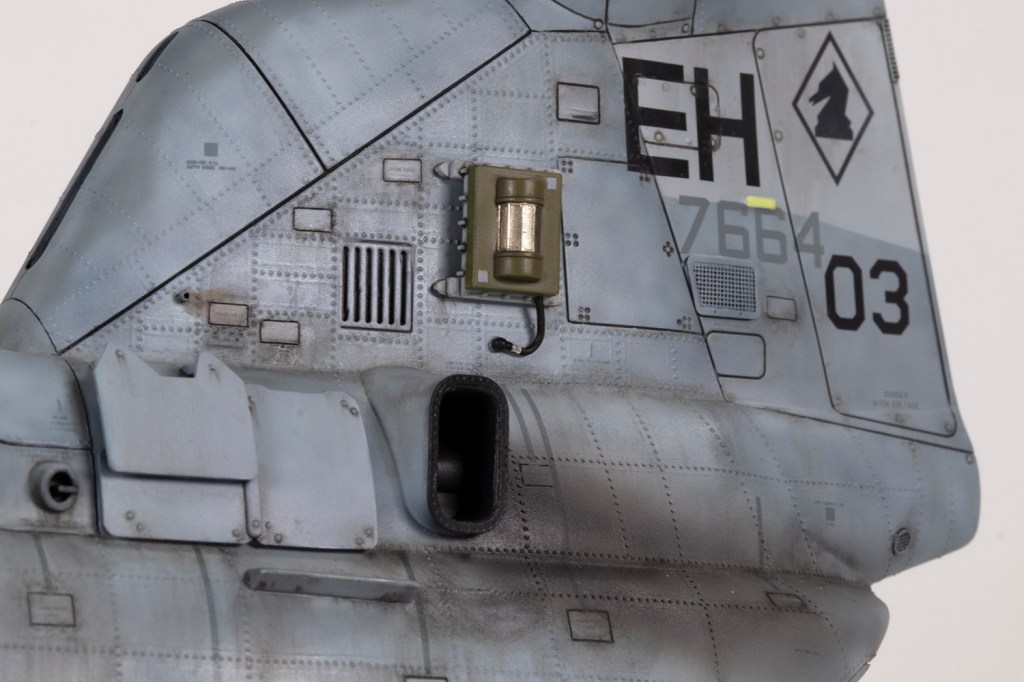
Numerous details still needed to be attended to: the navigation lights were smashed from heated clear sprue pushed through an Eduard PE template, Academy didn’t provide the blade aerials for under the fuselage so mine are from the spares box, as was the landing light at the front and the tail light at the rear. The ECM boxes on either side of the tail were missing their wiring and attachment points, the former made from lead wire and the latter from scrap sprue.
Removal of the masks is always stressful: ‘Has it worked?’ ‘Er, sort of’. The inner surface of the cockpit was covered in a film of material which I think is overspray that came through the front rotor mast hole I forgot to plug. In any case, it looked horrible. I was resigned to doing nothing but discovered a Covid LFT throat swab could just about be manipulated through the side door to wipe the deposit away. The windows down by the rudder pedals were a lost cause and they remain marred.


After many more touch ups all over the aircraft, which helped to add to its grubby appearance, it was almost done. ResKit’s wheels are sublime, with separate hubs and tyres. Don’t make the same mistake I did and over-sand the hubs – the rims should be very proud from the tyre. Getting them all square was rather easy and the flats were created by dragging the model over a sheet of 400 grit sand paper on a flat surface. The PE antennae posts on the underside were fitted on this airframe, but no wire aerial was present.
This transpired to be a much more involved project than I had intended it to be. The rivets were an obvious part of that, but I had not anticipated all the smaller modifications I needed to make. It was actually very enjoyable and stretched me in all kinds of ways, such as soldering the PE exhaust mesh. The Academy kit is clunky, but sound and amenable to being upgraded. The Eduard set was patchy, and large sections remained unused as either inaccurate for what I making or redundant – the replacement armour, for example, was as too thin as the kit plastic was too thick. AOA have provided some wonderfully interesting markings with great references and whilst it does not stand up well to close inspection, I think it makes an impressive addition to my display case. I am eyeing up the Academy 1/48 CH-53 in my stash with anticipation!


Year bought: 2004 (The Aviation Hobby Shop, London)
Year built: 2022 (New Addington, Croydon)
Back to home.
