with Falcon vacform canopy
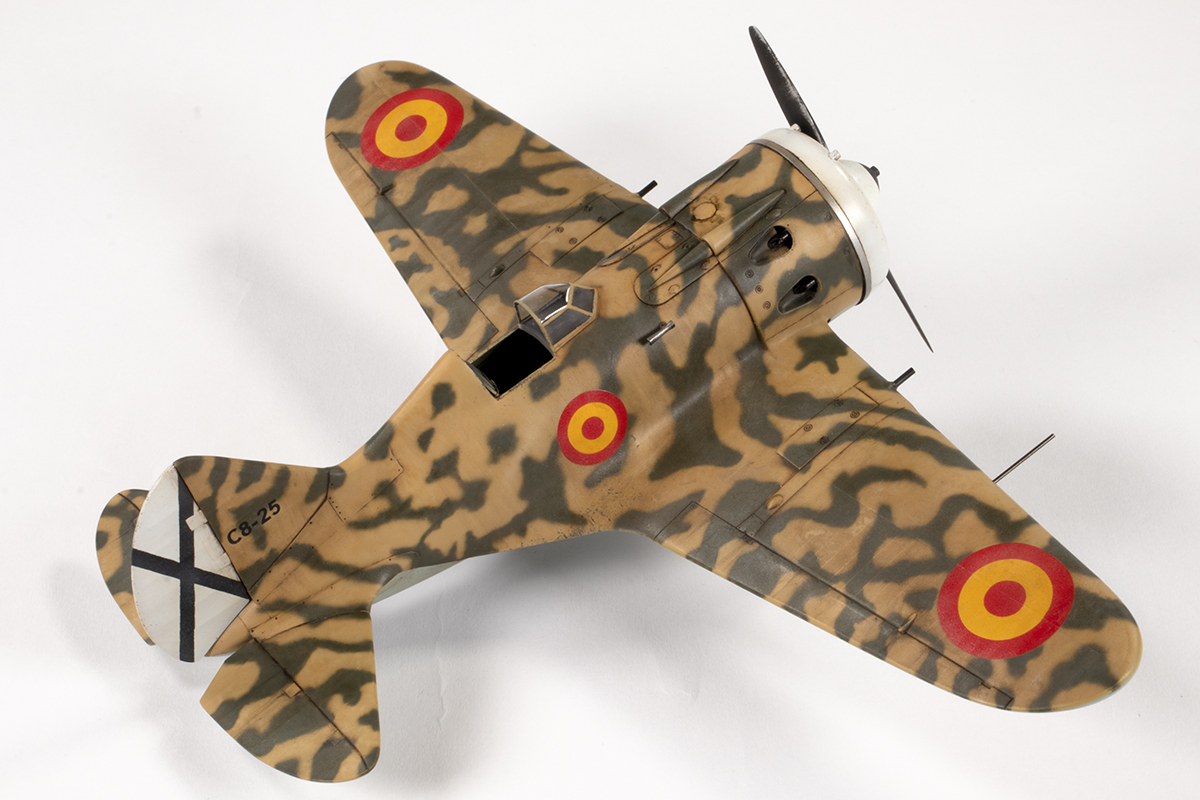
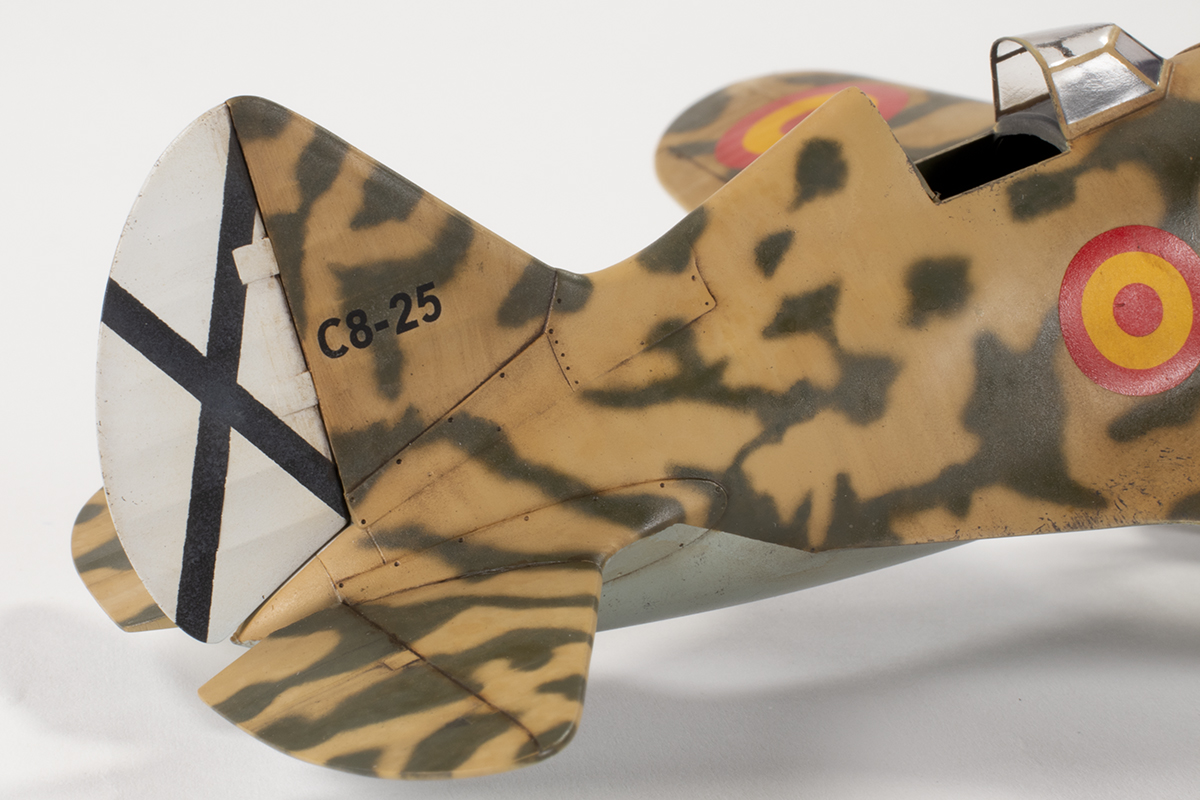
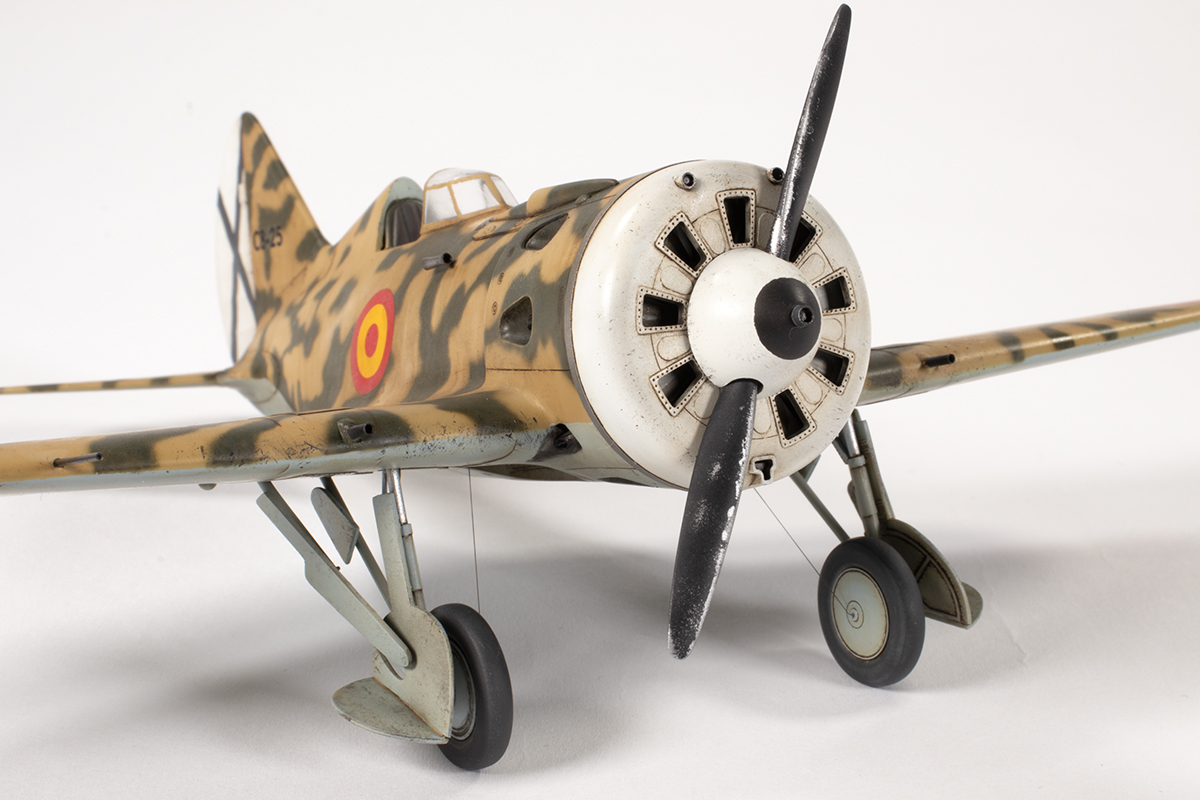
Morón Fighter School, Spanish Air Force, Spain 1949

Over the years I’ve occasionally seen ‘build a 1/48 kit in 48 hours’ group builds pop up on the internet. Always up for a challenge, I set aside two days in August 2021 when the rest of the family were away and I was off work and decided to give this a go.
My subject of choice was the smallest and what I perceived to be easiest kit to build in my stash: Eduard’s 1/48 I-16 Type 10. This was released as a double-combo kit containing a variety of Spanish markings which included an example from 1949 that would fit nicely into my collection. The advantages of this kit for a quick build seemed obvious: it’s very small, it has a simple canopy. the markings are very simple, pre-painted photo-etch was included, masks were included, and I could build it straight out of the box.
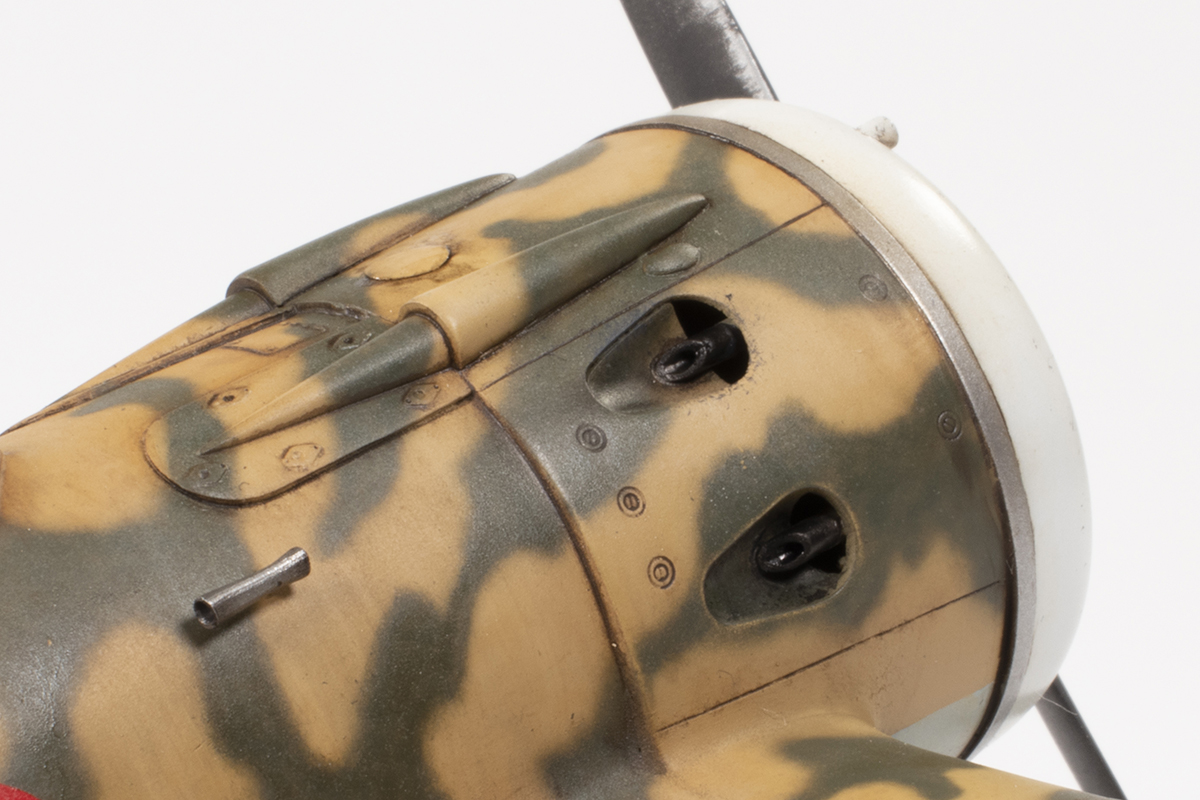
Or could I? Although the I-16 was a Soviet pre-war fighter delivered to Spain in the mid-1930s, it turns out that some of them were assembled in Spain and featured local modifications. These included a substantially different windscreen and a different, higher fuselage spine. Furthermore, this particular airframe had longer ailerons, which extended further towards the fuselage. None of these features are in the kit.
To solve the windscreen issue, I had a Falcon vac-formed canopy set lying around from a previous project, and hoped that would fit the Eduard kit. The rest would have to be sorted out by me, at speed.
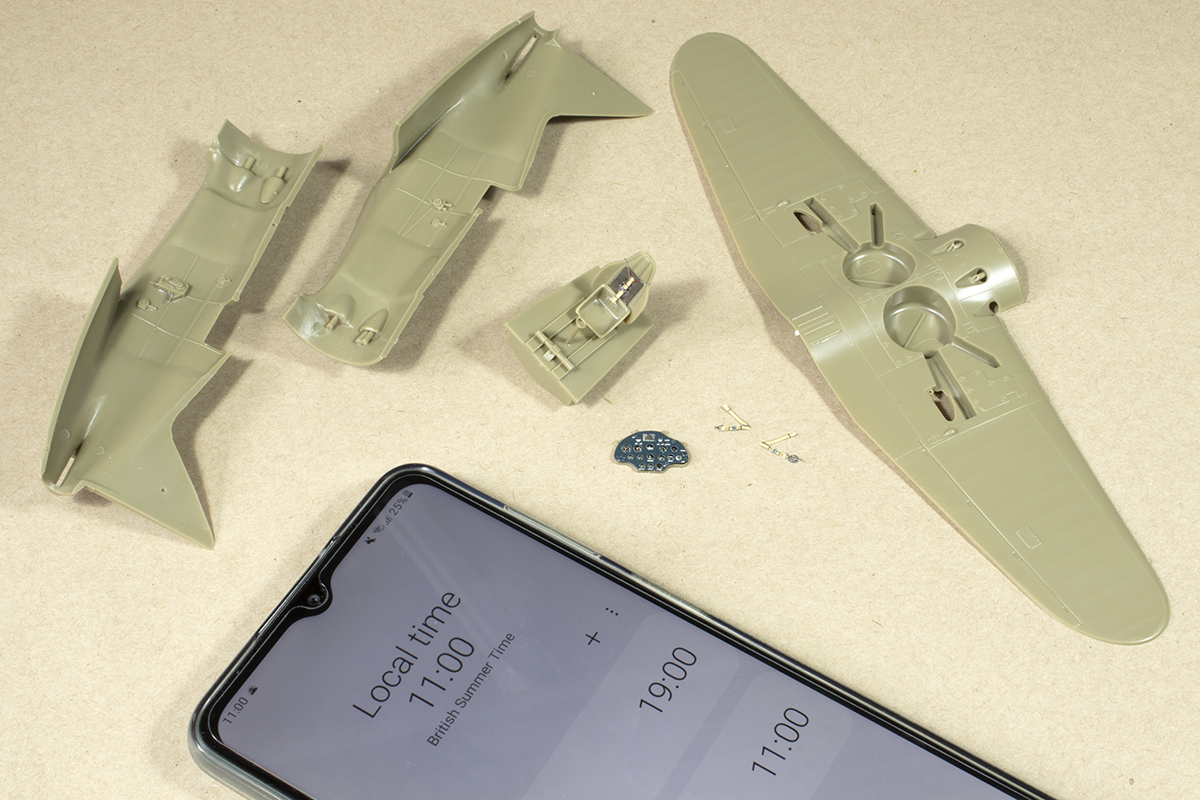
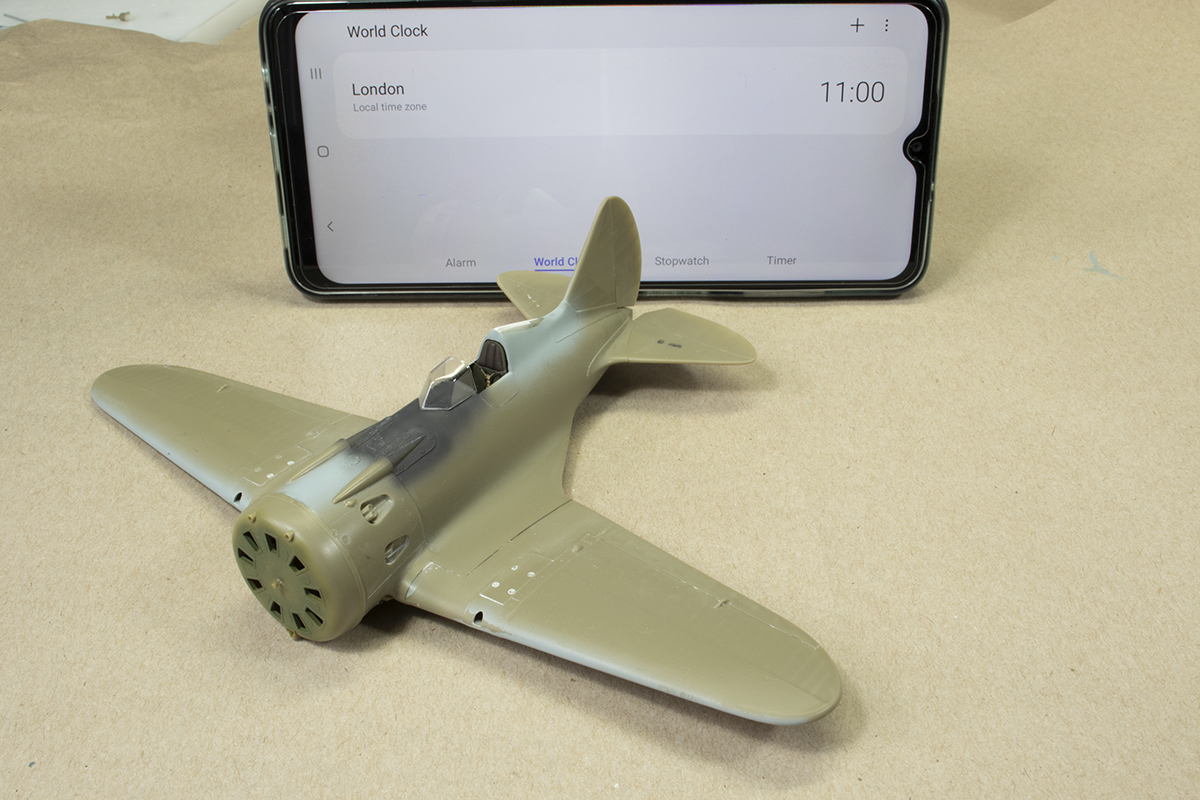
And so it was that at 9am on Thursday 26th August 2021, I sat down at a clean bench, with a lot of podcasts lined up to listen to, and got the bits and pieces out of the box. The kit gives the appearance of being very complete, with a lot of photo-etched parts (duplicated due its dual-combo nature), full colour instructions and a nice decal sheet.

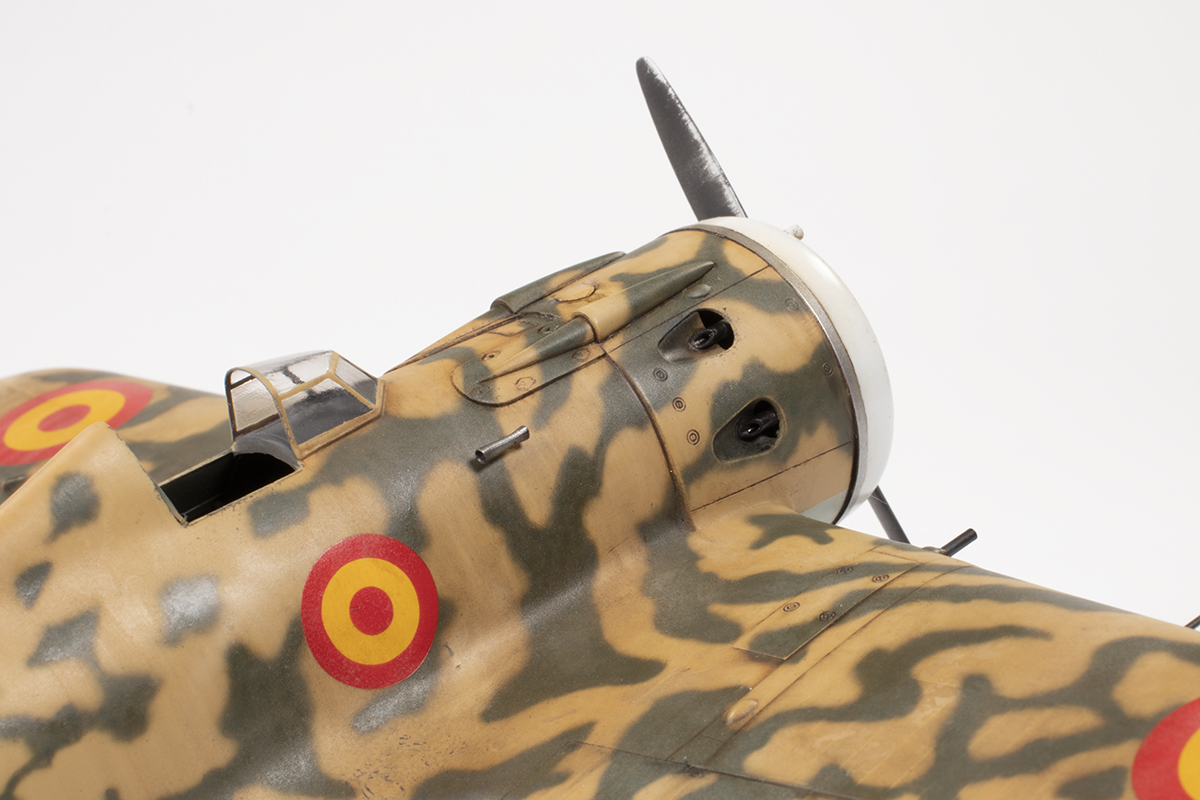
Visual progress to start with is obviously slow. Parts need to be separated from their runners and cleaned up, and I had to make a decision on whether to use the plastic or photo-etched cockpit parts. Aside from the instrument panel, I decided to use the plastic parts as I deemed it quicker and they are more three-dimensional in shape. The engine exhausts were drilled out and attached inside the fuselage halves. These lack locating points and are difficult to fit. They also seemed too anaemic in diameter and would be an obvious area to improve were this not a quick-and-dirty project.

The next hour saw more of the same and the cockpit was pieced together. I used the colour photo-etch instrument panel and made a start on the complex seat belts. It would transpire that the instrument panel would be a waste of time since it sits so deep in the fuselage it is completely invisible, even with the open cockpit. I had already figured out the same would be true of the rudder pedals and did not even bother with them. Anything to save time!
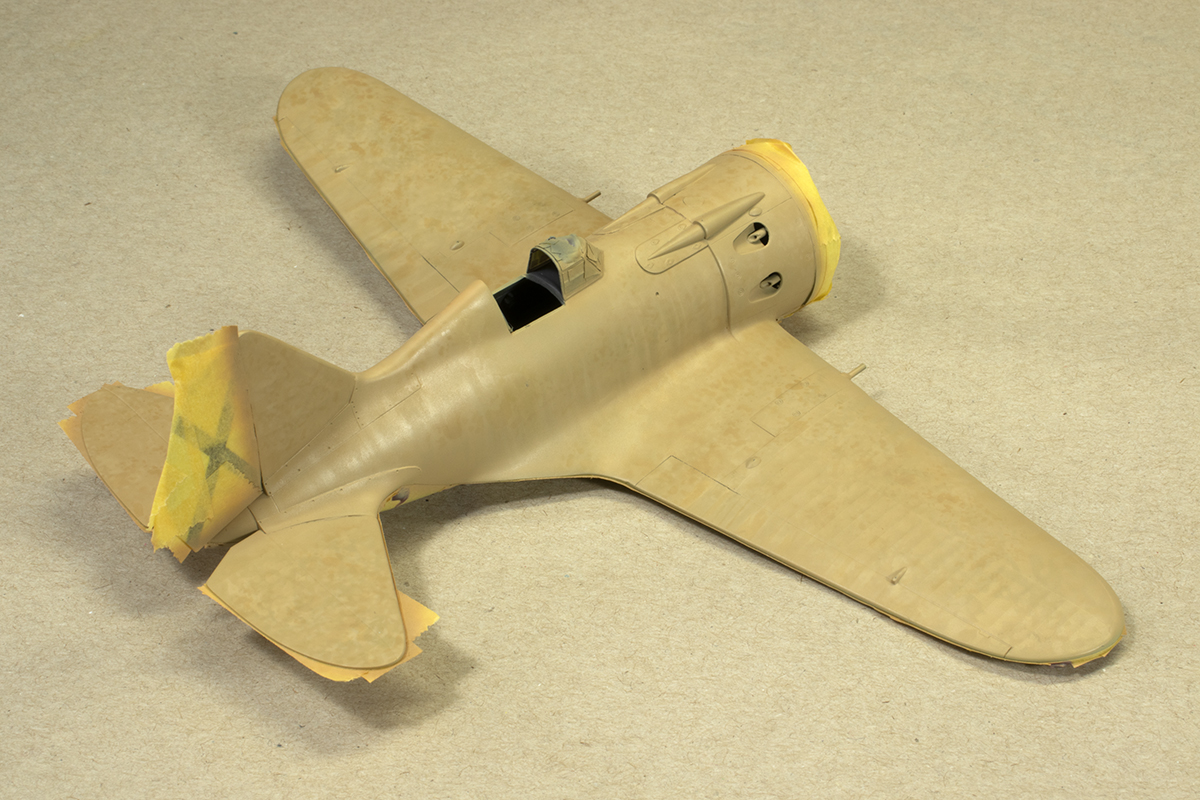
In the third hour, paint made its first appearance. The inside of the upper wings needed to be painted as this would be difficult to access later. This threw up my first dilemma: what colour should the lower surfaces be? The internet seemed agreed they should be pale blue. Eduard suggest Mr Color 323 Light Blue. On the basis of nothing beyond my own personal preference, I decided that colour was way too bright and vivid, and settled on Mr Color 117 RML76 instead. Work also started on the undercarriage. As is the case for several Eduard kits of this vintage, the mould alignment was not perfect and many items that should be circular in cross-section ended up being somewhat oval. I elected to have the engine cowl shutters closed to save me from having to paint the engine. What I neglected to realise is that these should be right up flush with the inside of the front cowling, and mine are set too deep.

After an hour for lunch, I returned to the bench and began to make some real progress. The cockpit was painted Mr Color 303 Green and washed with Sepia oil paint. The headrest was brush painted a sort of leathery colour and the seat belts repainted with something buff-coloured. I made a start with joining the fuselage halves, but they were fairly warped along their length and so had to be joined in stages. I started with the tail and used thick superglue as it cures rapidly and won’t leave any ghost seams later on.

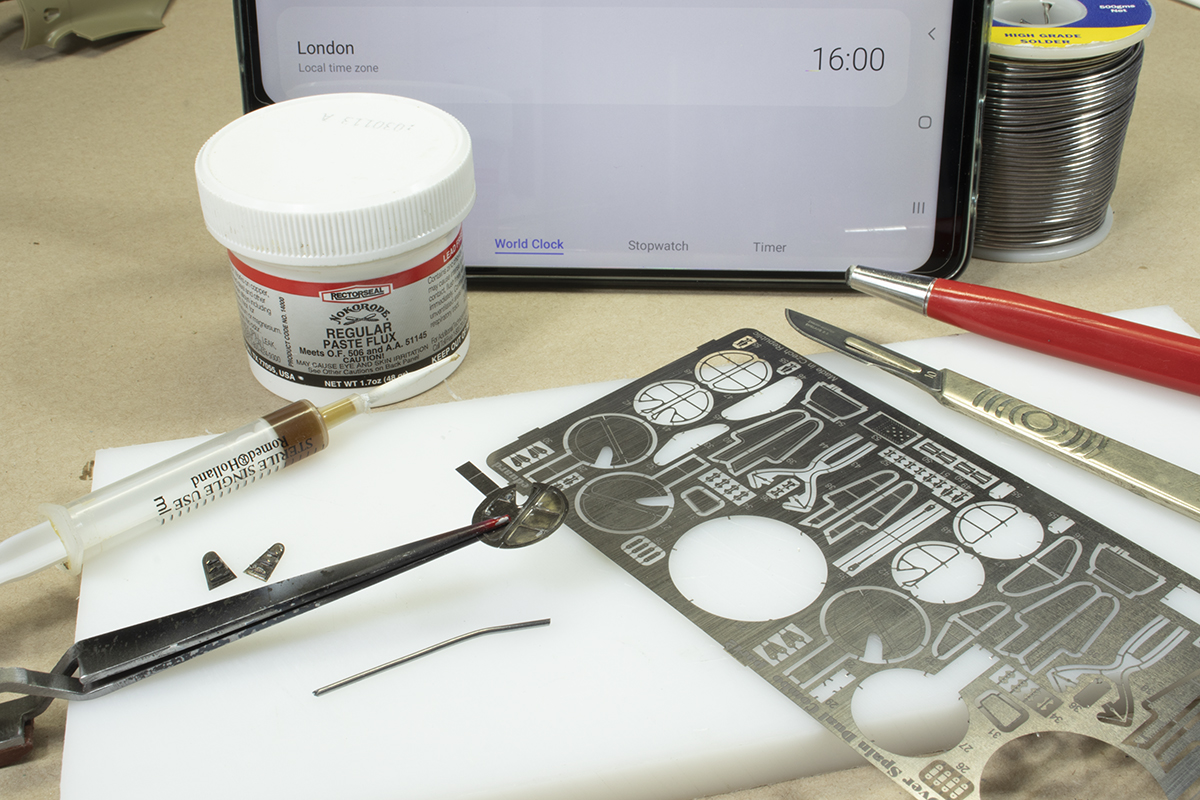
Despite superglue curing quickly, it does need a little time to set up, and so joining of the fuselage proceeded a little slowly over the next hour. Use of the time was made to start on the photo-etched undercarriage components, some of which are tiny. In truth, this is where the project started to go off track and several hours were to be wasted…

The following hour was taken up almost entirely with photo-etched parts. Eduard supply all the undercarriage doors (there are six) in photo-etched brass, each made up of the door with an inner skin. I’ve been experimenting with soldering PE together, and continued with that here. The problem is, soldering is very time consuming. Tiny, tiny fragments of solder are used along with a flux dispensed from a homemade syringe. At this stage, I realised things were taking a lot longer than I needed them to. Moreover, the attachment points for the doors to fit to the undercarriage legs were numerous, tiny, and each needed folding. I used tiny dots of superglue to fit them to the doors, but they were a real struggle.
With most of the soldering done, I reverted back to the fuselage and wings. The superglued joints were all sanded down rapidly and did not require much further attention. This is when I decided to tackle the taller spine of the Spanish made I-16. With no reliable drawings, and the clock ticking down, I had to do this by eye. I made a thick plastic card former that I glued along the fuselage join to give a height to aim for. The sides were then built up with chunks of plastic sheet and thick superglue mixed with VMS’ CA Glue Filler powder. This took several iterations as this mixture has a tendency to generate bubbles when applied thick. The spine was subsequently sanded to shape.
Now, I realise that purists will see I did not get the shape right. I think the height is good, but the cross section is far too pointed. The spine should be much fatter at the apex of the curve. However, in the interests of time I went with what I had. To get the correct shape would have required an awful lot more work as the shapes would have become exponentially more complex.

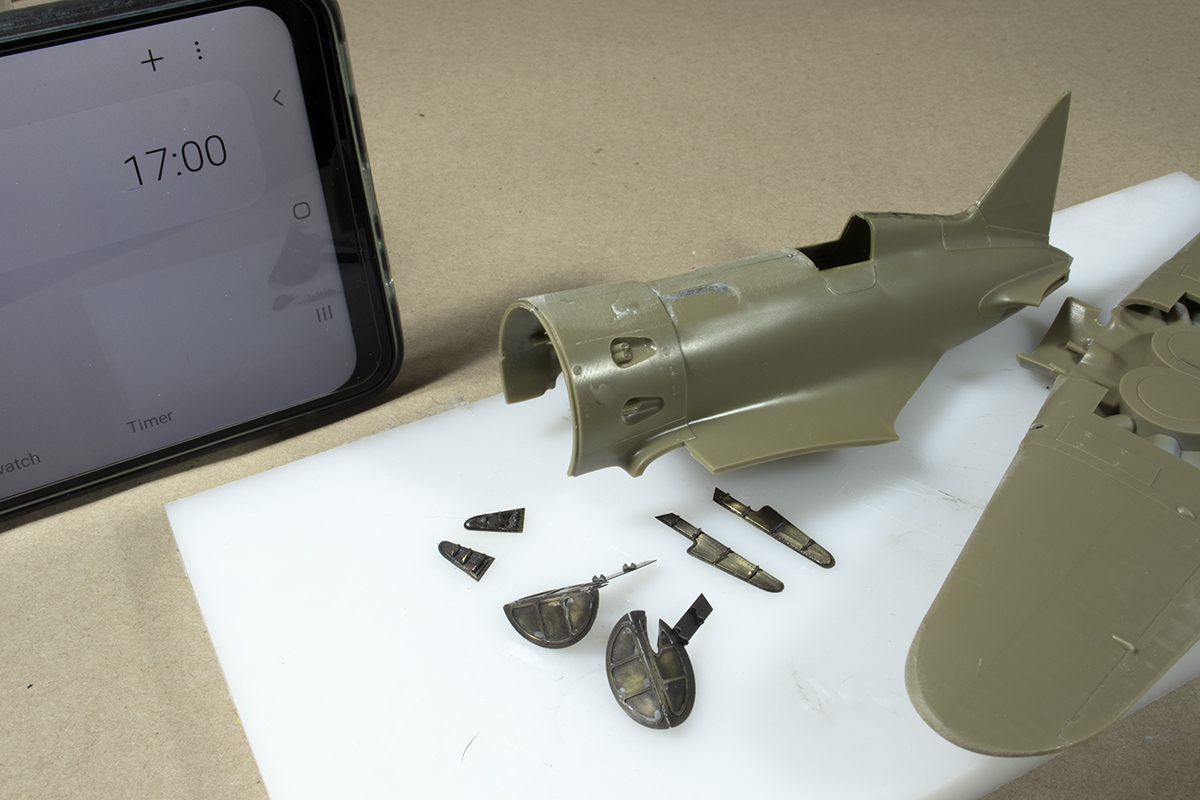
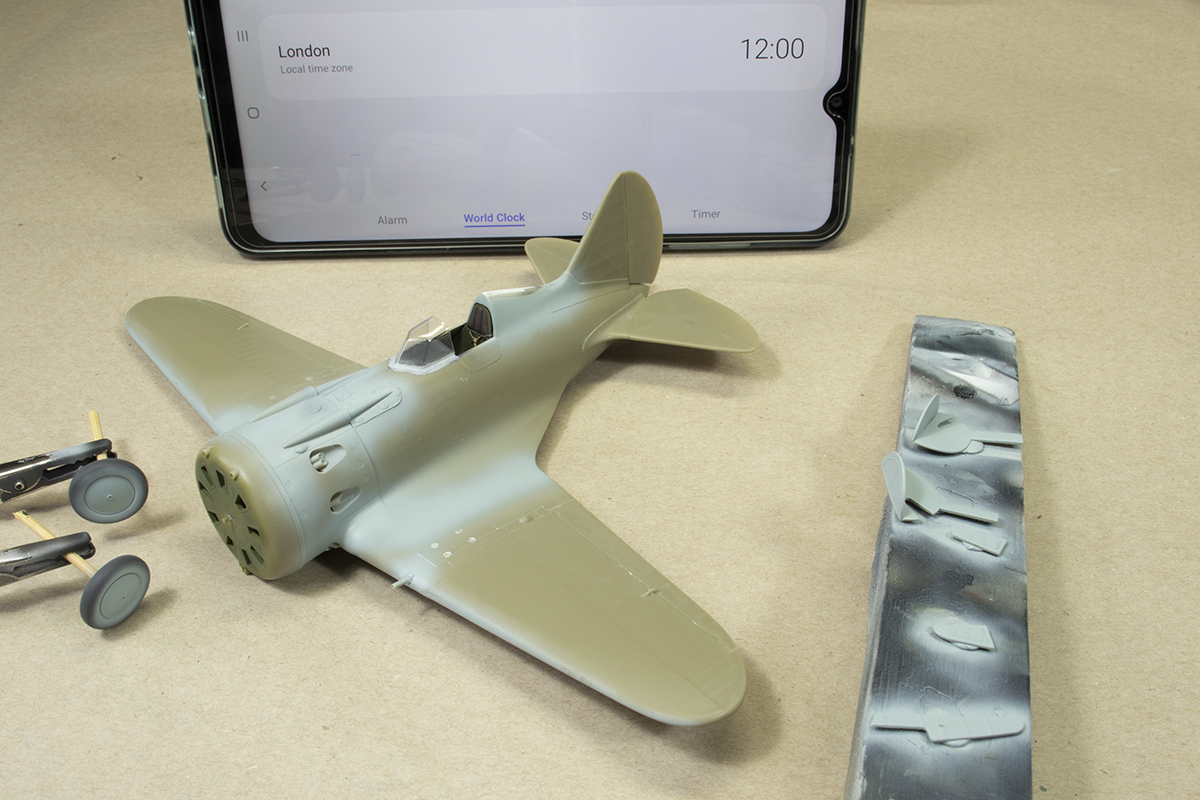
I was tired by now and realising that modelling fulltime is not as much fun as I thought it would be. After some tea, I returned to the bench and attached the rudder (a very nice fit). I broke out the Mr Color 117 again and airbrushed the undercarriage and made use of the same paint to check my seam work. I think it was at this stage I realised the choice to go with the PE doors was a mistake. The attachment points were phenomenally fragile and kept falling off, and I discovered the plastic doors were more three-dimensional in shape. Despite being much thicker, I decided to cut my losses, abandon all my carefully soldered work, and just use the plastic pieces.
The day closed with the cockpit being inserted and the wings being joined to the fuselage. This was a very unpleasant experience and took much clamping, copious amounts of superglue, and a lot of accelerator. The gaps and steps were horrendous all the way round. This was a mystery as I’ve read many build reports of this kit and without exception all comment on the great fit of the wings to the fuselage. I did spend ages fiddling and fettling the parts, but all to no avail.
Because it cures quicker, I used a very thin generic superglue for this joint. This cured much harder than the superglues I usually use and it took some real effort to sand away; much more than I’m used to. Eventually it was done and the upper fuselage cannon bulges could be added.

At the beginning of day 2 I was doubtful this project was going to work as planned. The main body of the aircraft was together, and I had made good progress, but there was still a lot to do.

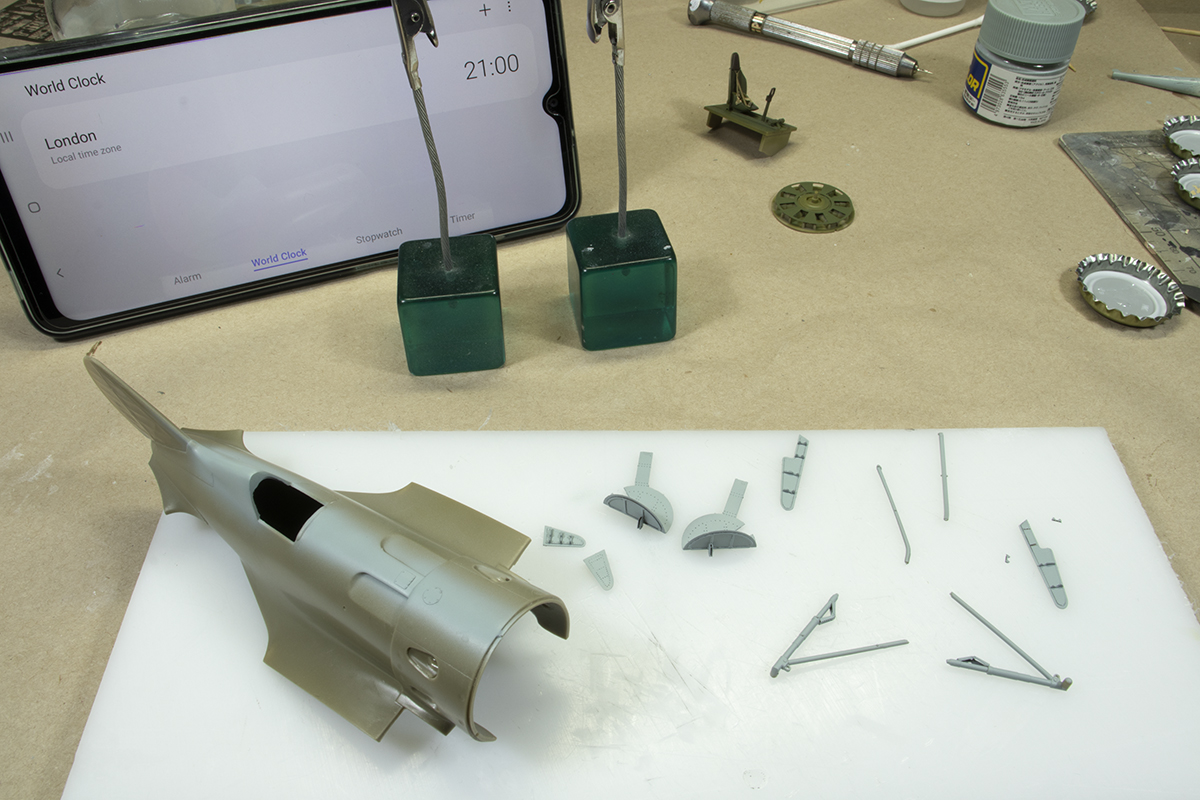
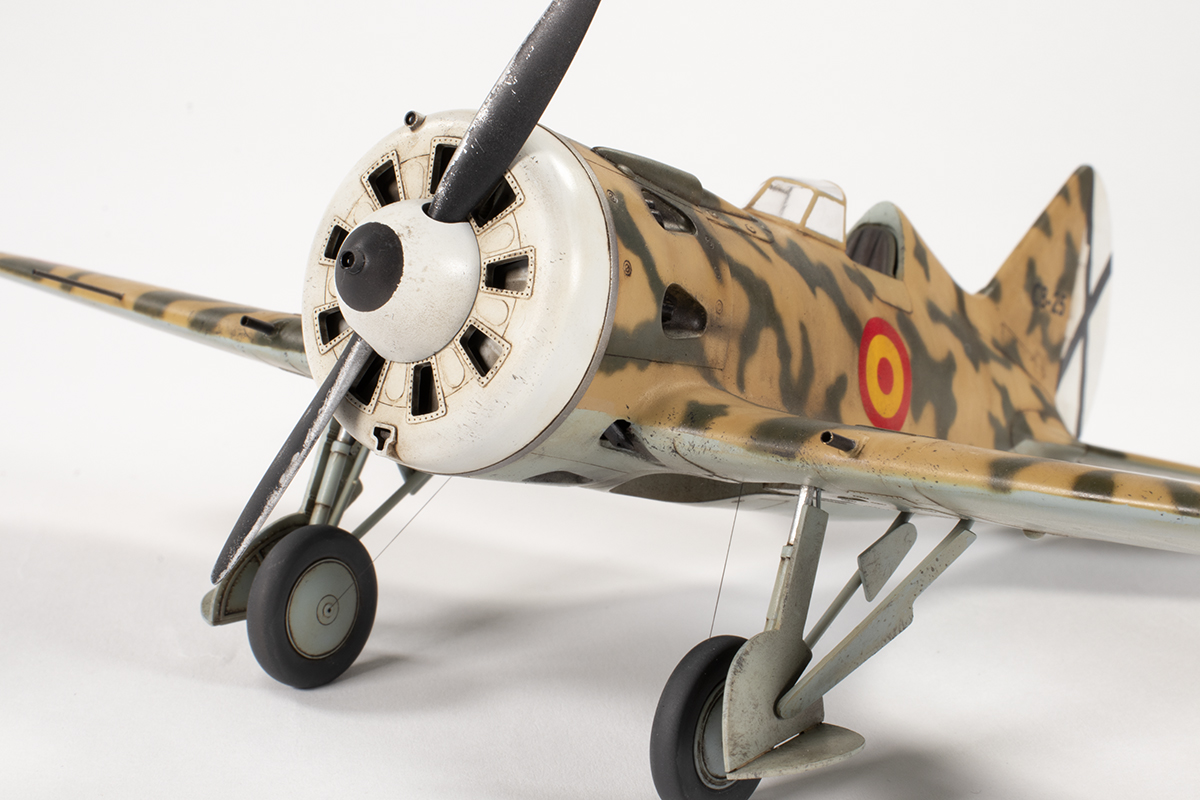
I needed to get to paint as quickly as possible. The plastic undercarriage doors were cleaned and prepped and I cut out the windscreen. I was very relieved to find it fitted perfectly and would just need some blending in with Mr Surfacer 500. The tail planes were not the best fit, but I reckoned I could get away without more seam work in this area.

I attached the windscreen using Tamiya Extra Thin, and that would take a while to set. The front cowling took some force to fit over the front fuselage, but it did eventually fit.
By lunchtime, I’d dealt with painting all the undercarriage (for the second time!) and was double-checking the seam work. The wing guns had been added and drilled out, but these sat at a very odd angle. I kept ignoring that and looking at the clock.
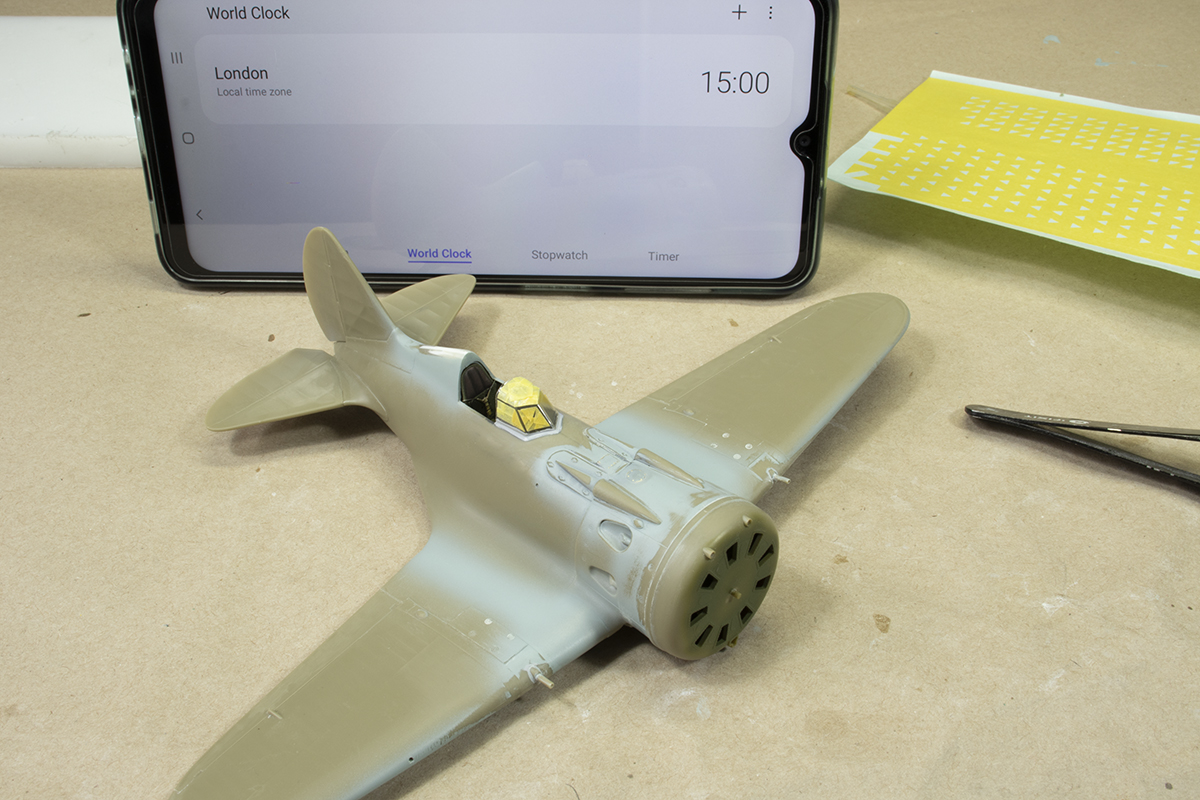
I was a bit burnt out on modelling now, and took a longer lunch. At 2pm I started again and focused on fairing in the windscreen and masking it. It’s a deceptively complex task as there are five very small panels to mask with barely a right angle between them.
One of the factors that gave me hope this model could be done in 48 hours is lacquer paint. Unlike the enamels of my youth, it dries so fast it can be handled and masked very soon after application. By 4pm I had the lower surfaces all covered in Mr Color 117, and very smooth it looked too. But here is where I fully abandoned my goal of getting the model done in 2 days. I discovered that modelling to a deadline, even self-imposed, is not fun. I was tired and cranky from sitting down all day and only looking at something a few inches from my nose. I had cut corners and was becoming increasingly disillusioned with what I was making. I wanted it to be better. So I decided to scrap the goal, see the day out, and proceed in a more normal fashion. I’d made a lot of progress in a short period of time, but now I was going to slow down and make some corrections.

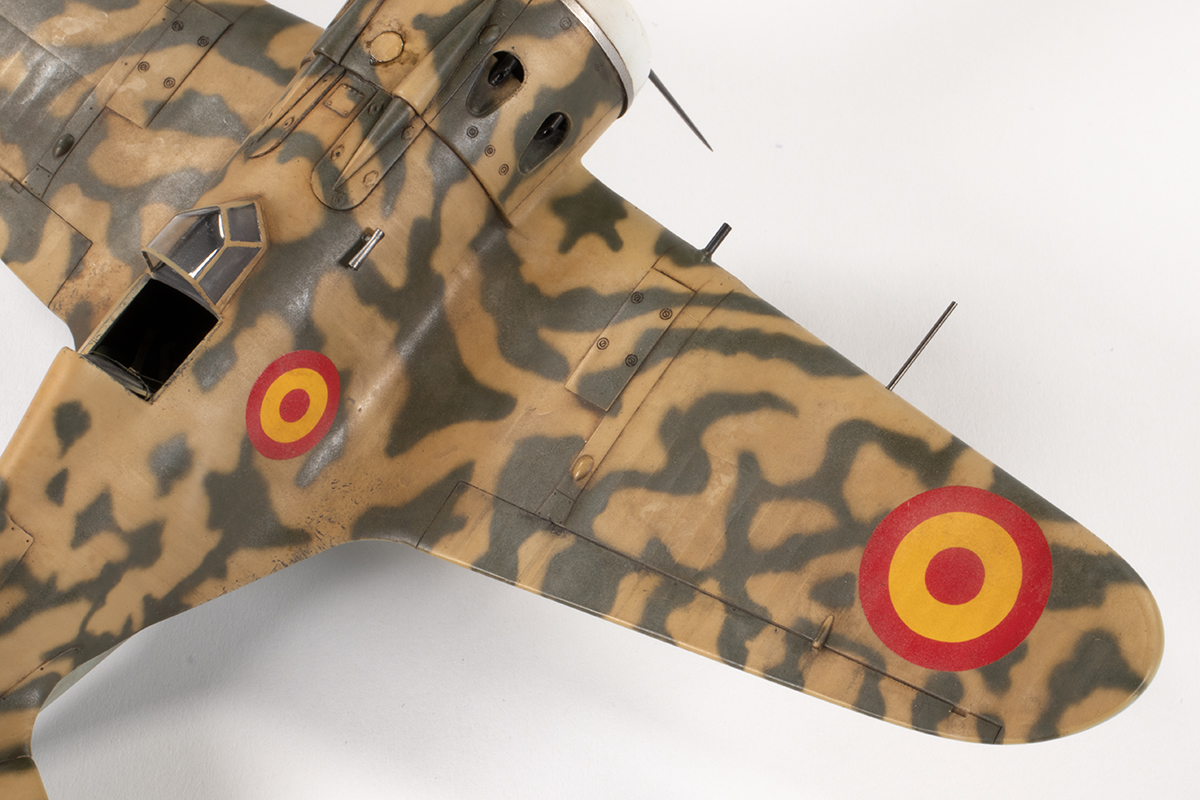
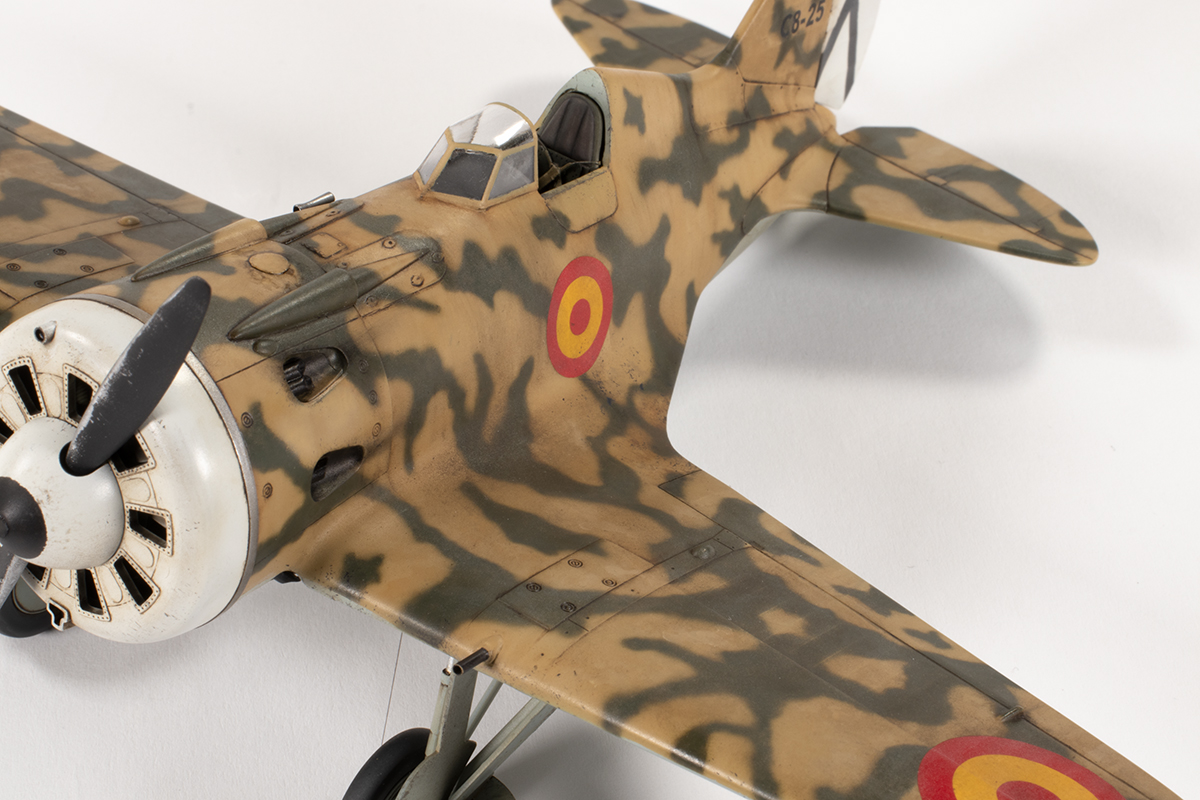
The first correction was the wing gun barrels. I could not live with their wonkyness and replaced them with some brass tubing from Albion Alloys. The next correction was the aileron length; they should extend further inwards. I filled Eduard’s detail with superglue and rescribed new aileron outlines towards the fuselage. With that, and some tea, out of the way, I used Mr Color 69 Off White to airbrush the cowling, spinner and rudder.


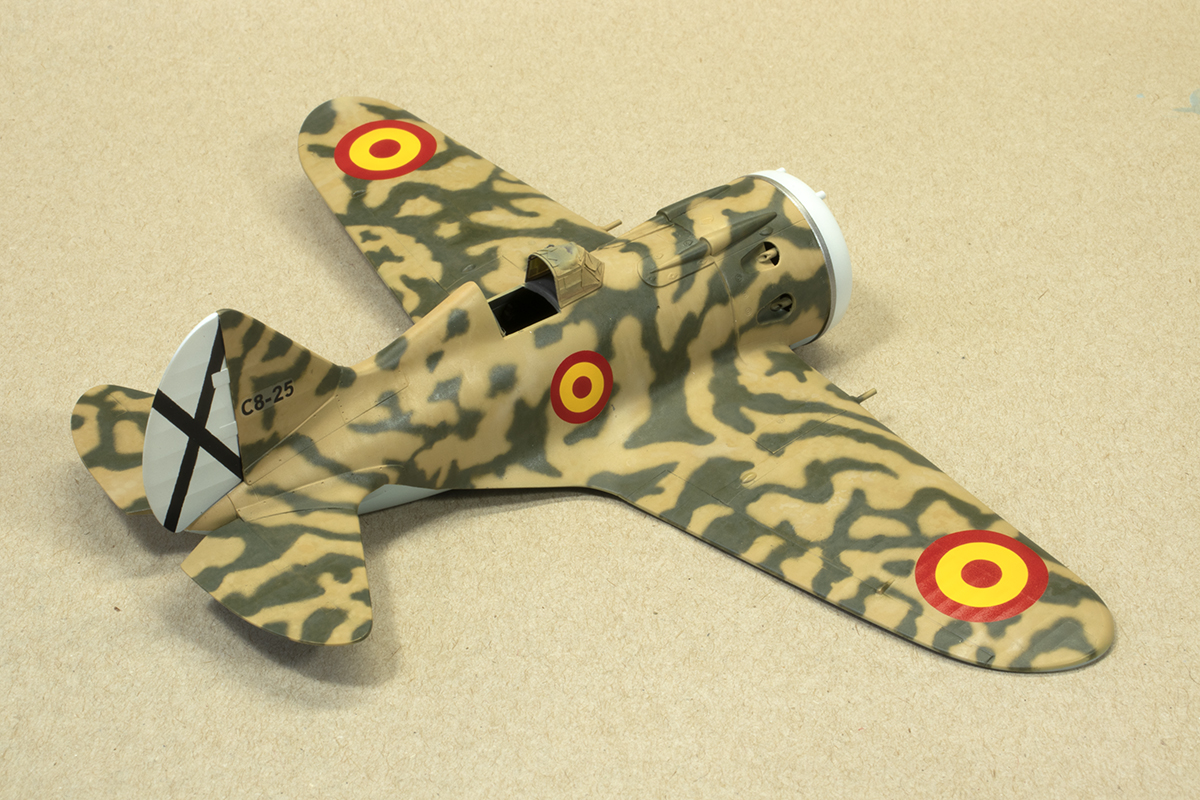
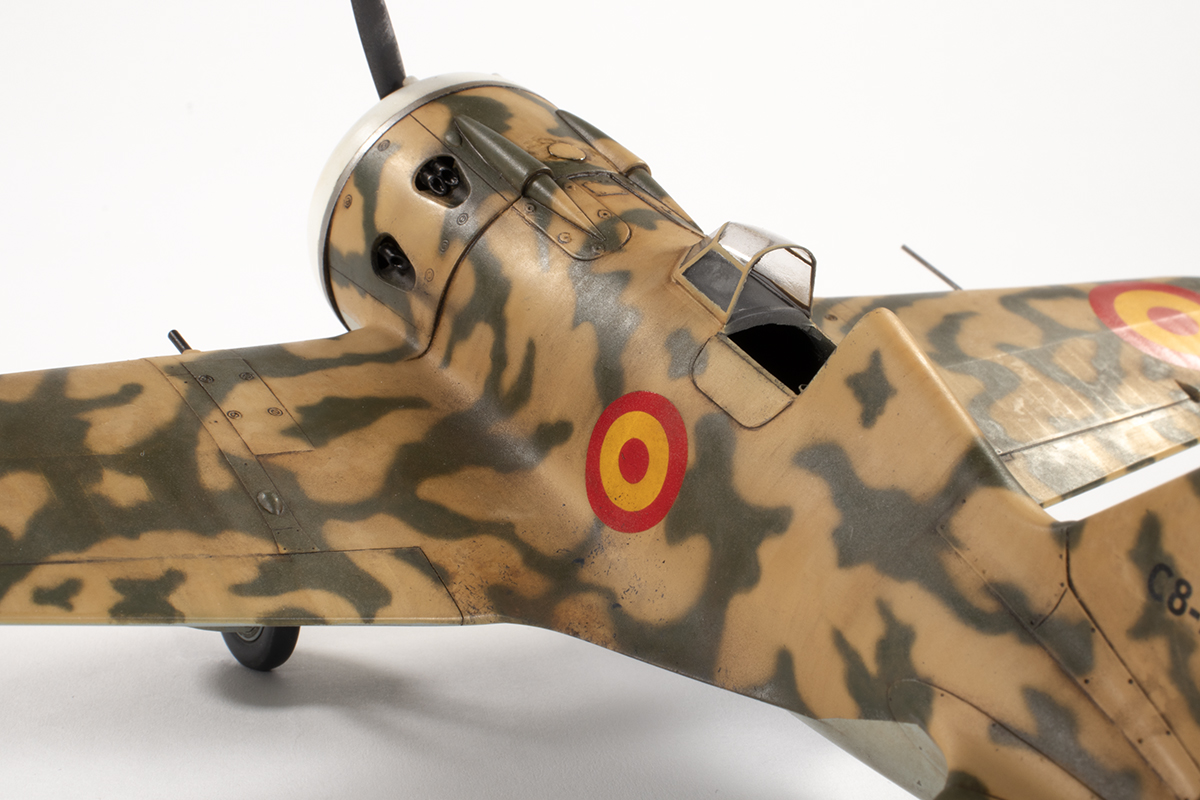
With life returning to normal, everything slowed down and I could take my time with painting. The question of what colours to use continued to be a vexed one. Authoritative sources stated the upper surfaces were a mottled green and red-brown over light brown, but the four photos I had of this particular airframe did not show much contrast between the mottles. Admittedly the photos are black and white and poor quality, although Eduard also indicated they should all be green. I went with green only to make life simpler.
The pattern is also a challenge. Eduard recommend very blobby, distinct, green mottles. The photos showed something far more dendritic, especially on the wings, and in places the pale colour was entirely enclosed by the dark. For better or worse, I decided on Mr Color 19 Sandy Brown for the base colour and Mr Color 309 Green for the pattern.
After applying the Sandy Brown, I made lots of small adjustments to the mix by adding Mr Color 44 Tan and 310 Brown to get various darker and lighter shades. I used lot of various mottling masks (from Artoolfx, Uschi van der Rosten and Cat4) to add these different shades in different patterns, including streaks to the fuselage sides and the control surfaces. The paints were heavily thinned with Mr Leveling Thinners and further variation came from using some Hataka Orange Cap C258 Stone Yellow.
Next came the green pattern. This was all sprayed freehand using an Iwata Custom Micron B. It took a while to get the paint mix and pressure right, so the pattern was not as tight as it could have been in places, but then the real mottles appeared quite diffuse anyway. I added some further variation by sanding the surface very gently with some Infini 2500 sanding sponge, and then touching up the green with Hataka’s version of the same colour (C016). Even though the I-16 is so small, it took a long time to get the green pattern applied.
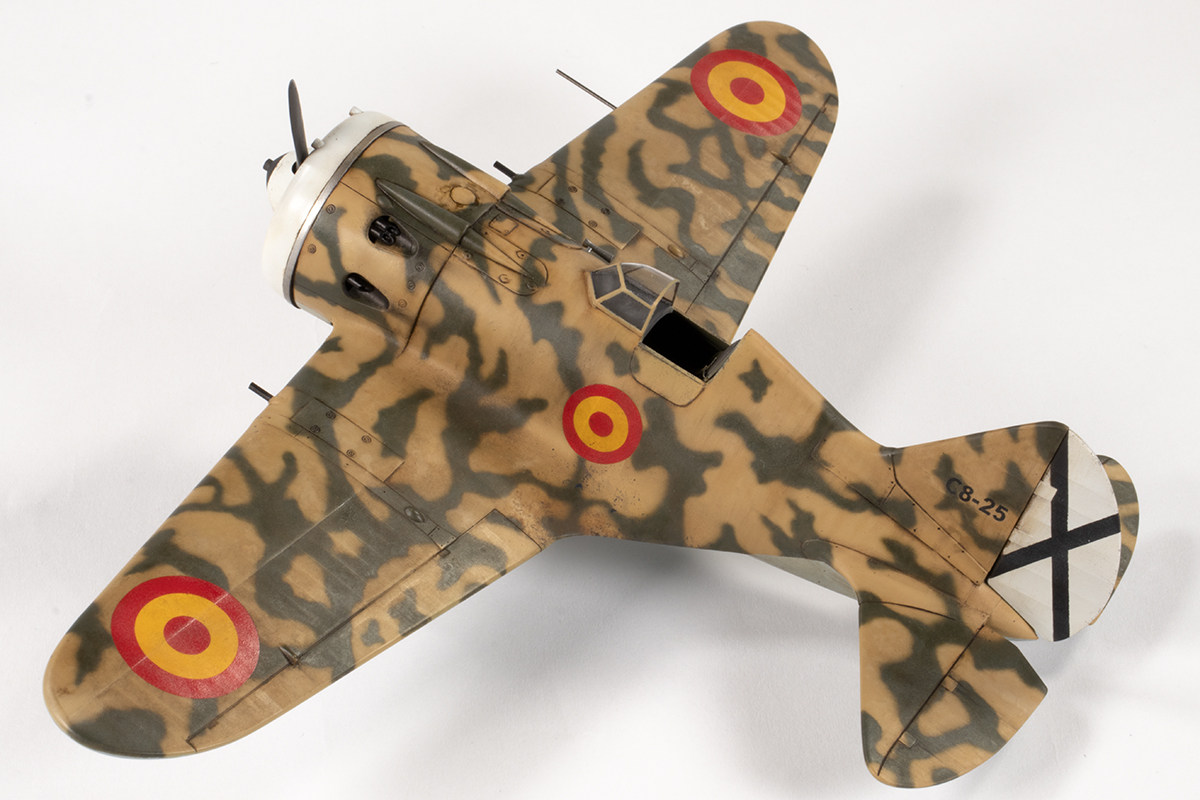
I decided to mask and spray the roundels rather than use the decals, and used MRP WWII RAF Marking Yellow and Tamiya X-7 Red. The masks were cut on my Silhouette cutter from a scan of the decal sheet, but I rushed their application and several of the roundels are not properly centred.
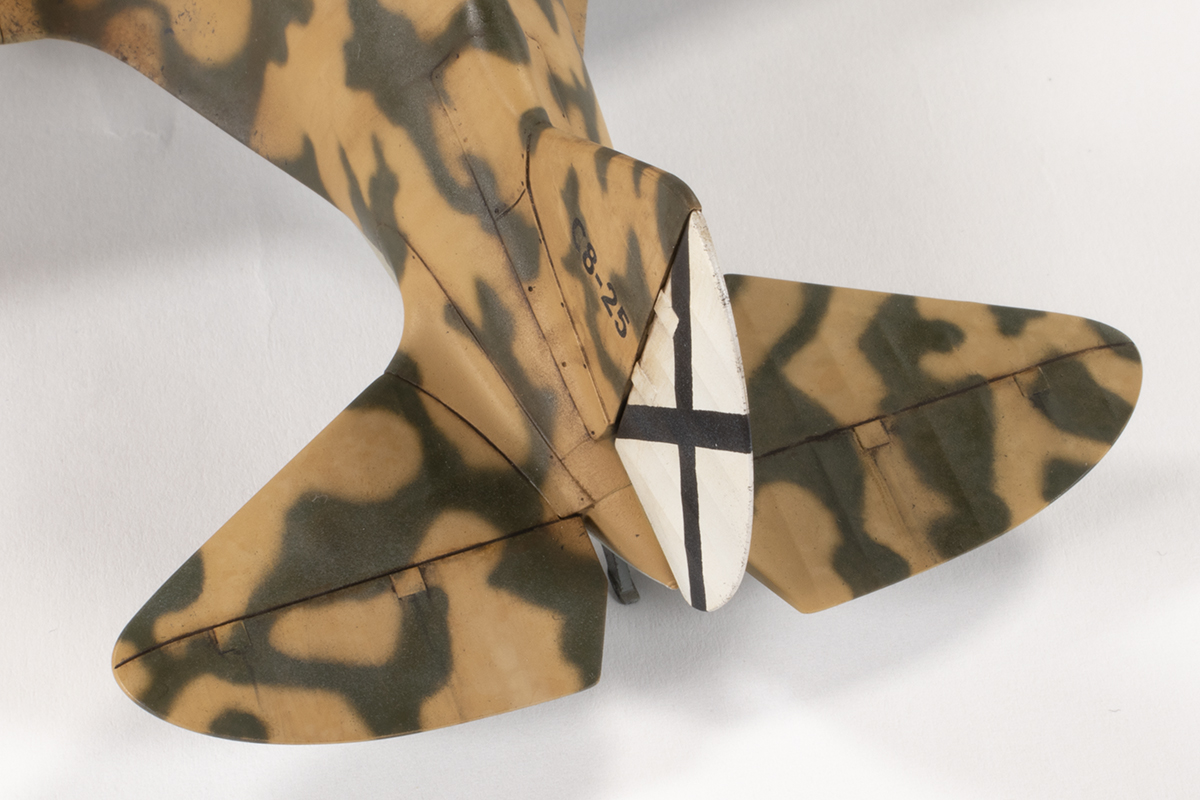
With that done, the only decals that were required were the tail codes. These settled down fine over a blob of Mr Mark Setter, but the font is noticeably wrong compared to the photos. I did not correct it.

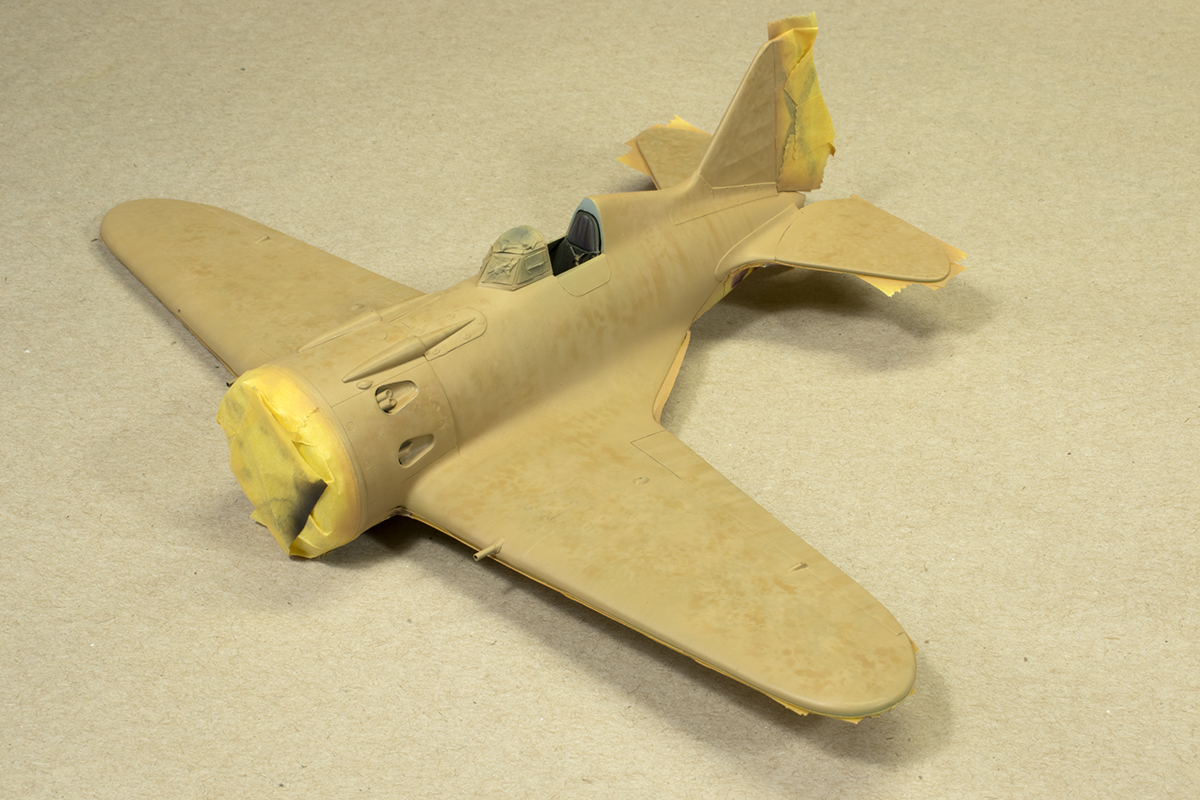
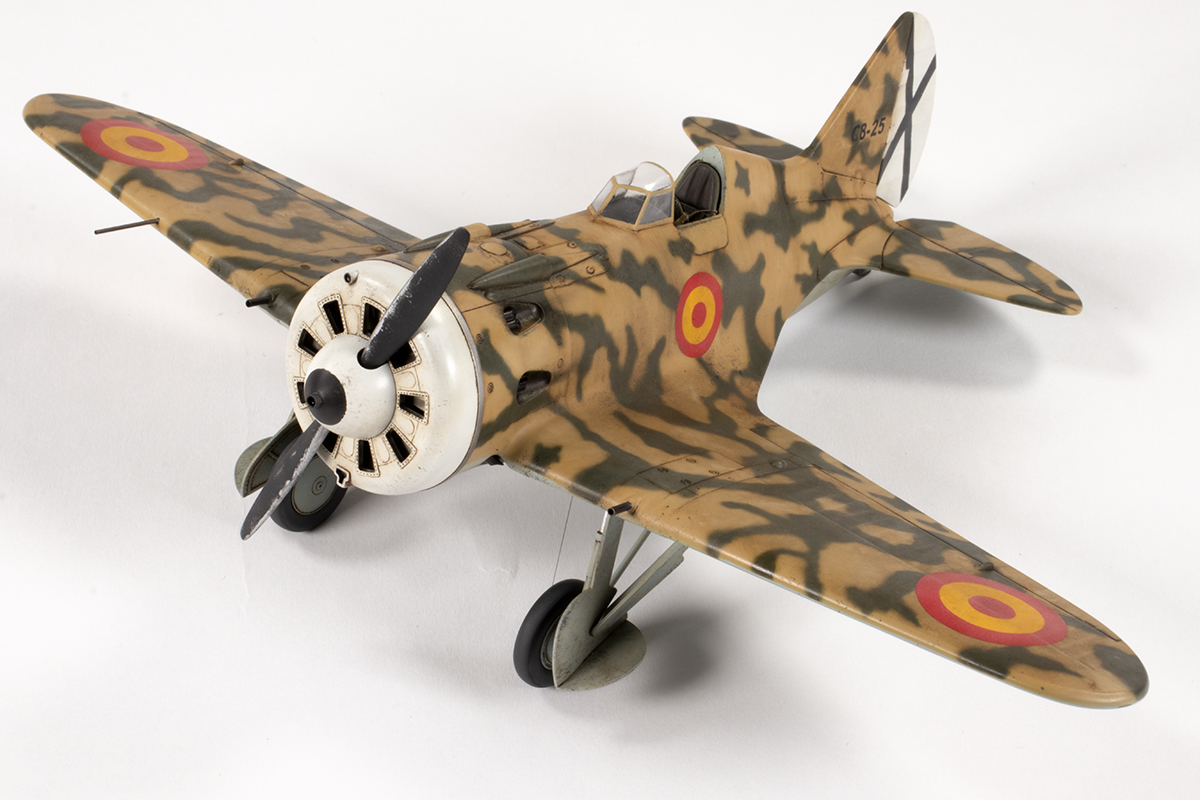
Even with a fair amount of tonal variation in the paint finish alone, I did want to grubby the model up a bit as befitting a 1930s workhorse still kicking around in 1949. My first step was to mix a light dust shade from Liquitex inks and then heavily thin it with Tamiya X-20A. I brushed this on the lower surfaces to get an intentionally blotchy finish, whereas I airbrushed it on the upper surfaces. Over this I applied a pin wash of AK Interactive’s enamel Streaking Grime with the excess removed using a thinner-soaked fine brush. The same product was applied more liberally over the wings and fuselage and then streaked as its intended to be using various brushes. Various dark coloured AK Interactive pencils were used in places like the rudder/tail join and blended in with a brush wetted with water. Fine chips were added using near the cockpit sill, wing leading edges, wing roots, cowling and undercarriage bays with Vallejo dark grey dabbed on with a sponge.
Props on these aircraft chipped heavily and I replicated this using hairspray over Alclad White Aluminium and under some Tamiya Rubber Black.
No clear coats were used anywhere on the model and this left a nice patina of different finishes over the airframe. The pitot tube was replaced with a length of Albion Alloys brass tubing.
Final assembly was a bit troublesome. One wheel locked nicely into place whereas the other flopped around everywhere. It took a long time to manage to get them attached in approximately the correct alignment. The undercarriage legs fitted fine, but the doors were very difficult to manipulate into the right locations and attach with superglue. The final feature was the cord used to retract the landing gear, made in this case with Uschi van der Rosten fine rigging line.
It’s worth noting that this aircraft had no gunsights fitted, which made life a bit easier.
This project did not pan out as planned. In retrospect it’s easy to see I bit off way more than I could chew, especially with the PE undercarriage doors and the corrections I made. Nevertheless, it was a very worthwhile experience. I’ve learned that modelling is a pastime I fit around other things; when it became the sole focus of my day it lost a lot of its appeal. The final product is a little compromised given the compressed timescale, but it’s another model built from the stash, and as it took exactly two weeks, I’m pretty pleased with that.
I wrote an article about this model which is in the November 2021 edition of Scale Aircraft Modelling which can be purchased here.


Year bought: 2017 (AJ Aviation, West Drayton)
Year built: 2021 (New Addington, Croydon)
Back to home.
