with Eduard interior and exterior photo-etch
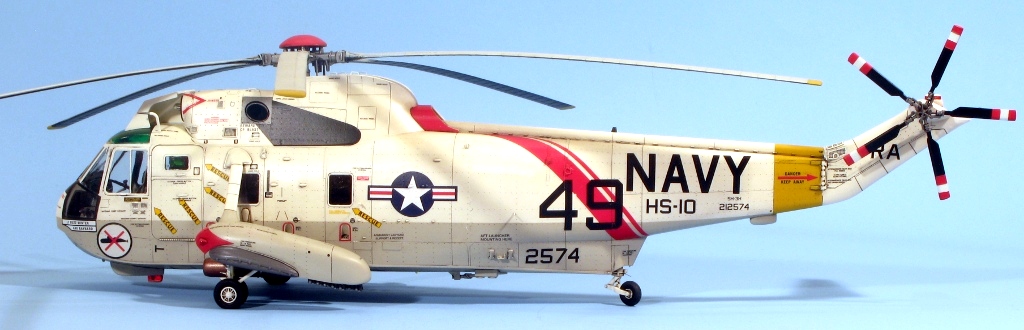
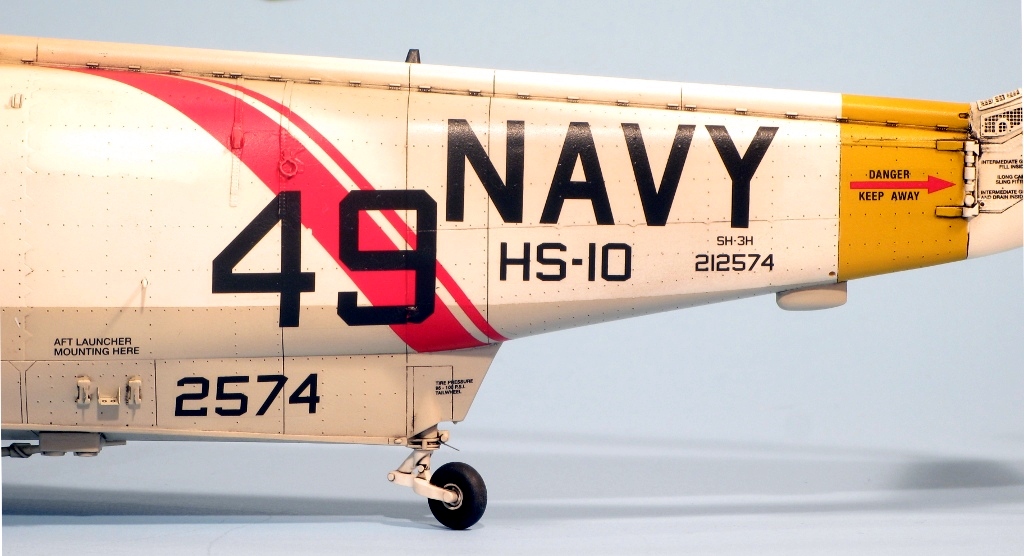
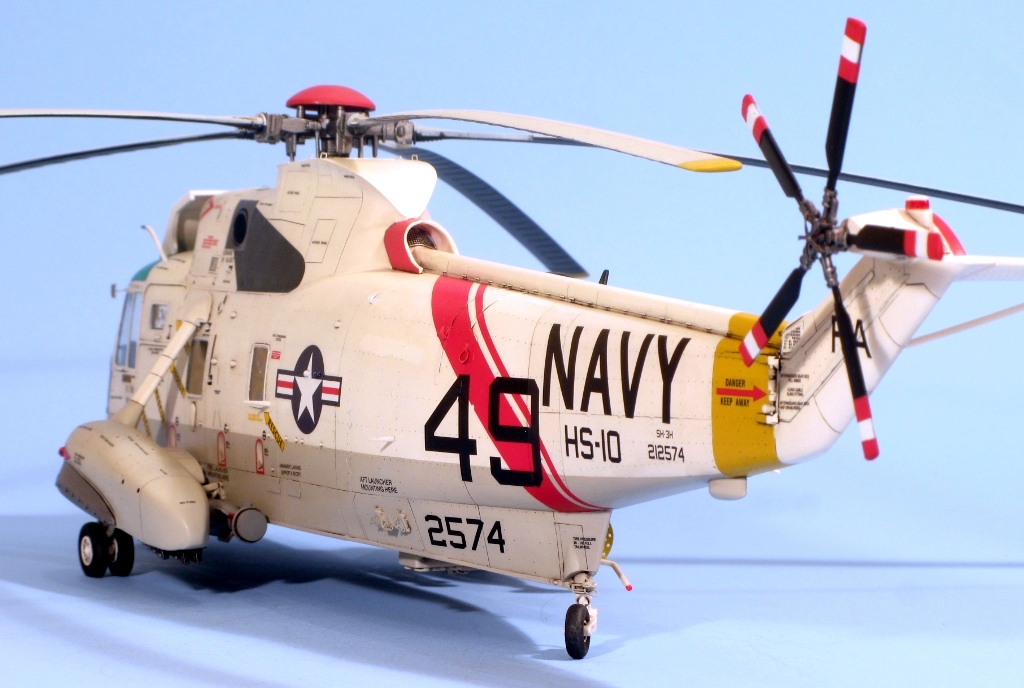
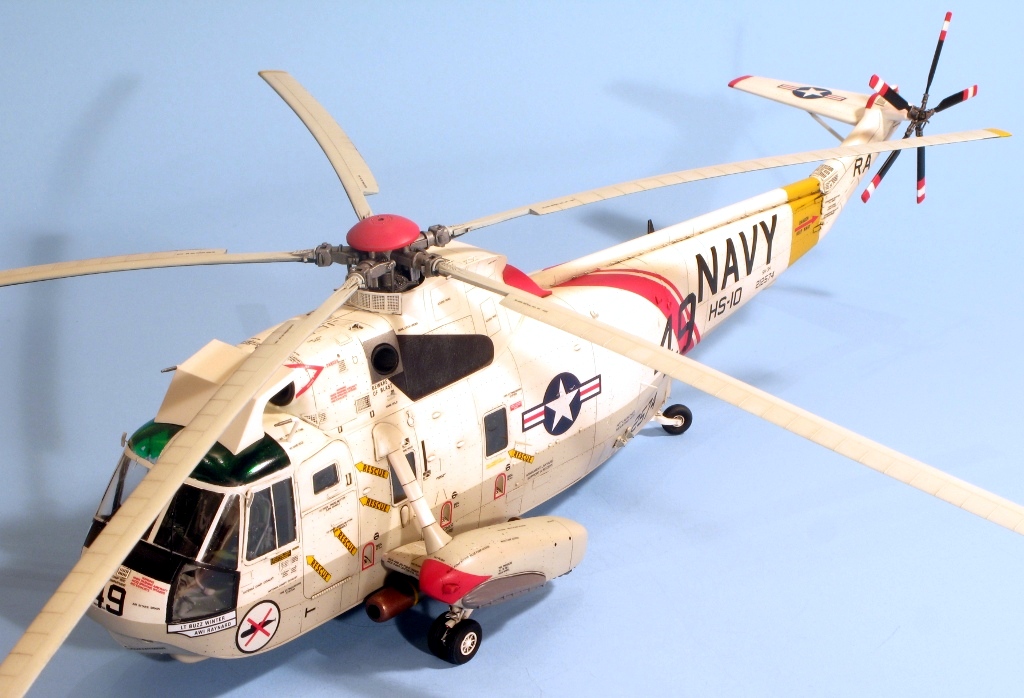
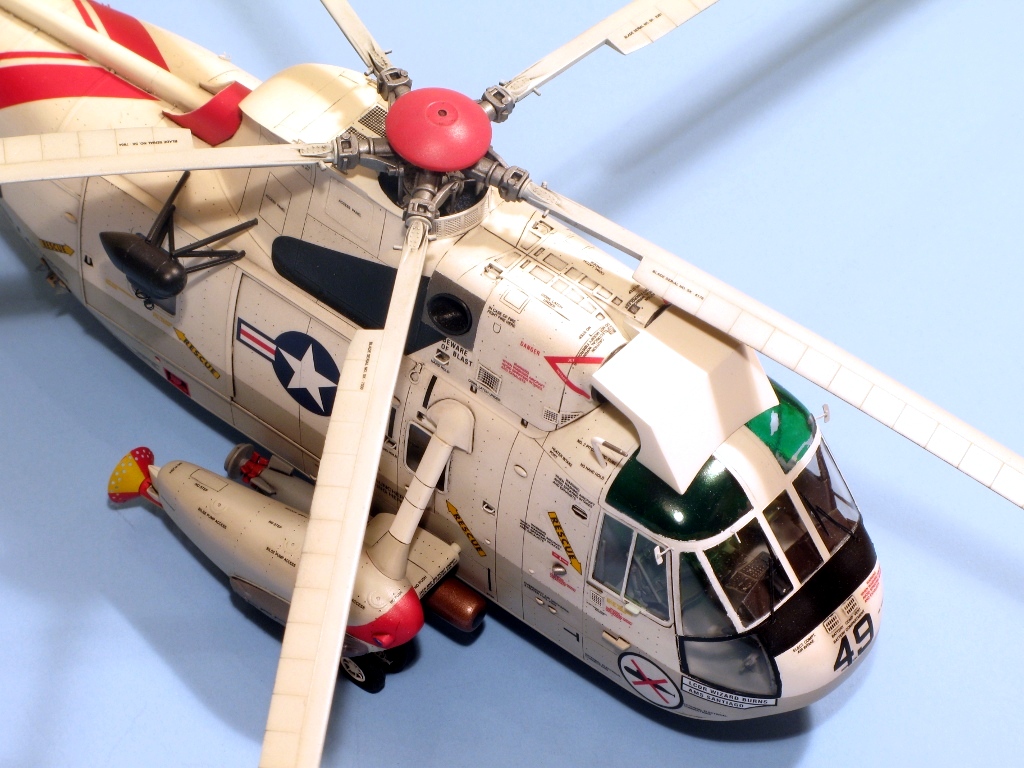
HS-10 ‘Taskmasters’, US Navy, USA 1986

Revell’s Sea King is a re-boxing of Hasegawa’s SH-3H. It’s marginally cheaper, but in my opinion you’d be better off paying the extra fiver for the real McCoy. Why? Well, there’s nothing wrong with the basic kit, but Revell has really managed to screw up the presentation. First, the instructions are terrible. (This is becoming a recurrent problem with Revell AG kits.) The colour call-outs are often wrong (e.g. they suggest the undercarriage legs should be grey and miss out many details, such as the red trim on the tail fin and plane), but fortunately the box art is very good and shows how it should look. The decal placement is woeful, with many decals missing (such as the nose number and underside NAVY marking), located in the wrong place (such as the hand hold and pylon stencils) or just referencing the wrong decals (e.g. the engine intake warnings). I picked up a lot of the mistakes, but I’m sure there were a lot more that I was unaware of. The stencils are also over-sized, and I suspect the NAVY marking is also too big and the national insignia badly proportioned. This leads to the second problem: the decals. They are almost bulletproof. I managed to get the bigger markings to settle down eventually using Daco Strong setting solution, but the stencils and smaller markings would not respond, even after soaking in setting solution prior to application. I also tried Microsol and Mr Mark Softer, to no effect. The anti-sub markings should have a white background, so I used the white section from a discarded RAF roundel. The third problem is that no photo-etch is supplied in the kit, unlike the Hasegawa boxing. There are therefore a few blank spaces in the plastic where photo-etch grills are supposed to go, but you have to find them elsewhere. Finally, Revell have moulded the kit in white plastic, which while a nice base for the final scheme of white, is a nightmare colour for spotting surface flaws.
So that’s what’s wrong with the Revell boxing. I had to live with the decal problem (couldn’t find any aftermarket for a US Navy hi-viz SH-3H), find as many of the mistakes in the instructions as I could and buy the Eduard photo-etch interior and exterior sets. The latter are actually very nice, and I regard photo-etch as almost essential for choppers as there are so many fragile sticky-outy bits that are just not fine enough in plastic. The base kit goes together fine. Fit of the major components is competent, but some of the smaller panels, such as the uppermost panel above the engines, needed a lot of superglue and sanding. The transparencies fitted very well, which was a relief. I masked them off using the Eduard mask set. This set works ok, but I wouldn’t use them again — they are too thick, and thus tend to lift on tight corners, were undersized, and caused the edges of the painted frames to chip leaving them looking tatty. The sponsons fit well, but are where I made my biggest mistake: I added the undercarriage legs before adding the sponsons to the fuselage. As a result, the legs are canted inwards; I should have added them afterwards. The photo-etch adds a lot to the highly visible cockpit interior, as well as some of the immediate interior behind the pilots. The main cabin is still empty, which is fine because it cannot be seen through the fuselage windows — not enough light gets in there. Additions to the exterior include new tie down rings, MAD tail, pylon details, loads of grills, windscreen wipers, undercarriage details, hoist, hand holds, etc., etc.
I painted the kit in Humbrol enamels. The cockpit roof transparencies were sprayed in Tamiya clear green, which lifted under the Eduard masks. Doh! Of course this was only revealed right at the end of the build. I could fix it, but I’d probably cause more damage in the process. I painted the torpedoes in more accurate colours, and noted that the kit only gives you enough markings for one of these. (As an aside, the Eduard mask set only gives you enough masks for two wheels, not the four on the helicopter.) Addition of the final bits and pieces was not straightforward either — e.g. the pitot location holes were far too big, and gluing them in was not very successful. As stated above, decal application was unsatisfactory, and the final coat is a mix of Pollyscale satin and flat varnishes.


Year bought: 2002 (A model shop somewhere in Guildford)
Year built: 2005 (Chesterton, Cambridge)
Back to home.
