with fündekals decals
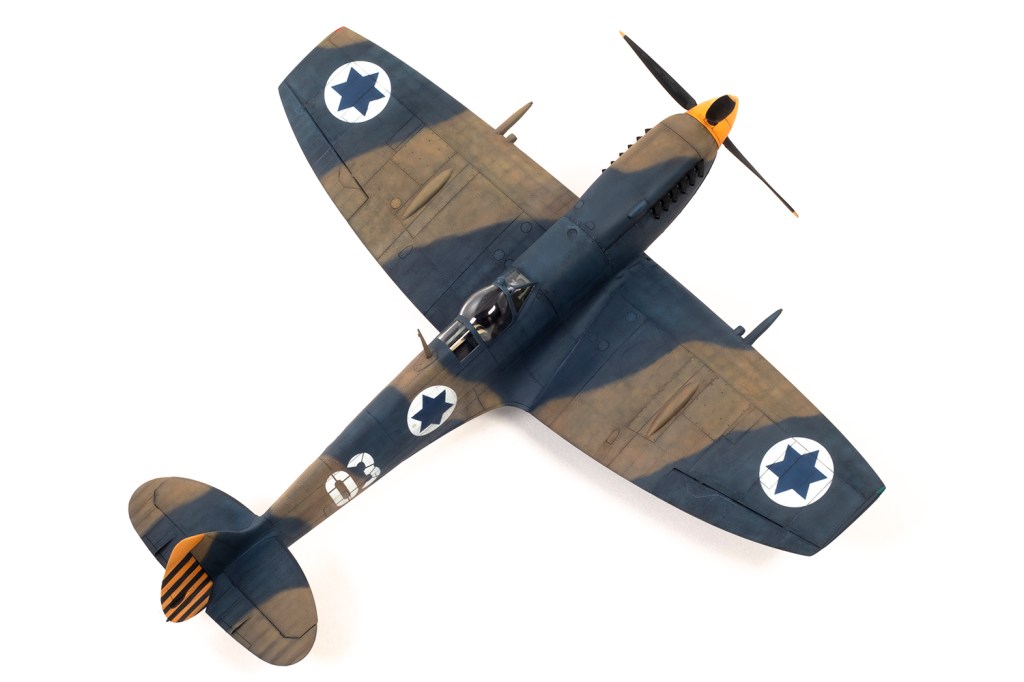
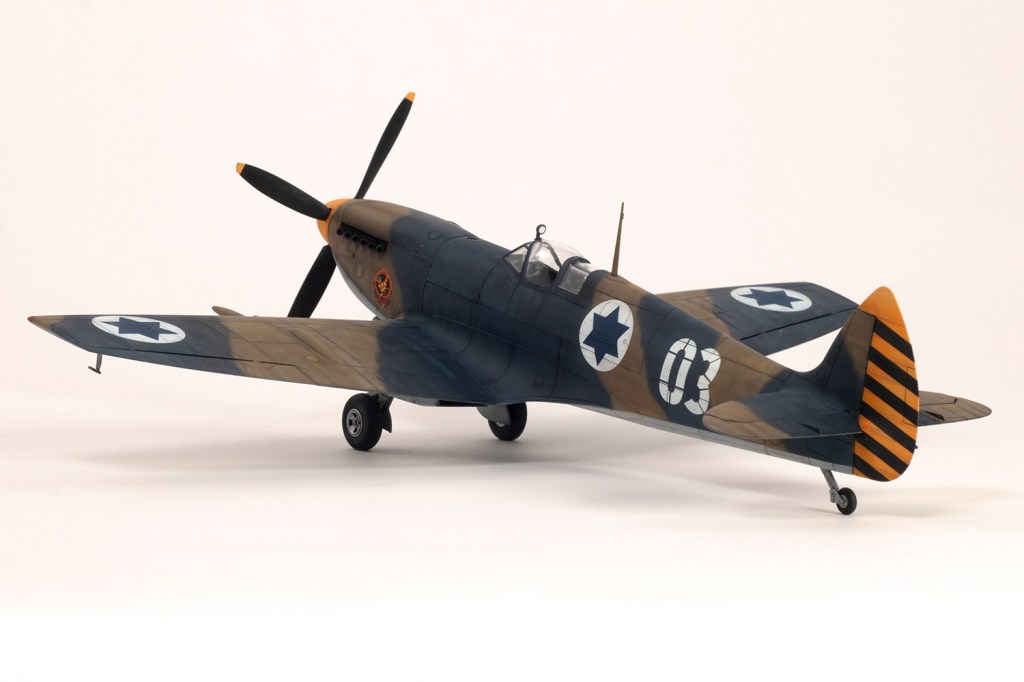
105 Scorpion Squadron, Israeli Air Force, Israel 1955

It’s hard to imagine a better value 1/48 kit than Eduard’s Spitfire. At the time of writing you can get a Weekend boxing of a Mk.IX, which is what this article features, for £17.50 from Hannants. Given the competition, that’s a pretty amazing combination of detail, moulding finesse and fit for the money. No wonder model magazines have featured a bazillion builds of this kit since it was released in 2013.
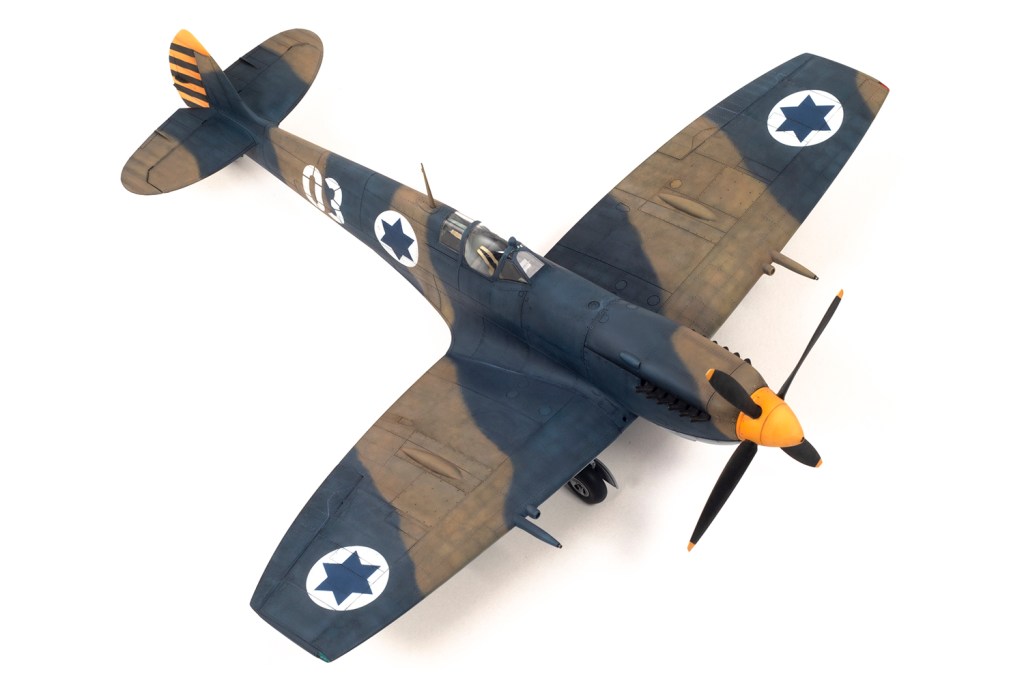
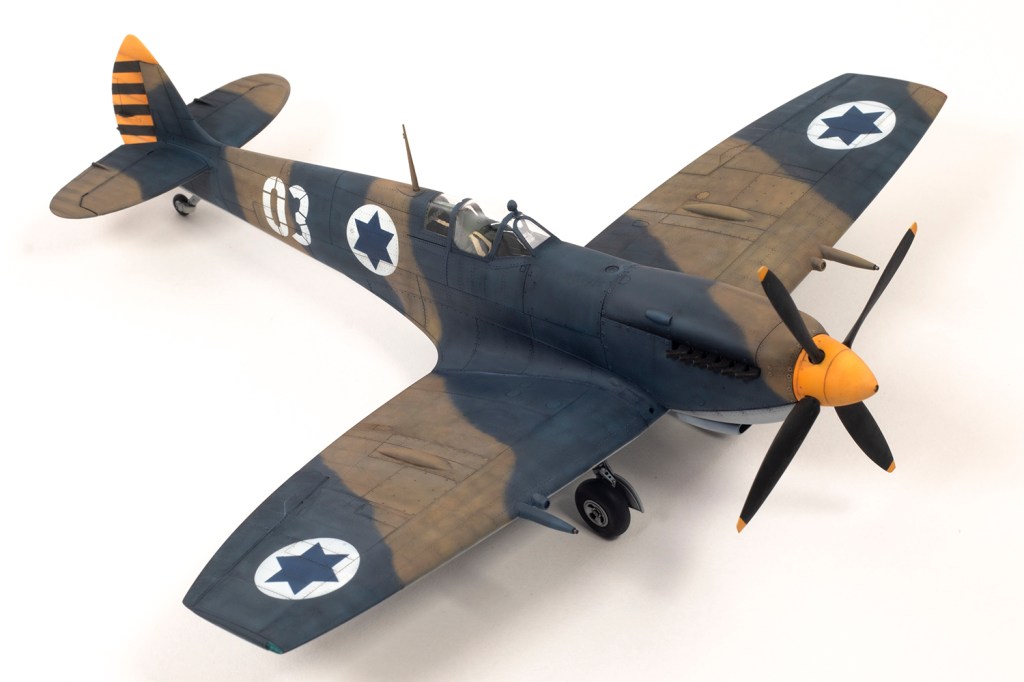
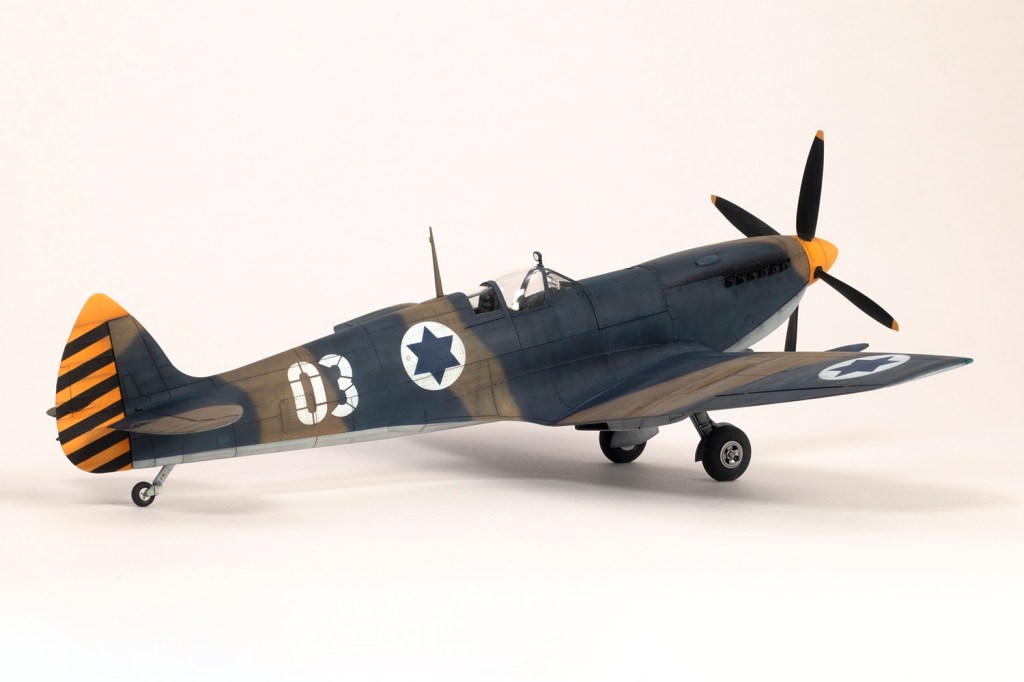
To make mine stand out a bit, and fit within my collection of post-war military aircraft, I decided to make mine in Israeli markings; although the Czechoslovakian markings the kit came with would also have worked, that scheme was just a tad dull. Much better, in my opinion, to have something finished in the unusual combination of dark blue and brown with a bright yellow tail and spinner. I purchased fündekals ‘Spitfires of the Israeli Air Force’ set, which was nicely printed but only had instructions online. There are lots of interesting and colourful options provided, although in the end I would only use a single decal from the sheet.
Israeli Spitfires found their way into the country from a variety of different places and via different means. The story is far too complex and confusing for me to summarise here, but it appears this particular airframe originated in Czechoslovakia and made its way to Israel via Yugoslavia.
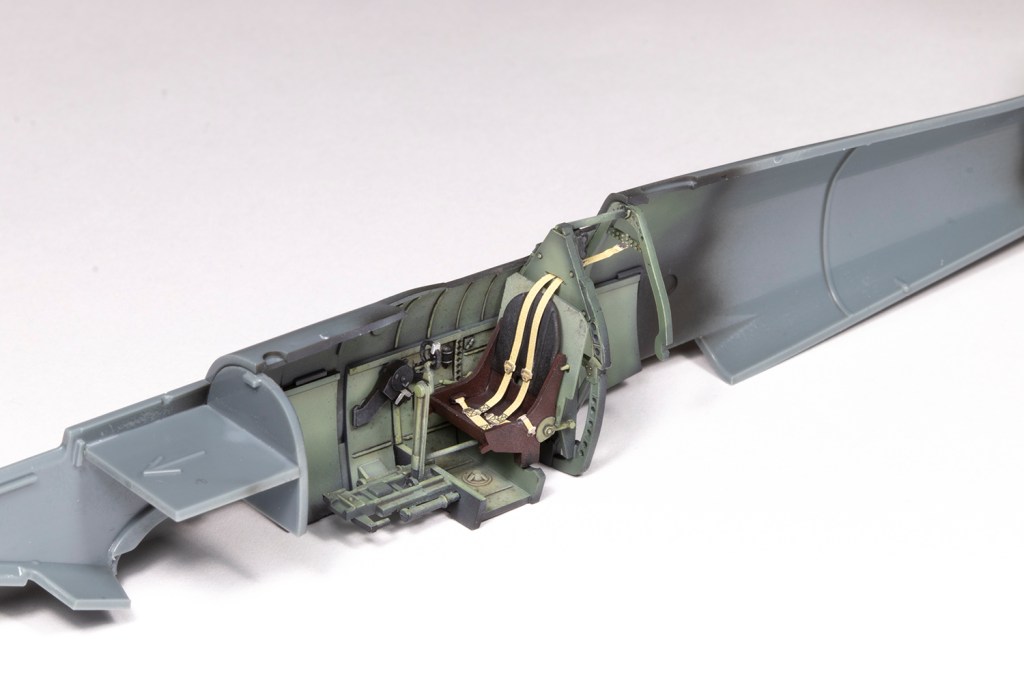
This is the Weekend boxing of the Mk.IXe and thus contained no PE or other details. My only addition was a generic set of seat belts from an old Eduard set I had. I do have the Profipack version, though, (the Mk.VIII) and stole the mask set from that kit. Once used I could scan it and cut my own mask on a Silhouette cutter to use on the kit I robbed it from.
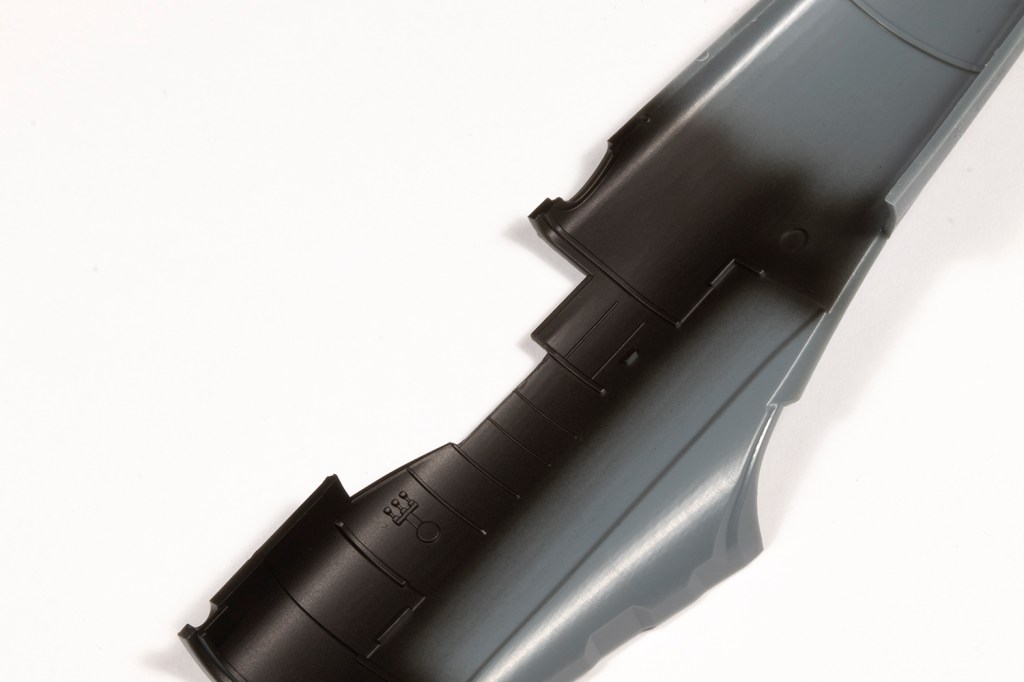
A little preparation work is required on the fuselage halves for a closed canopy, involving the removal of some plastic around the cockpit opening. This was a little disconcerting on such a nice kit, but careful cutting produced a beautiful fit with the clear plastic. I also elected to join the upper and lower nose cowlings together at this stage. Out of necessity, Eduard moulded them this way but do sell a single-piece resin replacement for the top cowl. I don’t mind the extra work and it kept this as an out-of-the-box simple build.


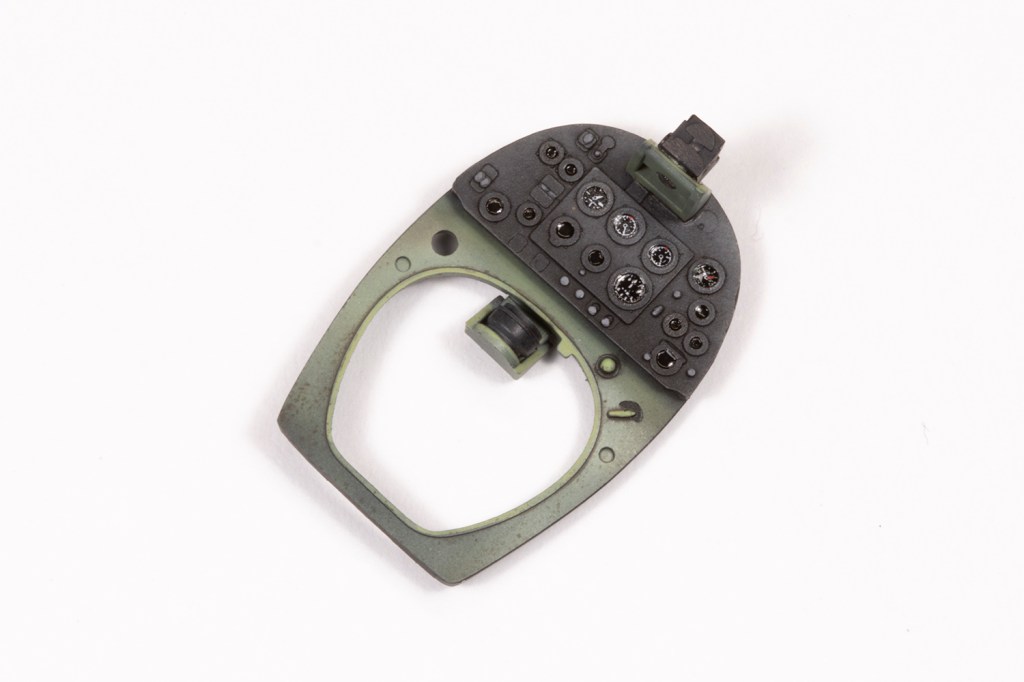
I wanted a fairly high contrast finish to this aircraft, and the cockpit was to be no exception. I shaded the instrument panel, for example, by dry brushing increasingly light grey oil paints over a solid black base. In the past I’ve always struggled with this because the oils never really dry and get removed by subsequent layers. I have learned to overcoat the oils with airbrushed clear (in my case MRP-127 Super Clear Matt). This ‘sets’ the oils in place, and more effects can be added over the top in seconds.


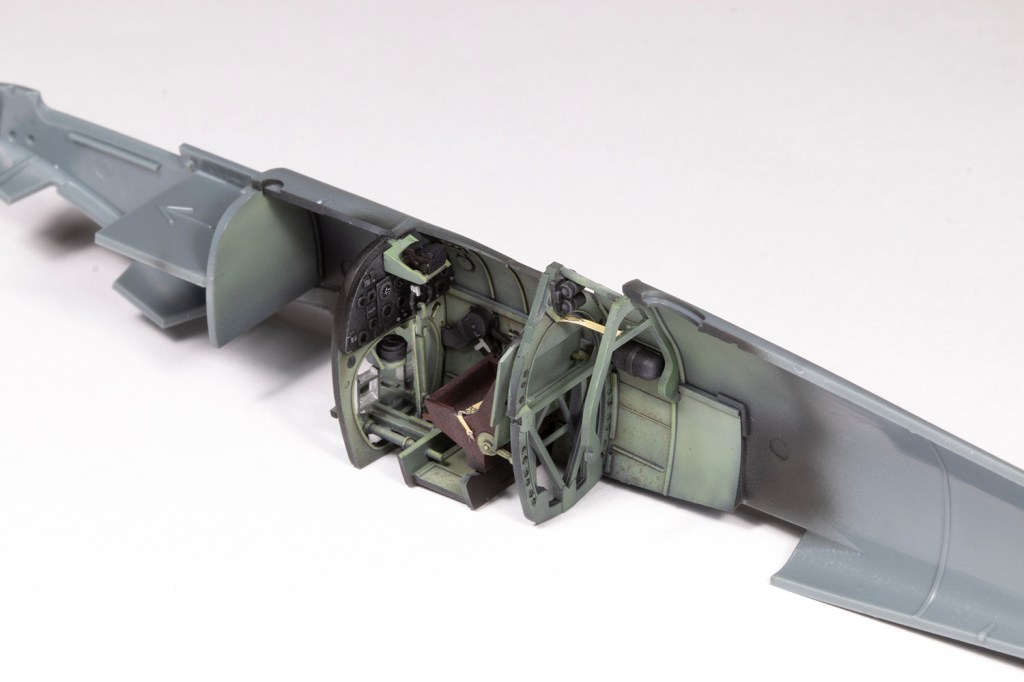
The rest of the cockpit is extremely complete given it’s all in plastic and there are way more details than will ever be visible through the closed canopy. Rather than follow the kit instructions and build it all up as a complete tub, I joined each side of the cockpit to its respective fuselage half and then dry-fitted the fuselage halves together to get the bulkheads to line up correctly. Once installed the fuselage was stuck together with thick superglue; the fit was wonderful, but the inevitable gaps caused by my unorthodox gluing method and materials needed to be fixed with some more CA. It’s worth noting the exhausts have to be added before the fuselage is joined. In some ways this is a pain for painting later, but the payoff is greater detail (the exhausts look like they’re actually joined to an engine!) and it’s easy enough to mask the area later for airbrushing. Eduard’s moulding is excellent – the exhausts are all hollow and require no extra work.


In keeping with the detail elsewhere, the undercarriage bays are a multi-part construction and need to be finished prior to joining the wings. I’ll discuss the choice of colours anon, but for better or worse I chose to use the underside colour for the bays and legs. All the separate components were painted with Hataka C039 FS36622 and shaded with Mr Color’s interpretation of the same shade (C311) and highlighted with white. The details were brought out with some ABT502 Dark Mud oil paint and very light greys mixed from acrylics and painted by brush.


In general, the fit everywhere was excellent, except at the tailplanes. The tailplane halves themselves were an incredible fit, but a bit gappy when joined to the fuselage. Care should be taken in this area as I have seen very nice builds of the same kit with the tailplanes fitted upside down. Judicious application of black CA and VMS filler powder (mixed into a sludge) filled the gaps and made sanding down with an offcut of Infini 400 grit sanding stick very easy. I like to cut these sanding sticks into different shapes to make access easier – all you need is a stout pair of scissors. The very finely-moulded surface detail (mainly the rivets) is at risk of obliteration during sanding and I like to deepen it (in this case with an MRP needle scriber) prior to sanding so that it is retained. Once hardened, the join can be reinstated with a scriber using Tamiya vinyl tape for curves as a guide. This is not an ideal guide because the tape is soft and liable to deform, but it’s that same flexibility that allows the curved line to be rescribed. Just go gently and make multiple light passes with the scriber.


Fitting the main components altogether was pure joy. The upper and lower cowling and wing all clicked into place requiring almost no remedial work anywhere. Only on the underside around the back of the carburettor air intake and where the rear of the wing joins against the rear fuselage did I need a little CA filler and sanding. The upper wing roots were perfect, which makes life a lot easier.

Continuing the pattern of using many parts where other manufacturers use few, the radiators under the wings are detailed and complex. Fortunately, the fit is excellent here, too, and adding them was painless. I pre-painted this area and then masked it with some sponge packaging later on.


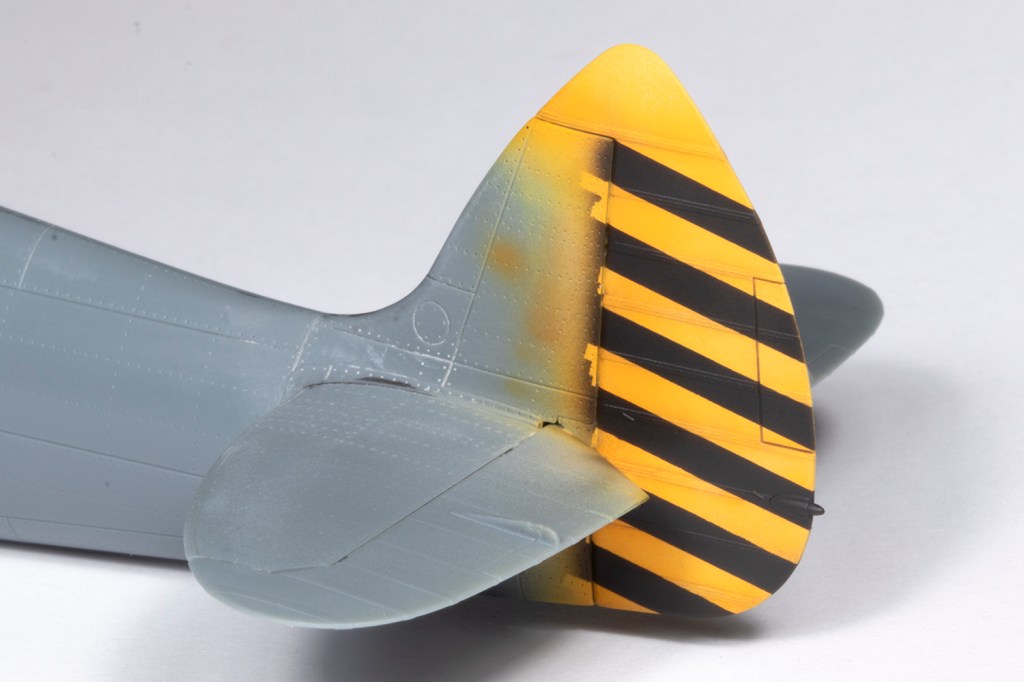
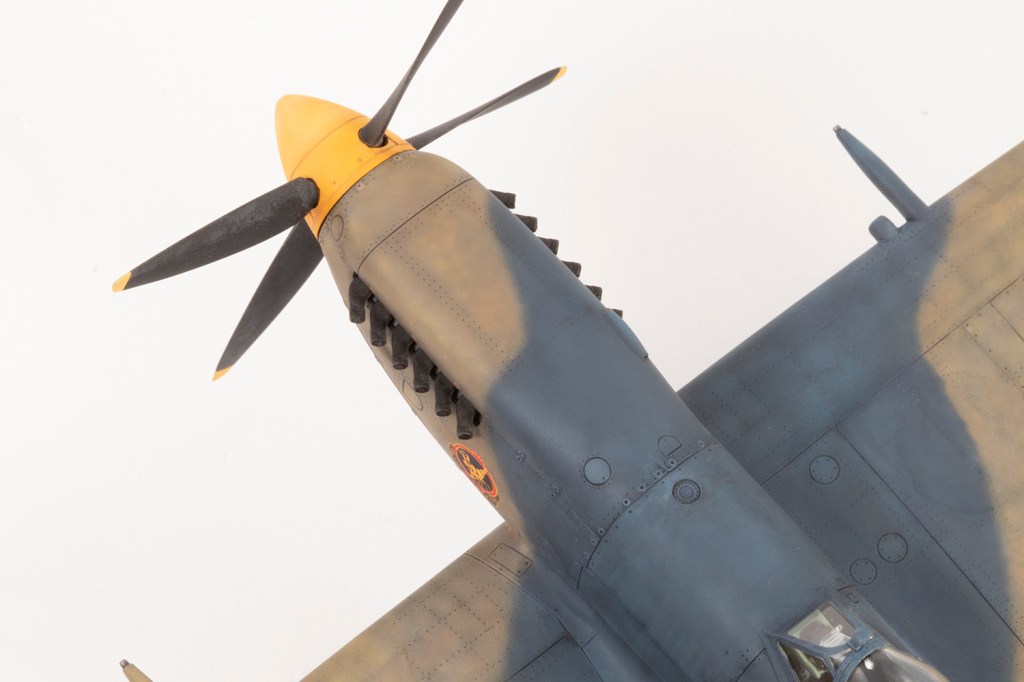
I wanted to paint the rudder fairly early on, before the wings were added, as it would be easier to access and straightforward to mask off. I scanned the fündekals decal sheet and made vinyl masks for the black stripes. The vinyl was much too stiff to go over the detail, but the plan was to use these masks to get the correct spacing so the actual masking could be done with Mr Hobby die cut 1mm strips of masking tape. I like using this as the edge is very sharp. The yellow was MRP RAF Marking Yellow applied over a pink undercoat. This was the first time I tried this and it gave a lovely deep finish. The yellow is probably rather too deep, but I like it. It was shaded by adding white, for highlights, and some red for shadows. Further shading was achieved with ABT Faded Dark Yellow oil paint (which is basically orange), frequently overcoated with MRP Super Clear Matt to ‘fix’ the oils.


I imagine many readers buy this magazine for clarity on matters of research and history. Apologies, but I can supply none in this article. I wanted to make ’03’ from 105 Scorpion Squadron in 1955. Or is it 1953? It depends on who you read. Eduard released a version of this airframe in their ‘Velveta’ boxing, and labelled it as 1953. This is mirrored by Ventura Publications who also maintain this aircraft was written off in 1954. fündekals, on the other hand, specify 1955, as do IsraDecal in their instructions for 1/24 IDF Spitfires. Who knows? I’m sure the answers are out there, but without buying a specialist book (which is not happening, I’m afraid), it will remain a mystery to me.
Similarly, what colours should it be in? Our very own Yoav Efrati has a build of this scheme on the internet and specified FS26373 Gray for the lower surfaces, FS25045 for the blue and FS30145 for the brown. fündekals themselves state the grey approximates FS36622 (which is very pale), the blue FS35042 (which is Gloss Sea Blue) and the tan FS33434. IsraDecals go for RAL7035 Gray, RAL5008 Blue and RAL8025 Brown. The Eduard Velveta boxing recommends FS36270 Gray, FS15044 Insignia Blue for the blue and Dark Earth (Mr Color C22) for the tan. All of these colours are quite wildly different and not many of the more sensible suggestions exist in paint ranges I use. It’s a mess.


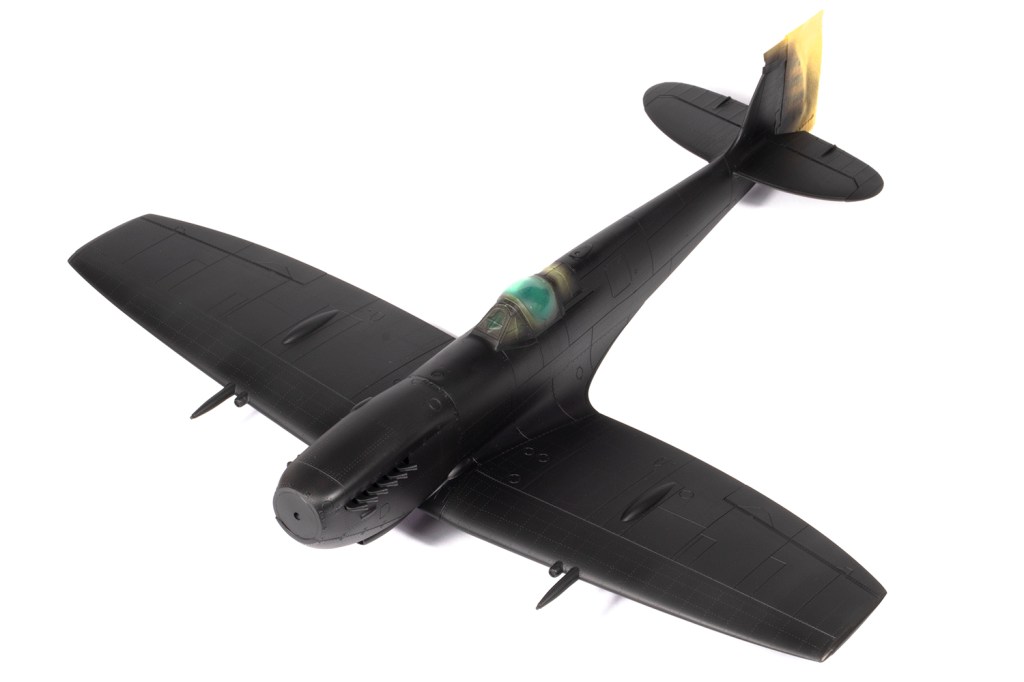
In the absence of anything approaching certainty, I felt liberated to finish in colours I found attractive rather than historically accurate. Everything was applied over a base of Mr Finishing Surfacer Black 1500, which tends to darken the colours anyway, and the light grey undersides was a combination of thin layers of Hataka C039, Mr Color 311 (both FS36622, although the latter is much lighter than the former) and Mr Color 325 FS26440.


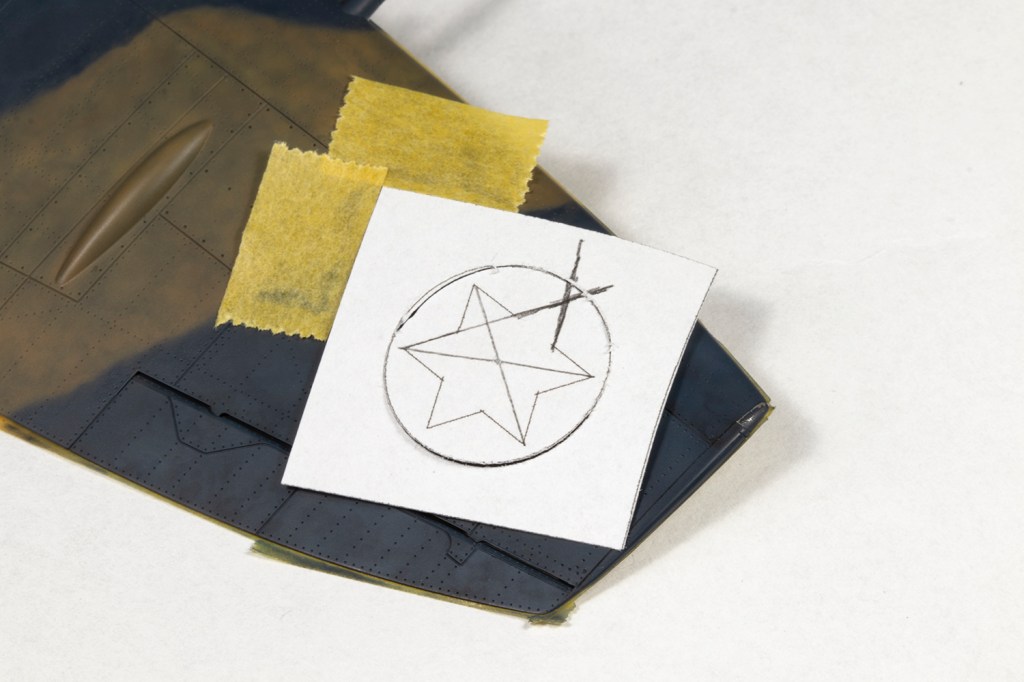
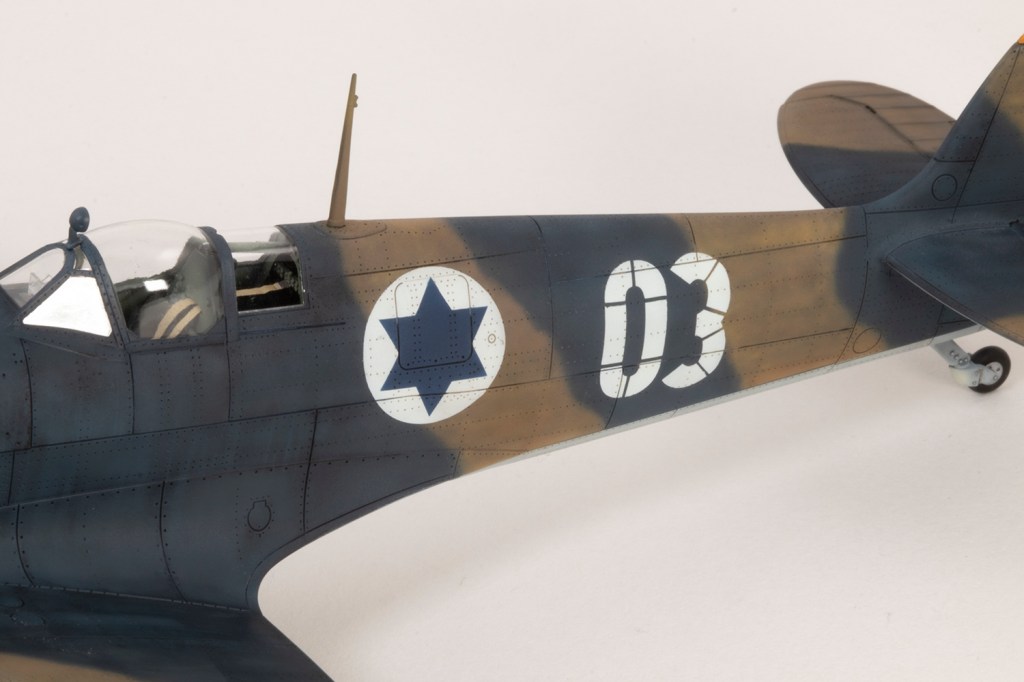
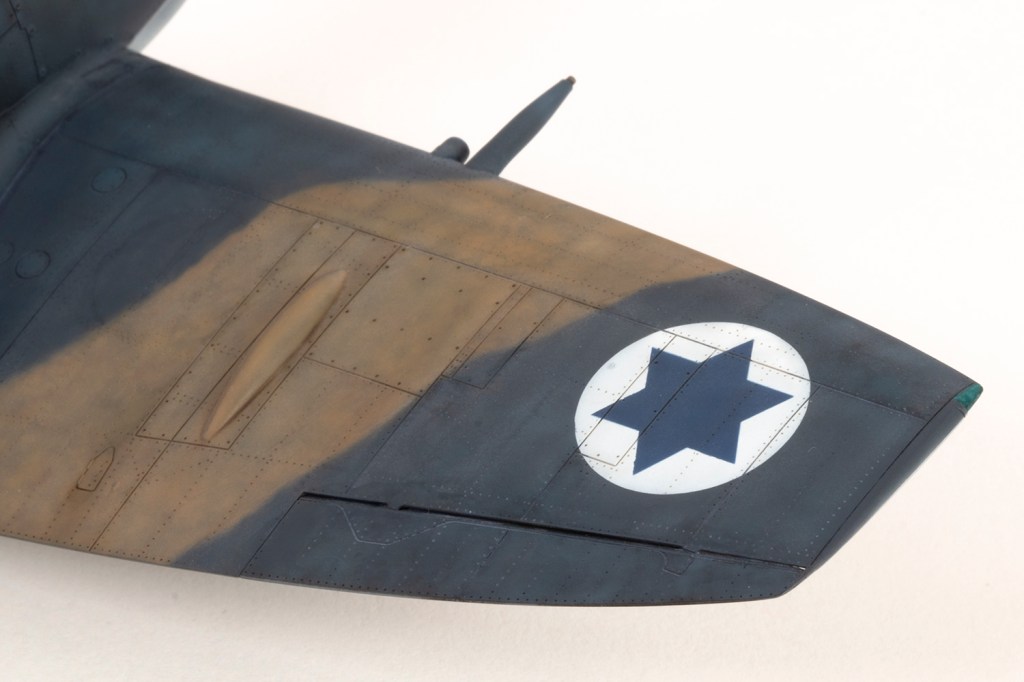
Before moving to the upper camouflage I wanted to paint the Star of David insignia on the lower wings so I would only have to mask once. In the end I elected to make masks for the vast majority of the markings and the only decal used was the squadron insignia, which makes the decal sheet a fairly expensive purchase! I couldn’t find a decent paint recommendation for the Star of David blue (IsraDecal simply say ‘Dark Blue’ for their masks) and thus embarked on spraying all the blues I had in stock. My conclusion was that Mr Color 328 FS15050 was an excellent match for the blue printed by fündekals and that was good enough for me. I slightly resized the star on the fuselage sides to give a better match to my interpretation of the photo I had, and also changed the ‘0’ slightly for the same reason.
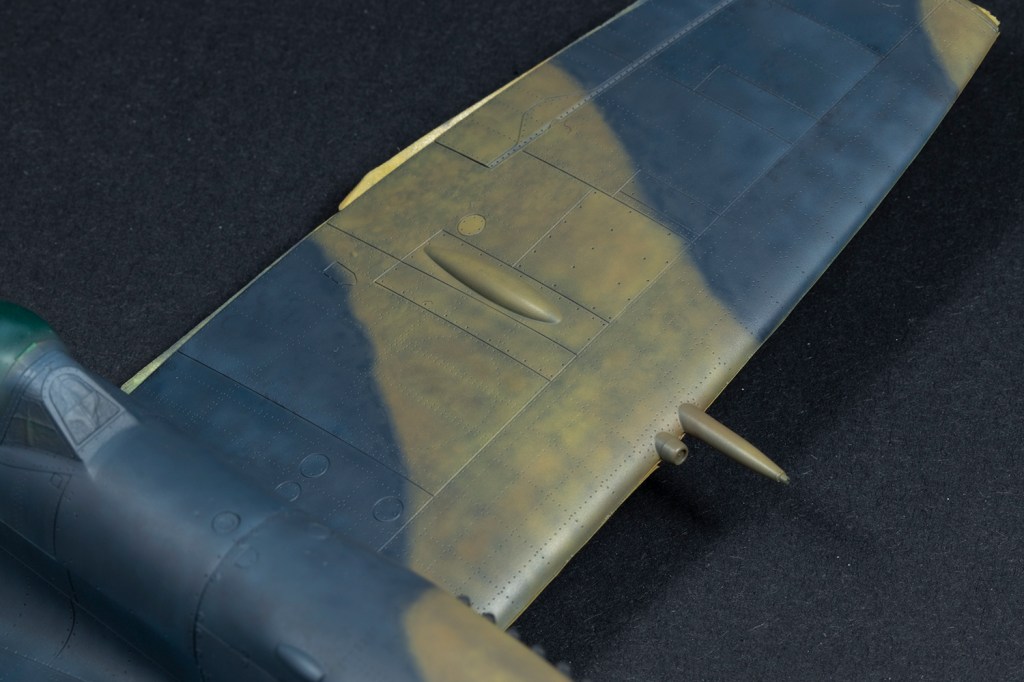
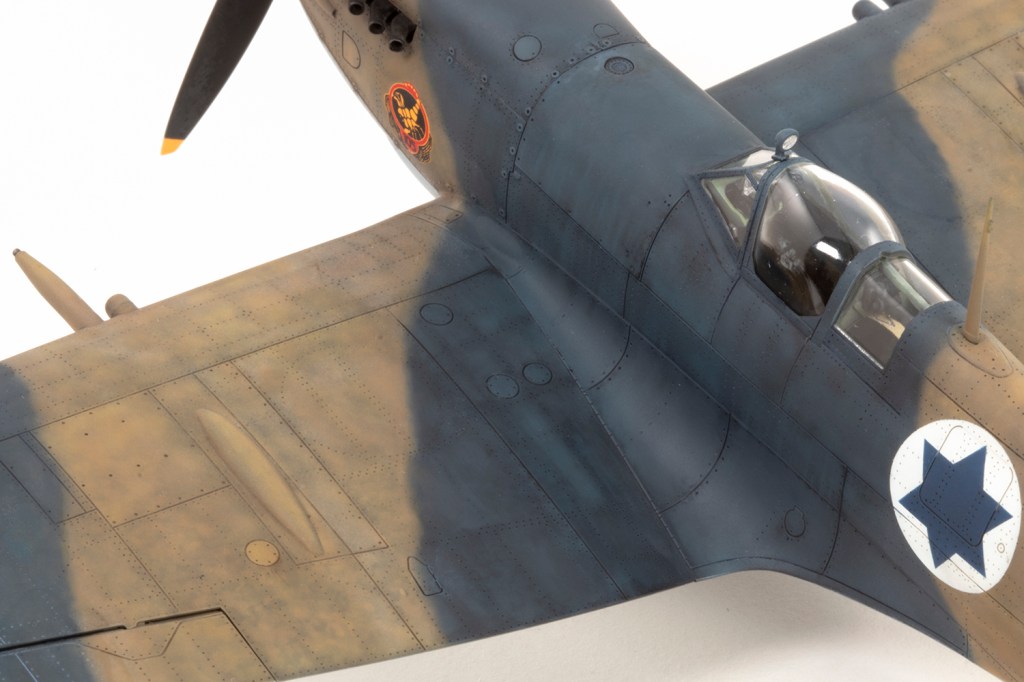
With that done on the lower wings, I could start camouflaging the upper surfaces. The pattern is nice and simple and freehanded with an airbrush as I hate masking. As stated, I wanted a higher contrast finish than I usually attain and thus experimented with layering quite different shades of blue and brown over the black primer, spraying very fine to get a lot of patchiness and sometimes using various mottle masks I’ve acquired. The core of the brown shade was Hataka C257 Uniform Brown FS30145 with much lighter patches in Hataka C259 Yello Ochre FS33434 and some different tones in Mr Color 22 Dark Earth. These lacquer paints were heavily thinned with Mr Levelling Thinners so I could build the opacity up slowly.
For the blue shade I started with MRP 281 RAL5008 highlighted heavily with MRP 238 International Blue FS35109 and lowlighted with MRP 300 Insignia Blue FS15044 (which was a little too saturated really). Playing around with all these gave me a very patchy finish which was then toned down with blending mist coats of the Uniform Brown and RAL5008.


Once I was happy enough with this patchy finish, the remaining markings were airbrushed in Tamiya XF-2 White and Mr Color 328 and the squadron insignia decal applied.


Everything had been going pretty well to this point and I was unusually happy with how things looked. An application of various oil washes (ABT502 Dark Mud underneath, Sepia and Raw Umber over the brown, and Paynes Grey over the blue) also went well, but everything took a turn for the worse with my new-found technique of using MRP Super Clear Matt Varnish for fixing the oils in place so I could apply more oils over the top without them all mixing together. (Who has time for these things to dry naturally?)
MRP Super Clear Matt is a great product, but I discovered it has a tendency to go chalky over dark colours, and that was a real problem over the blue. Brushing some white spirit over the top knocks this back, but has the unfortunate effect of dumping the chalkiness as a white gunk in the recessed detail and leaving pale tide marks. The more I tried to fix it the worse it got, and everything looked very furry and white, and the worst area was the top cowl. In the end I resorted to brushing some Johnsons Klear over this area and respraying with VMS Matt Varnish. This fixed a lot of the problem and produced a more lustrous yet flat finish over the nose. I left the rest of the airframe alone and chalked (!) it up to a new lesson: use MRP Super Clear Matt with care!
I was on the home straight now with just a few items remaining. A punched disc of ANYZ Models chrome decal was added to the canopy mirror and fixed in place. My one real complaint against the kit was the very floppy fit of the landing gear which was fixed in place with VMS Black Flexy CA for its slow drying time so I could place the model on a baking tray and use magnets as jigs to get the legs square. The final step was to gently drag the model dozens of times across a flat sheet of 400 grit wet and dry paper to sand some small flats into the tyres.
And then, in just over four weeks, it was done. This was a delightful kit to build and brought me great joy. The fit is superb, the engineering is generally great and the detail better than any other 1/48 Spitfire I’ve yet seen. I’m very glad I have another three Eduard Spitfires of various marks laid up in the loft and look forward to building them in due course.


Year bought: 2014 (LSA Models, Telford)
Year built: 2024 (New Addington, Croydon)
Back to home.
