with Wolfpack resin update set and Frontpenny decals
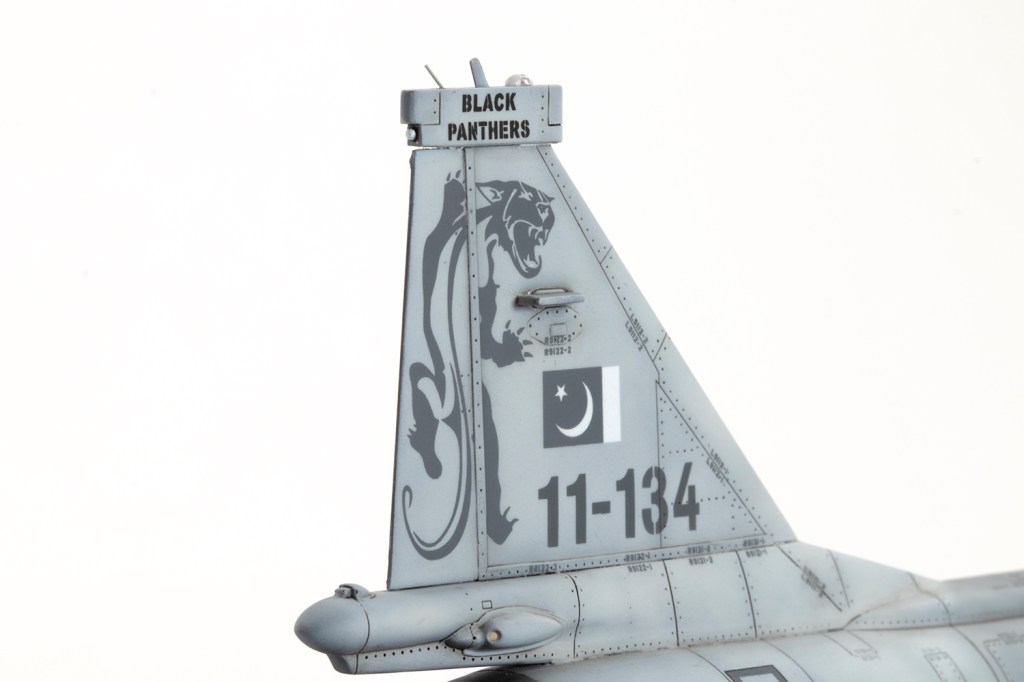
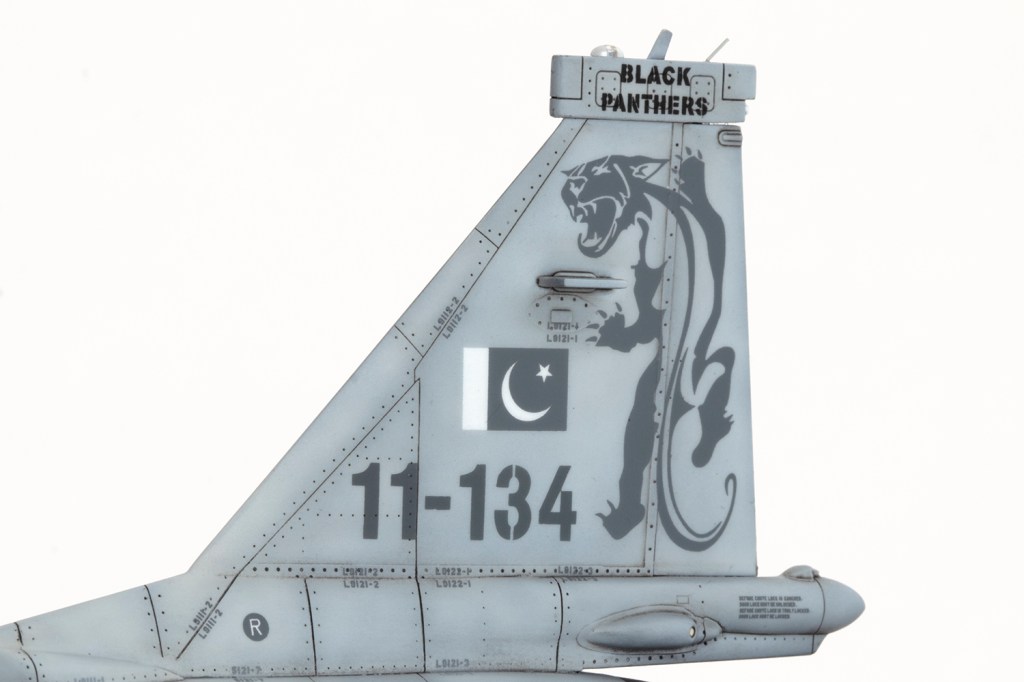
16 Squadron ‘Black Panthers’, Pakistani Air Force, Pakistan 2013

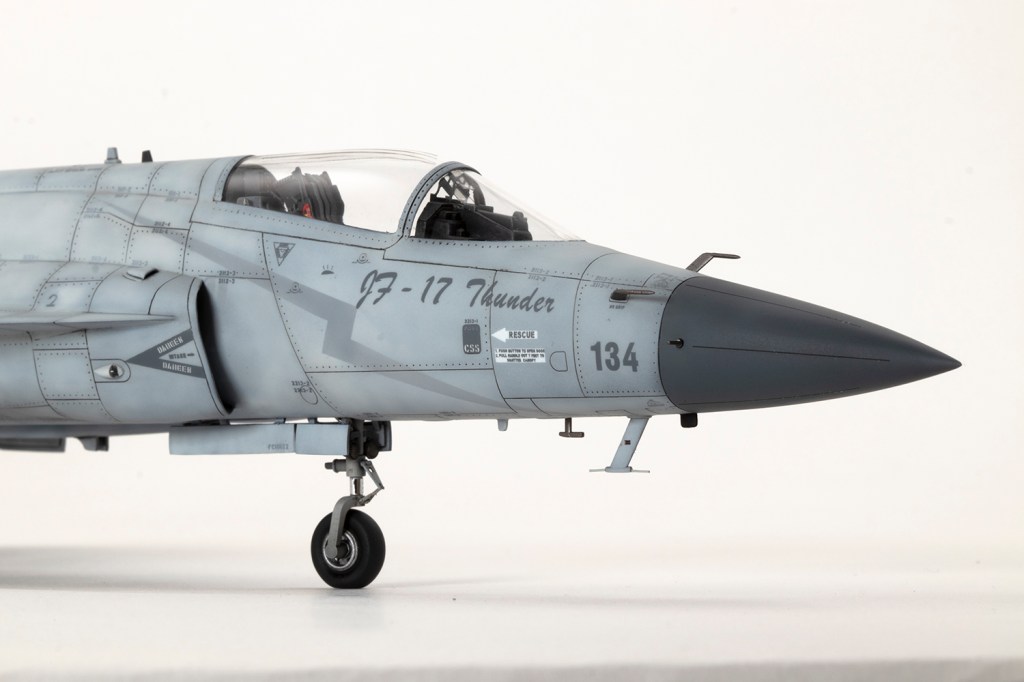
It is for the most random reasons that a model rises to the top of the stash and gets built. In this case, a friend of mine, well known award-winning American modeller Justin Lentz, needed a drop tank for his Pakistani F-7G and the obvious place to get one is from this kit: Trumpeter’s 1/48 JF-17 Thunder. Having sent the parts to him I was left with an incomplete kit, which meant I needed to build it.
I bought this when it was released in China in 2010, and it’s pretty bog standard for Trumpeter. The moulding is quite naïve, with flashes of nice details (such as the cockpit panels) amid chunky parts elsewhere, large sprue gates, mould slip and little wisps of flash. It’s not terrible, but neither is it great. A couple of generic sprues for Chinese missiles are included, but since I can’t be bothered with ordnance, they were consigned immediately to the spares box along with all the pylons. There are plenty of photos of clean JF-17s just carrying the belly-mounted gun pack.
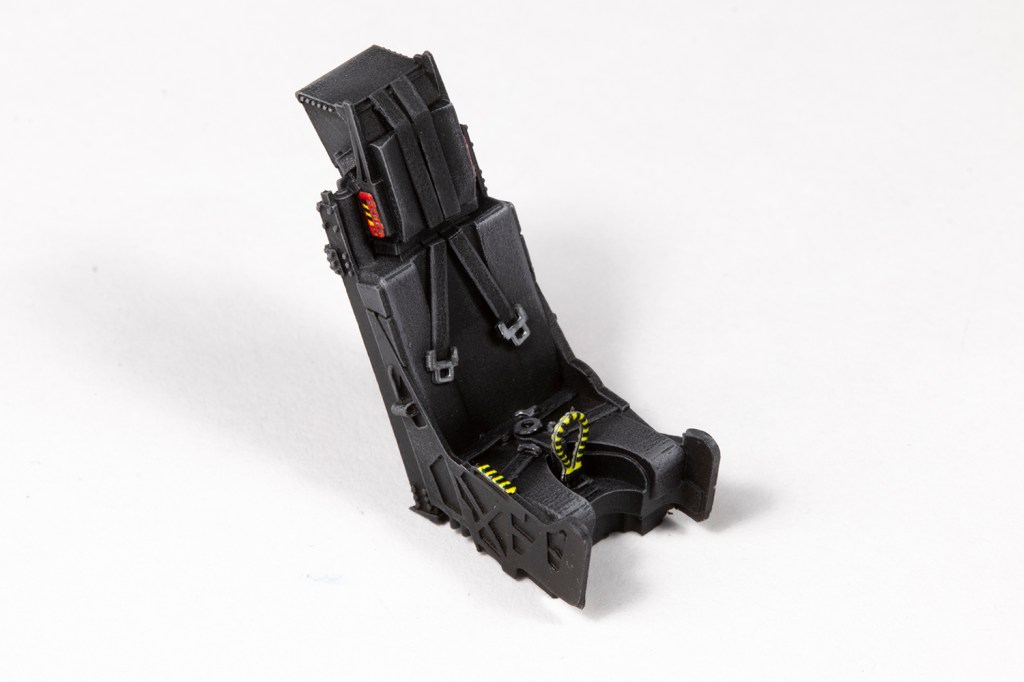
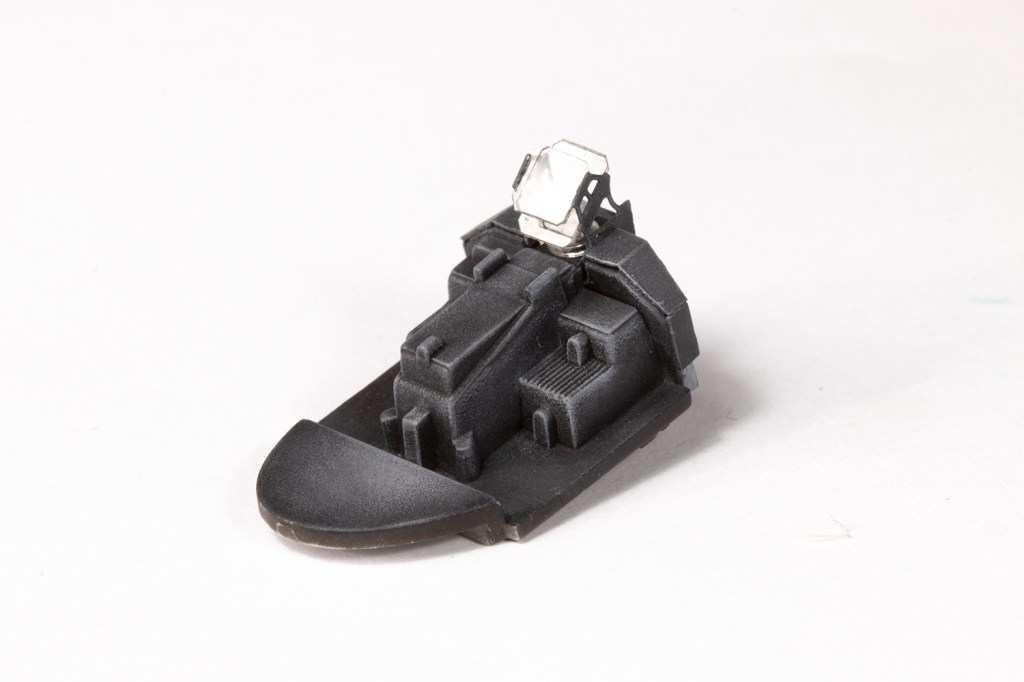
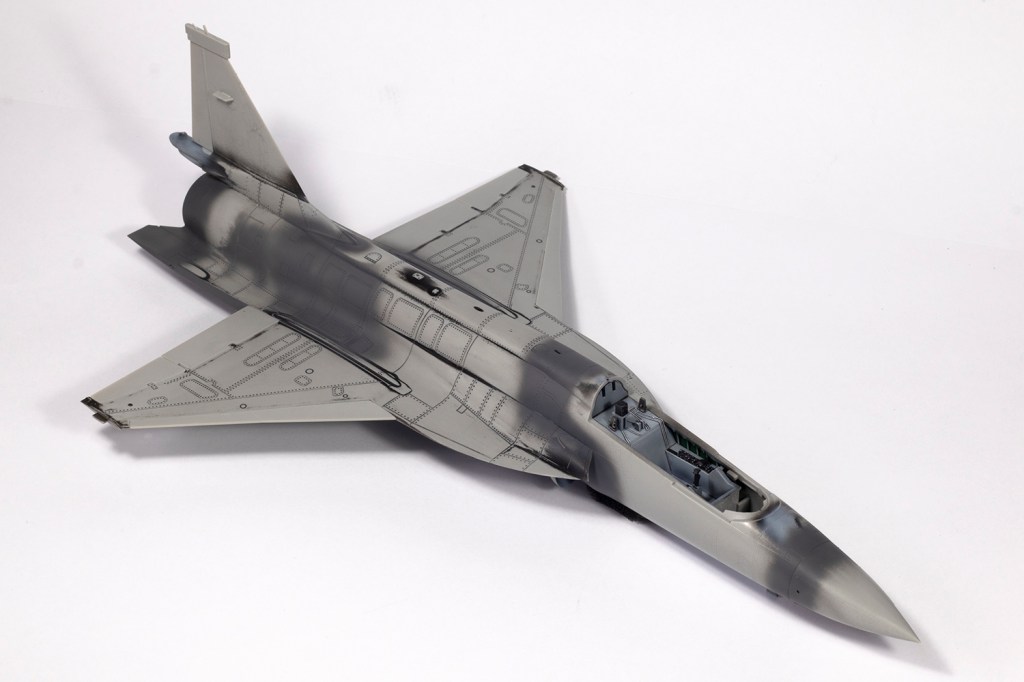
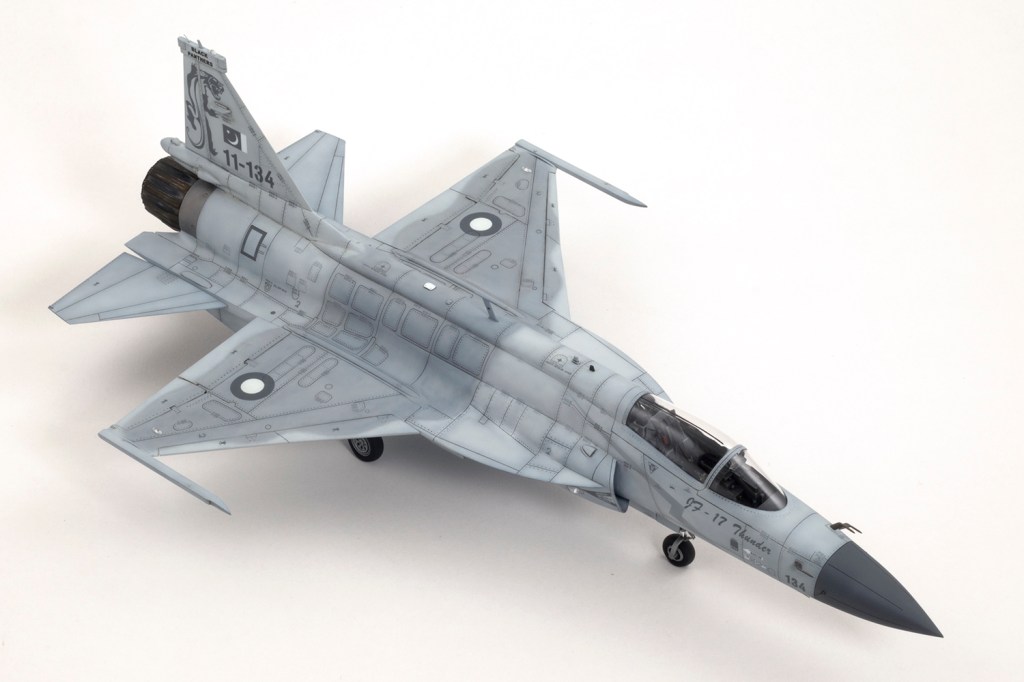
To my eye looking like the melding of an F-5 with a Gripen, the JF-17 has been around for a couple of decades and equips around eight squadrons of the Pakistani Air Force. Although it is a joint venture between Pakistan and China, the latter do not operate it, but it has thus far been exported in small quantities to Myanmar and Nigeria. Produced in three blocks, the kit represents a Block 1 aircraft, but the external differences appear to be minor as the aircraft has evolved. I purchased a Wolfpack resin and PE update set which mainly provides the correct ejection seat and a better detailed engine exhaust.
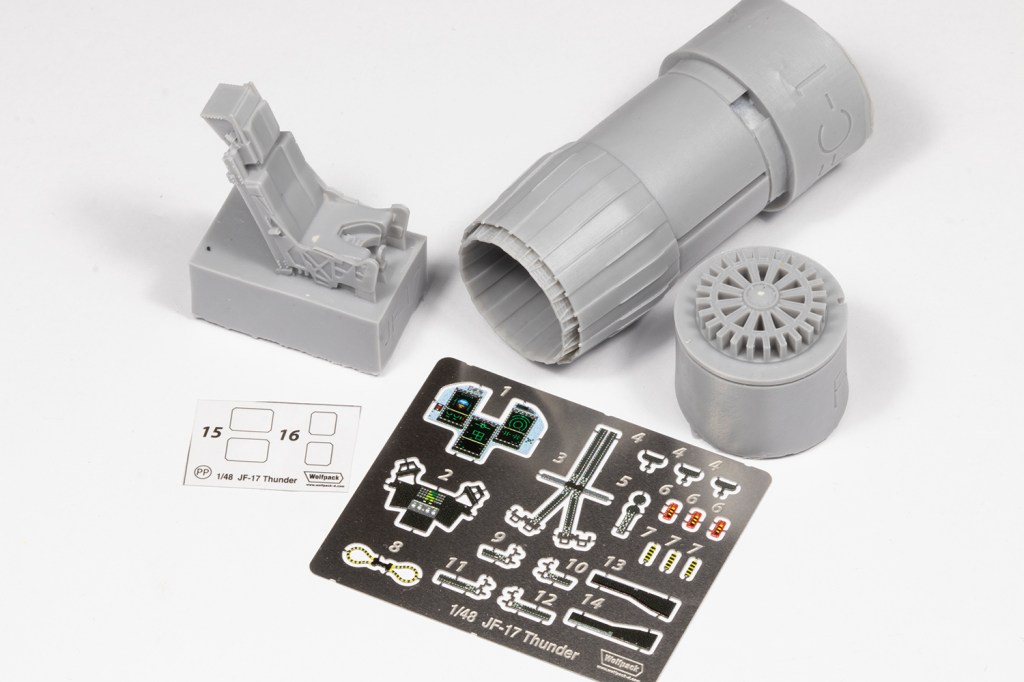

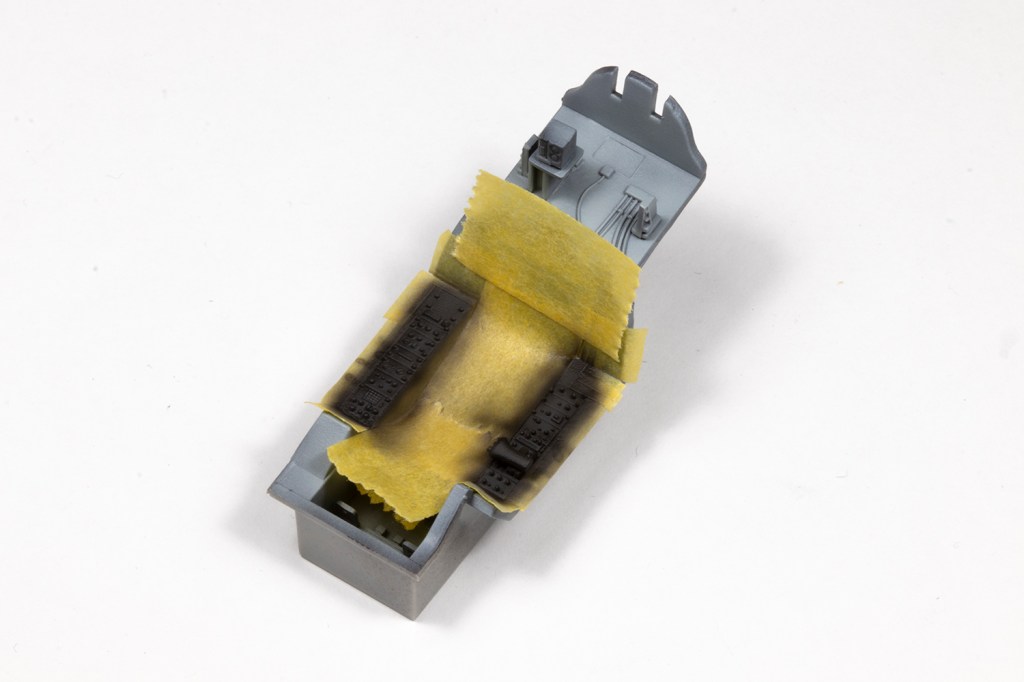

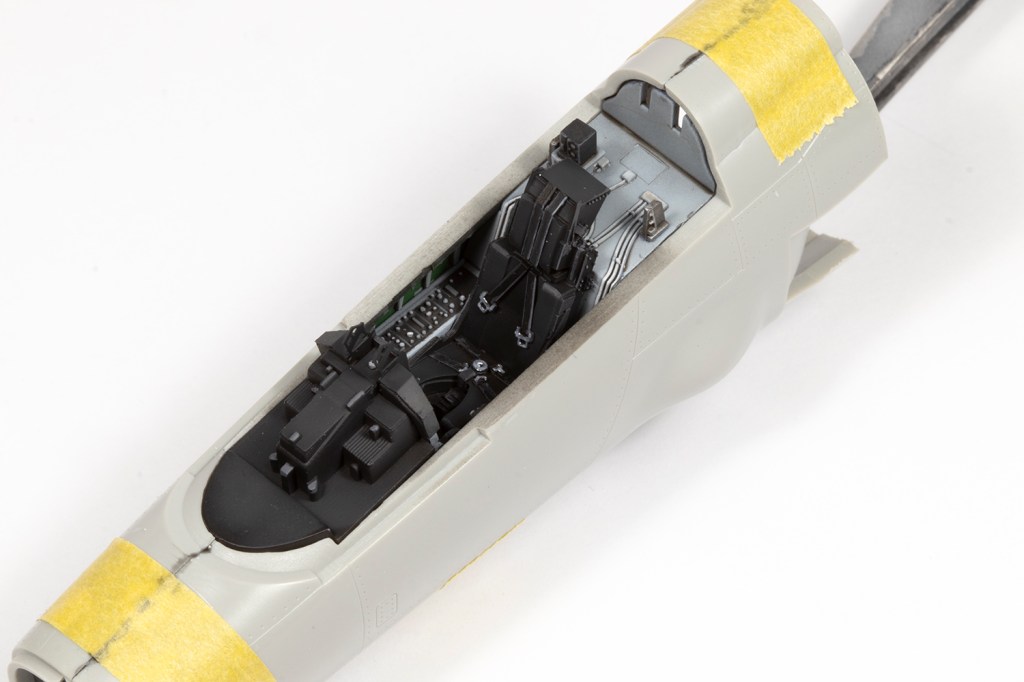
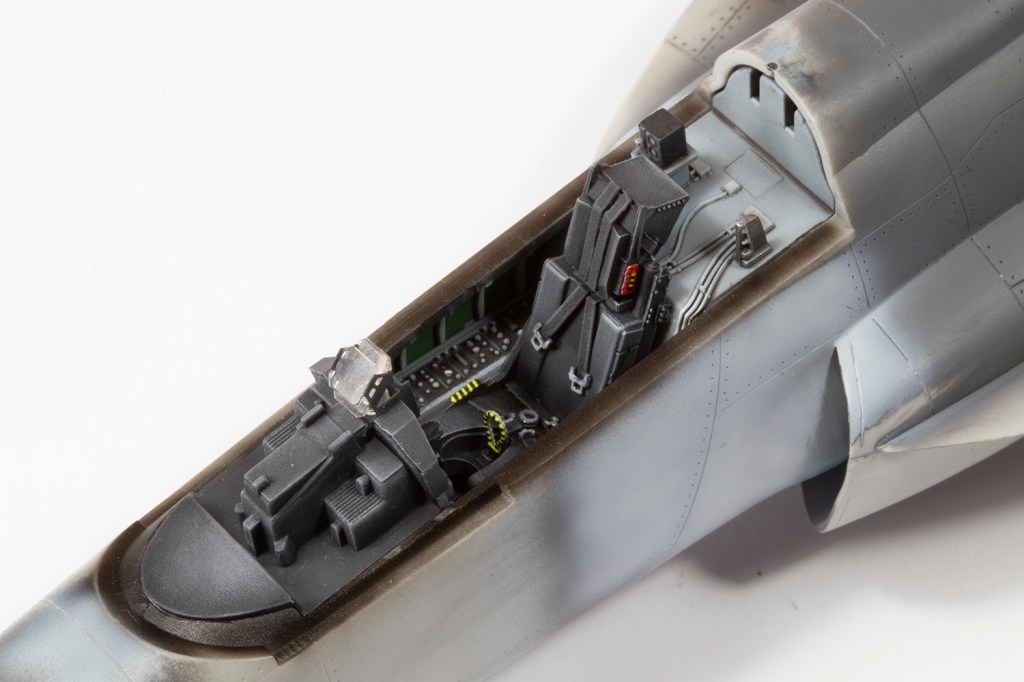
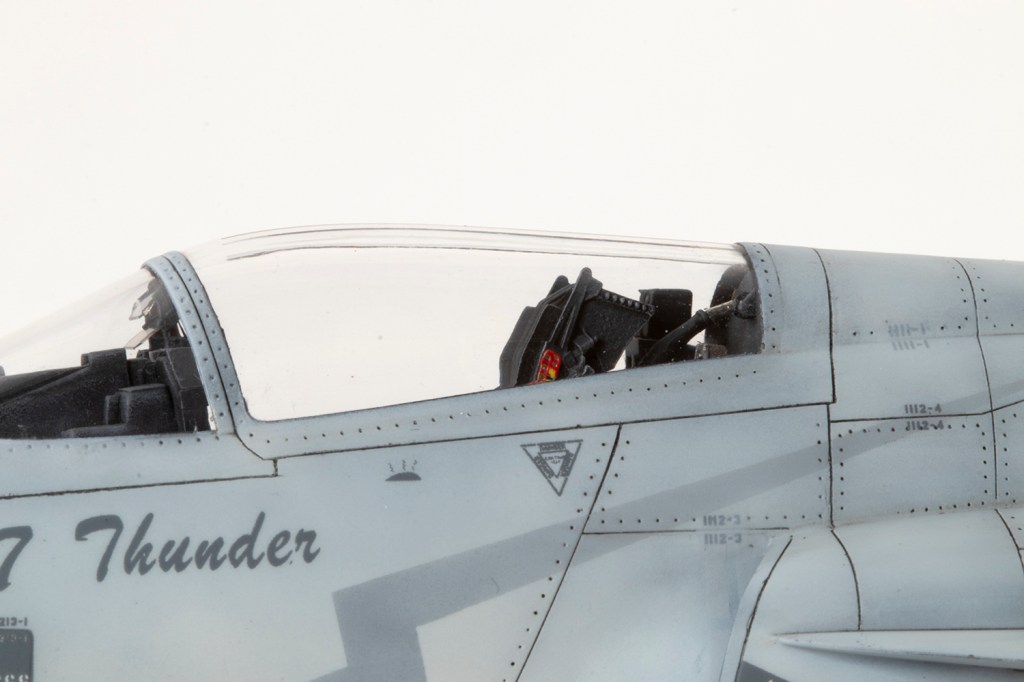
I ignored the Wolfpack PE for the interior as I preferred to paint the nice raised detail moulded by Trumpeter. It was, however, useful to replace the HUD along with some supplied acetate screens. The Trumpeter kit does include a PE fret for the HUD, instrument panel coaming and seat belts, but the Wolfpack items are just better. The resin seat is very simple and mostly just black. As always, the end result is highly simplified compared to the real thing, but under a closed canopy looks busy enough. You should definitely test fit the HUD under the windscreen – there’s not much clearance!

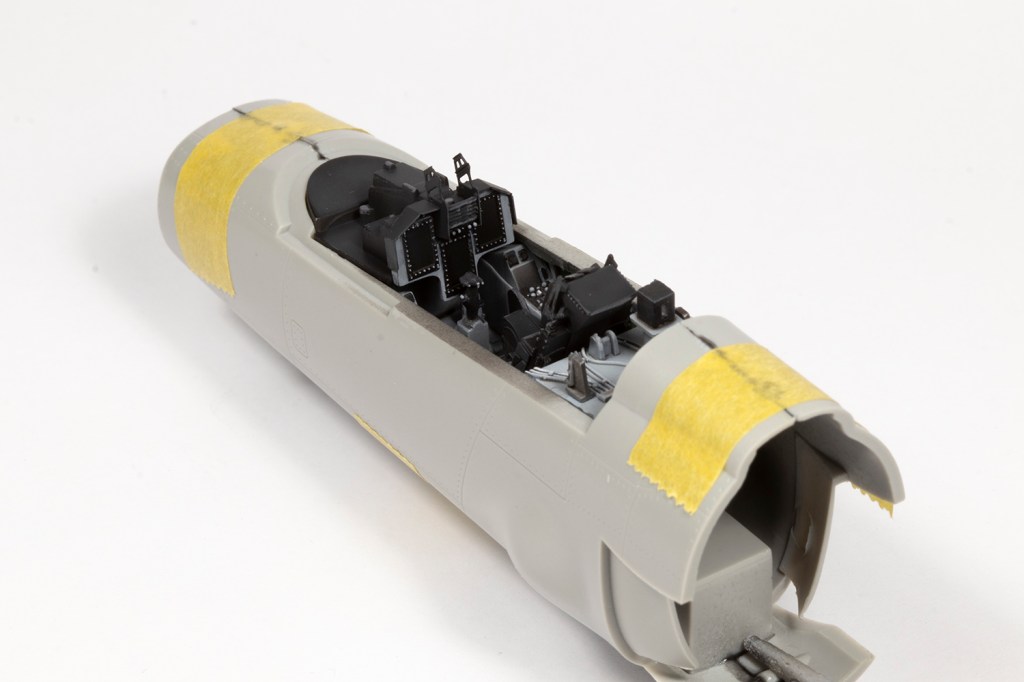
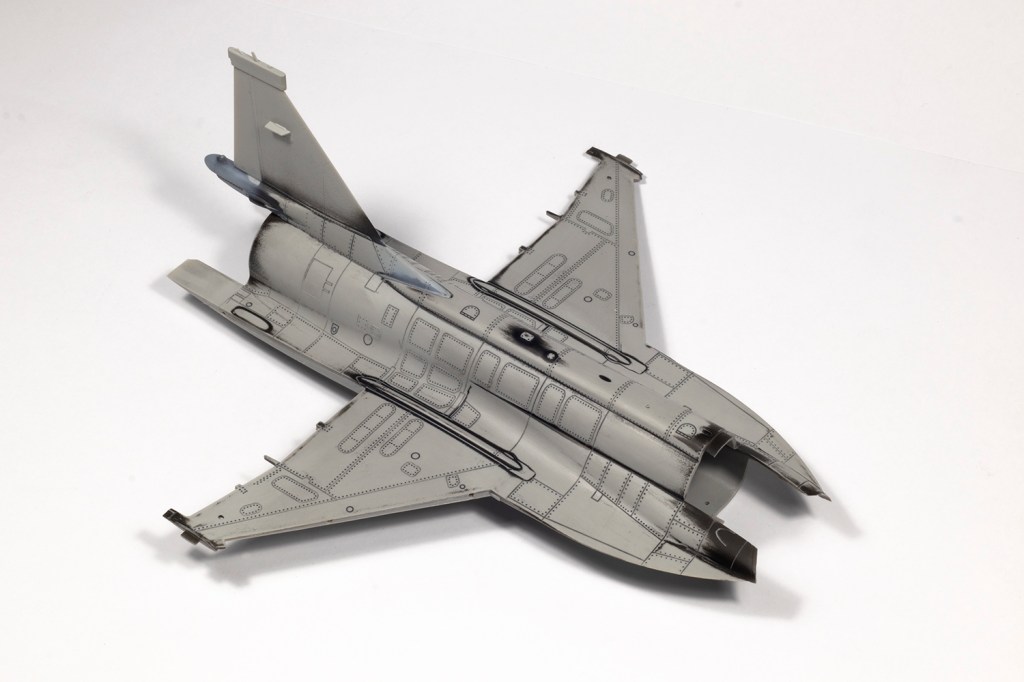
The forward fuselage is vertically split and mates to the horizontally split rear fuselage. Thankfully the wings are moulded with the fuselage which saves any problems getting them straight and is one less joint to clean up. You can safely ignore Trumpeter’s instruction to install the nose gear early on (it fits without modification right at the end) and join the front fuselage halves around the cockpit. The fit is fine and use of superglue as the adhesive made for rapid and easy seam clean up without worrying about ghost seams. It’s a shame that the lower aerials are moulded with the fuselage halves as it makes sanding the seam out and restoring the recessed detail more difficult. Inevitably I damaged the large lower aerial and had to replace the finer parts with stretched sprue at the end.

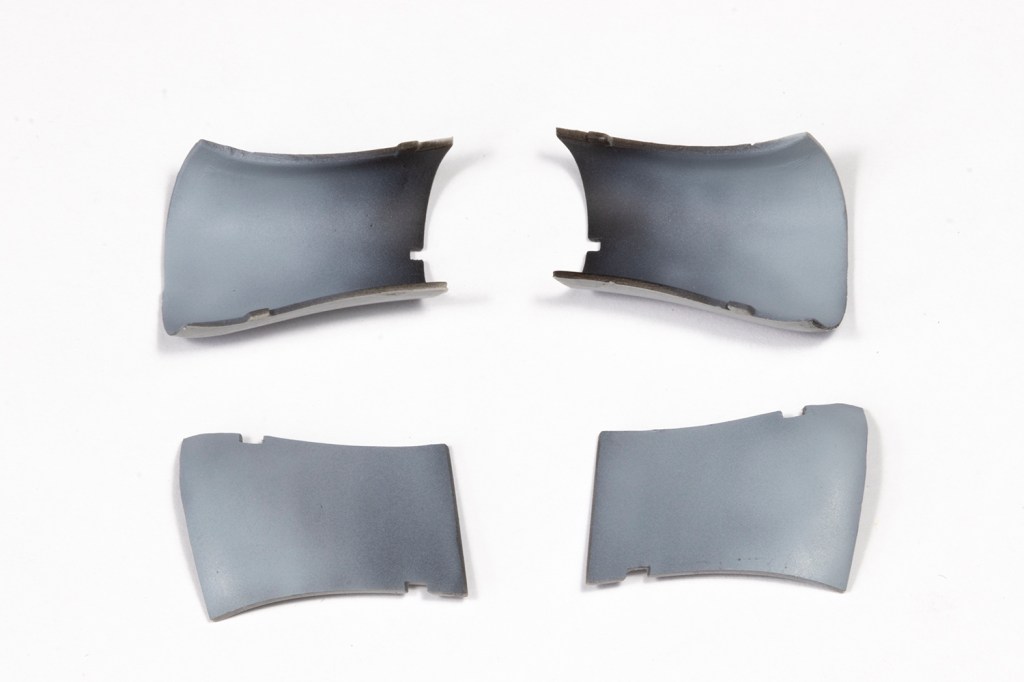
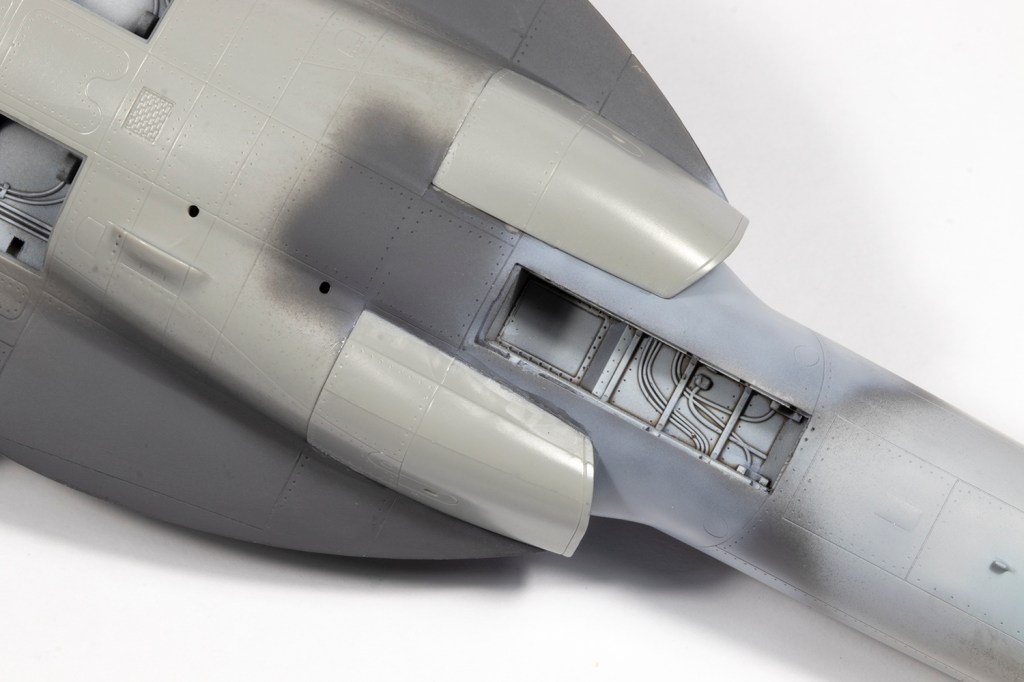
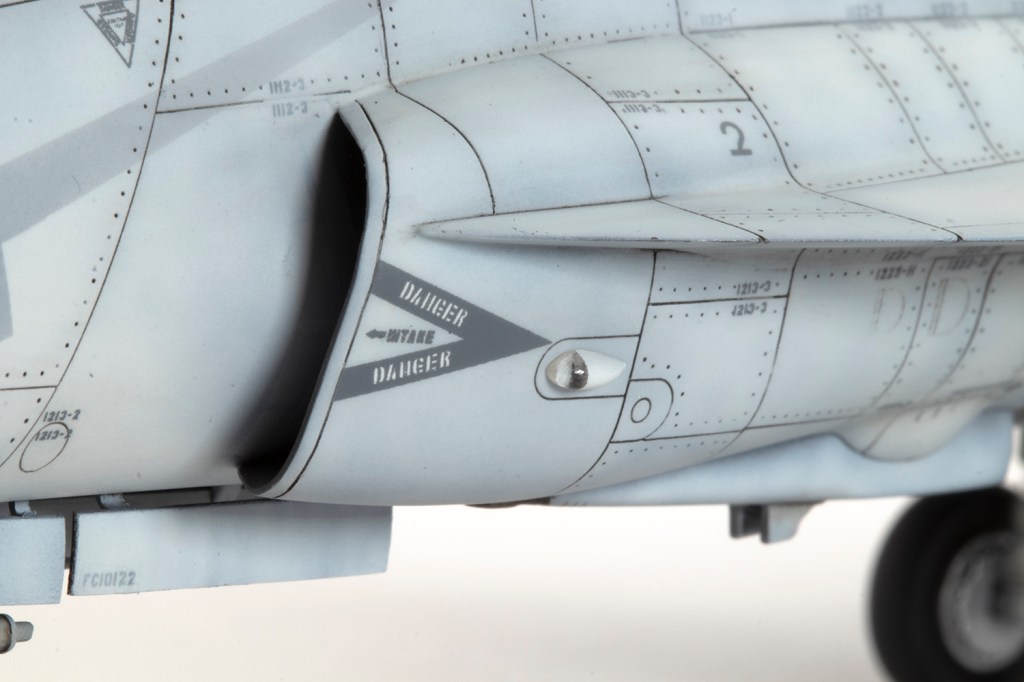
The intakes are not full length, but thanks to their unusual geometry, where the outer sides are swept forward, it’s very difficult to see up them and you can’t tell there’s no engine face. I did spend some time removing ejector pin marks from their inner surfaces, but it’s wasted effort really as you could never have seen them.
Trumpeter did not mould a particularly smooth surface to the airframe, and the irregularities irritated me as time went on. In the end, I primed with some black, not to fill the imperfections, but as a guide to knowing when the sanded surface was smooth after polishing the primer away with some 1500 grit sponge. This further revealed that quite a lot of the panel lines were shallow and indistinct, so rescribing them was necessary in quite a few areas.


Because of the way the rear fuselage is split, there’s not a lot of seam work to attend to once the upper and lower halves are joined. The exception is under the leading edge extensions, where the join does not run along a panel line. Some cheap thick CA filled the gap well enough. More CA and VMS filler powder was also used to fill the large gap between the front of the base of the fin and the fuselage spine. I was a bit slack with the panel lines here as some of them end in the middle of nowhere; I should have extended them to their natural conclusion. The control surfaces on the wings are all moulded separately, but cannot be posed. I really don’t understand why manufacturers do this – the model would be so much neater if they had just been moulded with the rest of the wing.


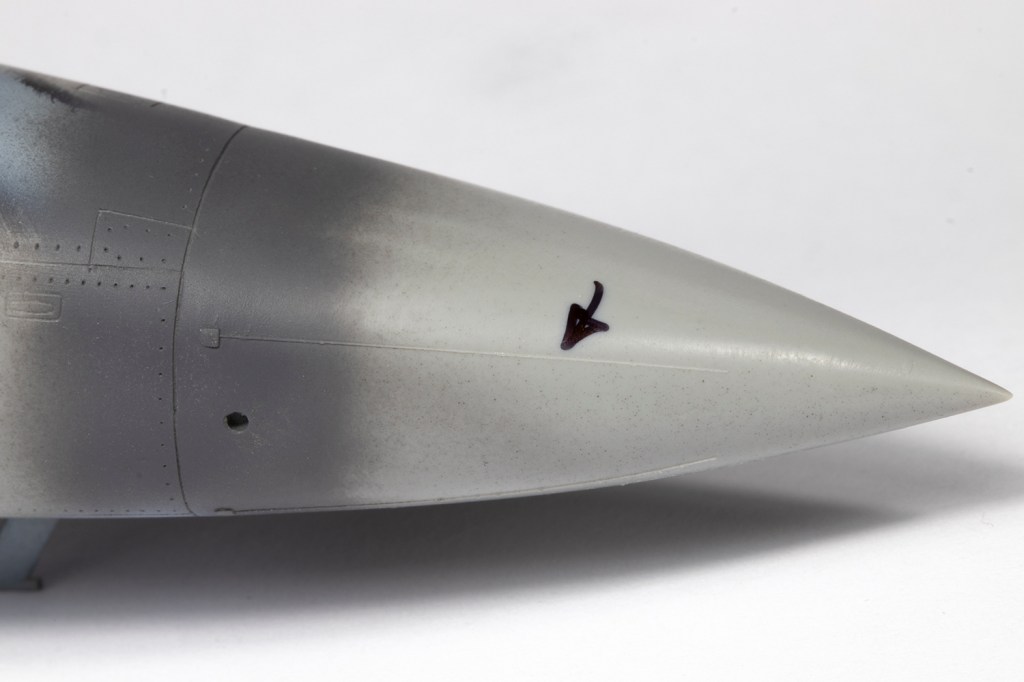
Joining the front and rear fuselage sections was uneventful and the fit pretty good. Ditto for the nose cone. In both cases, I tended to remove the seam completely with super glue and then rescribe the join afresh as they fall on panel lines. I just prefer this method as I find it easier to get a clean panel line with a 0.15mm Madworks DLC scriber and some scribing guide tape. It’s worth noting that the strips moulded into the nose are in the wrong place. I sanded them down and replaced them with some fine decal strip at the end in the correct place.

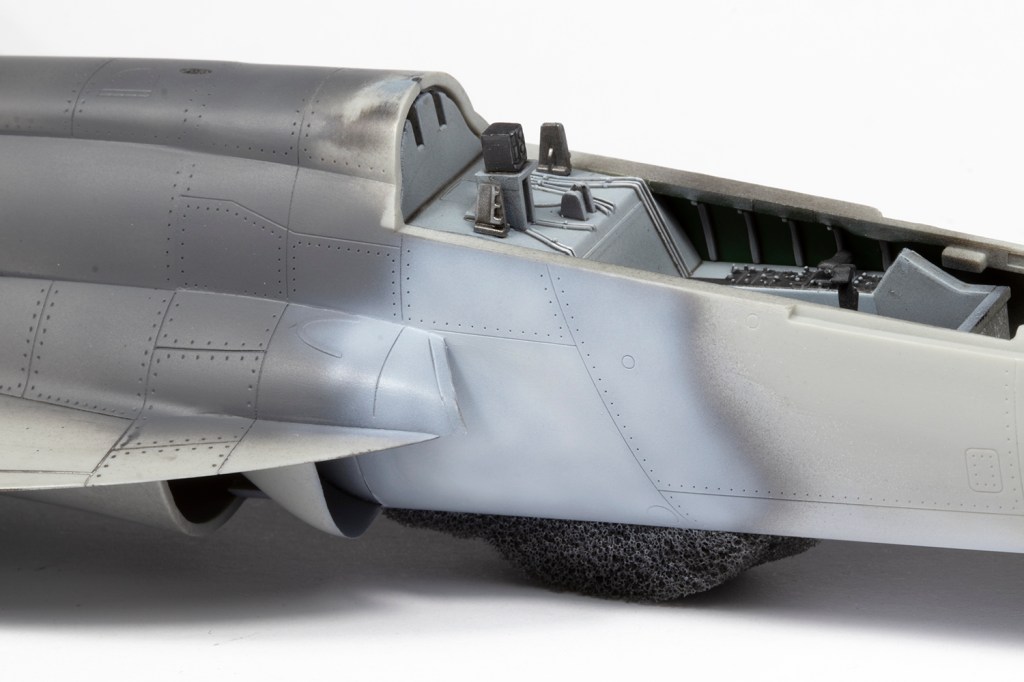
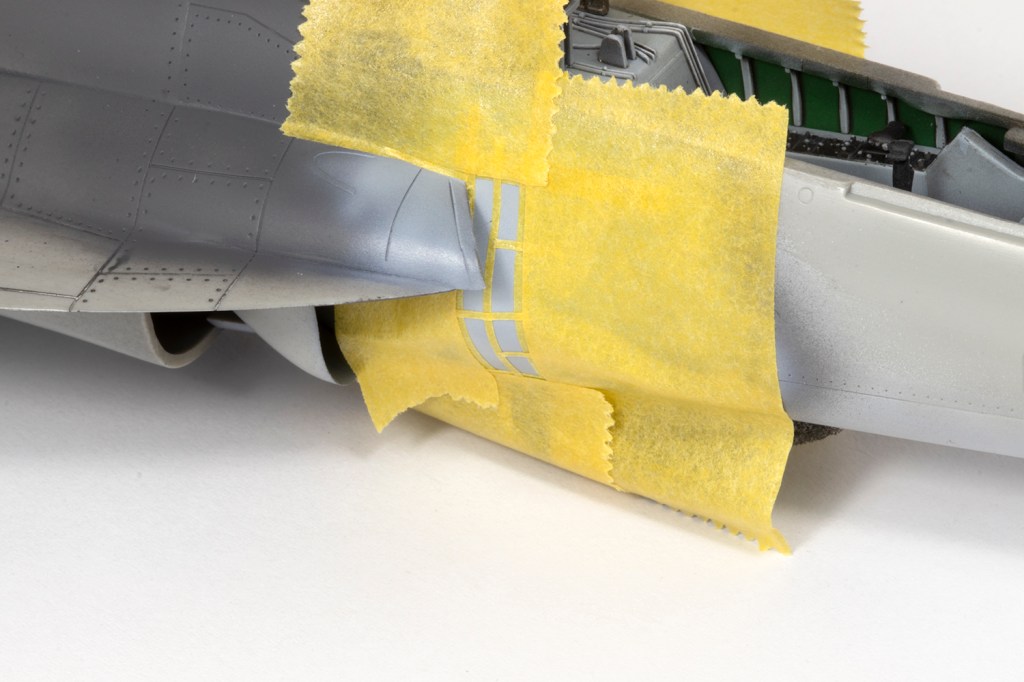
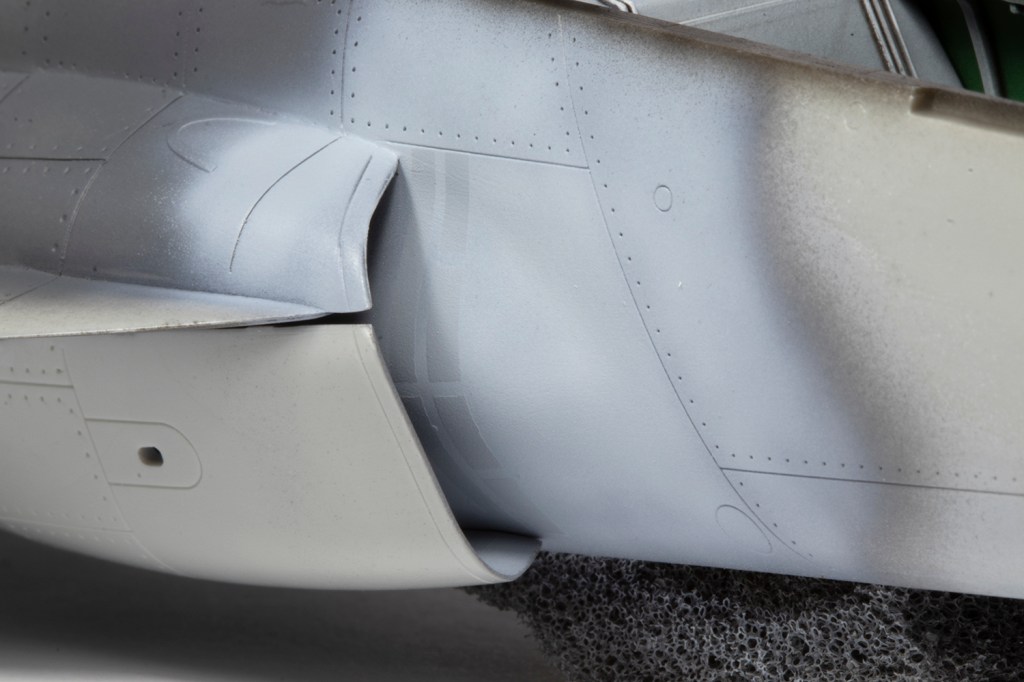

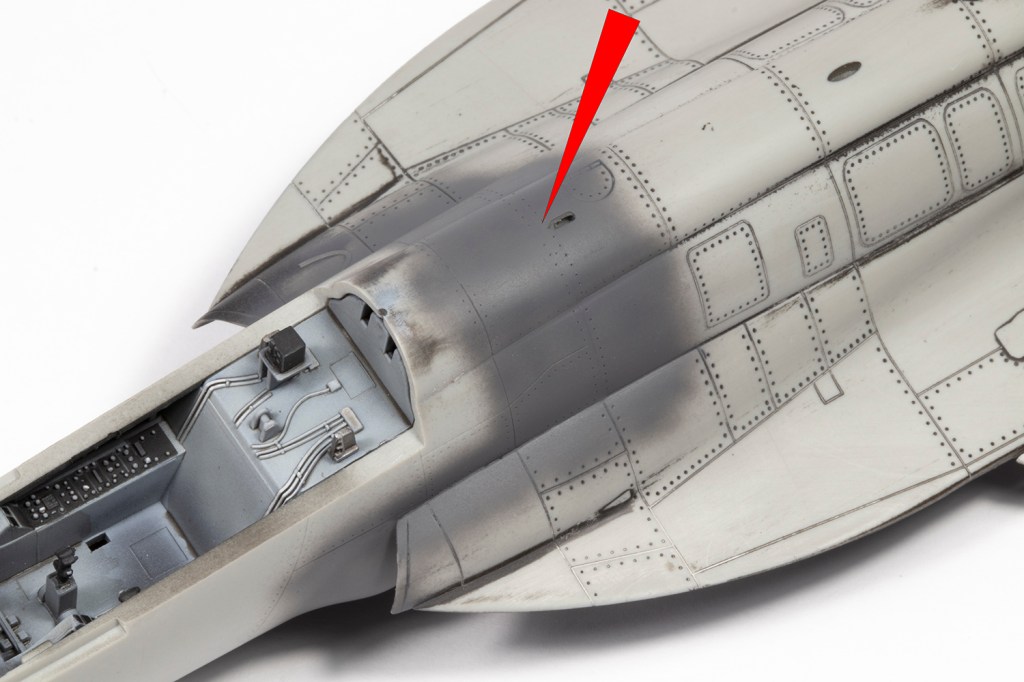
I added the lower intake sections next, and was met with some nasty, huge gaps. I’m not entirely sure how these arose – over zealous sanding of the lower fuselage halves on the underside of the LERX may have been the cause. In any case, I was stuck with them and bridged the substantial gap with a CA/powder mix being careful to add a little at a time so I wouldn’t have to worry about the intake insides. After sanding, the moulded panel line could be reinstated with a scriber and some Tamiya vinyl tape as a guide.


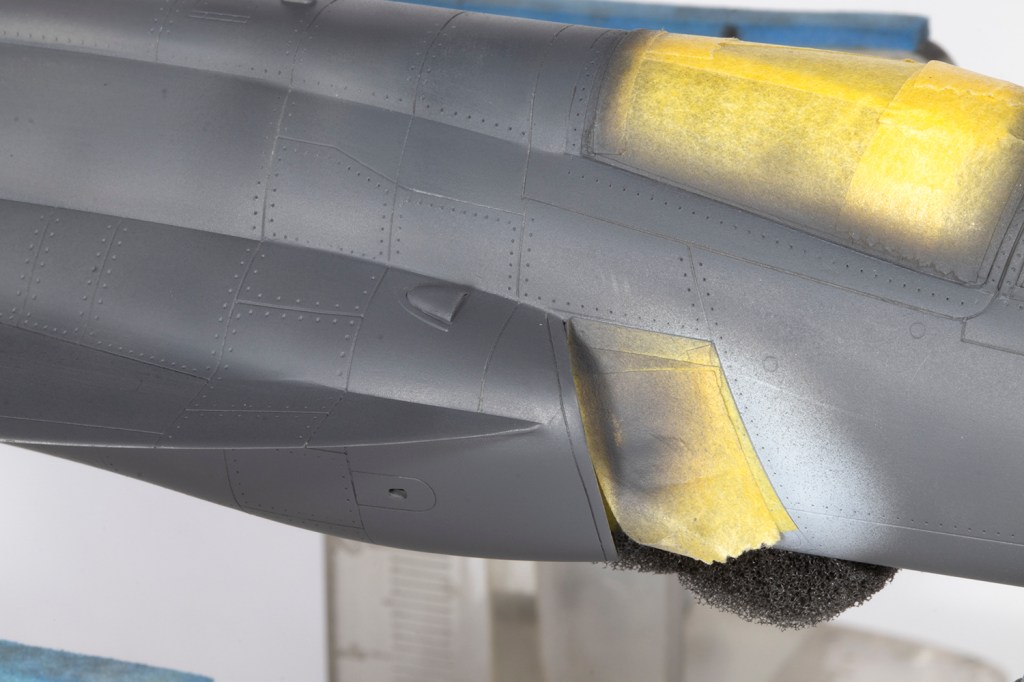
A moulding line has to be removed from the canopy and windscreen, which is easy enough with some fine grit sanding sticks followed by polishing with Tamiya Coarse, Fine and Finish compounds. Note, however, there should be a line on the inside of the canopy, which I masked and airbrushed black. The fit of the clear parts is pretty good, but the canopy sat ever so slightly too high. I sanded the base down gently until it sat level at the top. To get a neater result, I completely filled the canopy to fuselage join and rescribed it with the aforementioned Madworks DLC scriber (I love this tool). I had earlier dipped the clear parts in Johnson’s Klear, a practice I’d stopped years ago, but one I am very glad to revive: for the first time in ages the interior surfaces of the clear parts remained unblemished at the end of the build.


We now arrive at paint. This was a tricky matter. First: what colour should the thing be? Trumpeter recommend FS36320 for the darker grey, and FS36375 for the lighter. I was not a massive fan of these choices. I’d acquired some Frontpenny decals, which seemed pretty thorough, and their recommendation was heavily lightened versions of the Trumpeter call outs. Again, I was not a fan. Asking AI brought no enlightenment, so I found the instructions online for the Caracal Decals JF-17 sheet and went with their suggestions: FS36495 for the light grey (Mr Color 338) and FS36375 for the darker grey (AK Real Colors 252). I certainly don’t vouch for these colours and in real life the shades of grey seemed to vary strongly depending on the lighting conditions, from quite warm to quite cool for the same airframe. In the end, one has to plump for something.
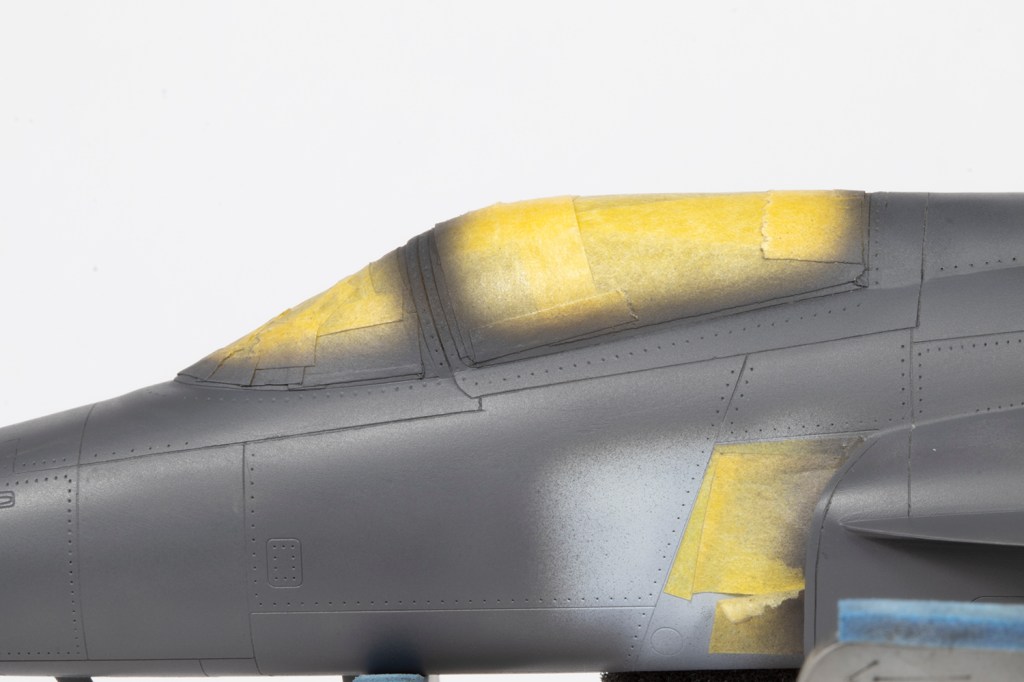
These shades were applied over a dark grey primer mixed from Mr Finishing Surfacer 1500 White and Black. I’m trying to move away from black-basing a little to shades more sympathetic to the final colour. The main scheme was painted with very small squiggles using highly-thinned paint and all done freehand.
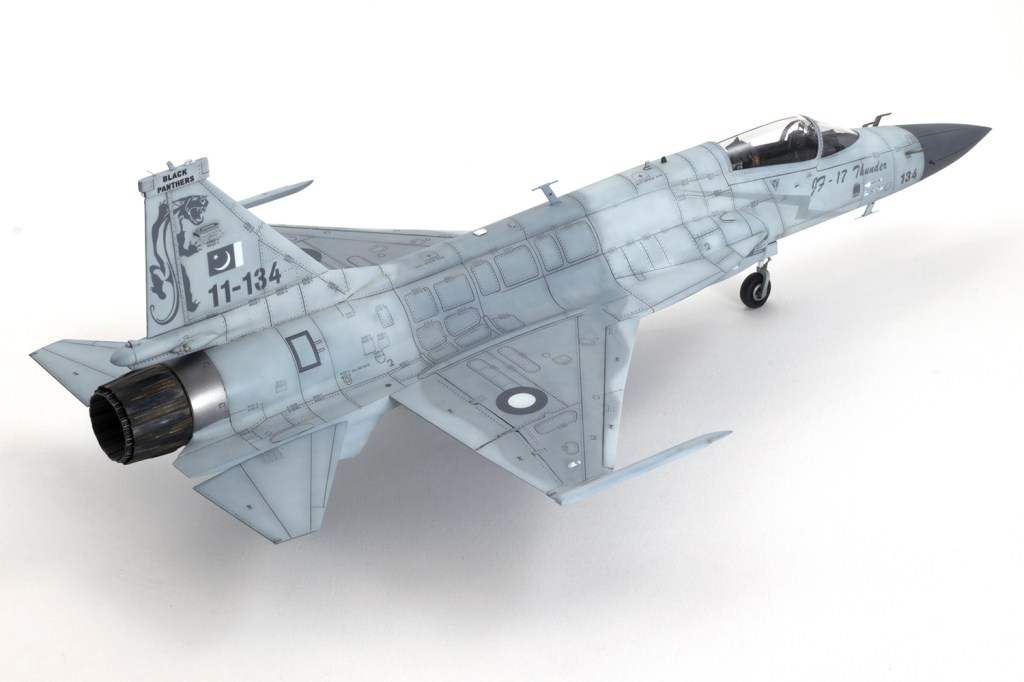
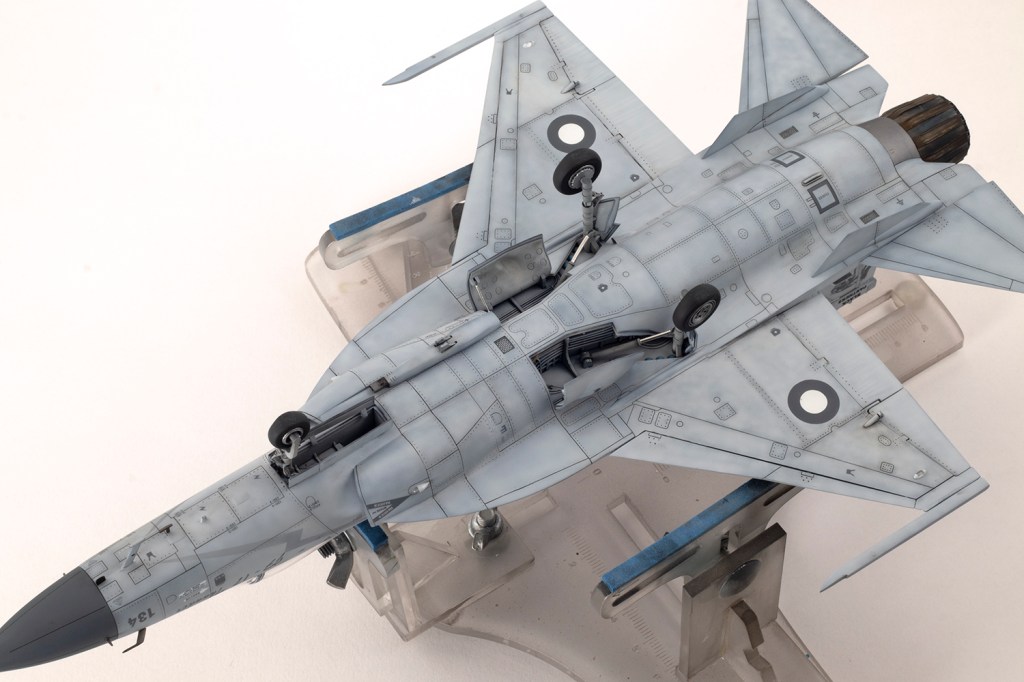
With the main colours down, my attention turned to the lightning bolts on the fuselage sides. These are not supplied by Frontpenny as decals, but they include some nifty paper templates so you can mask them up. To make life easier, I replicated the templates in vinyl using my Silhouette cutter, and airbrushed them with AKRC 252. Now, it may just be me, but I found this to be a very unstable shade. I mixed it quite thin using Mr Leveling Thinners, and during an airbrush session the colour would change, becoming increasingly darker with time. I assume this was due to pigment separation in the airbrush cup. It was actually a complete pain, and I should have used the Hataka version of the same colour which I had on the shelf, but had forgotten about.
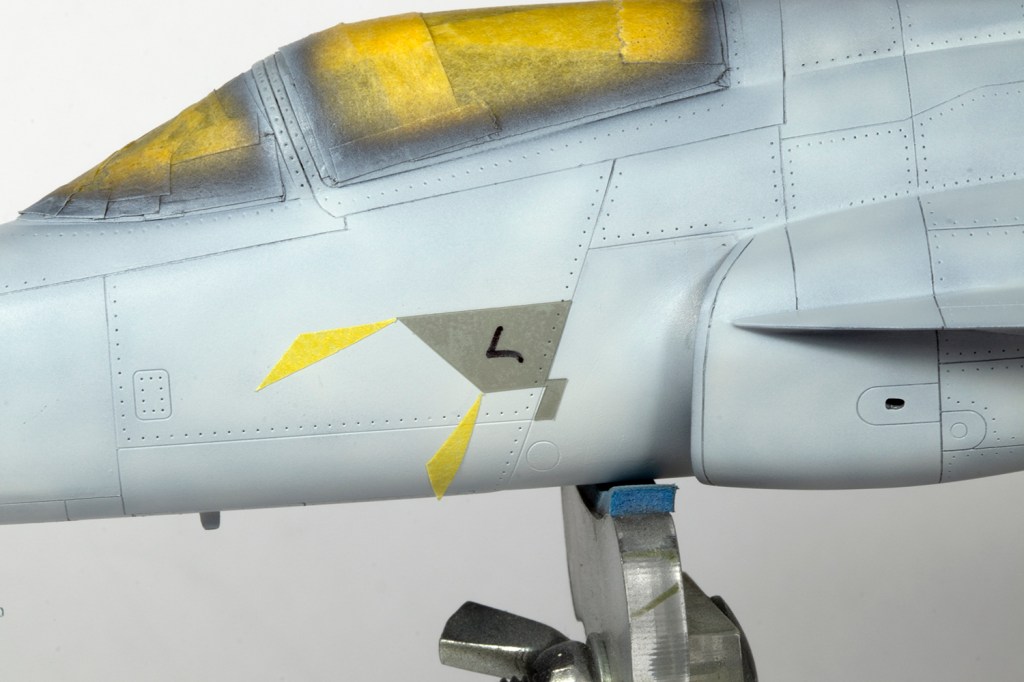


Since I love my Silhouette cutter so much, I utilised it for the roundels and tail codes also. I attempted to cut the little ‘134’ for the nose, too, but these were just at the limit of what the cutter can reliably create, and I reverted to decals for these. I spent ages airbrushing little swatches of every grey paint I own to try and find as close a match as possible for the dark grey, as the tail code in particular would be right next to the large decals ostensibly the same colour. MRP-114 Extra Dark Sea Grey was the best match, and was used for the nose cone also.
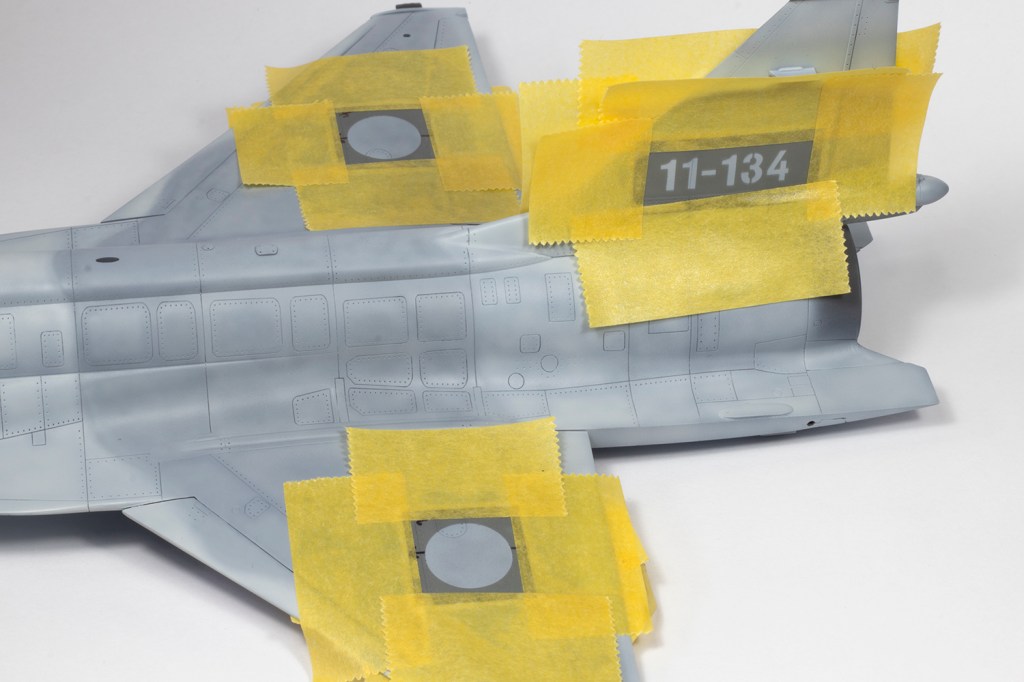
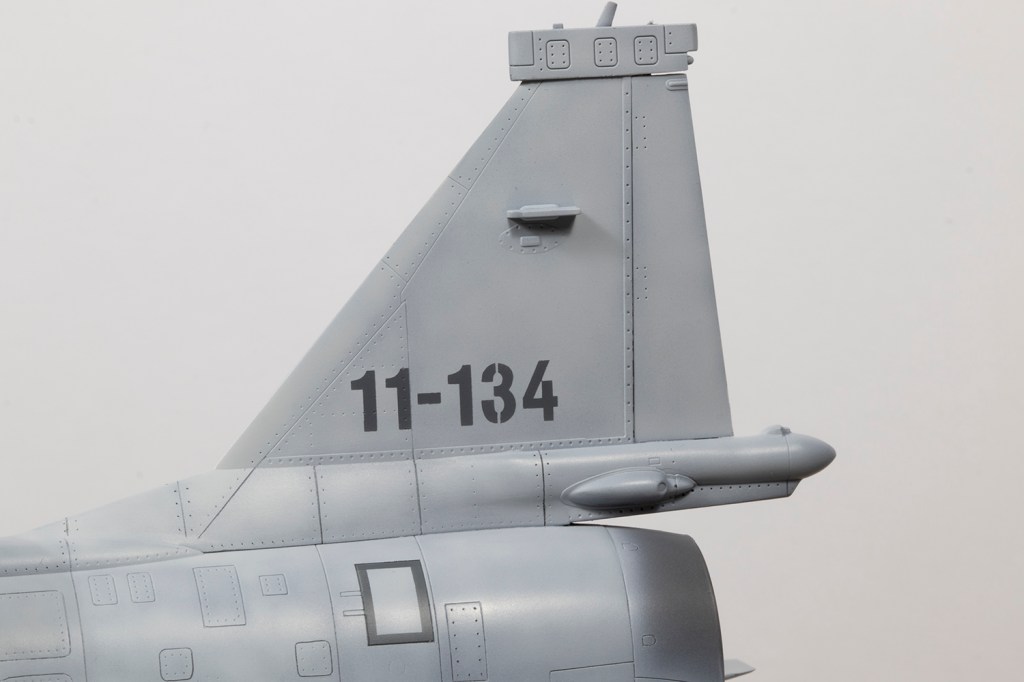

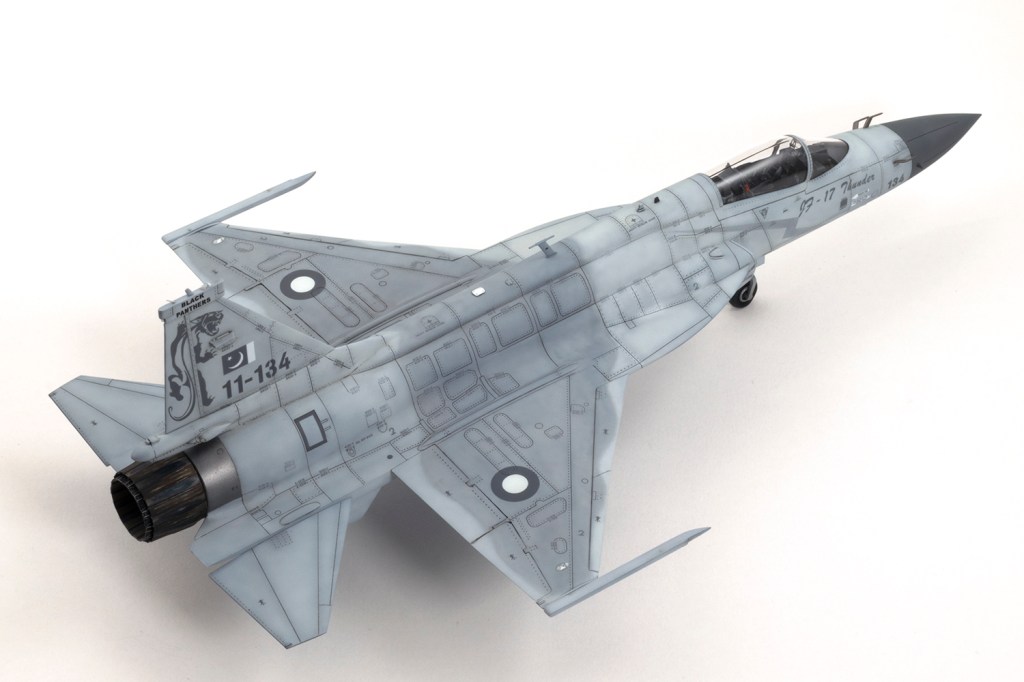
Little creates controversy in the aircraft modelling world like panel lines. Regardless of what one thinks, they are a fact of life, and a very prominent one on this kit, even if not on the real aircraft. I believe that something has to be done with panel lines; leaving them alone just does not work for me aesthetically, which means filling them with paint. In this case I wanted nice, crisp lines, so I glossed the model with some Tamiya X-22 thinned with Mr Leveling Thinners. ABT502 Starship Filth was my shade of choice, and mixed with some Zippo lighter fluid, was applied neatly to all the panel lines and then removed with (a lot of) environmentally friendly cotton buds. The model then shifted from something I was quite happy with to something I was definitely not: a glance at photos of real JF-17s will show that any semblance to reality was now lost. Admittedly, Thunders can get properly dirty and filthy on their undersides, but generally they look pretty clean, especially the distinctive airframe I was modelling, 11-134 with the massive panther artwork on the tail.
I loathe going backwards (‘negative modelling’) and did not want to redo all the panel lines in a lighter shade. They were always going to be too prominent, even with a lighter grey. I lumped it and pressed on.
Frontpenny’s decals are comprehensive and nicely printed, but the carrier film is large, thick and tends to have ragged edges. Over little pools of Mr Mark Setter they settled down surprisingly well into most of the detail, but rather like the panel line wash, the effect is not what I wanted. I am a complete sucker for stencils – I love them – and I applied nearly all of them. But in reality they’re almost invisible on the real thing and the decals were much too large and dark, and with this the model departed even further from reality: I refused to remove them, lump it, and press on.
I was always planning on experimenting with glossing the decals and sanding them to remove evidence of the carrier film, a technique I’d heard about but never tried. Once they were dried, I airbrushed a lot (and I mean a lot) of clear gloss over the top of the decals – not the whole airframe, just over each decal and the surrounding area. Aquagloss is often recommended for this, but I don’t have any and it appears to have disappeared in the UK, so I used some old KColors SW100 Super Gloss I had lying around which looks very similar (i.e. a thick, milky acrylic gloss). Once left to dry for 24 hours, I set to gently wet sanding over each decal with a small piece of Infini 1000 grit sponge held in some reverse action tweezers.
Initially all seemed well. I was terrified of sanding through the gloss and the decals, but this didn’t happen. I ended up with beautifully levelled markings with no evidence of carrier film. Sadly, I also ended up with a lot of white sanding residue in all the recessed detail. And this is where it all went wrong. I could not shift it for love nor money. It would not wipe away, it would not brush away, it would not blow away. I tried spraying water at 80 PSI, and that didn’t shift it. In some areas, this white residue was just stuck to the paint. My assumption is that the water from the sanding mixed with the residue to form a kind of revitalised white paint that was impervious to anything except mechanical removal. I resorted to scraping the residue out with a sharpened toothpick, and in many places, with a needle. This did not go down well with the paint and the panel lines looked even worse than before.
I do not count this experiment a complete failure. Under a coat of VMS Flat varnish, the decals do indeed blend seamlessly with the paint and all evidence of carrier film is gone. Clearly, though, I need to use a different gloss coat; next time I shall try Tamiya X-22.
Modelling with magnifiers, which I do, inevitably magnifies the problems, and removing them every so often to see the model more as a whole meant I was happier with it at more normal viewing distances. The finish was far from perfect, and certainly not realistic, but it was shaping up to be a nice enough model. All that remained were the little bits at the end.

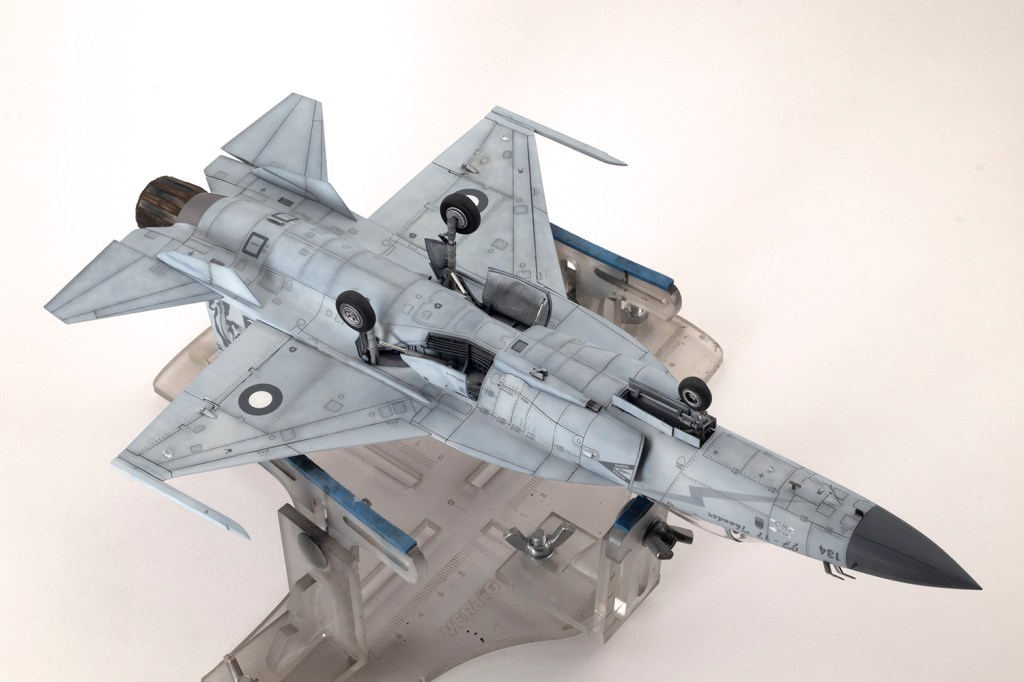
Unbelievably, the JF-17 has ten undercarriage doors. Initial scepticism gave way to pleasant surprise as they, and the landing gear, all clicked into place easily enough. The wheels are very basic and would benefit from aftermarket replacements, but come with moulded bulges; mine don’t sit entirely flat against the surface.
I spent a long time on the exhaust as I usually give this part of the aircraft short shrift, and the Thunder’s engine is quite complex. It’s the same engine as that in the MiG-29 and prone to developing strong brown and blue shades, often in an alternating pattern around the petals. My interpretation involves a brown undercoat, layers of MRP Smoke and Exhaust, some airbrushing with MRP Pale Blue Metal, then some raw umber inks, followed by Ammo Clear Black Blue. Ammo Silver, Steel and Gun Metal oilbrushers were next, sealed with a flat clear and overlaid with ABT502 Starship Filth, Faded Orange and Burnt Sienna. I just kept throwing stuff at it until I was happy enough. I do, however, feel that Wolfpack didn’t quite get the shape of the engine right near where it meets the fuselage, but it’s still way better than the kit part.
There are loads of little clear lights, and these needed to have various sections painted in grey, which was tricky to mask. Trumpeter are determined to place the sprue gates in the most awkward places possible (which also applies to the many pitots) and these clear parts were generally extremely fiddly. I also could not fit them into their locating holes – it was just easier to cut the pegs off and glue the parts with PVA directly to the plastic.
My final additions were the multitude of pitots superglued in place around the nose (and the little inevitable glue spots matted down with a quick spurt of VMS Flat) and the addition of a small black aerial behind the canopy, although it’s way too big, and a bit too far aft.
This is an indifferent effort by Trumpeter, and in all honesty a fairly indifferent effort by me. Nevertheless, it’s a pleasing enough addition to the collection, afforded the opportunity to deal with thick decals in a way new to me, and most importantly, another kit built from the stash.


Year bought: 2010 (老麦模型 Laomai Model Shop, Zhengzhou, China)
Year built: 2024 (New Addington, Croydon)
Back to home.
