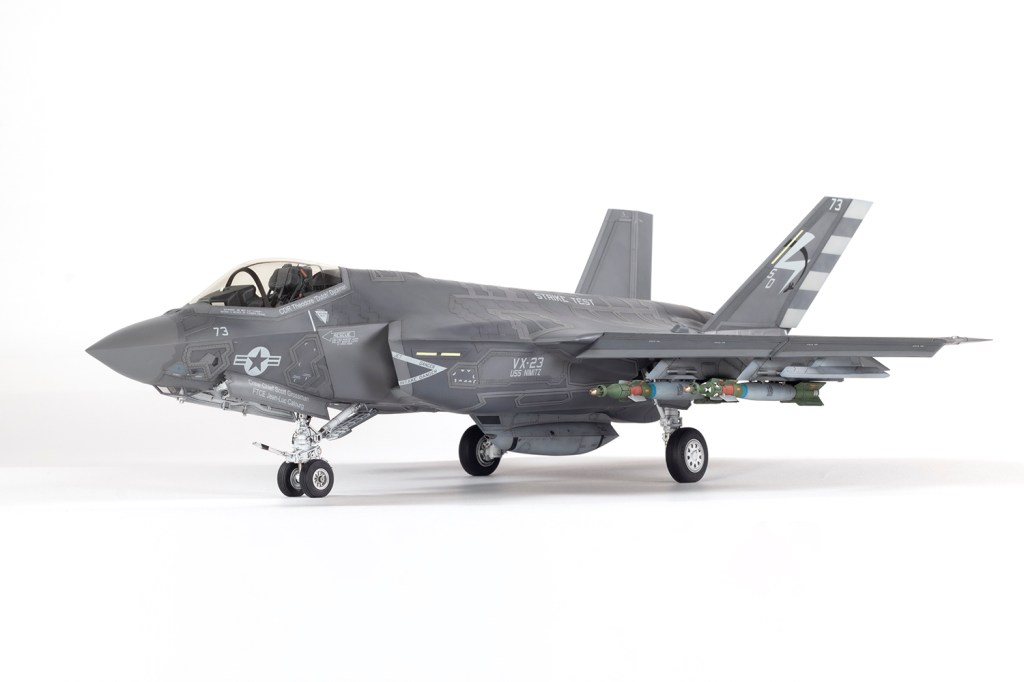
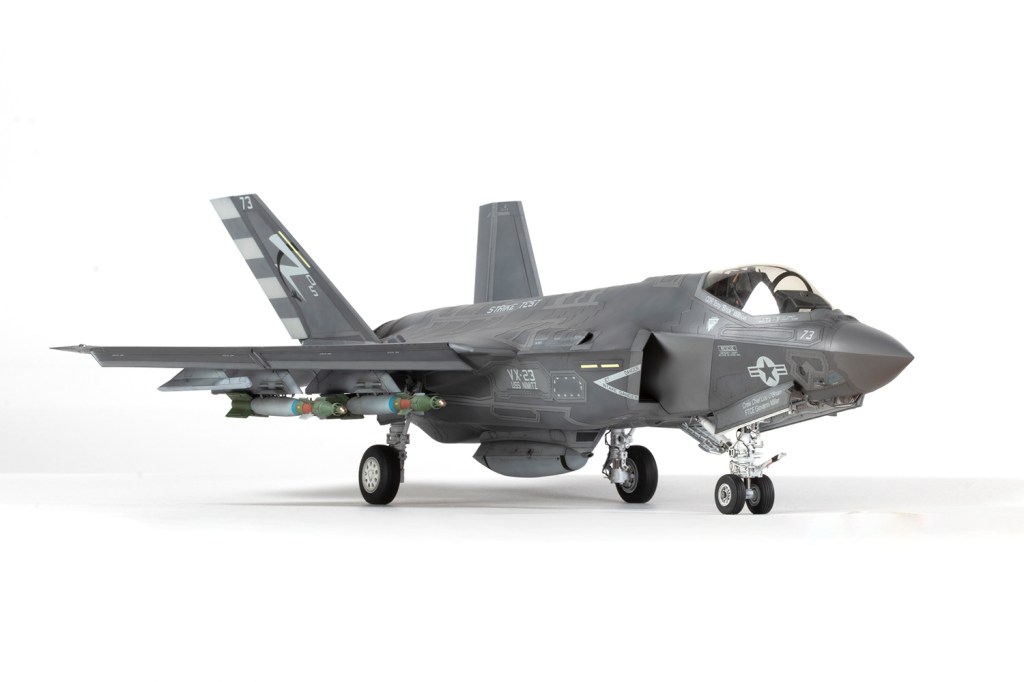
with ResKit resin cockpit, bombs and exhaust, EVA Model Kit resin undercarriage and Furball Aero Design decals
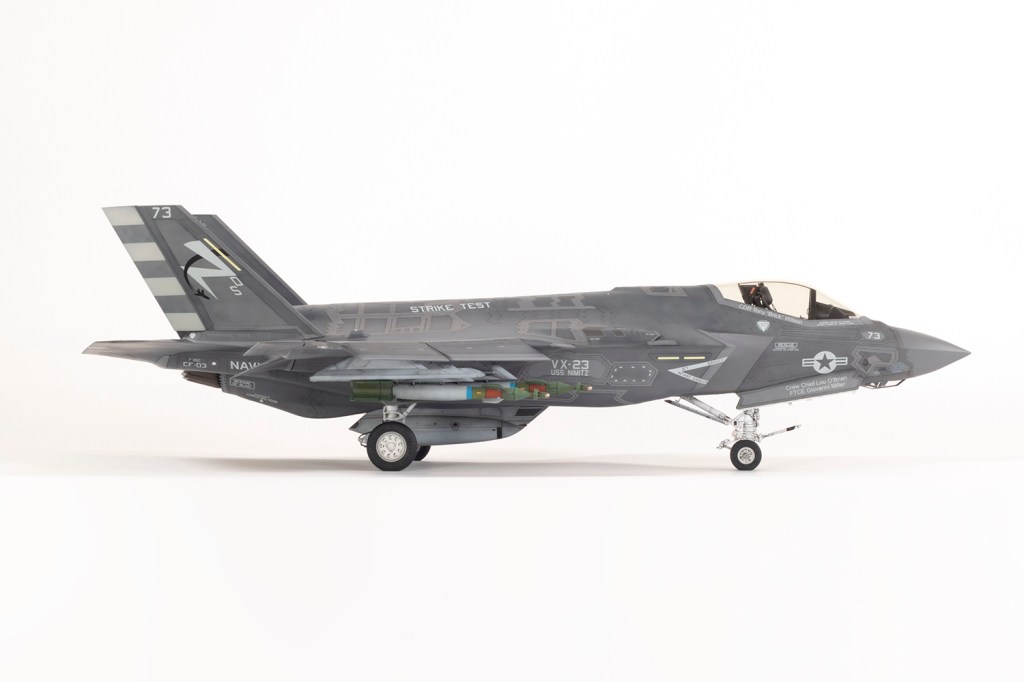
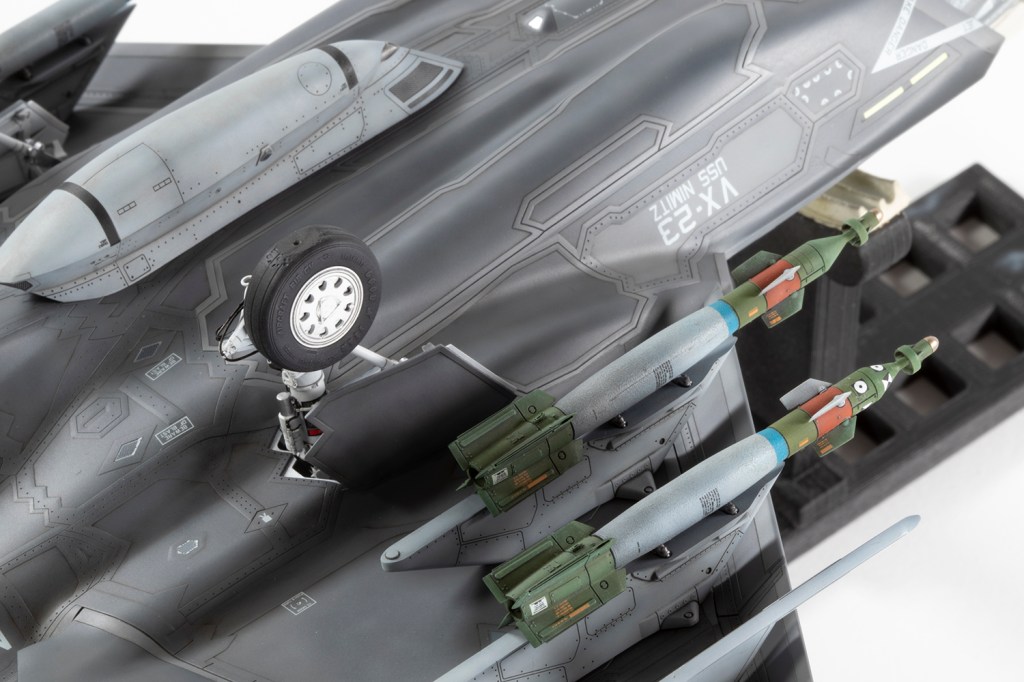
VX-23 ‘Salty Dogs’, US Navy, USS Nimitz 2014

Tamiya continue to push the boundaries of high quality 1/48 jet models produced via conventional methods, and their F-35 series is right at the forefront of their advance. I have all three in my stash, but it was the latest, released late in 2024, which was destined to be built first, thanks to a commission I received.
Superficially similar, there are in fact substantial differences between even the A and C models, and Tamiya appear to have thoroughly accounted for the them all. The fuselage, all flying surfaces and the undercarriage (including all the doors) are new mouldings, and the only significant repeats from the A are most of the cockpit, the canopy, the exhaust and intakes, the weapons bay and most of the pylons, along with the included ordnance. Features unique to the C, such as the refuelling probe and tail hook, are all nicely included, and those items which can be posed (open/closed canopy; folded/unfolded wings) are duplicated so you can change them on the finished model. At present, only Tamiya can get away with this, because the fit is universally fantastic and need not be commented upon further.
I usually model my aircraft clean and with everything closed, and I also strongly prefer operational airframes, but this build wasn’t for me, and I was going to have to make some compromises. Fortunately, these were relatively small: I would need to make some bombs, and this was going to be a test aircraft from VX-23 in 2014, although more on that later.
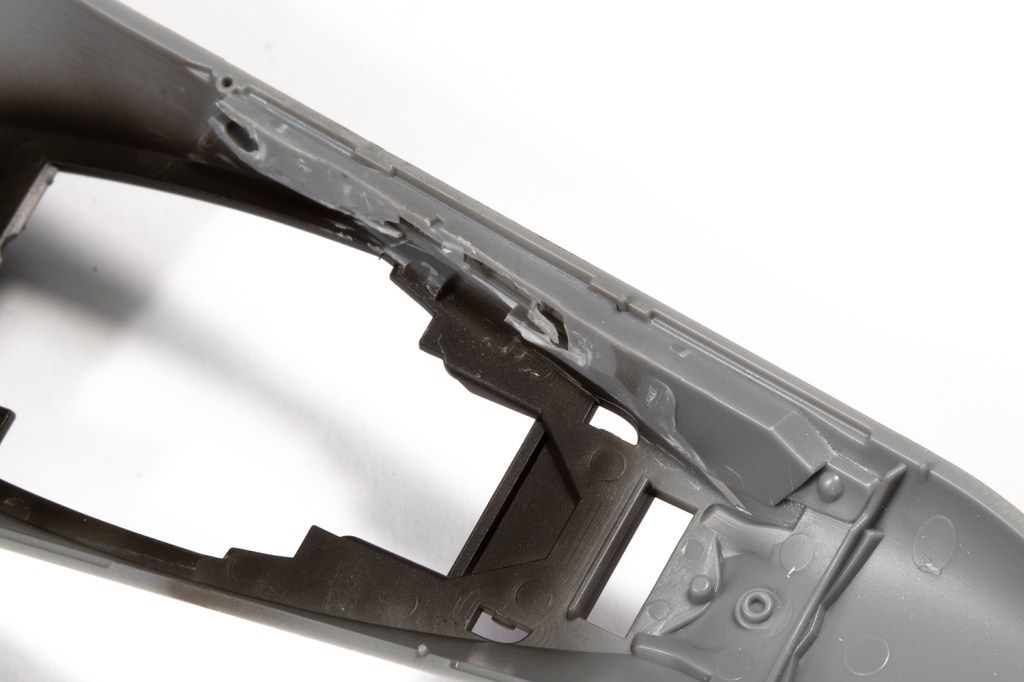
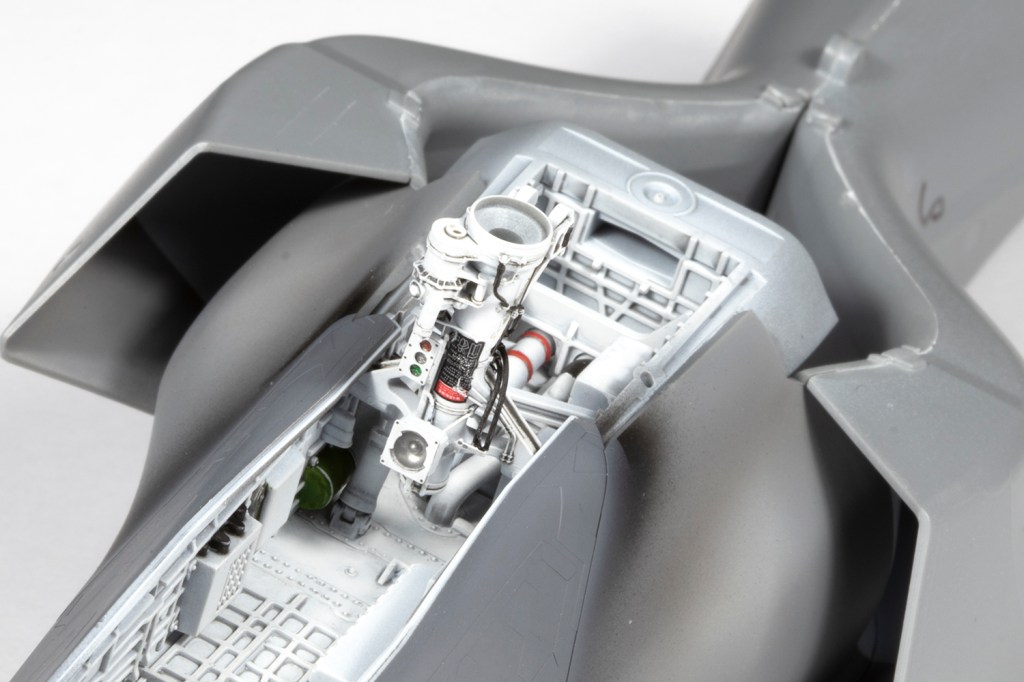
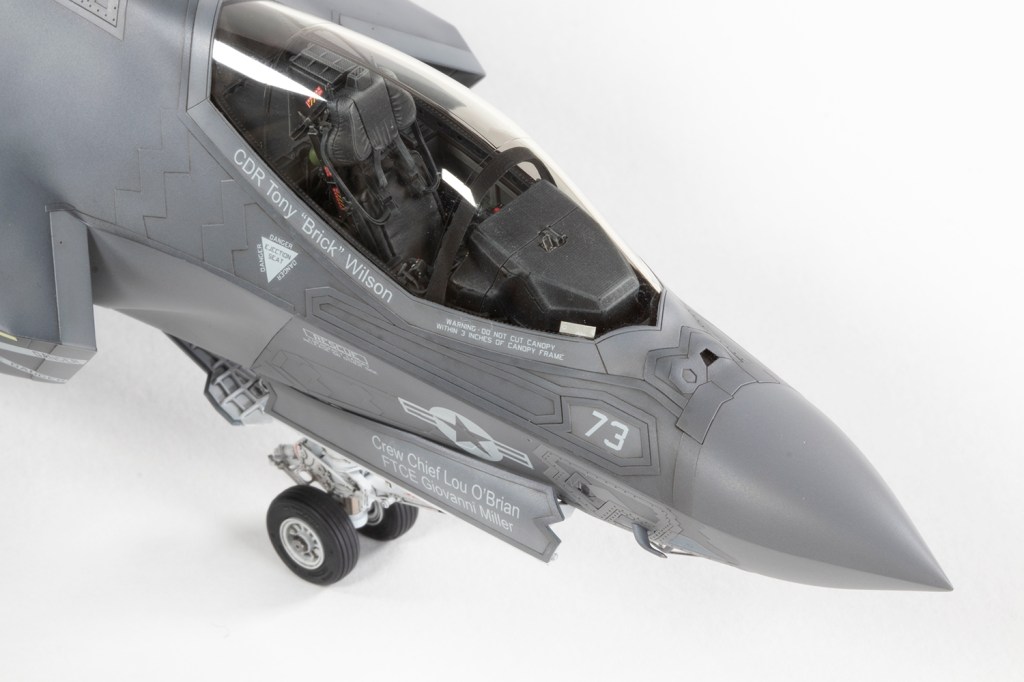
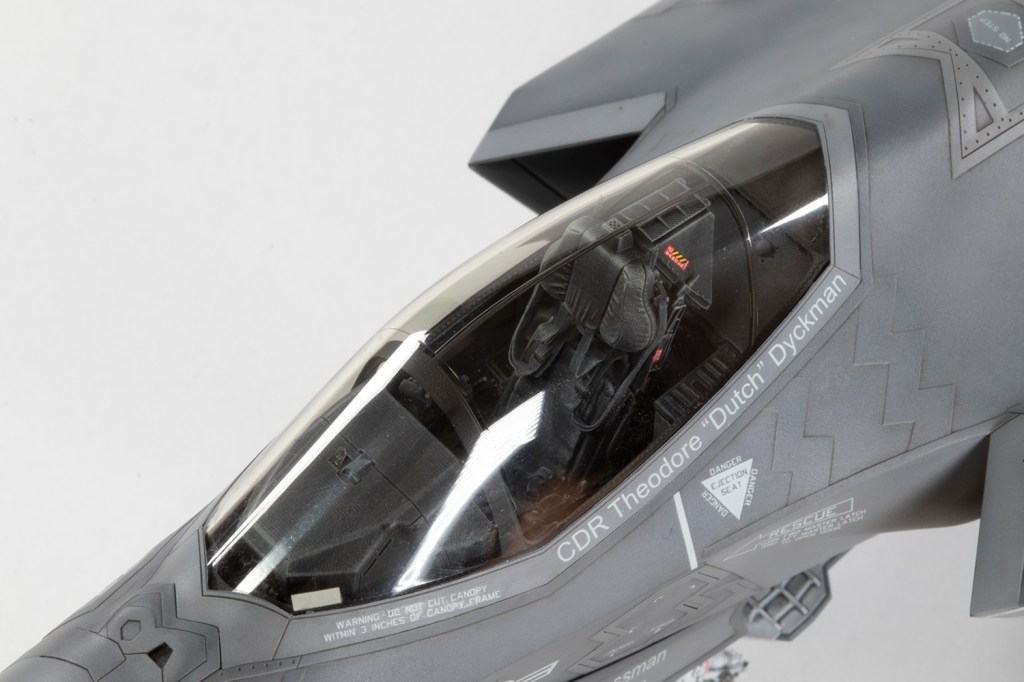
The person I was building this for had some aftermarket requests. A cockpit was first, but no one had made a C-specific set yet. I made do with an A cockpit from ResKit, modified slightly with a kit part. As far as I could tell, the differences were extremely minor, and the better details (especially around the seat) worth the effort. The main thing to bear in mind is that the ResKit set was designed for a kit without an inflight refuelling bay, and this interferes with the fit. I had to hack the Tamiya bay away to get the tub in; essentially you can’t have this interior and the refuelling probe deployed.
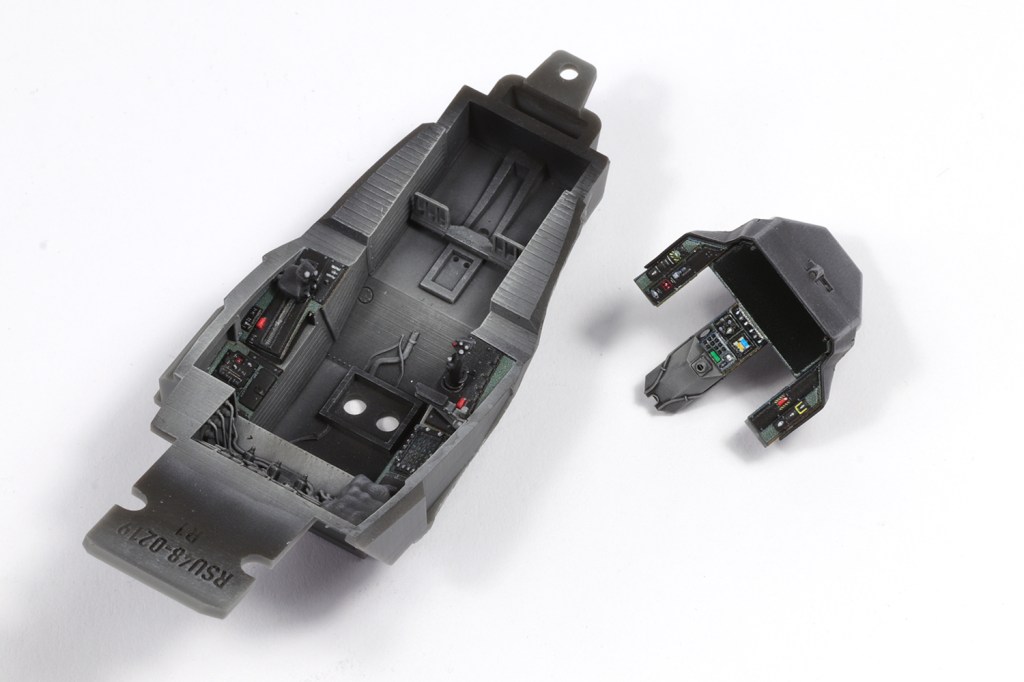
There’s not much to an F-35 cockpit, and the set I was given had 3d decals rather than moulded (printed) detail to paint. Now, I don’t know about you, but I am not philosophically well-inclined towards 3d printed decals. They look amazing, but when they’re installed, there’s nothing to be proud of; there’s no sense of achievement. Painting instrument panels may produce an inferior result, but it’s somehow more satisfying. Of course, this philosophy is not very consistent – I happily use decals elsewhere, and nearly all of the model came to me in a form where I can’t take any of the credit for it (I didn’t mould it, for example!), but I suppose we all have our lines in the sand where we say, ‘I want to do that and not have it done for me’, it’s just those lines lie in different places for different people, somewhere in between being a pure scratch builder and a diecast collector.
Having said all that, I used the 3d decals and very nice they looked, too.


Included in the ResKit cockpit is a seat, which is pretty incredible. Everything is printed in place with wonderful definition, but I broke the tiny ejection pull handle and used a 3d printed decal to replace it. The only downside are some quite prominent layer lines around the headrest, although these are really only visible under strong magnification. F-35 seats are quite boring because everything is black, so to bring some interest I spent a while dry brushing it all with increasingly pale shades of grey oil paint, each layer fixed in place with some MRP Matt Varnish, and painted the belts with some Lifecolor Vulcanised Rubber Black for variety. The stencil decals are provided by ResKit.


My client was really keen on using 3d printed landing gear to replace the Tamiya undercarriage, but as with the cockpit, it simply didn’t exist, and unlike the cockpit, it could not be adapted from an A or a B set, since the parts were wildly different. In the hope that a suitable set would be released during the build, I embarked on getting as much else done as possible. The complication was that the nose gear absolutely must be fitted very early on in the build process, so this resulted in a very strange build sequence.
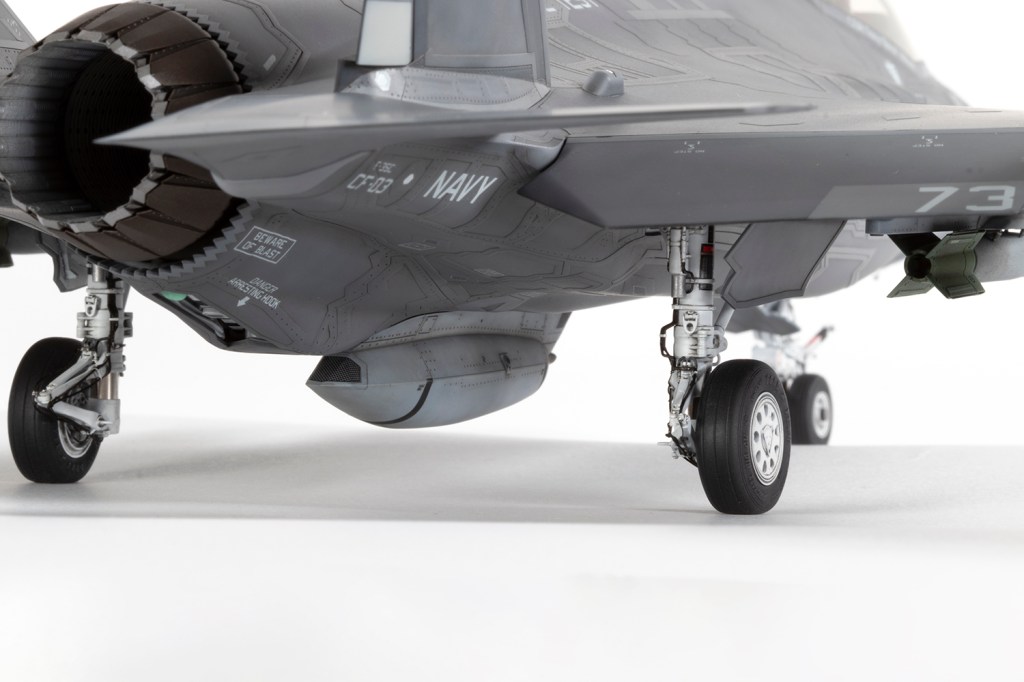
I did get as much of the undercarriage bays done as early as possible in anticipation of the legs being added later. Tamiya’s detail is comprehensive and beautifully moulded, with a lot of it being a pleasure to paint. F-35 landing bays are generally pretty clean, but adding a darker wash makes them much more interesting to look at, and in this case a mix of Johnson’s Klear, water and a dark grey from Tamiya was flowed over a solid coat of Mr Base White 1000. This obviously dries glossy, so I matted it down with some MRP Matt. Tamiya provide a very nice painting guide, and this was followed for all the little details.


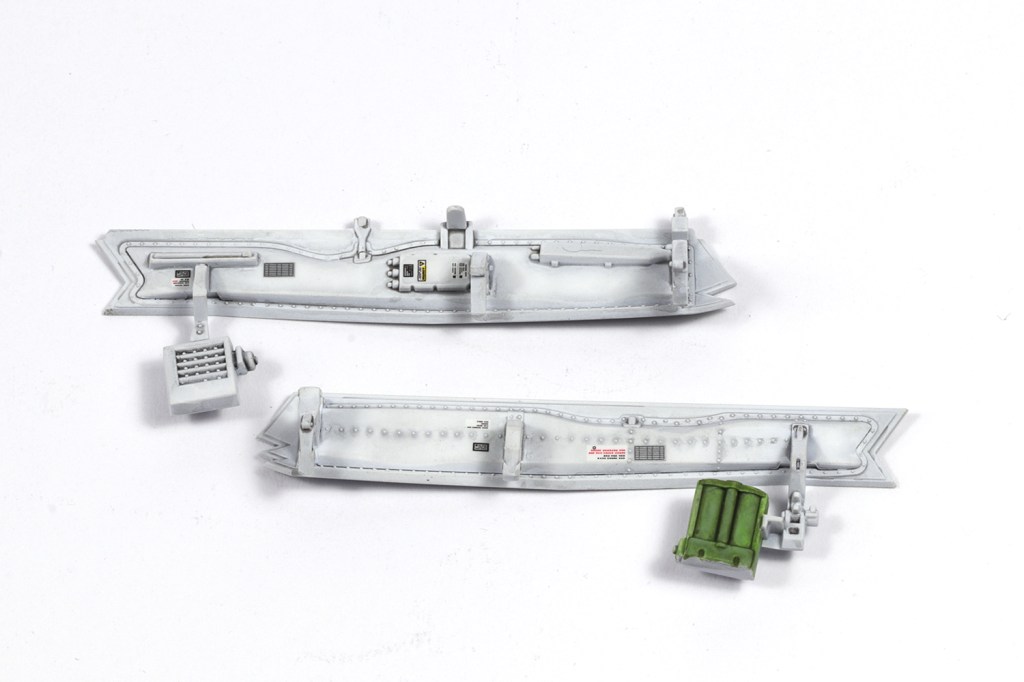
I was very happy to be modelling a closed weapons bay (although the detail inside is amazing), which meant the main undercarriage bays could be completed easily. Tamiya want you to fit some undercarriage actuating arms (parts EE11) really early on, but they can safely be left off until the end. I was able to fit all the lower fuselage parts at this point, and whilst they do fit well, there are very fine seams to clean up. Looking at photos of other people’s models on the internet, it appears most people don’t bother with these since they can be mistaken for panel lines, even if their location looks a bit odd. Clean up of these has to be done patiently and with care because they cross a lot of delicately moulded surface detail.


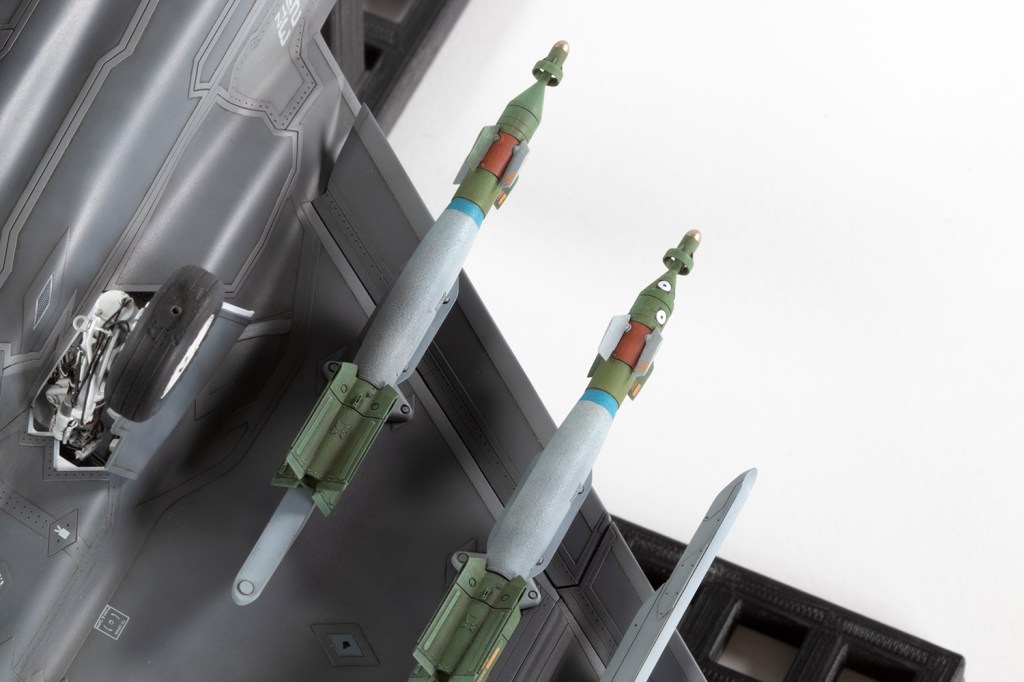
While still waiting for a suitable aftermarket undercarriage to be released, I looked round for other things to do. Four ResKit GBU-12s were to be fitted, and one needed to have some test markings added around the nose. These are beautiful little items which went together very easily, but the paint scheme is complex and took a lot of masking. ResKit’s decals add some nice details, but add character rather than accuracy, since one of them reads ‘LOAD CREW TRAINING ONLY NOT FOR FLIGHT’ – I didn’t add those! The seeker heads are meant to be a clear orange, but some Alclad Pale Burnt Metal substituted for this.
I was using two photos of a particular flight with this loadout for reference, and noticed that the GBU-12 forward fins were a mixture of green and grey. For some of the bombs I could see which was which, but on at least one of them I had to guess. One also had some black and white camera test markings, which I made from cut up and punched black and white decals; it was surprisingly challenging getting decent triangles and circles and manipulating them into place.

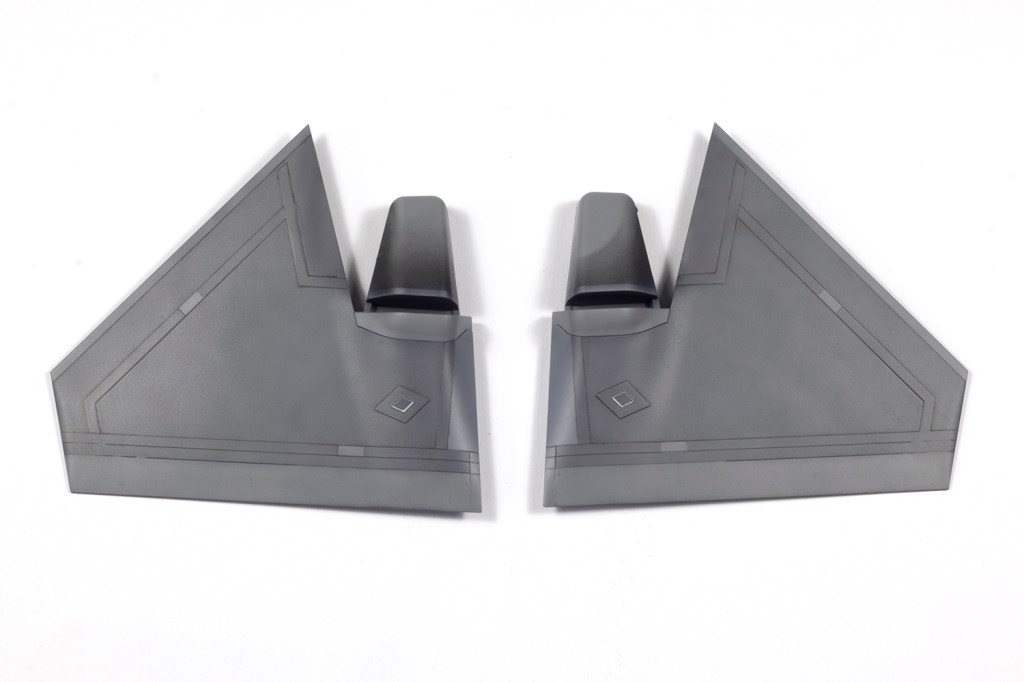
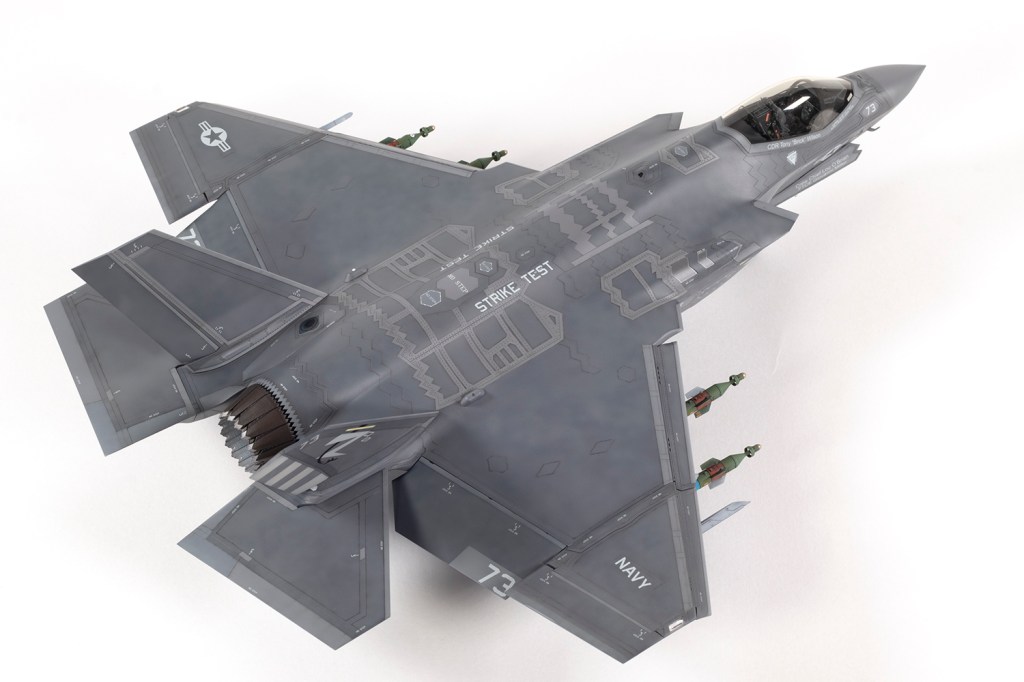
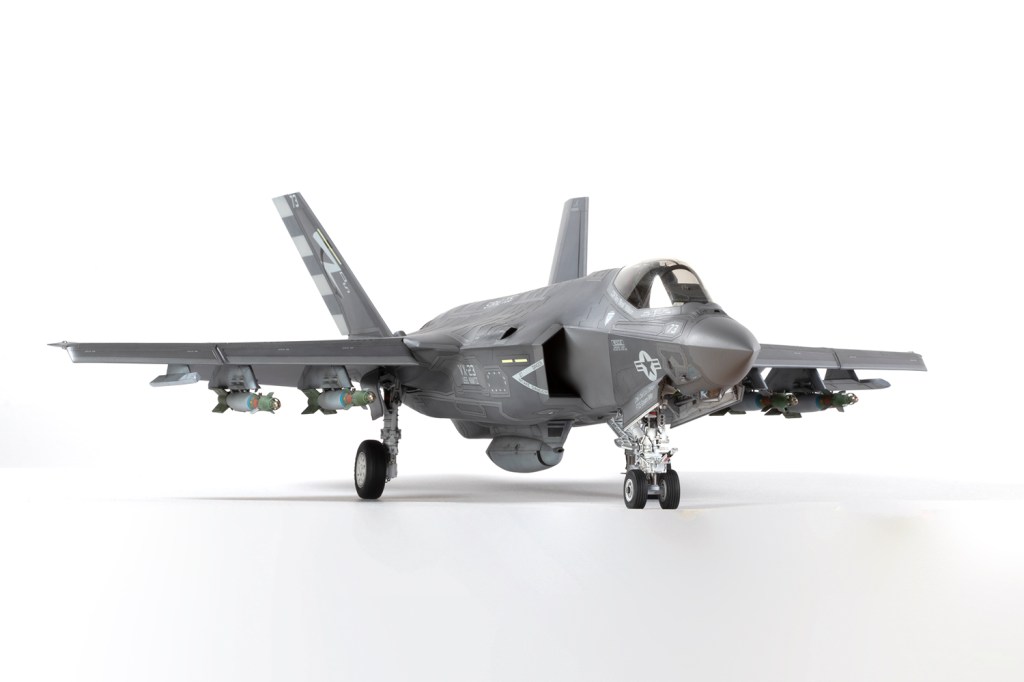
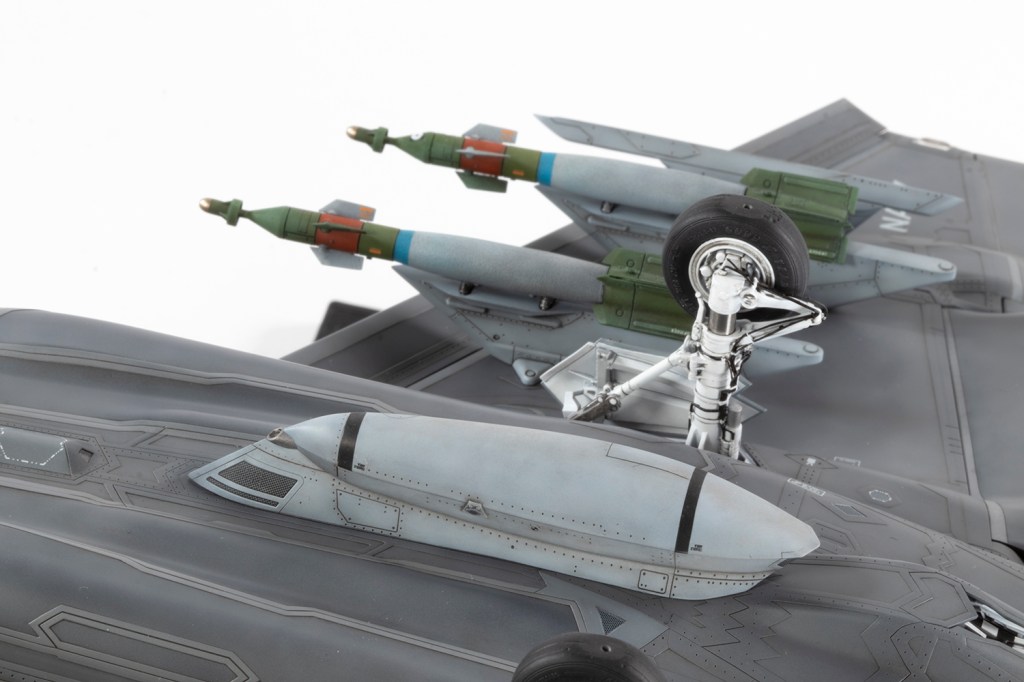
Another nice F-35C feature is the gun pod, provided in the kit. It gives the C a definite ‘male’ appearance when fitted. This, along with the pylons made at the same time, was done in Light Ghost Gray, which makes a nice contrast with the darker shades used on the airframe. The pylons are pretty good, although some rail detail along the bottom of the outer ones would have been nice for those of us not fitting Sidewinders.

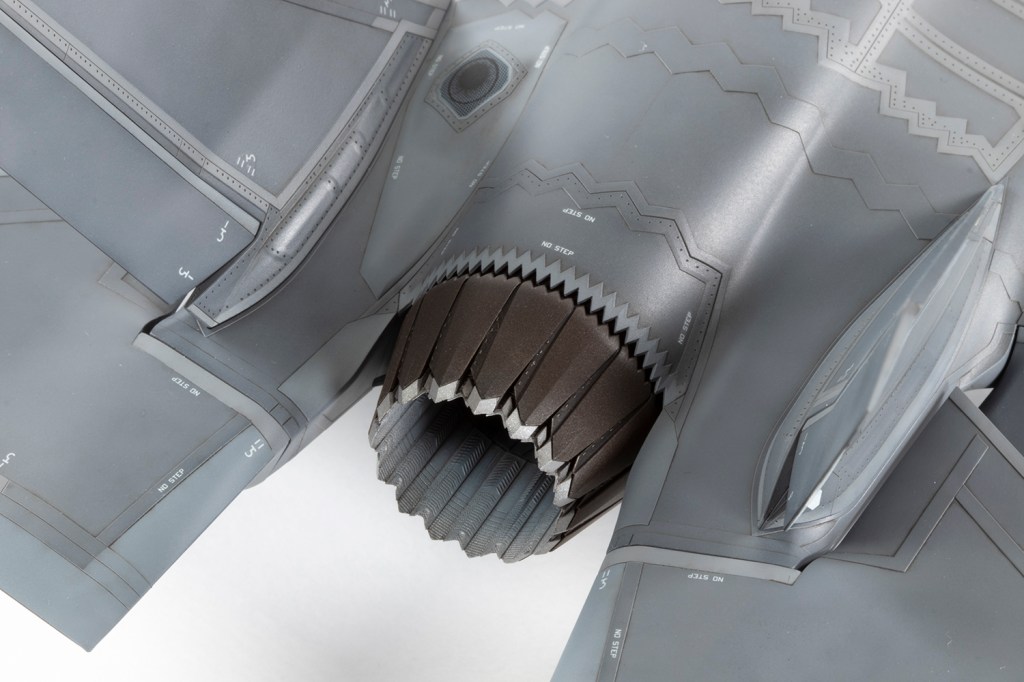
Continuing with the theme of getting bits and pieces done prior to constructing the main airframe, I also finished the exhaust. I’d been provided with the ResKit part, which is very nice, but the real thing is pretty simple and the improvement in detail modest. Deciding what colour to paint it was a challenge, and in the end I went with some dark brown mixed with Alclad Magnesium. I also assembled the intakes at the same time, and realised that the turbine face provided by Tamiya is completely invisible on the finished model, so I didn’t need to paint it. Nice that it’s included though.

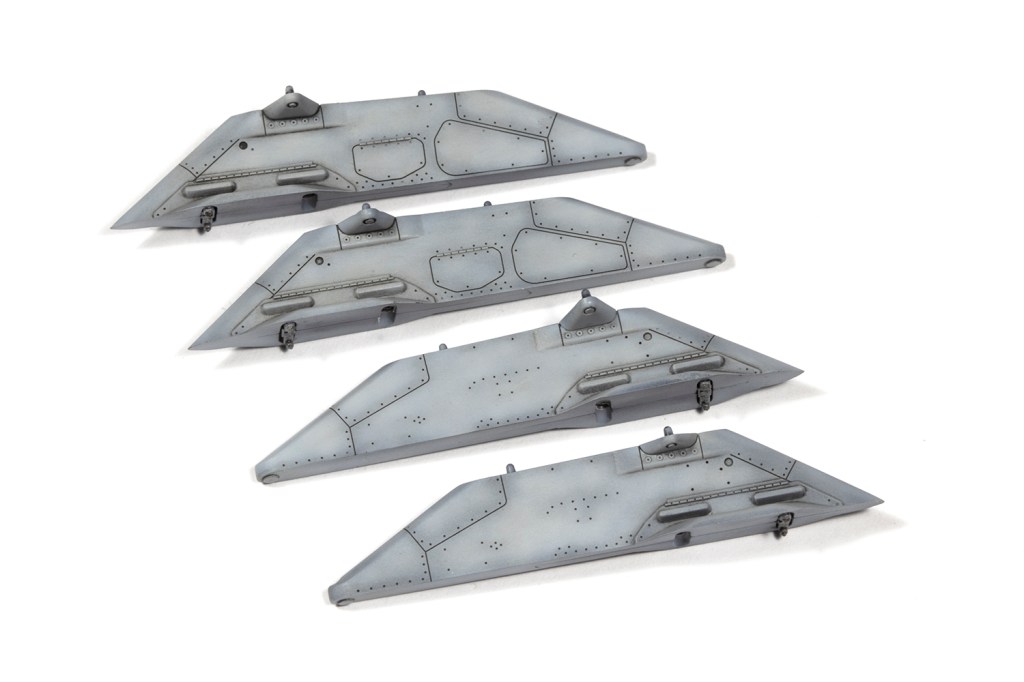
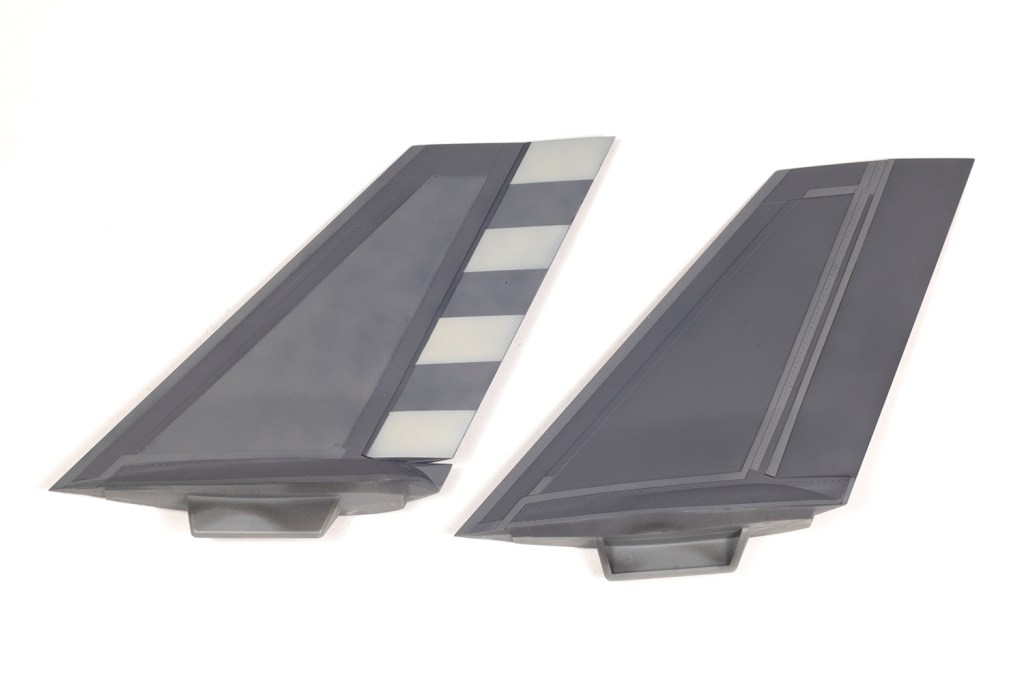
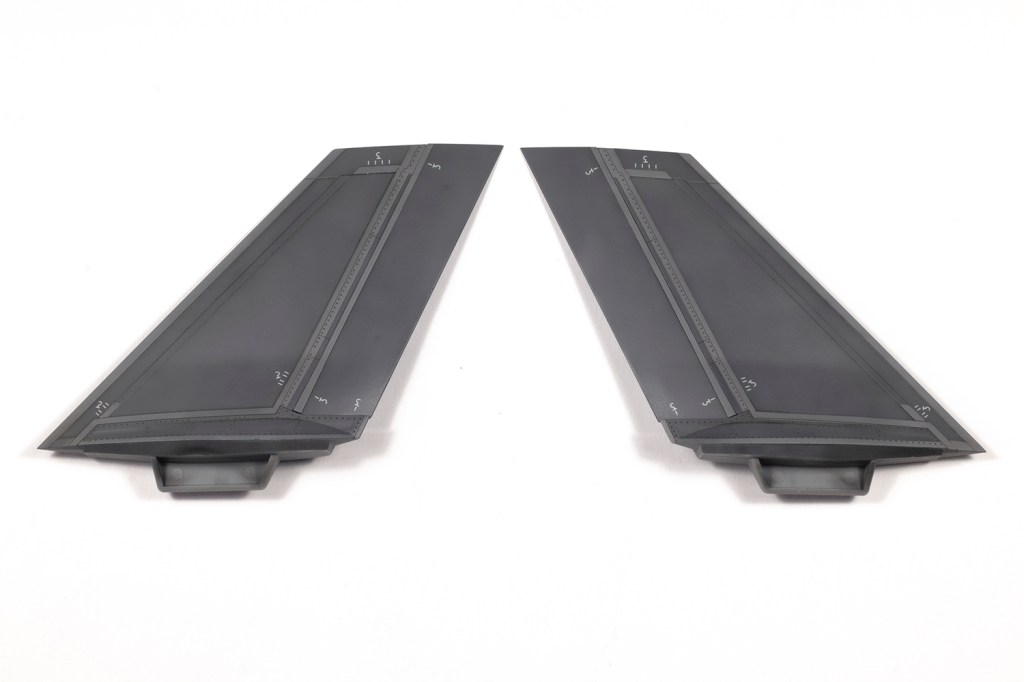
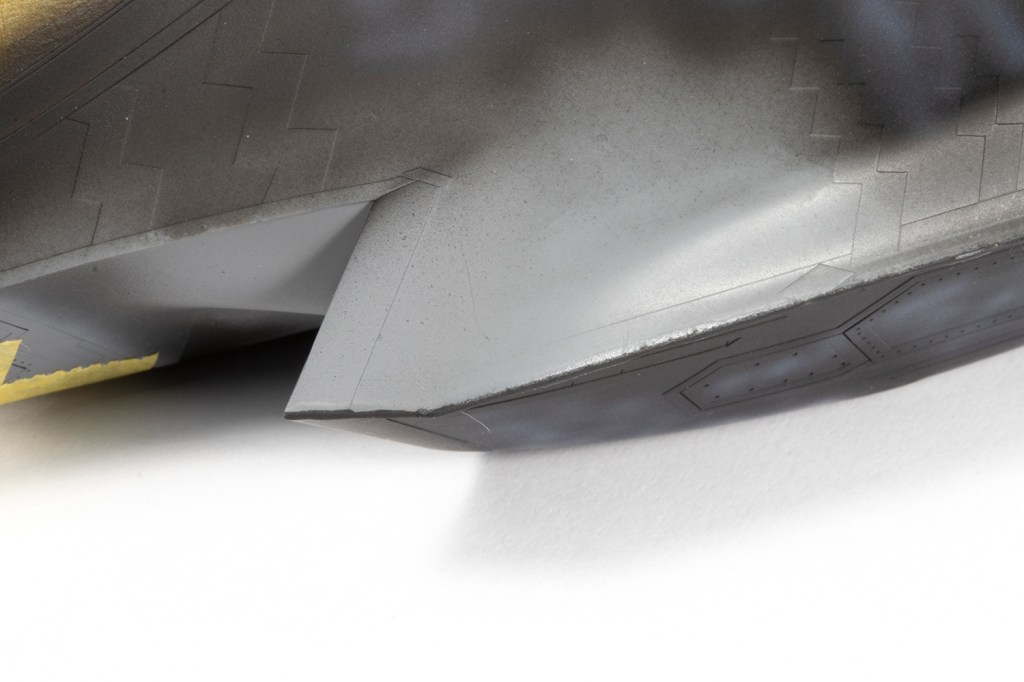
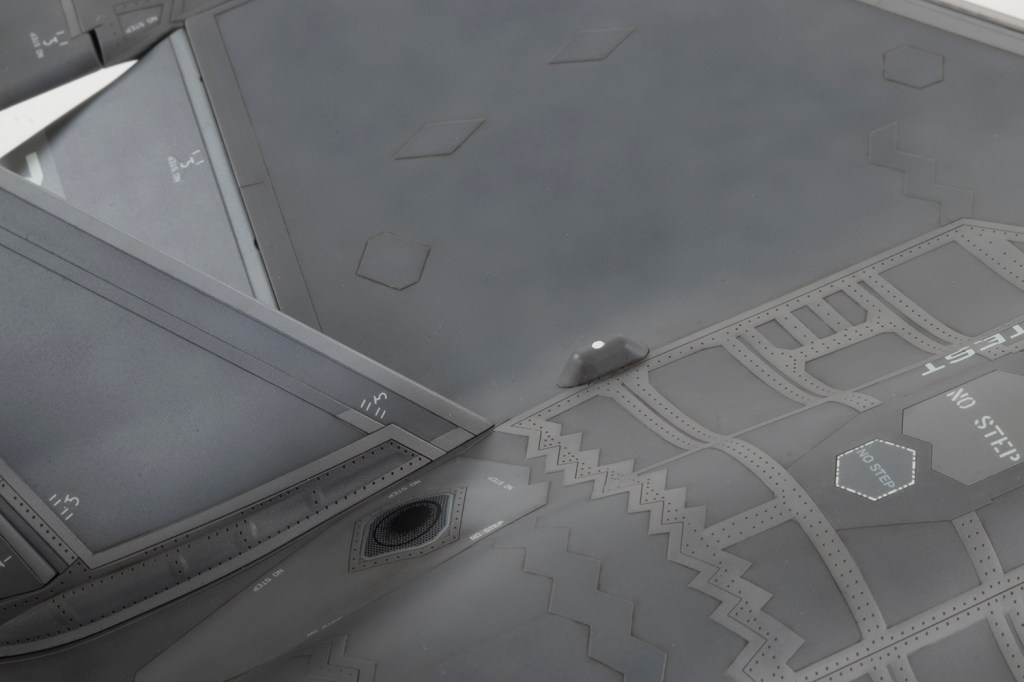
By this time, there was still no undercarriage on the horizon, so I decided to do all the flying surfaces which could be added later. This would allow me to map out my process for finishing the rest of the airframe later. For the main colours I used Tamiya’s LP-84 and 85, specifically released for the F-35, marbled over a layer of black primer and pin-washed with some heavily thinned Abteilung 502 Dark Mud oil paint. When Tamiya first released the F-35A they suffered a fair amount of criticism for the prominence of the moulded surface detail, but they were really between a rock and a hard place: the surface texture of the Lightning II is very prominent from some angles, and invisible from others. I personally think no one could achieve anything better than what Tamiya have done. Nearly all of the Dark Mud was removed and that which remained subtly enhanced the various features just the right amount. Well I think so, anyway.
The two main shades of grey, supplemented by LP-12 as recommended in a few places by the instructions, are very elusive. In some photos they look reversed (the lighter looks darker), and from some angles the delineation between the two is very stark, whereas from others they blend into a single shade. It’s a nightmare to replicate, so I didn’t bother. A lot of the shapes to be masked are complex and I had an Eduard mask set to hand. This was surprisingly made from a black vinyl material which was unbelievably sticky, and in some places a very poor match for the moulded detail. I avoided using it as much as possible, as the aggressive adhesive had a tendency to pull up the paint, and where the geometry was simple, die cut strips of tape made by Gunze Sangyo provided a better solution. I really like these die cut masks as the edges are super-crisp – much better than I can manage with a scalpel blade – and produce nicer paint demarcations.
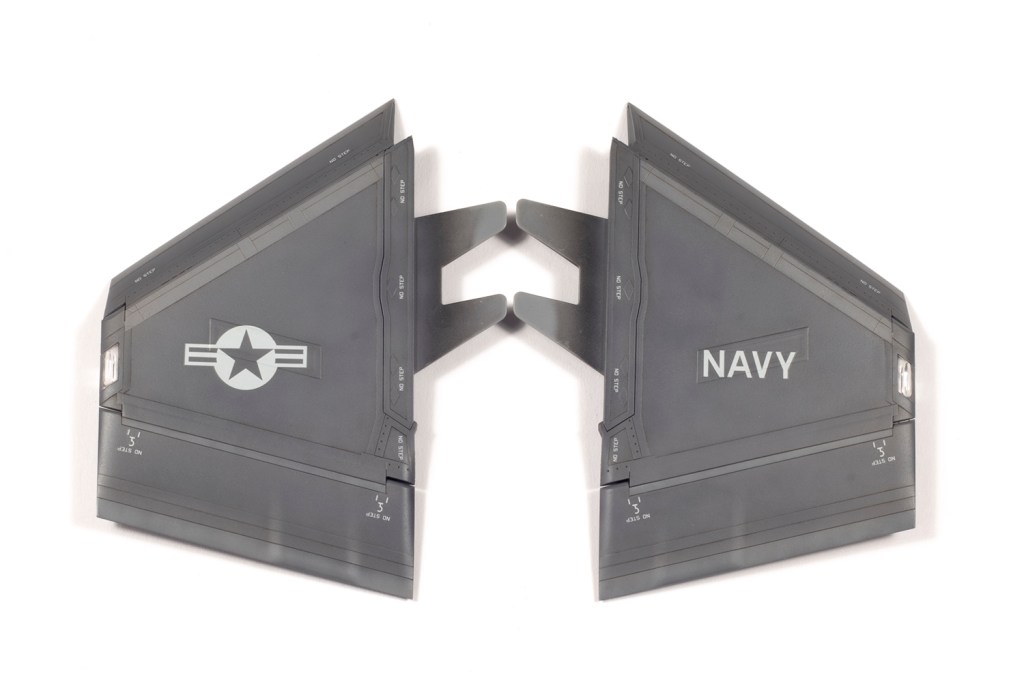
I could then play with decals. The vast majority came from the Furball F-35 Anthology Part VI set, which includes comprehensive stencils. These are super thin and bed down wonderfully, but appear to have been sized for an older kit (maybe the Kitty Hawk one?) since some pieces, like the slime lights, are a less-than-perfect fit. In a few places I had to use the Tamiya decals, which predictably performed worse than the Cartograf-printed Furball items. Everything was then sealed with VMS Satin.


For lack of an aftermarket undercarriage, the build then reached a standstill. At one point the client sourced some 3d files online and had them printed, and I got as far as cleaning these up and base painted when, hallelujah! Eva Model Kits released a proper 3d set available through the48ers.com. I grabbed a set quick, which was a good thing as they sold out within a day.
This was my first experience of highly-detailed 3d printed landing gear, and it was not straightforward. What is undeniable is the incredible detail and that the print quality is very high – no distracting layer lines at all. A nice little PE sheet and some clear acetate rounded out the package, along with aluminium tubing which would provide strength and perfect looking oleos. What is also undeniable is that removing these parts and cleaning them up was a nightmare.
EMK use a pretty brittle resin, and some parts (like the wheels) had a *lot* of very thick print supports. Some small parts are meant to clip in place without glue, but this is fraught with the risk of breakage. Thank goodness they provide quite a few spares. I spent a couple of hours with a new scalpel blade, single-edged nippers and razor saw separating the parts, and despite being as methodical and careful as I could, still a lot of parts suffered minor damage. The most difficult areas are the various cables, and they did not all survive unscathed. Furthermore, the printed cables would interfere with the various decals (provided by Tamiya) which should go underneath them, which was obviously physically impossible. But, in the end, I did have some incredible looking landing gear legs which fitted beautifully.
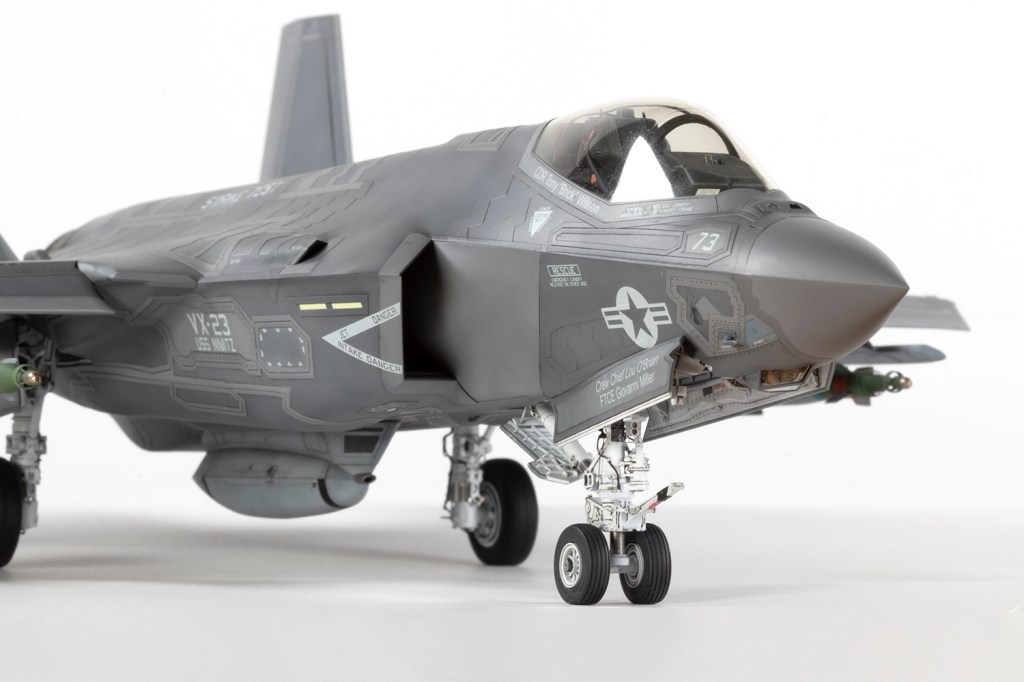
One thing I did note is that the F-35C nose gear leg changed at some point. Tamiya would have you make what I think is the earlier leg, with the AOA box (containing the green/clear/red lights) near the main landing light, and this is what the airframe I was modelling had. EMK provide what I presume is a later iteration, where the AOA box is much lower down the leg. Tamiya actually provide a part for this (CC1, which is marked as not used), but on my model, it’s not accurate. Still looks great though.


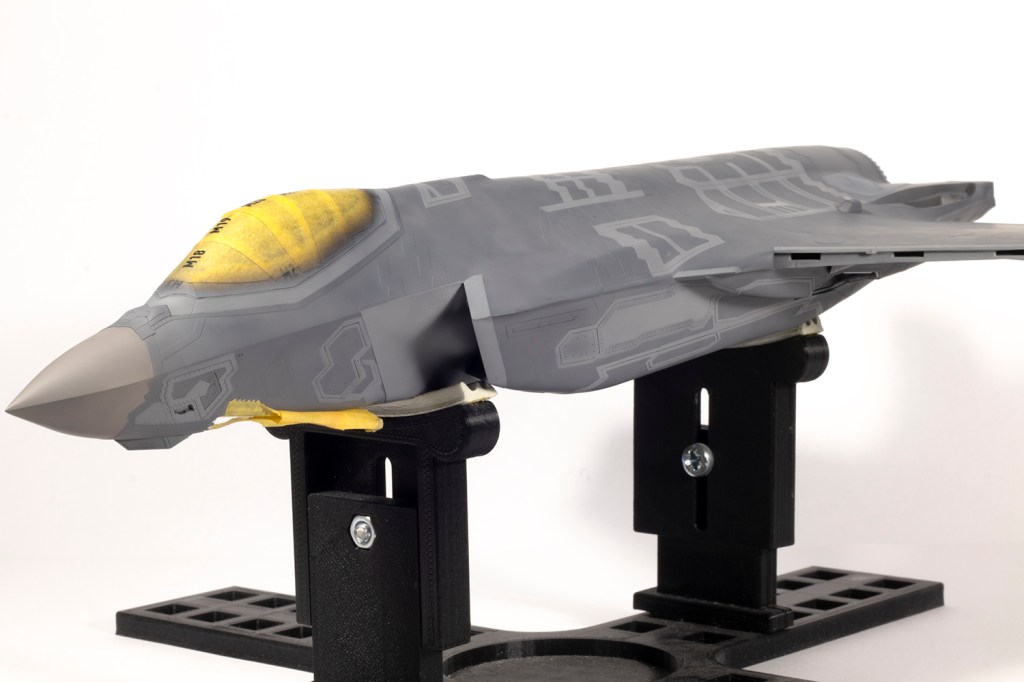
Once the landing gear was done, I could crack on with assembling the fuselage. This was quick as the fit is great and I’d done almost everything else. I could not get a perfect join of the upper and lower halves around the nose, and so used some carefully applied black CA mixed with VMS filler powder to fill the hairline gaps and then sanded it to a sharp chine. It’s worth pointing out that, as good as the Tamiya moulding is, there are faint witness lines where they used multi-part moulds, and I was careful to ensure these were all sanded away, especially around the nose.

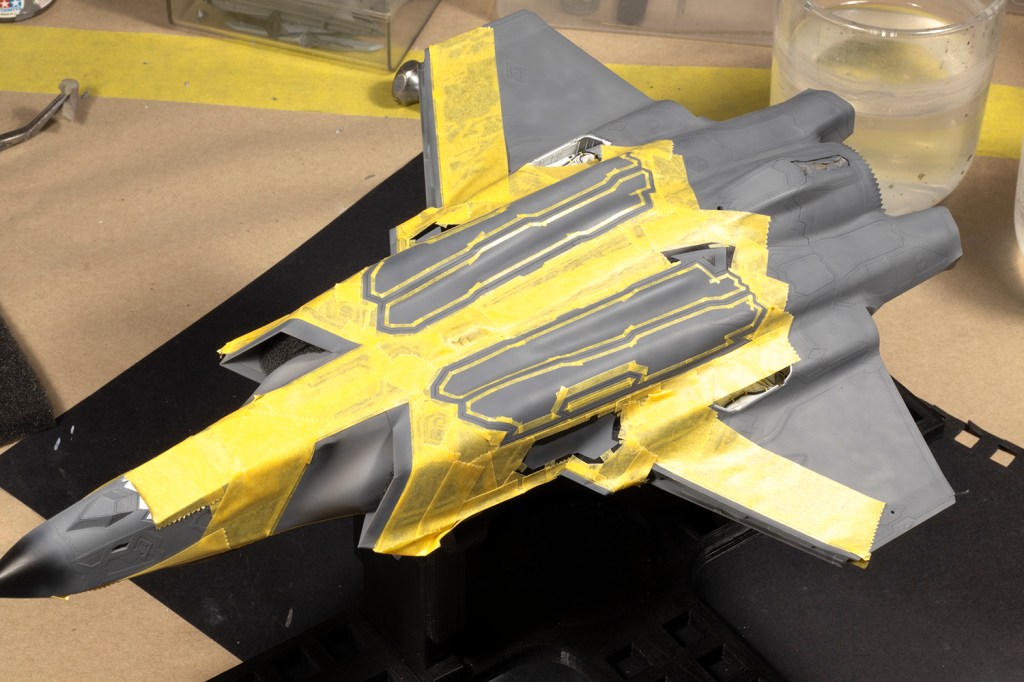
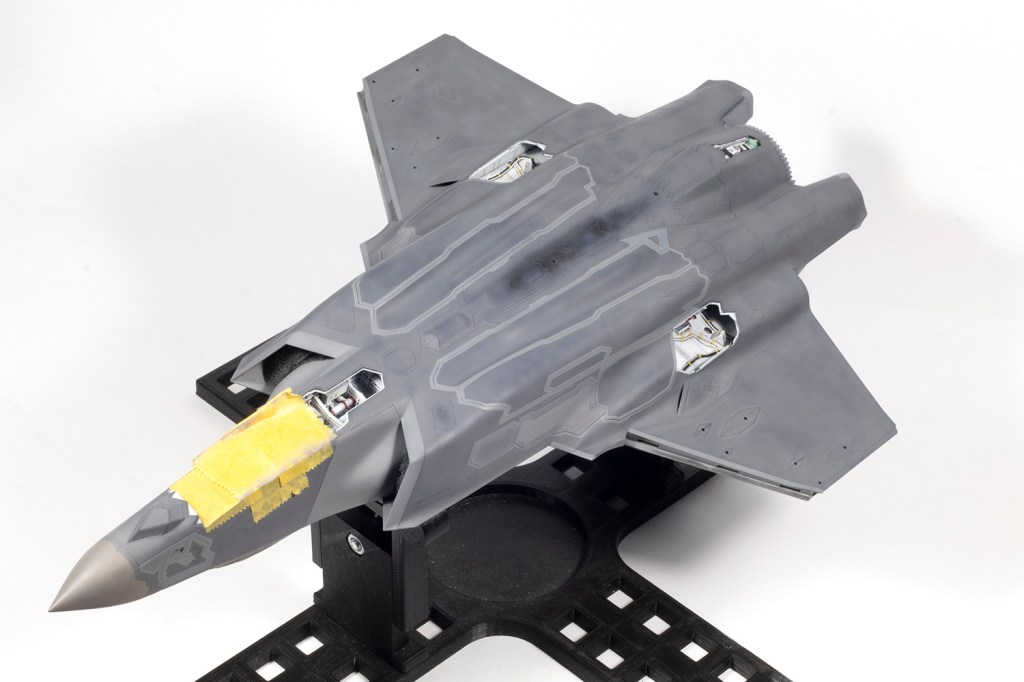
Then came paint, and that opened a can of worms. F-35Cs, such as those provided for by Tamiya, generally don’t have many light grey RAM sections, but perusal of a lot of photographs and walkarounds showed that this was highly variable – some operational airframes had extensive light grey RAM sections. Closer study of CF-03, the developmental test aircraft I was making, showed that at least some of the RAM sections were in a lighter grey, but I didn’t have full coverage. This had two downsides: 1) I didn’t have a mask set for a C, so would have to do nearly all the masking myself, and 2) I didn’t really know which sections I should be masking. In the end I went for artistic licence, and just did the parts that seemed right to me.
I applied a base coat of mottled LP-84 over black, and then started masking for the lighter LP-85. This took forever. Using some die cut masking triangles (again by Gunze) was a tremendous help, but the geometry of what needed to be masked was super-complex. I also decided not to do it all at once, as masking for some sections would interfere with others, and so did it in ‘patches’ – masking some areas, painting the LP-85, removing the masks, and then masking the next batch of areas to be done in light grey. The edges of the weapons bay door were especially onerous owing to the complicated shapes. After about a week of fairly intensive work, I had both greys done, and some other smaller areas done in LP-12. In reality, I should probably have masked a lot more sections to be done in the paler grey, but enough was enough.


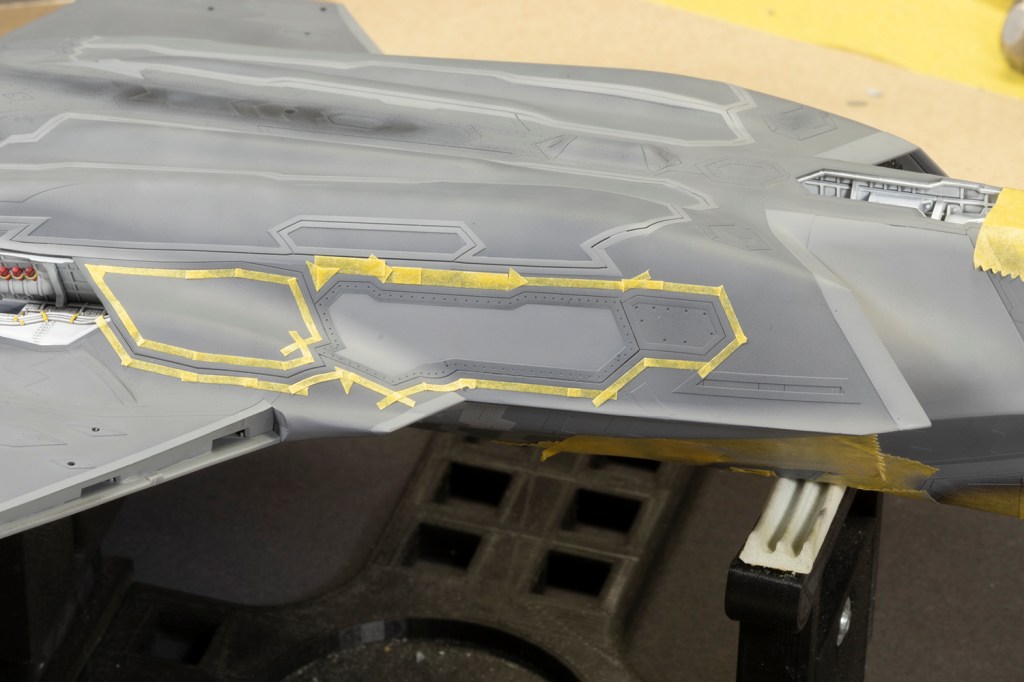


With all the paint down the contrast between the LP-84 and 85 was too stark for me, so after applying (and removing) the Dark Mud oils (as per what I’d already done with the other completed sections of the kit), I overcoated some of the RAM detail with very highly thinned LP-84, to darken it a bit. I’d attempted to follow Tamiya’s recommendation of a 5:1 mix of Dark Ghost Grey and Dark Brown for the nose cone, but it was too light and too beige. It meant more masking, but I overcoated it with a 50/50 mix of LP-84 and 85 to get something that looked better; it’s another one of those elusive colours that changes depending on the light and the angle.
The remainder of the decals could then be applied. For the sake of completeness, I should mention that Furball provide decals for CF-03 from 2014, when it was associated with USS Nimitz, but the photos I was using for this particular loadout were from 2016, when CF-03 was marked up for USS Dwight D. Eisenhower. As modelled, what I’ve made is inaccurate in terms of the loadout and some of the minor markings, but it looks cool.
The last step was to apply the VMS Satin, but this was a near disaster. My bottle is several years old and pretty thick. I’d never worried about this before, as I apply it neat through a 0.6mm nozzle in an Iwata RG-3 mini spray gun at more than 20PSI, but it clearly went bad during the closing stages of the project as it wouldn’t spray smoothly and spat out tiny fragments of already solid clear varnish; I was basically airbrushing suspended grit particles. Fortunately, I realised this quite quickly, and had started on the upper wing where there were no decals. I threw the bottle away and ordered some more.
It then took all the patience I could muster to leave the gritty satin varnish alone. VMS varnish dries to the touch very quickly, but takes a few days to harden. I wanted to sand it, but to do so before it went hard would result in a gummy mess. After around 48 hours I decided to risk it; it was still a little soft, but using some well-lubricated Infini 2500 grit sanding film and very light pressure, I managed to get the surface smooth again. Polishing with a Infini 4000 grit polishing pad then restored the shine. The fresh varnish went down extremely smoothly.
I could then just put everything together, and the fit is so good it was a bit like assembling Lego. Quite a few of the major parts are just pressed in place without glue, and I did the same for the undercarriage. The latter is really quite stressful as there’s so much detail to avoid damaging, and I do worry about the strength of the legs for transport, even with the metal rods.
In short order I had a completed, and surprisingly large, F-35C. It’s not the most exciting subject in the world, but it’s so much fun to make such a well-engineered kit, and of an aircraft that when I was a kid seemed like it belonged to the very distant future. I am really looking forward to getting round to the A and B one day.


Year bought: 2024 (Jadlam)
Year built: 2025 (New Addington, Croydon)
Back to home.
