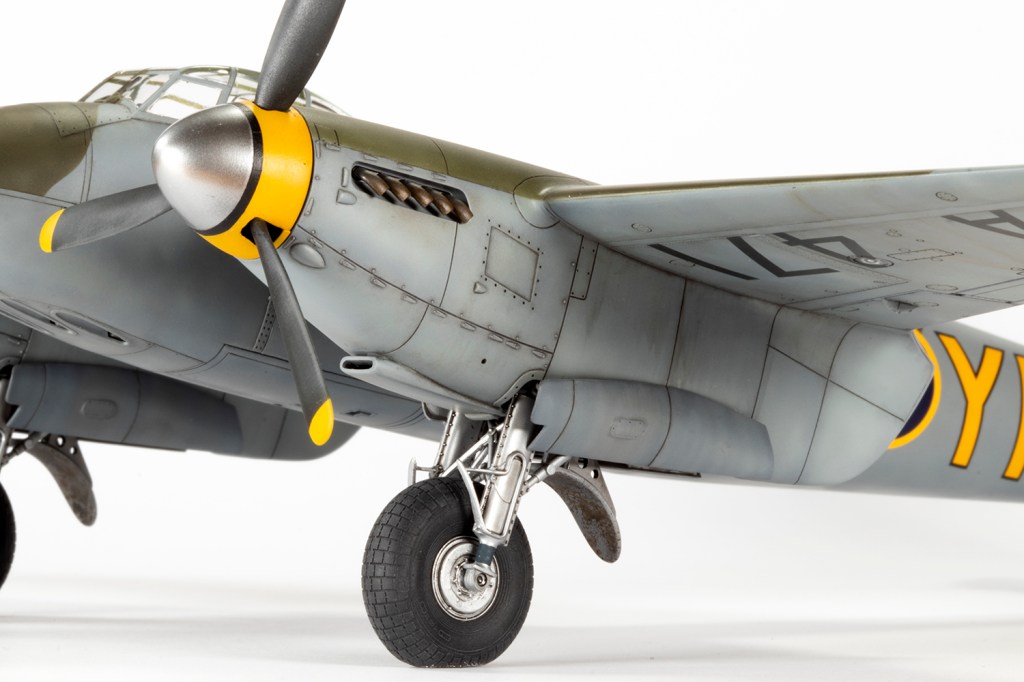
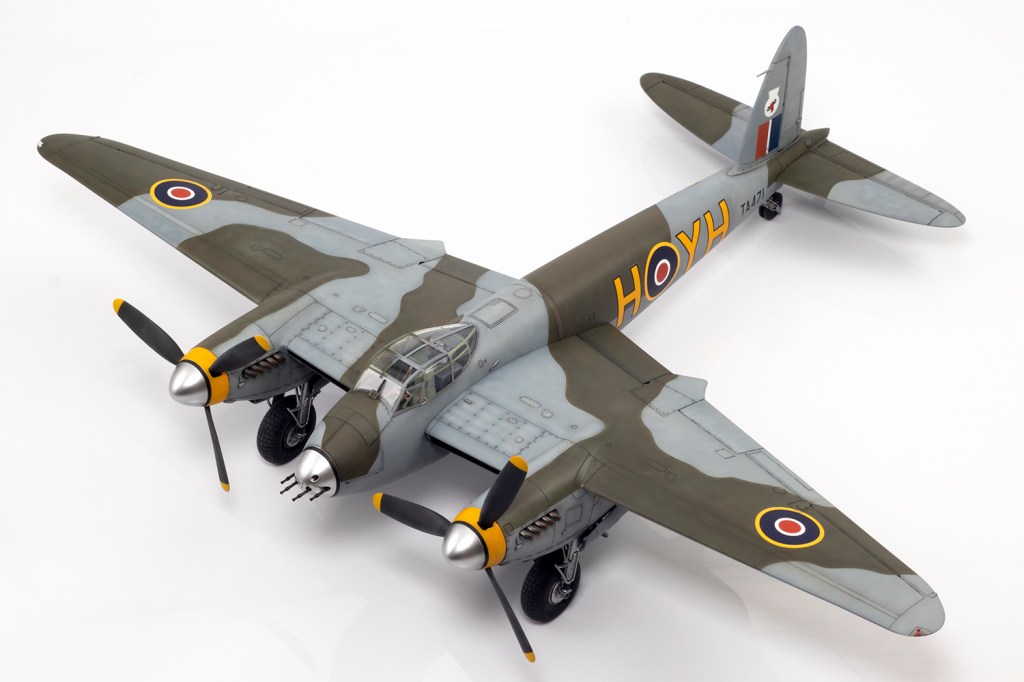
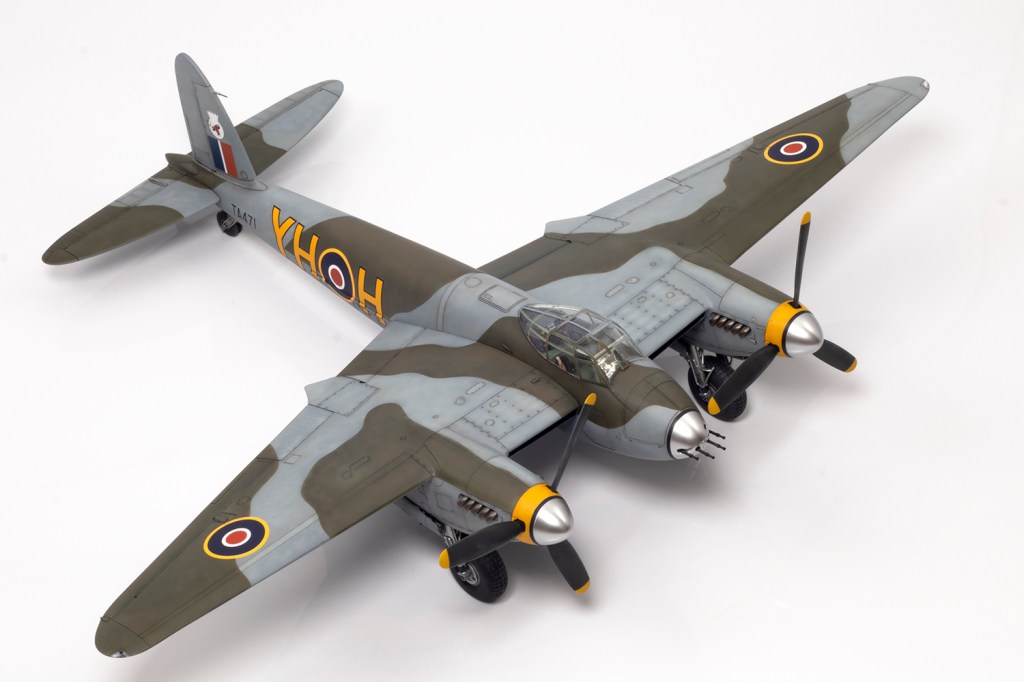
with Eduard resin wheels, Master metal gun barrels and pitot, and Kits At War decals
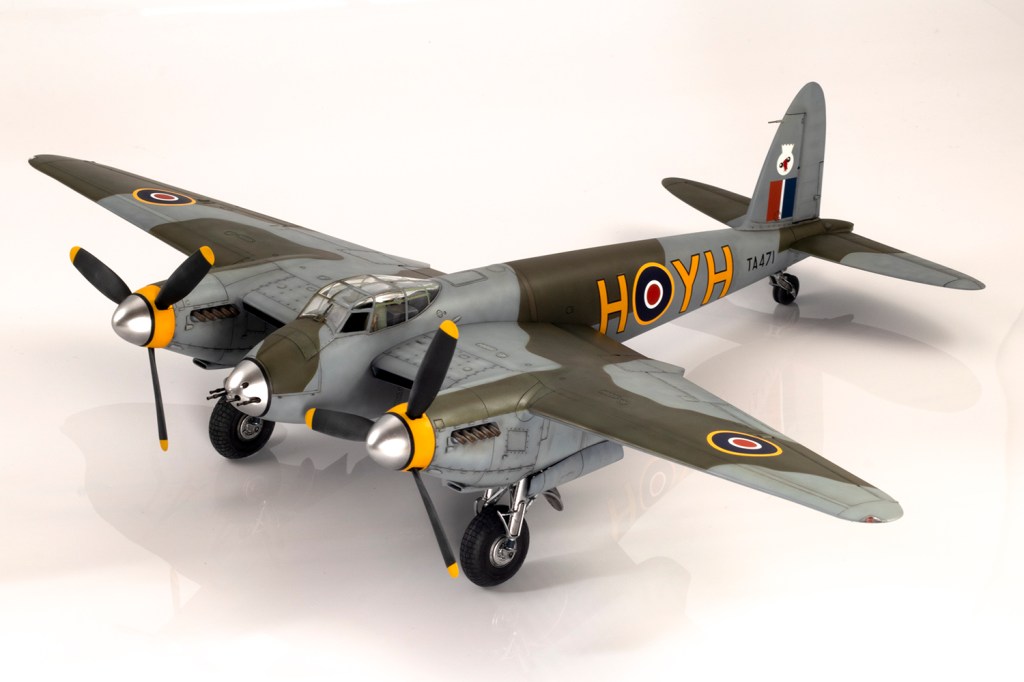
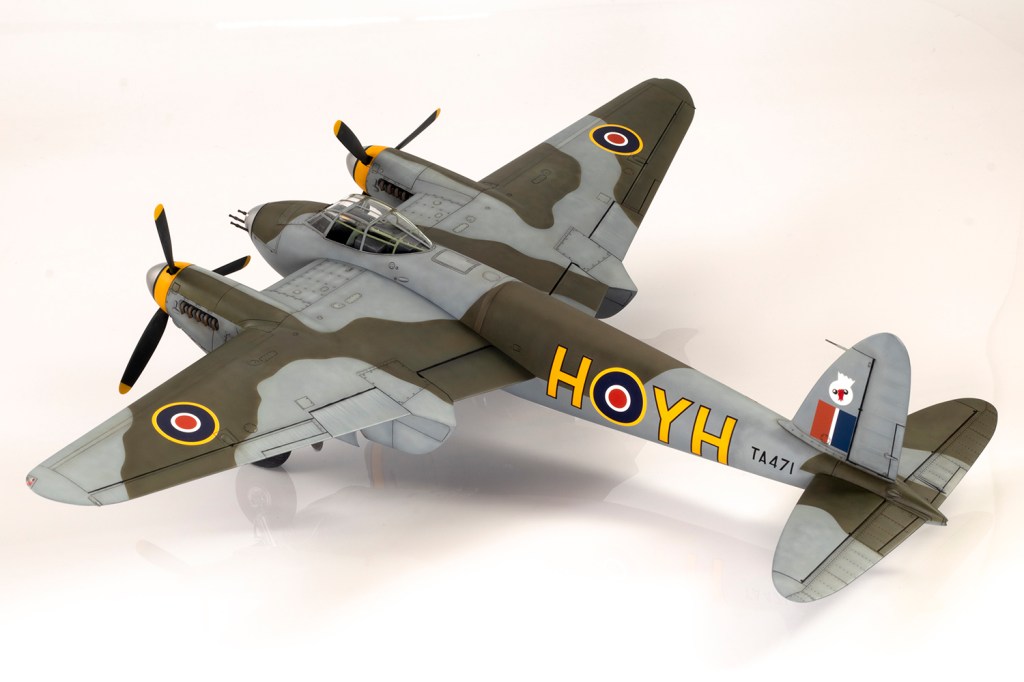
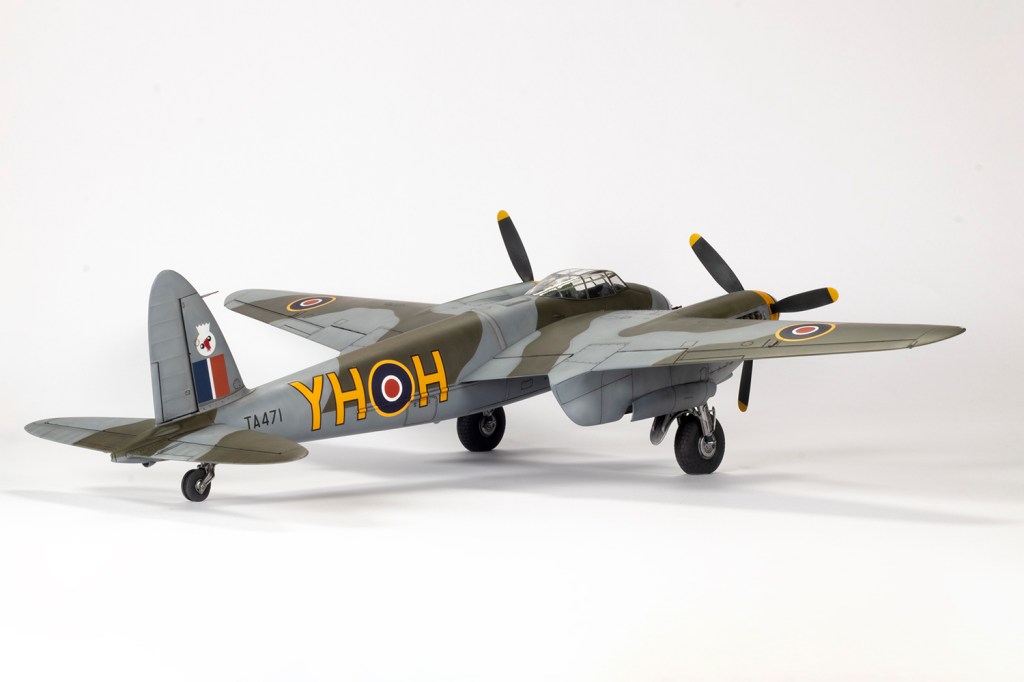
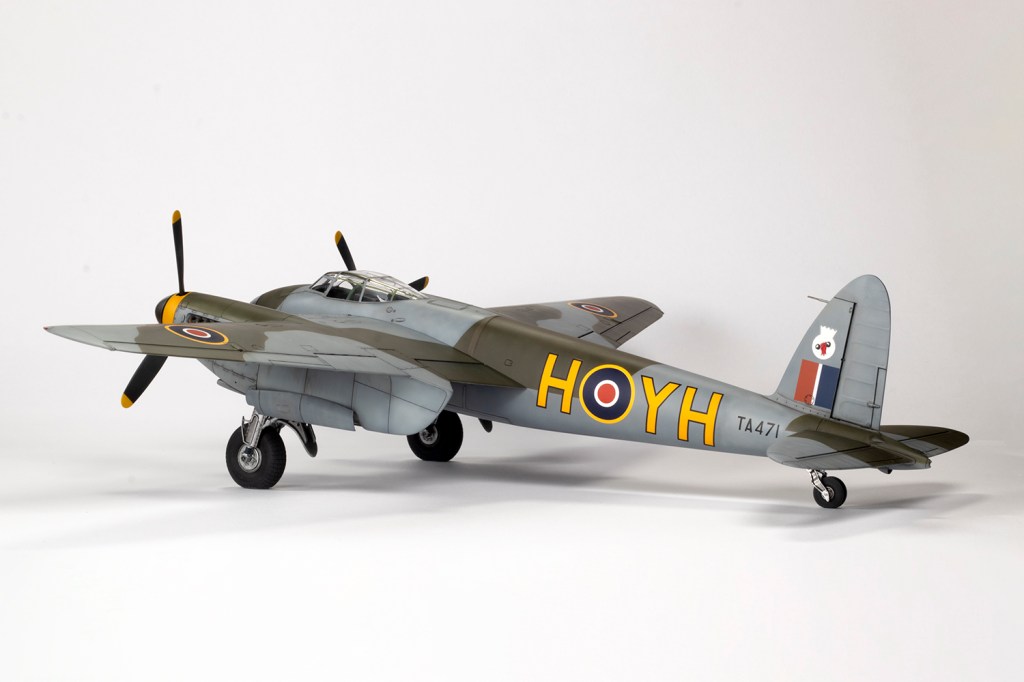
21 Squadron, Royal Air Force, Germany 1946

Well there I was, quite happily bumbling along with two HobbyBoss 1/48 A-6 Intruders for company, when I was rudely interrupted by the Plastic Posse Podcast and tempted into a Group Build. I generally avoid these as they rarely mesh well with my building programme, but this was to celebrate their 100th episode, and had originally been a 1/48 Tamiya Armor (sic) group build. As an aircraft-only modeller, I jokingly posted that I would enter a Tamiya 1/48 Mosquito, as it was the longest standing Tamiya kit in my stash, and they went and changed the rules. Now I was obliged to be involved.
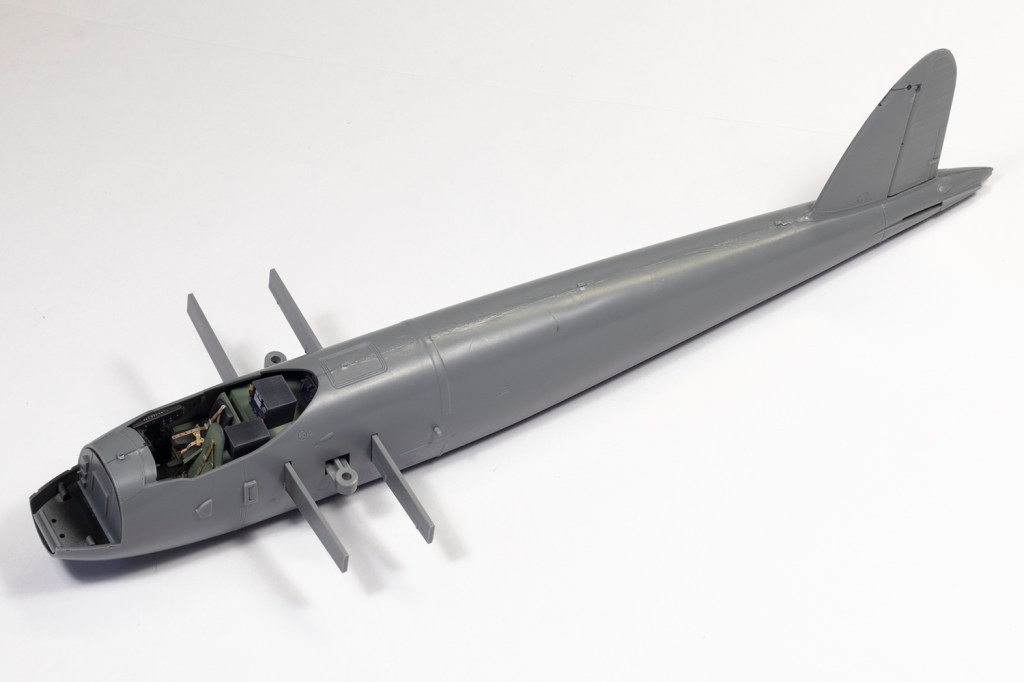
This, then, is a very rapid build of the Tamiya 1/48 Mosquito FB.VI kit hailing from (can you believe it?) 26 years ago. It is a very nice kit, but nevertheless getting on a bit now, and you can really see the advances Tamiya have made in the intervening decades. The plastic is pock-marked with ejector pin circles and some prominent mould lines need cleaning up, but it is nicely moulded with adequate details and a few inaccuracies.
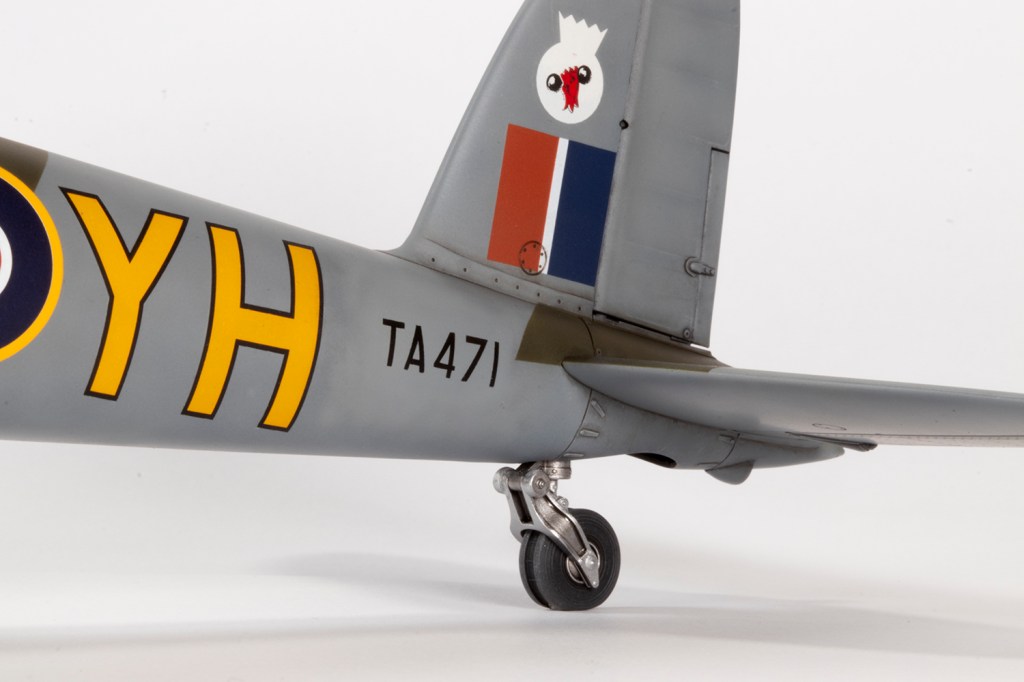
In order to make a post-war FB.VI, I used some decals by Kits At War for TA471 of 21 Squadron. I found a couple of photographs online, but as always, they did not show everything I wanted to see. To try and pin things down a bit better, I spent far too much time trying to decipher the squadron Operations Record Book, from 1946 until its disbandment in November 1947. You can download these for free from The National Archives. The handwriting was jolly hard work, I learned a lot about the weather, the sports activities of the squadron and their somewhat unreliable Oxford, but very little about the Mosquitos. I then discovered the typed version, which was infinitely easier to read!
Based in Germany, 21 Squadron was a night interdiction unit which spent a fair amount of time on air-to-ground gunnery and bombing training sorties, along with a bit of air-to-air, listening to a lot of lectures, and on various detachments around Europe. From March to October in 1946 they provided four crews to run the ‘Nuremburg Courier Service’, shuttling documents between Blackbushe and Fürth. One picks up all kinds of little details along the way, such as the air speed indicators in the Mosquitoes not being changed to knots until 23rd June 1947, 2½ years after the rest of the RAF! The squadron was disbanded in November 1947.
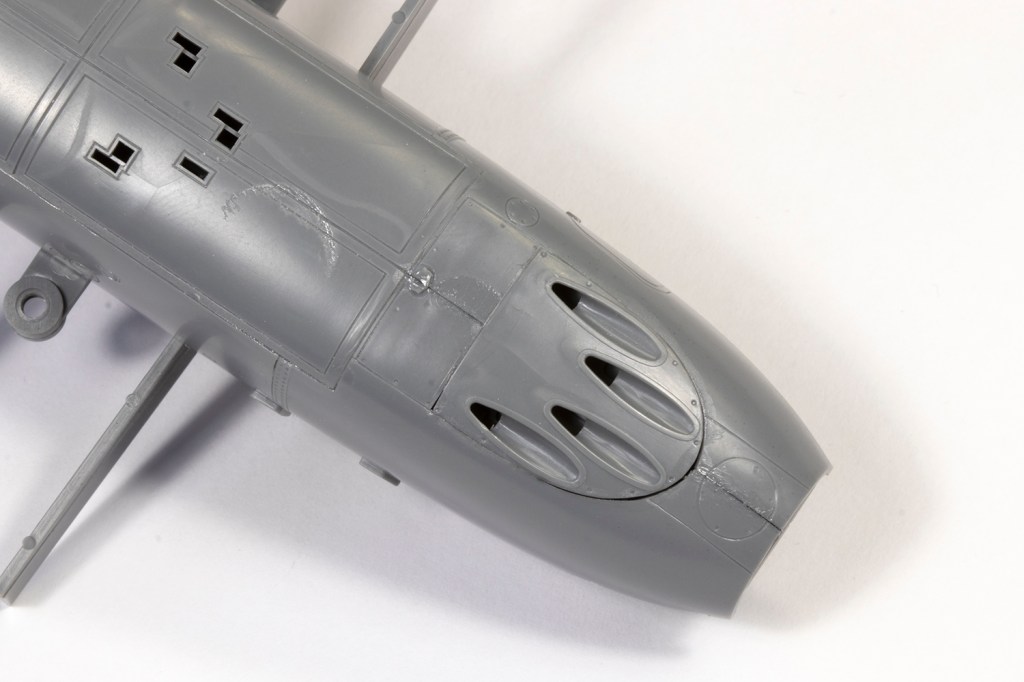
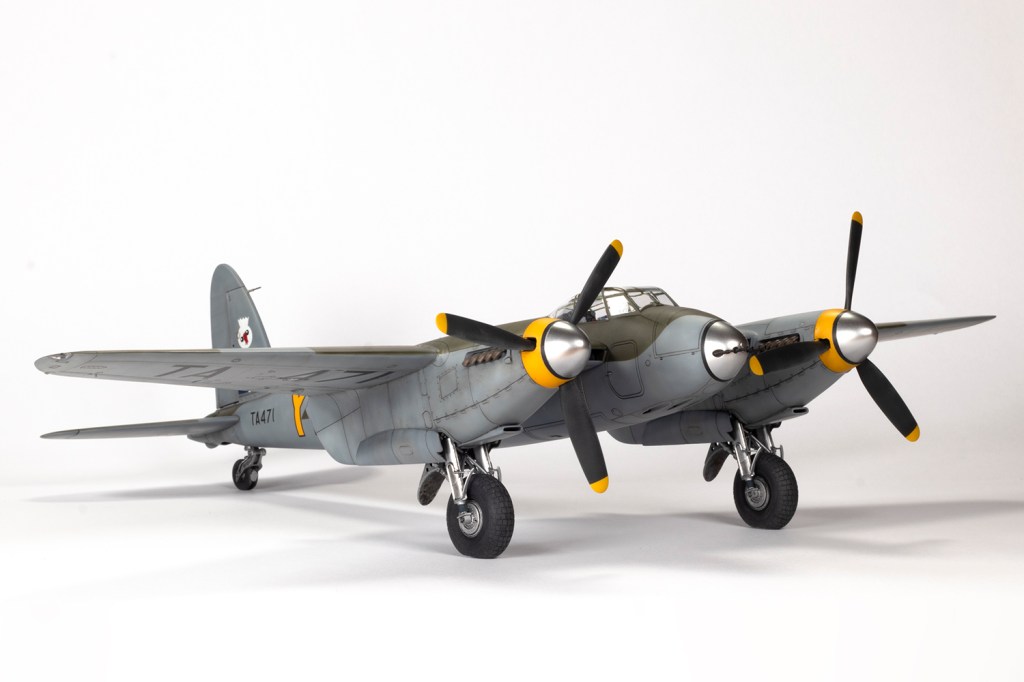
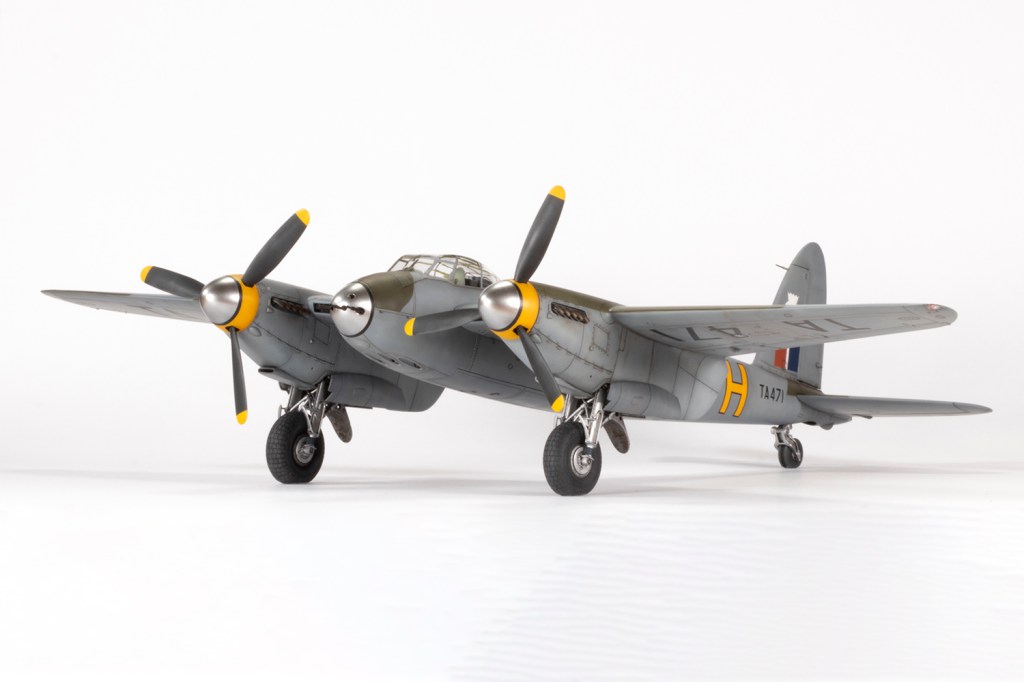
I know very little about the Mosquito, and was not especially interested in learning more beyond the details required for my build. No doubt it remains full of errors, but the aim was to get it done in five weeks, and finishing it was more important than accuracy. Photos showed I needed the broader chord propellers and Tamiya erroneously provide a clear window for the rear lower fuselage which should be filled and blended. I could also consign the flame suppressors for the exhausts to the parts bin. For a long time I was unclear as to whether guns were fitted or not. There’s a famous photo of a couple of 21 Squadron machines lined up at a German airfield with the nose guns missing, and initially I built the model planning to leave them out. However, given the amount of gunnery exercises the squadron participated in, I later changed my mind and had a nightmare inserting the replacement brass guns (from Master) through the openings from the outside. I do not recommend this. I now suspect the photo referenced above was after 21 Squadron had disbanded.

Save for some generic Eduard PE seat belts, the cockpit is entirely out of the box. It’s almost certainly the case that the T1154/R1155 radio equipment provided in the kit is wrong, and TA471 was fitted with Gee. I also neglected to fit the gunsight (since I thought I wasn’t fitting the guns at all). This really does need to be fitted when Tamiya say it does – it’s so difficult to fit later on that I gave up…


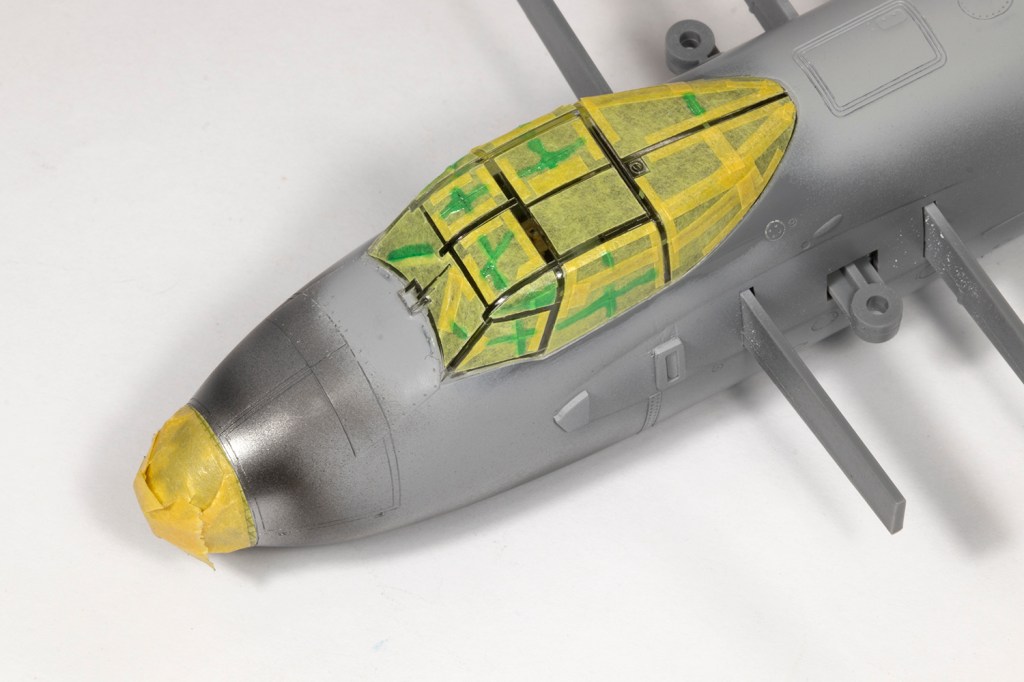
Tamiya correctly identify that some of the canopy framing is internal, and they supply some decals for this purpose. I elected to mask the frames and paint with Mr Color 364, which is easy enough as they’re moulded on the inside of the clear part. For the exterior I utilised an Eduard mask set, which I can’t recommend because, a) it’s not terribly well-shaped (especially the upper quarter lights), and b) Eduard think the interior framing is external, which means you might as well have masked it all yourself.
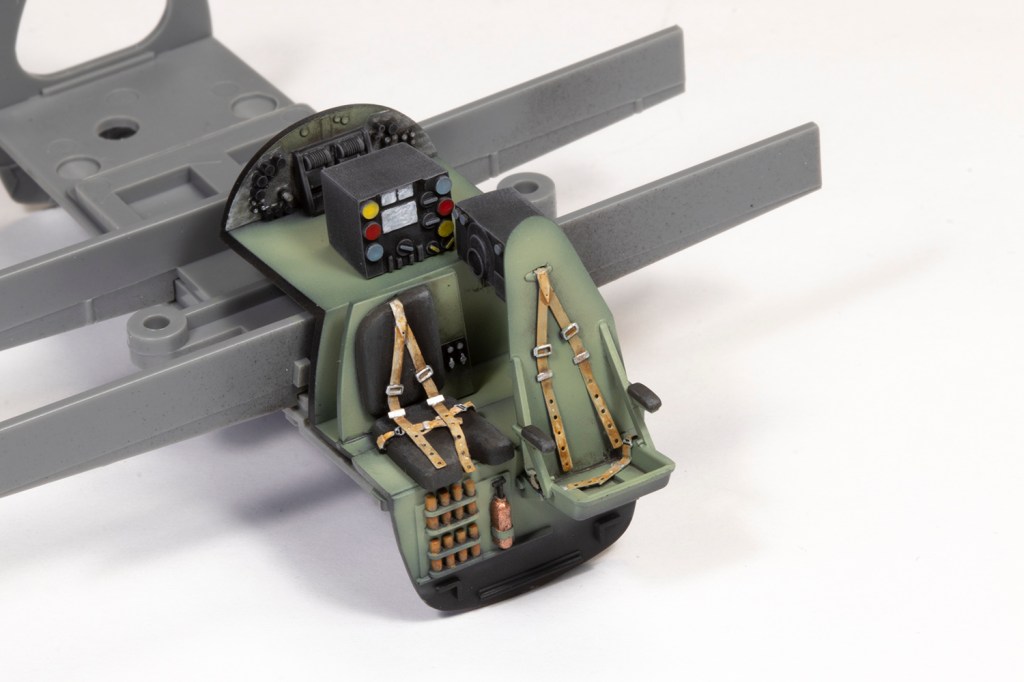
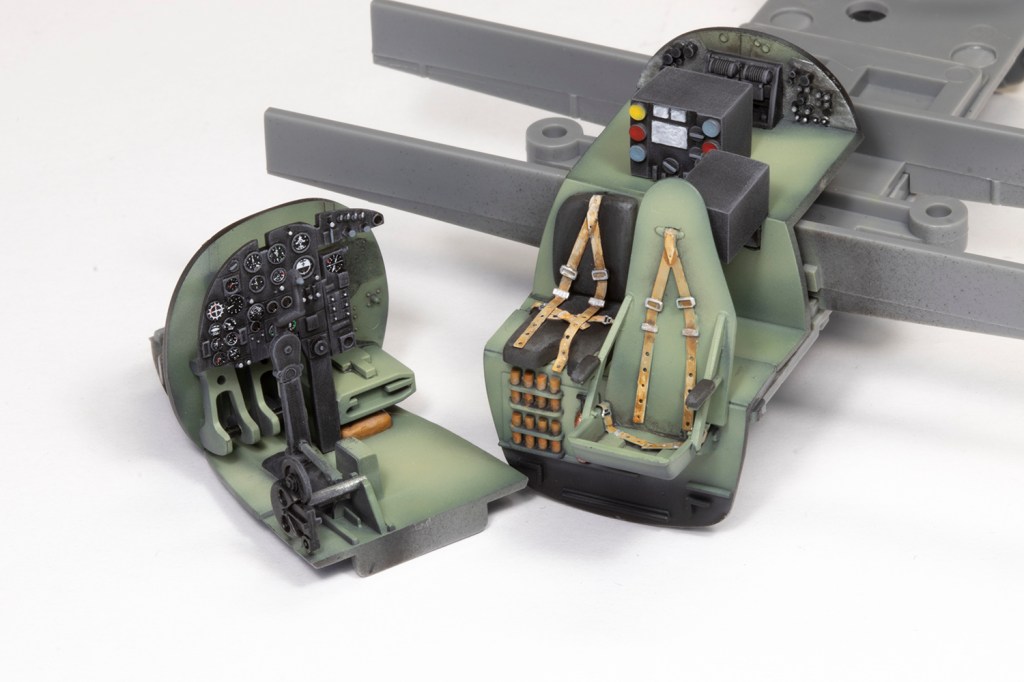

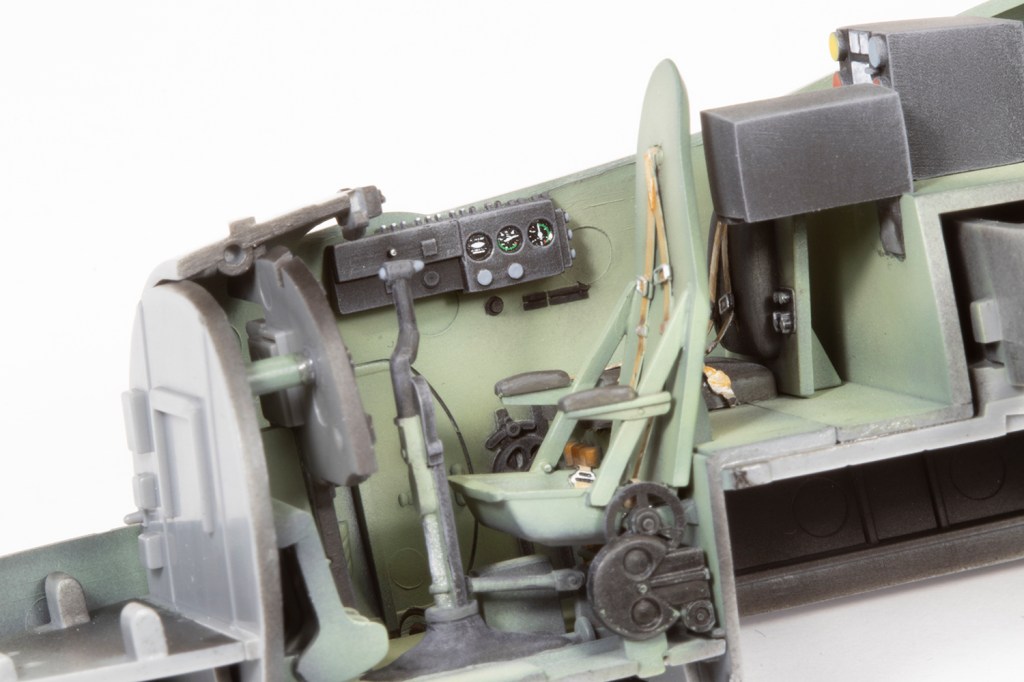


Reading old articles on this kit, I understood the vertical tail was too tall by 2.2mm or so. Now, I can’t emphasise enough that I did not do my own research and have just blindly followed commentators more qualified than me, but I did reduce the height of the tail by 2mm and reduced the height of the rudder by the same. This was painless enough to do prior to joining the fuselage halves with superglue.


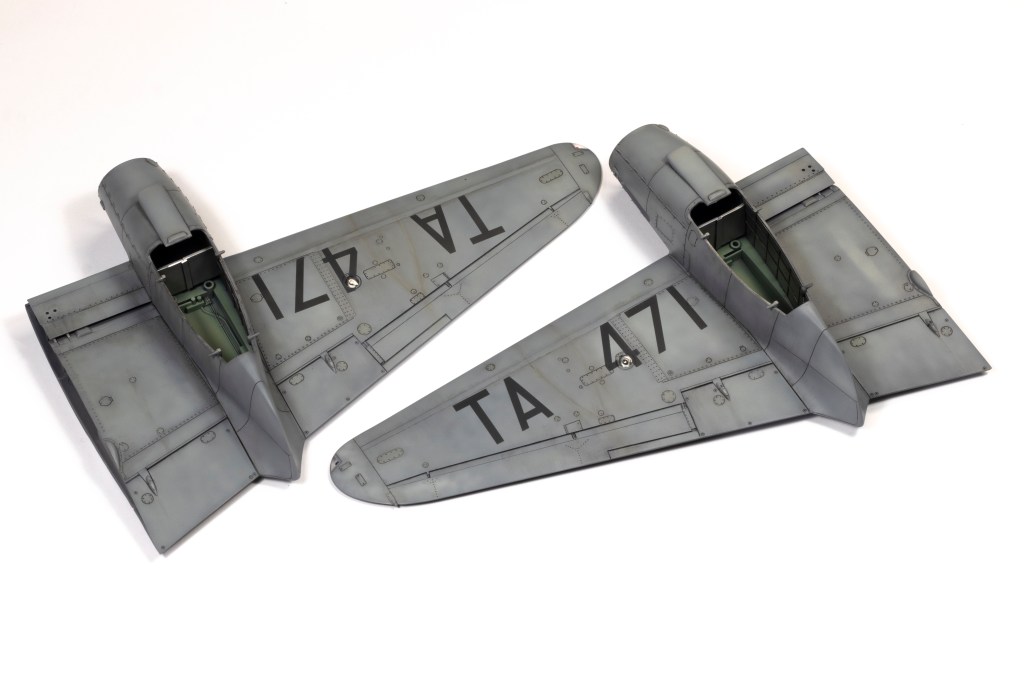
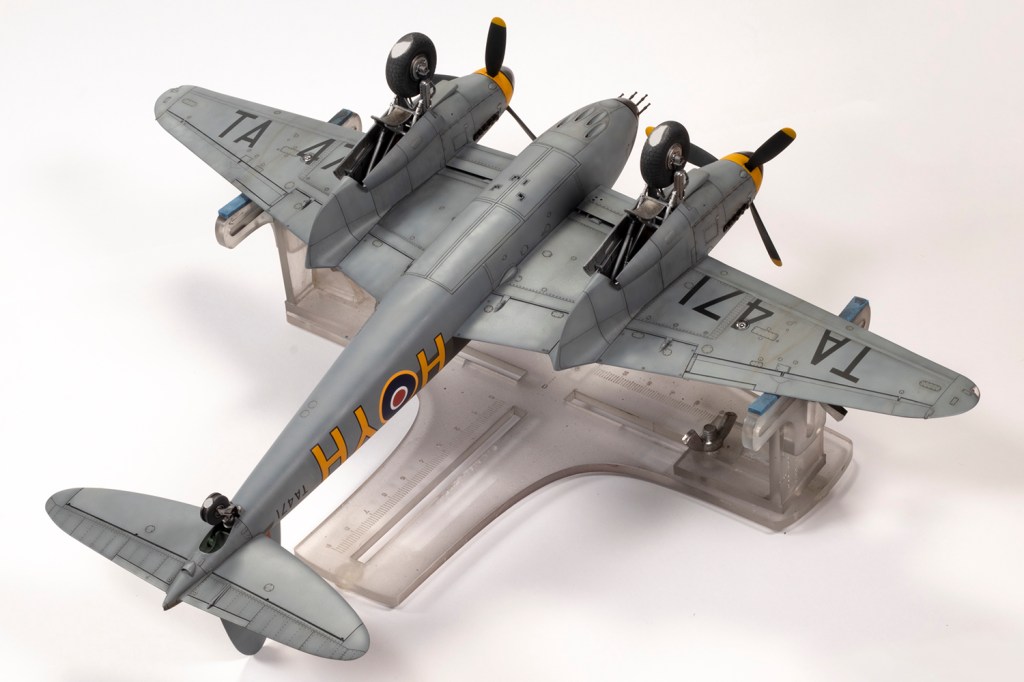
Whilst working towards completing the fuselage, I also embarked on the nacelles. In general, everything on this kit fits pretty well, but there is an inevitable seam at the rear of the wheel wells. I skinned this with sheet styrene and sanded it all flush. There’s an equivalent seam at the front of the wells, but this is much less visible with the undercarriage in place and I just cemented a strip of styrene over it to make it look structural. Once this was all done and painted, the nacelles joined pretty well to the completed wings, but needed some adjustment, especially with the recessed detail.
One element that caused me confusion were the ice (or snow) guards fitted in front of the intakes on the nacelles. The Tamiya parts are very clunky, and I would rather have not fitted them. They do seem to be fairly ubiquitous, but I convinced myself they were not visible in the photos of TA471 I had. I pushed on without adding them, and filled the locating holes, and was later delighted to discover in the ORB that they were only fitted in the wintertime – October, in fact. I thus decided I was modelling a summertime Mosquito, to make my life easier.

I had planned to work on the wings to quite an advanced stage before adding them to the fuselage. This was mainly so I could paint the inner sides of the nacelles more easily, without the fuselage in the way, and avoid dusting in the paint at the wing root, where quick-drying lacquers can give a rather gritty finish. Tamiya don’t really let you do this, as the wings are pegged to the fuselage spar late in the build. The pegs are attached to some panels on the underneath of the wing, which are not there in real life. I removed the pegs, attached the panels and eliminated the joins, and tried fitting the wings over the spars. The fit is pretty good, and I ended up adding the wings as the penultimate act of the project (the very last element was gluing on the props, because I stupidly neglected to add the polycaps in the spinner which would have given a push fit). In all honesty the final fit is good, but not brilliant, and had I more time I should have added them earlier in the build and dealt with the joint properly.


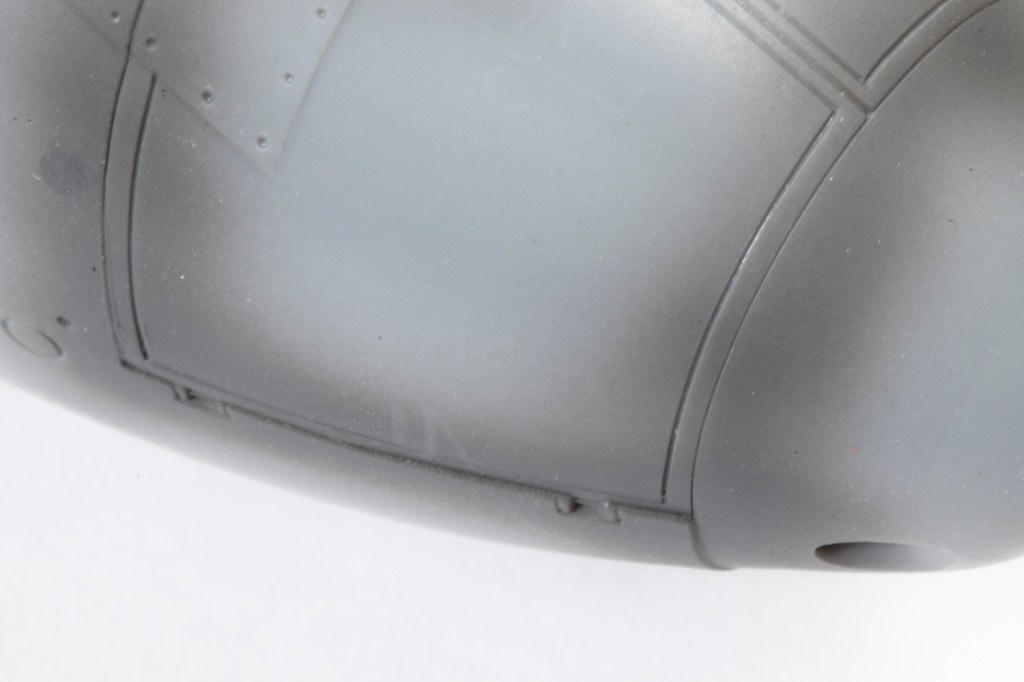
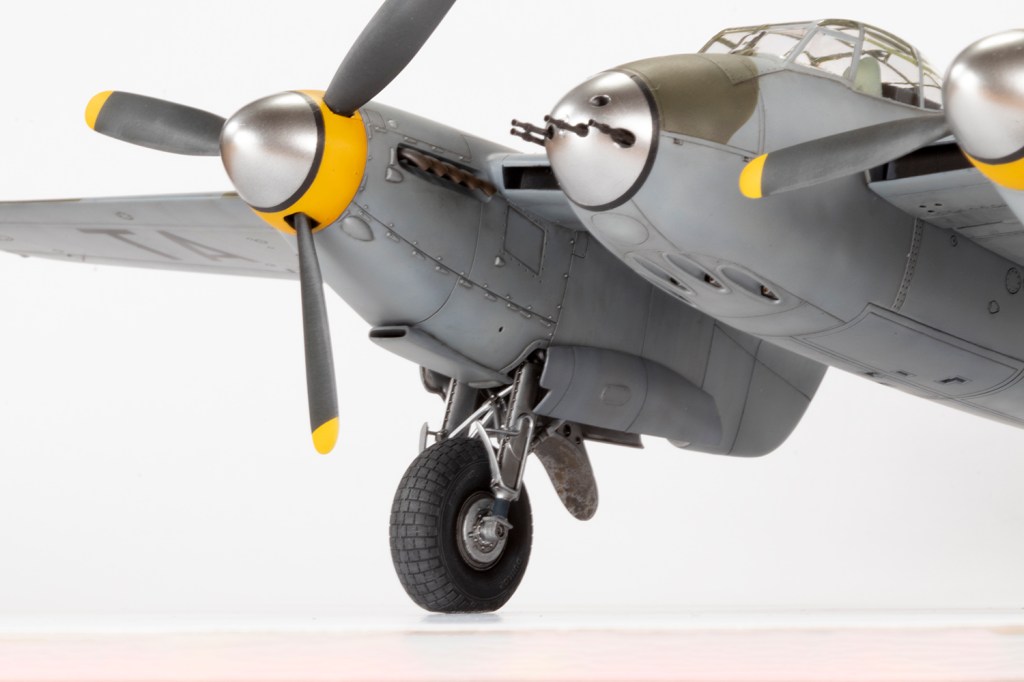
Once the fuselage was all together I found the canopy didn’t fit very well and was a little too long. I very carefully pared down the plastic until I could clamp it in place without any gaps. The fit of several of the other inserts, such as the nose gun cover and lower gun muzzles were also just a little off. I sanded them all flush, filled with black CA and VMS filler powder where necessary, and then used various scribers (mainly a Madworks 0.15mm DLC scriber) guided by Tamiya vinyl tape to reinstate the detail. It’s slow and laborious work, and often takes more than one go to get it right, but I find it necessary to get things looking right.


I had intended to get some Quickboost exhausts, and had it in my Hannants cart pending me needing something else to save on postage. Of course, by the time that happened, they’d sold out and so, apparently, had everywhere else. You snooze, you lose; I had to spend quite a long time hollowing out the ends of the kit exhausts with a scalpel blade. It’s not easy as the parts are quite hard to grab hold of, a bit bendy, and the ends are not circular. Definitely worth the squeeze, though, even if it’s not very apparent on the finished model. I painted them with Alclad Steel and then dabbed Smoke and Sepia coloured oil paints over the ends.

While working on various bits of the airframe, the undercarriage parts made slow progress. Tamiya have designed them to be handed (particularly parts D5 and D6) which I understand is wrong – I believe the undercarriage units were completely interchangeable. I knew this, then forgot this, and thus it was too late to do anything about it. The replacement Eduard wheels are very nice, but not designed in quite the way Tamiya would approve of, and thus a bit awkward to fit as you need to find a drill bit of just the right size to open the holes up – 1.7 or 1.8mm should do. I refined the mudguards slightly by drilling some lightening holes.
The Eduard tail wheel unit is wonderful, and unlike the kit provides a separate wheel and fork. The fit is excellent (in fact, my tail wheel is not glued in place, as you may see in some of the images where it rotated), and this also avoids having to deal with the horrible longitudinal seam the kit parts have.
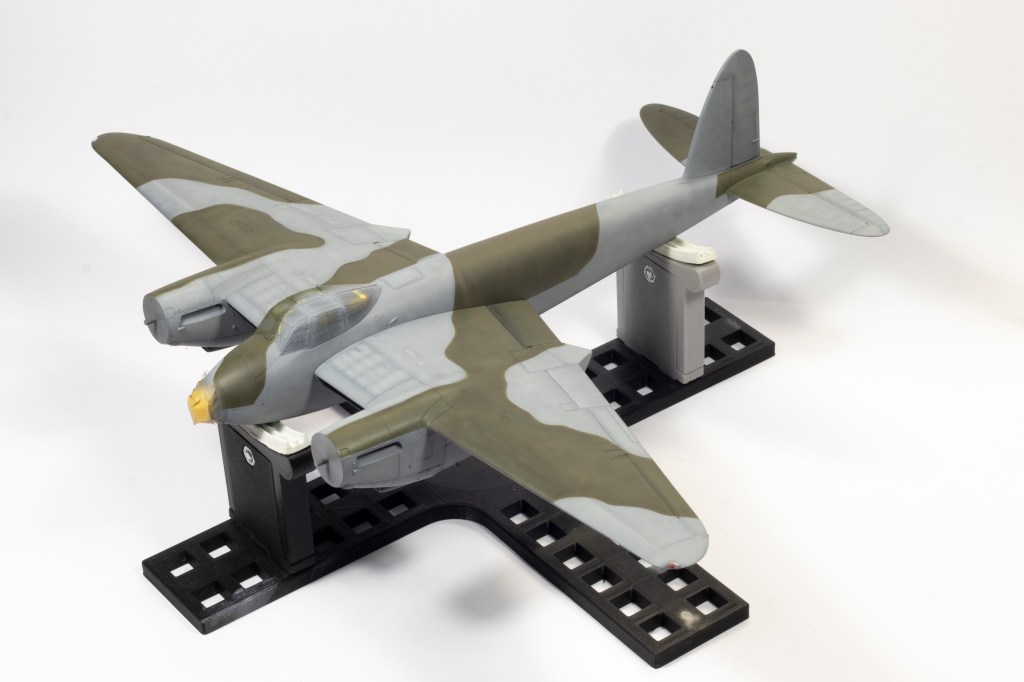
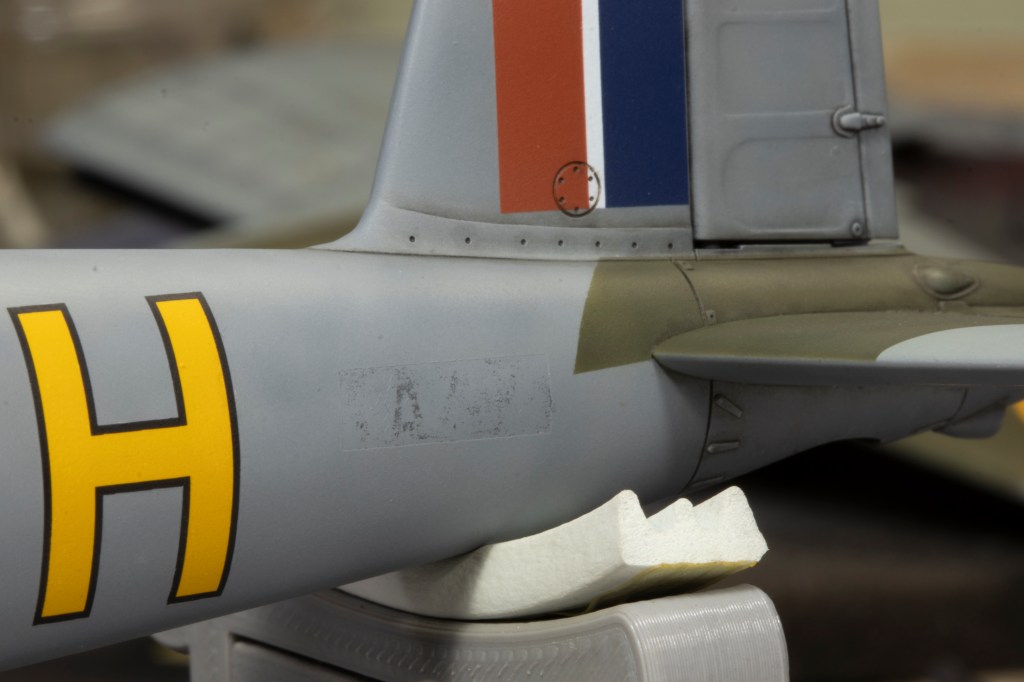
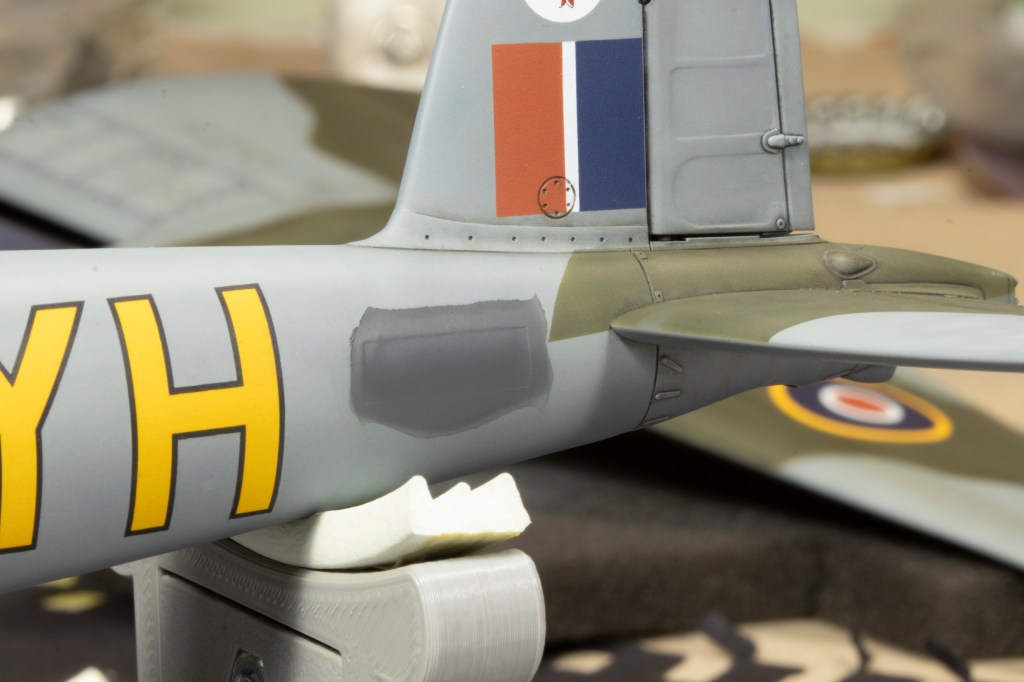
With separate fuselage and wings we rushed towards paint. I find Mosquito fighter schemes really rather boring, and very much liked the yellow spinner bands and silver noses on this aircraft. Initially I cut masks for the black striping separating the silver by tracing the decals Kits At War provide. This didn’t work too well as I struggled to get a truly parallel cut. In the end I reverted to the decals, but they didn’t conform very well and wrinkled a lot. This is definitely a weak area of the model.
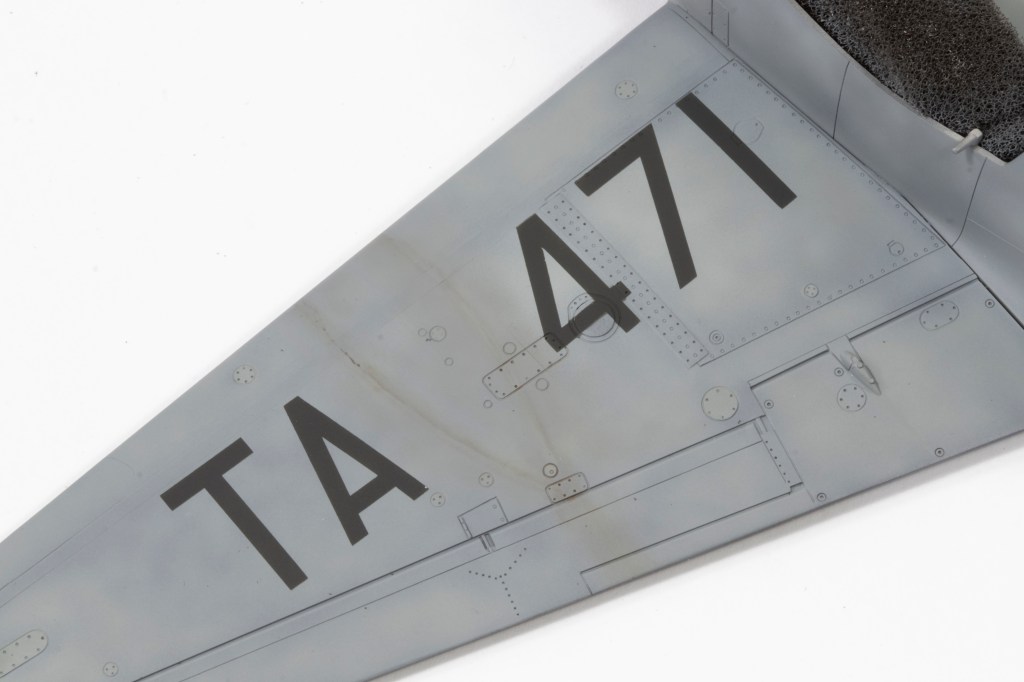
The decals had other problems. No underwing serials were provided, so I designed these in Inkscape (a free vector graphics program) and cut stencils using a Silhouette cutter. I find that I can get a better cut if I extend each line that is cut into the area of the mask that will be removed, as this tends to produce straighter lines. As an experiment, I also cut the fuselage serials as well.

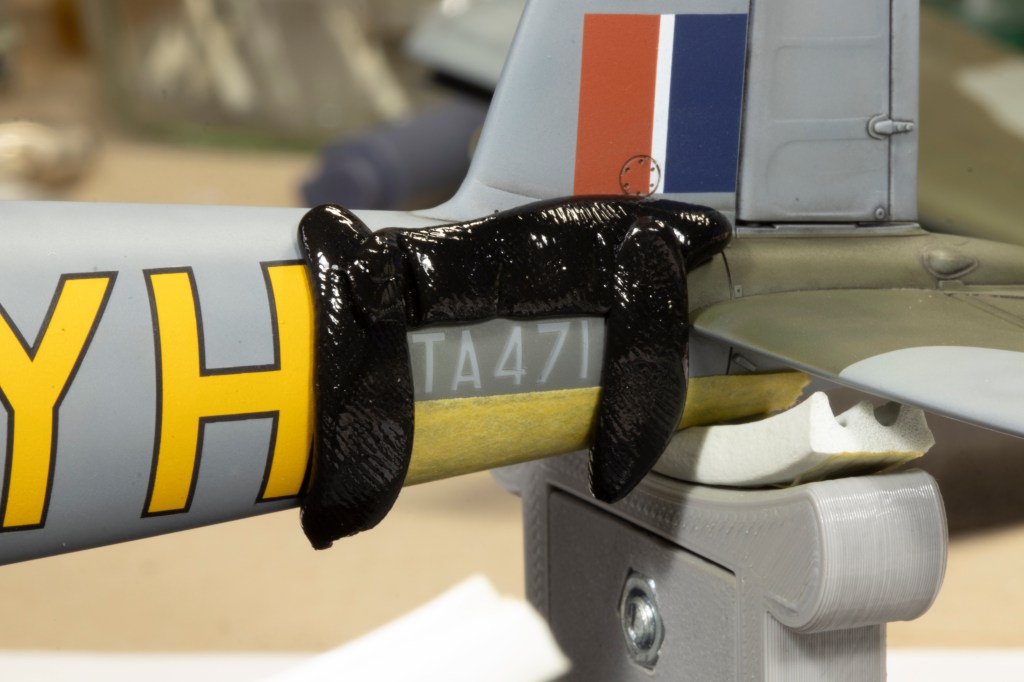
I primed the model in a mix of black and white Mr Finishing Surfacer 1500 to get a reasonably dark grey. Over this was mottled Mr Color 335 Medium Sea Grey, which was in turn post-shaded with Tamiya XF-83 and lightened and darkened versions. I was after a high-contrast, slightly cartoonish finish. The serials were applied under the wing using Tamiya XF-69 NATO Black, making sure to leave space for where the slipper tanks would fit. These were made up from the kit parts to get the locations right, and lightly outlined to show wear from where they would be fitted.

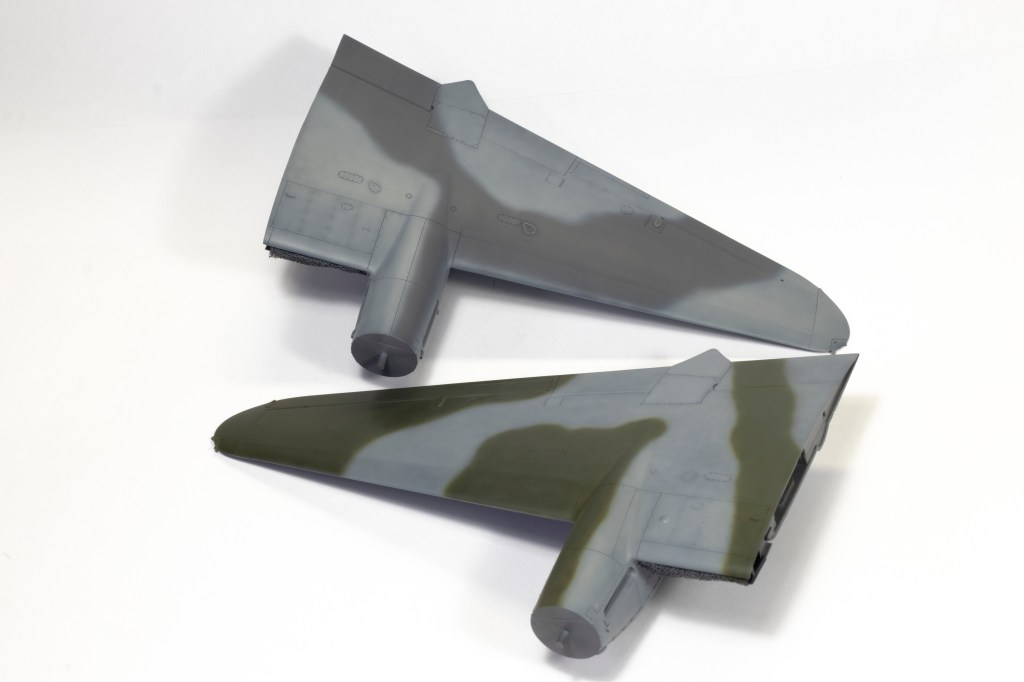


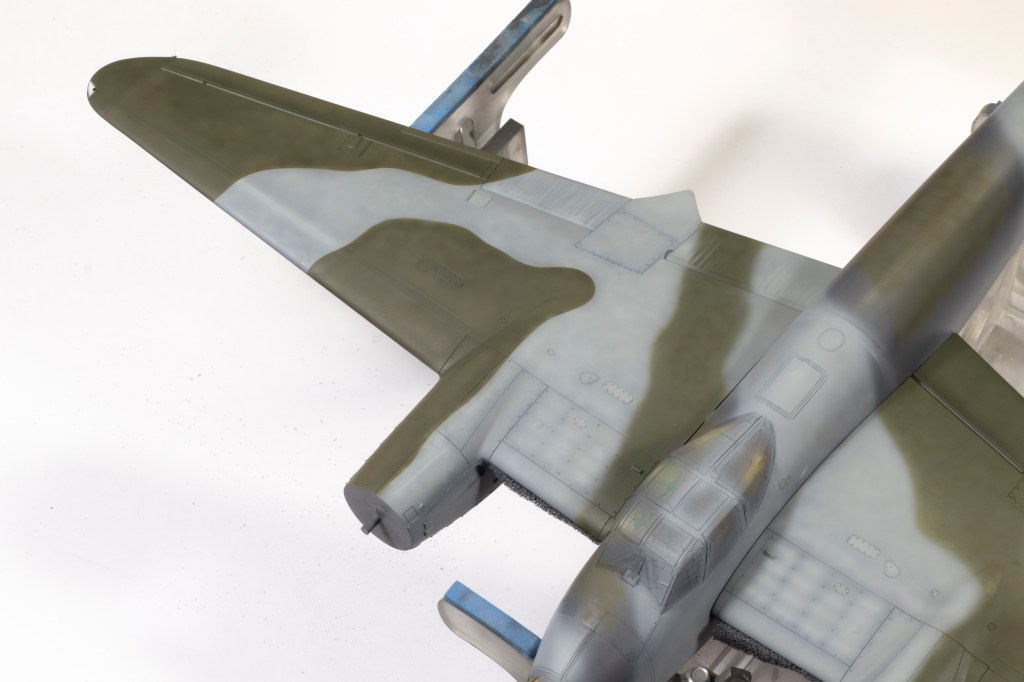
The green was applied in the same manner, using Mr Color 330 Dark Green and Tamiya XF-81. I think the demarcation should be a tight feather, but preferred to go for a hard pattern, and masked off the grey with Tamiya tape for curves. I couldn’t quite get the pattern I wanted with this, and so some of the perturbations are a little low in amplitude and frequency, but it was close enough, and I was on a deadline! Rather than trying to apply all the green in one go, I progressed across the wings and fuselage patch by patch, and dry-fitted the wings in place to try and get the transition across the wing roots accurate.


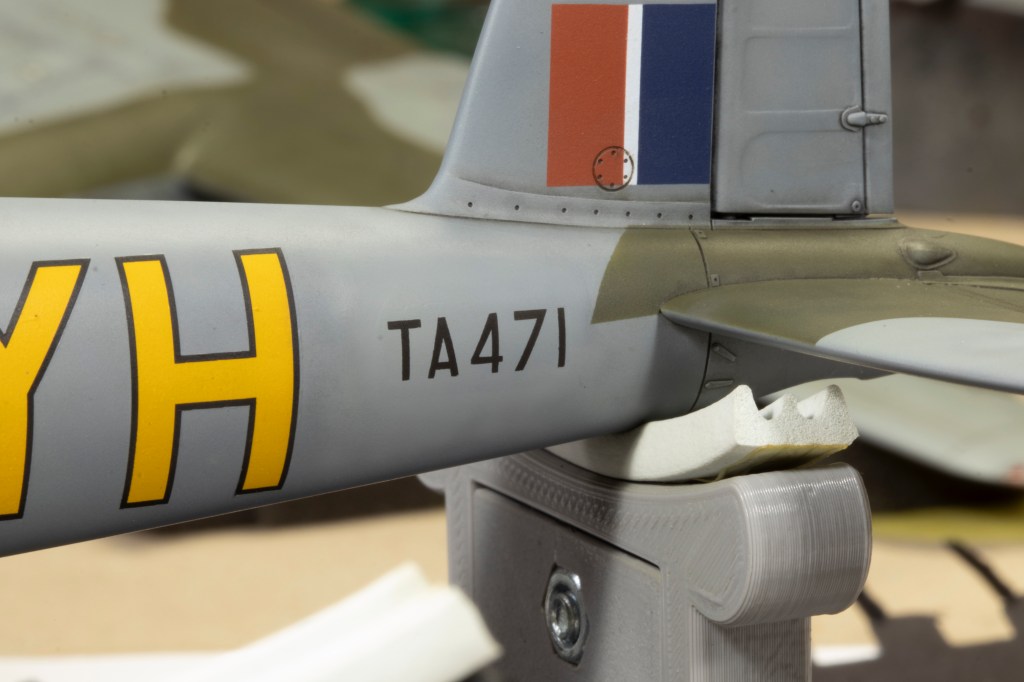
I then returned to the decals. The fin flashes were out of register, and thus replaced with examples from Aeromaster I had lying around. Similarly, I replaced the roundels with some from an old generic Finescale sheet, printed by Cartograf. Surprisingly, these are slightly out of register. The blues don’t match between the tail flash and the roundels, but no time to worry about that. I think the tail crest is not proportioned quite right, and sadly the decals don’t cater for the long raised rib on the starboard fuselage side, so the bottom of the legs of the ‘H’s don’t line up. Most annoying, however, was the silvering.
Despite repeated stabbing with a scalpel blade and applications of Daco Red, UMP Extra Strong and Mr Mark Softer decal solvents, the silvering generally persisted. The worst example was the port fuselage serial, which I decided I would try and remove and paint. The decal practically fell off when touched with some very de-tacked Tamiya tape – a sure sign the adhesive hadn’t aged well since 2003 when the decals were printed – and I removed the remaining traces with Infini 1500 grit sanding sponge. The resulting dip in the paint needs filling with more primer, and then sanding flush before respraying the grey and applying the serial. It actually looked really good, and I should have done the same on the other side. Other areas of silvering were much smaller and continue to blight the finished model…


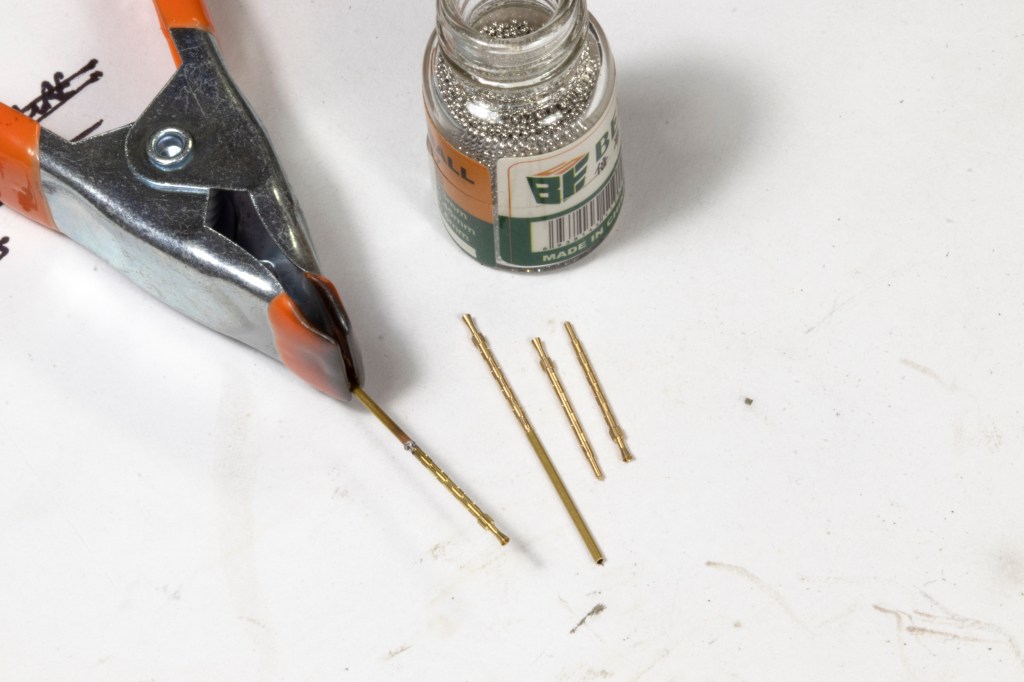
Eventually all the markings were done, and covered over with a generous layer of VMS Satin. I was on the final stretch. Adding the nose guns was stressful because I’d not added the internal structure, assuming I was leaving them out. There was thus nothing for them to join to, so I soldered lengths of 0.6mm brass tube to the rear ends. Even with this, there’s not much holding them in there, but the Master barrels are just peerless.
I built up the wings in their entirety – undercarriage units and doors all in place – before sliding them onto the fuselage spars and fixing with superglue. None of the wheels had been glued in place, so they could be rotated so the flats were orientated correctly.
And with the addition of the props, it was done. I had thought I’d breeze through this project within the six week timescale, but actually it was a push. The kit was more involved than I’d anticipated and I had to cut quite a few corners – the unfixed silvered decals, the wonky black stripes, the very bright markings not really integrated into the finish, and so on – but in the end I’m quite pleased with the effect and it’s another kit built from the stash.
Now what I’d really like are some new kits of late mark post-war night fighter, reconnaissance and bomber Mosquitoes…anyone?


Year bought: 2005 (Squadron)
Year built: 2024 (New Addington, Croydon)
Back to home.
