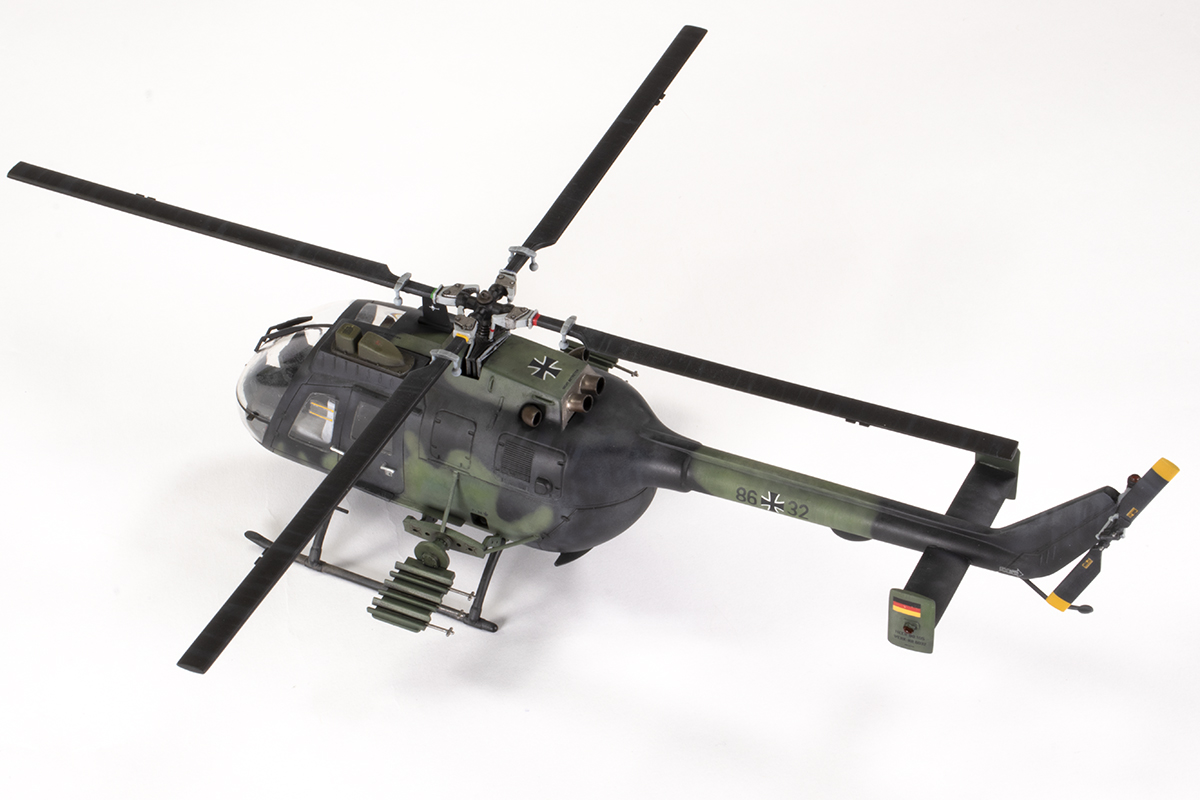
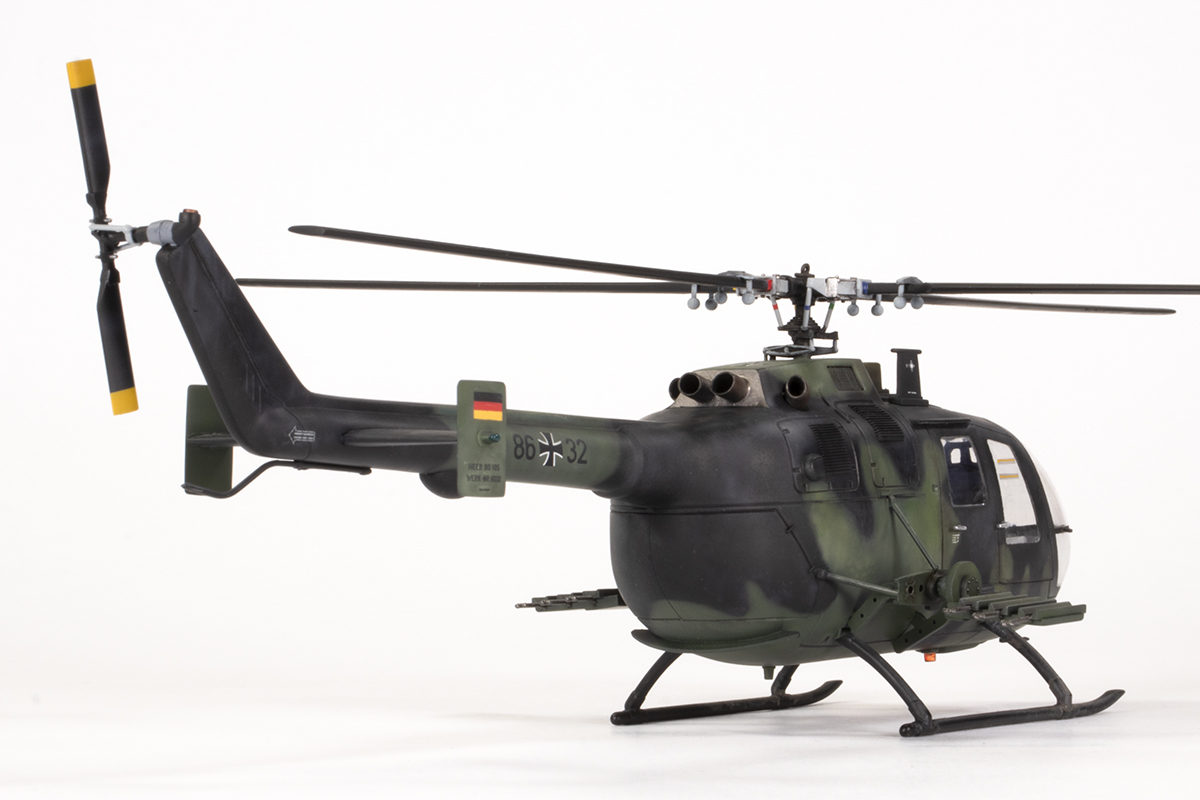
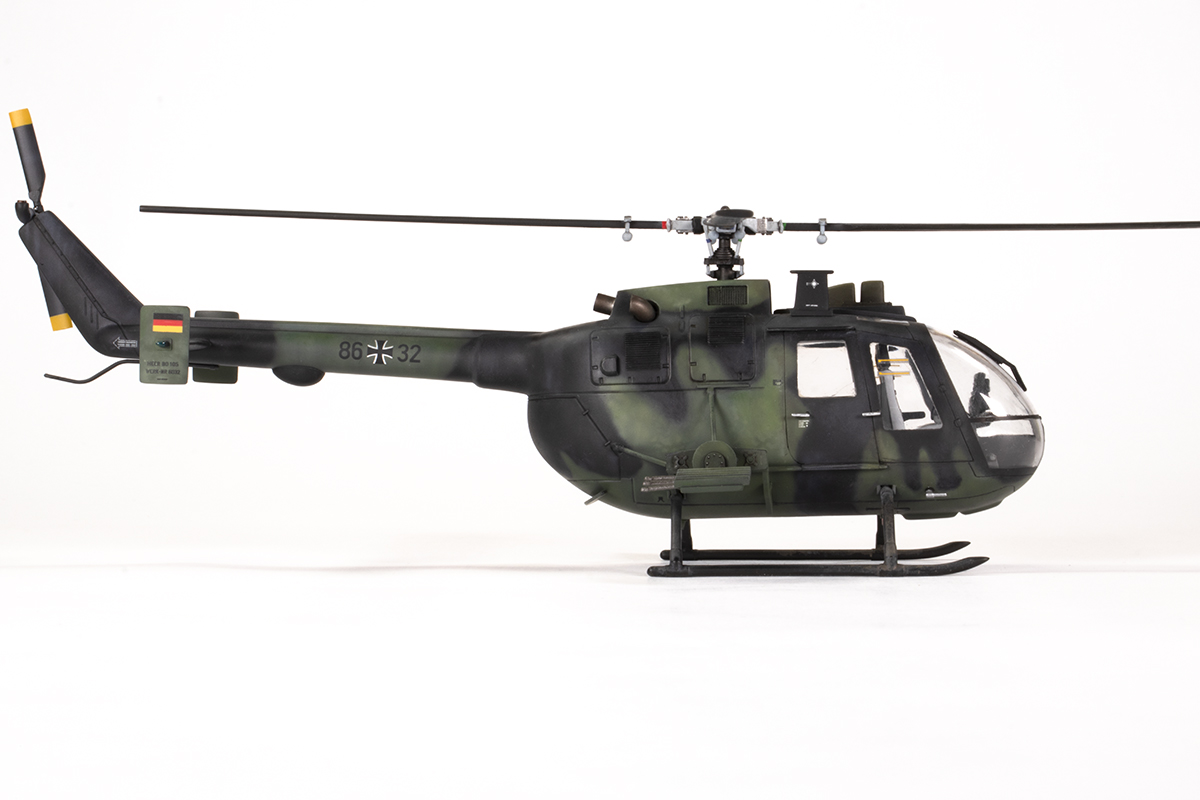
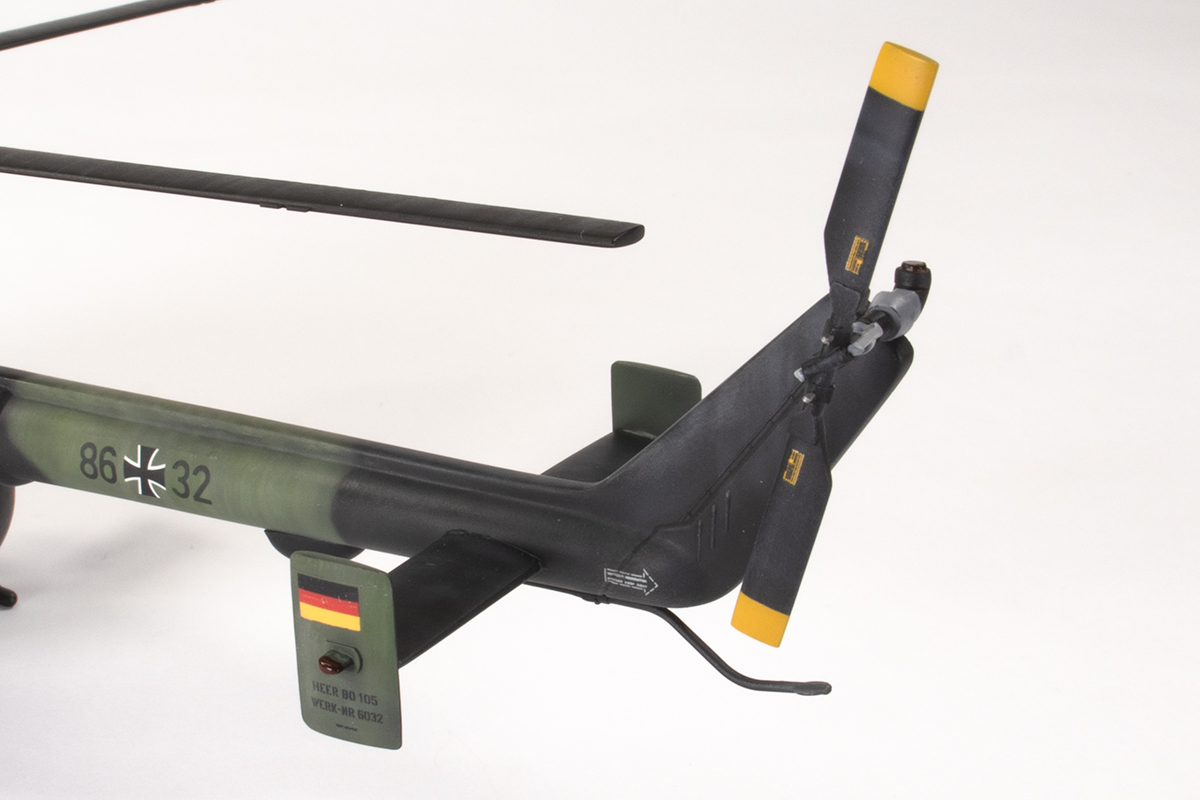
with DF HeloStuff resin corrected exhausts
HFlgRgt 16, German Army, Germany

Impulse buys are rarely a good investment. As I survey my kit-lined loft, I look at a few of them and think, ‘Why did I buy that?’ And that was definitely the case for the Revell 1/48 Bo105 I bought from Antics in Guildford on a whim back in 2006: a model I thought would be consigned to the never-will-get-built pile.
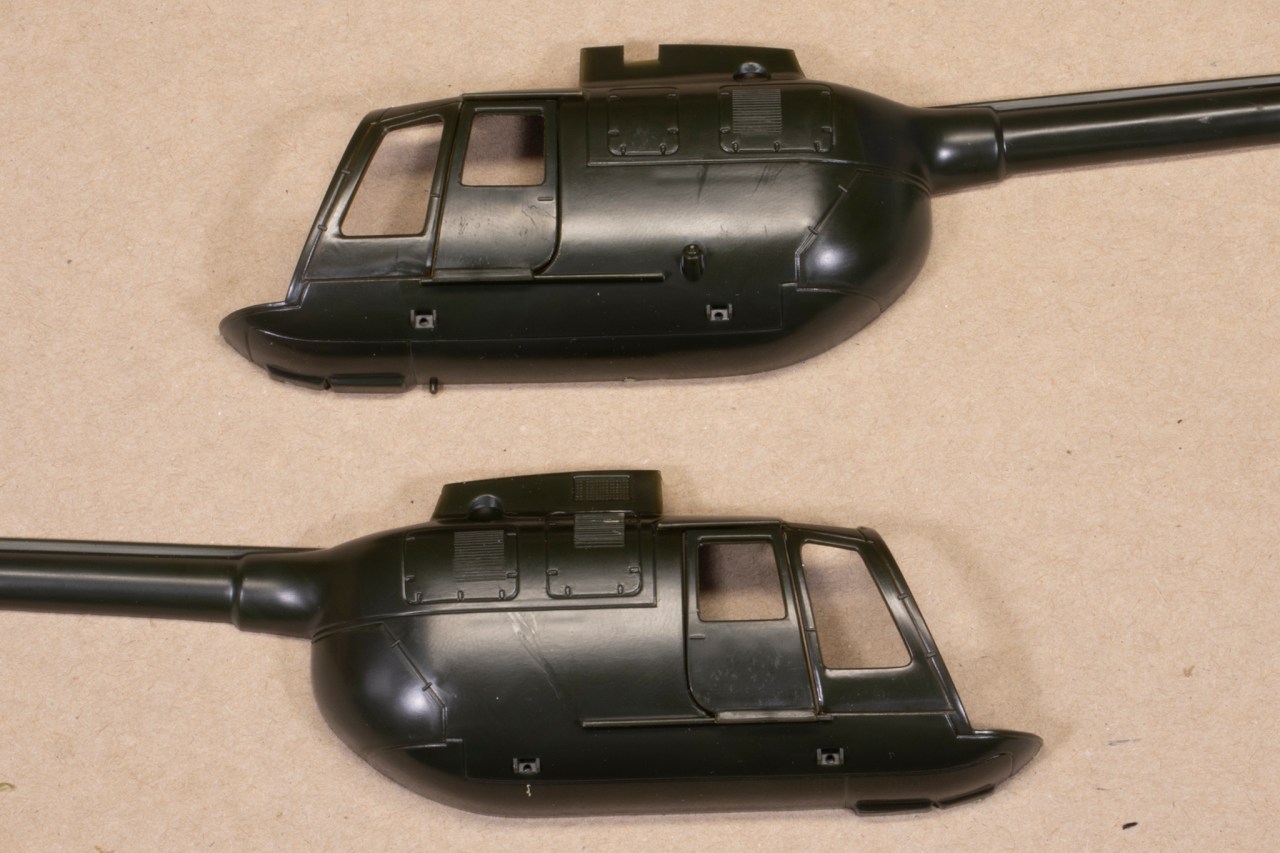
This particular kit was rescued from obscurity by the advent of a Bundeswehr Group Build on the Scale Modelers Critique Group on Facebook. Whilst boxed by Revell in 2006, it is, in fact, mostly a 1981 moulding from Esci moulded in dark green with some very matt and slightly out of register decals. The plastic is smooth with minimal flash and recessed panel lines, although they are somewhat wide. Back when it was first released I imagine the detail was quite impressive, but as you’d expect, this is not the case in 2021.
The Bo105 is a highly manoeuvrable twin engine helicopter developed in West Germany that entered service in 1970. It saw service with the German Army in two main variants, the armed PAH and unarmed VBH. Ostensibly both of these variants can be built from the kit in their early guises.
Somewhat surprisingly for a 40 year old mainstream kit, it has been completely shunned by the aftermarket world, which is a shame because the model needs it. The only additional set I could find were some updated 3D printed resin exhausts by DF HeloStuff, which I sourced direct from their website. Other than that, all modifications would have to be scratch built.
Quite a lot of such modifications are necessary because the kit is pretty inaccurate, even for an early PAH-1. I am not an expert and had to base all of my judgments on looking at lots of photos online, but the following is what was apparent to me.
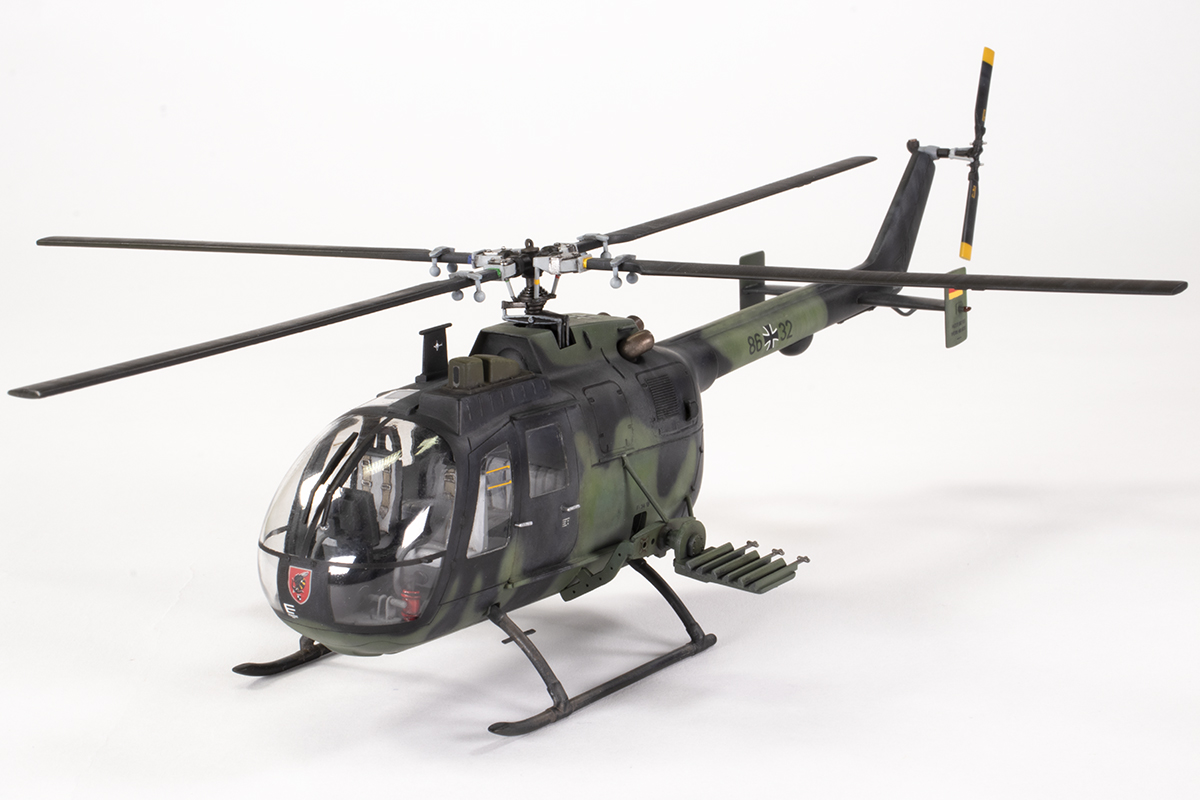
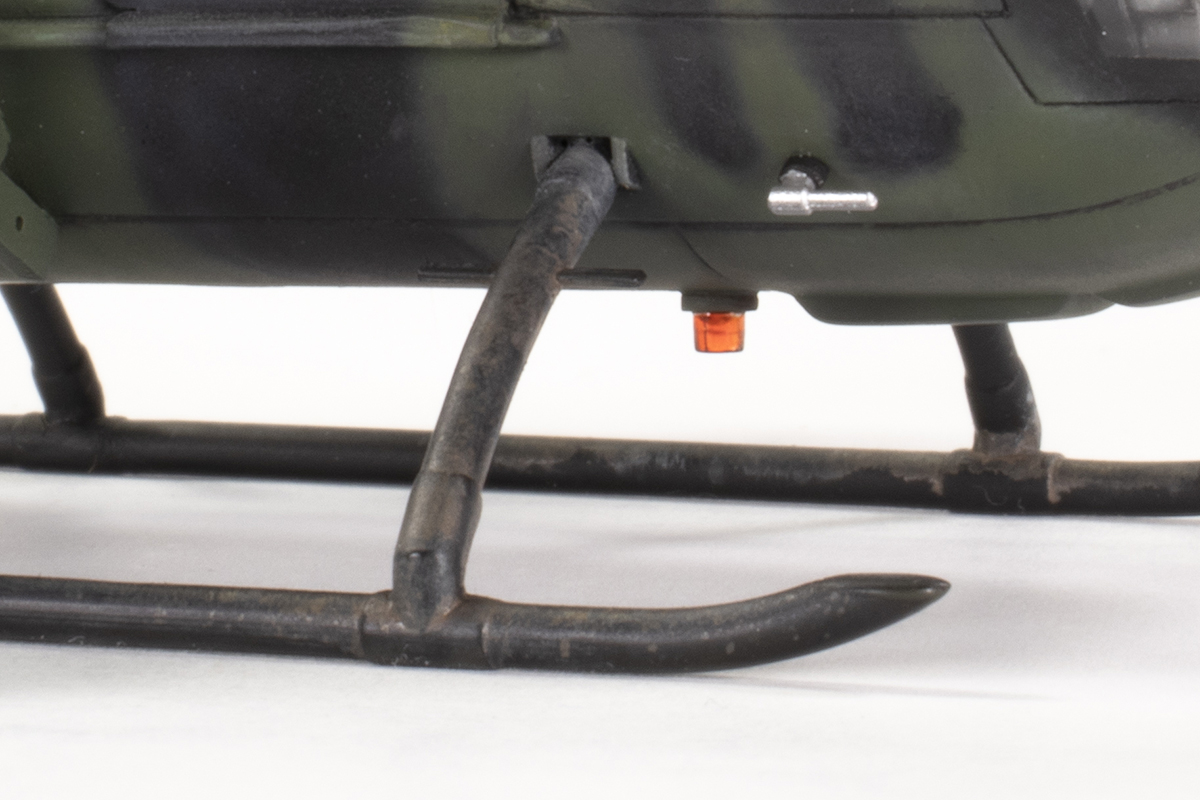
The kit best represents an early PAH-1 without the FOD guard over the engine intake area. Later PAH-1s also acquired some sort of sensor on each side of the fuselage above the pilots and a baffle below the grille on the starboard side of the rotor housing. The upgraded PAH-1A1 variant had the staggered TOW tubes rather than the flat configuration in the kit. Also missing from the kit are the distinctive ‘balls’ that hang from each rotor blade, although some very old photos don’t show these, so perhaps they were also a slightly later addition. Careful comparison of the kit fuselage with photos shows the recessed fuselage detail is mostly wrong (it seems accurate for the civil version) and that Revell omitted various hand holds and lumps and bumps around the airframe, as well as the housing for the red light on top of the tail. This light, and the one provided for underneath the fuselage, are far, far too small as moulded. The panelling under the nose is completely the wrong shape and does not feature the retractable light; the markings schematic in the instructions shows what this should look like. Lastly, the fuel filling point is wrong for this version and should be recessed into the fuselage.
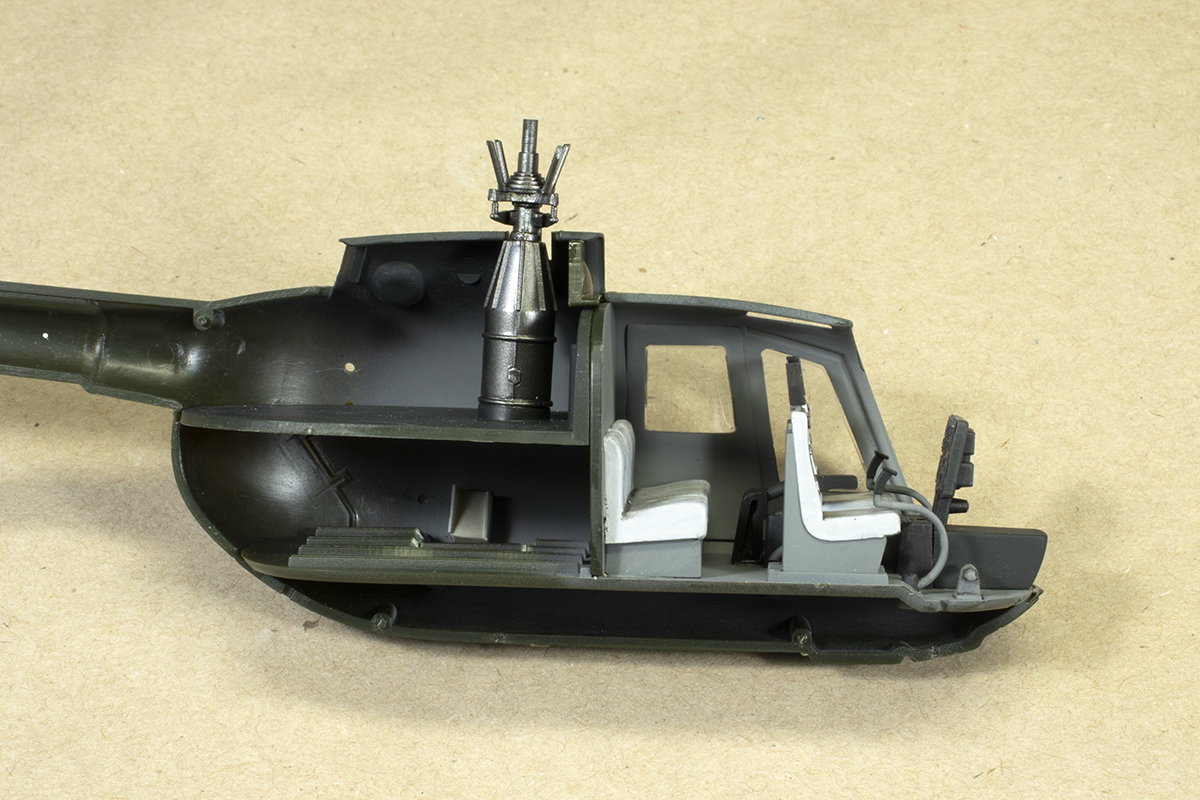
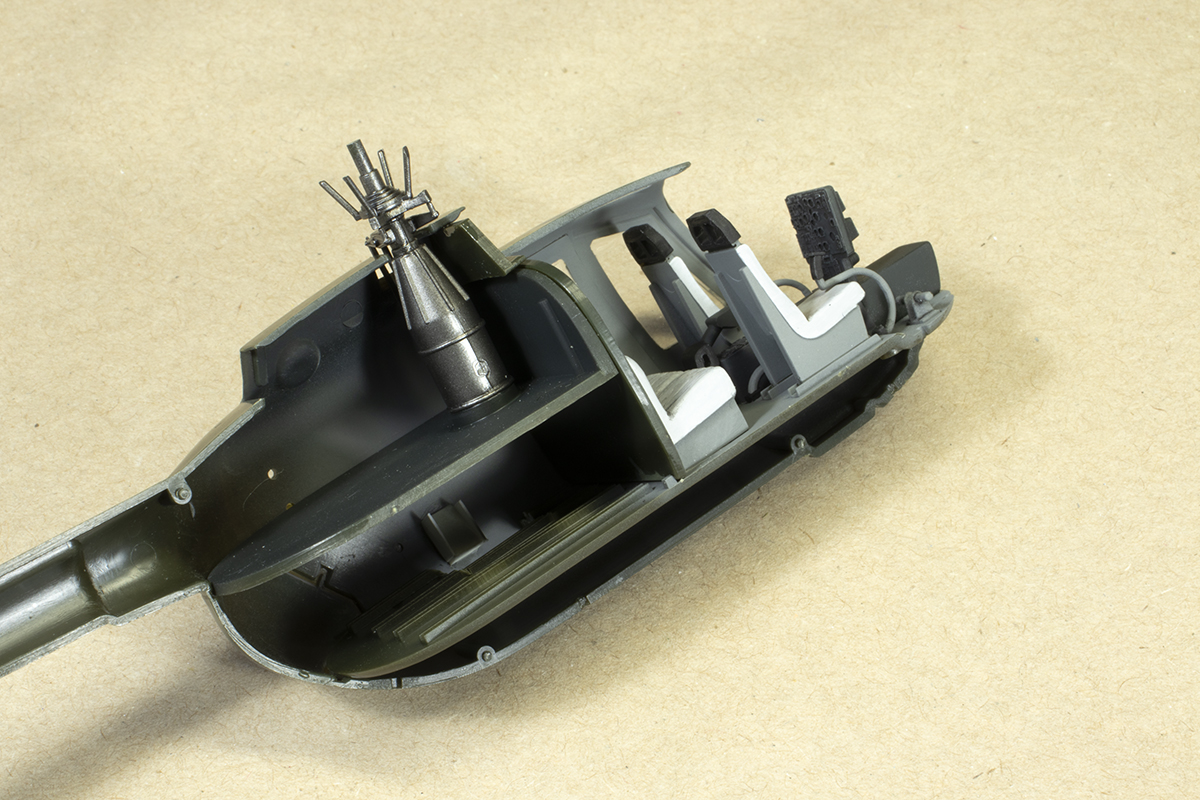
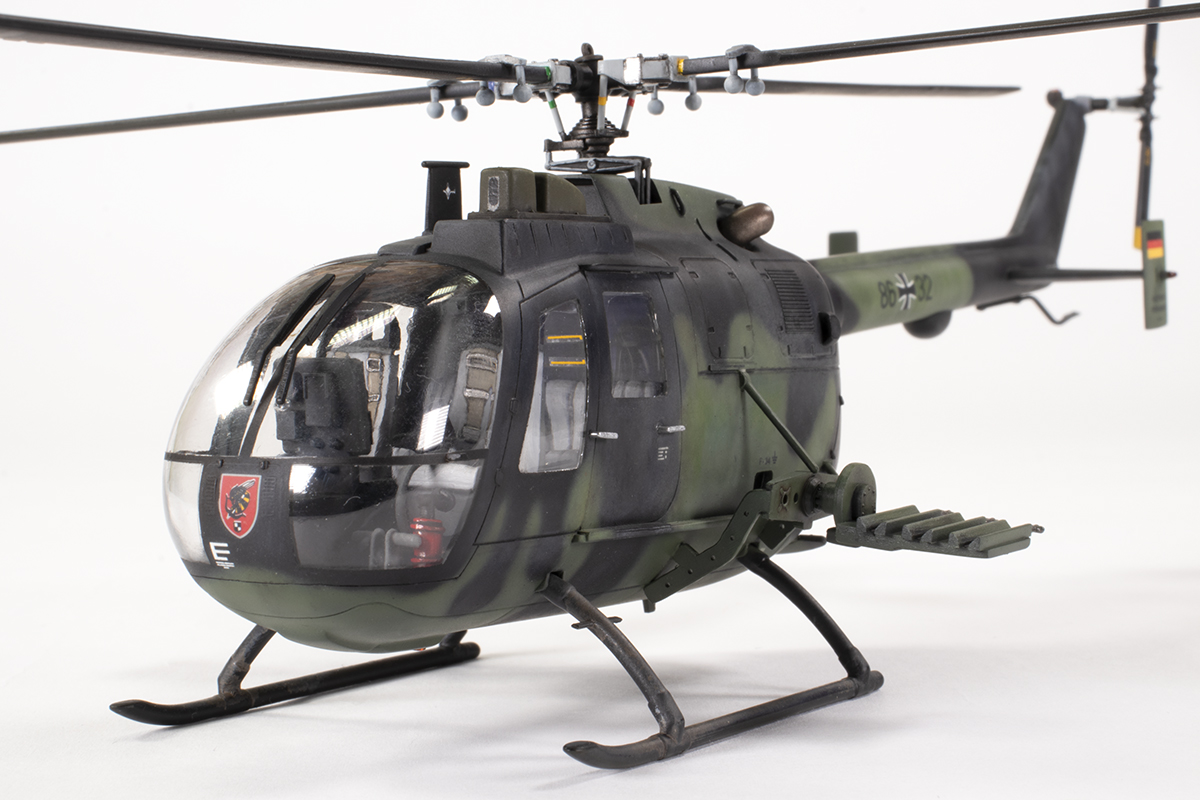
The provided interior is basic and I did little to improve it. The seats have incorrectly shaped headrests and I modified them to be more accurate. Sadly, I was not paying attention to my references, and my improvement is little better than the original as there ought to be three holes, not two. There should be two prominent fire extinguishers, one by each set of pedals, and these are highly visible in photos. Revell provide a single extinguisher of a different shape; I did not add the other. The instrument panels are all flat and I used some old Reheat generic photo-etched detail set to make the instrumentation more 3D. German Bo105s also have quite a distinctive instrument panel shroud, but again this was not provided and I did not recreate it. In short, the interior is rather inaccurate.


At the same time as fiddling about with the inside, I explored the fit of the windows. This was not encouraging, with large gaps in places. Modelling the side doors open would help a little here, but I like my aircraft all buttoned up and was set on everything being closed. Filling gaps around clear parts in situations like these is always a challenge, and this time I experimented with some clear UV-setting resin I bought on Amazon. This works okay, but the resin is a little soft and you can tell where it and the clear plastic meet quite easily.


A further wrinkle was the the doors did not fit well into their apertures. I skinned the edges with some plastic strip and sanded this down until the fit was better. Once I was happy enough, I glued the doors in place. I also removed the lower sills as I thought they were overscale. Next came sanding it all down.


Wet sanding using Infini sanding sticks, sponges and films from 400 grit up to 2500 grit levelled everything out across the windows and doors. In some places, further filling with superglue was required as a few gaps became apparent. Once I was done, I moved to applying Tamiya polishing compounds with a cotton buffing wheel in my Proxxon motortool. This is extremely messy and I usually don a big bin bag and goggles to prevent me getting covered in polish.


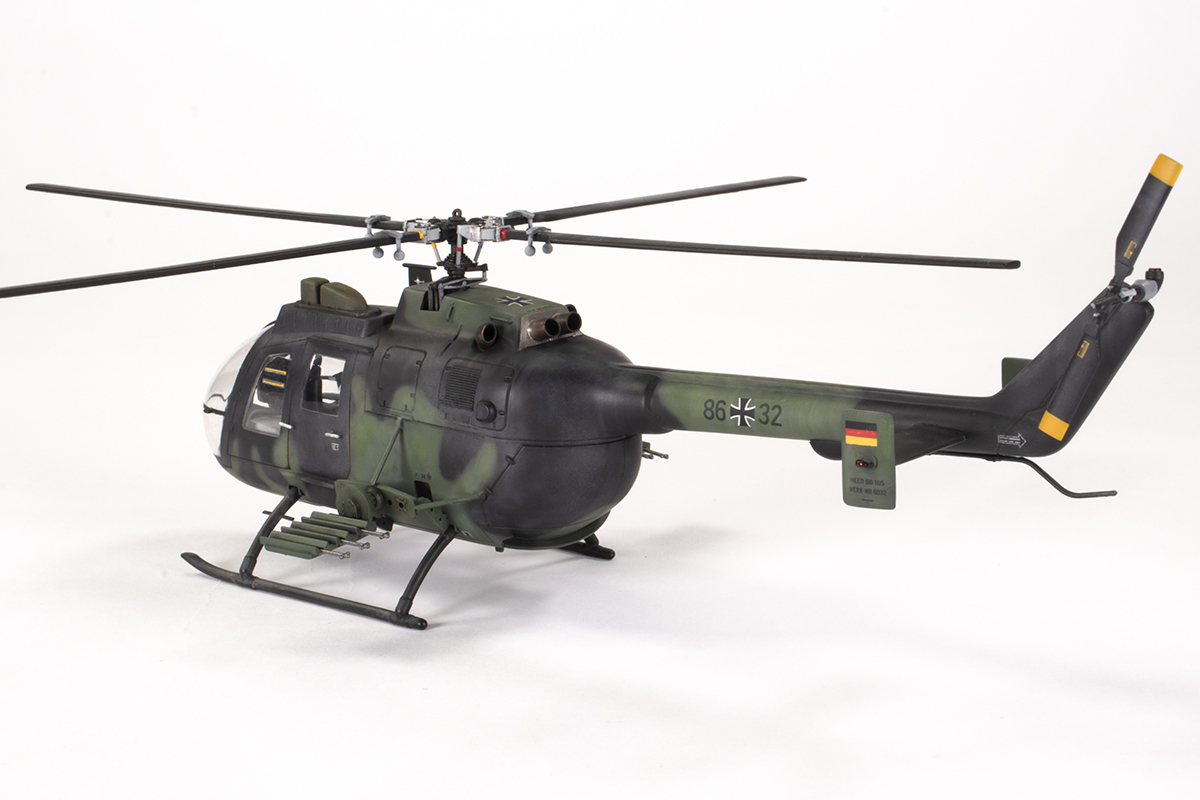
Before joining the fuselage halves, I needed to address the fuel filling point. On the kit this is moulded as a protrusion, which is accurate for some versions of the Bo105. However, German Army machines had this mounted in a recess above the rear skid mount. My usual philosophy when fixing stuff like this is to aim for ‘close enough’. It’s all done by eye and a hope it will turn out looking approximately right. In this case, I cut off the protrusion, scribed out a new panel using a needle and template, and then cut through it to make a hole. From the inside I boxed in the recess using plastic card and made a new fuel filler cap from a punched disc of plastic card with a spare photo-etched part on the top.


With that done, I could consider closing everything up. Revell have you add some detail and decals to the lower part of the rotor mast, which is completely pointless as it’s totally invisible on the finished article. It’s always worth looking out for stuff like this which otherwise would waste precious time! Now that the windows were all fitted, filled, polished inside and out, and the interior completed, I glued the fuselage halves together with superglue. My favourite brand is Everbuild High Viscosity Superglue (available on Amazon) which is thick and does not cure particularly hard, and so makes sanding it out much easier.

The fit of the fuselage halves was rather good. I’m sure that when this kit was released it must have been pretty state of the art, and the basic fit and detail is more than acceptable for such an old product. However, it was at this point I began to consider the various omissions in the kit.
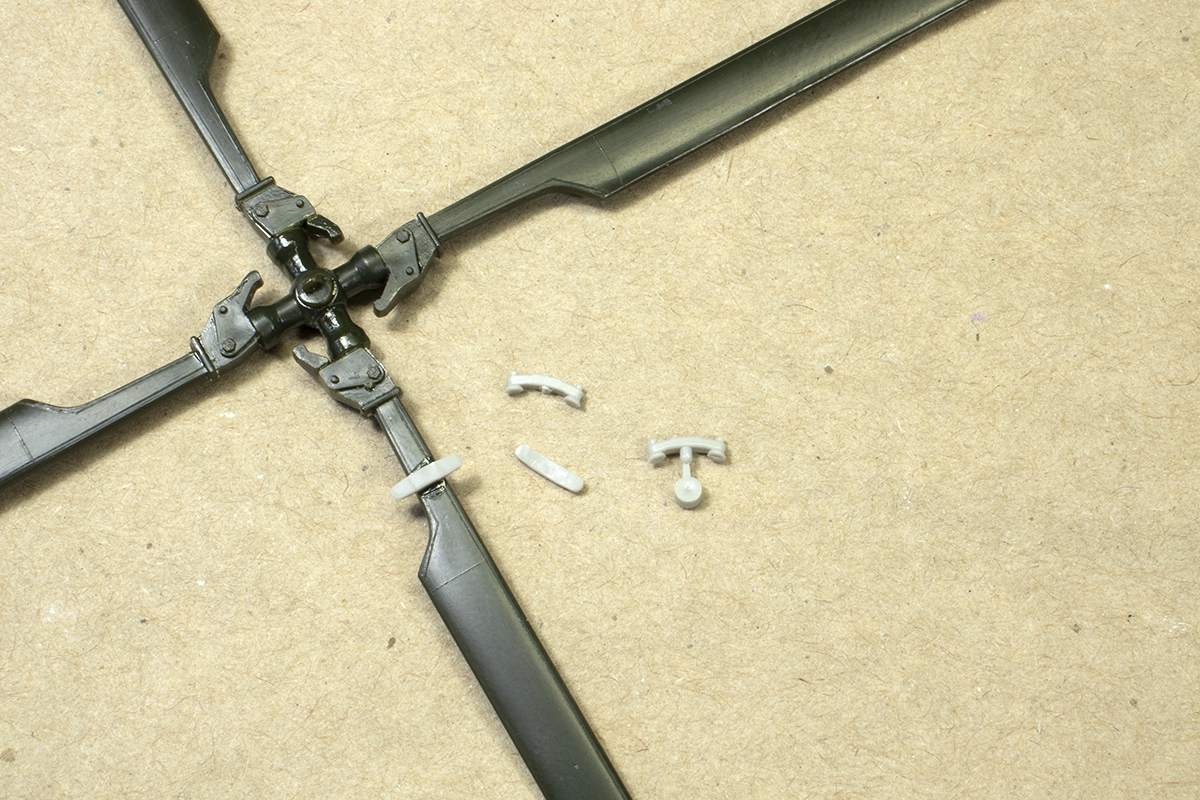
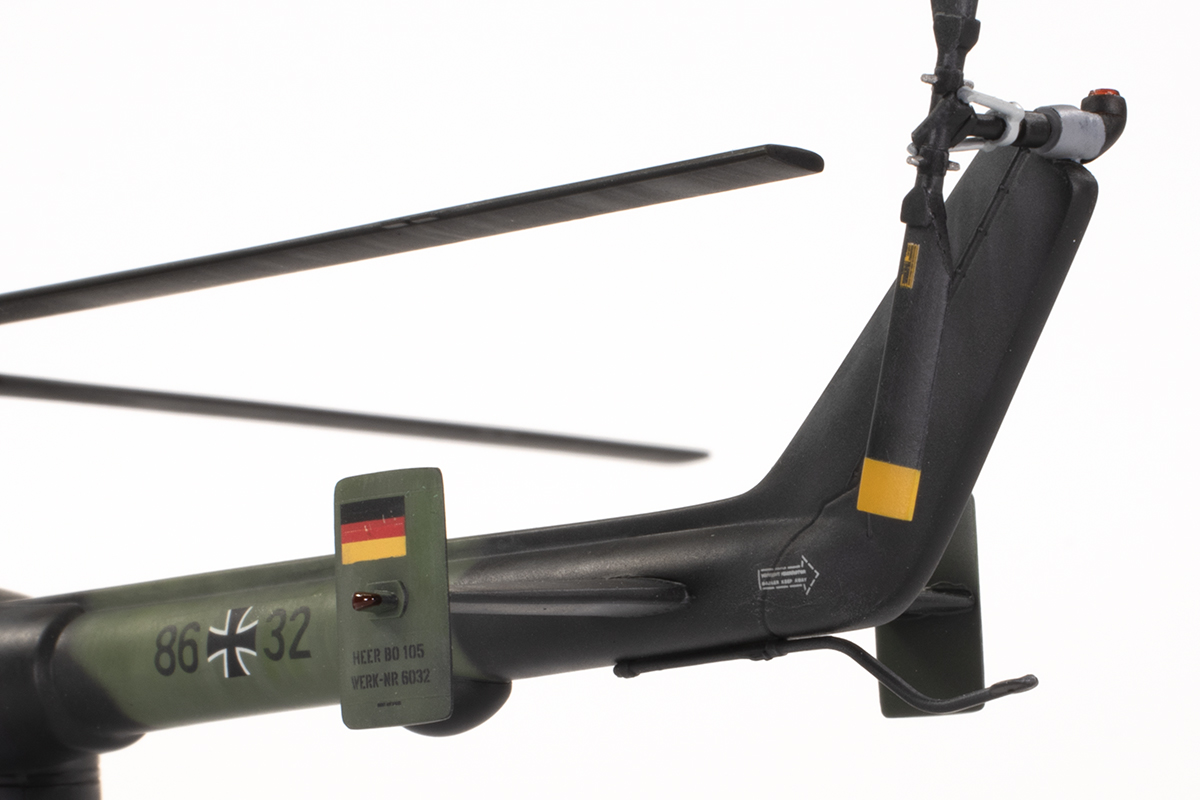
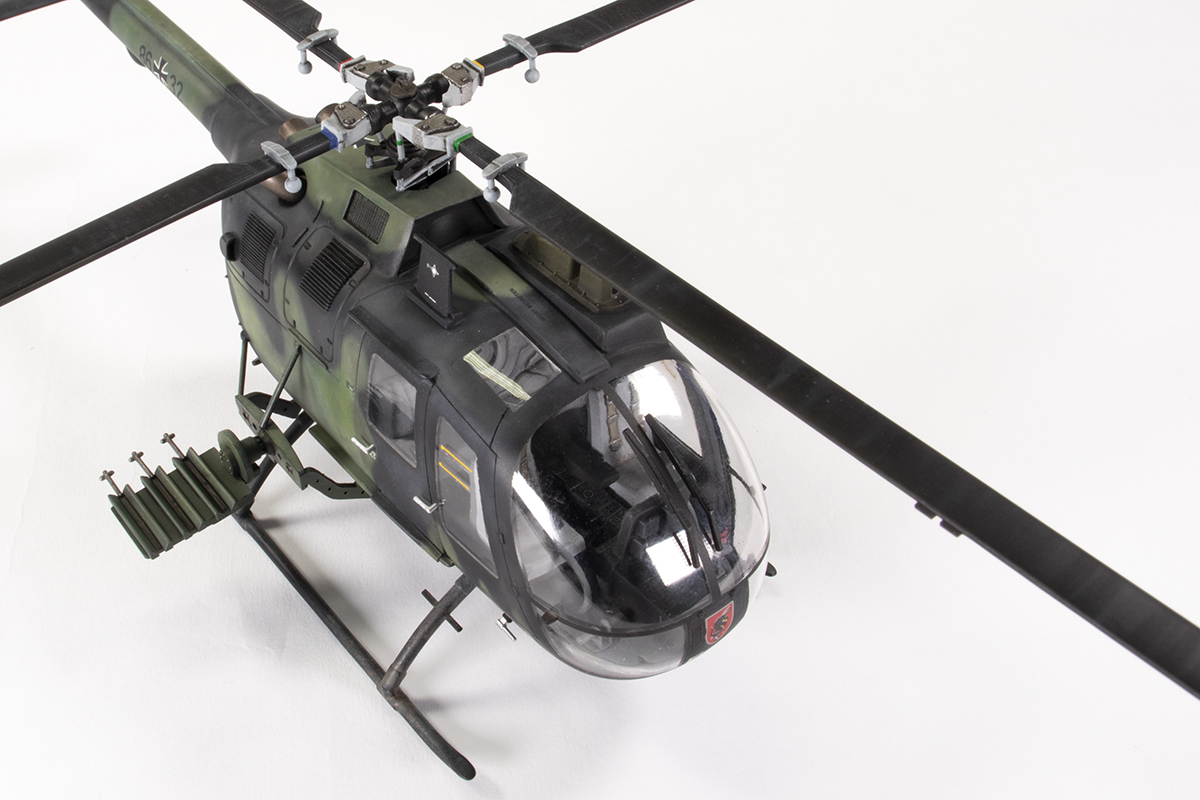
First up were the balls that hang from the rotor blades. A rummage through one of my spares boxes turned up several triplets of spheres that looked about the right size. I’ve no idea where these came from, although I suspect it was MiG of some kind. Eight of these balls were drilled to accept some plastic rod. The mounts were adapted from some sway braces (also found in the spares box). The shapes are not right, and the rod is a bit thick, but it gives a good impression of this obvious feature of the real thing.

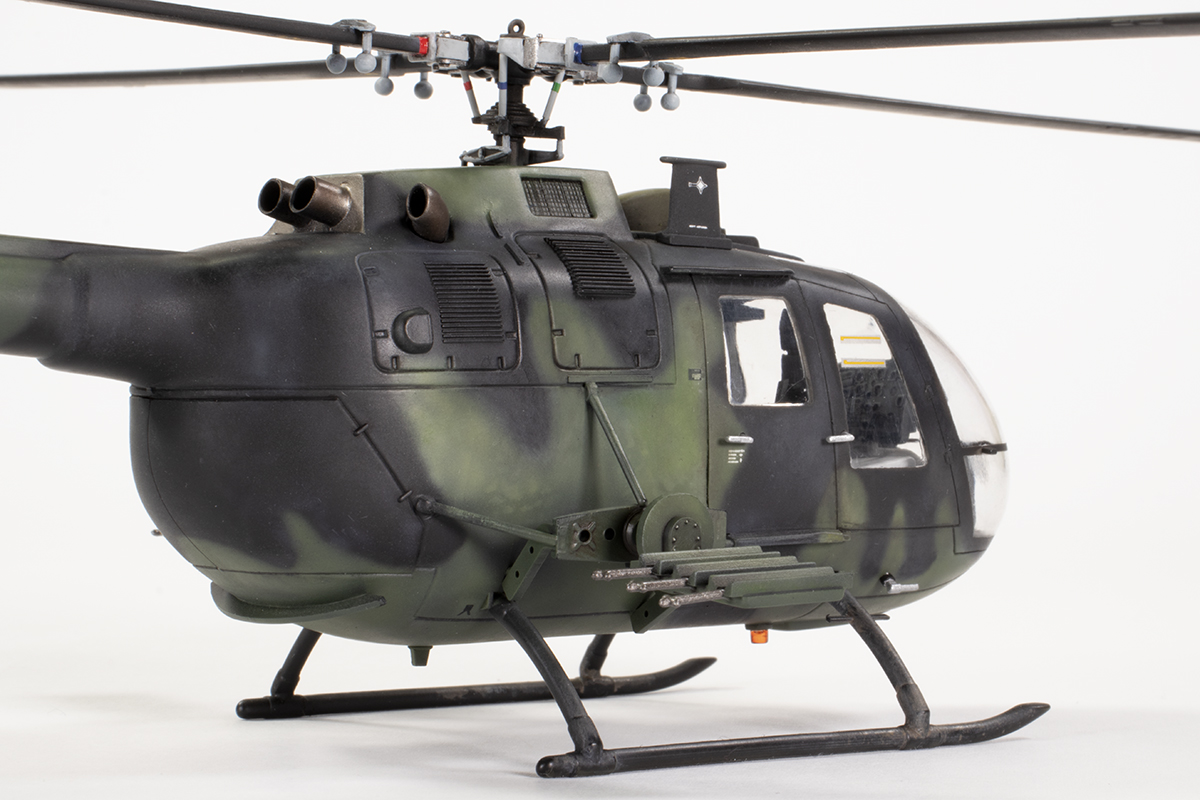
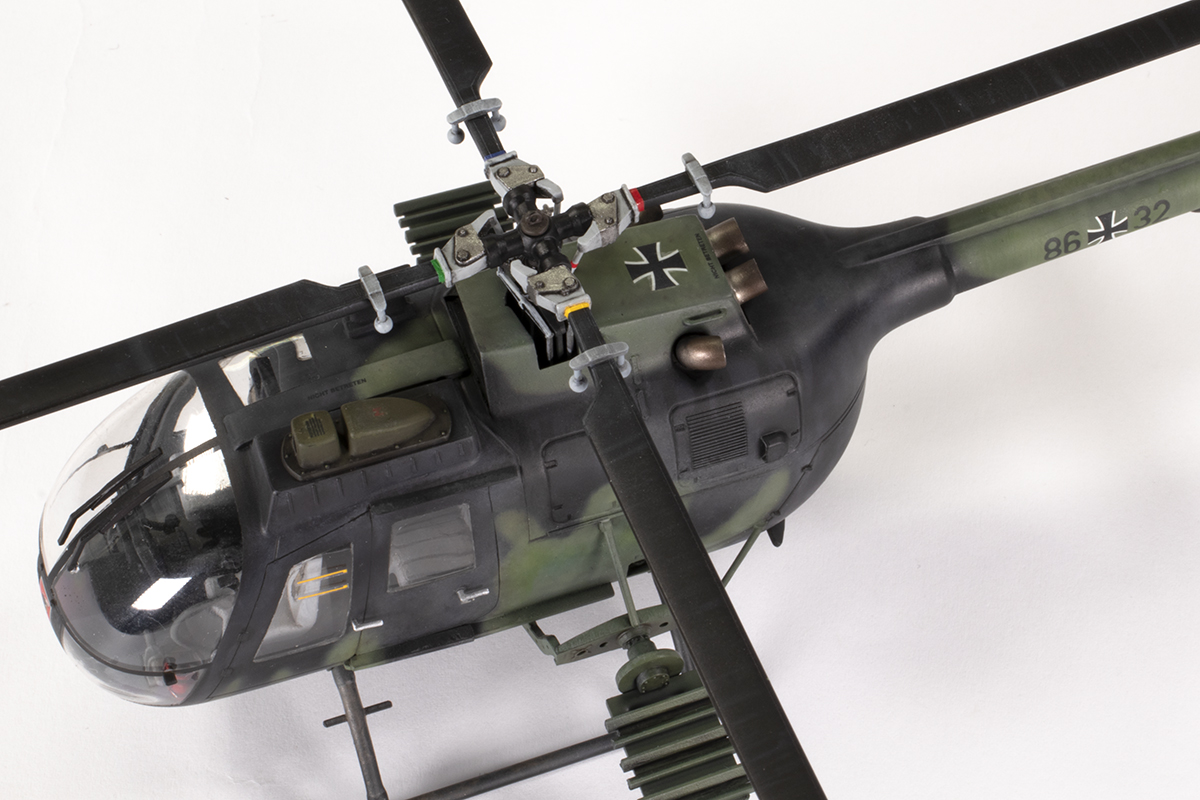
Various issues with the main airframe were dealt with next. The door outlines needed rescribing, and this was completed with a needle. The grab handles on the left side were added from brass wire (I forgot to add a third, which should be near the sliding door) and some other features from plastic card. The replacement exhausts from DF HeloStuff are moulded on a panel which is woefully undersized, and so I had to add a blanking piece from card.


I suspect there’s an error with the rear resin exhausts and they are too small in general. The ones on the side of the fuselage, however, looked fine. All of the exhaust parts exhibited some fine striations from the 3D printing process which I sanded out with some 600 grit paper. The parts are very thin, but the resin seemed quite strong and able to withstand my rather brutal clean up. Holes had to be drilled into the fuselage sides to accept the larger exhausts. While they were a pain to clean up, and the rear ones are too small, I do think this aftermarket upgrade was worth it.


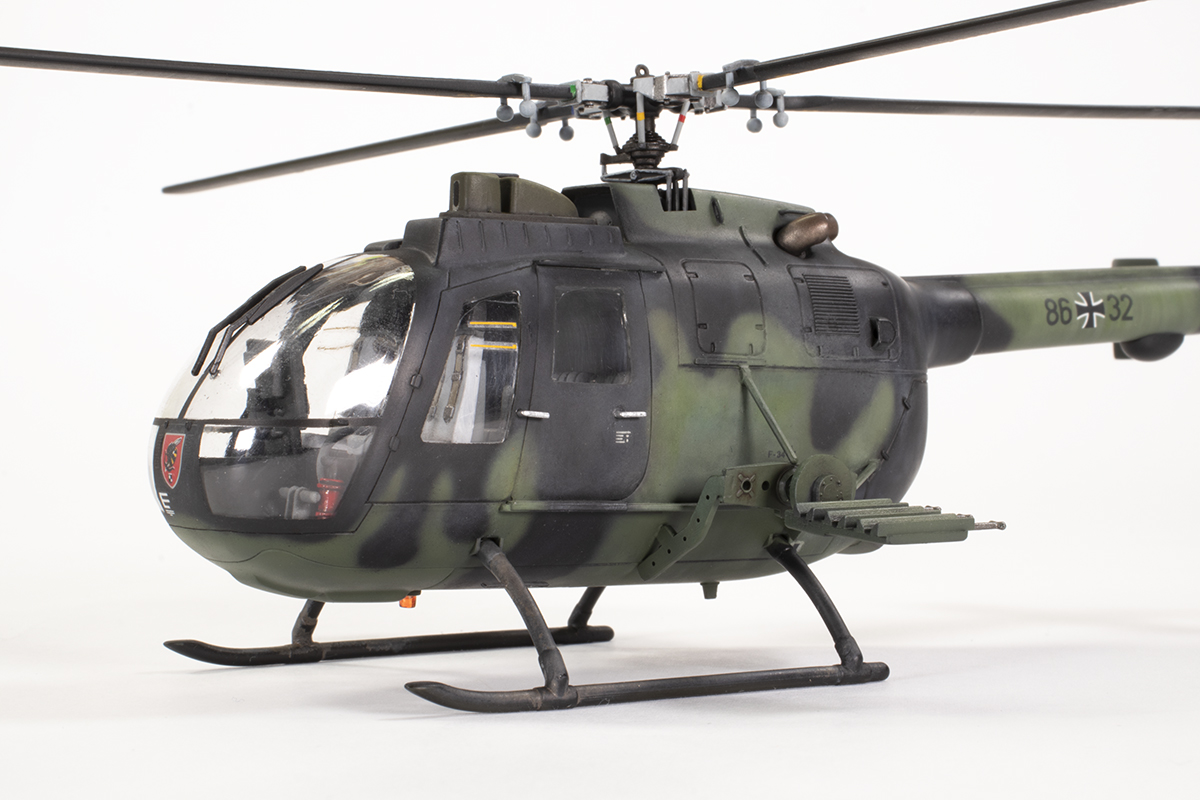
Once I had dealt with as much of the fuselage as I could, I attached the front windscreen. This is a big moment in a helicopter kit like this, and will make or break the model. Thankfully, unlike the side windows, the windscreen was a very good fit. It still needed to be filled and sanded in places, but there were no huge gaps. I set to with my various sanding tools once again to get rid of the seam, and took the opportunity to go over the cabin windows again. I did try as much as possible to retain the moulded frame detail on the windscreen.


After the windscreen, the last major component was the TOW sensor over the cabin. I believe that this part, and the pylons, are later additions to the basic kit. The TOW sensor completely lacks any lens detail at the front, which is a shame, and does not fit wonderfully well. I applied plenty of coats of Mr Surfacer 500 to build the transition up between the sensor base and the roof. Once dry, it was all carefully sanded down. This was also when the door sills were rebuilt from plastic card and the front door hinges (which has been collateral damage in sorting out the windows) replaced with some scrap photo-etch pieces.


The fuselage was completed by adding the pylons, the large aerial over the cabin, and making a new tail light mount from some scrap plastic tube. I had no good references for this area, so as with all my modifications, it’s more for flavour than accuracy. Once done I had an airframe ready for paint.
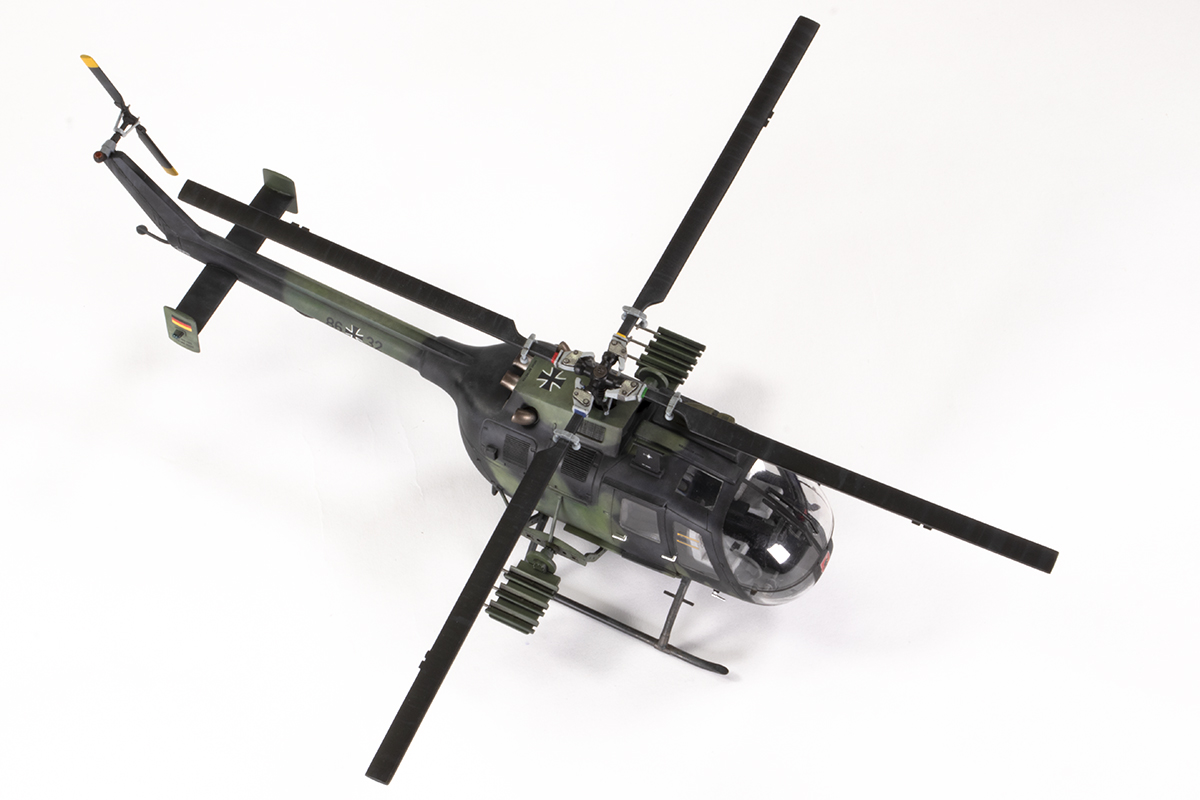
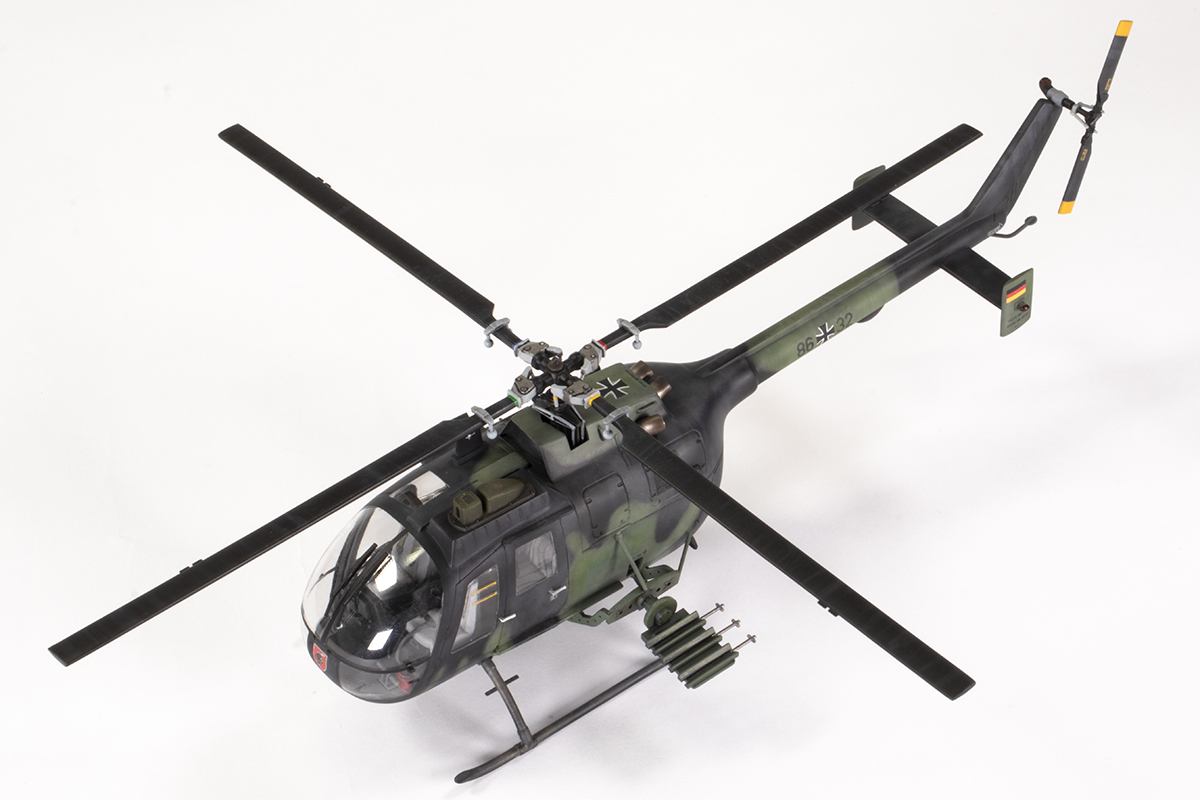
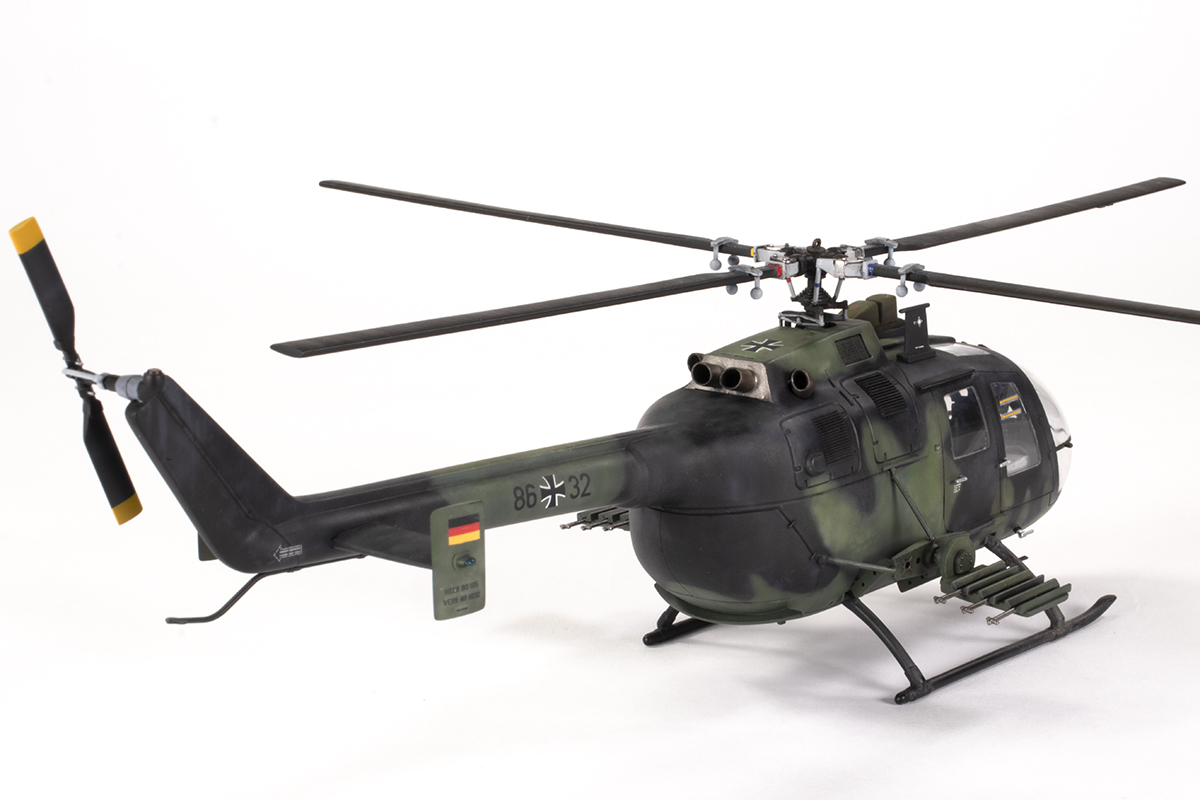
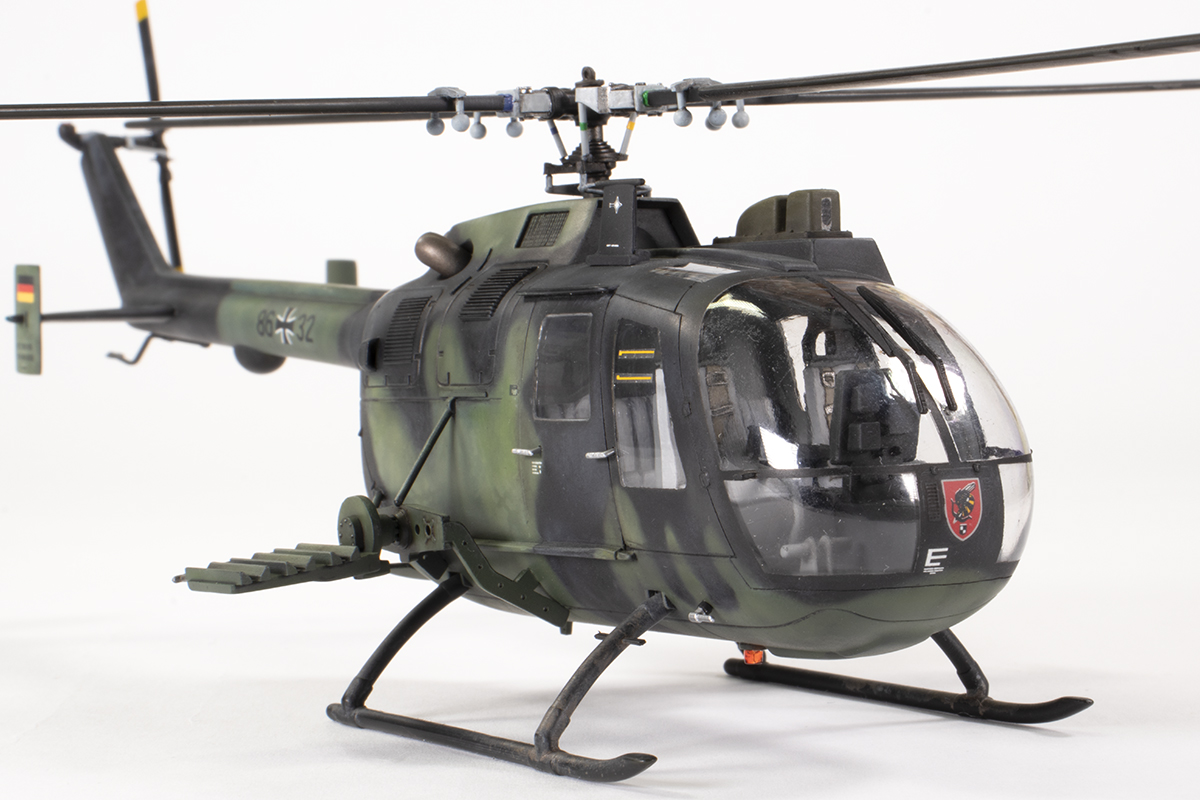
German Army Bo105s come in a single basic scheme of RAL6003 Green and RAL9011 Black (or similar). There is discussion online as to whether these changed over time, but any change is minor. Several of the kit schemes are for special markings and did not catch my fancy, especially as the decals looked unreliable. I therefore plumped for a standard machine, 86+32, provided in the kit. Unfortunately I could not find any photographic references for this helicopter and so had to rely on other airframes as analogues.
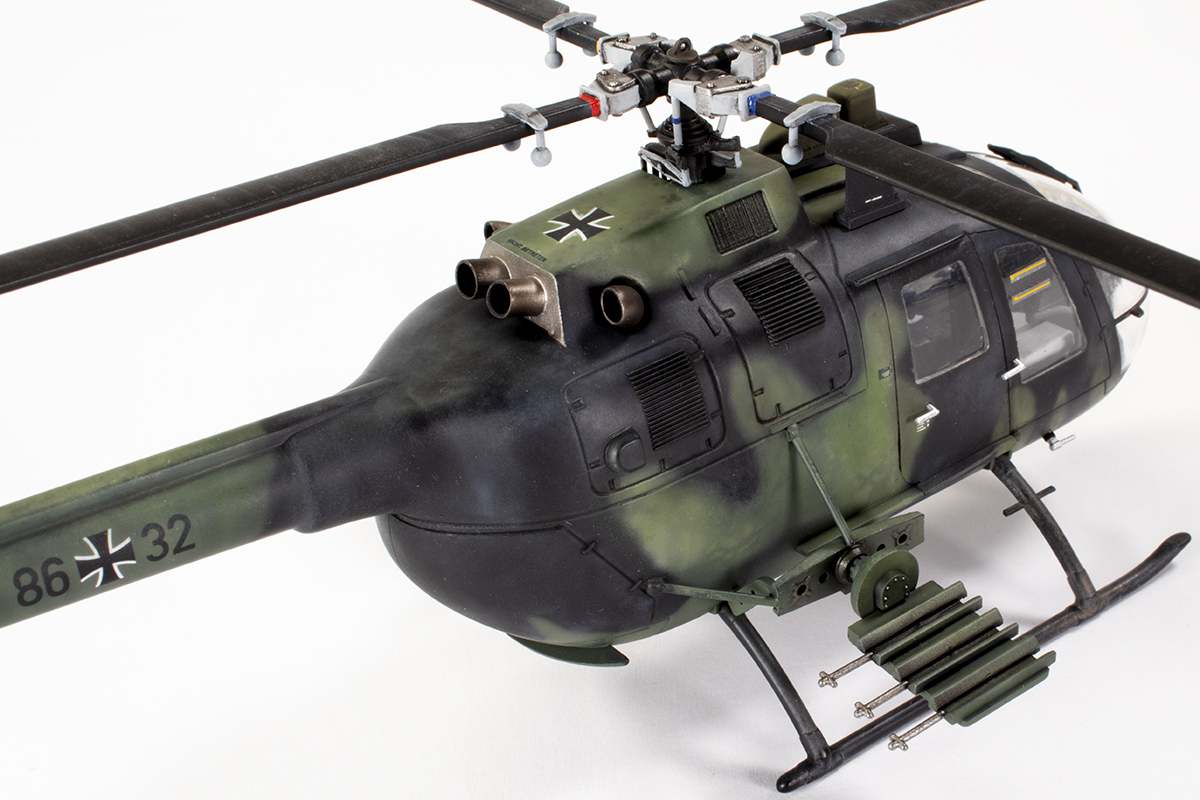
My preferred primer is Mr Finishing Surfacer 1500 Black, thinned quite heavily with Mr Leveling Thinners (around 1/3 paint and 2/3 thinner). Over this I applied the RAL6003 freehand. My choice was MRP-035 RAL6003 Olive Green since it doesn’t need thinning, but it does not look ‘olivey’ enough to me, and rather desaturated compared to photos. Nevertheless, I stuck with it.
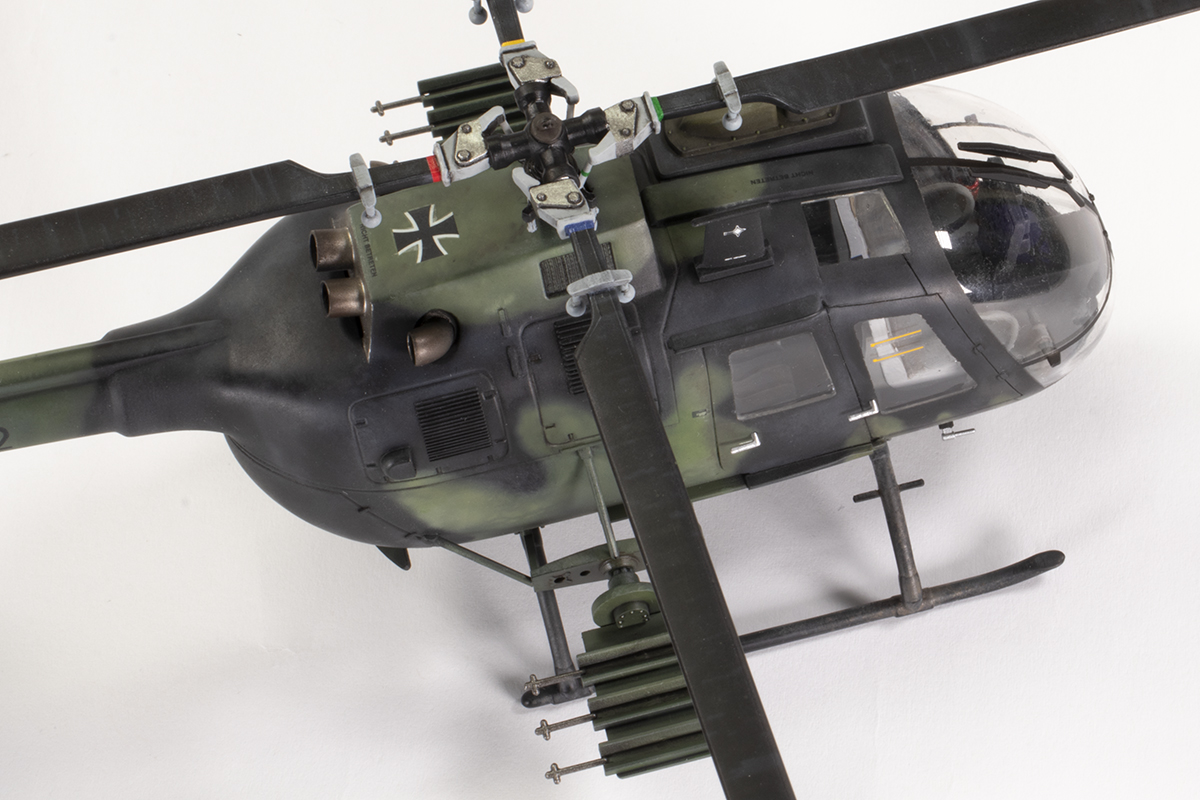
I could not source RAL9011 anywhere and so went with the very similar RAL9021 NATO Black, also by MRP. I used a very fine airbrush (0.18mm needle in an Iwata Custom Micron) to squiggle over the black primer and more clearly demarcate the boundary with the green. Most German Bo105s have a very tight demarcation, but it could vary, and on my model it’s quite loose.
The TOW sensor was painted with a Mr Color shade of Olive Drab and then the main camouflage colours were mottled using variations of the base colour. For the green I added yellow and other shades to get some variation; for the black I added some MRP Traffic Gray to the NATO Black. Some of the mottling was done through texture masks, in particular the vertical streaking using one by CAT4. I kept the contrast quite high so that the effect might still show through subsequent layers. The exhausts are a random mix of Alclad Magnesium, White Aluminium and Pale Burnt Metal.

Prior to weathering, I elected to add the decals. These do not inspire confidence on the sheet. They are very matt, appear rather thick, and have quite a lot of carrier film. Even worse, some of them are out of register. The iron crosses were highly variable, and of the 10 on the sheet, I only found three that were acceptable, which meant the one underneath looks pretty poor. The German flags were so out of register that I had to root through all my other kits and decal stash to locate replacements. The closest I could find were from an AMP Sycamore sheet; they are slightly too big but at least the colours line up.
I followed my idiosyncratic decal application method (that is, just leave the decal sitting untouched in a pool of Mr Mark Setter) and was pleasantly surprised: most of them settled down really well and the carrier film all but vanished under some Mr Color GX113 Flat Clear in the most prominent areas (like the tail boom markings). Some, sadly, did silver, especially the national insignia on the roof and a couple of stencils. Decals never make sense to me: you use an identical method on all of them, and some just fail. As Matt McDougall says: they’re voodoo.


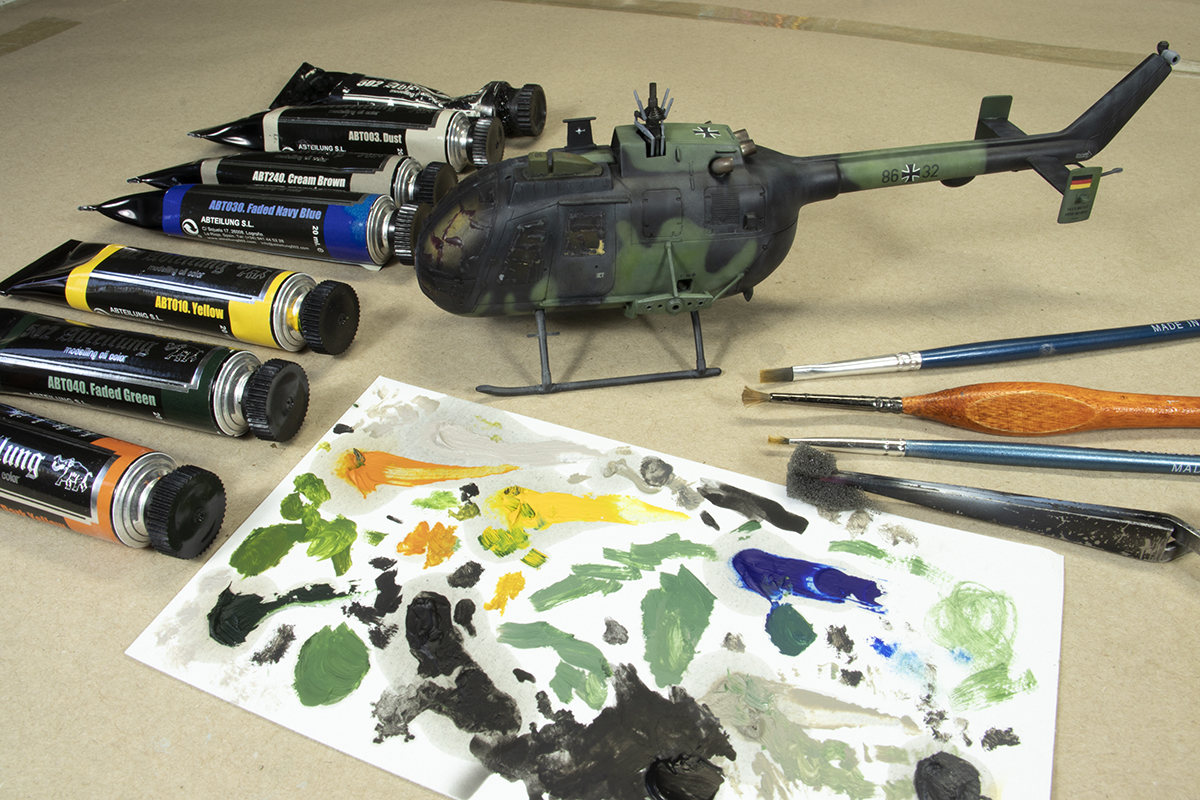
Next on the agenda was some weathering. I utilised three main weapons for this: oil paints, some AK Interactive weathering pencils, and some Liquitex inks. I started with the oils. My main aim here over the green was to add some more saturation, some blue in some areas, and some dust in others. This meant playing around with a few shades, but I mainly focused on varying ABT502 Faded Green with Yellow and Dark Yellow (to get more saturation) and with Dust and Cream Brown to get some desaturation, and some Faded Navy Blue to get a slight blue tinge on the fuselage sides. For the black areas I mainly used the Dust and Cream Brown. I have no idea what I’m doing when it comes to oil paints, so it would be pointless for me to pretend to be an authority, but I brush and sponge them on in various areas and then experiment with blending them with brushes and sponges while using small amounts of odourless thinners.
Once I had something I was happy enough with, I left the oils overnight to dry and played around with some pencils the next day, mainly Smoke, Rubber and Dark Grey. I draw onto the area I want to affect, and then use a brush dampened with water to blend in the pigment. I find this can give some very smooth transitions, and I mainly focused it around the doors, along the top of the tail boom, and on the roof.
The final step was to use a little highly thinned ink mixed from Raw Sienna, Raw Umber, Burnt Umber and White to give a medium tan shade. I thinned it with Tamiya X-20A at around a 1:10 ratio of ink:thinner, and then splattered it around the skids using a loaded brush flicked with a cocktail stick. I was particularly interested in doing this around the skids as they obviously get pretty dirty. I had already used some oils in this area and the splattered inks just add another subtle layer on top.
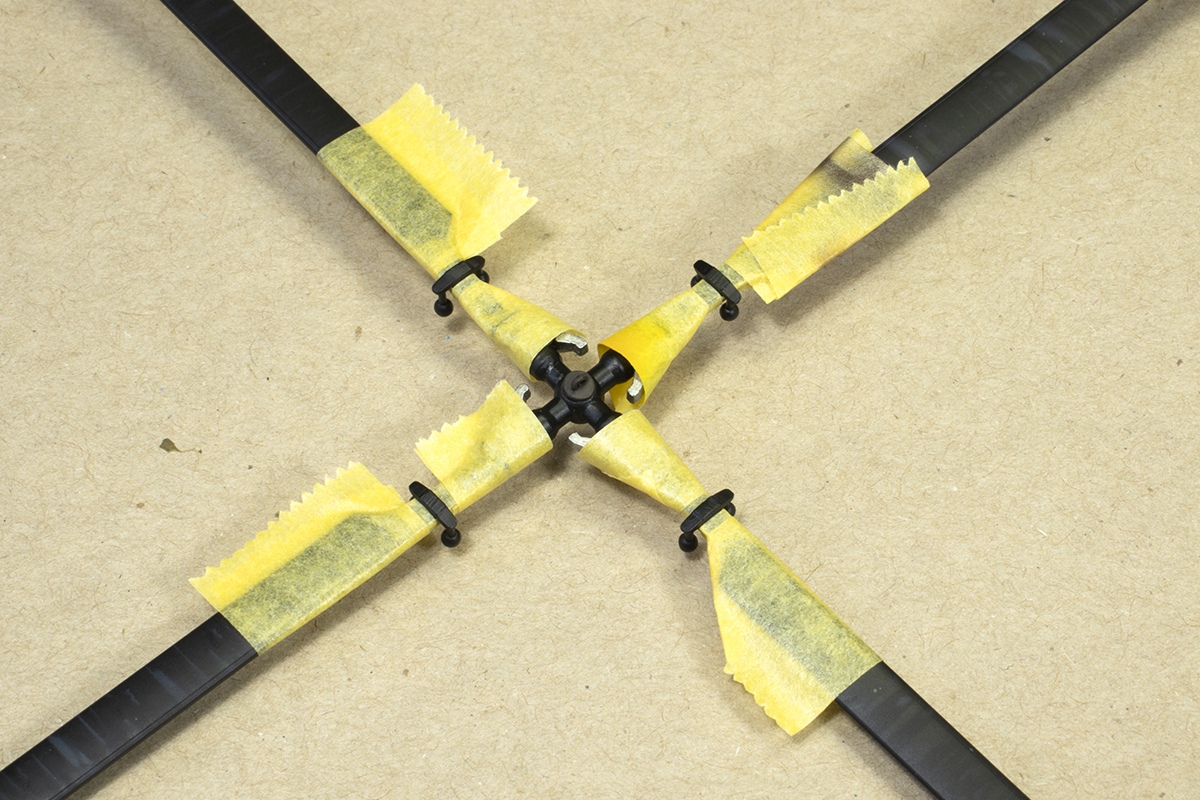
Once that was done, the model was almost finished. The rotor was superglued on next, which was not ideal, but late in the game I had decided to replace some of the kit-moulded struts with plastic rod. The windscreen wipers were stuck in place using PVA, which was very tense as there are no location holes and the rotor kept getting in the way; they are also very chunky. I’d sanded off the door handles when cleaning up the windows, and since they are very prominent and silver, I had to replace them with some more spares I found in my box. They are overscale, but right at the limit of what I can deal with at that size. The last parts to be fitted were the TOW holders. I chose not to fit the TOW tubes themselves (to save time – anything to save time!) as they were sometimes carried empty. These parts flop around all over the place and getting them square to the fuselage was a challenge.
And there we have it. No one would consider it a great kit, but it is 40 years old, and it is tiny. One would have hoped it would receive some love from an aftermarket manufacturer, but it hasn’t, so you’re on your own. It needs a lot of work to make it representative of a German Army Bo105, and I don’t claim to have reached that goal, but I think it looks better than what came in the box, and I’m certainly pleased it’s no longer lining my loft. It did win a silver at Telford in 2021, which I was quite pleased with.


Year bought: 2006 (Antics, Guildford)
Year built: 2021 (New Addington, Croydon)
Back to home.
