with SuperScale decals, Quickboost resin nose and Eduard photo-etched seat belts
509th FBS, 405th FBG, US Air Force, USA 1955

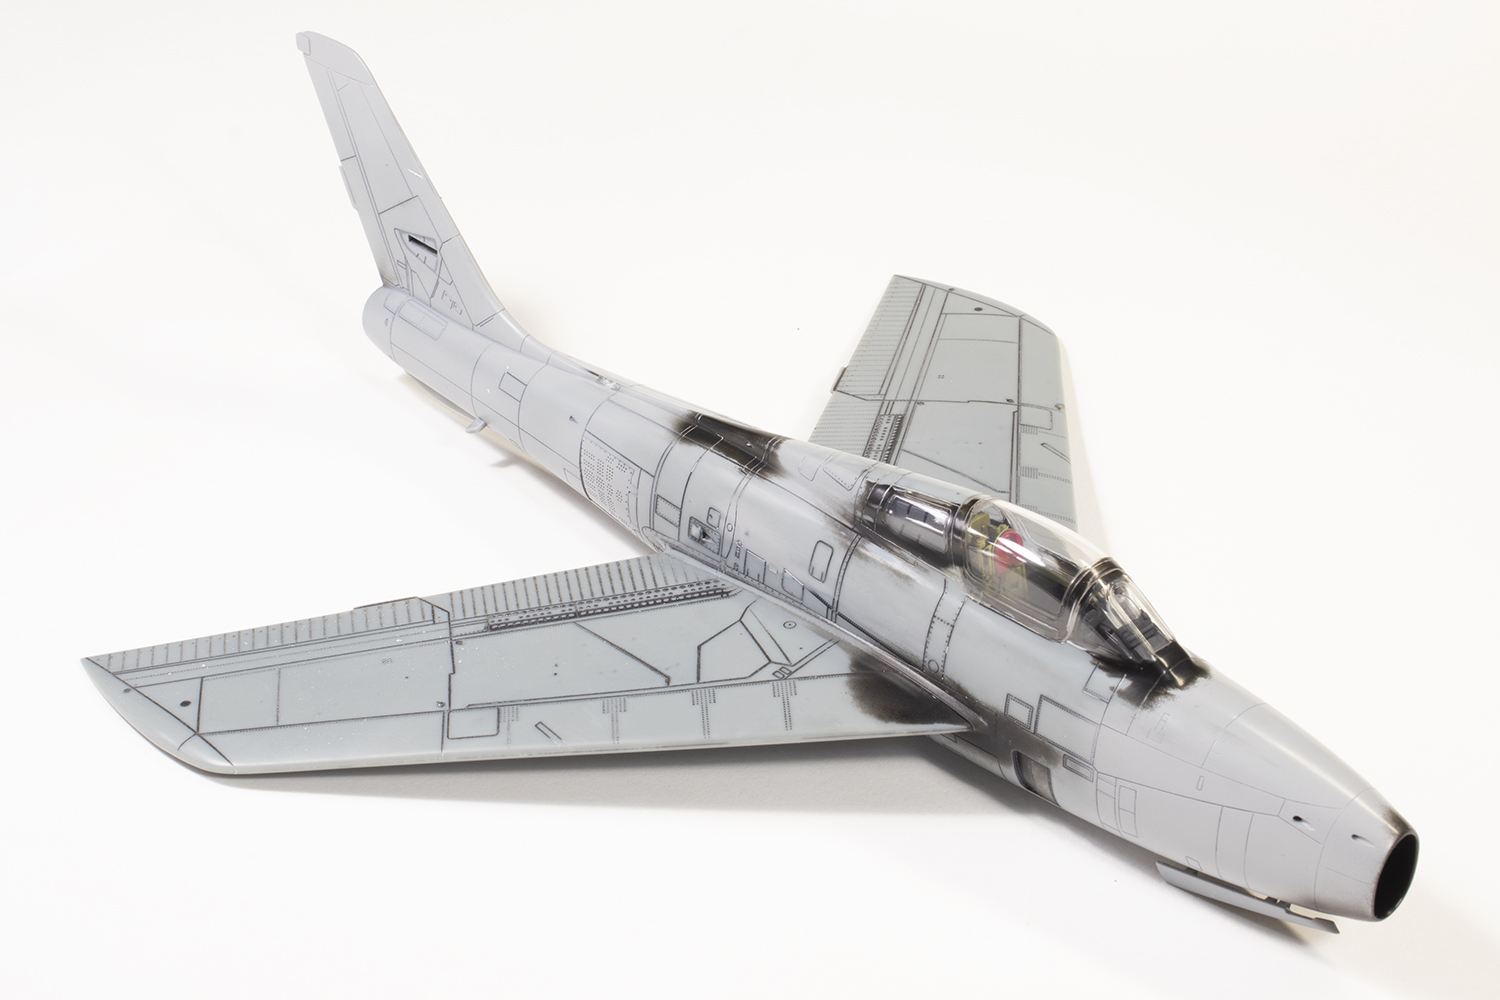
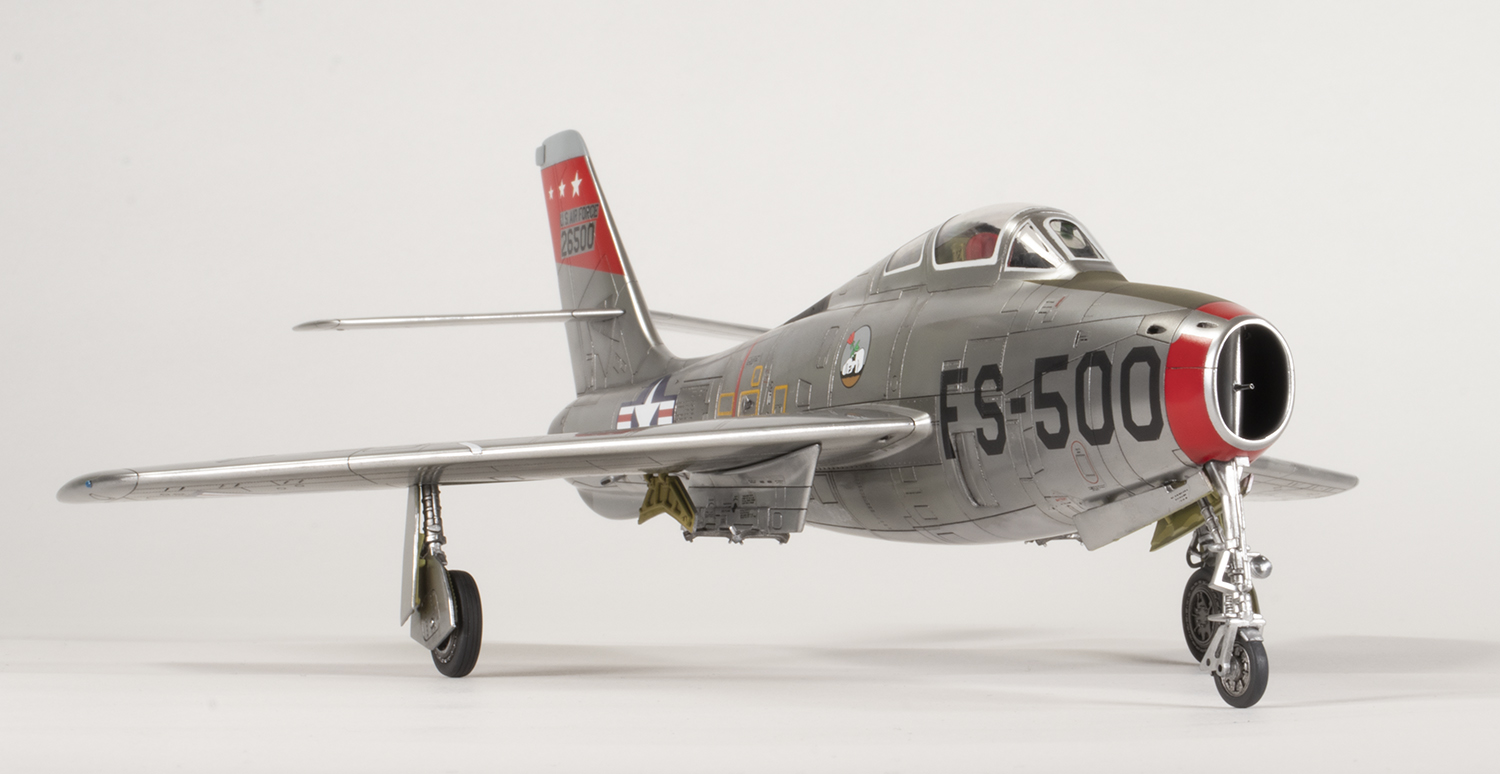
Republic’s swept-wing F-84F Thunderstreak began as the YF-96A, a substantial development from the earlier straight-wing F-84E Thunderjet first flown in 1950. Despite being obviously different, the Thunderjet and Thunderstreak both bore the F-84 designator simply because it was easier to get Congressional funding for developing an existing aircraft vice creating a new one. The mind boggles at how anyone responsible for such funding decisions could believe the public would allow the wool to be pulled over their eyes, but I guess that’s politics for you. In any case, I think it’s a superb looking aircraft with that intake straight from The Scream, swept flying surfaces and fastback canopy.
The Thunderstreak has not been particularly well-served in 1/48. Monogram and Heller have produced kits which are pretty old by now, Fonderie Miniatures had a go, and Kinetic produced the model I made here, reboxed by Italeri. HobbyBoss are the newest kid on the block. There are some very passionate discussions online in relation to accuracy. The Monogram and Kinetic kits are considered to have skinny rear fuselages and the HB kit is thought to have the best outline. I urge readers to do their own research and form their own opinions. Mine, for what it’s worth, is that the Kinetic kit outline is actually pretty good and a tracing of the fuselage can be made to fit profile photos of the aircraft to a tolerance I am prepared to live with.
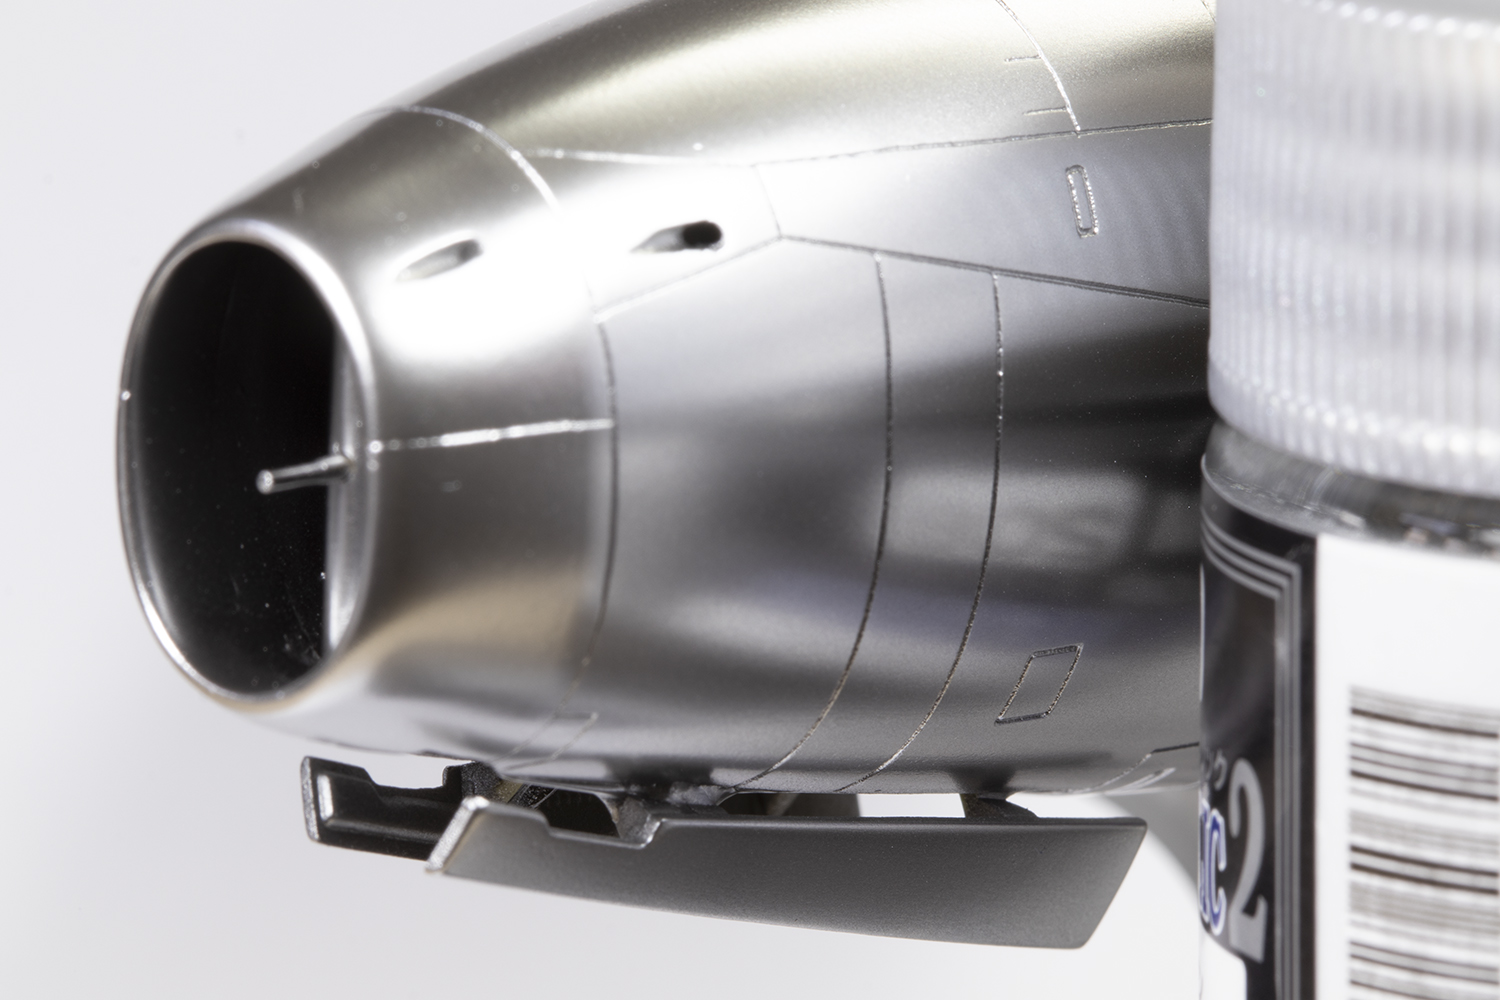
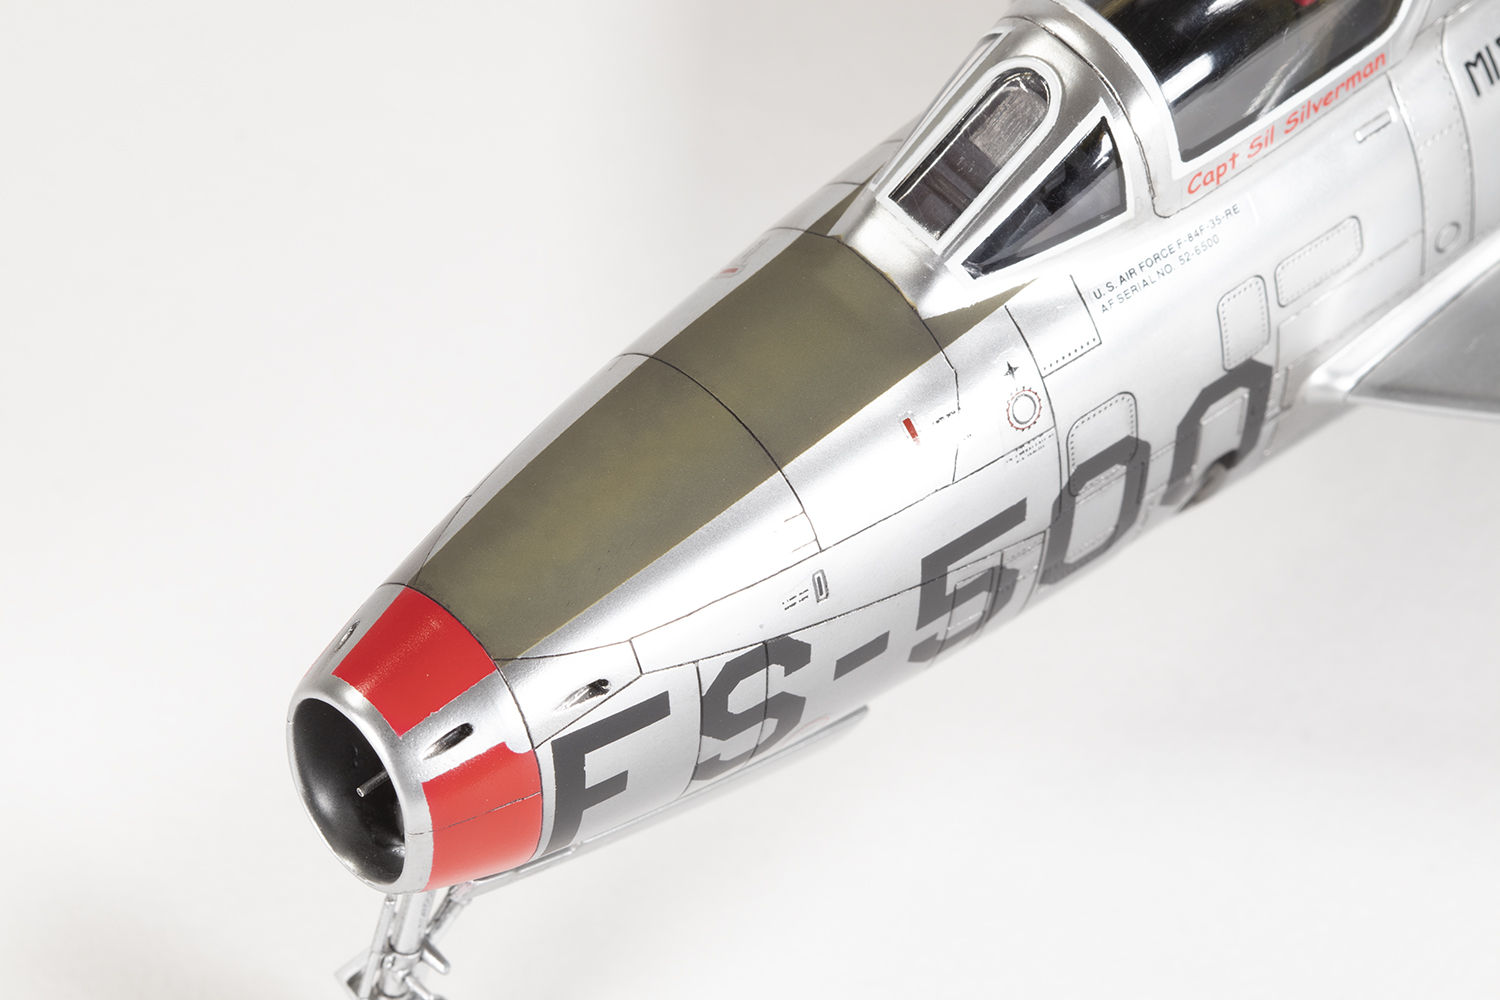
Having said that, the Kinetic kit is obviously wrong in the intake. It’s been moulded as an ellipse, but it should be a stadium (i.e. parallel sides with semi-circular top and bottom). That made the Quickboost resin correction part a necessity, although the sides of that are still not quite straight enough in my opinion. The only other aftermarket I added were some steel PE seat belts by Eduard and SuperScale decals.
The development of the F-84F is deceptively complex and if you care about such things, you really need to pin down the block number and timeframe of the aircraft you are modelling. Kinetic have provided a late-block tall-tail Thunderstreak with the large drag chute housing under the rear fuselage, large blow-in doors, all moving horizontal stabiliser and rudder trim tab. I was unaware of all these subtleties when I started the kit and was in for a few surprises. Some later airframes also had the pitot mounted on the port wing rather than in the intake.
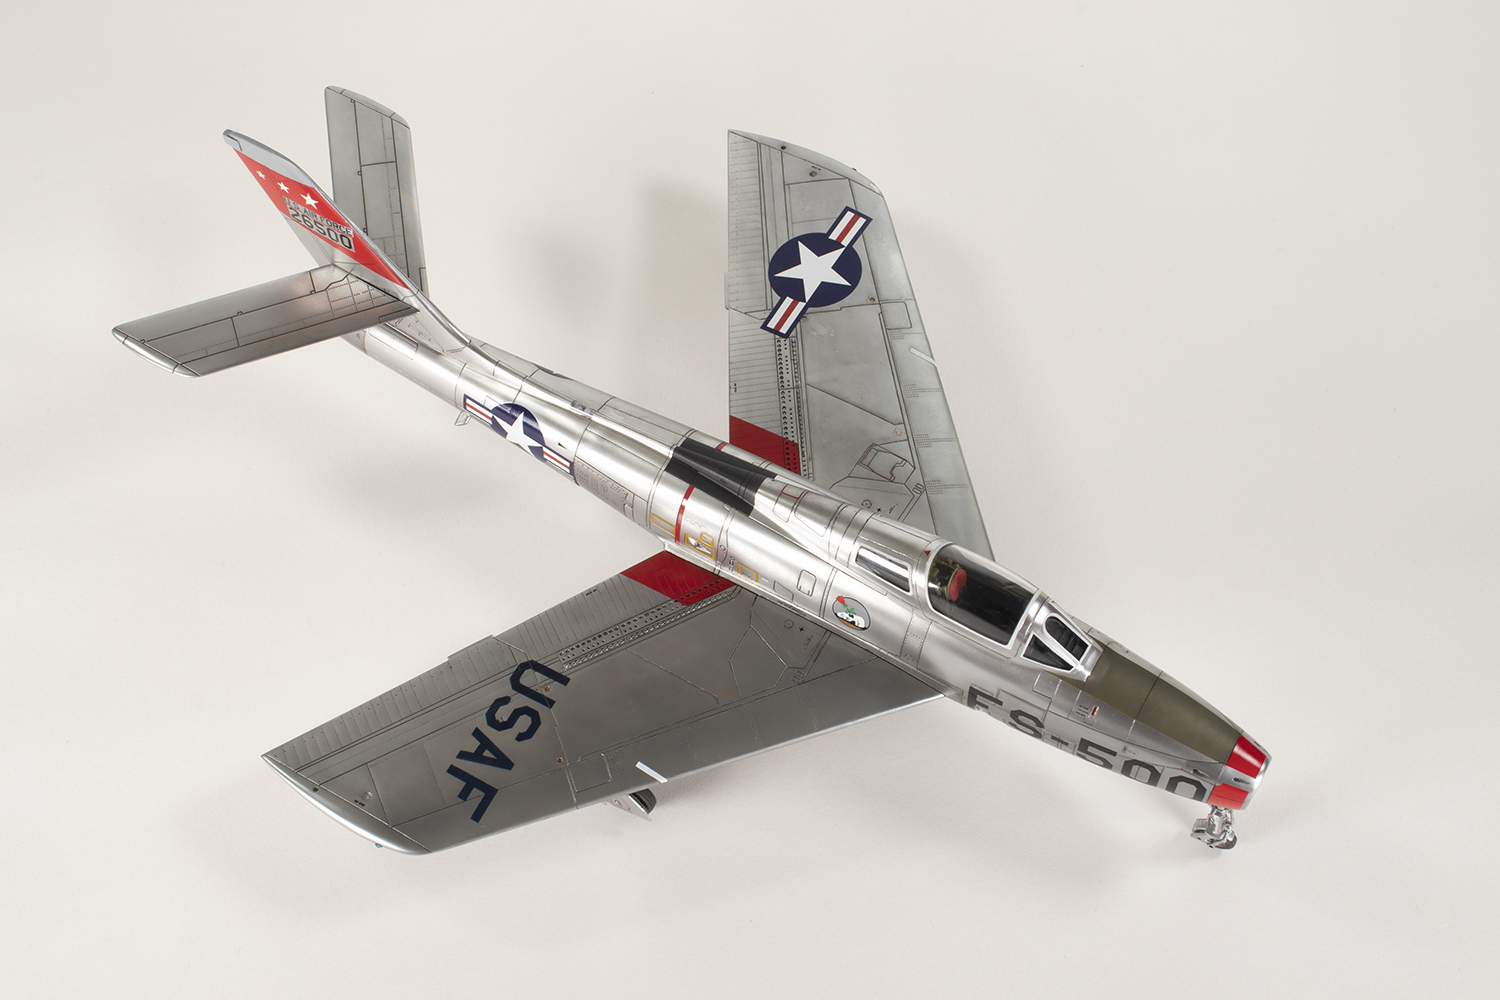
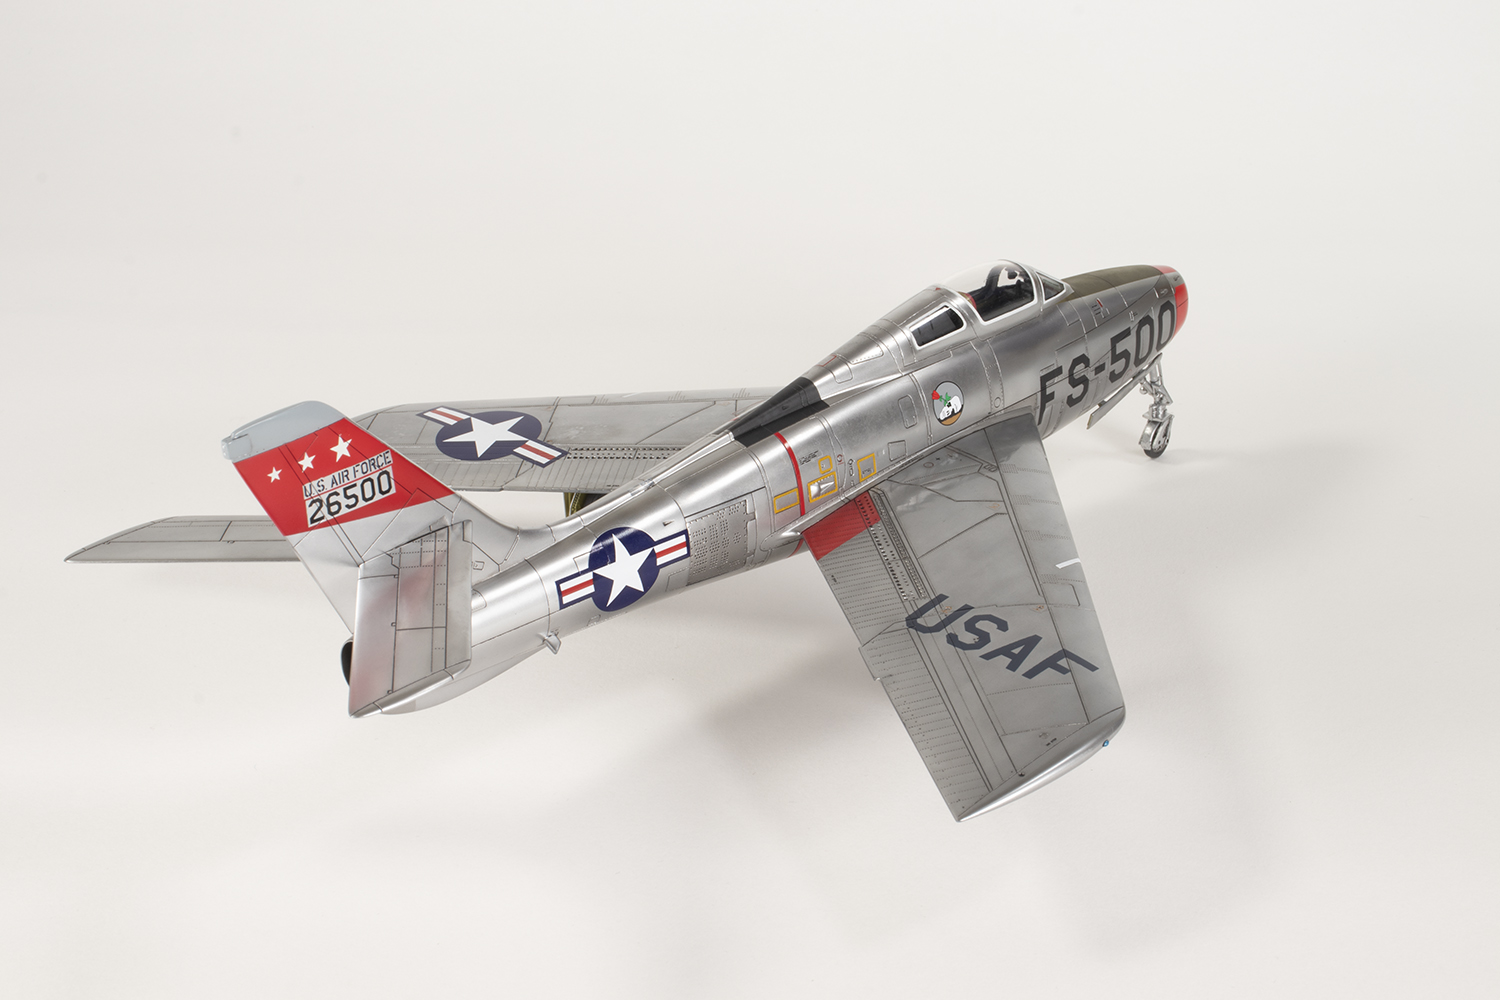
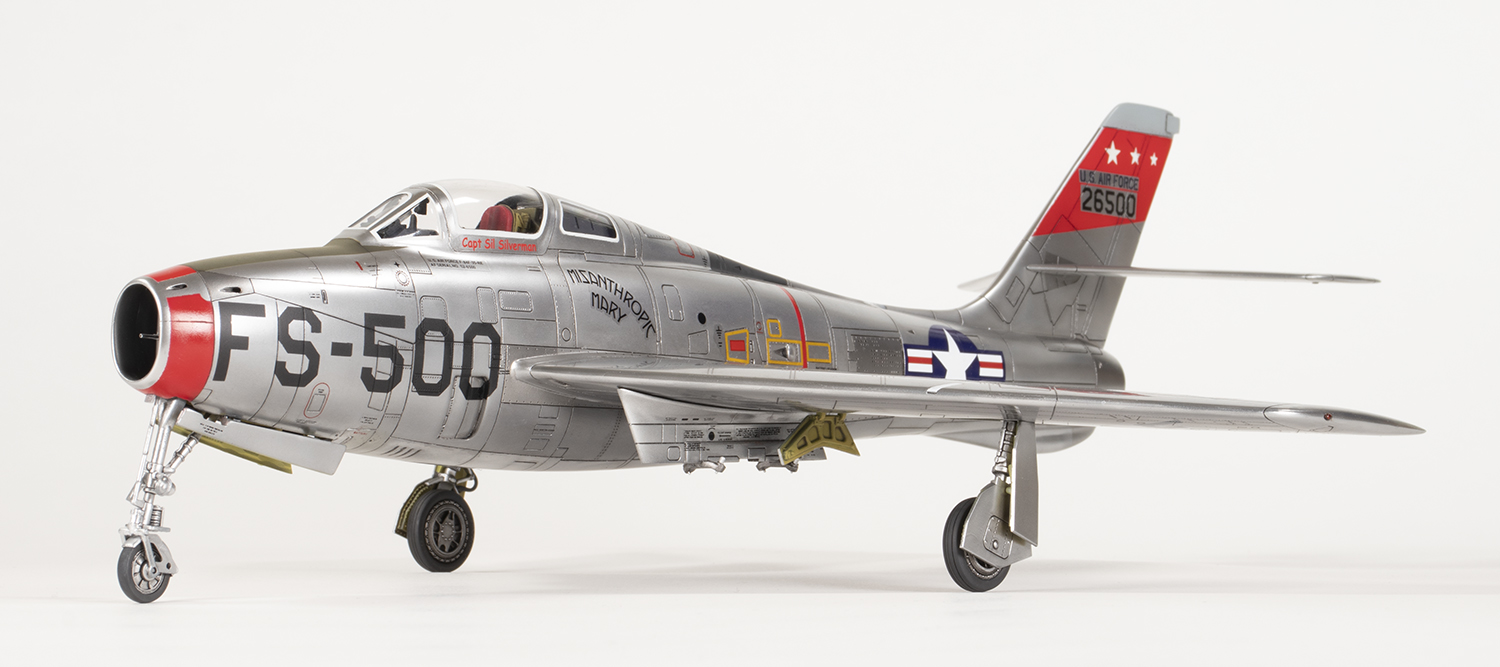
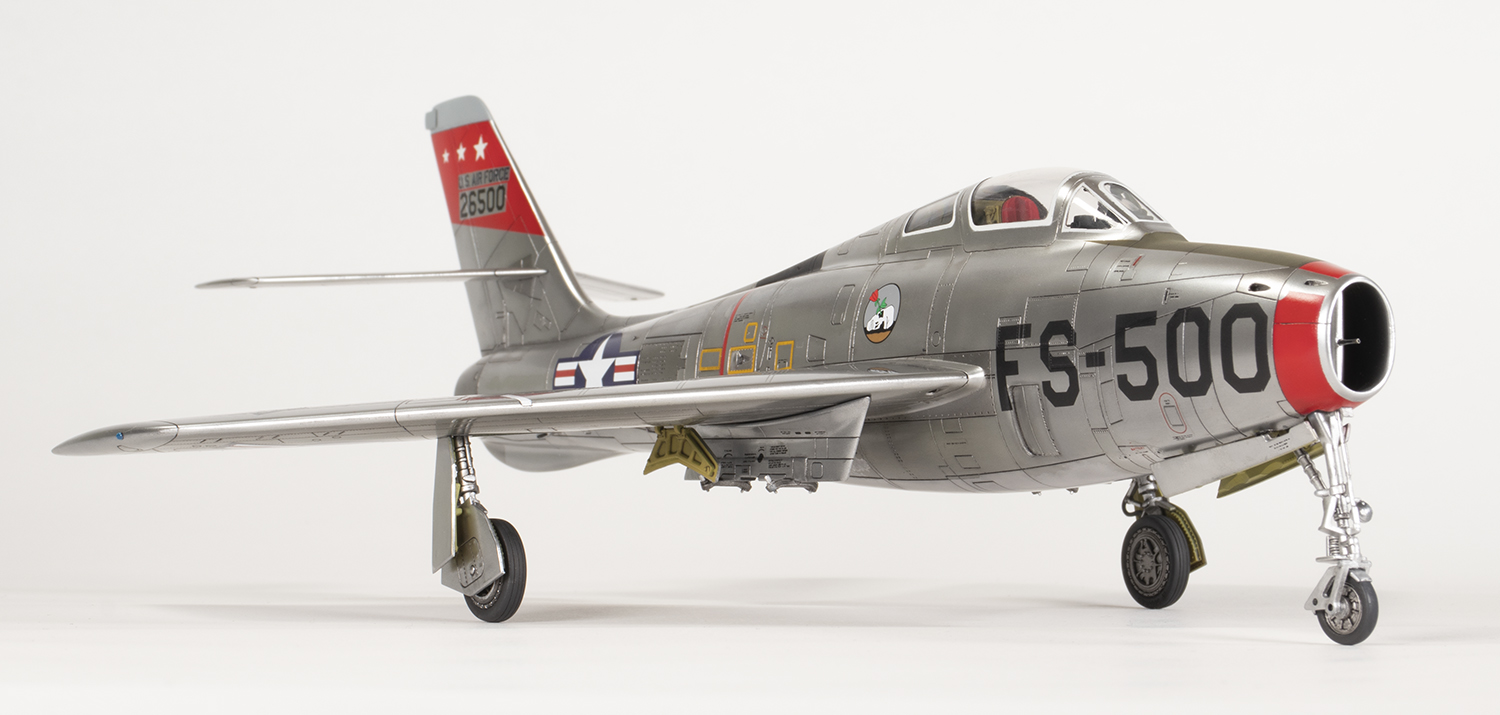
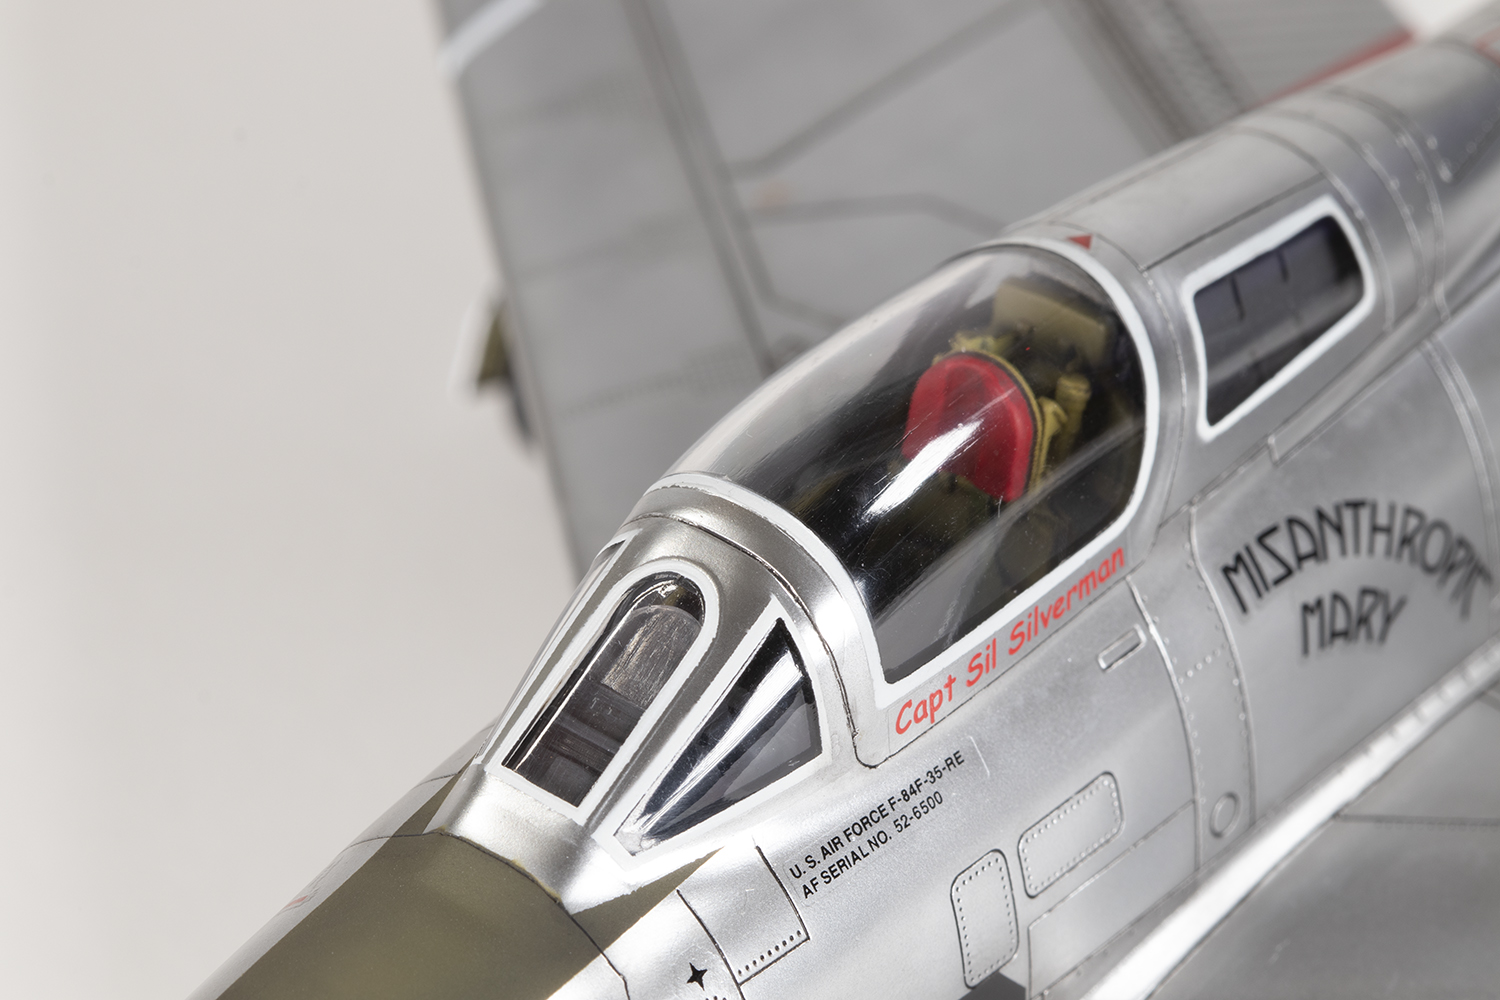
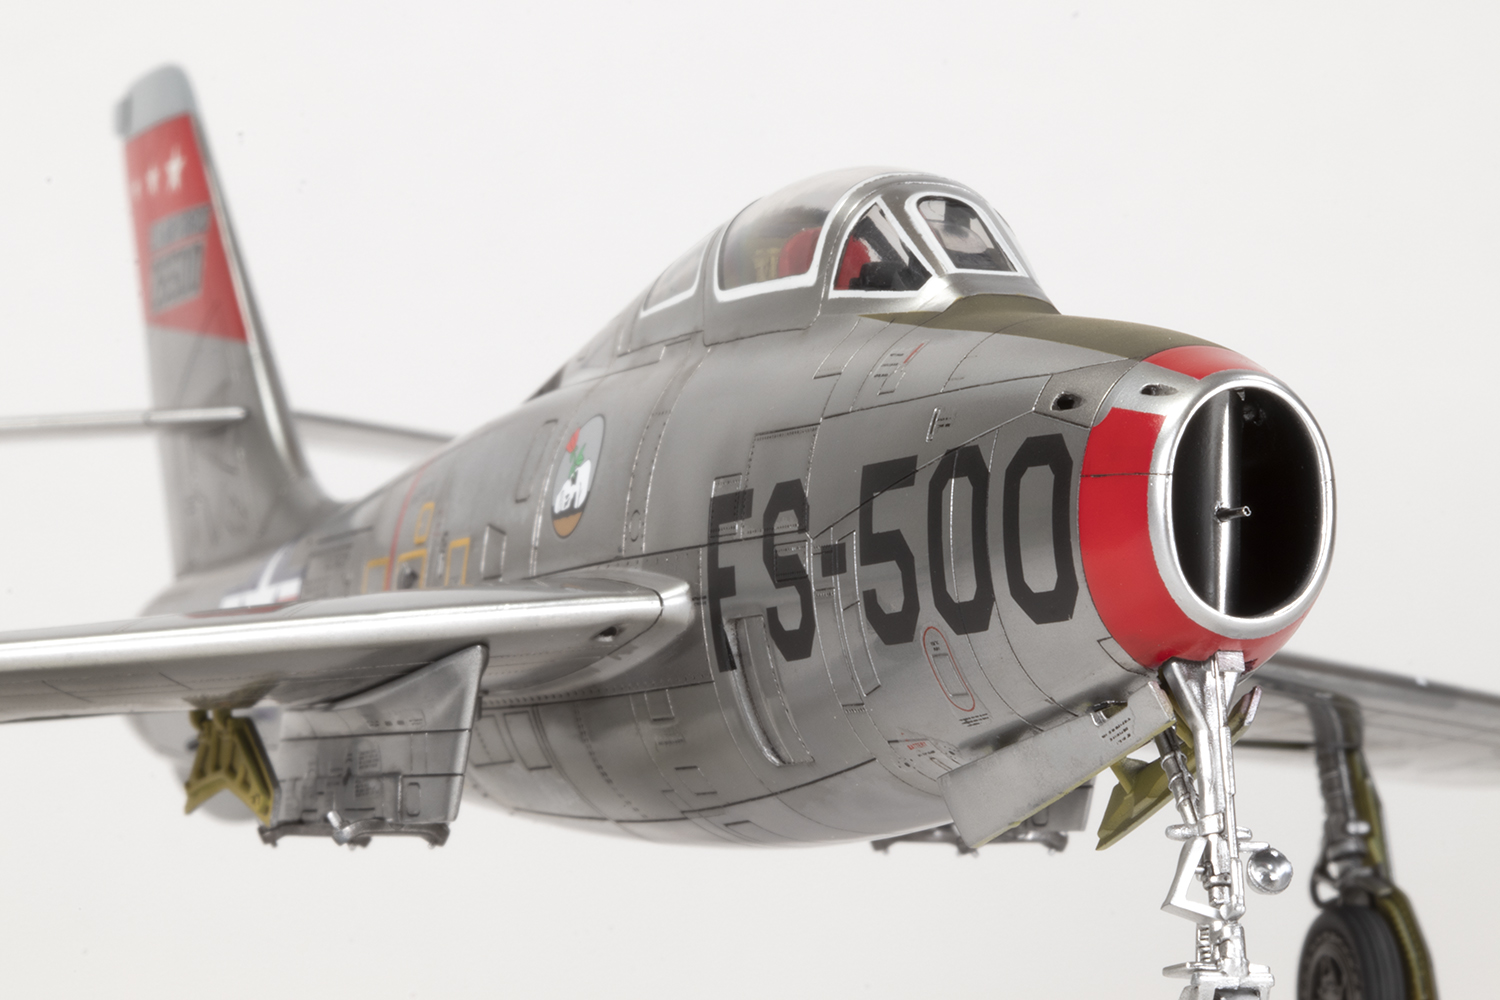
From the SuperScale sheet I was determined to build 52-6500 ‘Misanthropic Mary’ from the 509th FBS, allegedly in 1957. There are a couple of photos of this aircraft floating around on the web, both of the front left quarter and almost certainly from 1955. What was immediately apparent is that I needed to cut down the tail fin to the short version; less so was whether it had the drag chute or not. More Googling produced plenty of other photos of aircraft from the same squadron and somewhat depressingly none of them had the drag chute. Further enquiries online revealed that F-84Fs with the buzz numbers on the nose did not generally have the chute; when the ‘UNITED STATES AIRFORCE’ legend moved to the nose drag chutes became more common through a retro-fit. The upshot of this was I would have to remove the chute housing and scratch build a replacement ventral strake, and I knew that would be hard as the shape is subtle.
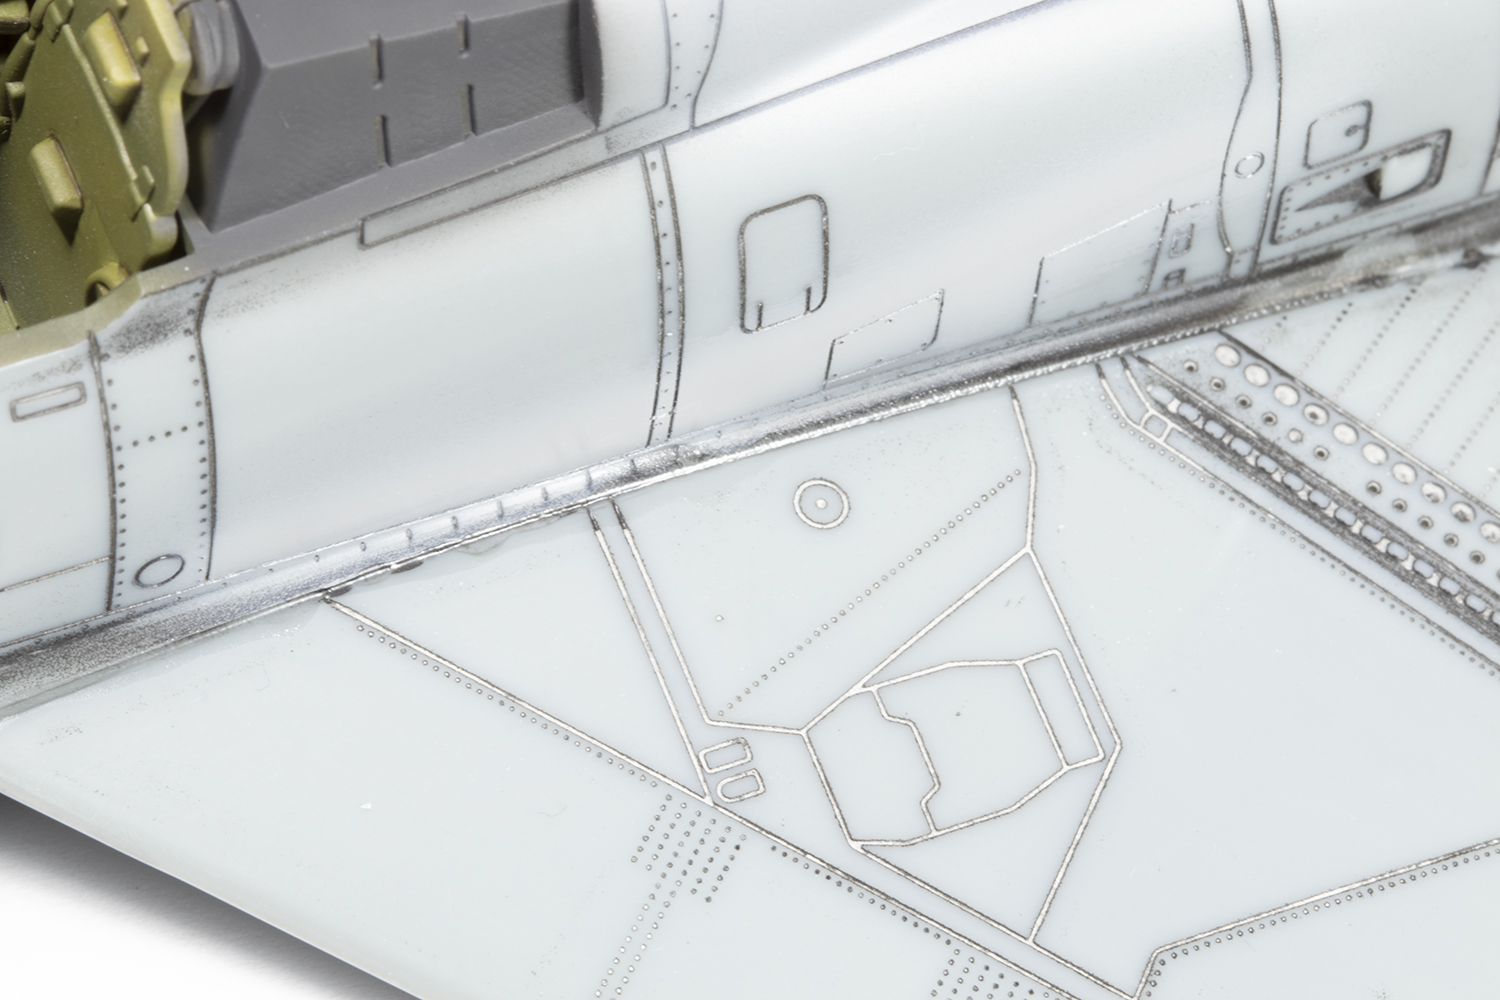
This kit was the first ever produced by Kinetic and I bought this upon its release in Hong Kong in 2007. It’s fair to say they have come a long way since. It’s not terrible, but you need to be prepared. What immediately struck me is the rough surface texture and very wide panel lines. A couple of these are for the RF-84F and need to be removed. Detail is chunky and there’s a fair amount of flash on some of the smaller parts. A nice inclusion are two large steel balls for nose weight that are designed into the plastic. The wingtip lights are way too big and there has been discussion on the location of the airbrakes, which is something I was beyond caring about. If you are making an airframe with the drag chute, it’s worth noting the tail skid was often not present.


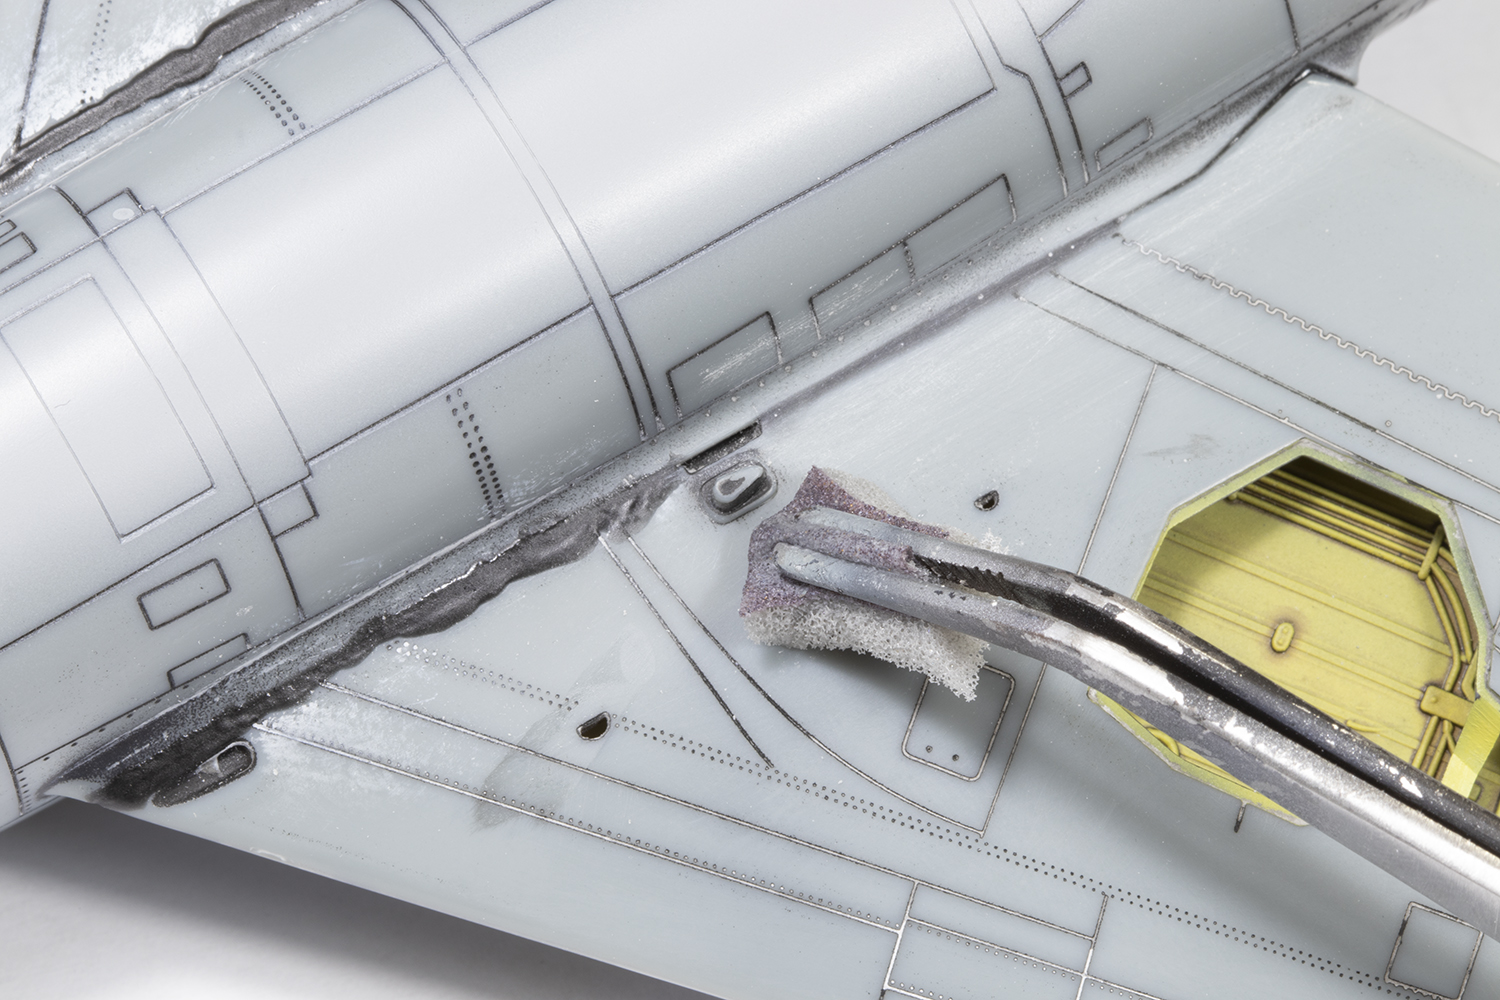
My first port of call was to smooth out the surface. After a generous coating of Mr Finishing Surfacer 1500 Black, I set to with Infini’s 1000 grit sanding film. Once the plastic had returned to its native grey colour I knew the surface was smooth enough. Concurrently I worked on the cockpit and undercarriage components without making any changes save the aforementioned belts. I guessed that the cockpit would be largely invisible through a closed canopy apart from the seat, and was proved correct at the end; it’s very dark in there.


Changing the tail rapidly became the core of this project as my research and build progressed in tandem. Since I don’t trust plans, I made extensive use of Inkscape (a free graphics program) to overlay profile photos of the Thunderstreak and a tracing of the kit fuselage. By doing this with multiple photos I arrived at a pretty good idea of what shape the tail and keel should be. I don’t claim any particular accuracy, merely that it’s good enough.
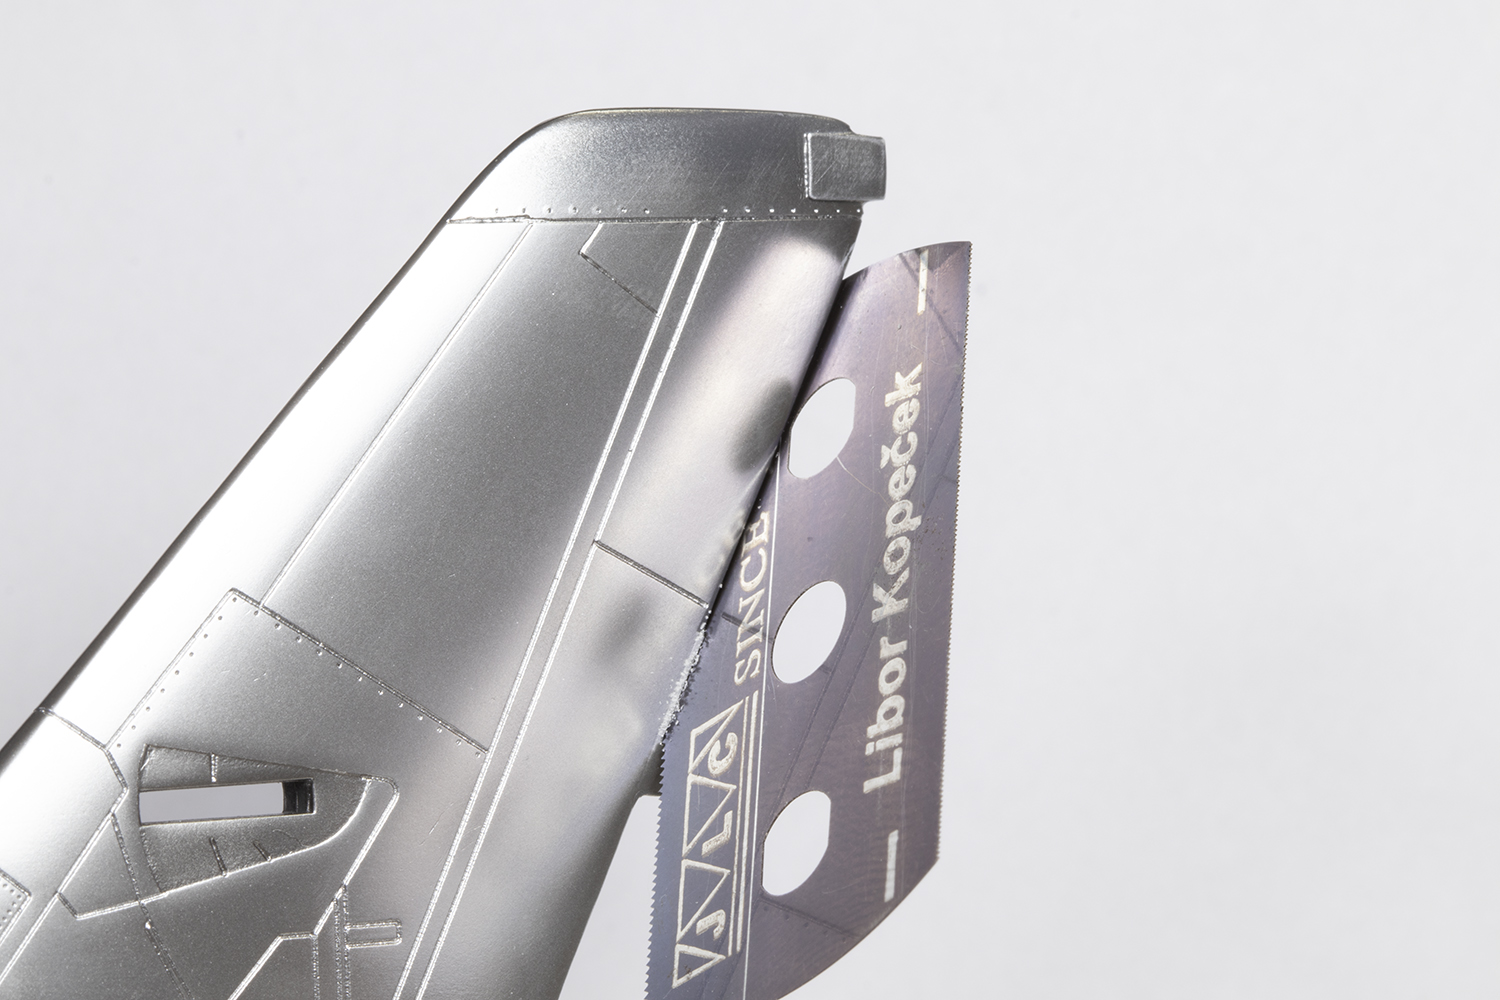
Chopping the tail down was easy: lop the tip off and remove about 10mm from the top of what remains. Then section the tip in two, fore and aft, reattach, fill the gap with scrap plastic and loads of super glue, and sand it all out. Job done. The housing for the tail tip navigation lights then needed to be rebuilt from strip.
Replicating the ventral keel was another matter. After pondering this for many hours (to help pass the time during quiet periods on night shifts), I decided to just take a brute force approach. First I backfilled the drag chute housing with two-part polyester body filler, and then cut it off using a motor tool. It wasn’t pretty, stank and created a lot of dust.
From a chunk of plastic formed by laminating three layers of thick plastic card, I then approximated the shape of the keel and just stuck it on the lower fuselage once the halves had been joined. Placing my trust entirely in the strength of super glue and the bond of the filler to the plastic, the basic shape was formed using a semi-circular seam scraper and all the gaps filled with more super glue and VMS filler powder. By luck rather than judgement, a shape emerged which I was rather happy with. I’m not claiming it’s perfect, and it’s definitely too fat, but it’s a nice feature to distinguish the model from one made out of the box.


In general, the fit of the major components was not bad. Super glue was used to join the main halves and as a filler to remove the seams. It is a complete pain that the nose gear doors are moulded integrally with the bay; at least they are attached very robustly and won’t come loose. They do make painting awkward though. The nose gun bay door is annoyingly separate, which means more seams to address and rescribe. At least the fit wasn’t awful.


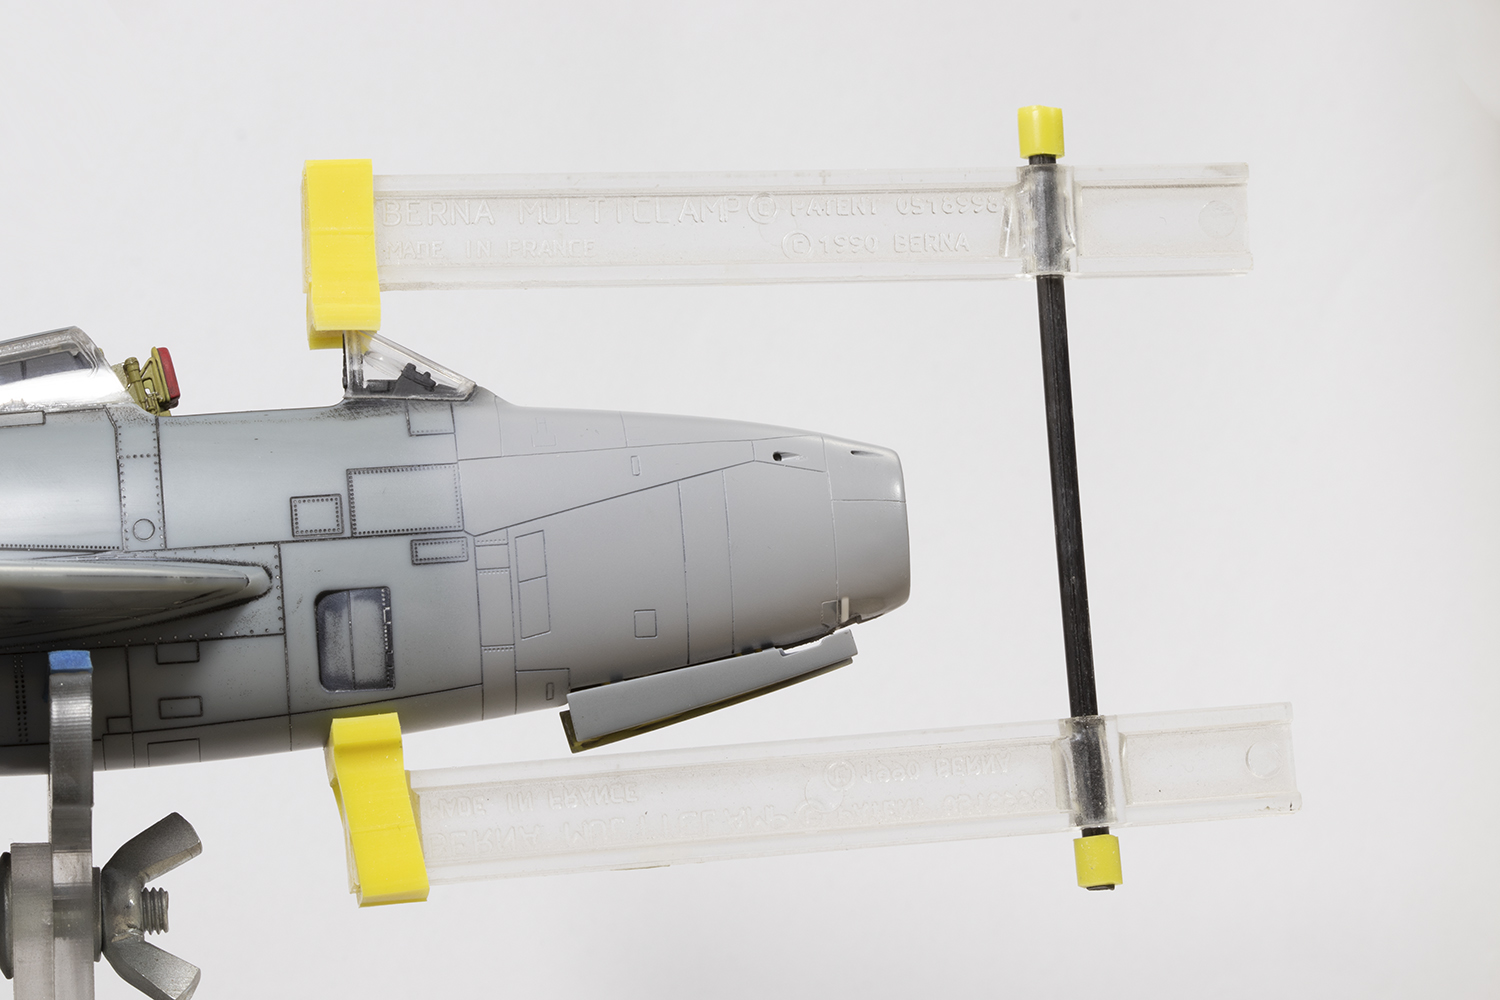
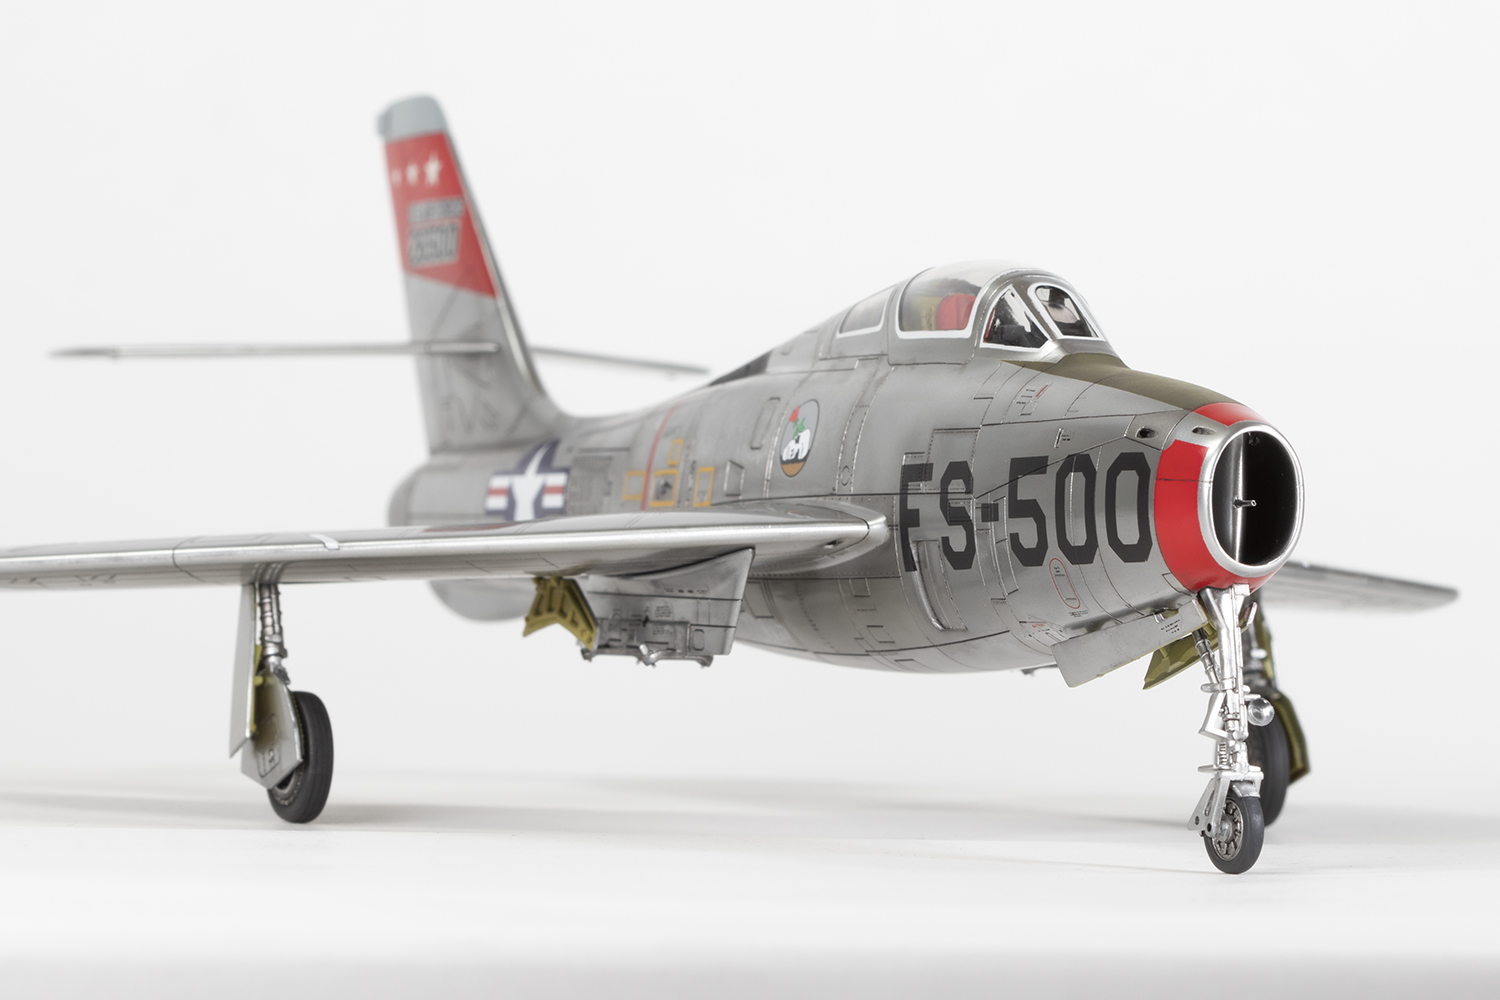
Sadly, the Quickboost nose is another matter. I was forewarned about this: it’s too small in diameter. The simplest solution was a spacer made of thick card. The downside is that this lengthens the nose, which makes the gun ports look odd, the nose undercarriage doors too short, and leaves nasty gaps at the front of the nose bay. Still, it was an effective enough solution and worth it for that much better intake shape.


What has taken only a few words to describe represents quite a lot of work, especially on that tail, so it was with some relief time came to attach the wings. On the upper side very little remedial work was necessary beyond some gentle sanding. On the lower side there was a gap, filled with (you guessed it!) more super glue and powder before sanding and rescribing. Surprisingly painless, and even bettered by the tail surfaces that could be left off until the very end. There is a gap here, but the real thing was all moving, so more than acceptable.
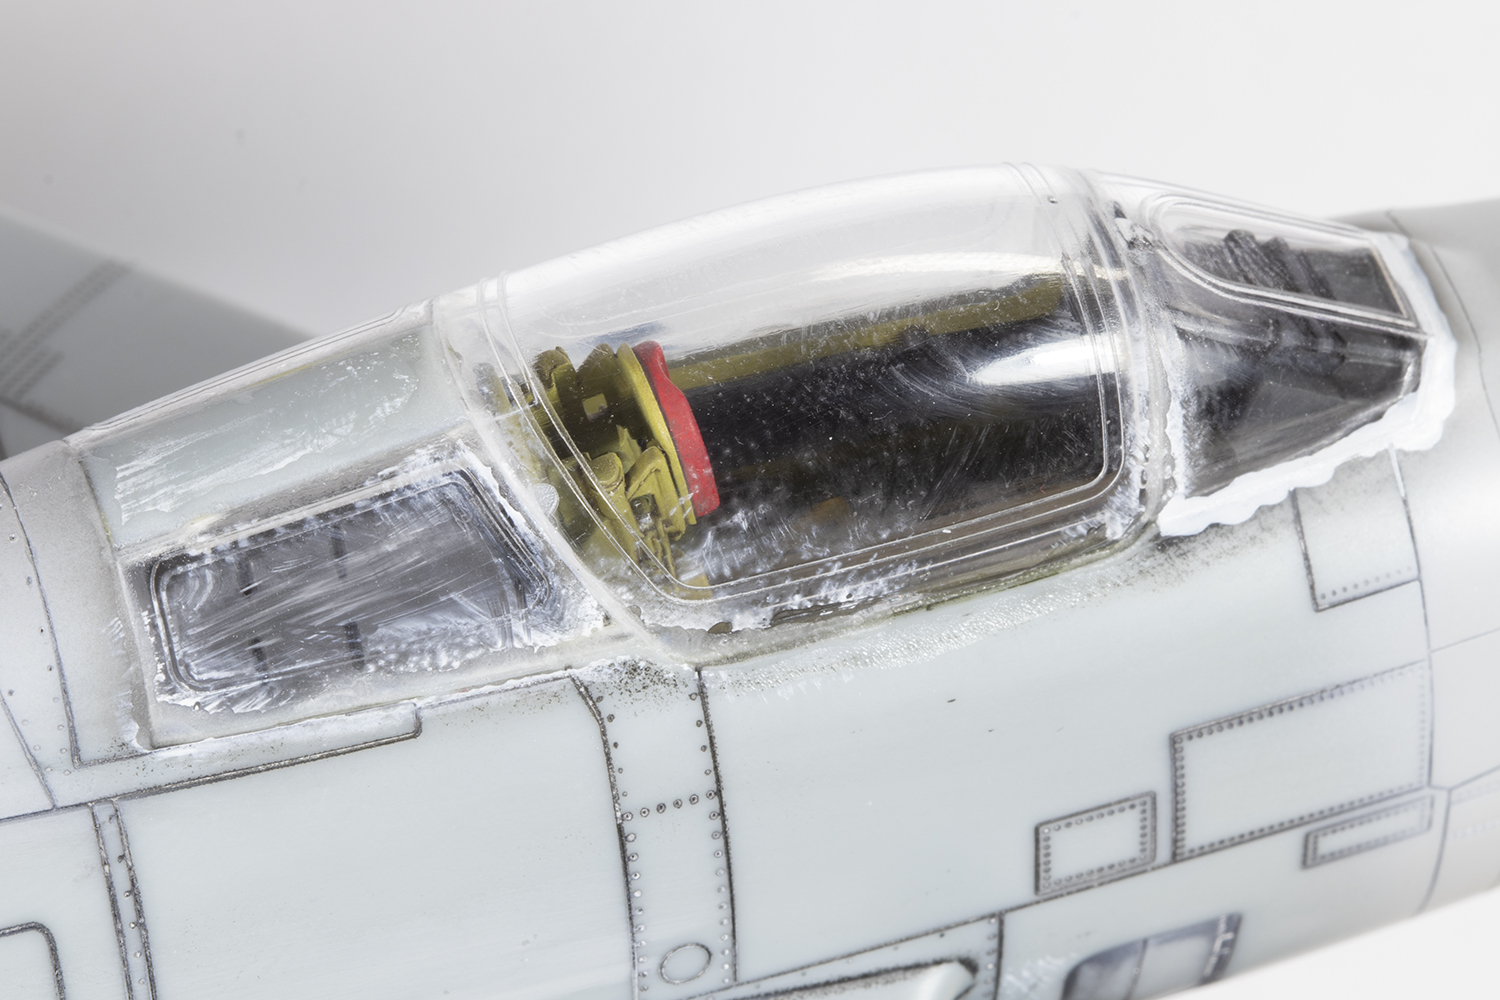
Clear parts are always a high-risk part of the build, especially when designed to fit open, as here. I don’t want my canopies open and thankfully the fit was above average. Nevertheless, some gaps inevitably arose and were plugged with small amounts of UV resin as this is very benign on the plastic. Once cured, super glue was used as a filler to remove all traces of the joins, the shut lines then rescribed using a combination of HIQ Carving Tape, Tamiya Vinyl Tape for Curves, and some HIQ die cut masking circles. The results are much wobblier than I would have liked. Rescribing is hard.


After a very thorough clean with 100% IPA (the pharmaceutical alcohol, not beer!) to remove my skin oils from the plastic, my thoughts could turn to painting. I briefly flirted with using foil, as with my F-84E, but that was quickly dispelled and reverted to paint, in this case from the Gunze Mr Super Metallic range, which has the benefit of being bulletproof once applied.
Standard procedure with metallic paints is to start with a gloss black base, but I wanted to see if a lighter colour would make any difference. Spoiler alert: it doesn’t. The Gunze metallic paints are very opaque, even when highly thinned with Mr Rapid Thinner. Nevertheless, mixing a gloss grey from Mr Color GX1 White and GX2 black was a nicer shade to work with and I’ll probably do it again.
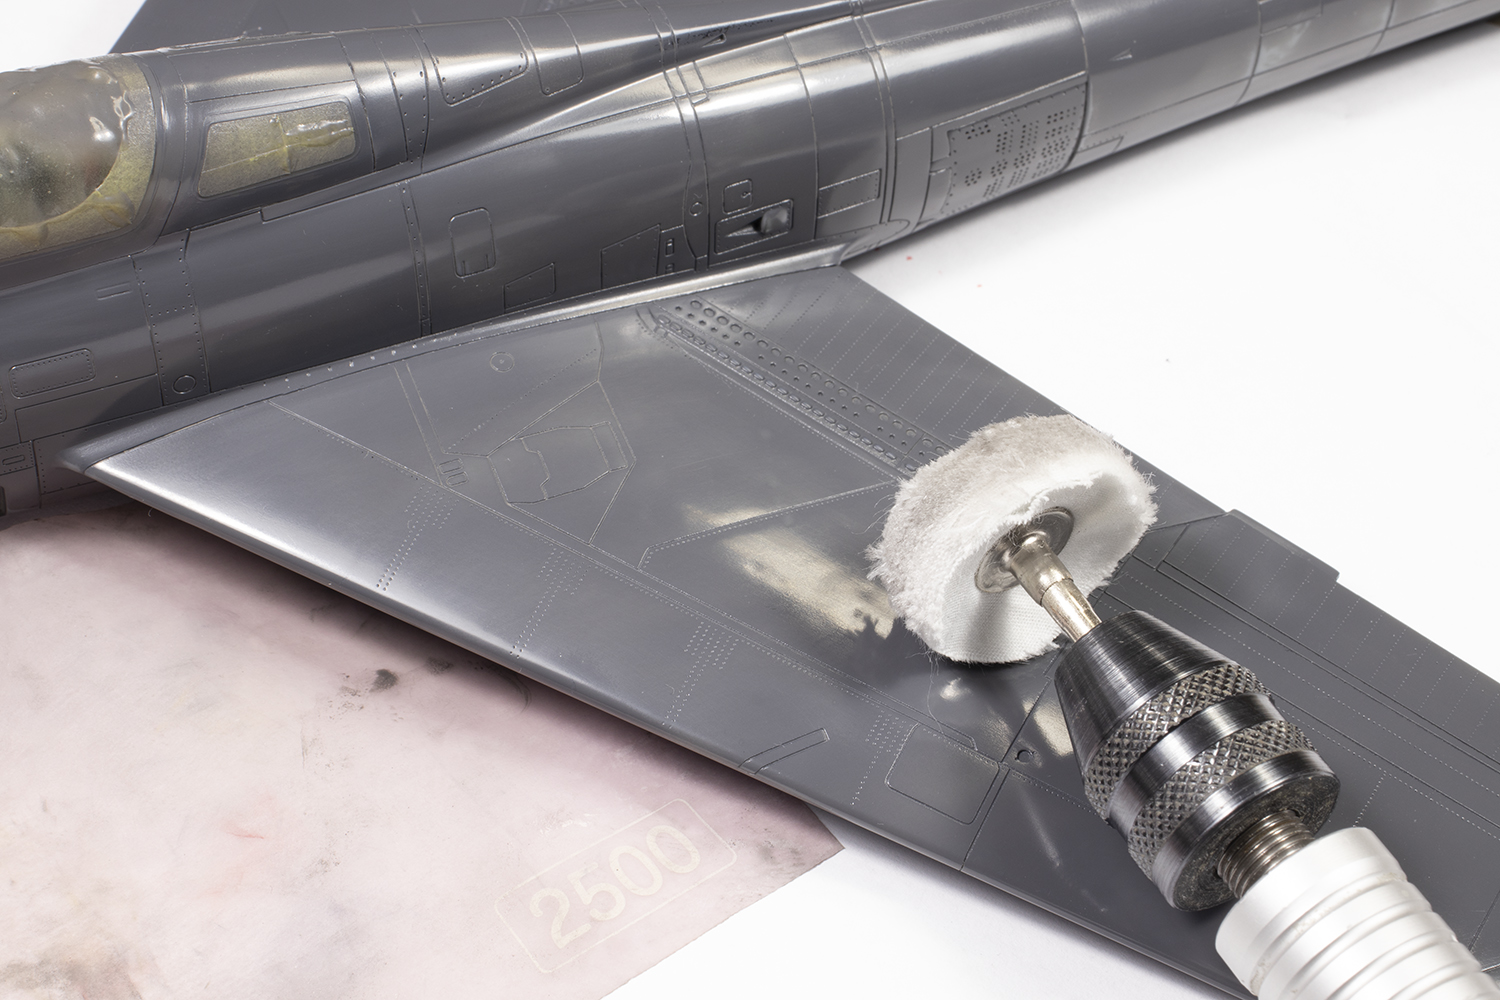
This paint, suitably reduced with Mr Leveling Thinner, goes down very glossy, but to ensure it was completely smooth I flatted it with Infini 2500 grit sponges and film and then ran a cotton buffing wheel in a motor tool over the surface. I didn’t use any polishing products; the cotton does a great job on its own. This revealed some undulations in the wings from moulding imperfections, but I rather liked the subtly uneven surface and left it.

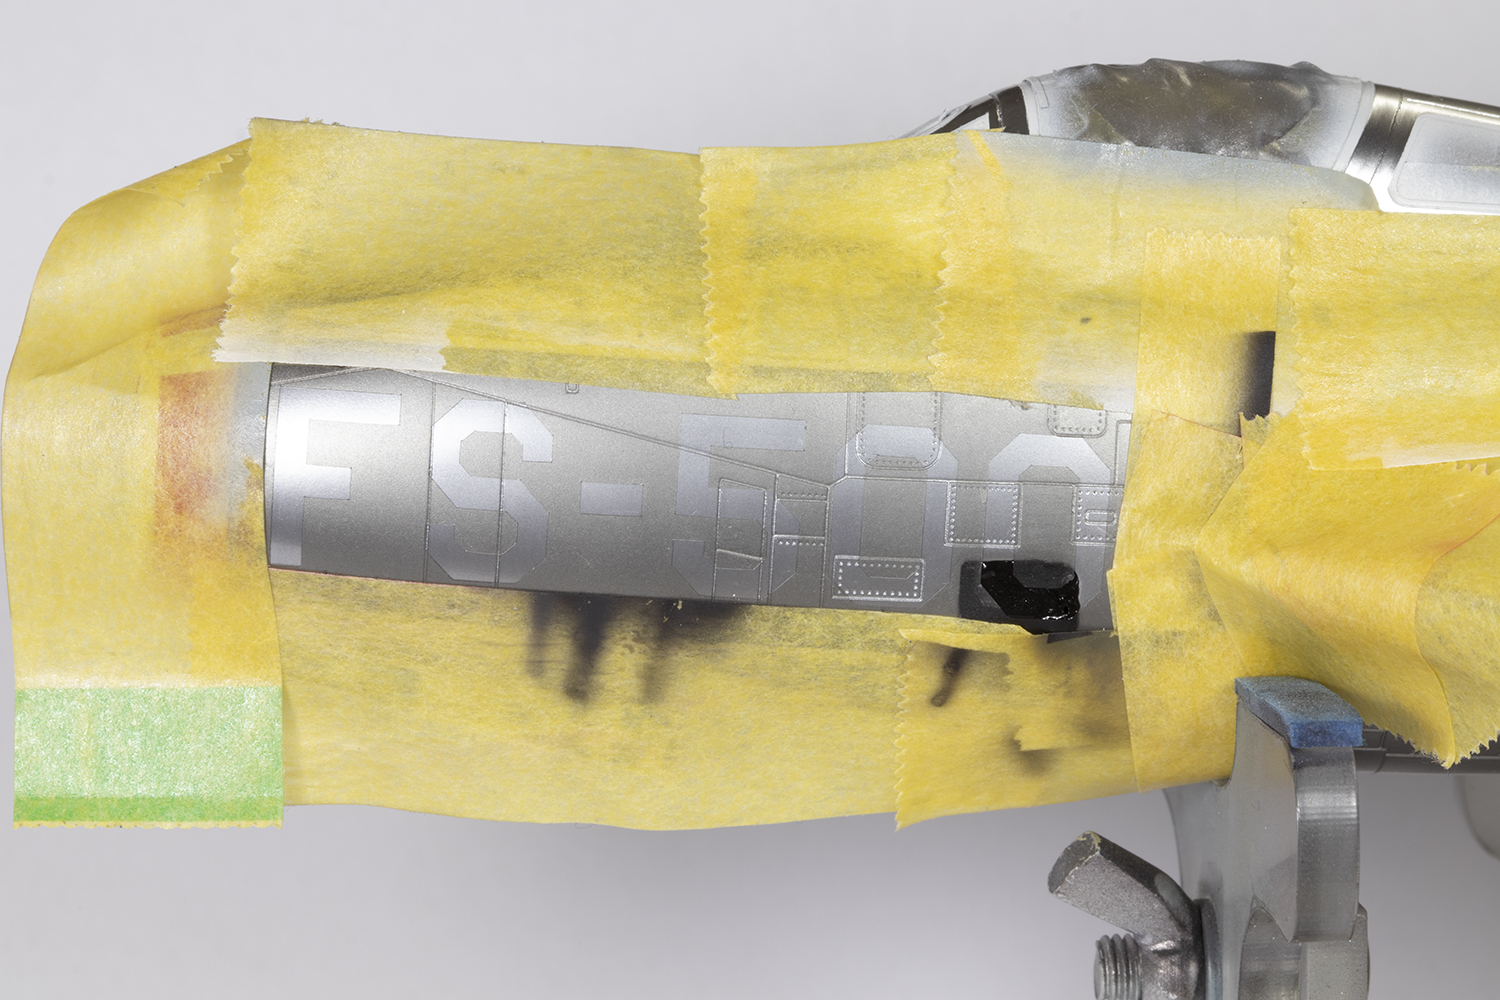
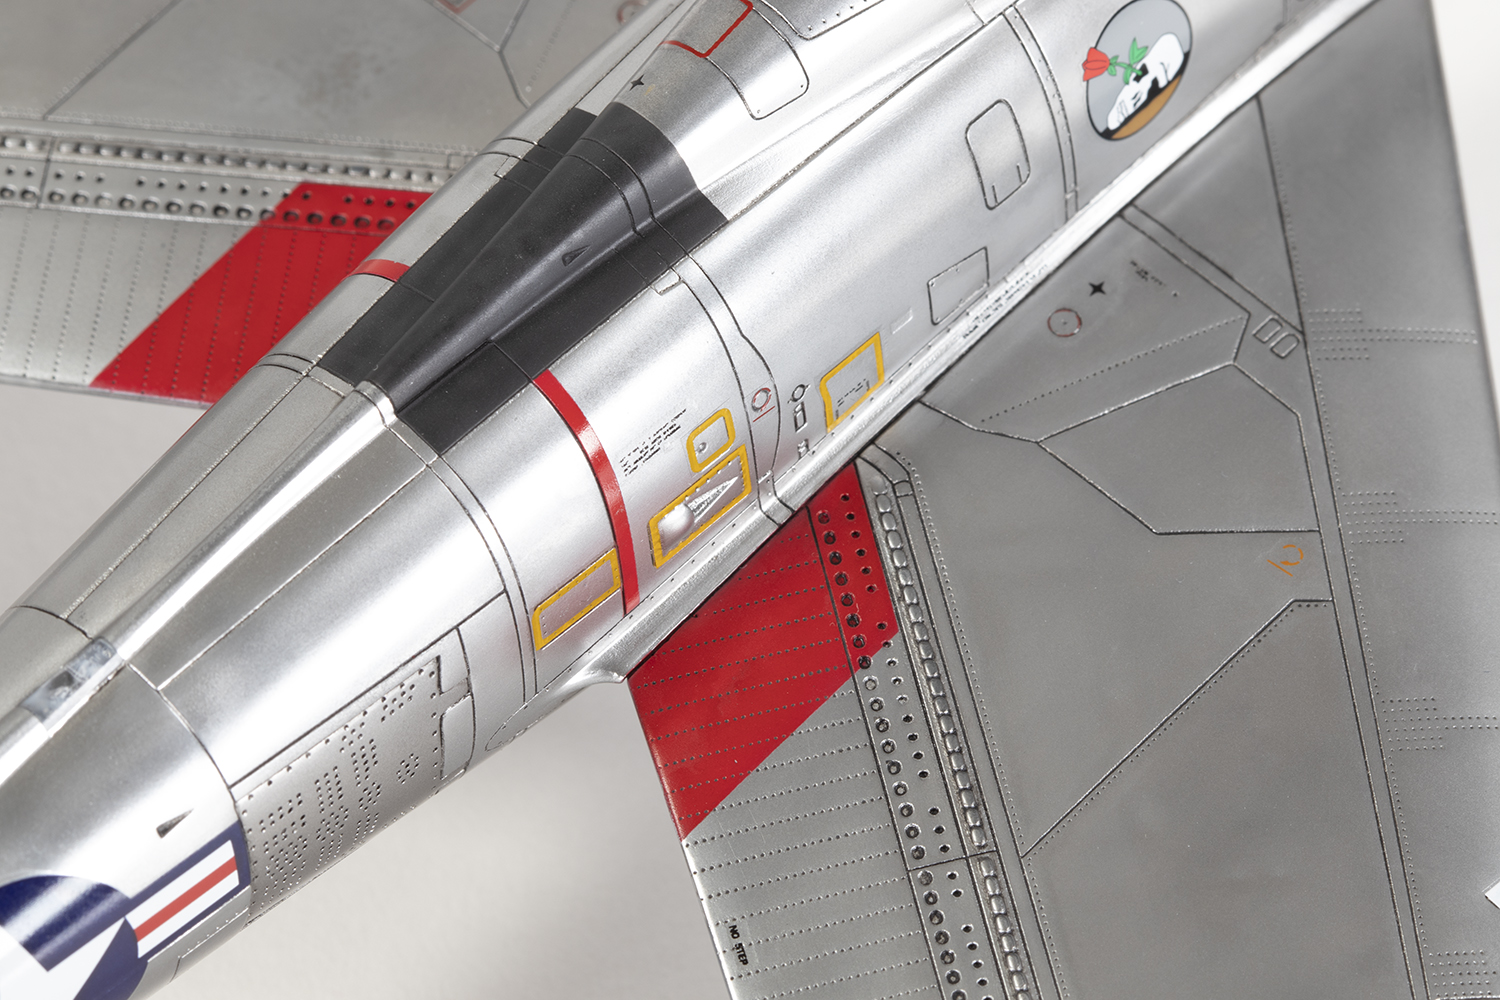
The main finish is SM208 Duralumin, which is about as shiny as one could expect. However, I wanted to push it further and rubbed in some dried pigment from Gunze’s other metallic range Mr Metal Color, in this case MC218 Aluminium. This paint is buffable but super-fragile and the pigment gets everywhere. It did impart more reflectivity, but needed sealing, in this case with KColors SW100 Gloss, which is an acrylic. This transpired to be a mistake as the gloss did not bond well causing it to lift under Tamiya masking tape later on creating no end of problems. I assume the pigment introduced a weak layer; next time I might try a lacquer gloss and hope for better durability. During painting I became aware I needed to remove the rudder trim tab, which was an unwelcome realisation.


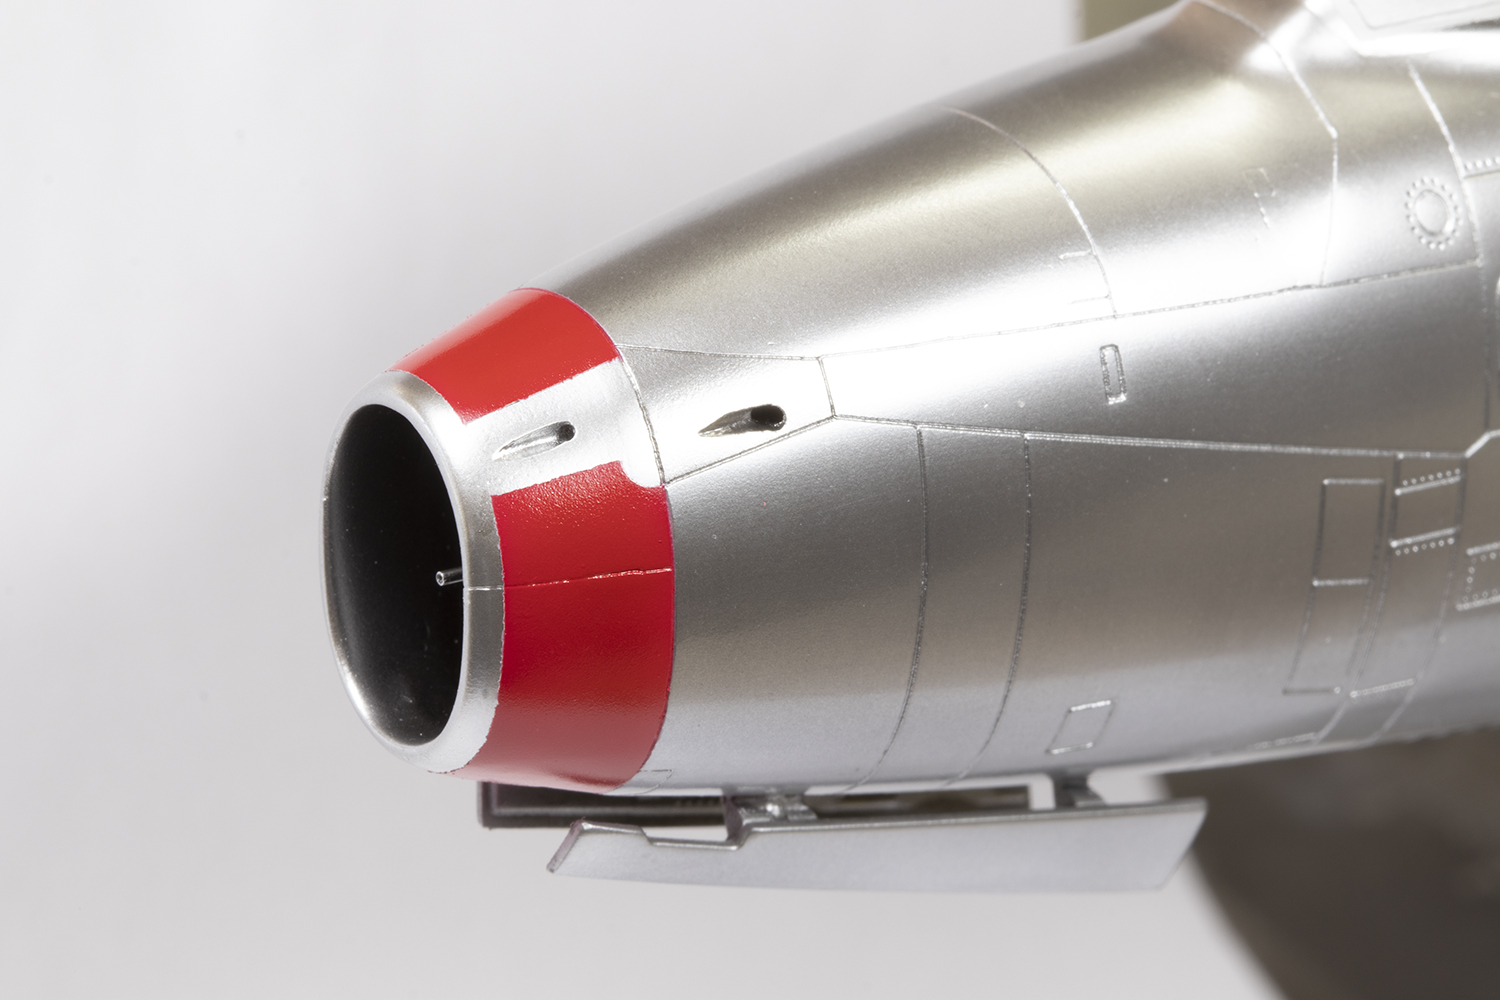
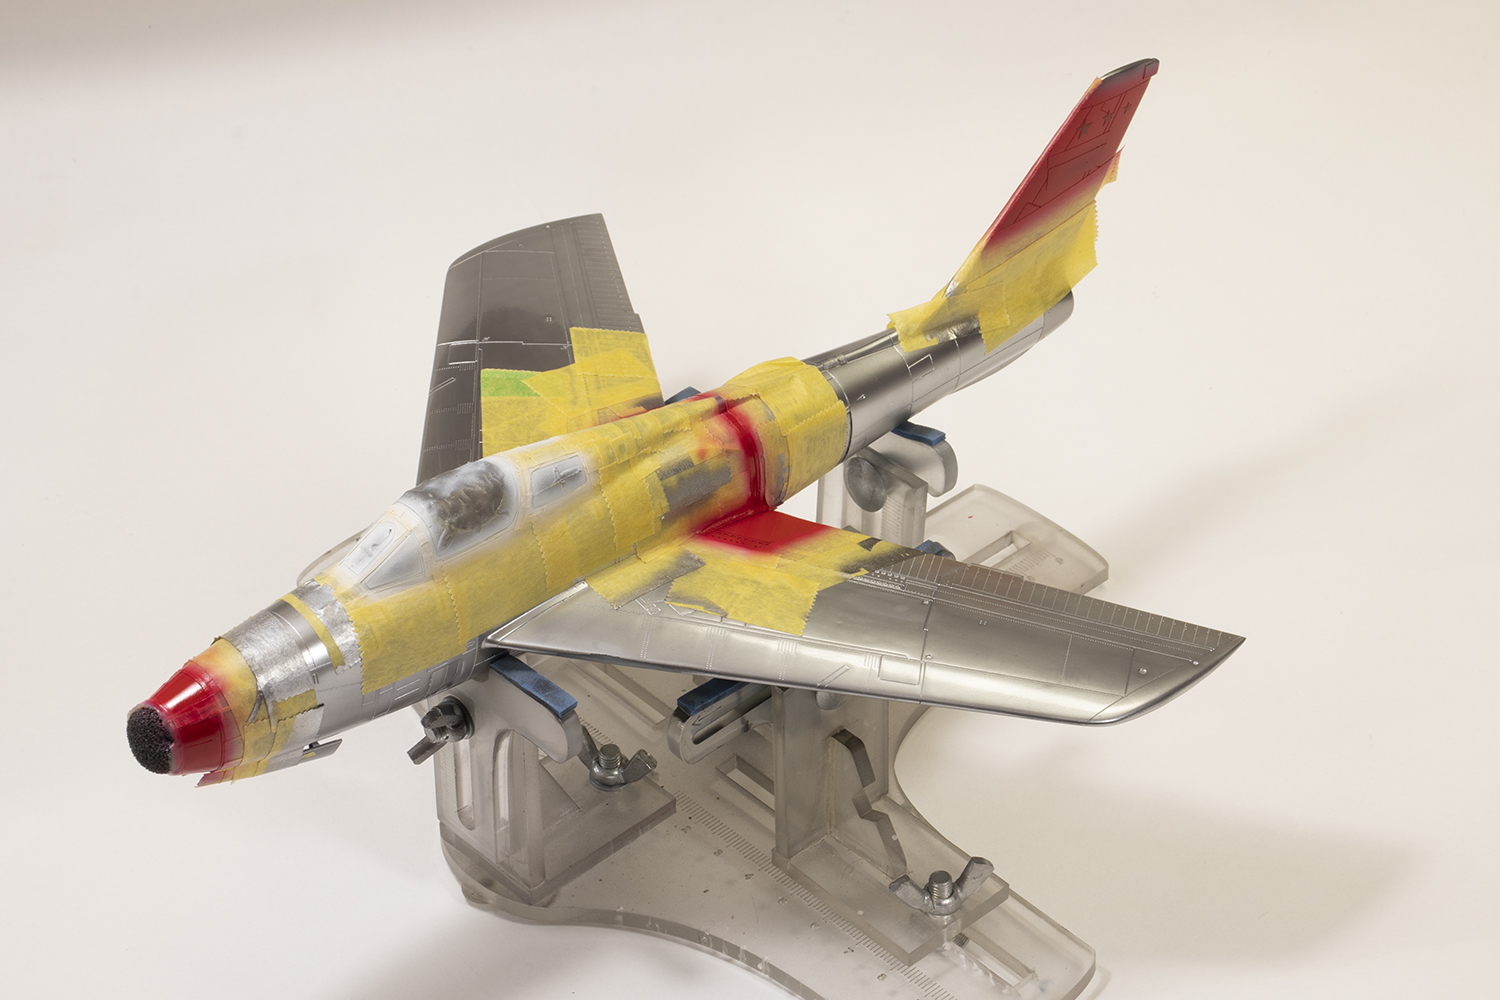
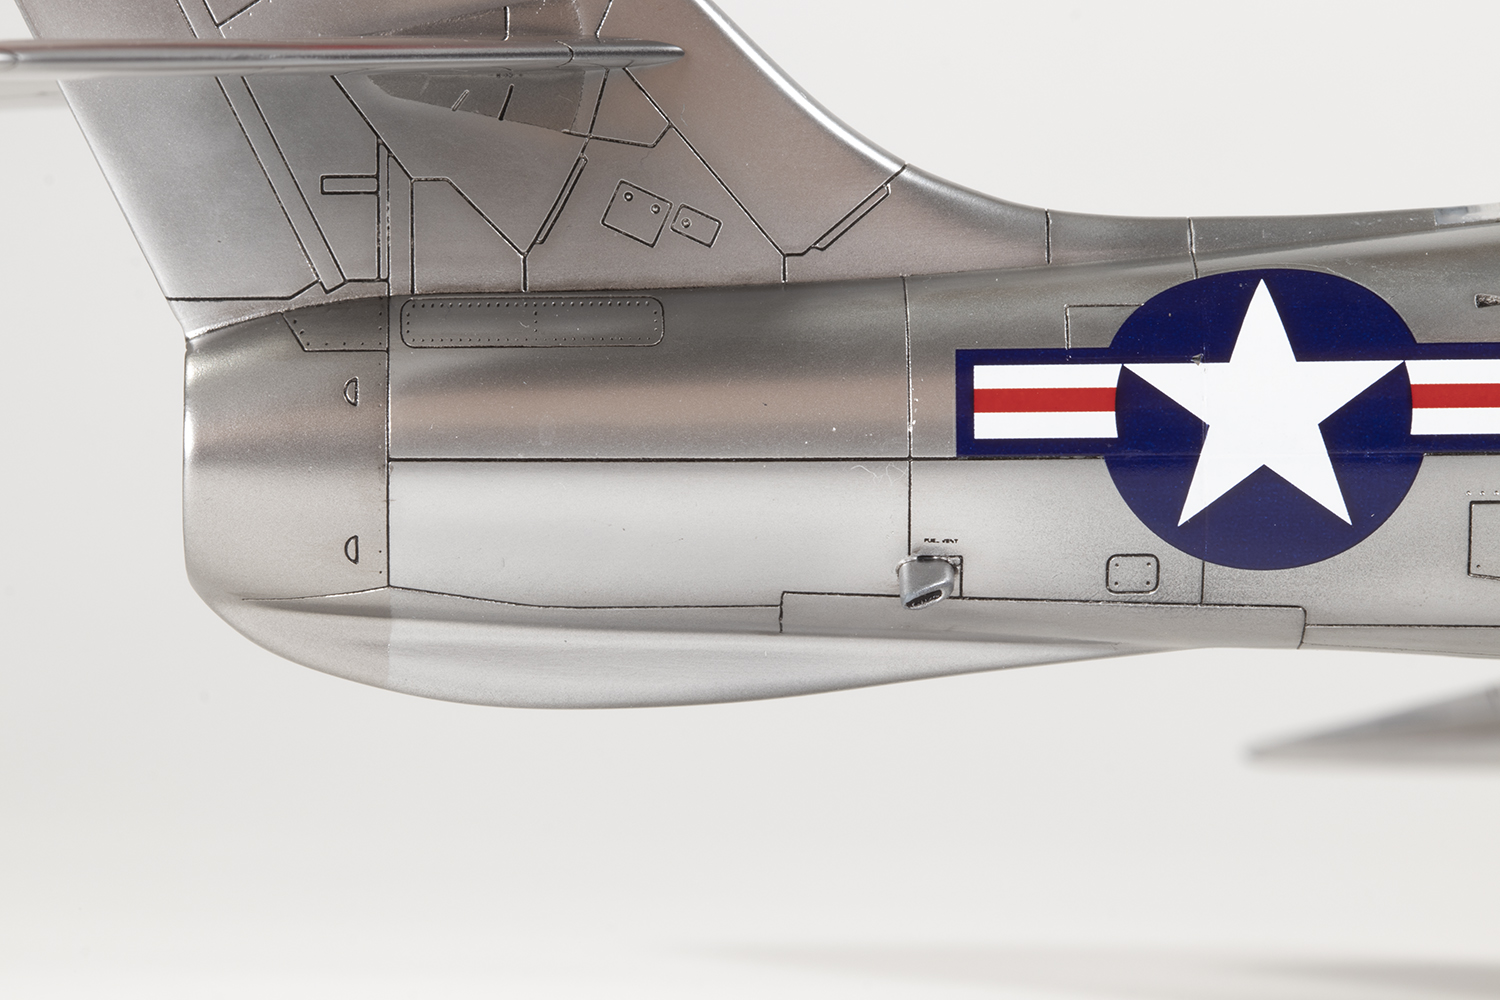
During the project I had been researching the scheme I was modelling, and had found two photos, one in colour, and both of the port side. It was immediately obvious SuperScale had made the following errors: there should be no black lip at the front of the tail tip; the wing tips were not red; and the red warning stripe was in the wrong place. Furthermore, the stars on the tail and in the national insignia were not symmetrical on the decal sheet. Given I had shortened the tail, the red tail decals wouldn’t fit anyway, and so it was an easy decision to create masks for the red nose stripe, the red and white tail markings and the buzz number and USAF markings. The stars and bars would come from a generic Furball sheet.
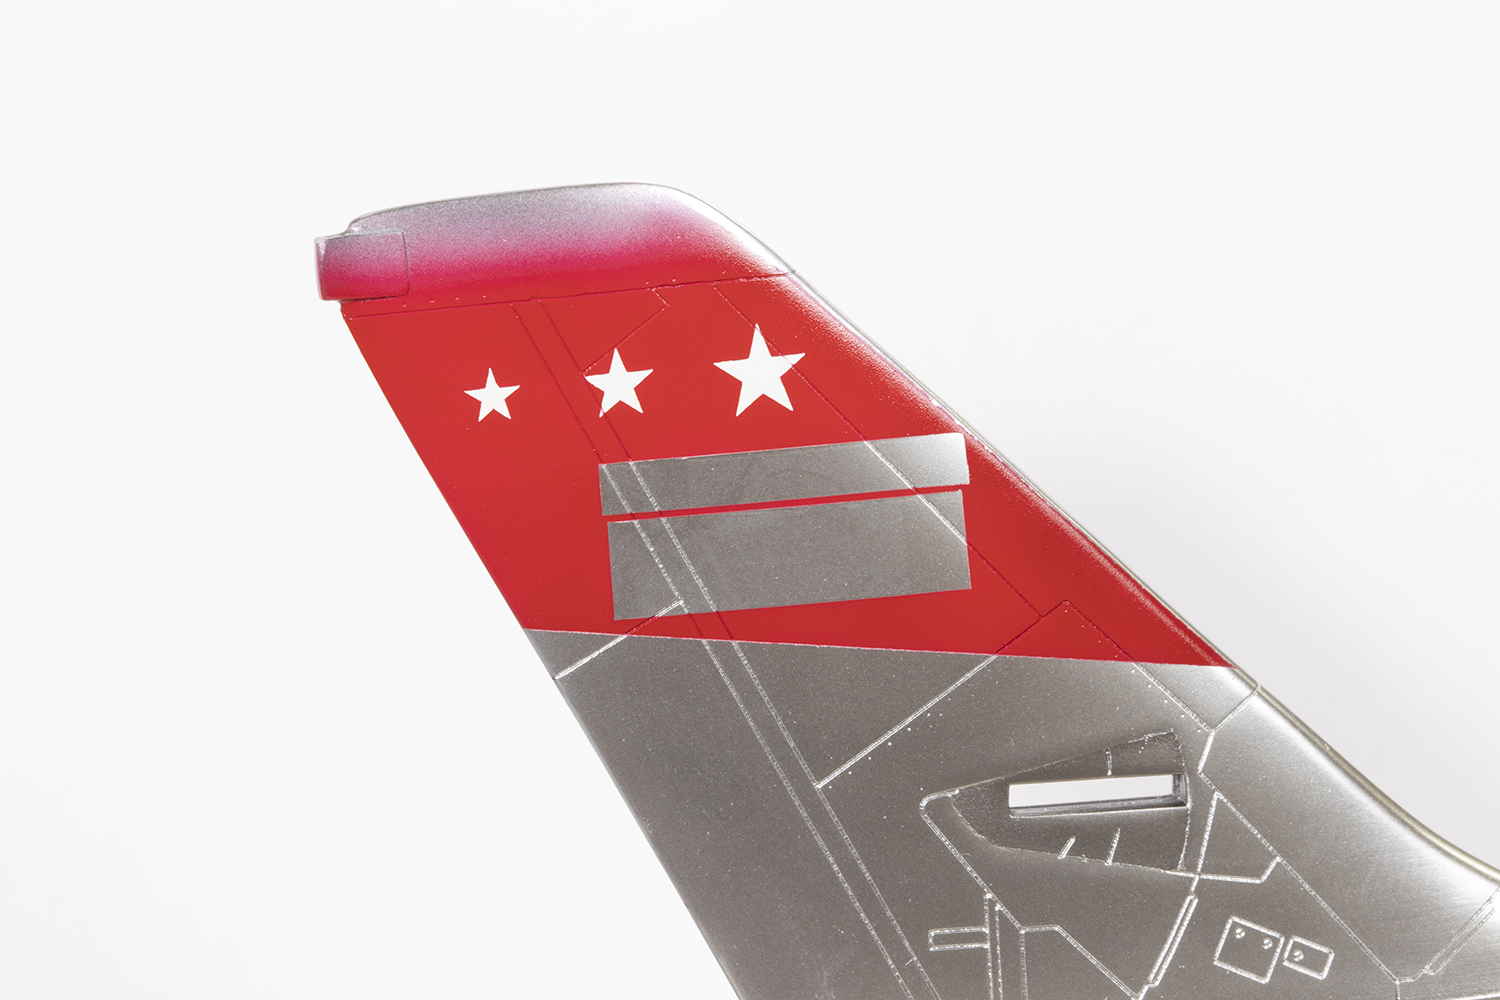
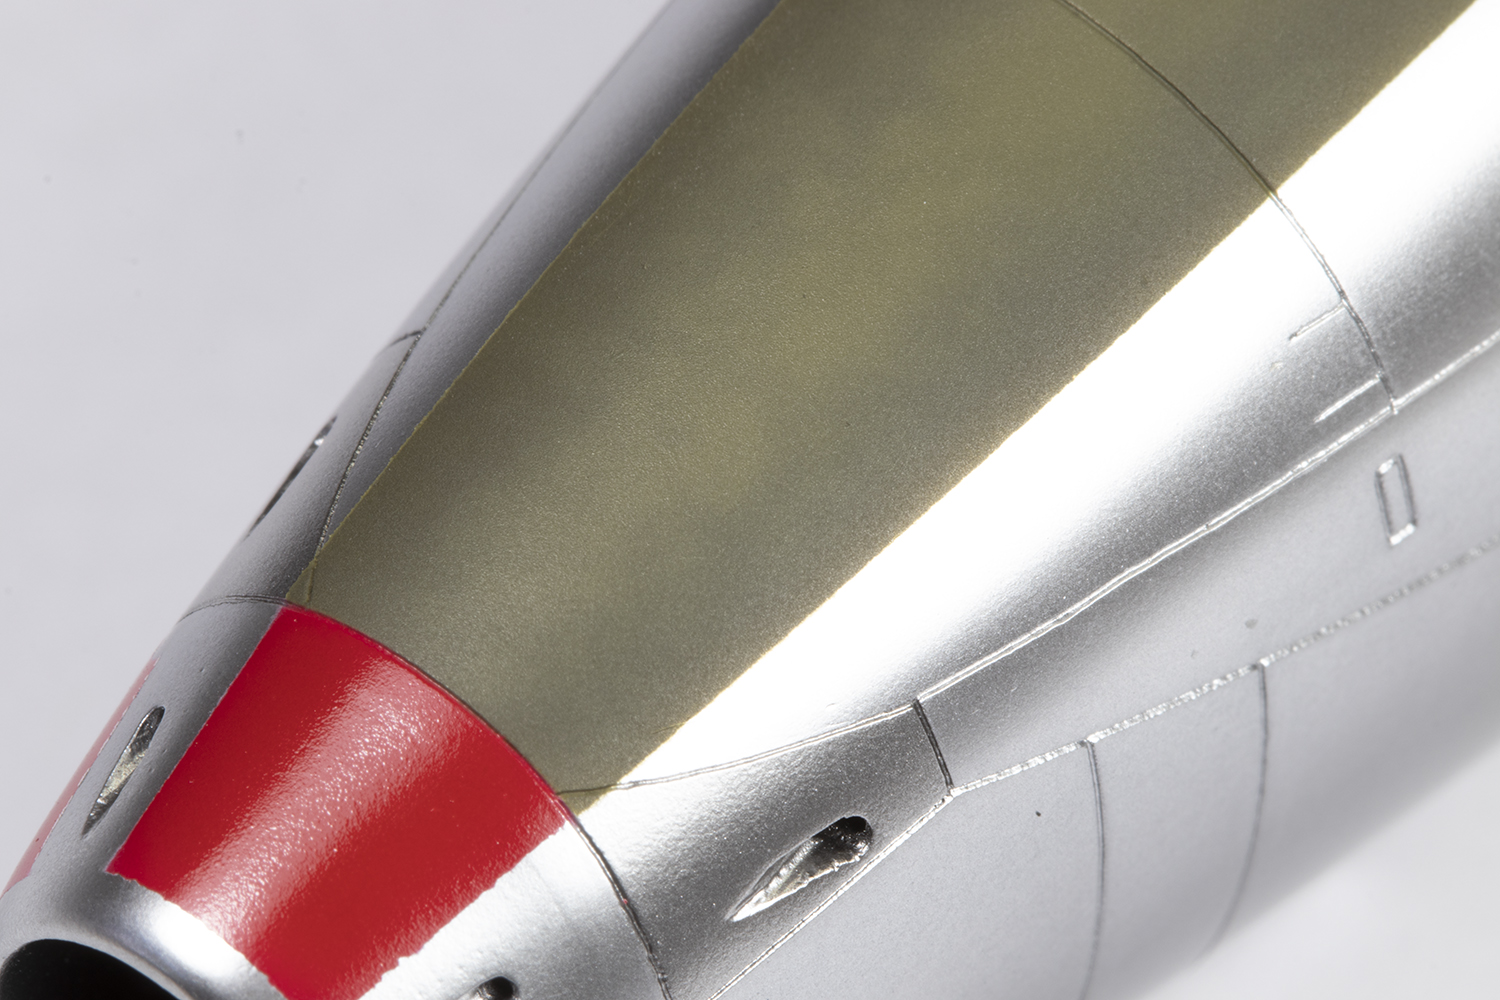
Some further detail painting was required. The anti-glare panel comprises three shades of Gunze Olive Drab, and the black spine panel is mottled from MRP Nato Black, Matt Black and Tyre Black. The tail tip is Mr Color 73 Aircraft Grey, and the red for the nose, tail, wings and warning stripe was all Tamiya X-7 over a layer of Mr Color 69 Off White, which also provided the stars. In the end, only seven decals were used from the SuperScale sheet and red or black options are provided for the ‘Misanthropic Mary’ legend. The colour photo suggested it was black. Most of the stencils were from the kit and were not very well printed, Despite being quite thin, they still left prominent carrier film visible on the metallic finish.


Weathering caused me a quandary: I liked it quite clean, but I also like models quite weathered. I went with my impulse for a clean finish and simply left it at an oil wash into the recessed detail. It’s too prominent, because the panel lines are massive, but looks better than left untreated.
The final touches were the pitot made from brass tube and wing tip lights made from heated clear sprue smashed through the little templates sometimes found on the frame of Eduard PE sets. Lastly came the landing gear. The main legs slotted into place very positively and come with actuators that I had no idea how to fit, so left off. The nose leg, on the other hand, is a nightmare. It’s quite poorly moulded, especially the part that traps the nose wheel. Despite spending ages trying to ensure a good result, that wheel still ended up quite badly misaligned, which is a shame as it’s rather prominent.
If you want a natural metal mid block USAF Thunderstreak, Kinetic’s kit is a bit of a project and produces a rather unrefined result. But I had tremendous fun making it and stretched my modelling skills in all kinds of new ways. This has been instalment #2 in my series on building F-84s from the stash, and I hope it shall be concluded in early 2023 with Tanmodel’s RF-84F Thunderflash.


Year bought: 2007 (Lucky Model, Hong Kong)
Year built: 2022 (New Addington, Croydon)
Back to home.
