with Quickboost resin seats and Aires resin wheels
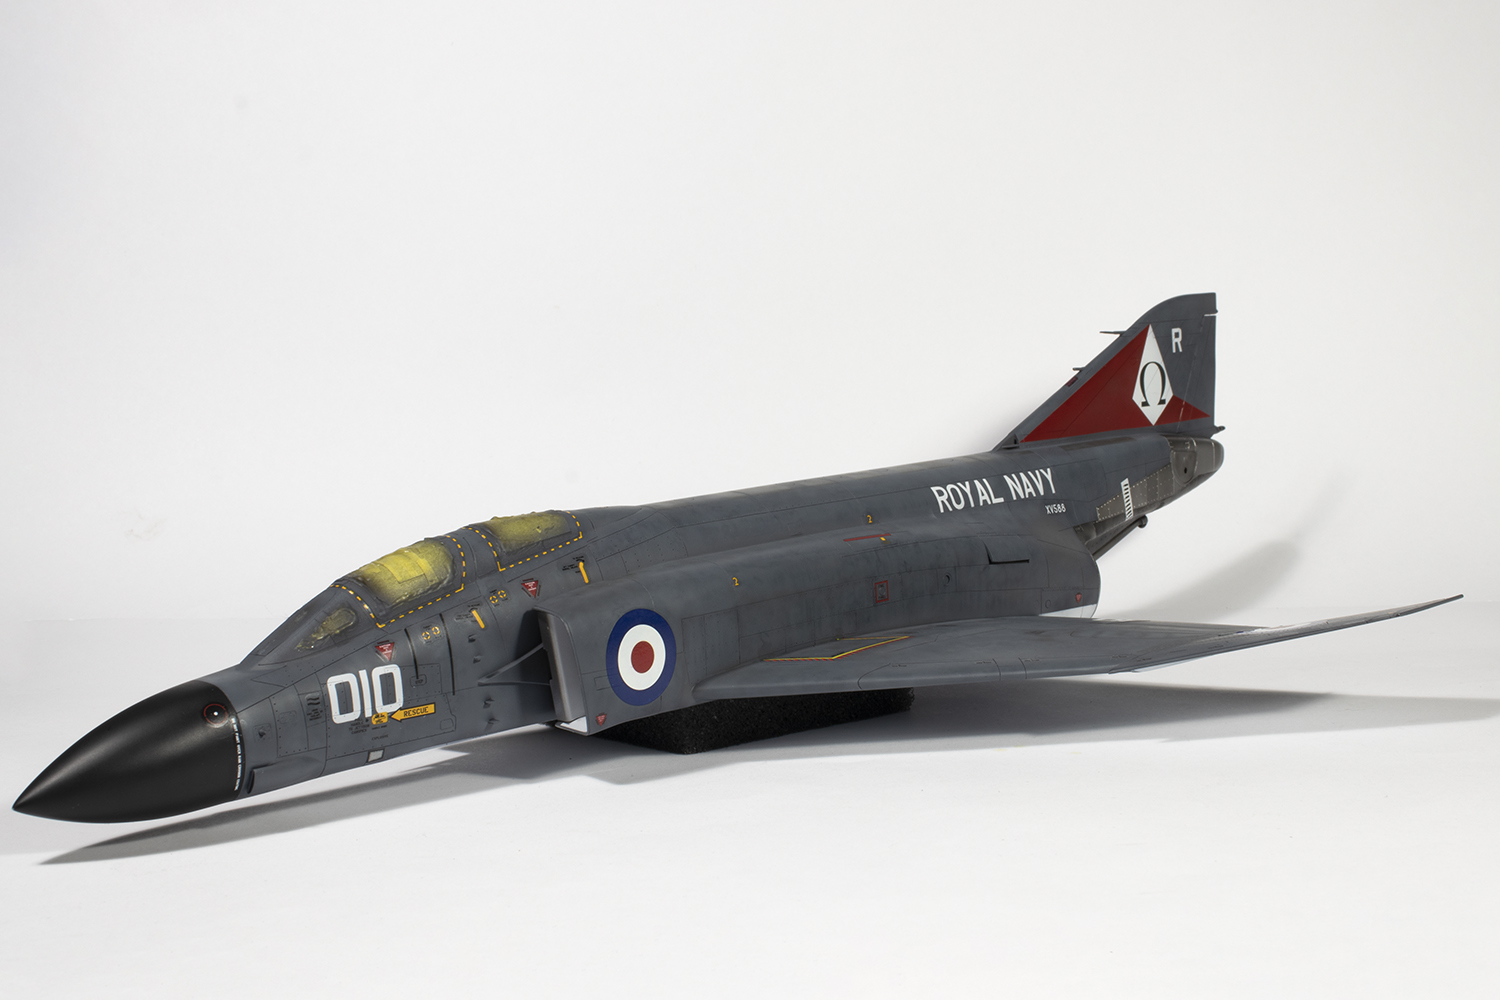
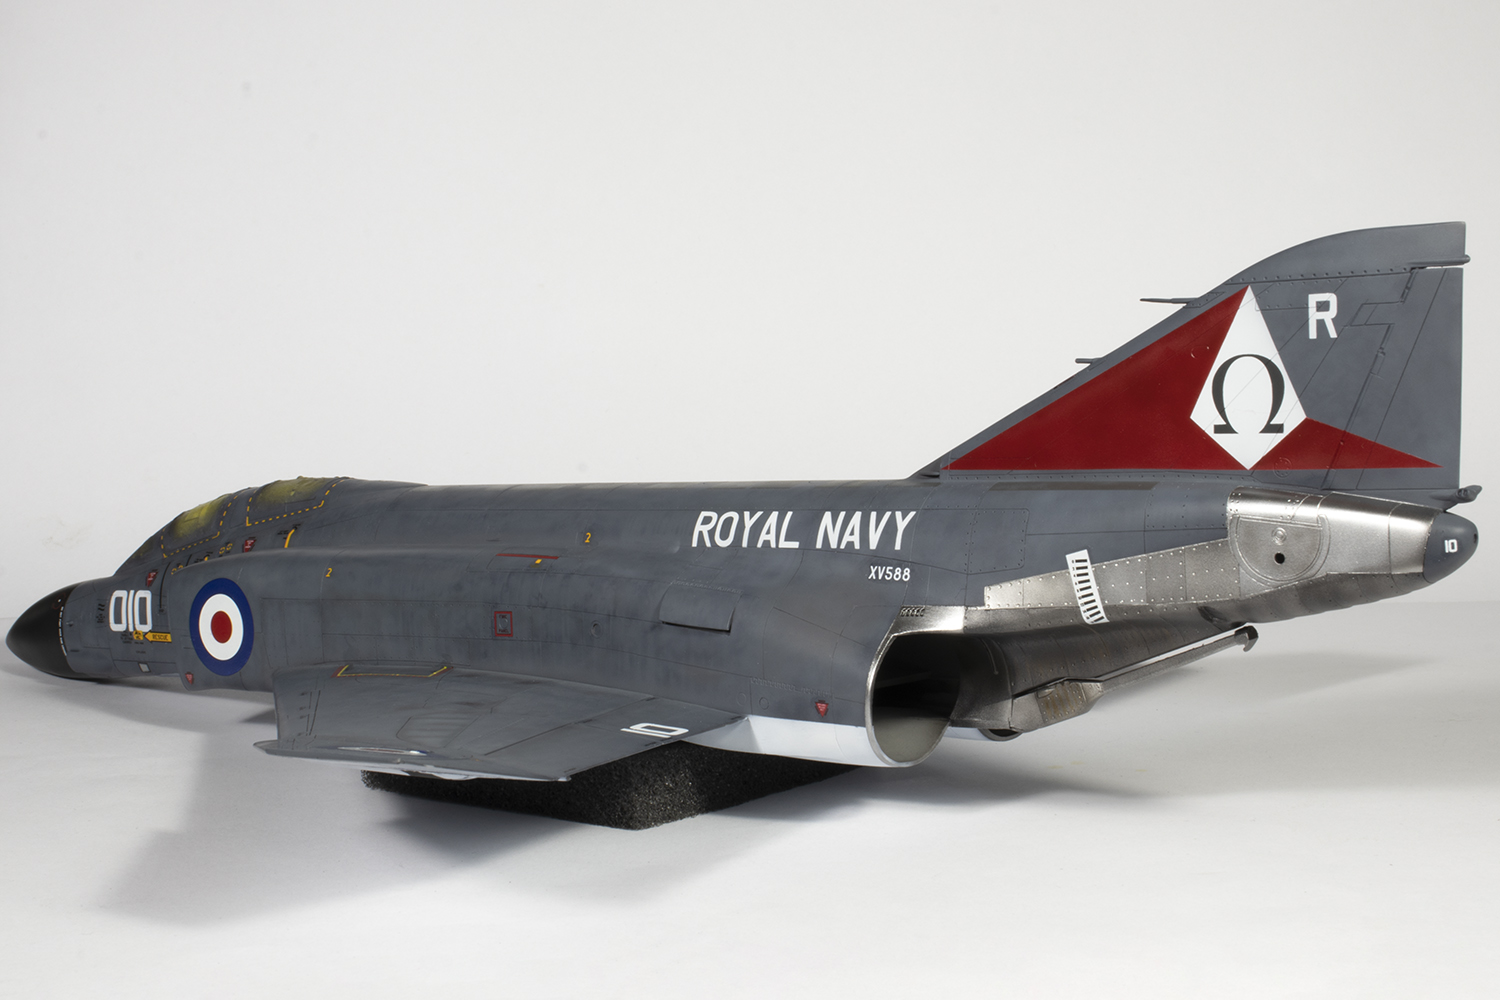
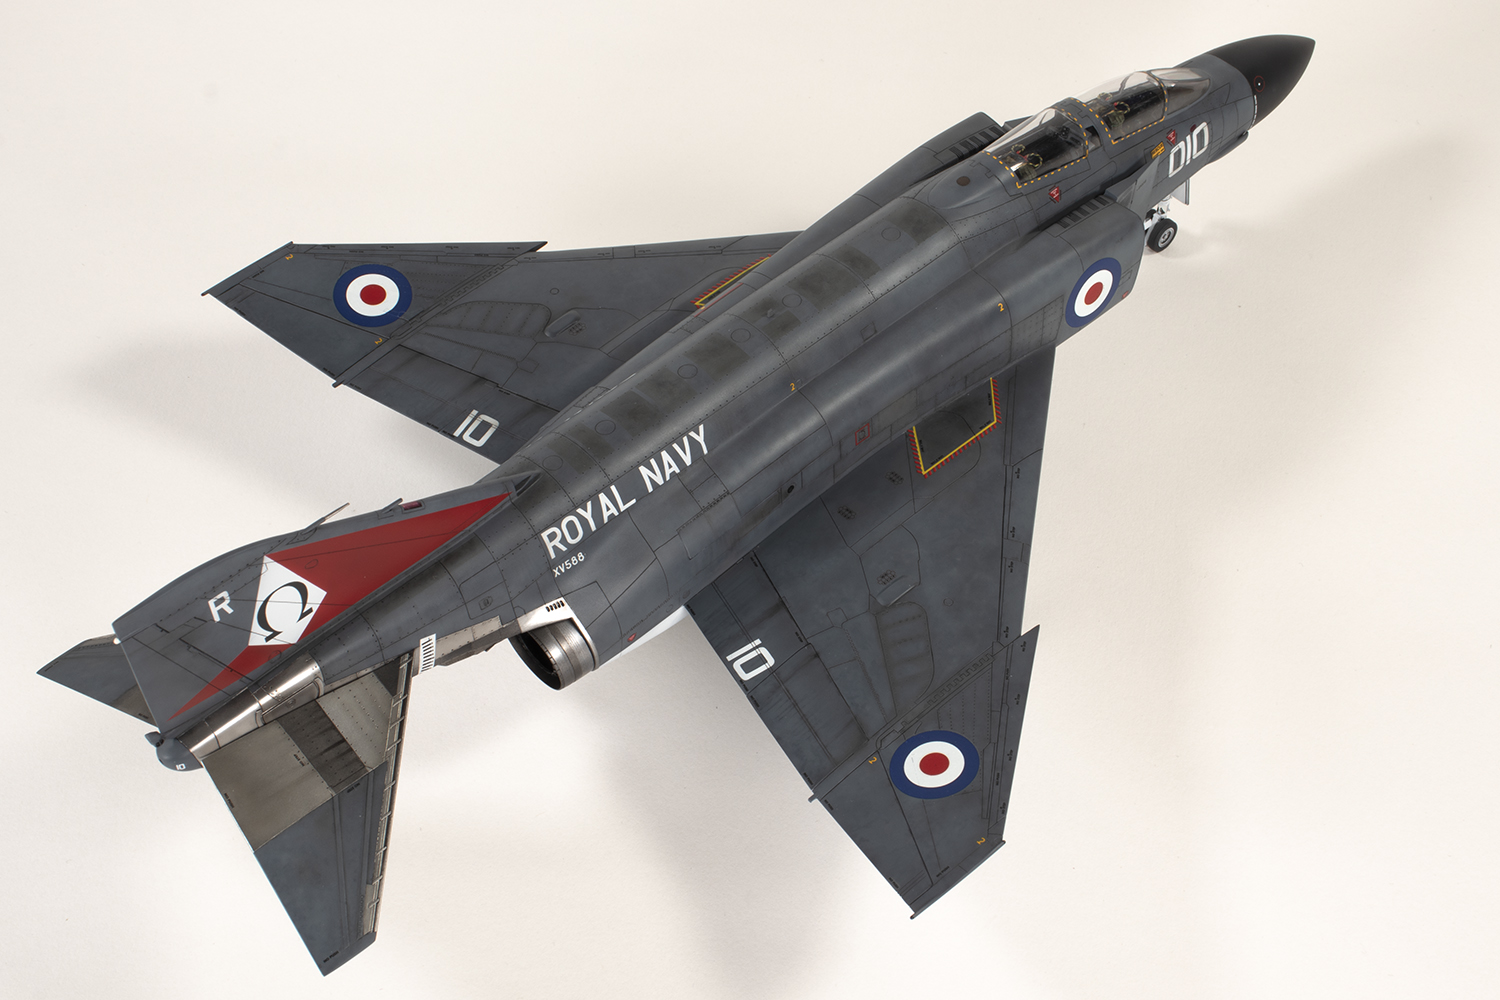
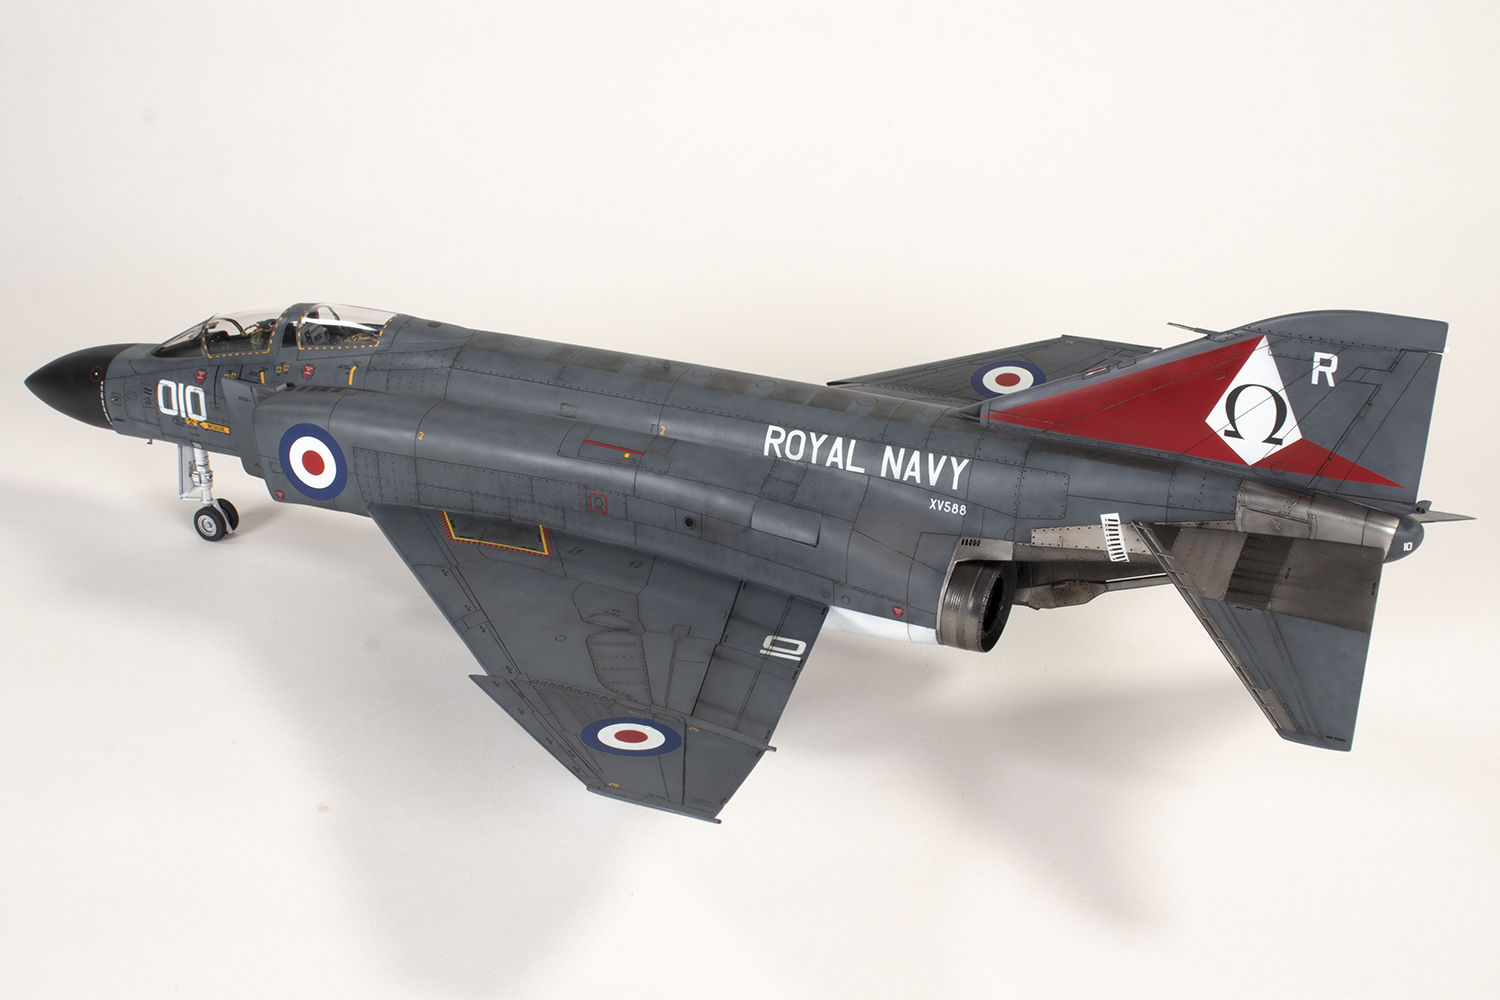
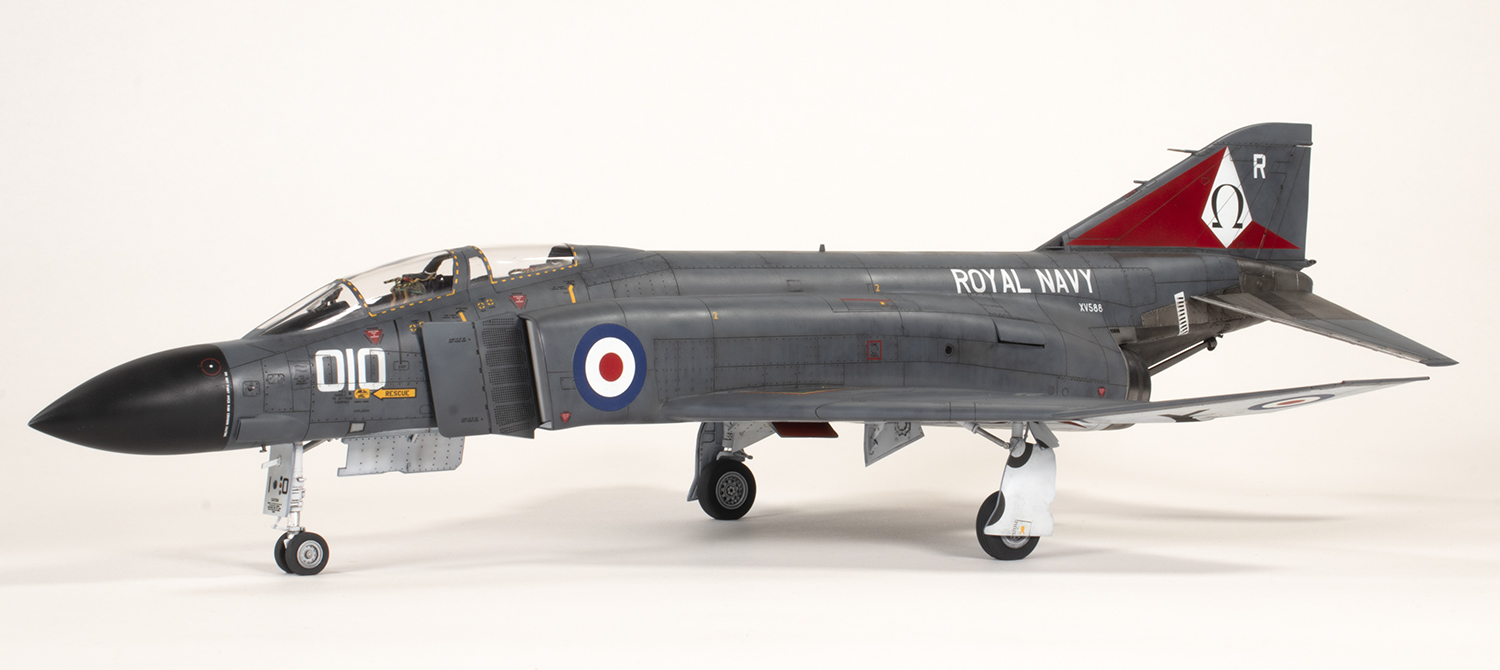
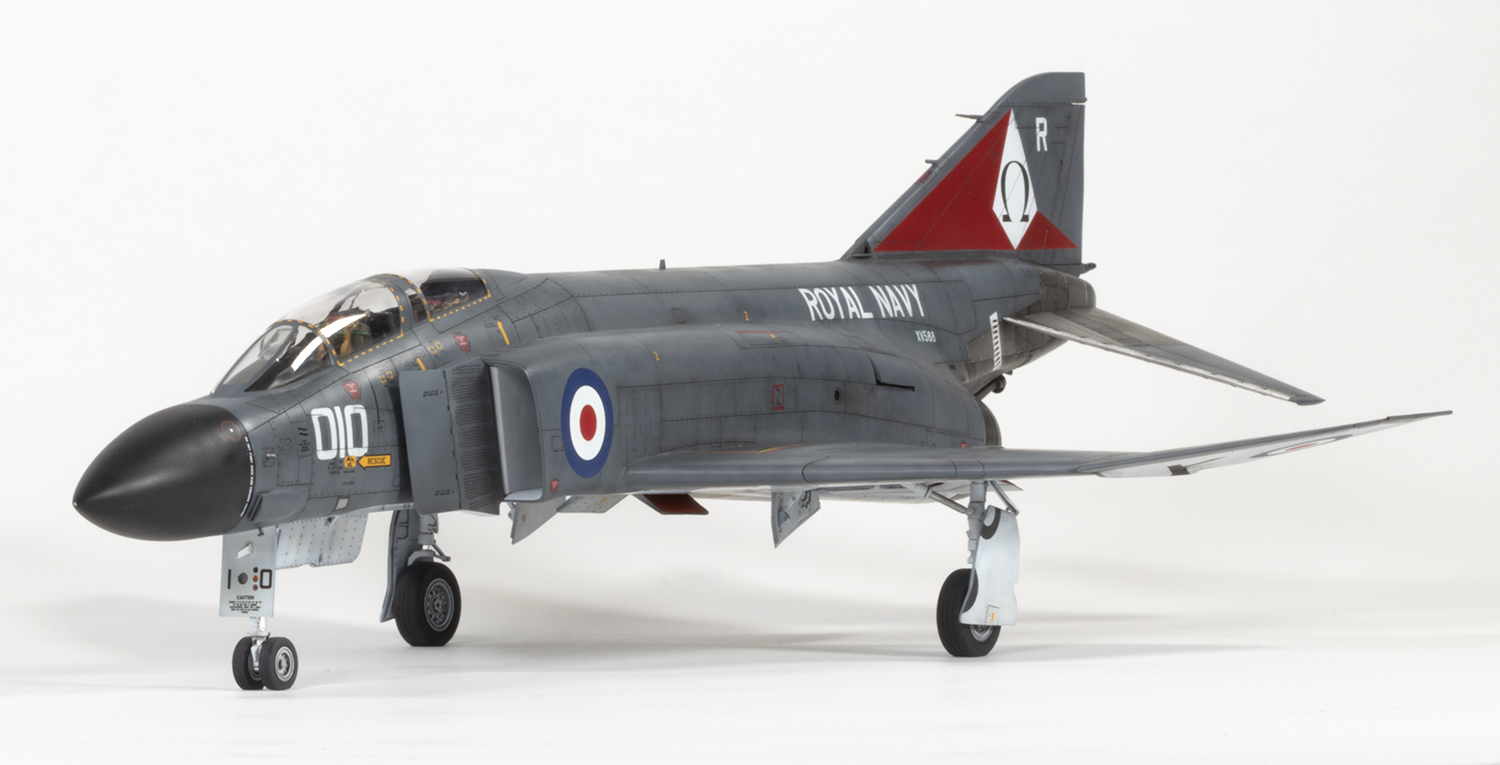
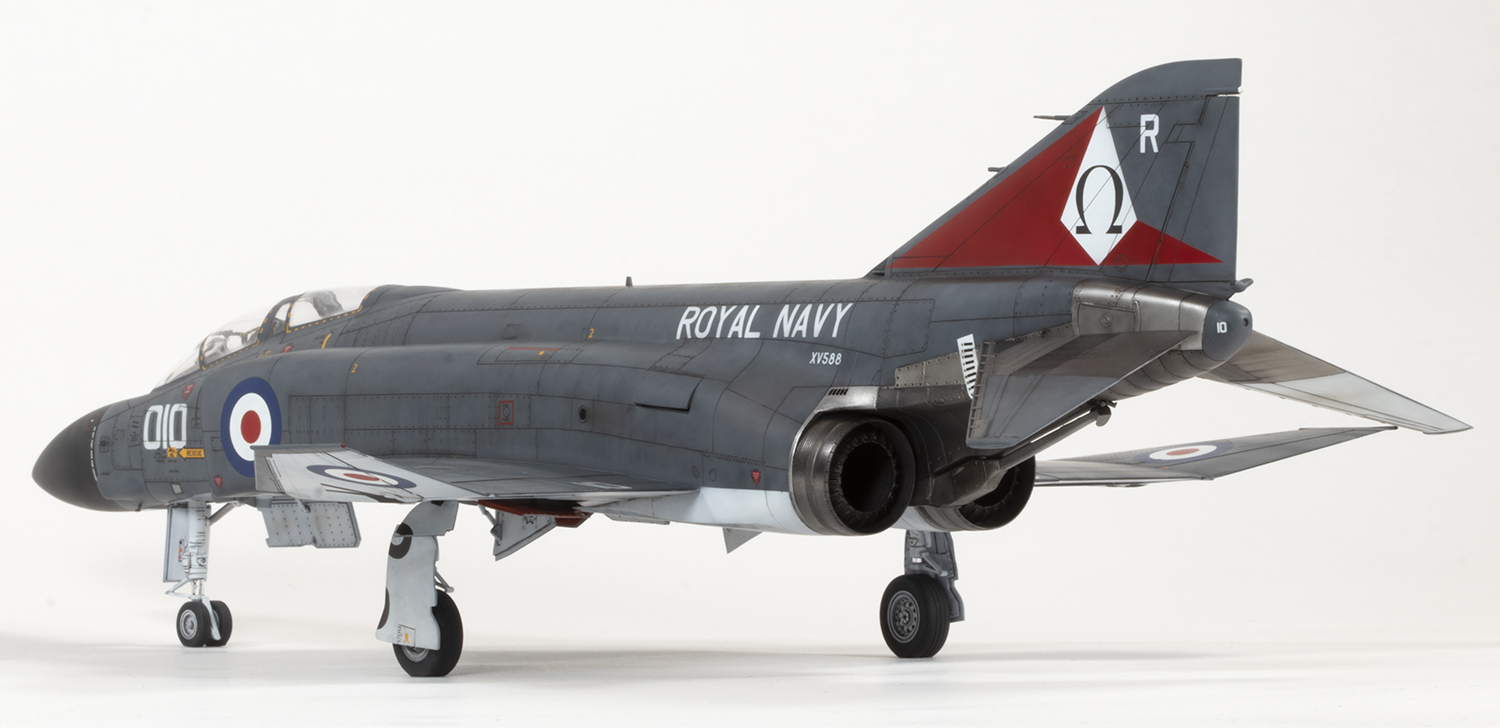
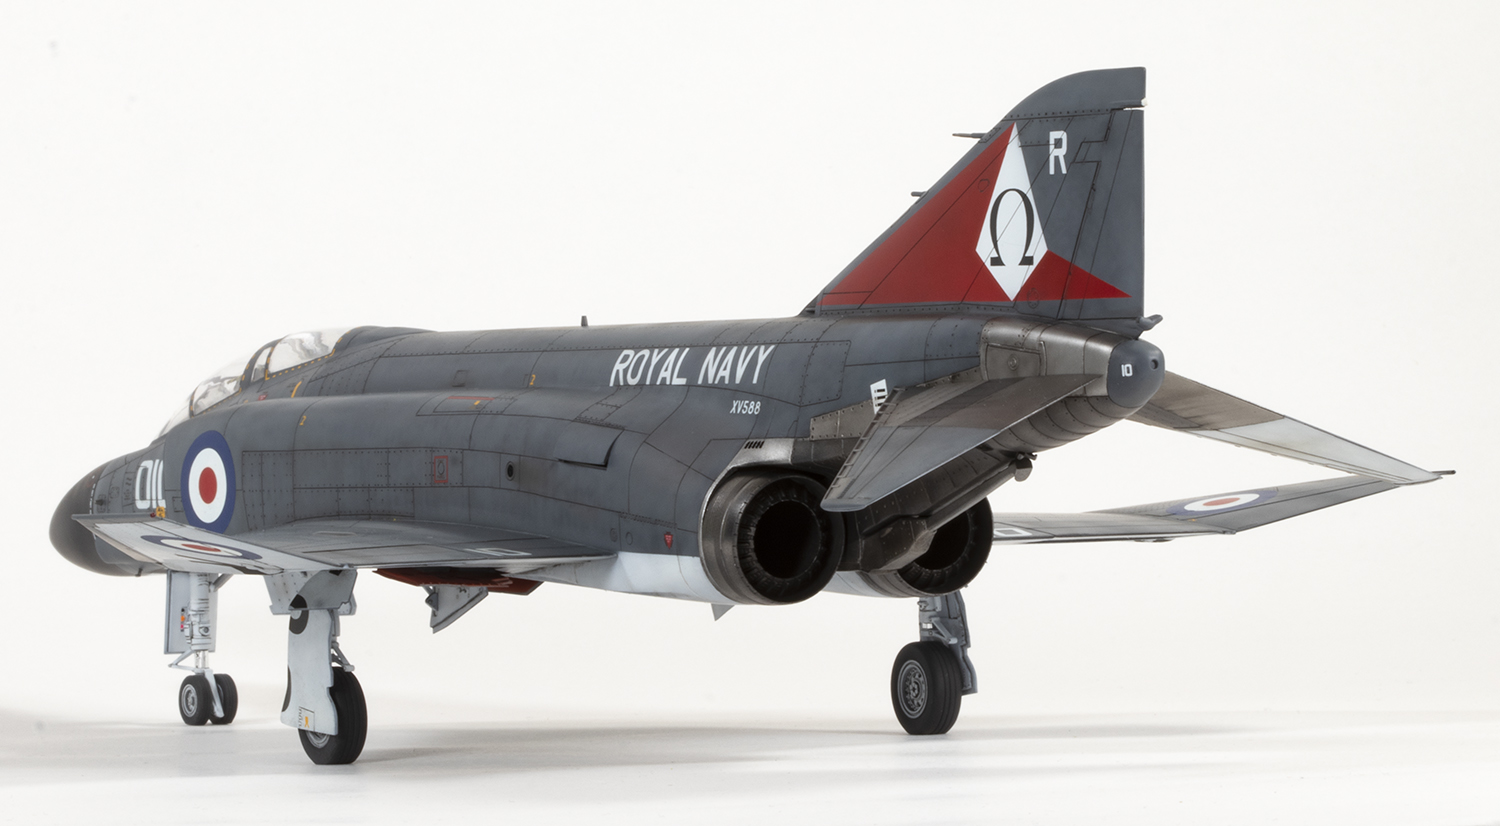
892 Naval Air Squadron, HMS Ark Royal 1972

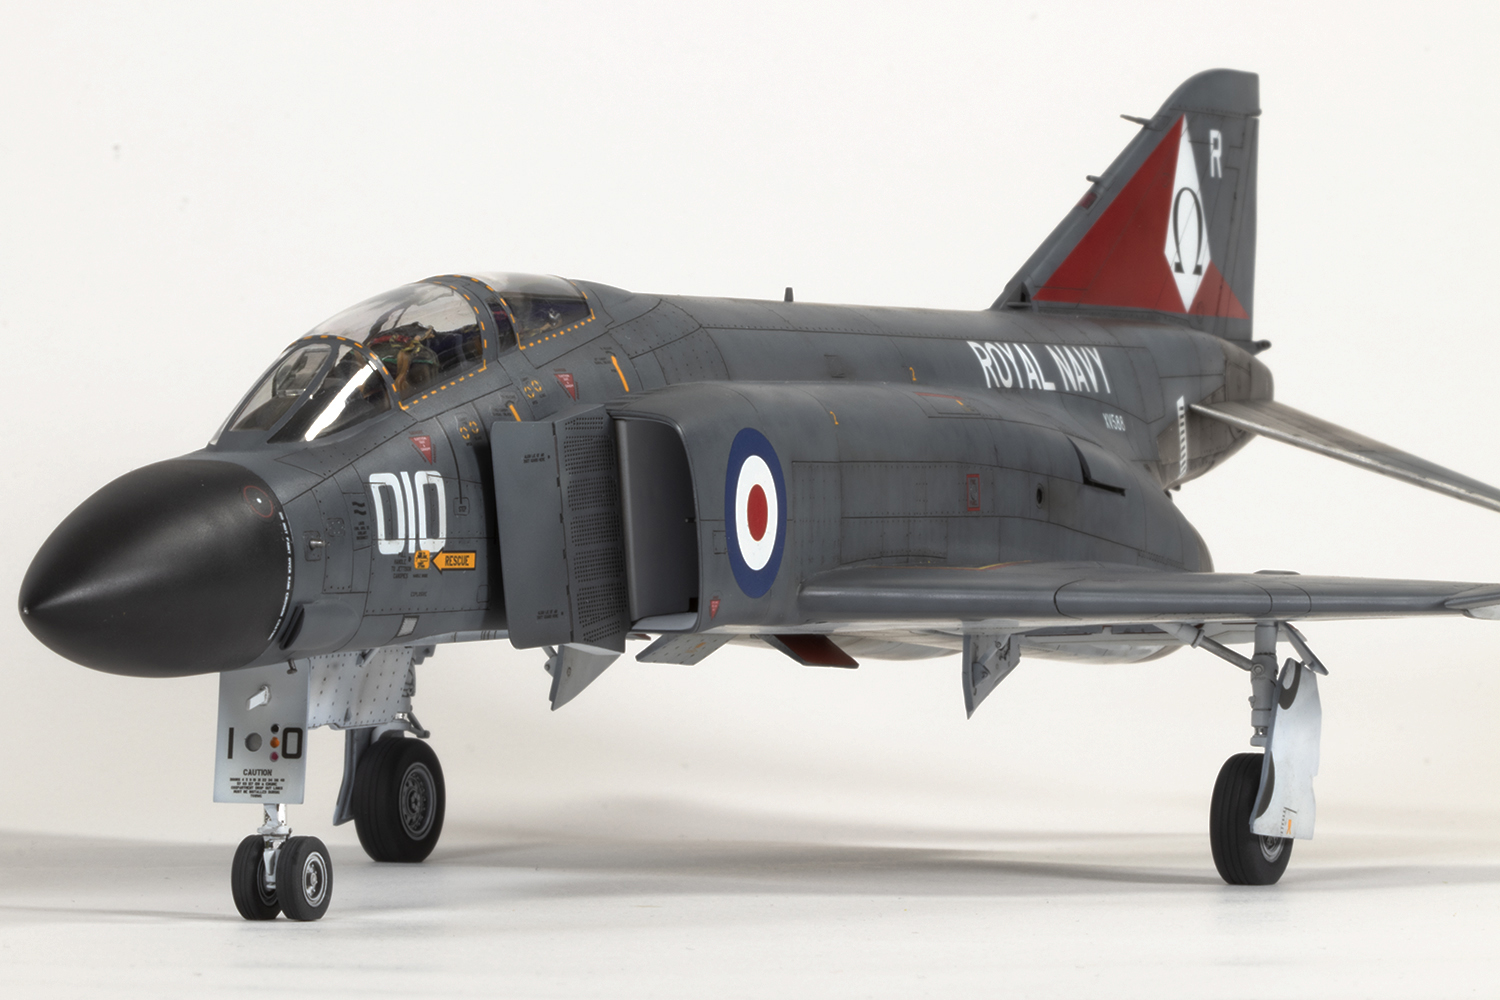
For decades Hasegawa ruled the 1/48 Phantom roost, but the past ten years have seen an explosion of competitors released by the likes of Academy, Zoukei-Mura, Tamiya and MENG. Sadly, none of these have seen fit to produce the mighty Brit Phantoms, and thus we remain beholden to Hasegawa (and the Revell reboxings) to model an FG.1 or FGR.2.
I was very happy to find the 111 Sqn ‘Black Mike’ boxing for about £10 twenty years ago during a visit to Hong Kong, but I wanted to make a bog-standard Royal Navy airframe from Ark Royal. There are very few aftermarket sheets out there for such an airframe, and it took a good few years before I sourced a suitable Hasegawa ‘Ark Royal’ decal sheet via Britmodeller. With some resin Aires wheels (to replace the yukky white metal and rubber kit parts) and Quickboost seats in hand, I was finally ready to embark on the project.
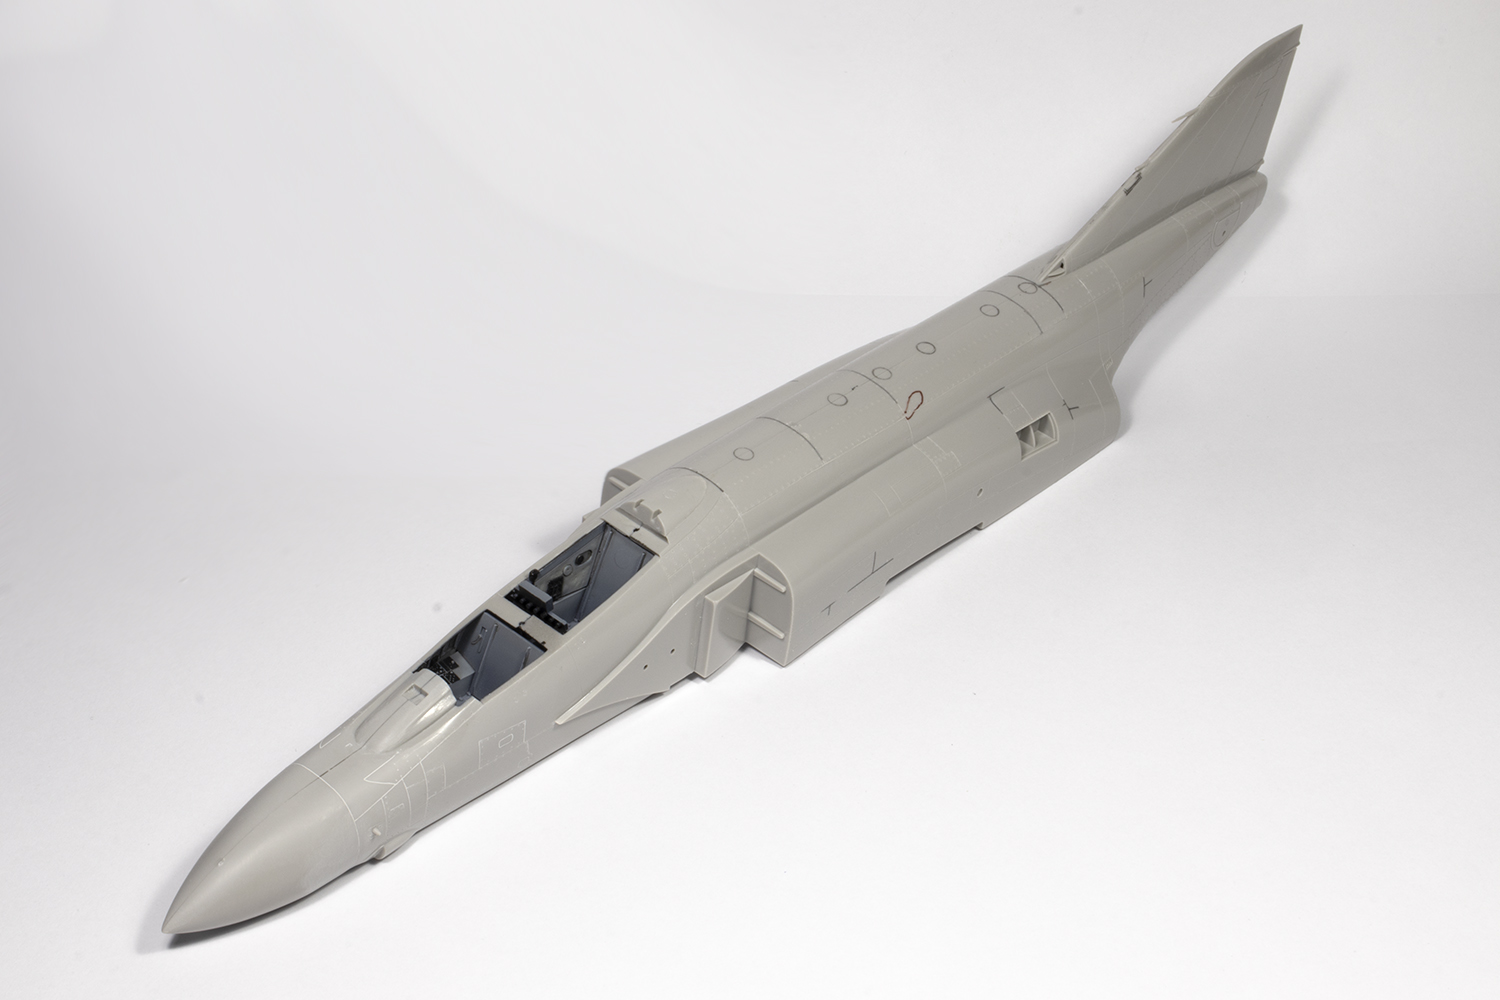
2023 is the year I expunge all the remaining Phantoms from my stash. This is the tenth Hasegawa 1/48 Phantom I’ve built and tracing the ancestral tree is not easy. The Brit Phantoms are clearly related to the others, but significantly different as well. In addition to the major differences, the surface detail is more extensive, the pylons and tail planes have recessed panel lines, and the wheel wells have more detail. As I move into my mid 40s I’ve found it necessary to work with magnification, which made a whole load of tiny tooling flaws visible that I was previously ignorant of, like panel line overruns, but it was nice to be making a model with very smooth plastic and no grainy texture to deal with. No doubt a more modern tooling suitable for the 21st century will be along in due course…won’t it?
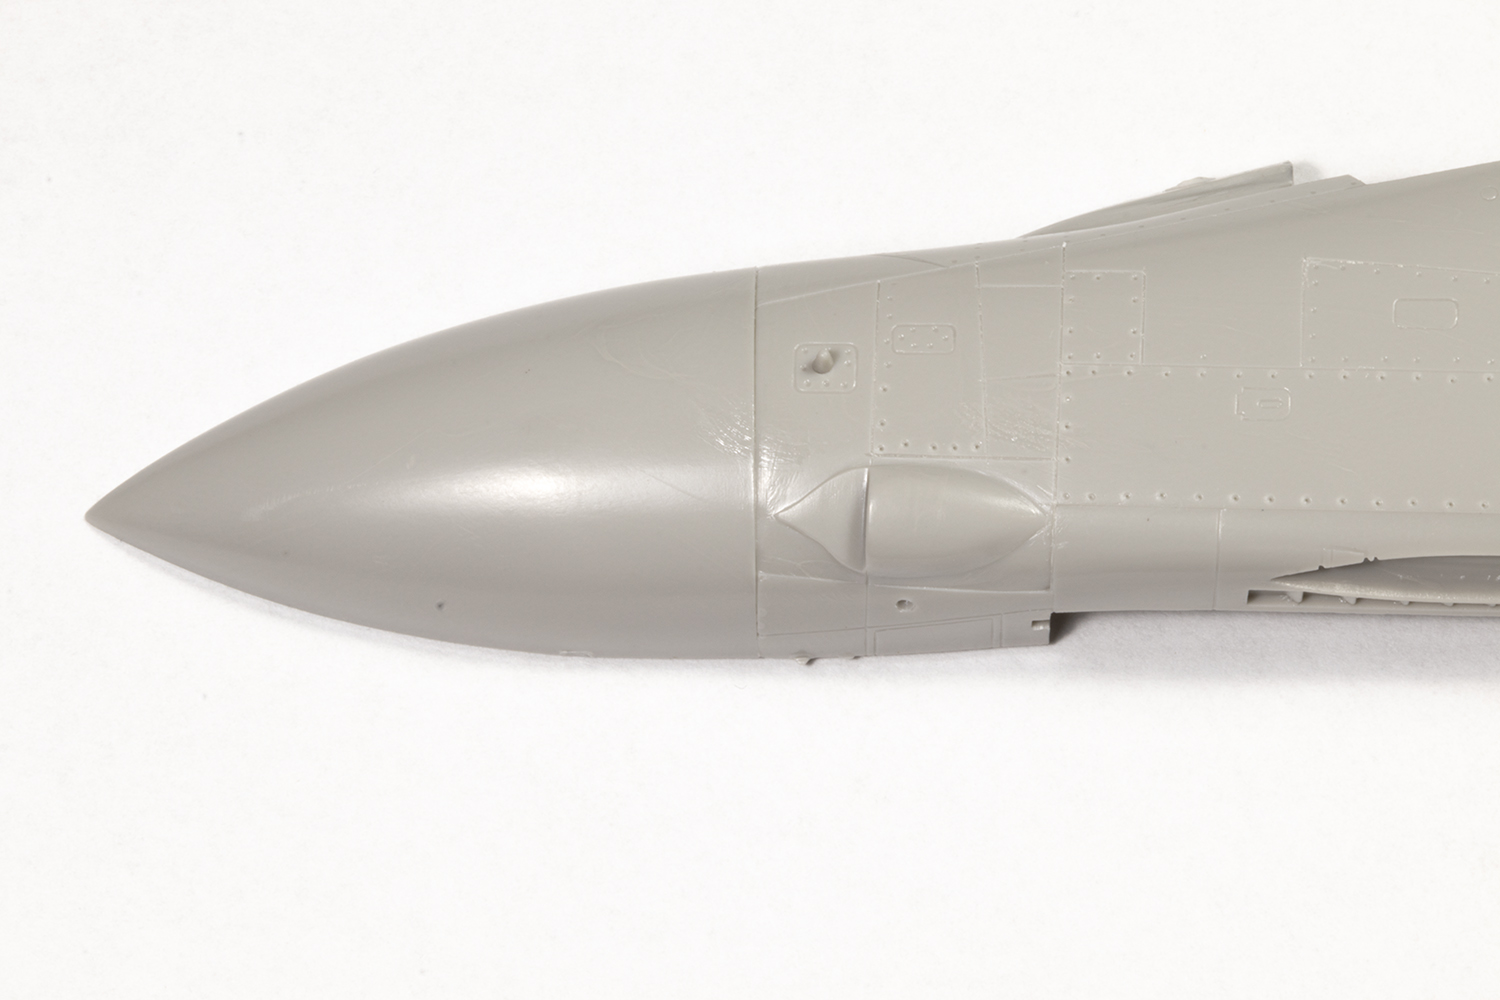
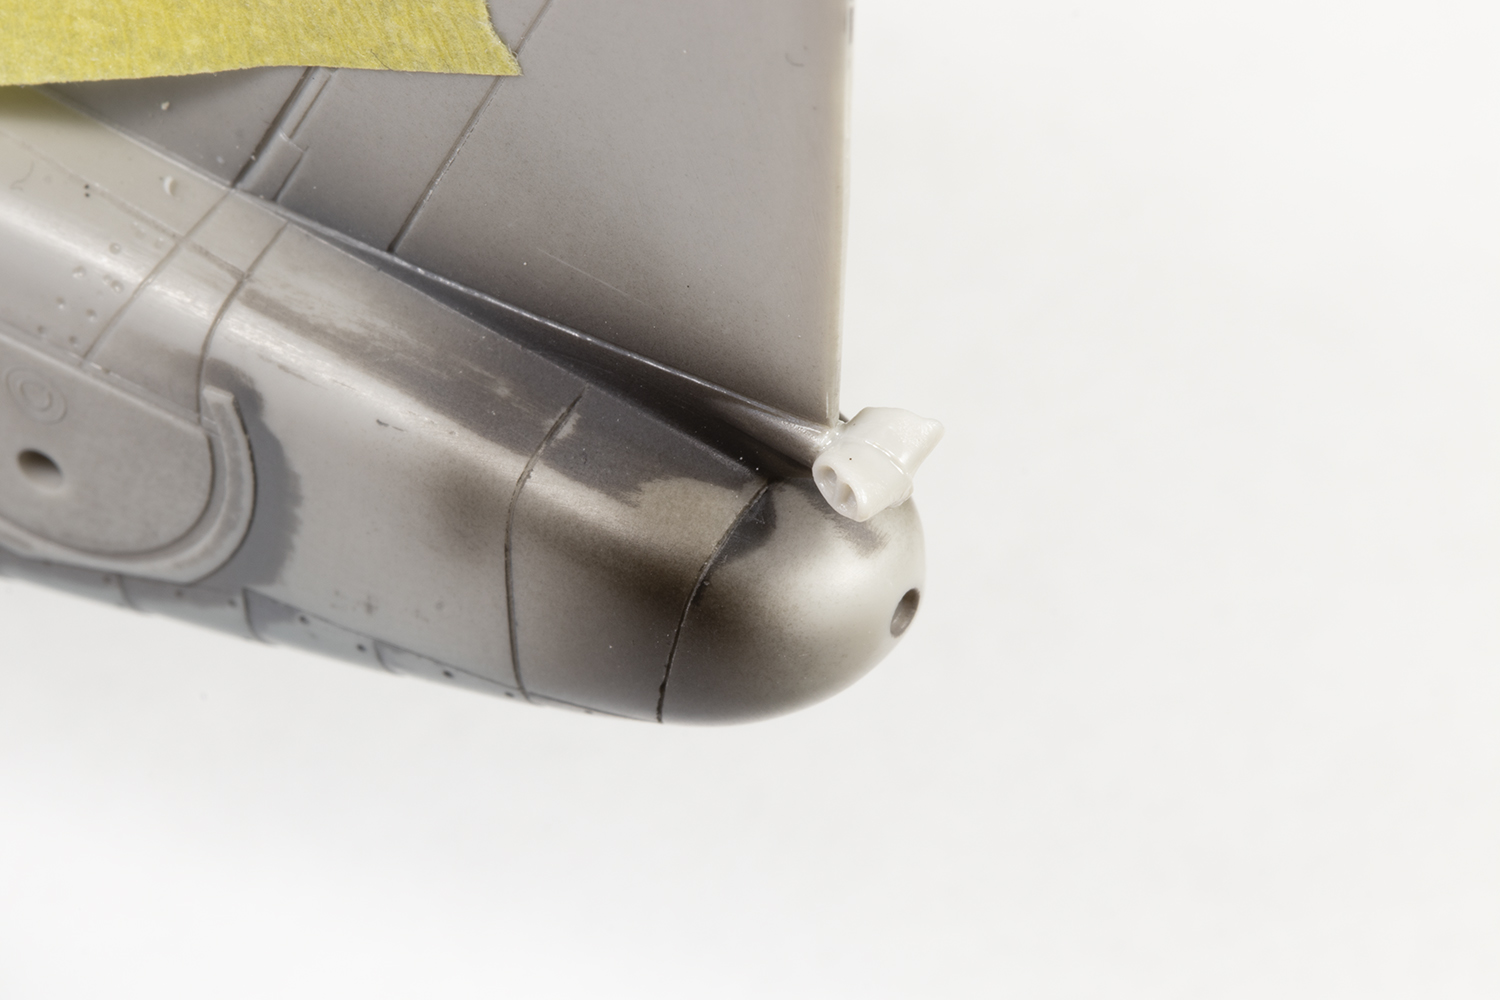
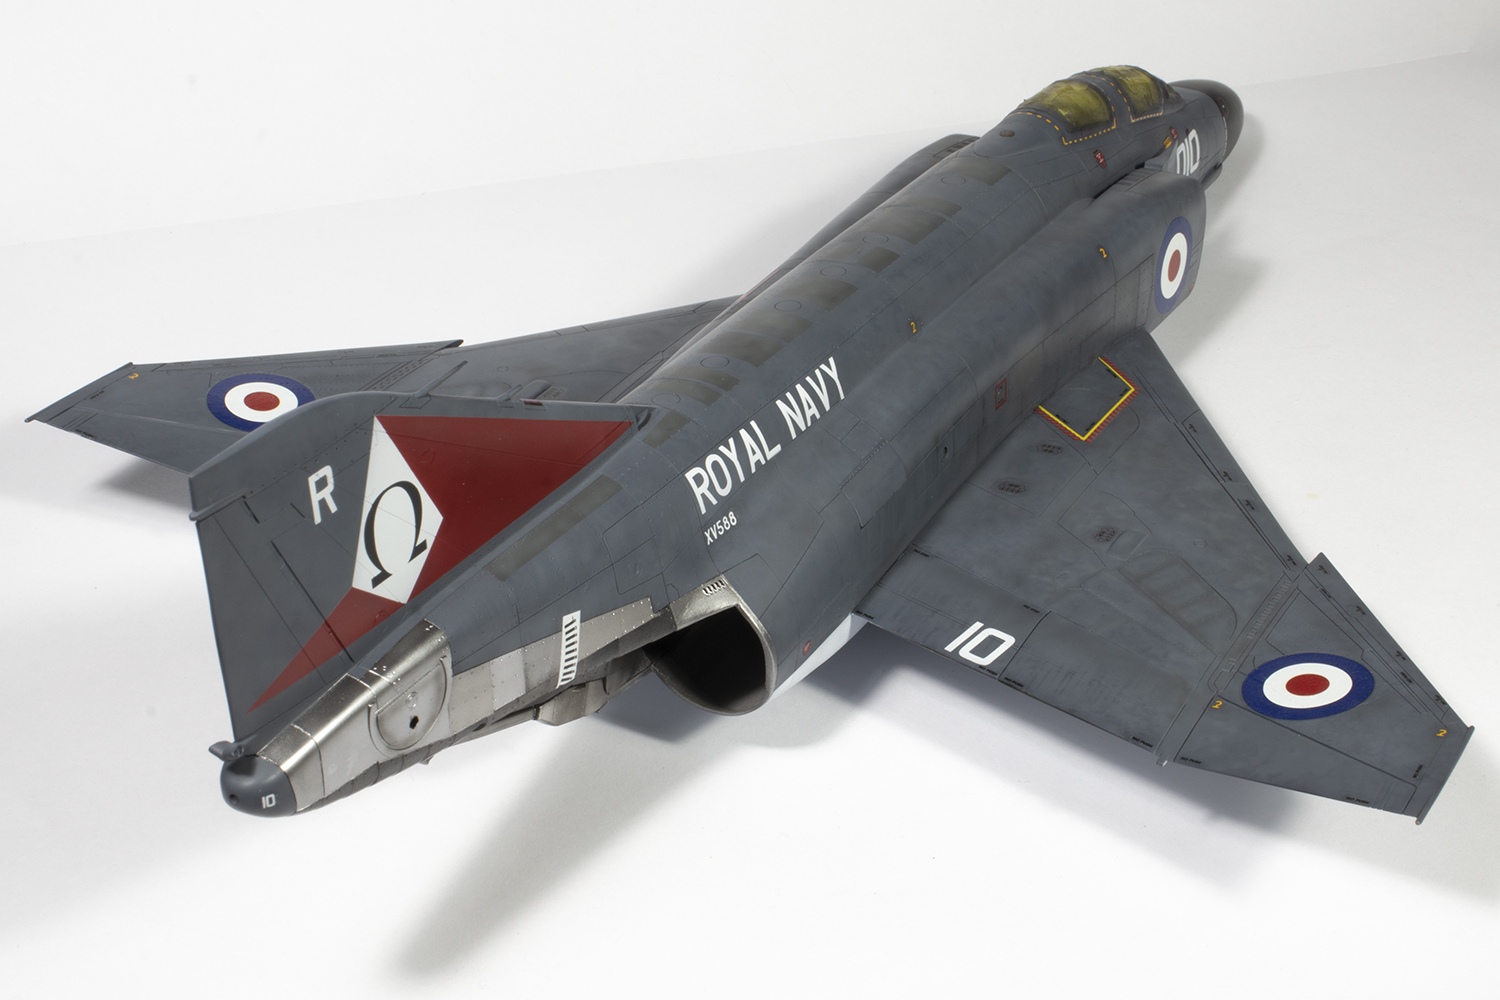
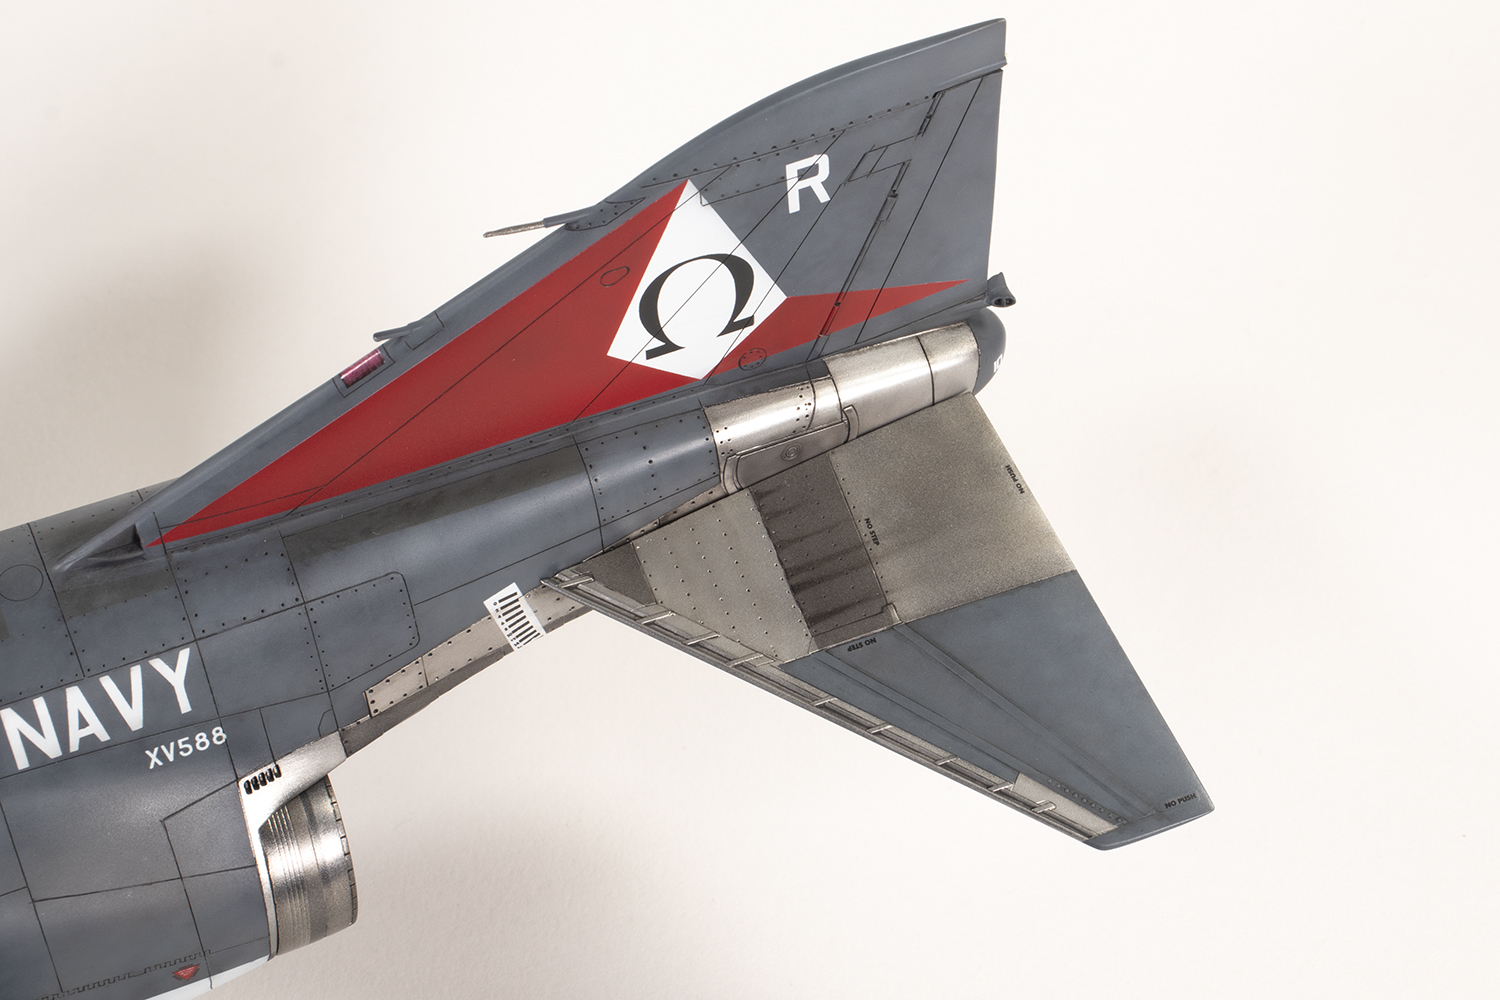
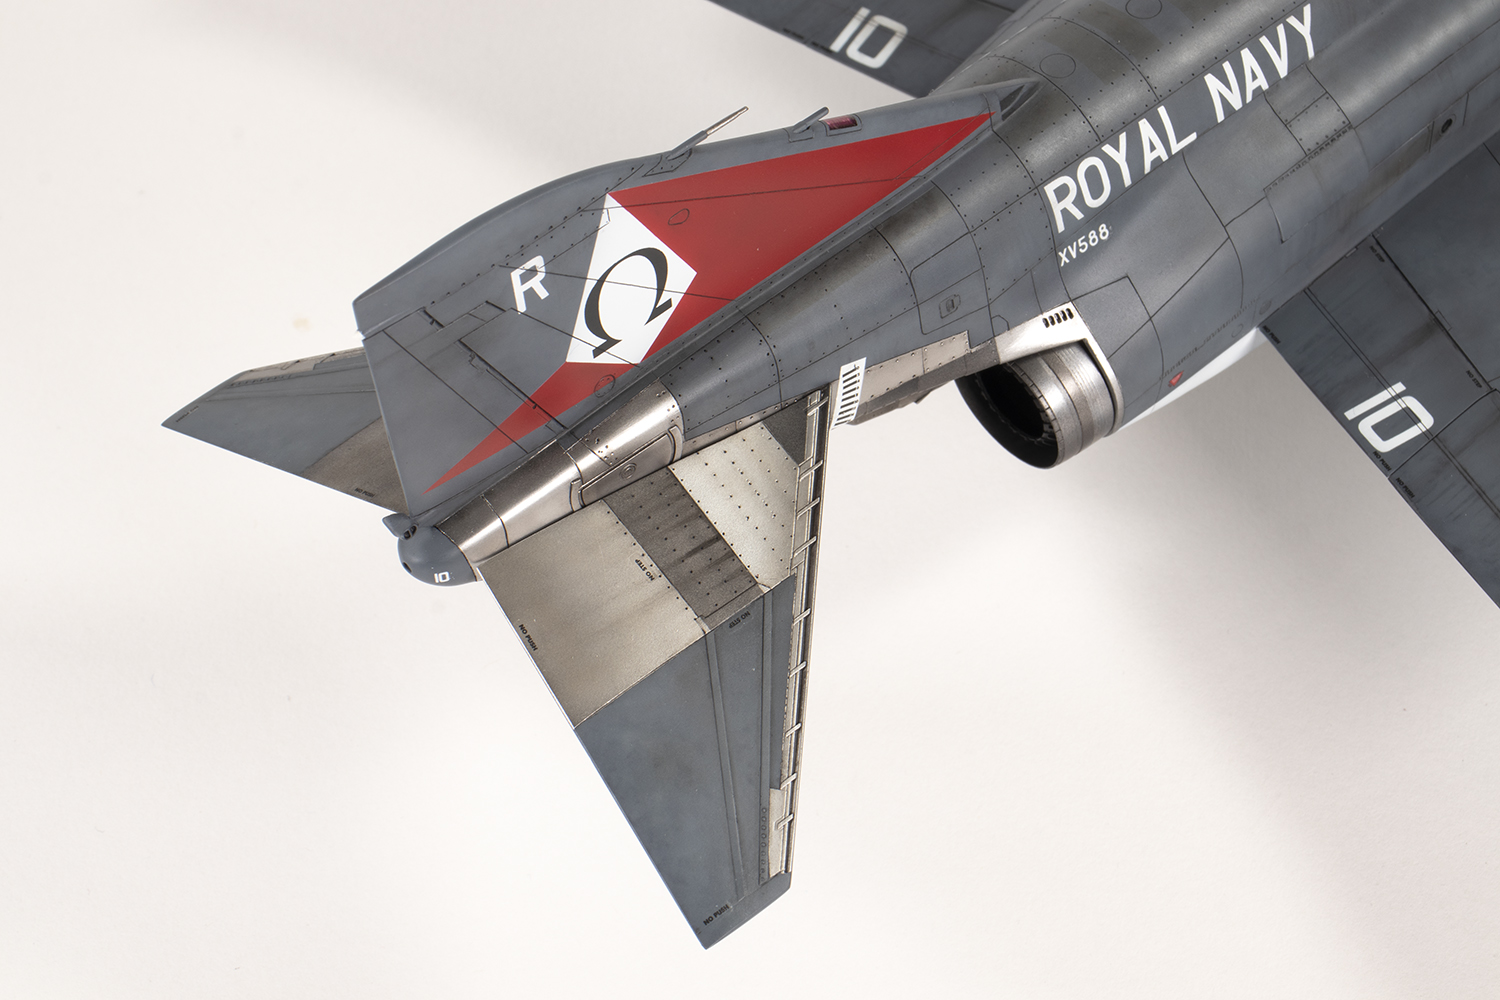
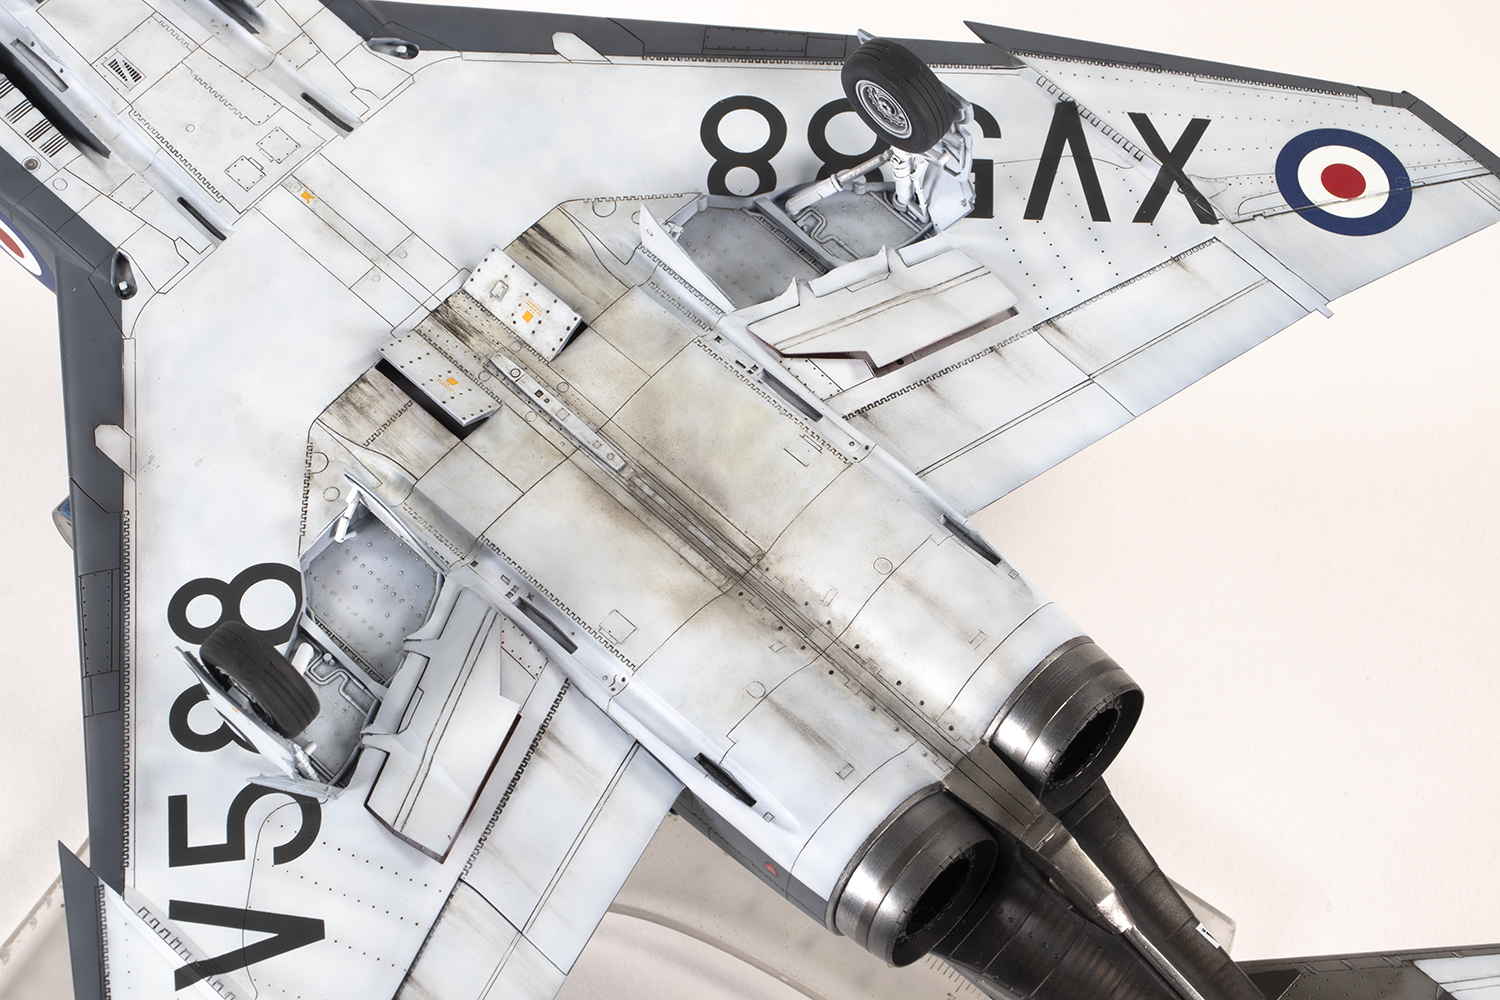
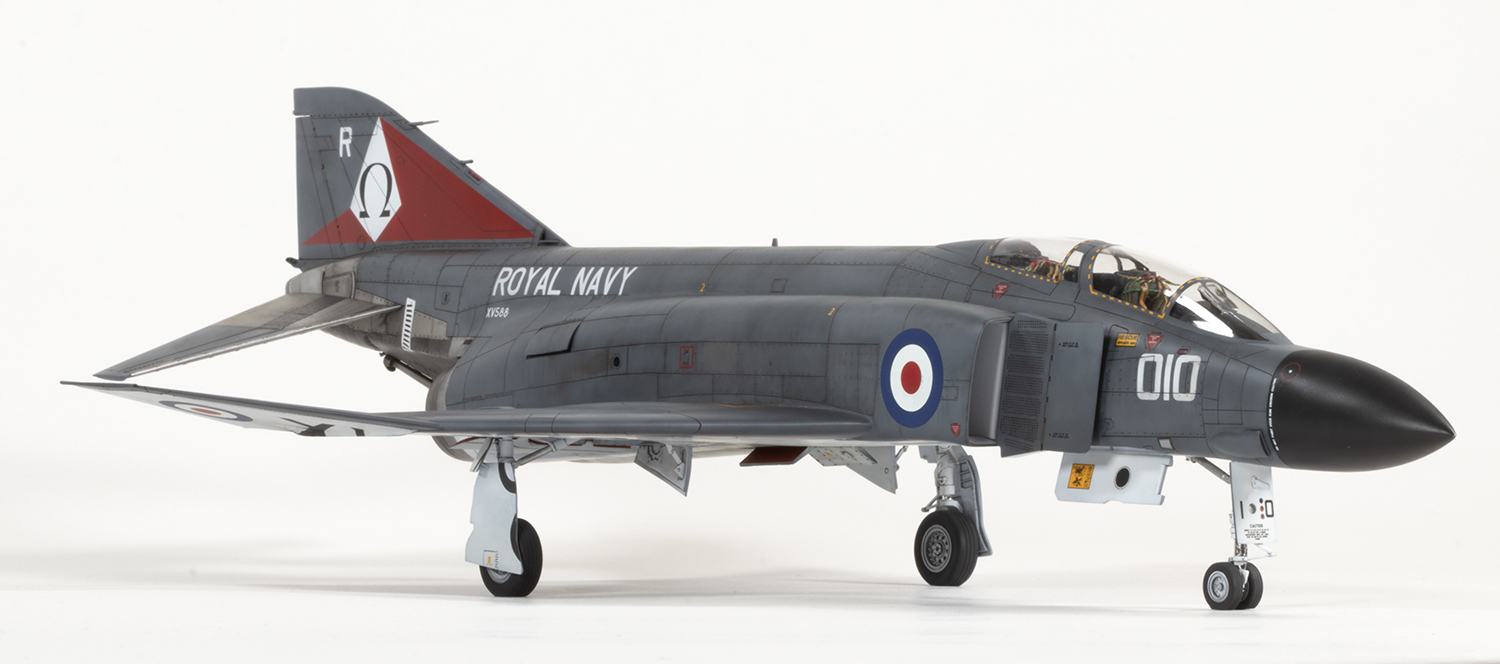
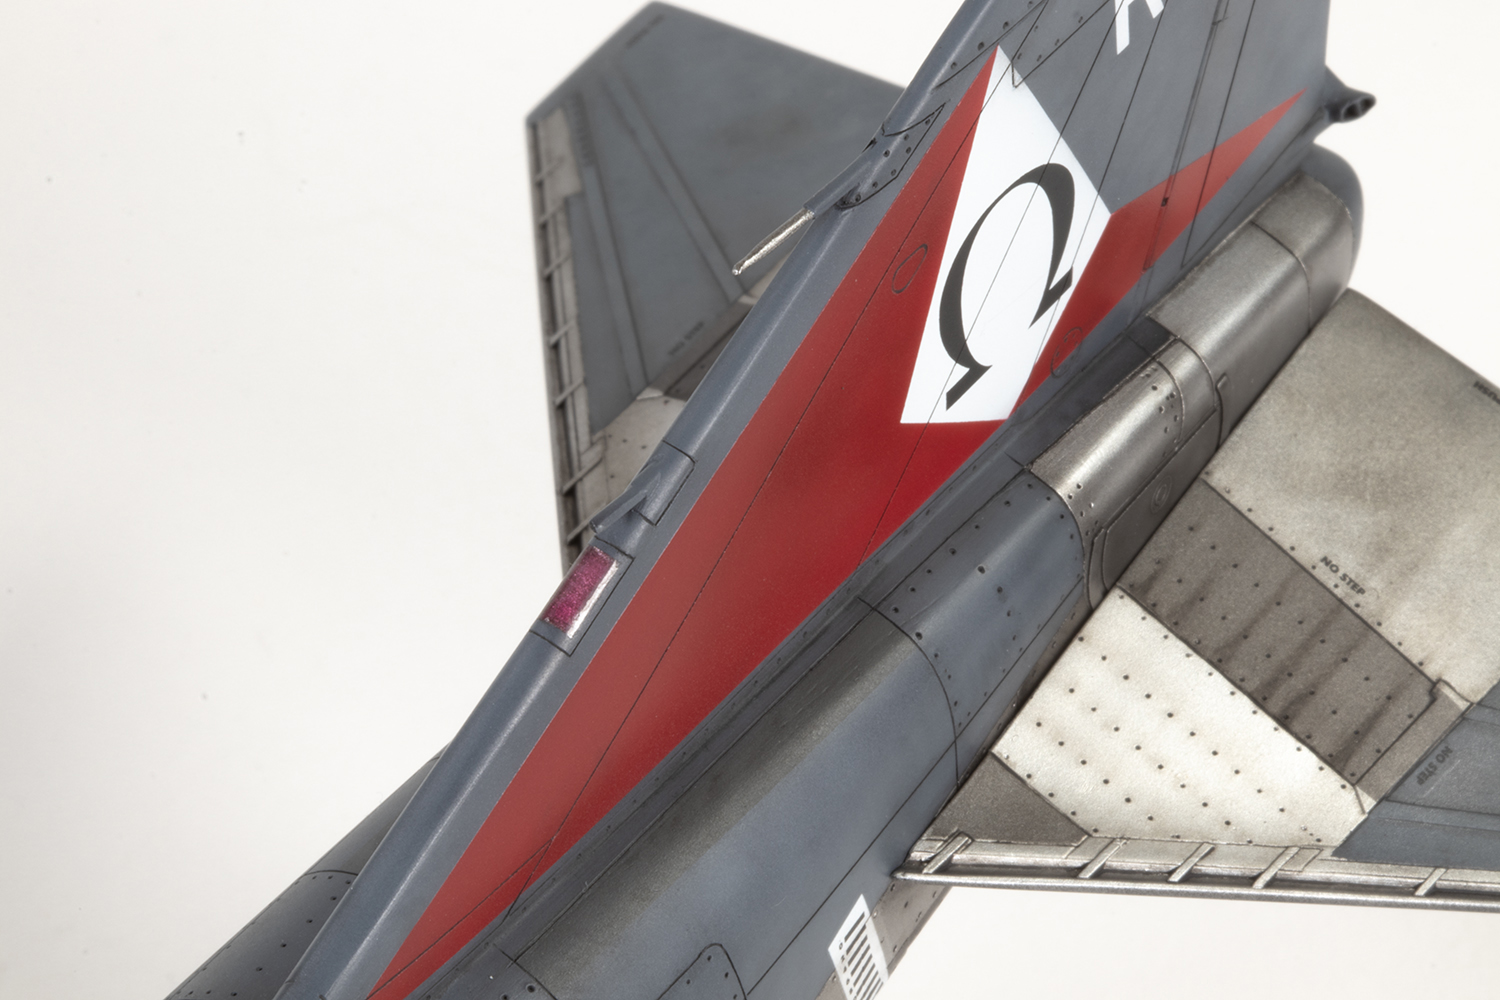
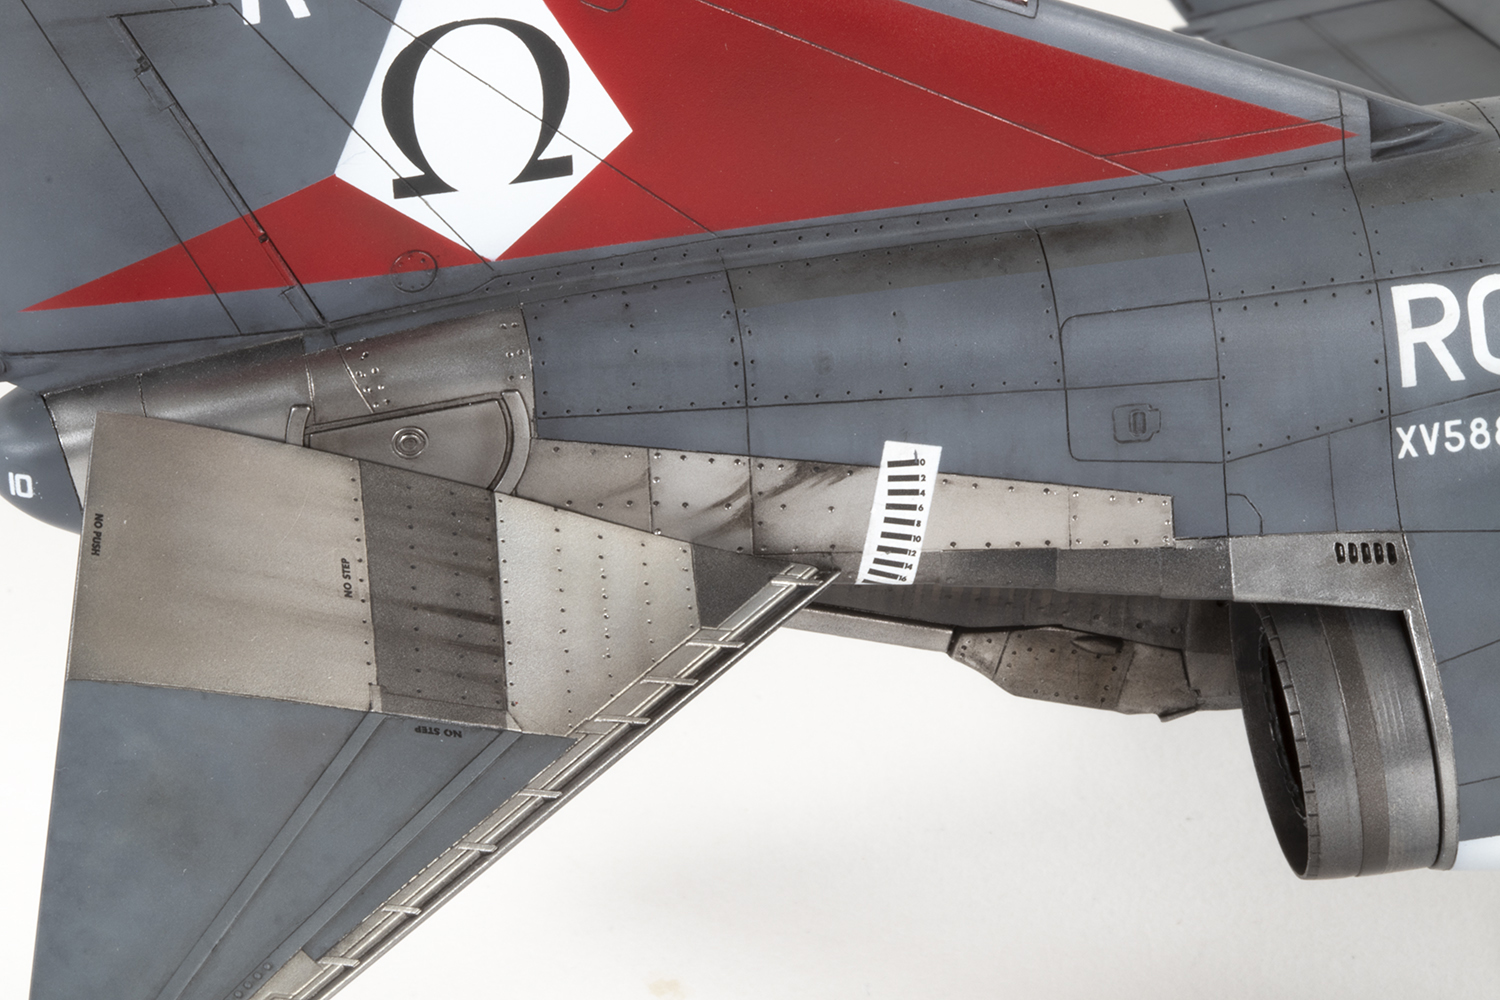
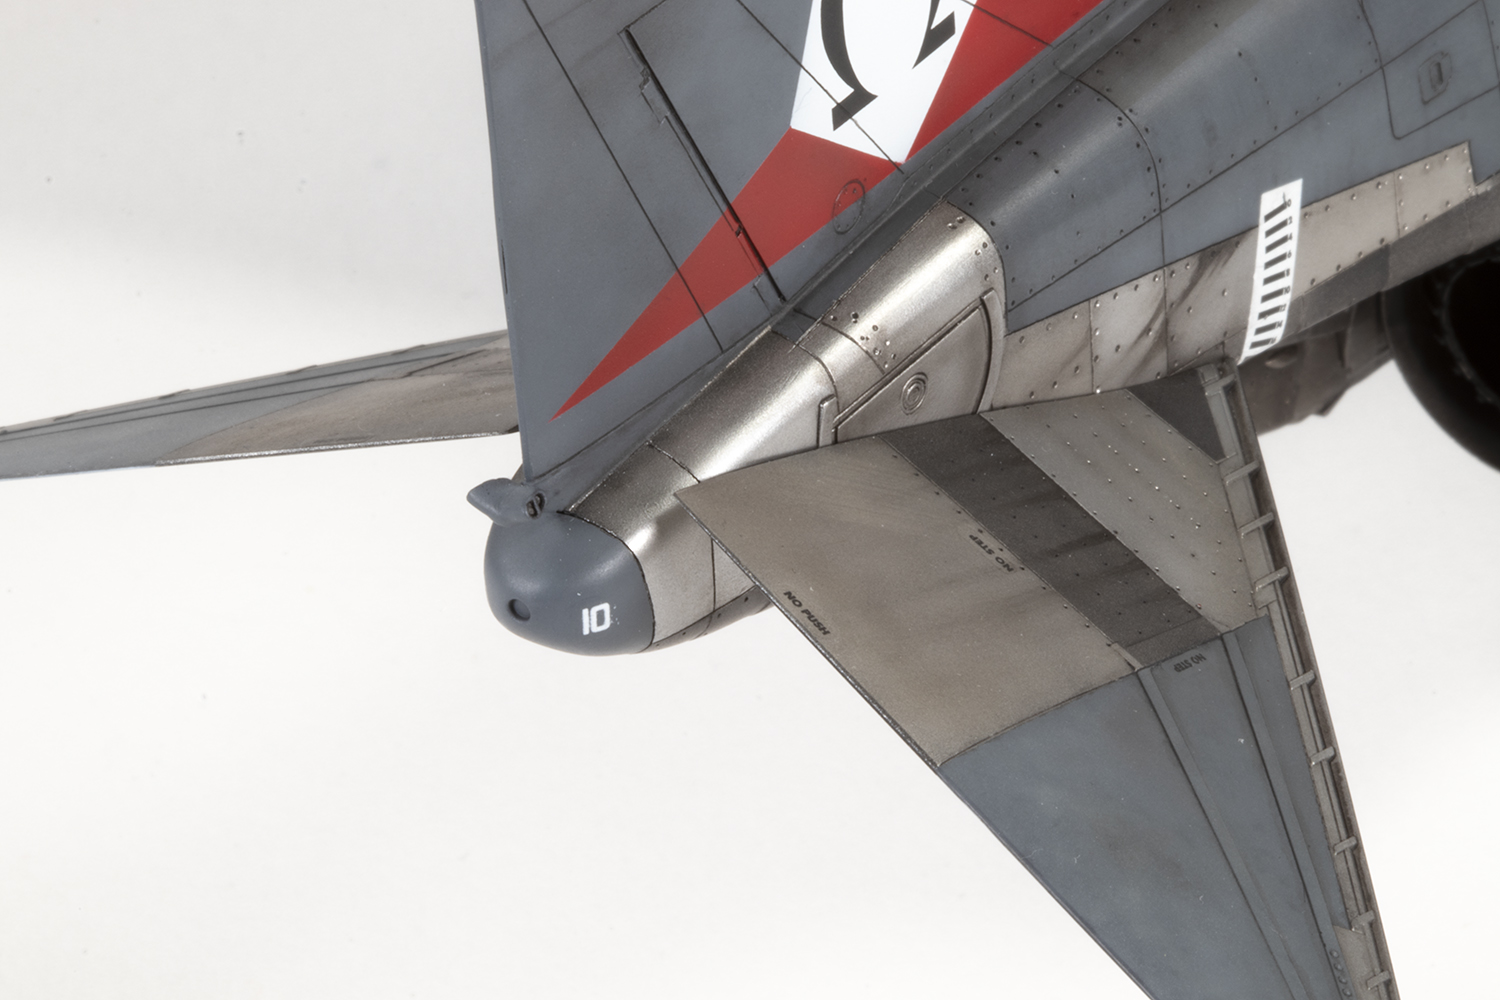
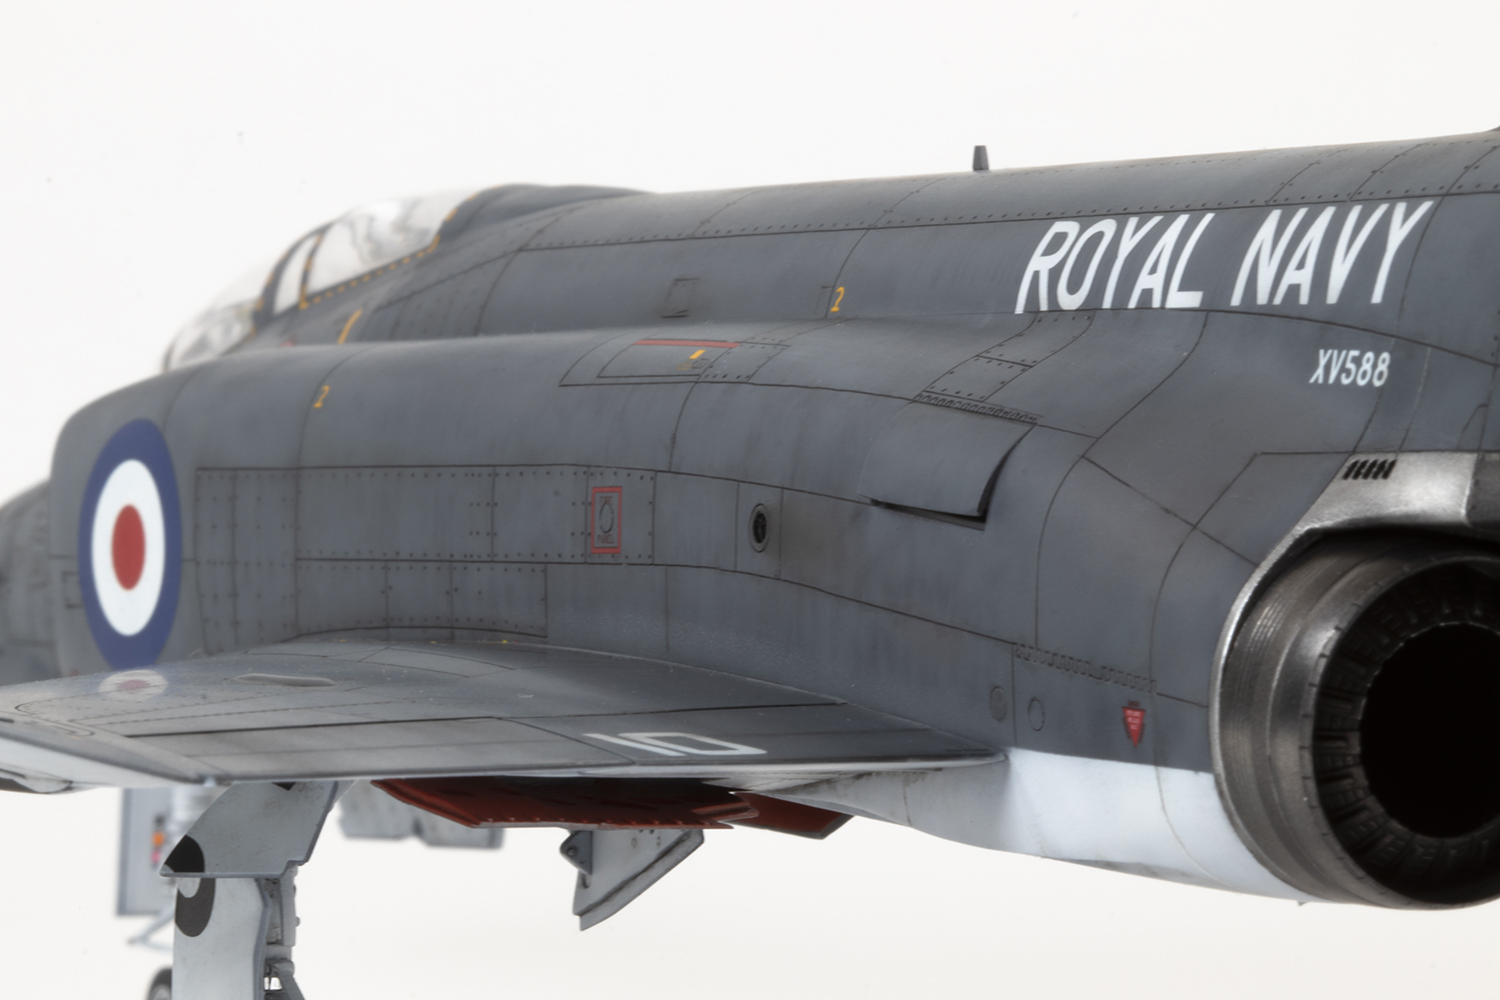
There are plenty of differences between the UK Phantoms and the rest, and Hasegawa captured most of these pretty well. The intakes are wider (some say too wide) and the fuselage more ‘bent’ to accommodate the Spey engines. There are extra air bleed doors on the upper fuselage flanks, and the lower doors are moved forward from the other versions, and the unique naval nose gear is included, with an extended option if you wish. Some subtle changes were missed, such as the change in contours in the metal areas just aft of the exhausts, and the ‘v’ shaped fuel vent mast at the base of the rudder. There is an aftermarket part for the latter made by a Russian company, but I cut and adapted the kit parts myself. This would be ripe for a cheap, simple part made by someone like Quickboost.
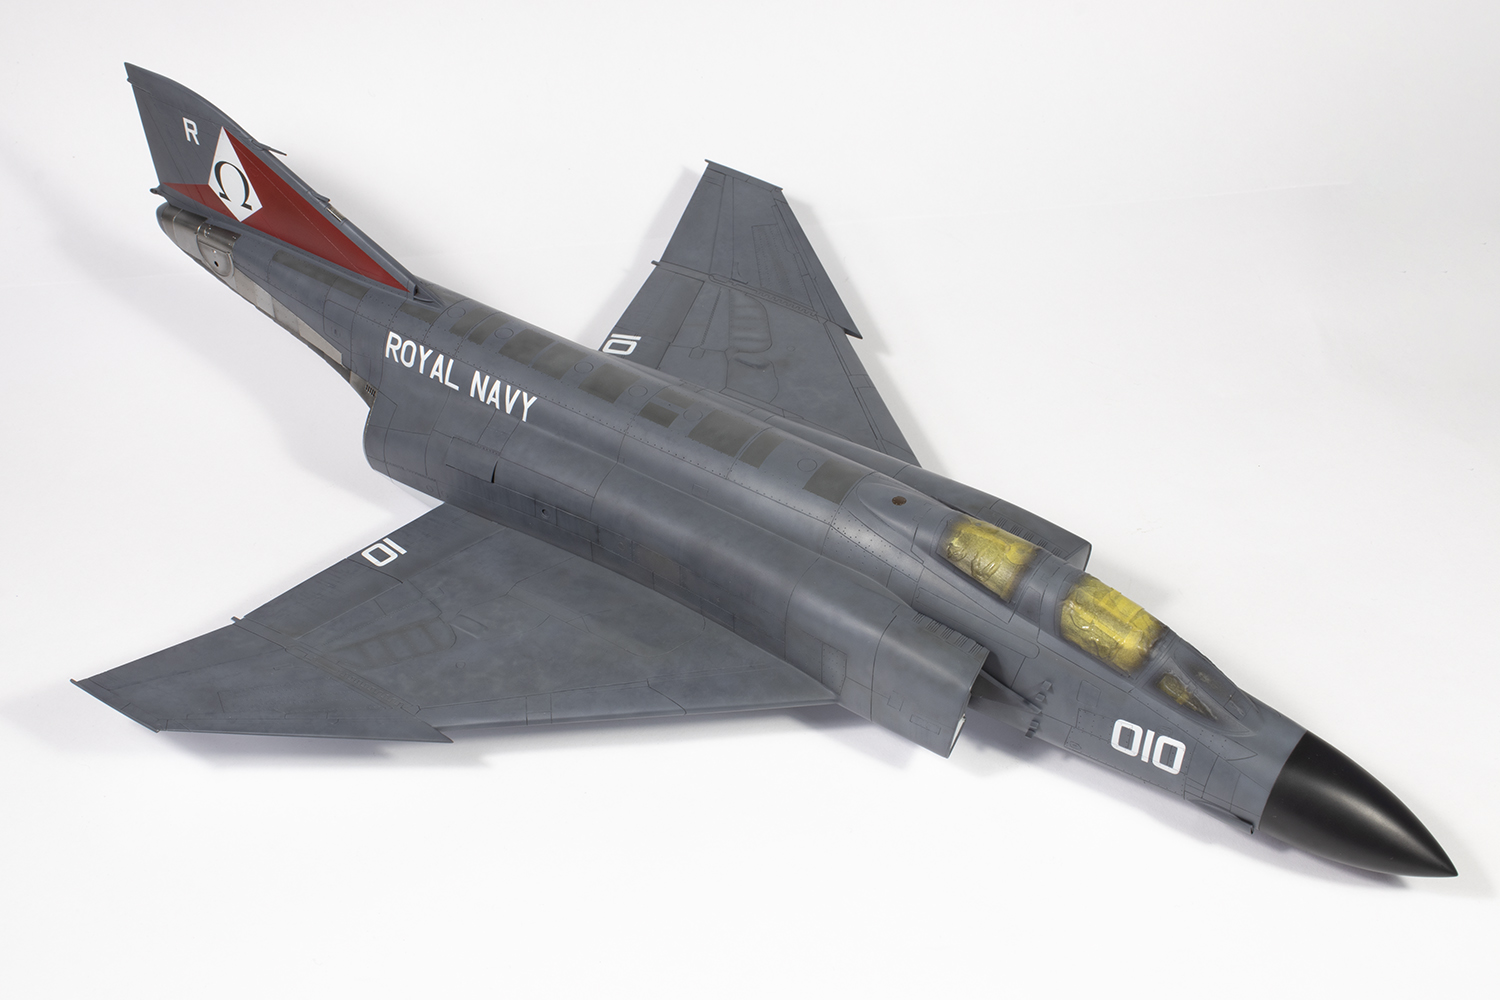
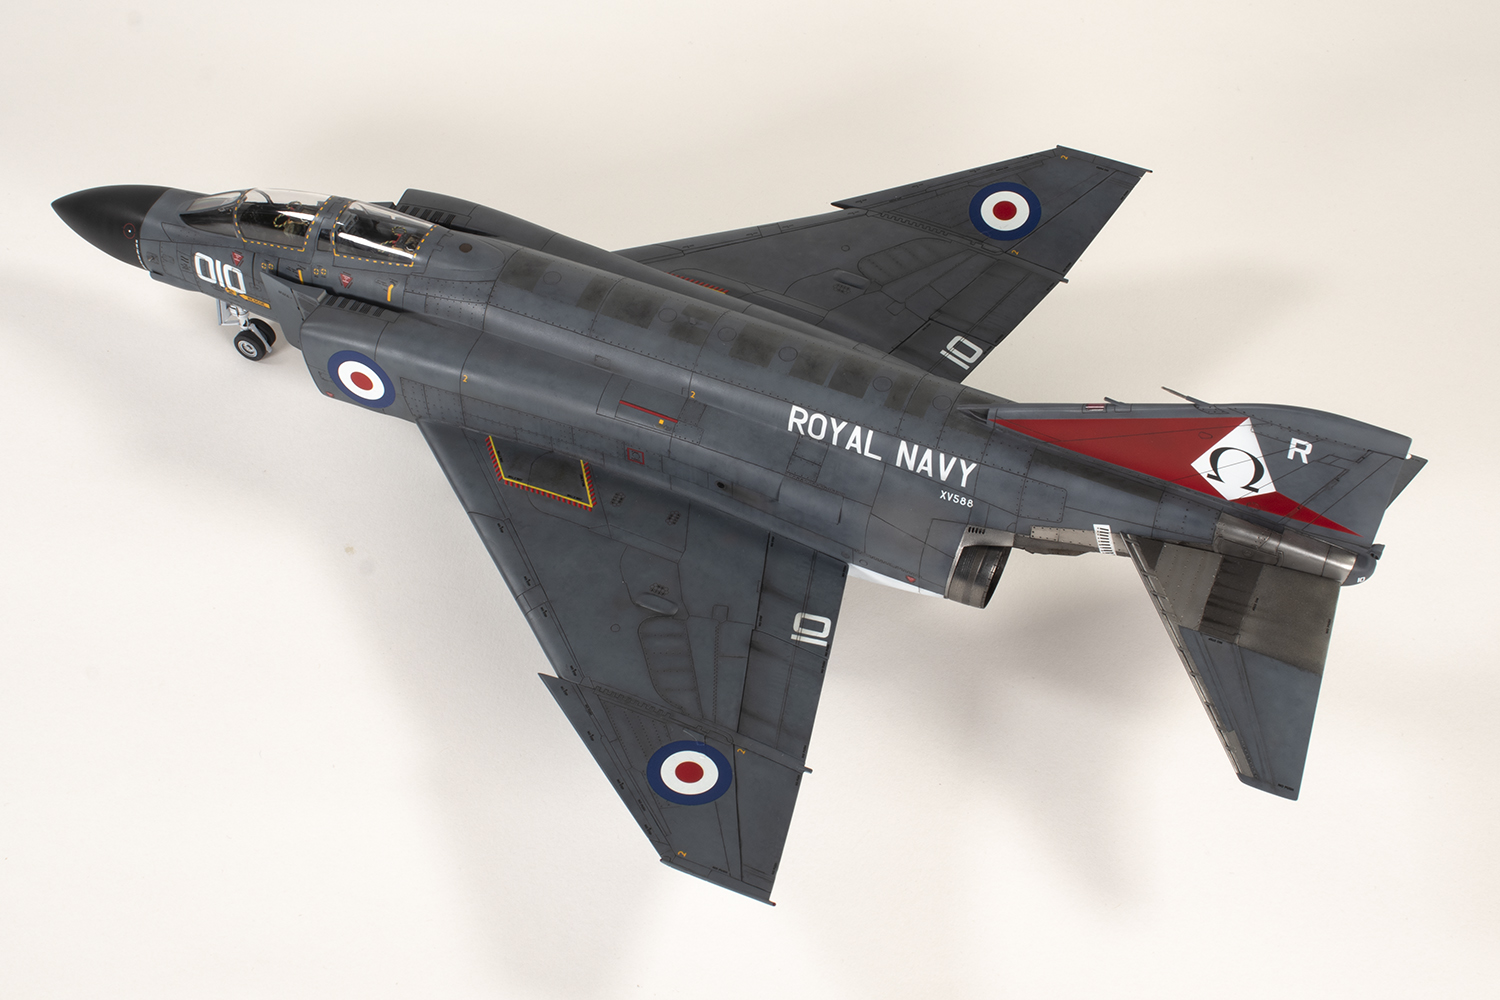
Since I already have an FGR.2 in my collection, I wanted an early FG.1 airframe for maximum visual differentiation. This meant using the earlier tail tip, without the RWR fairing, and the simpler tail cone. It also narrowed my decal options considerably, as the vast majority of markings available for 892 NAS are for the later aircraft, especially those specially marked for the Silver Jubilee.
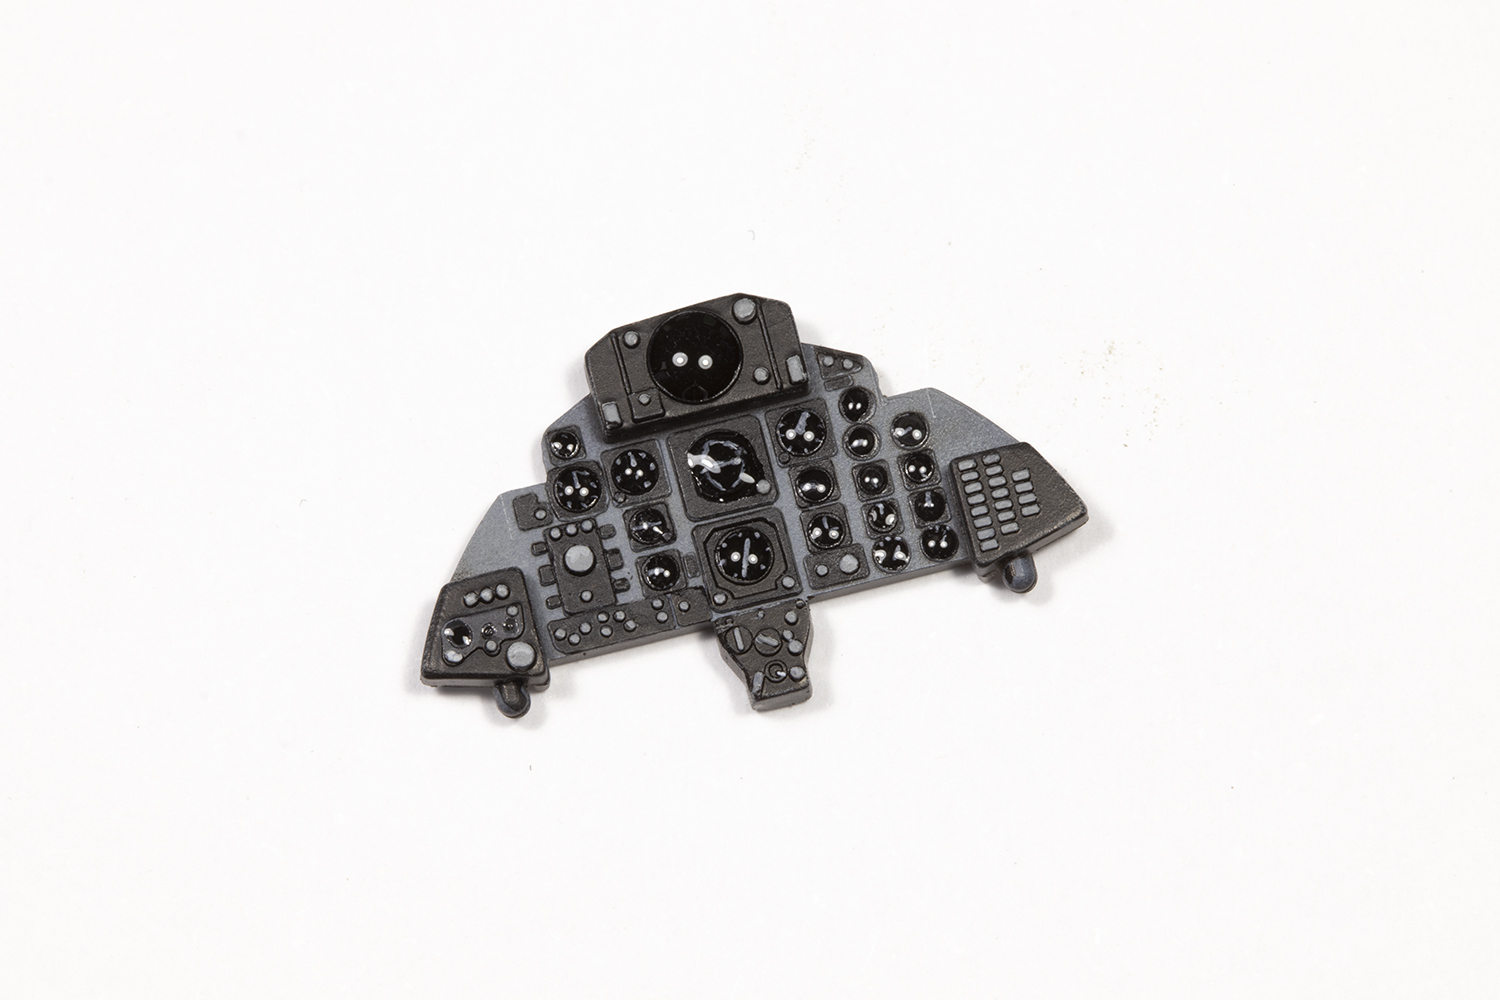
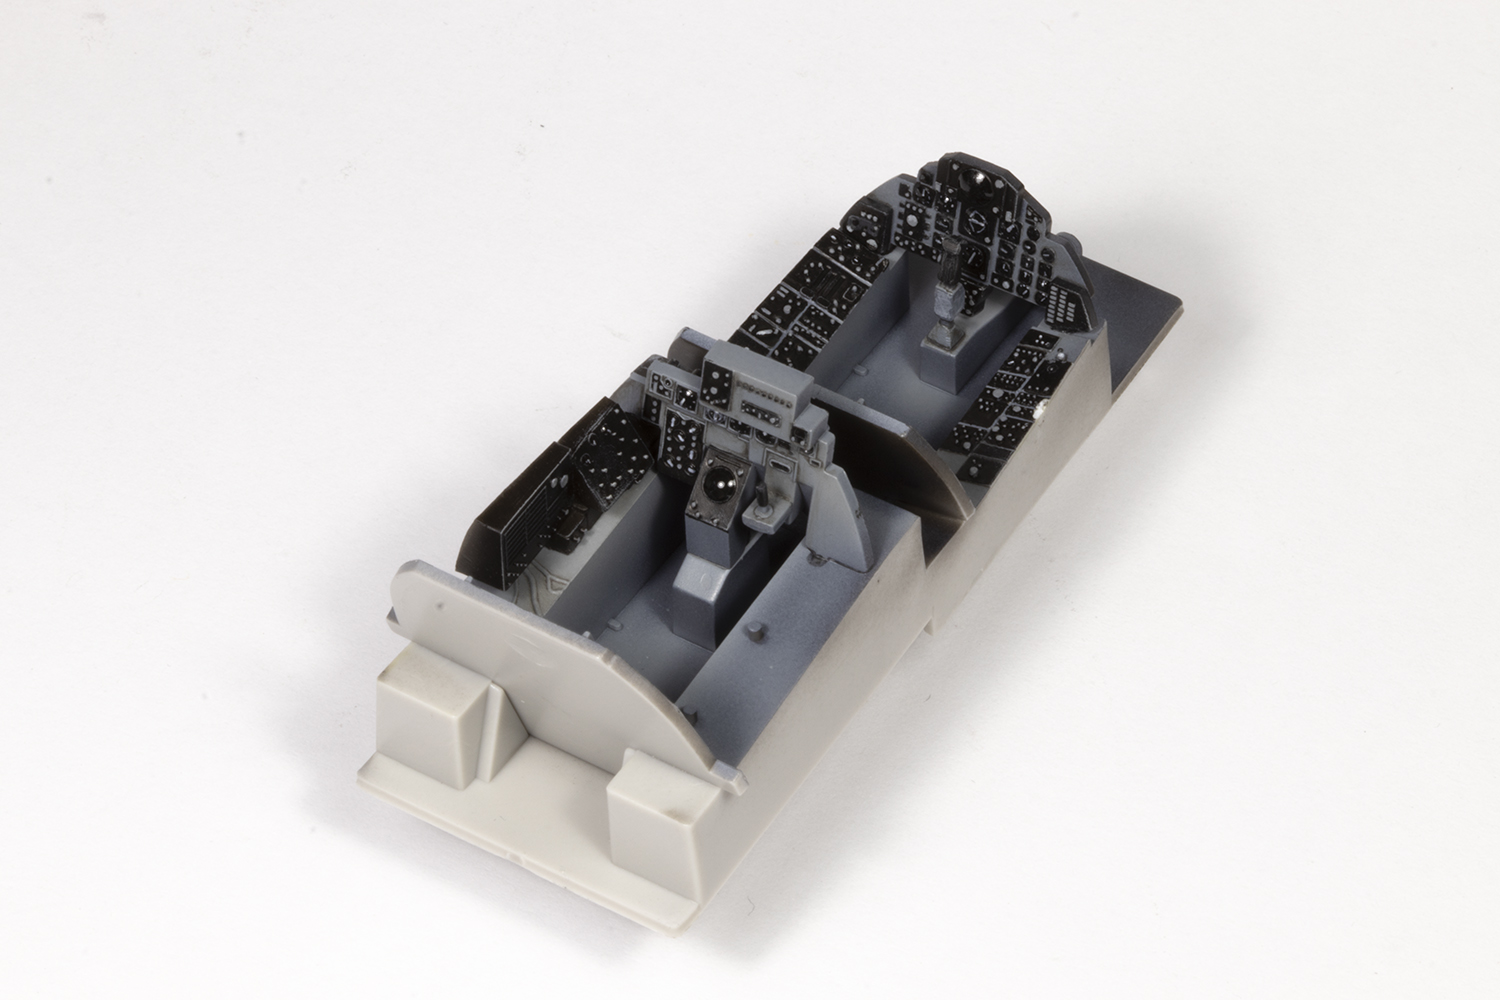
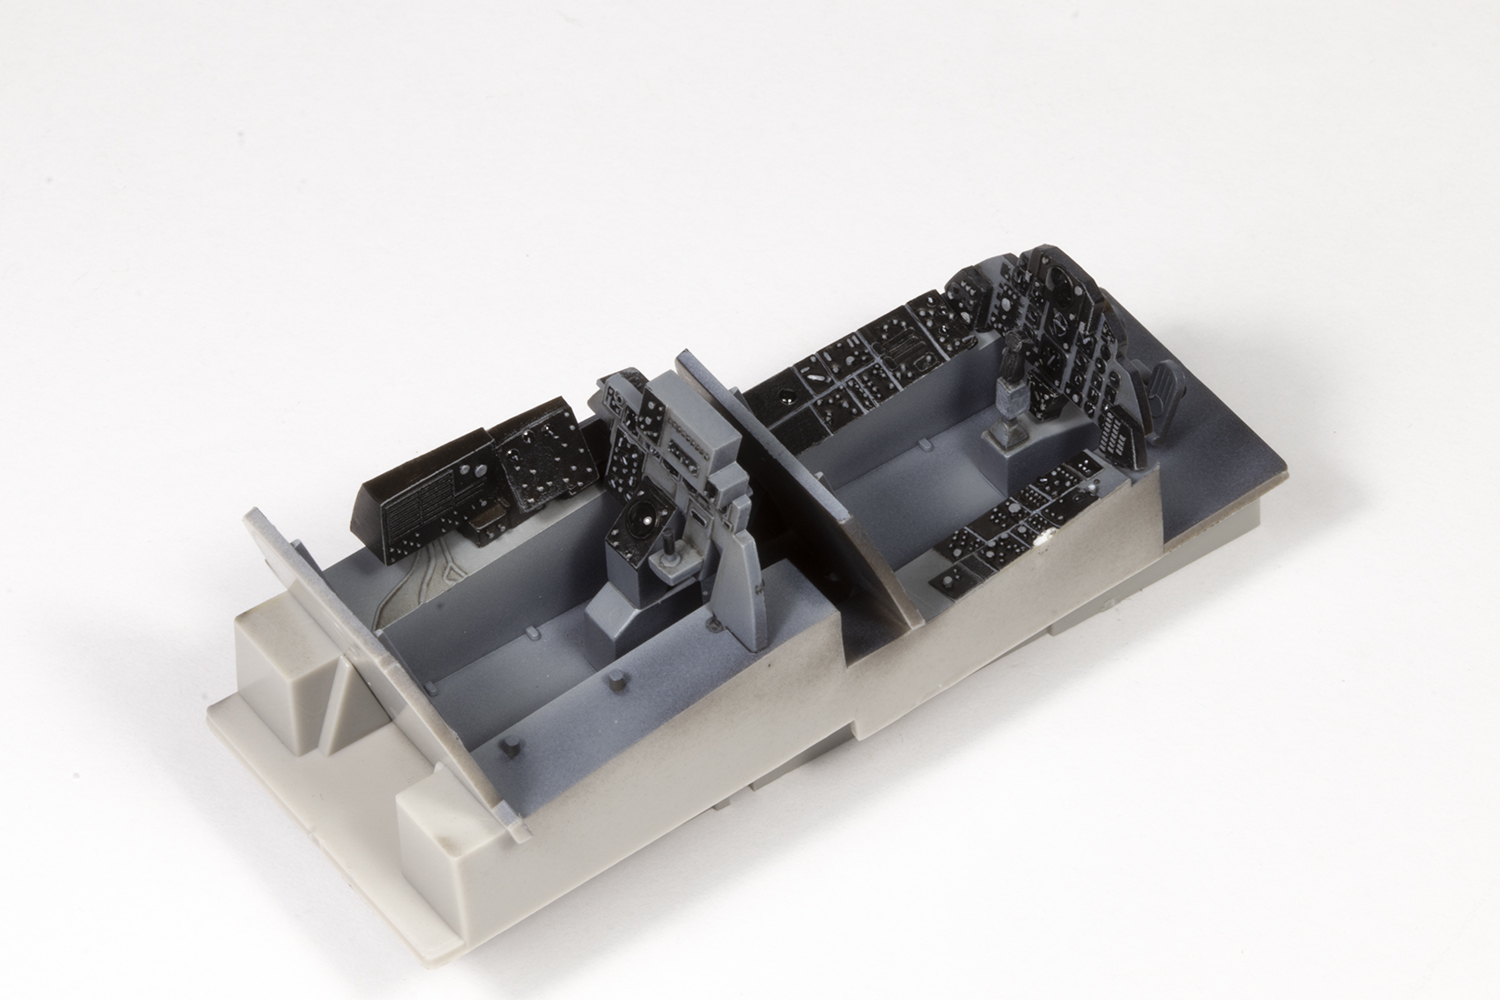
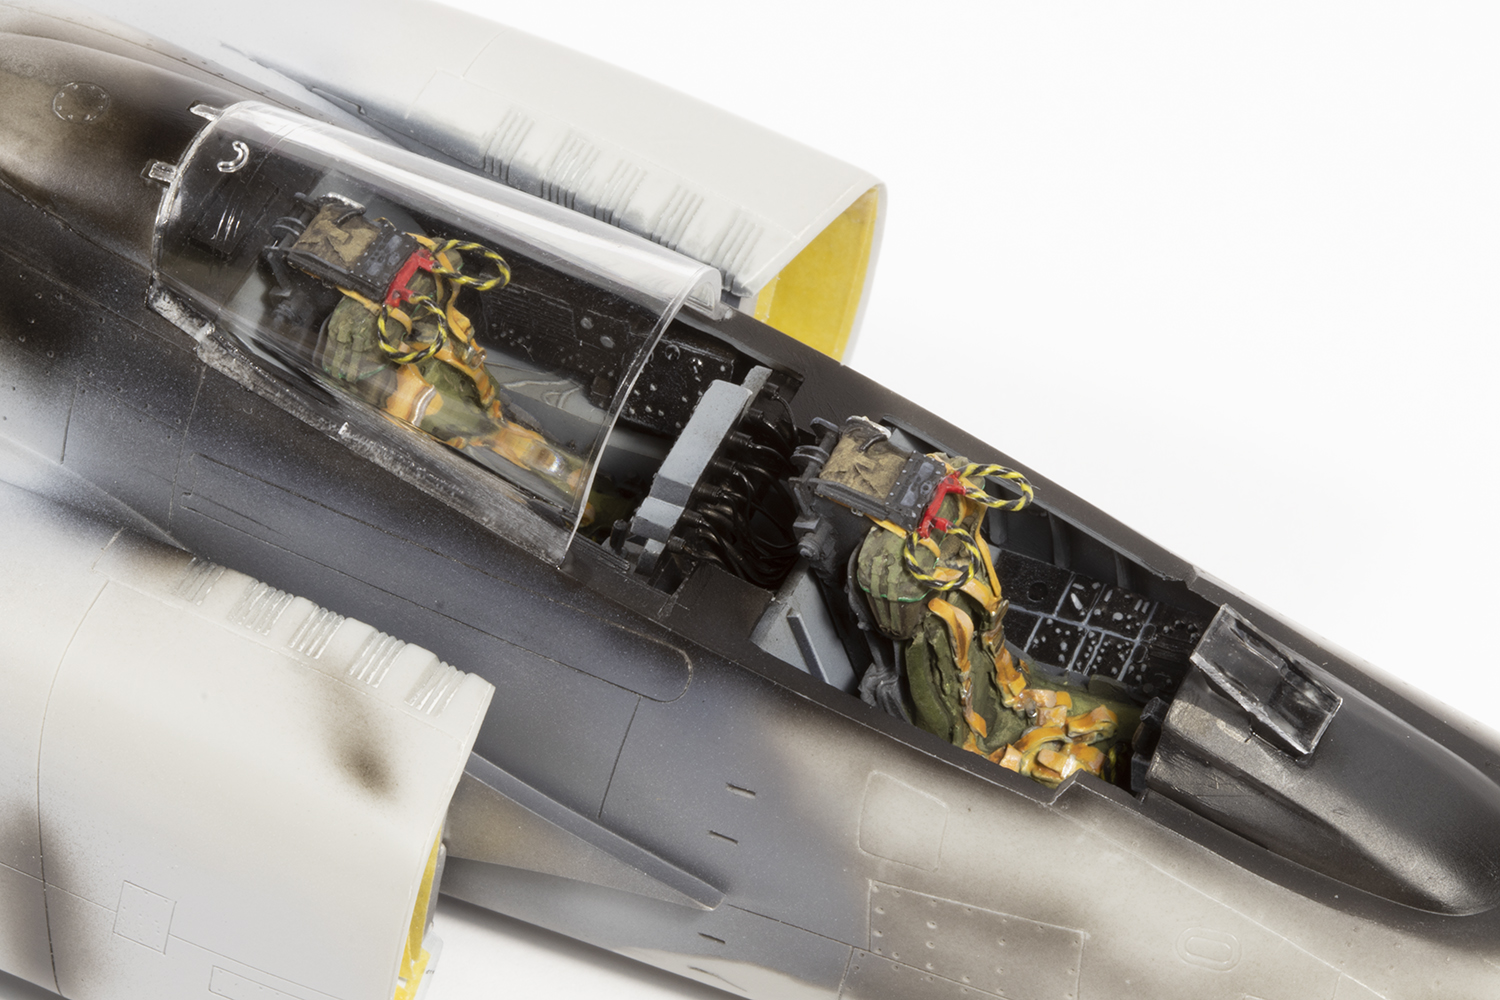
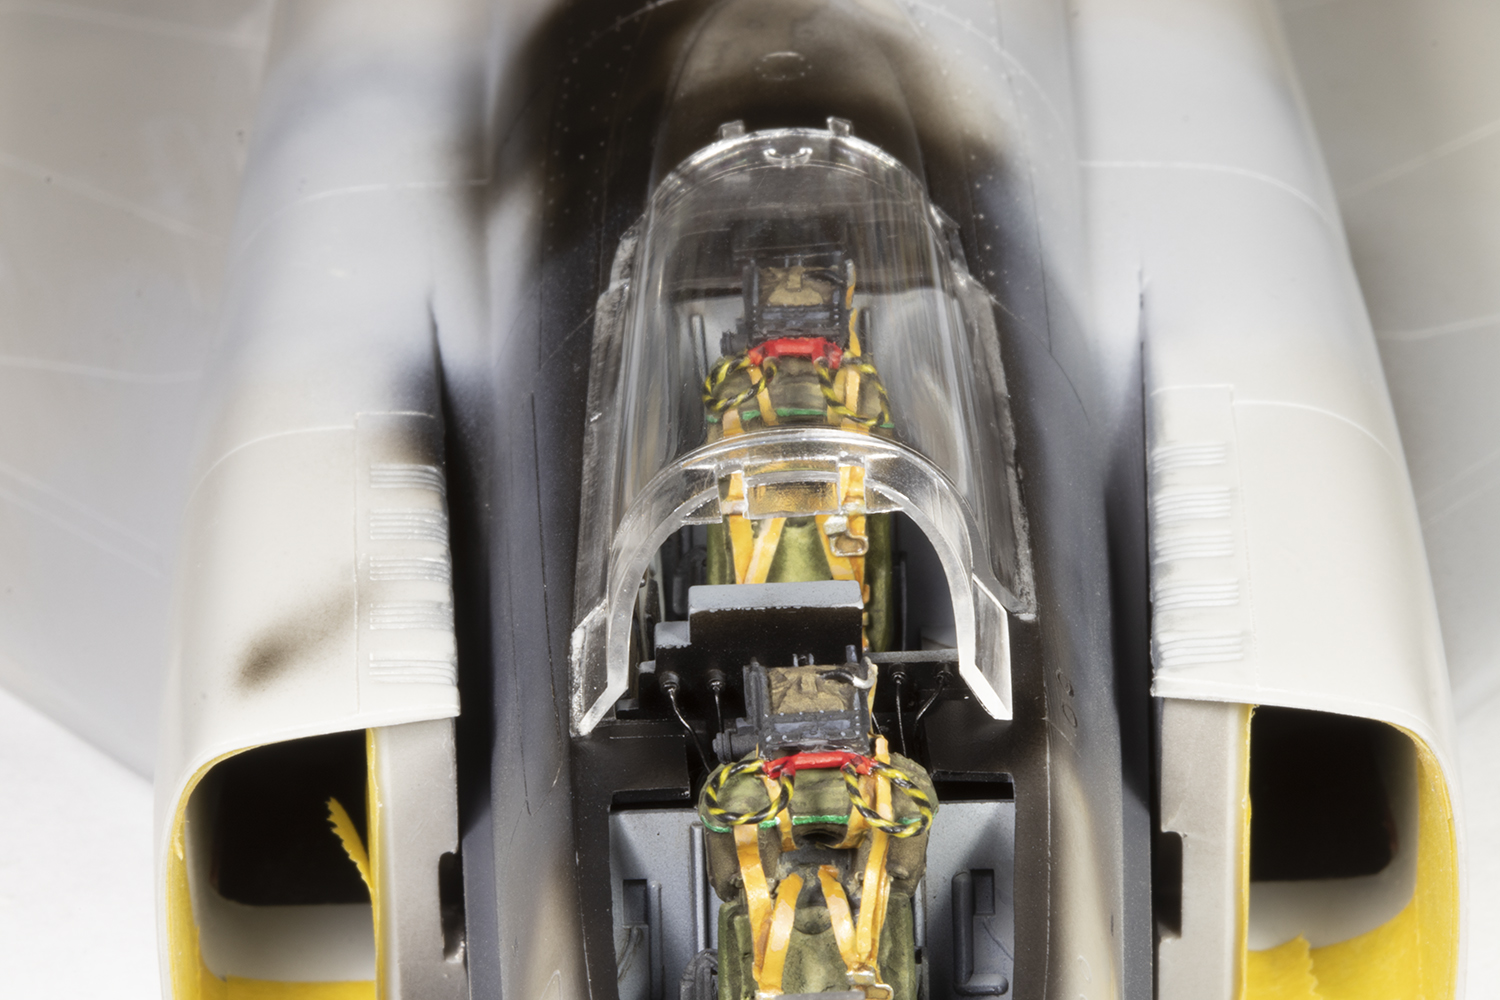
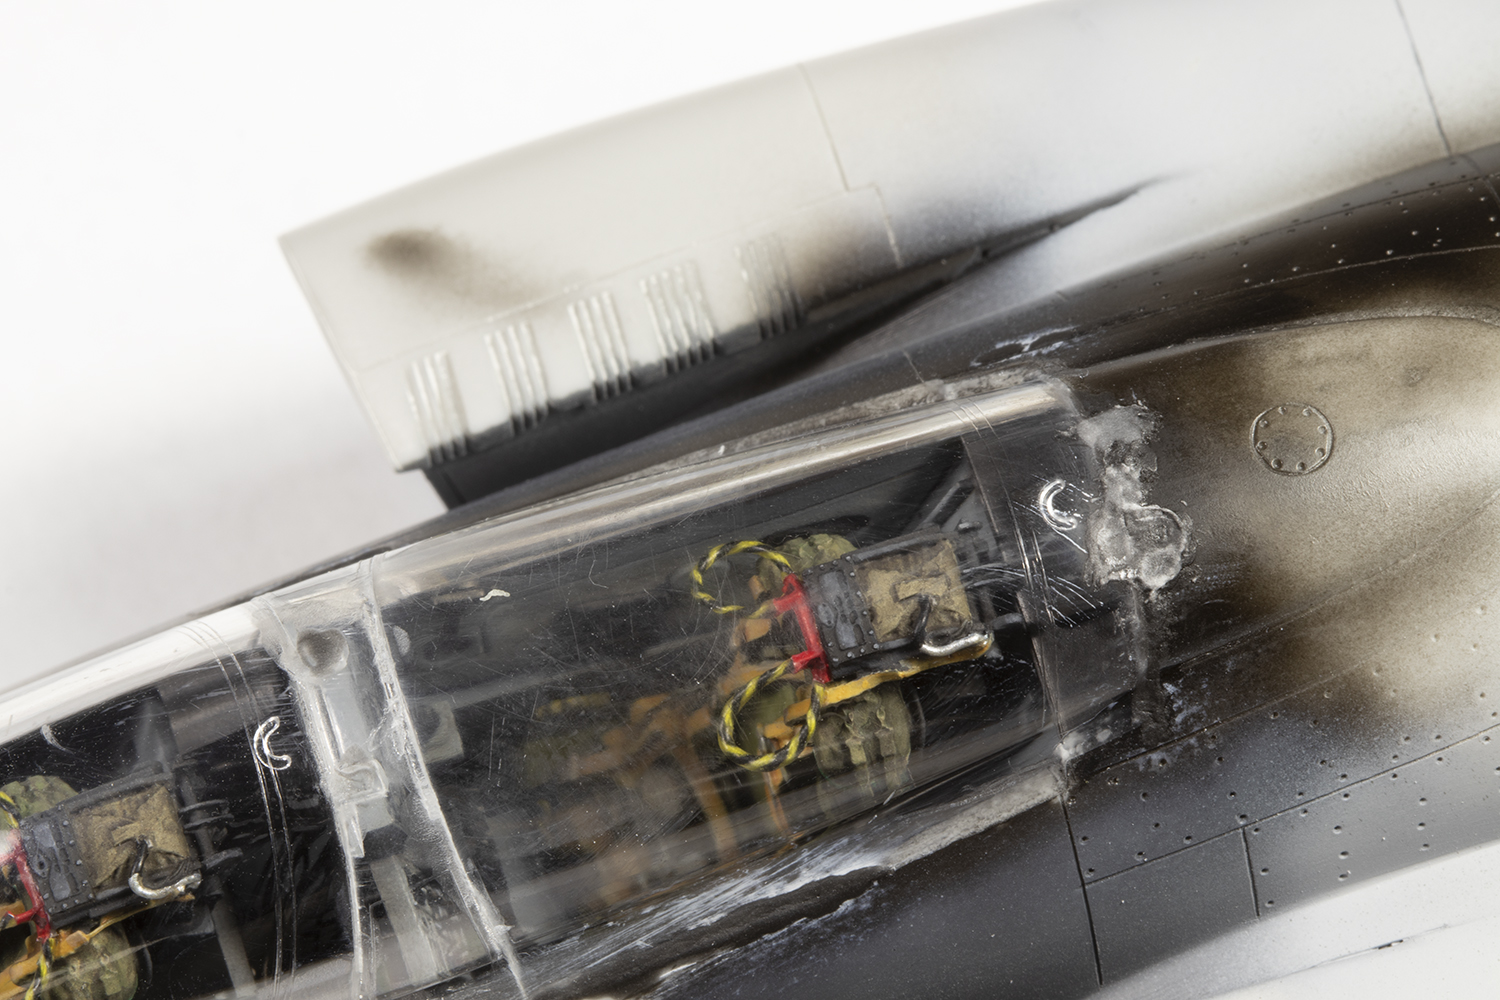
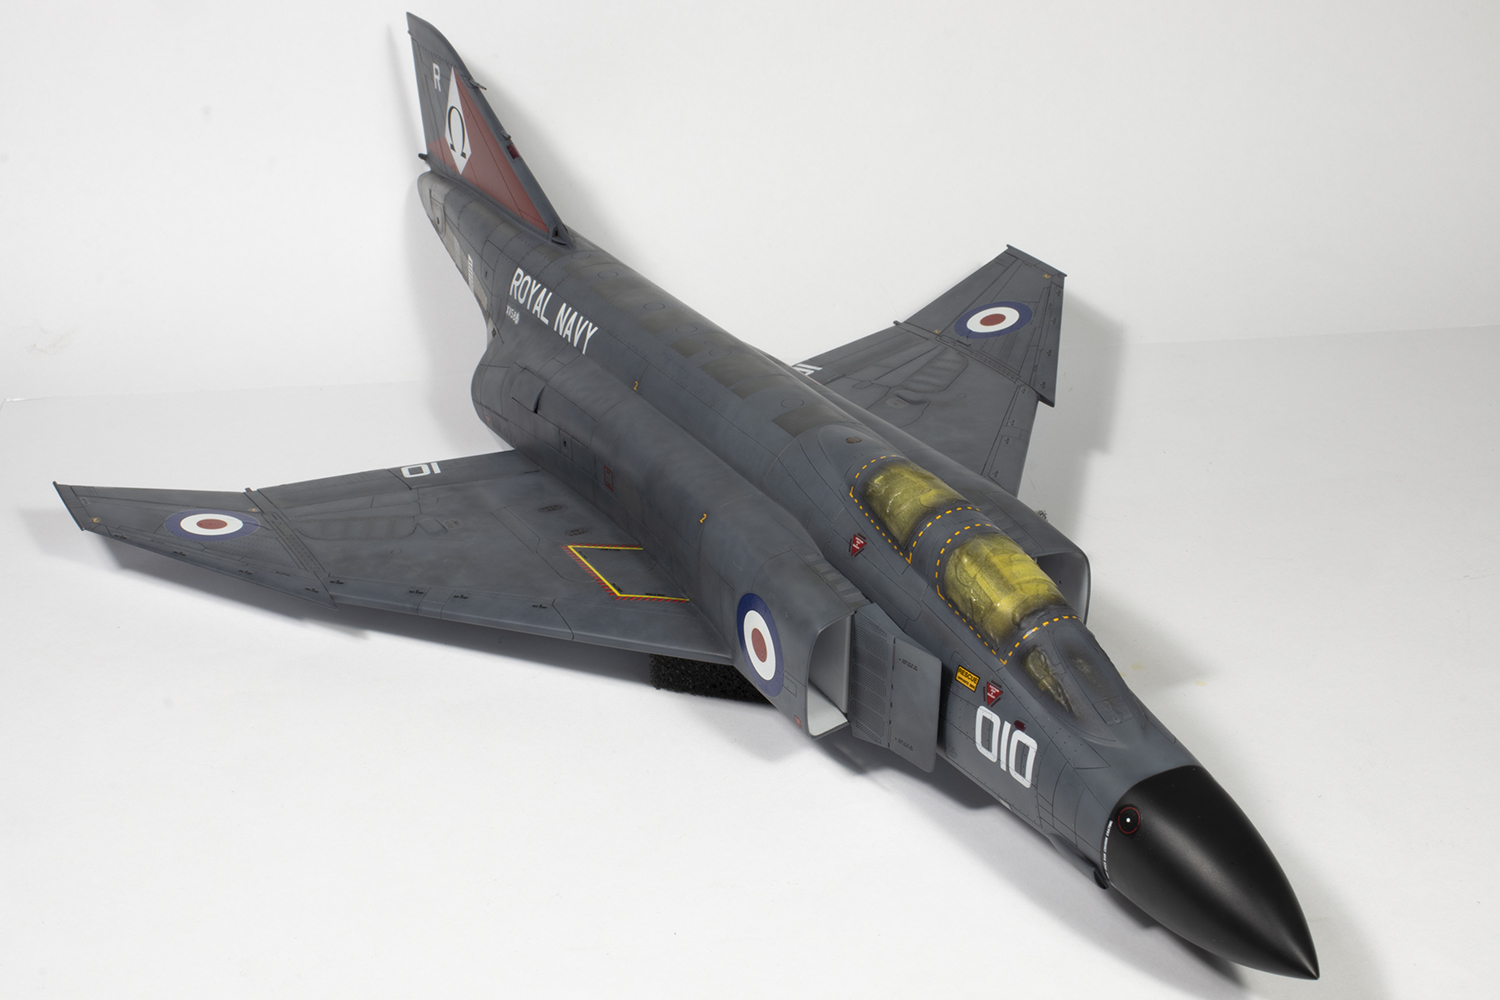
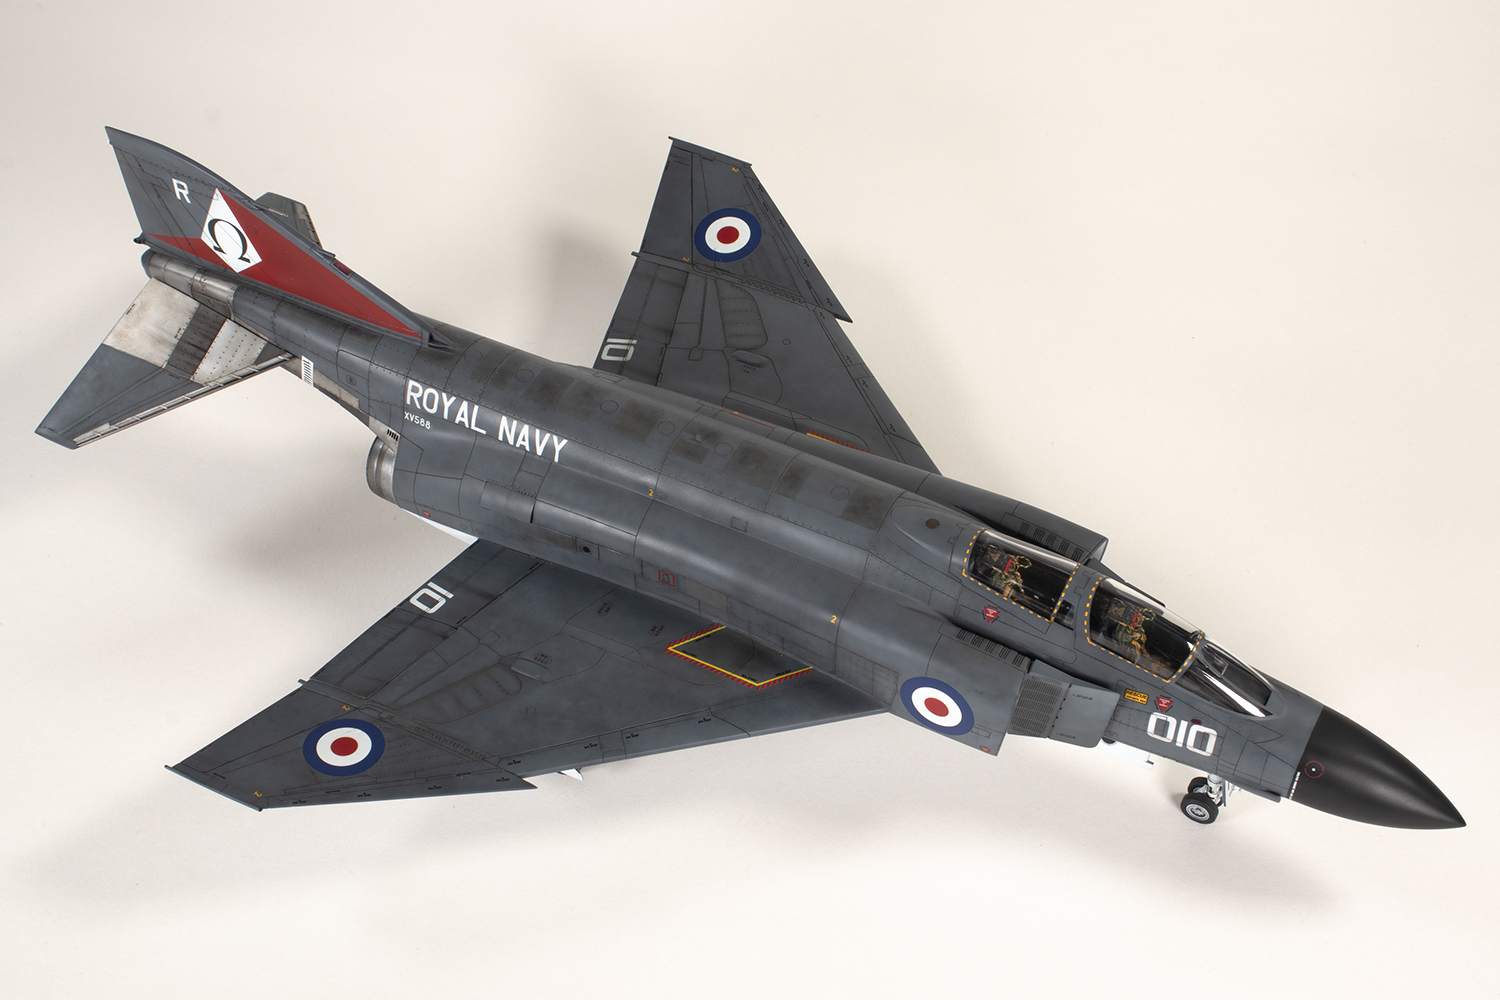
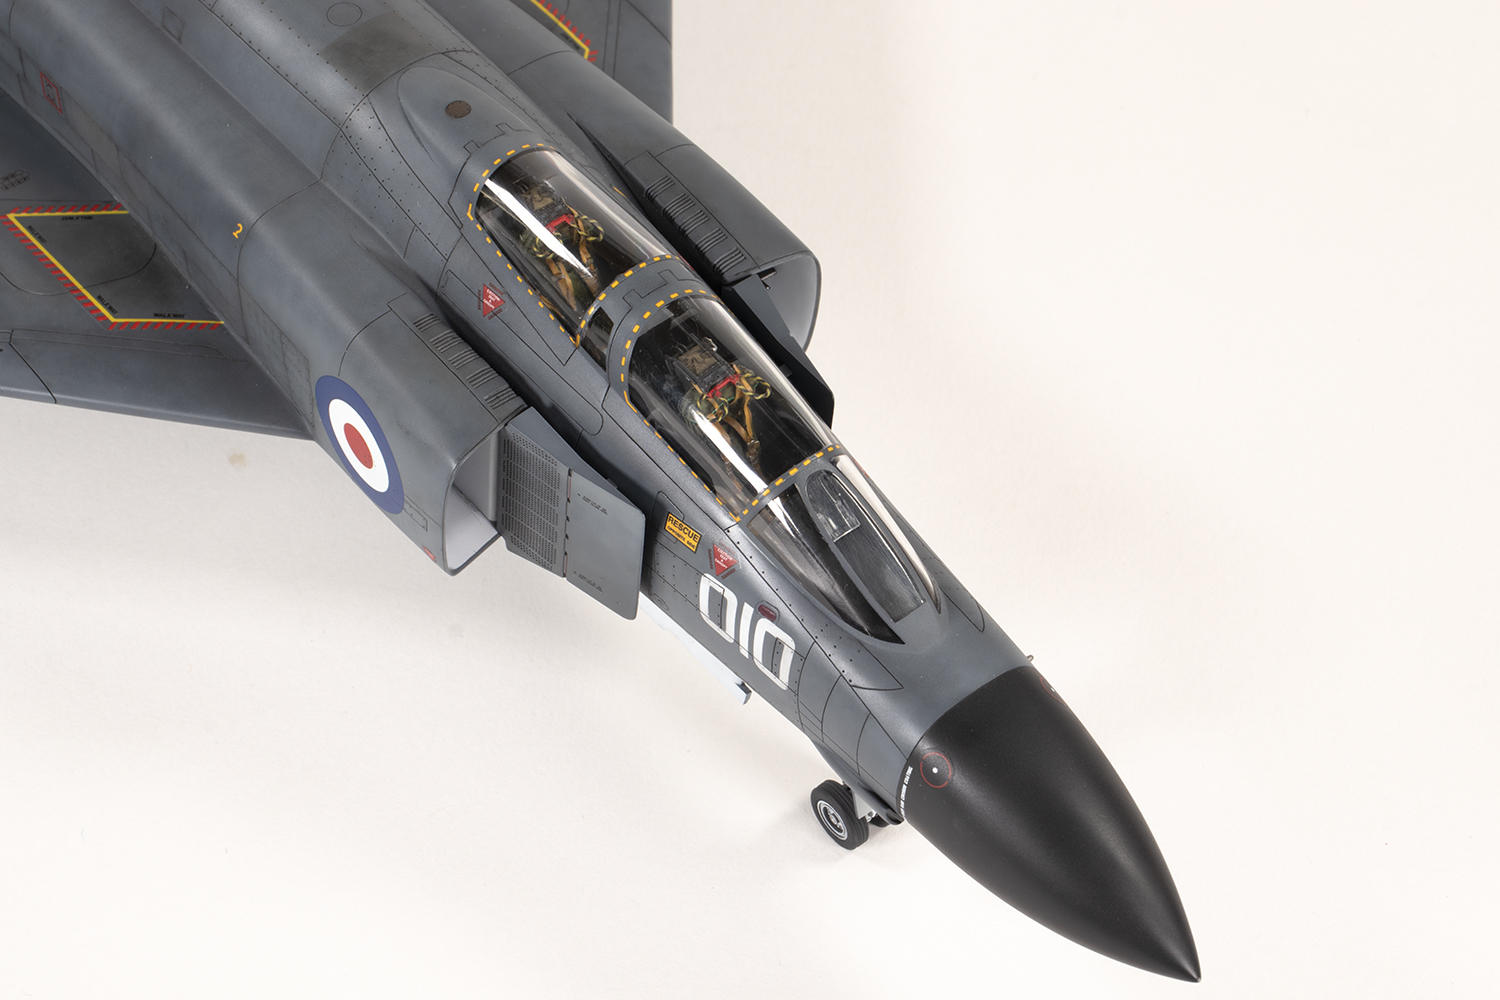
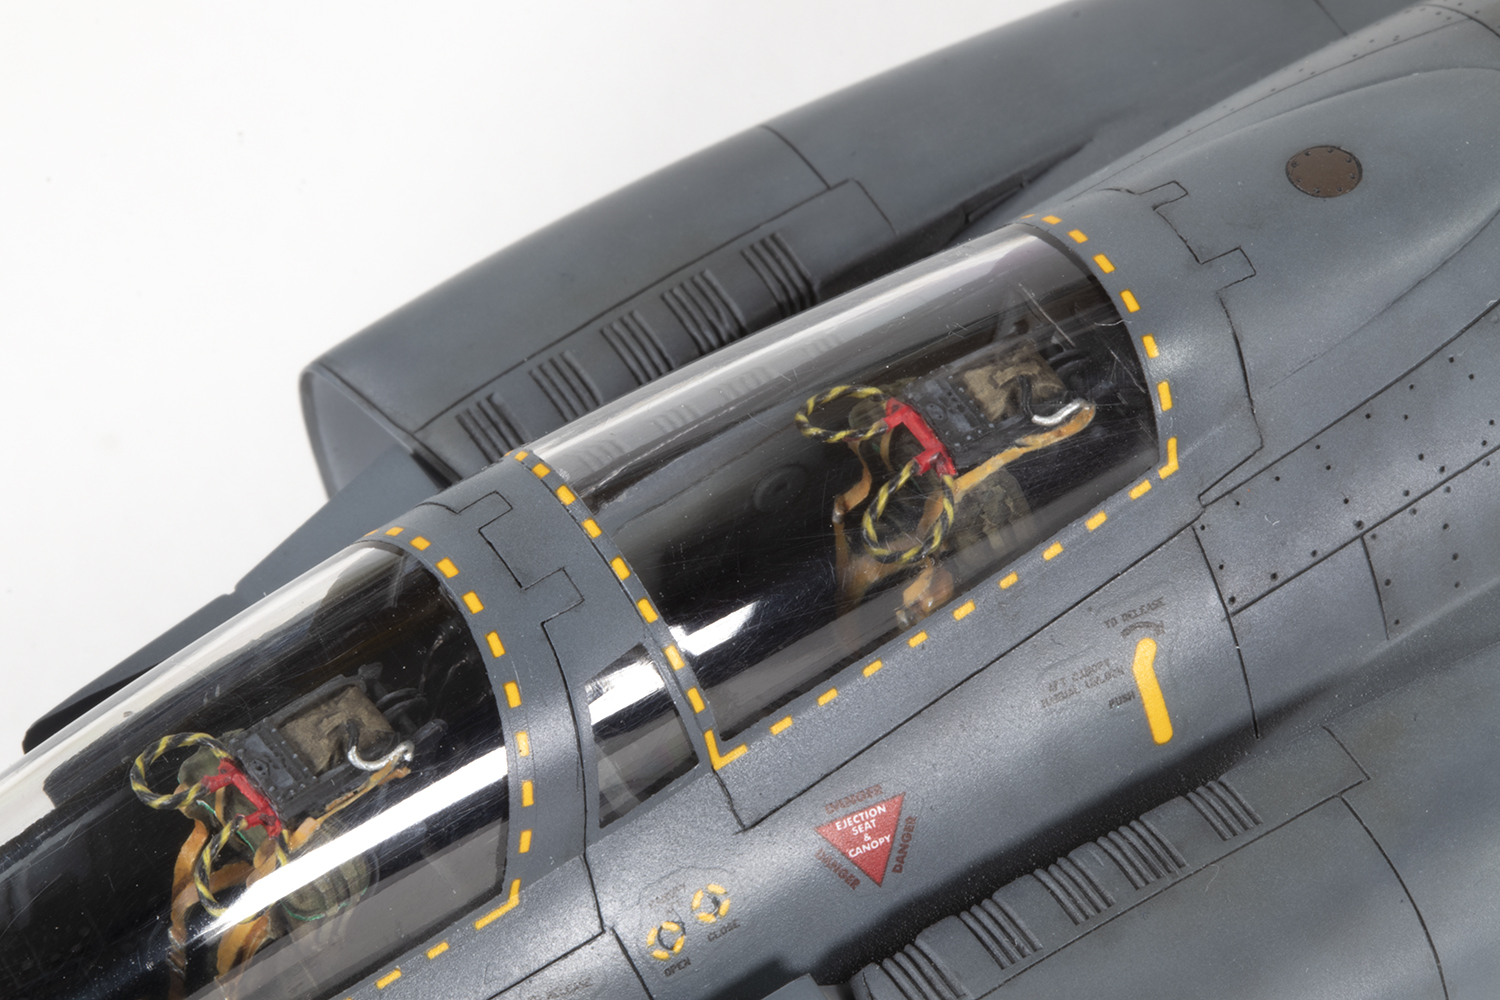
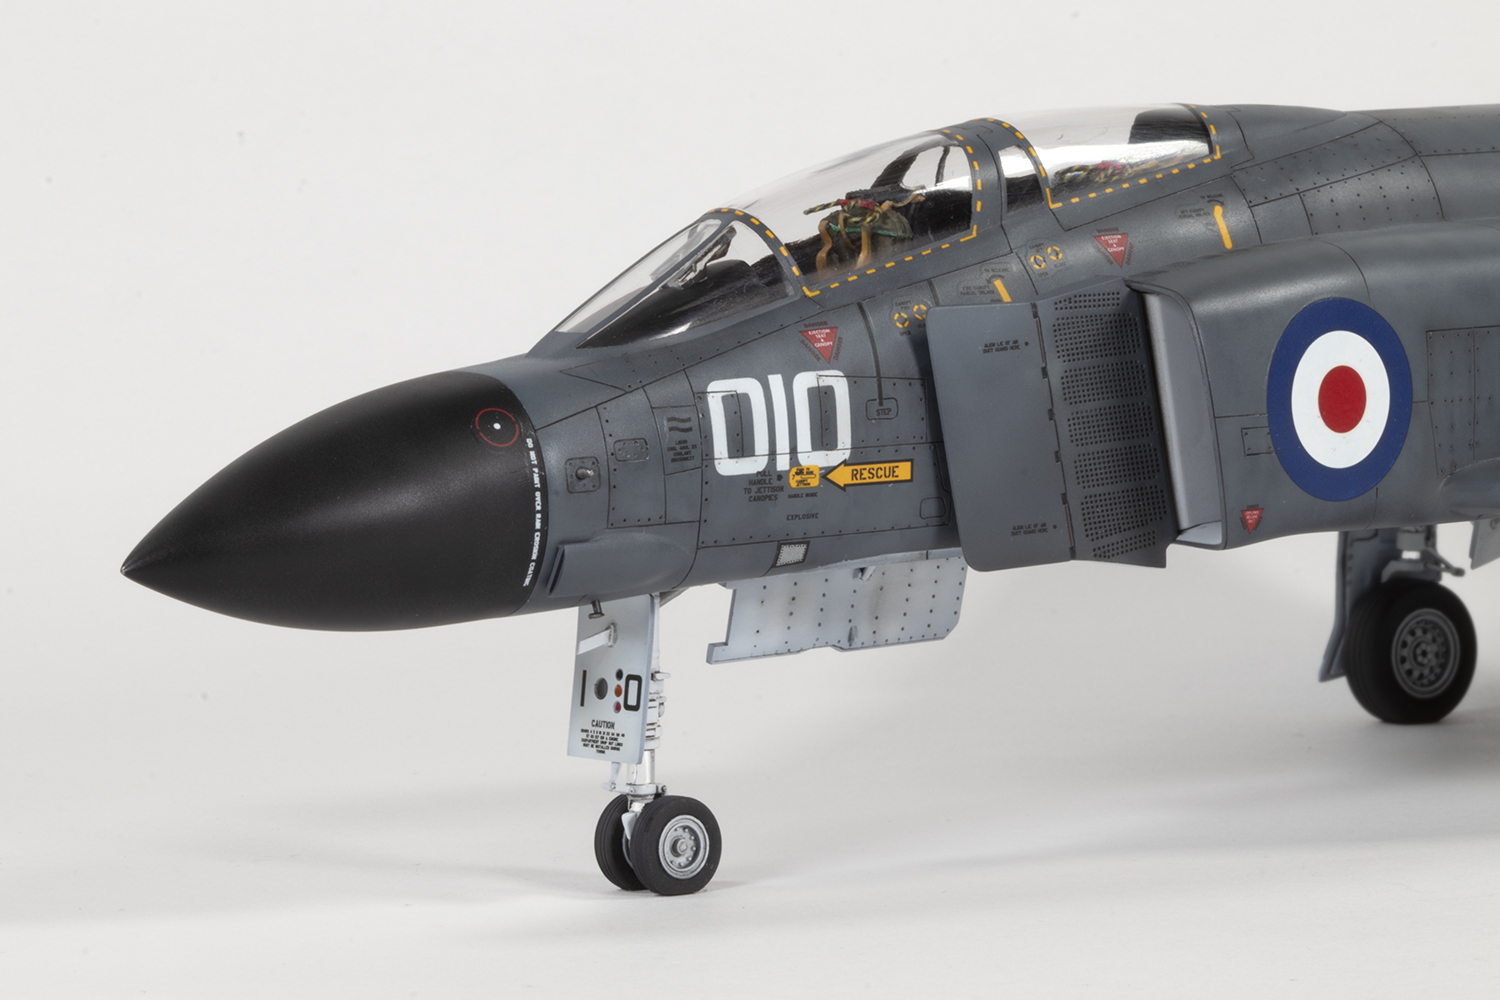
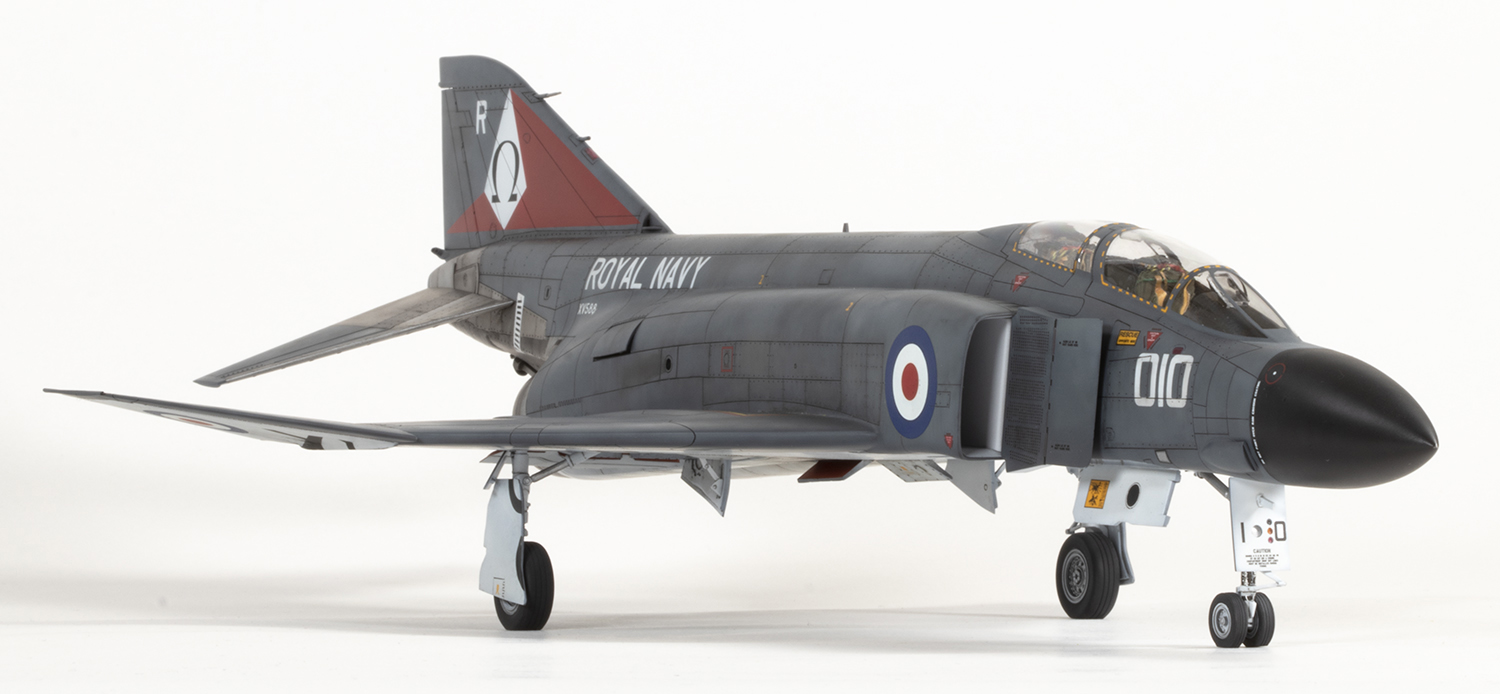
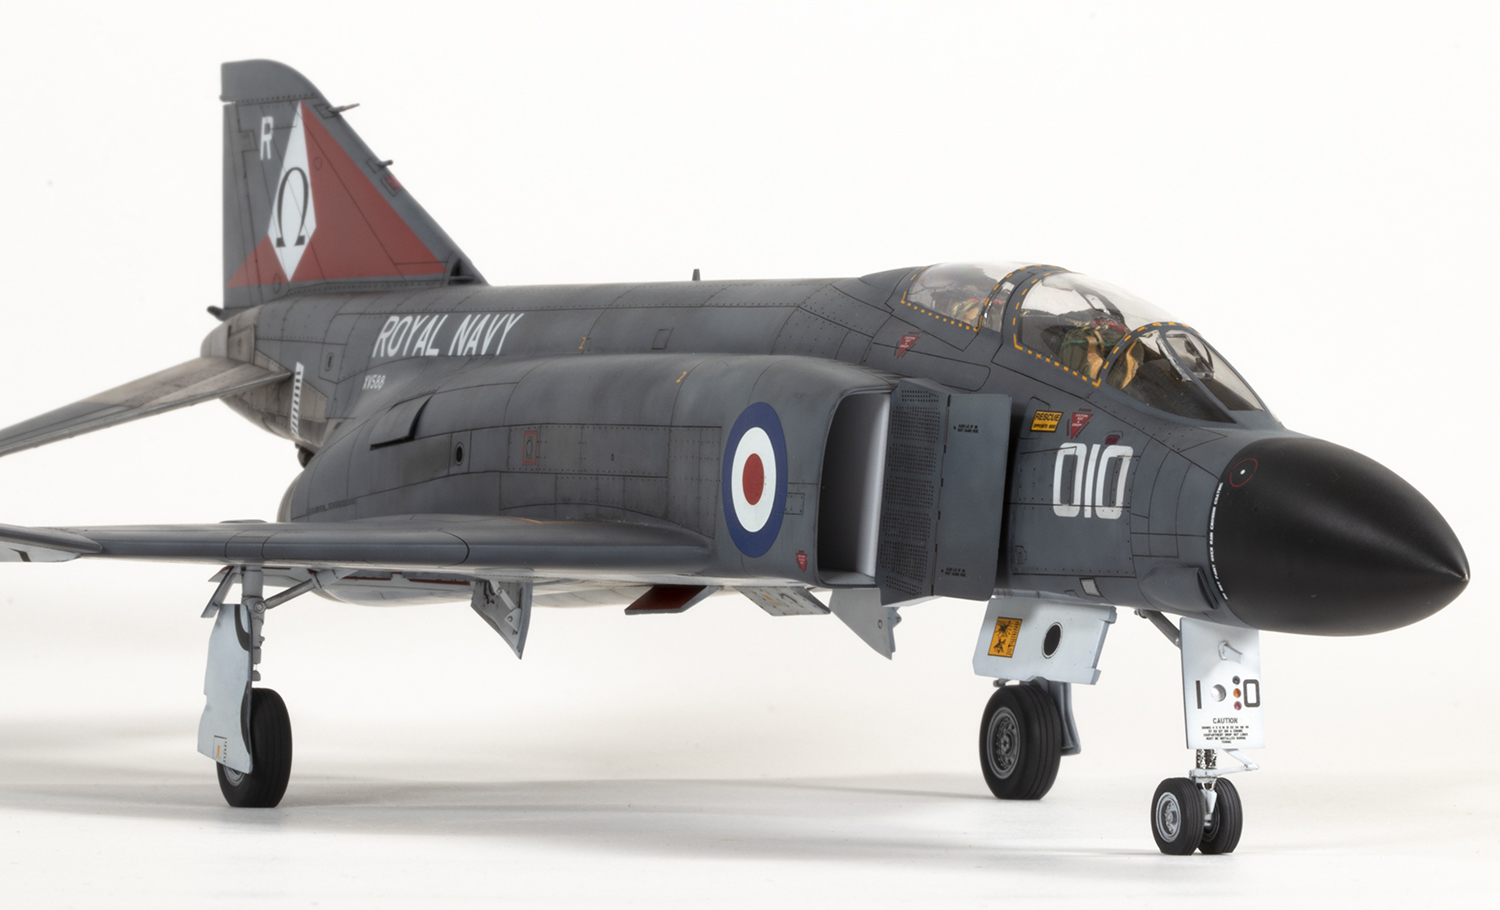
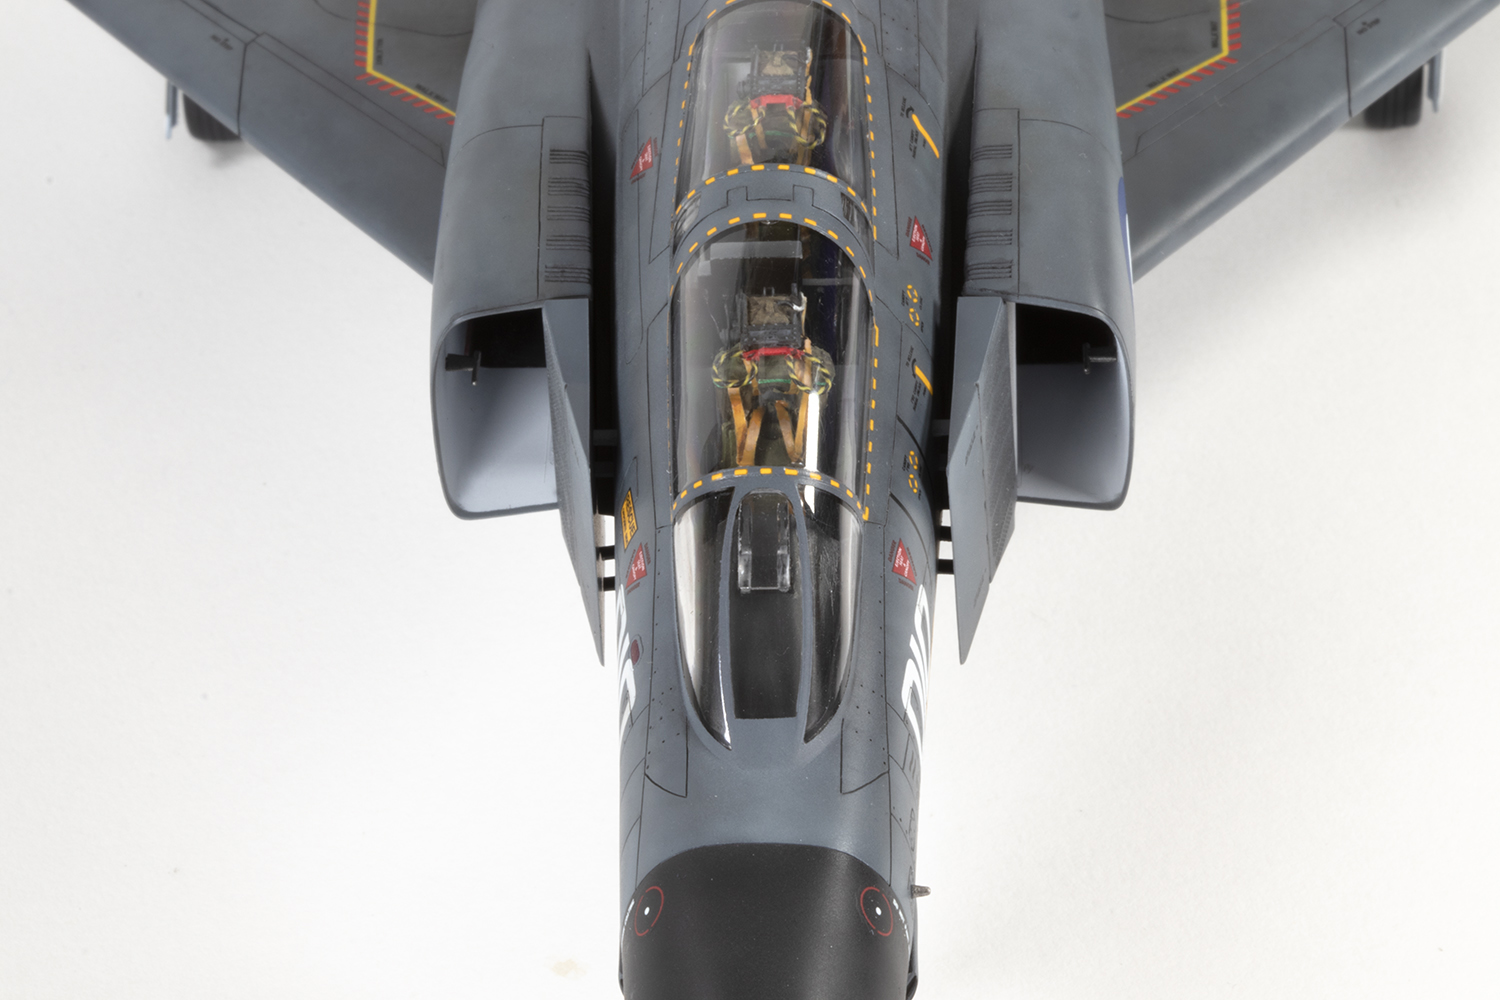
Having made so many of this family of kits, I was well aware that with the canopies closed, not much of the interior is visible. This is a plus, since the detail is basic, if nicely moulded. I settled for some hand painted instrument panels and consoles and concentrated on upgrading the seats. These are from Quickboost and have the belts moulded in, which I much prefer. I’ve never been happy with how I paint ejection seats and so spent more time than usual trying to get a more engaging look to the interesting bits (i.e. the cushions and belts). My basic technique was to airbrush a pale green shade over the cushions and then paint lots of very, very thin coats of green acrylic paint, heavily thinned with AK Interactive thinner, over the pale base colour. The belts were built up in a similar way using brown paints.
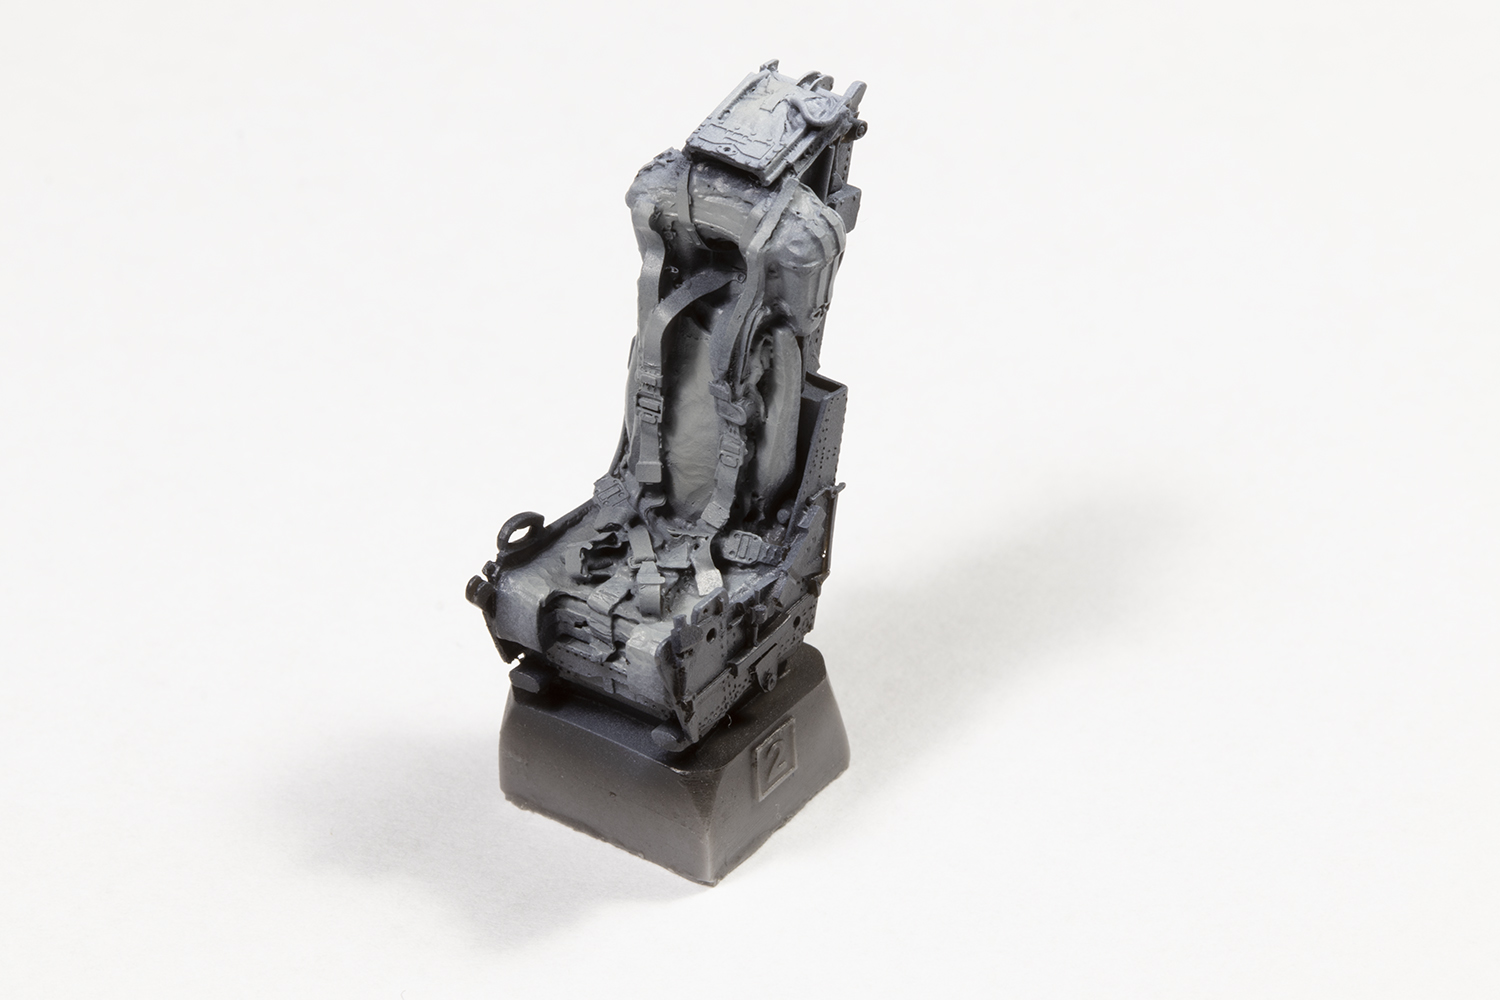

For the black and yellow striped ejection pull handles, I reverted to an old technique twisting black and yellow cotton thread together. To cut down on fuzz, I first coated the thread in thin PVA, and then clamped a thread of each colour together at one end with a weight and spun the threads. Once I was happy with how tight the pattern was, I coated the conjoined treads with more PVA. Lengths could then be attached to form the rings and handle. It’s not perfect under close examination, but good enough. The Quickboost seats appear to be a straight replacement for those in the kit, but once installed sat really low in the cockpit.
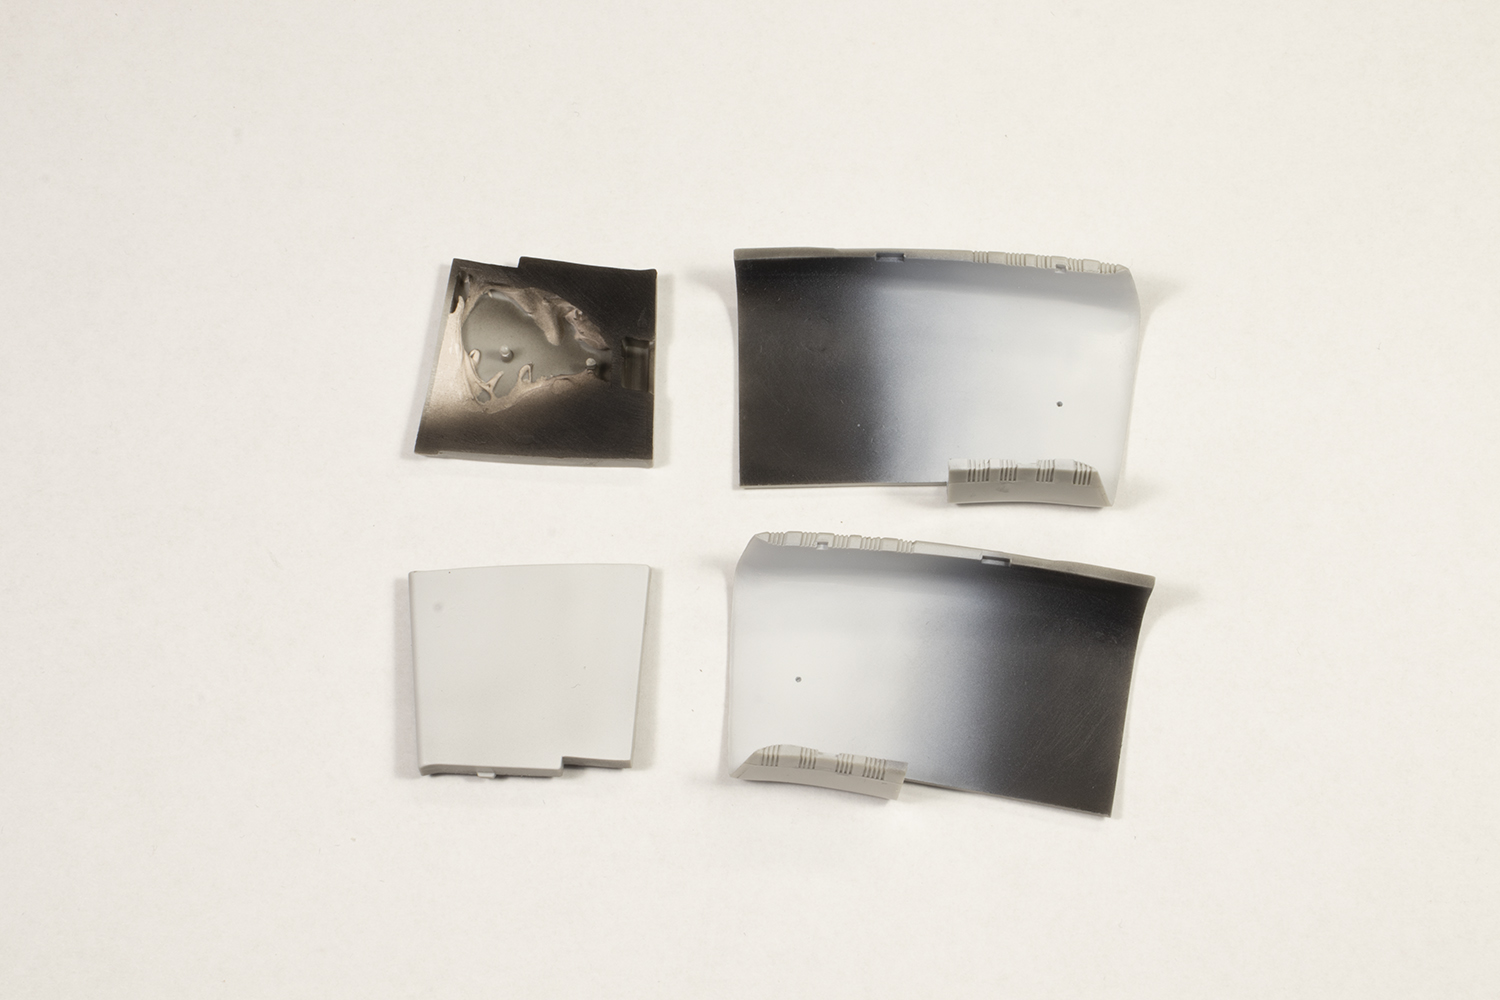
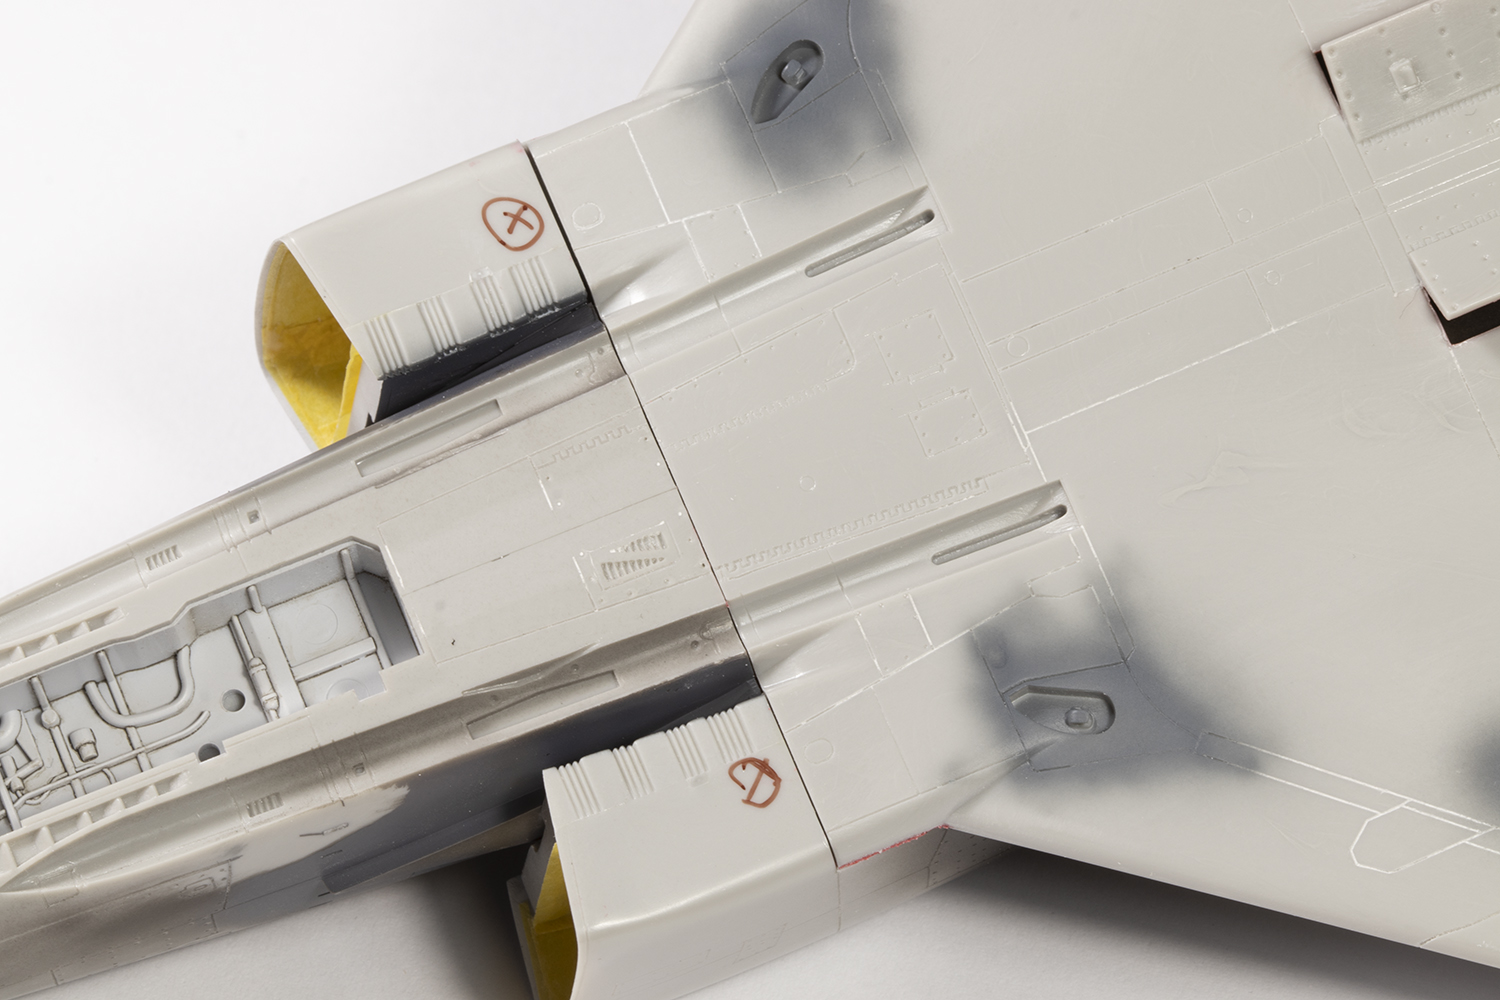
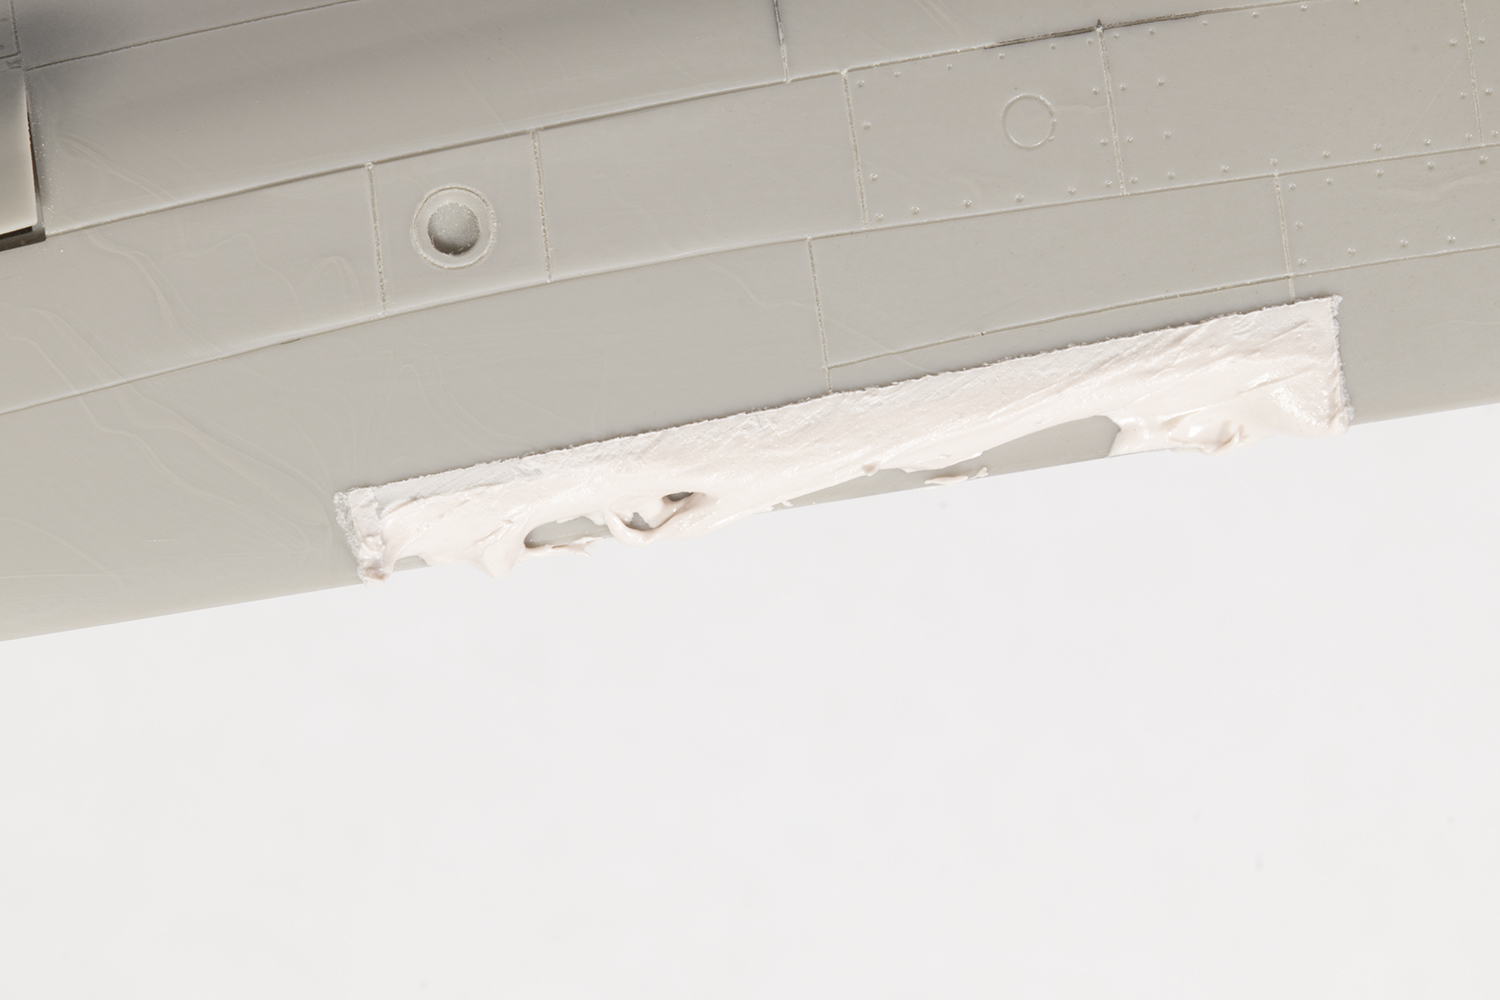
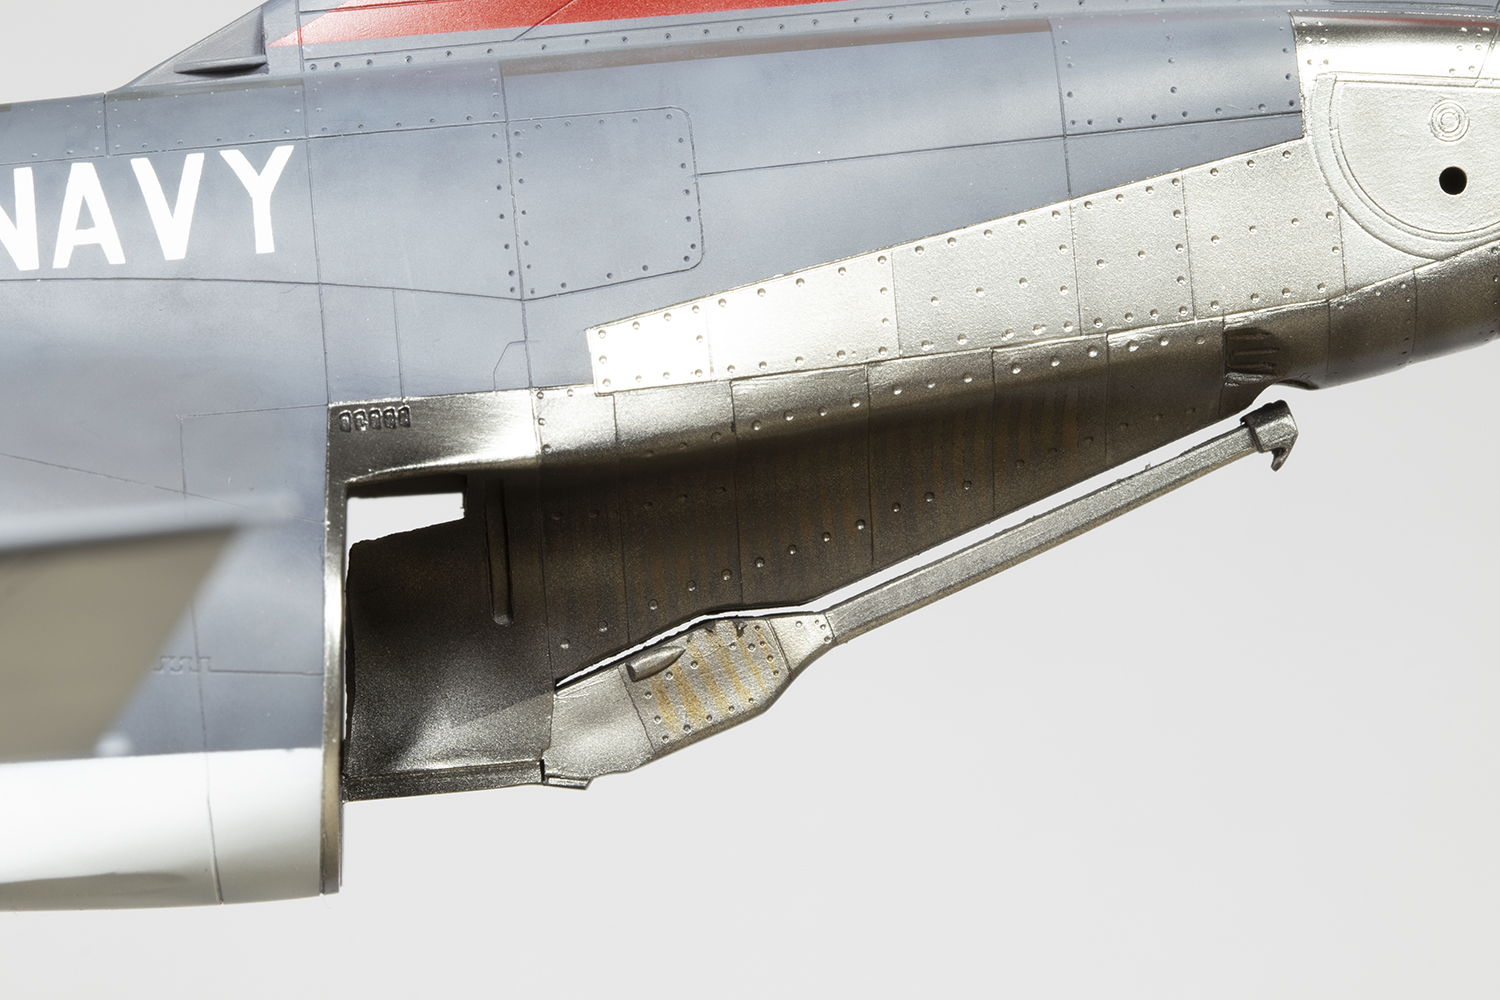
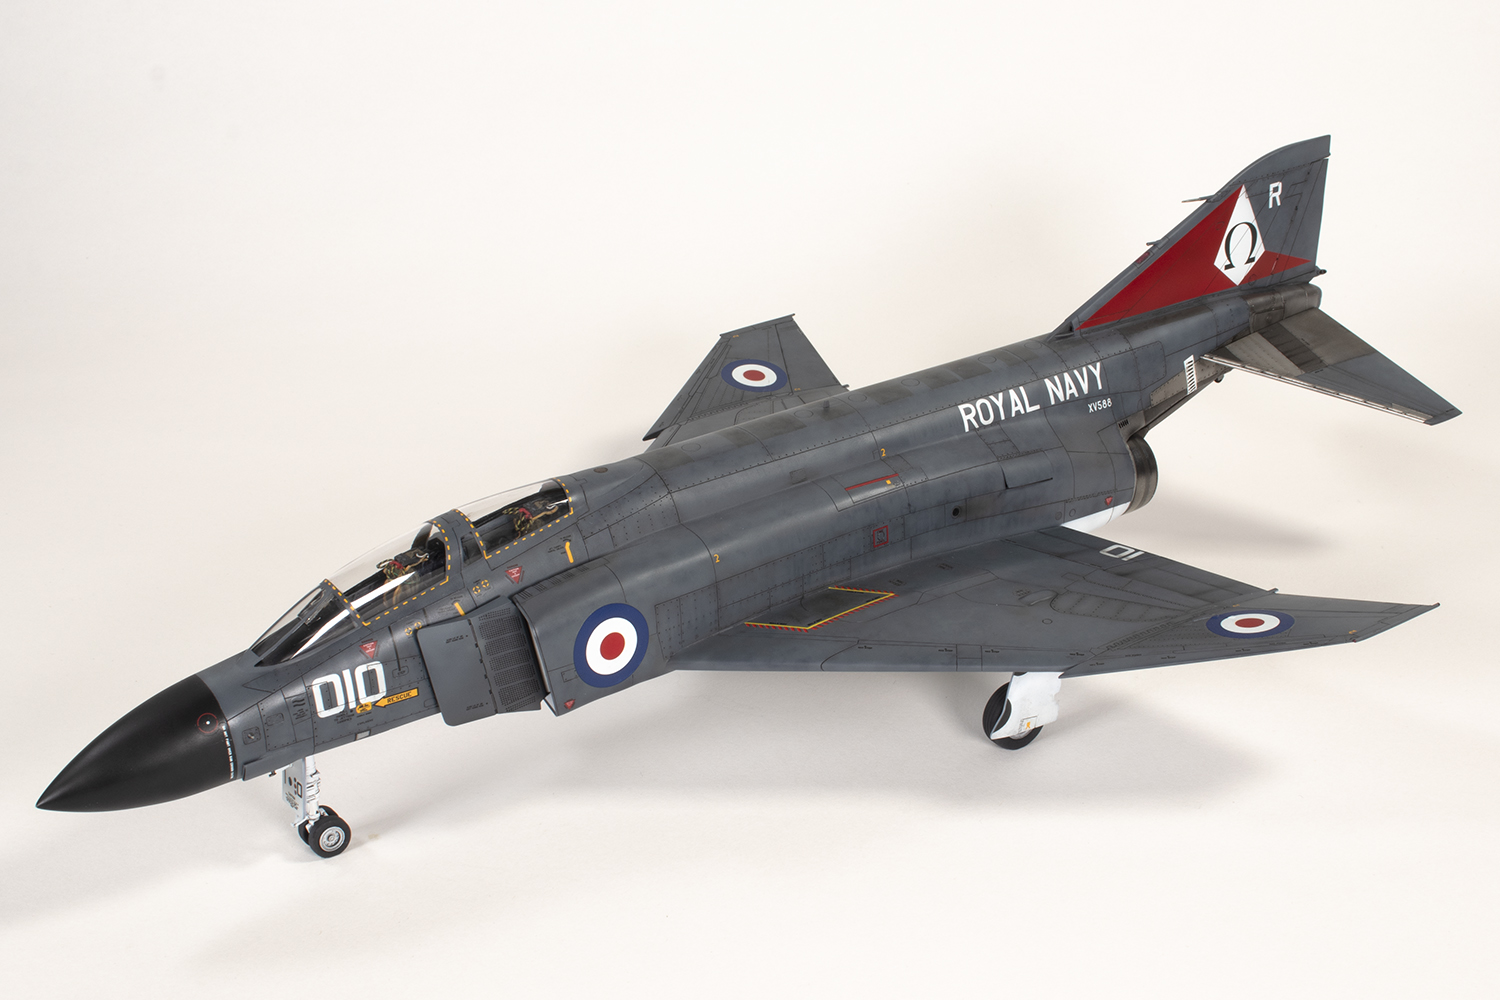
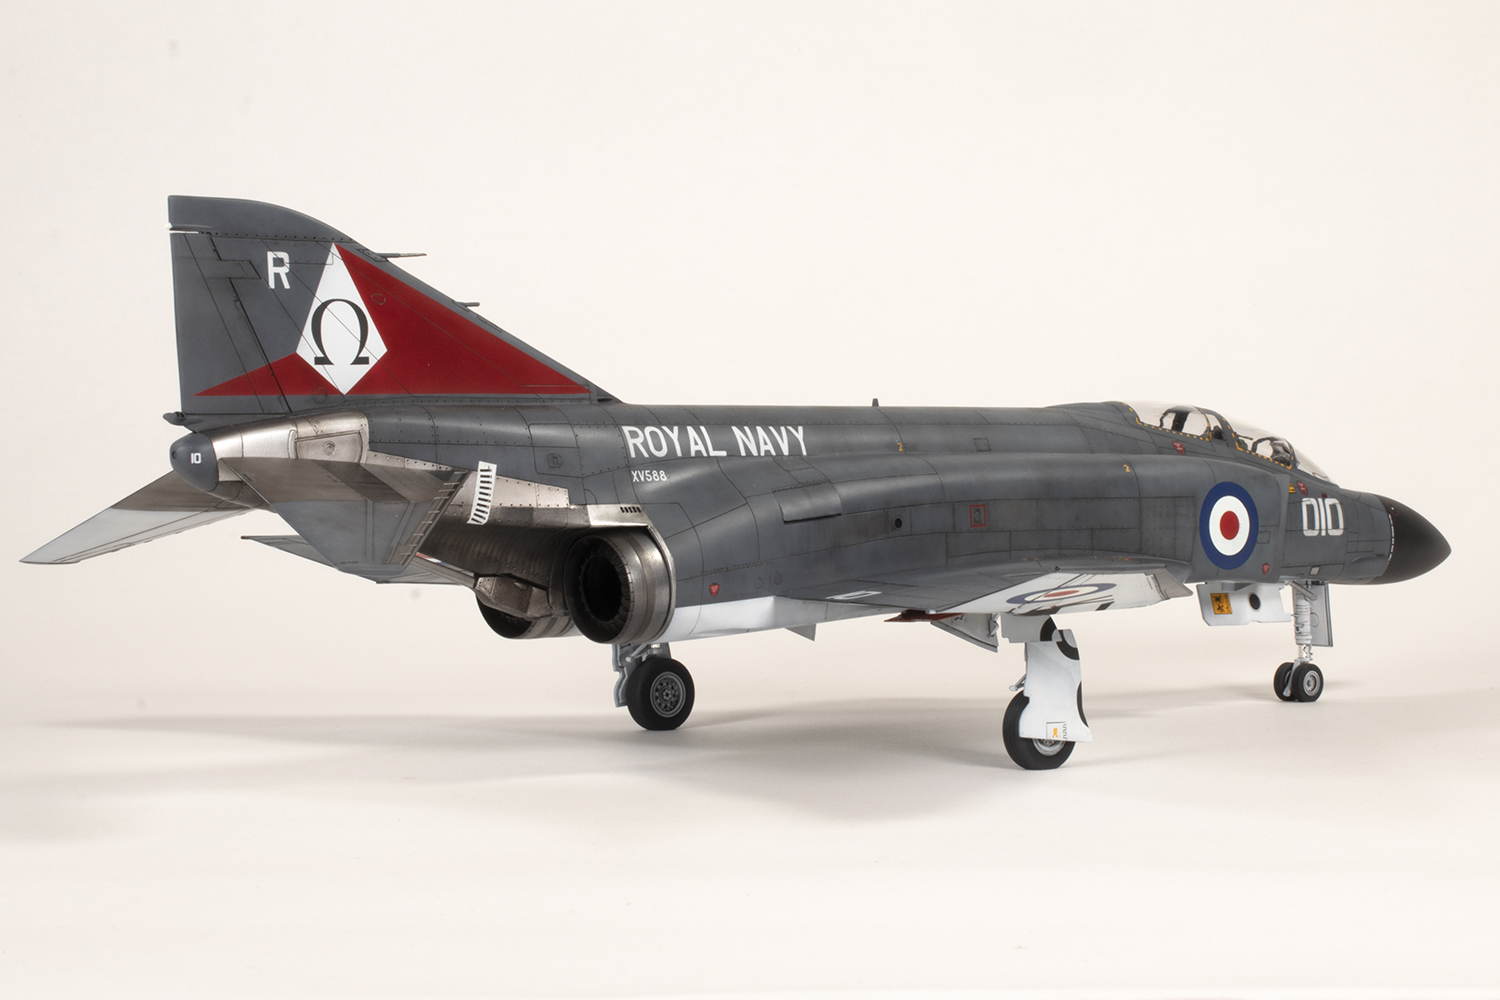
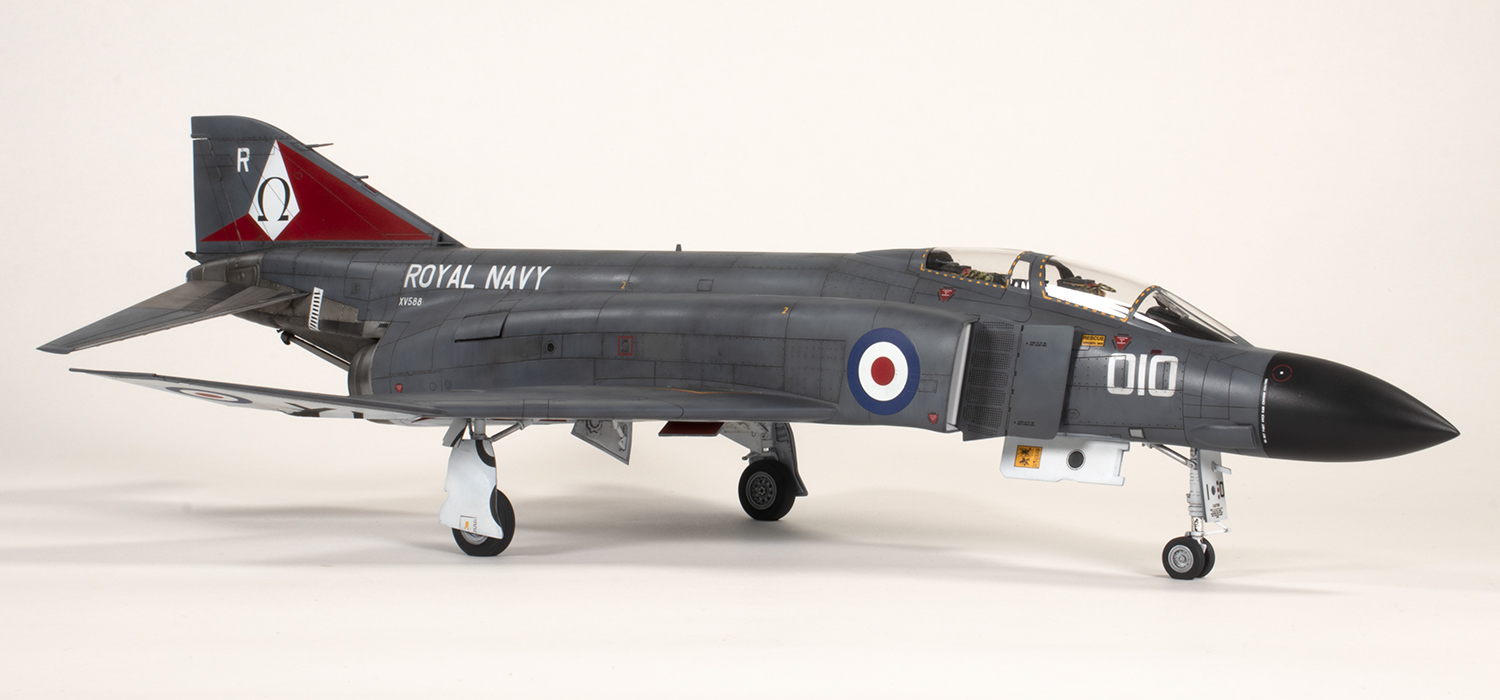
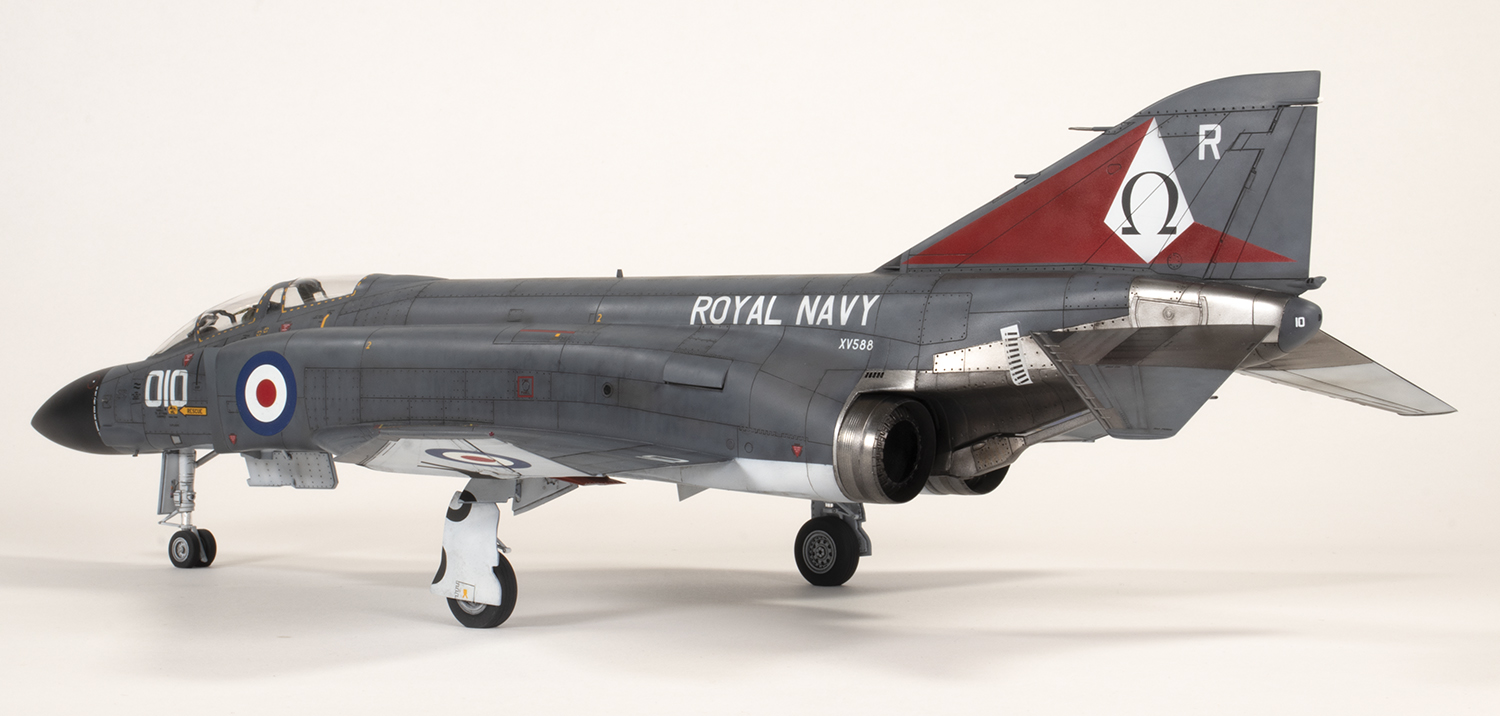
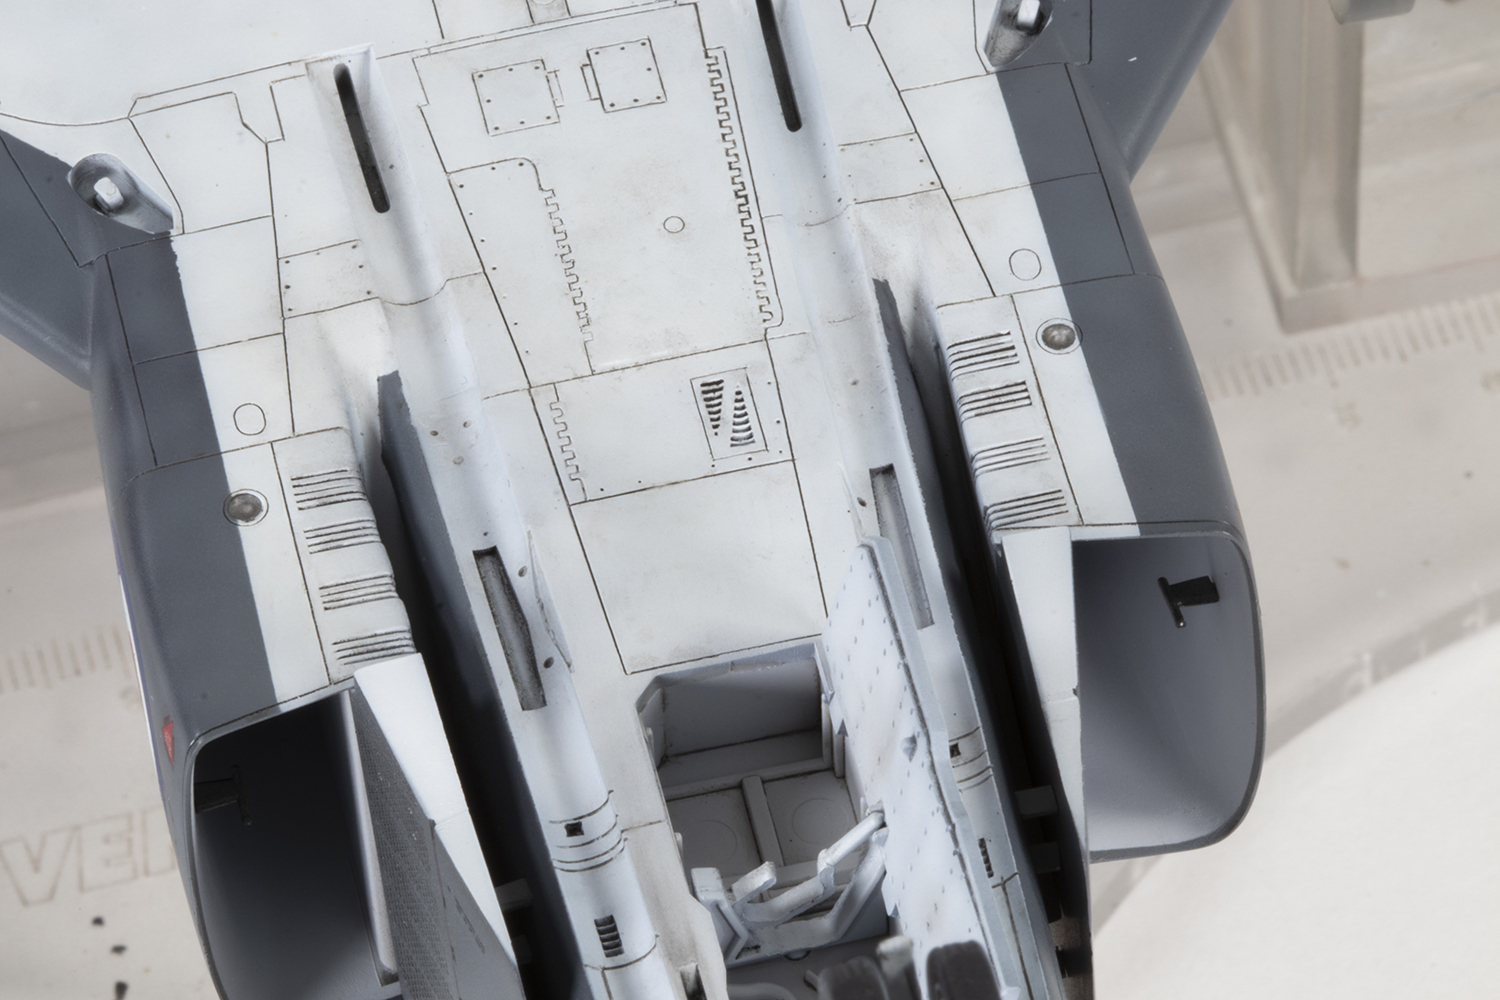
For decades pylons have been the forgotten detail of aircraft models, usually ill-fitting and poorly detailed. Happily, aftermarket companies have been taking more of an interest recently, with some superb offerings out there with all the necessary detail present along the bottom of the pylon. Nevertheless, where I can I try and avoid fitting them, mainly for aesthetic reasons. I was therefore delighted to find photos of an Ark Royal Phantoms at air shows with no pylons fitted – rare, I’m sure, but a great excuse to fill the location holes, shave off the pylon plates Hasegawa moulded to the underside of the wings, and throw the kit pylons into the spares box. The kit parts are better than some other Hasegawa F-4 pylons, but still very chunky with coarse detailing and an indifferent fit.
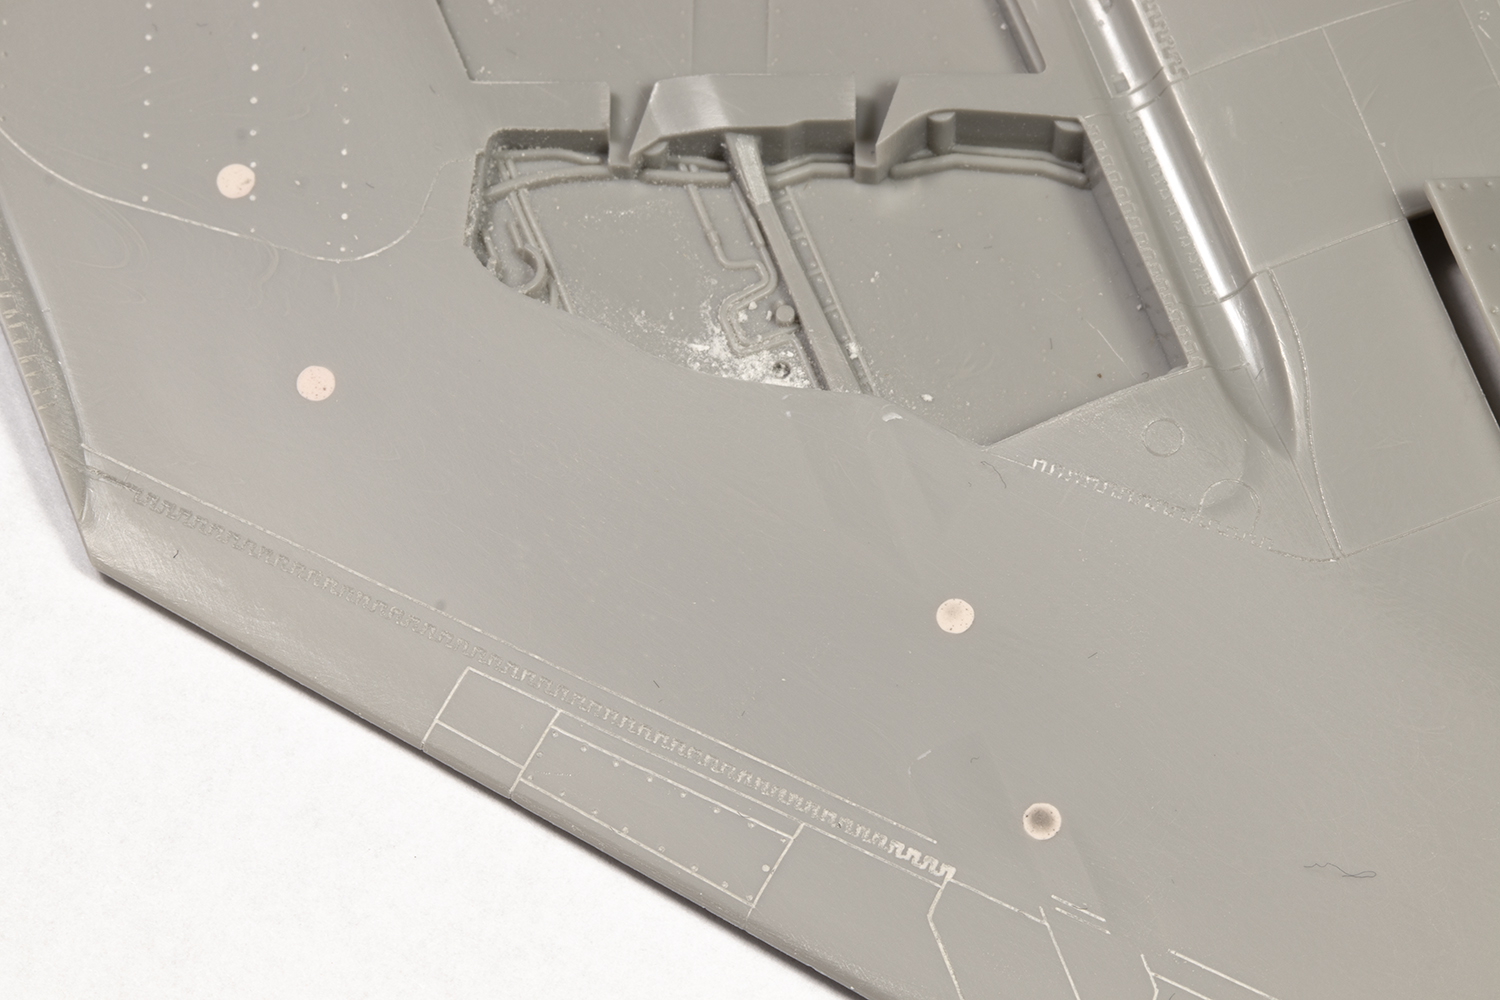
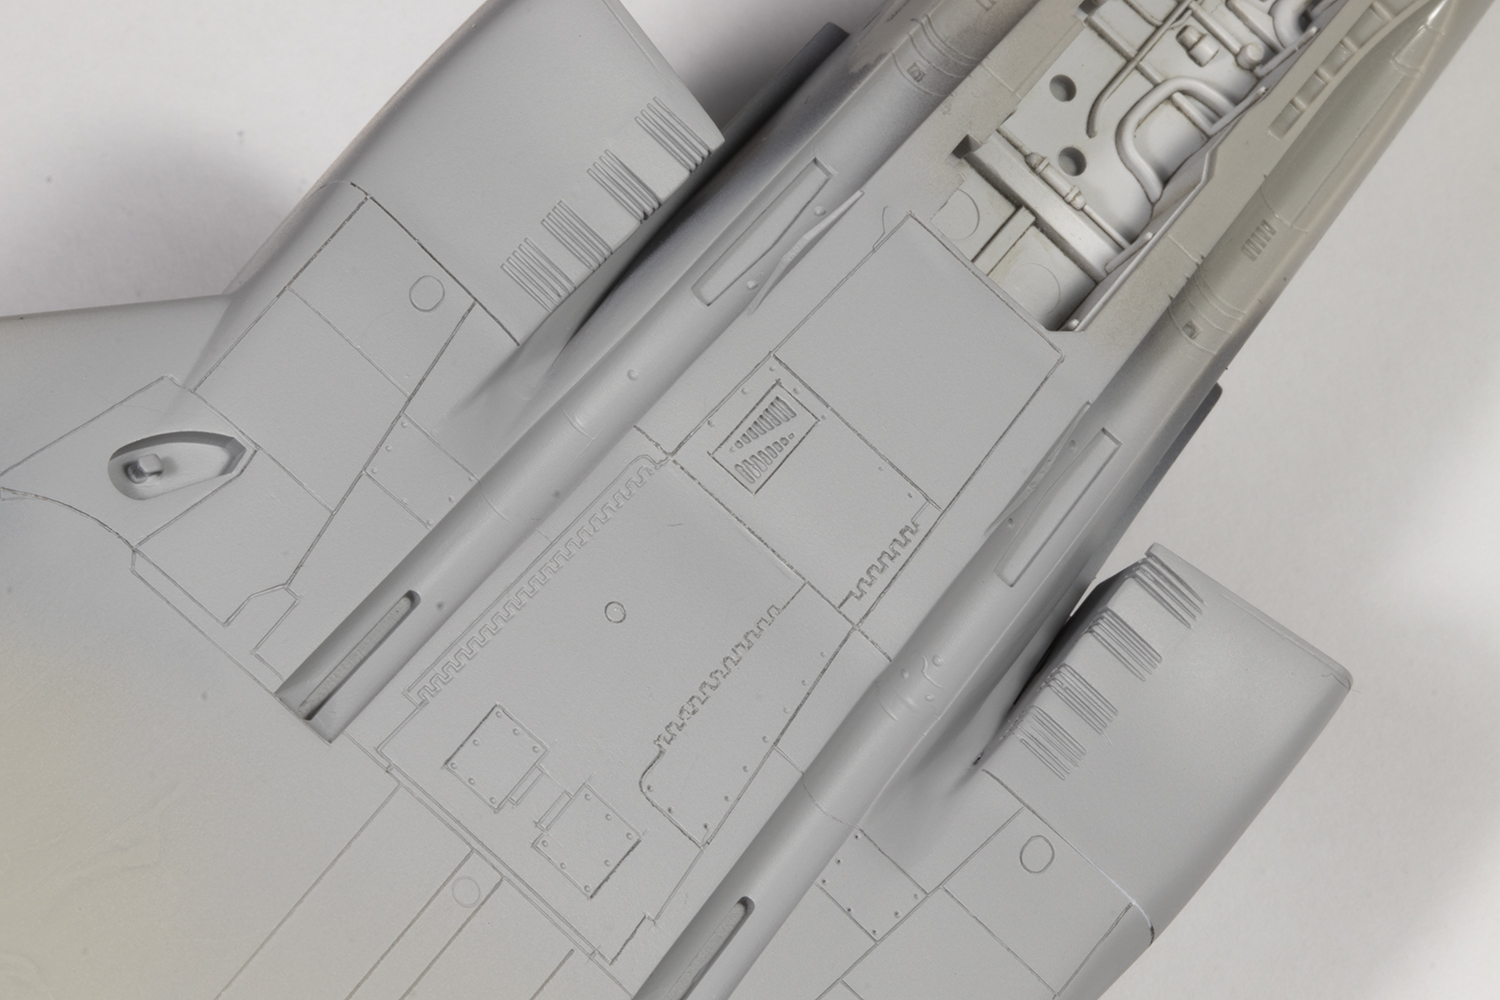
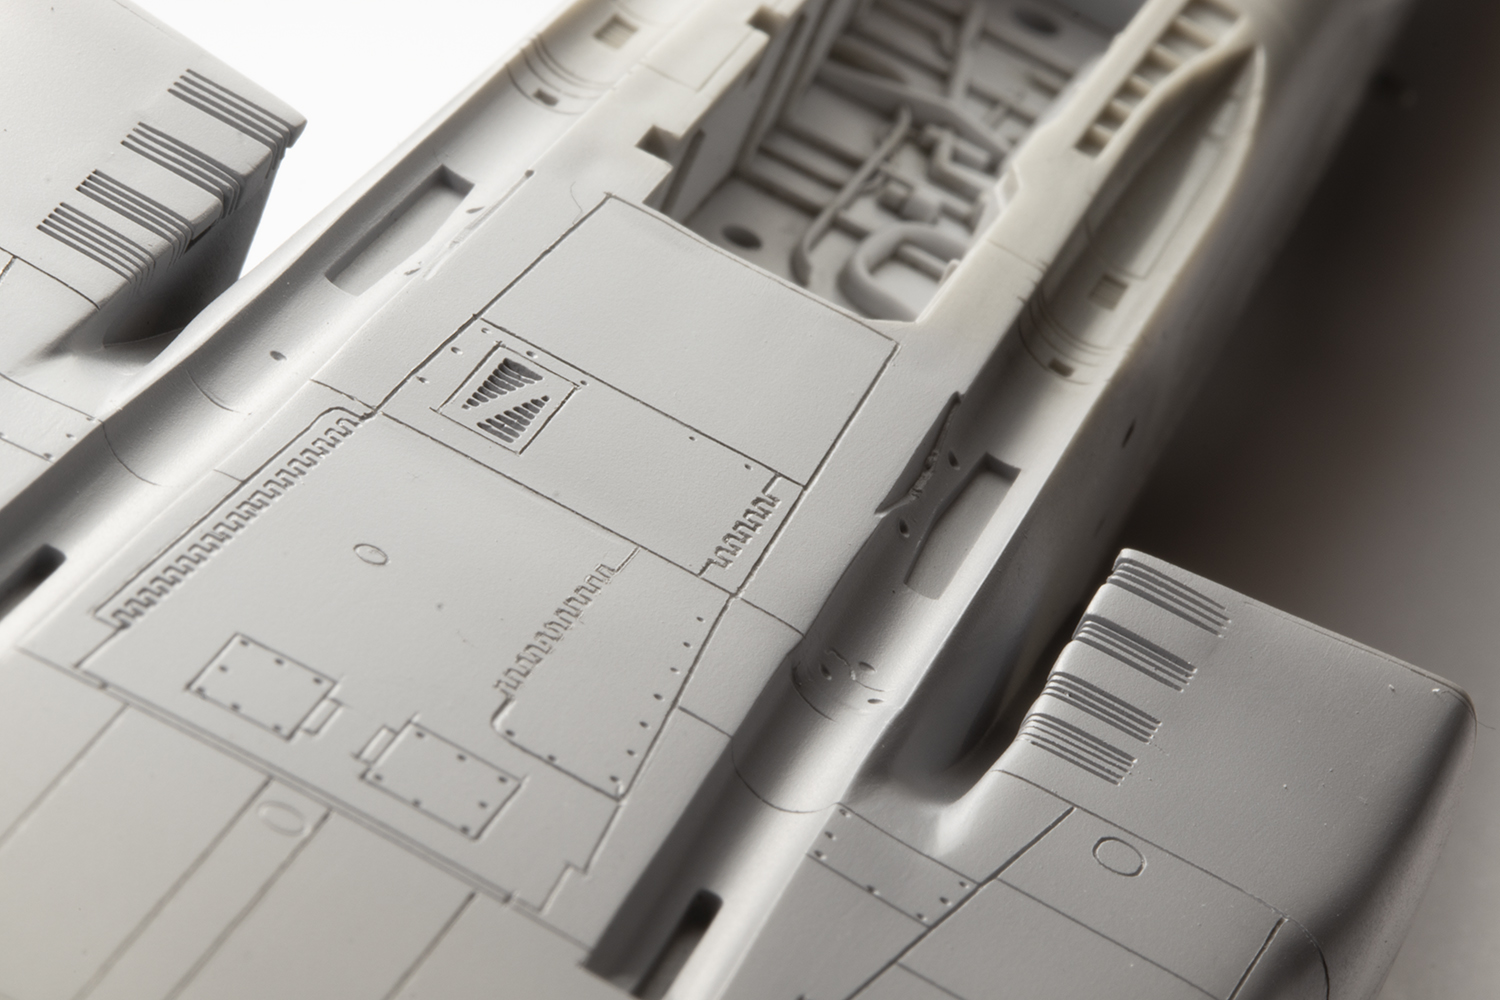
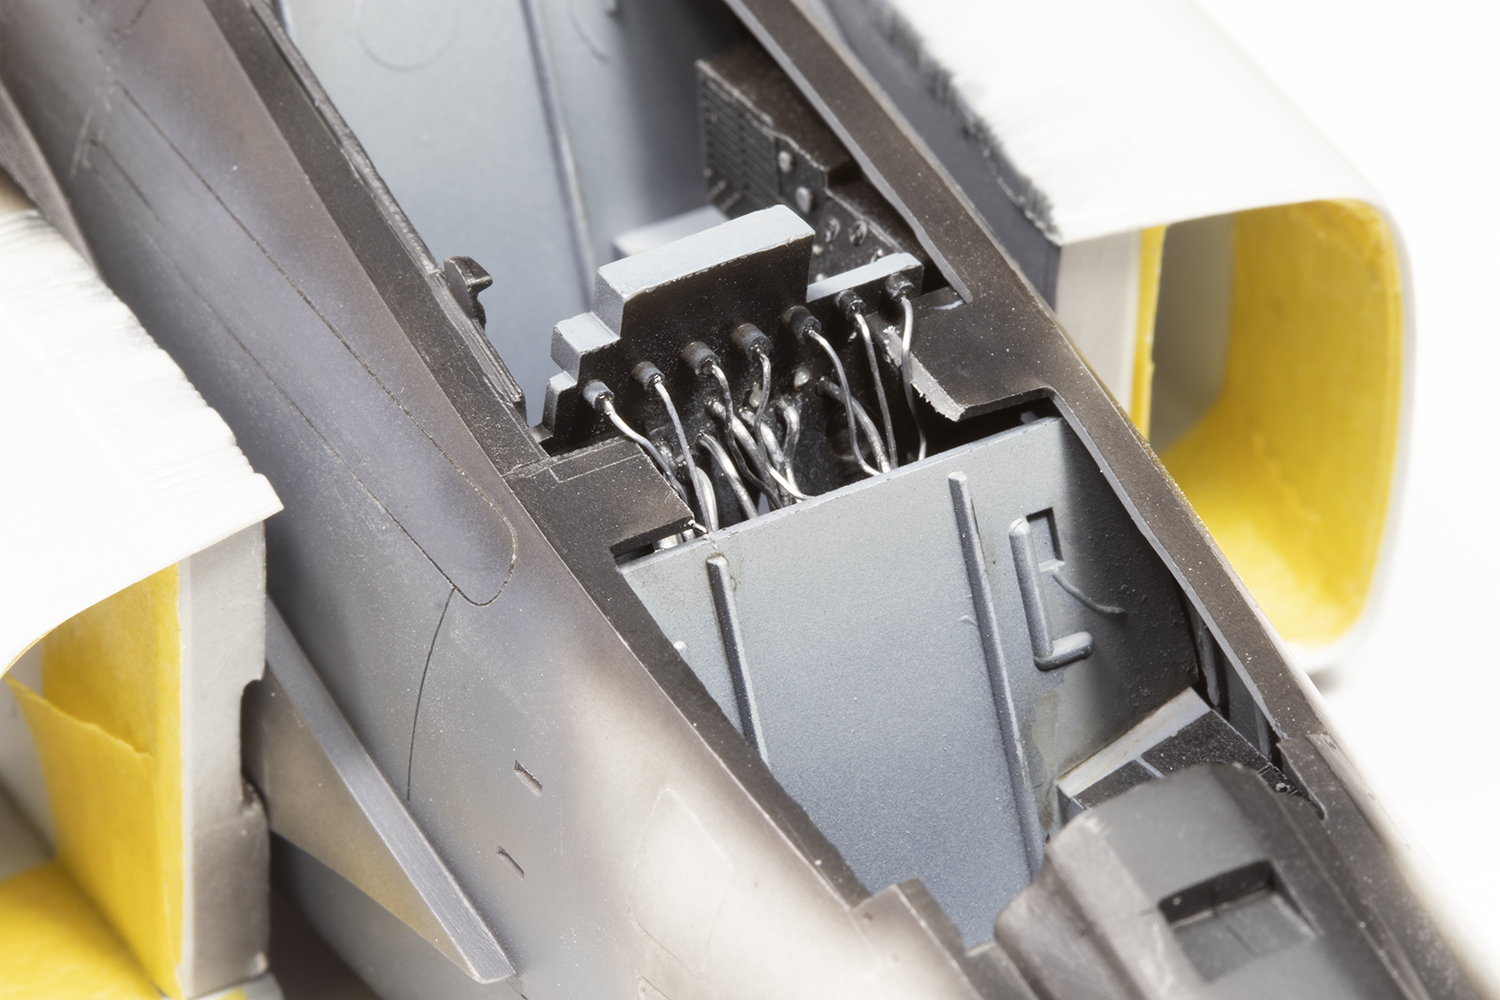
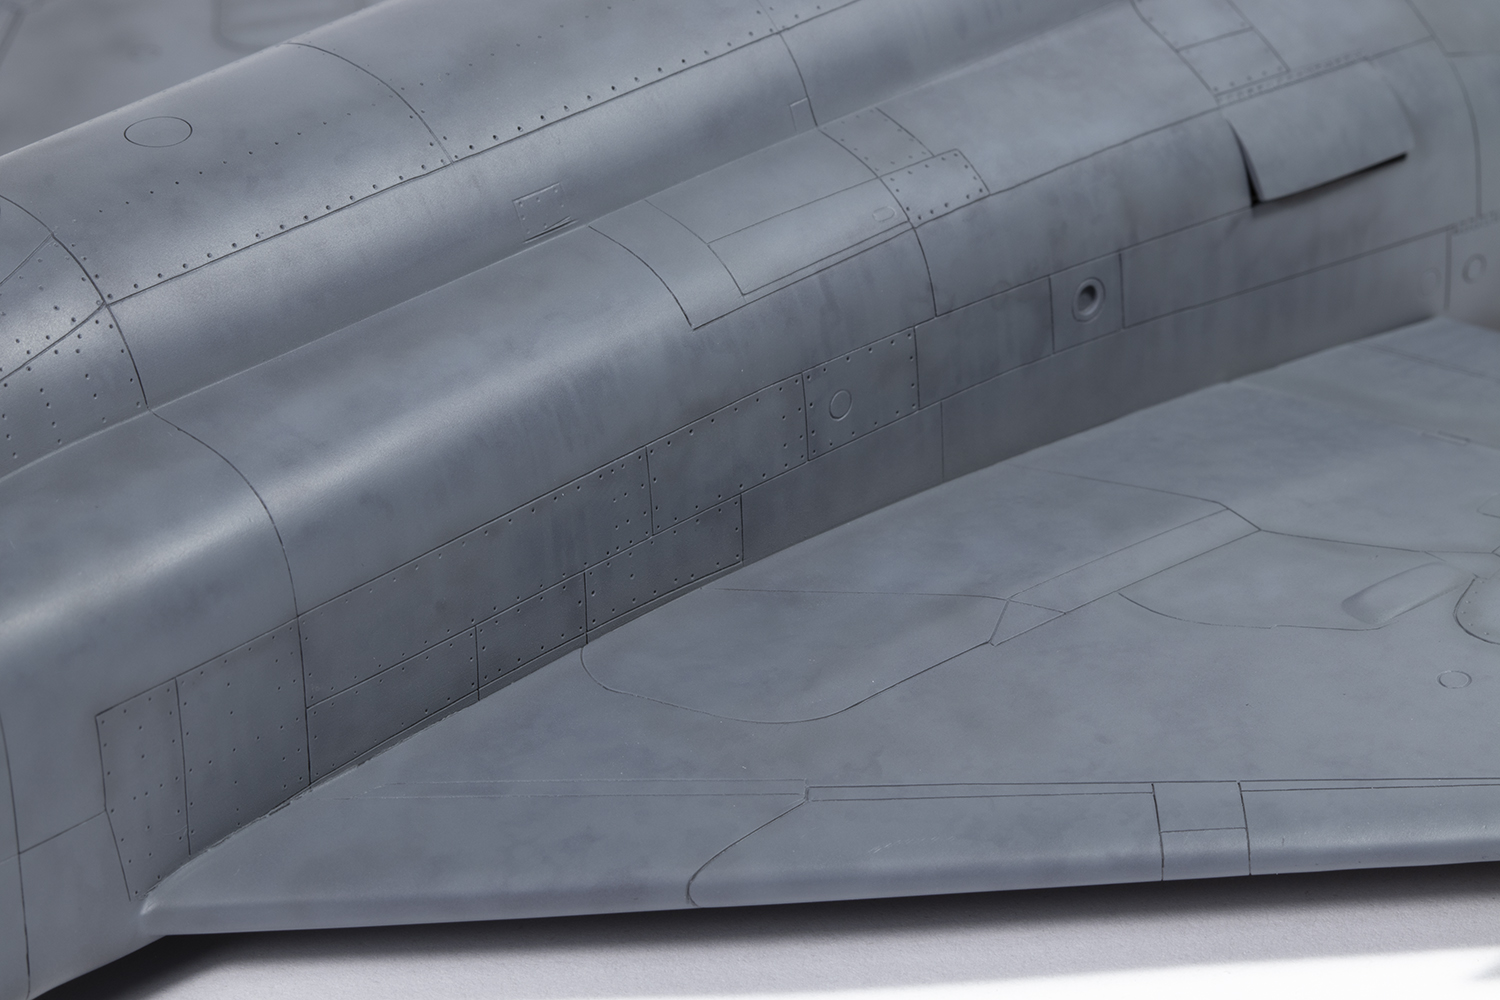
A common issue with Hasegawa Phantoms is the hollow backs to the intake sides. It’s difficult to see, I grant you, but seen it can be, and thus I filled the relevant voids with two-part polyester putty sanded flush. The great thing about this putty is how quick it sets – sanding can start within minutes. Less great is the stink and the need for a mask to avoid the dust. Whilst we’re discussing hard to see parts of the intakes, I might as well mention the lack of bracing struts between the splitter plates and the fuselage sides. There are four each side and they should have an aerofoil profile. I believe (but might be wrong) that only Tamiya and Zoukei-Mura have replicated this feature in 1/48. I attempted it, too, (but without the profile) by chiselling slots into roughly the correct places and gluing in some 0.4 x 1.5mm Evergreen strip styrene. I did not bother replacing the kit intakes with full length aftermarket examples, although this is a more worthwhile change on this model of Phantom owing the better view down to the engine faces.
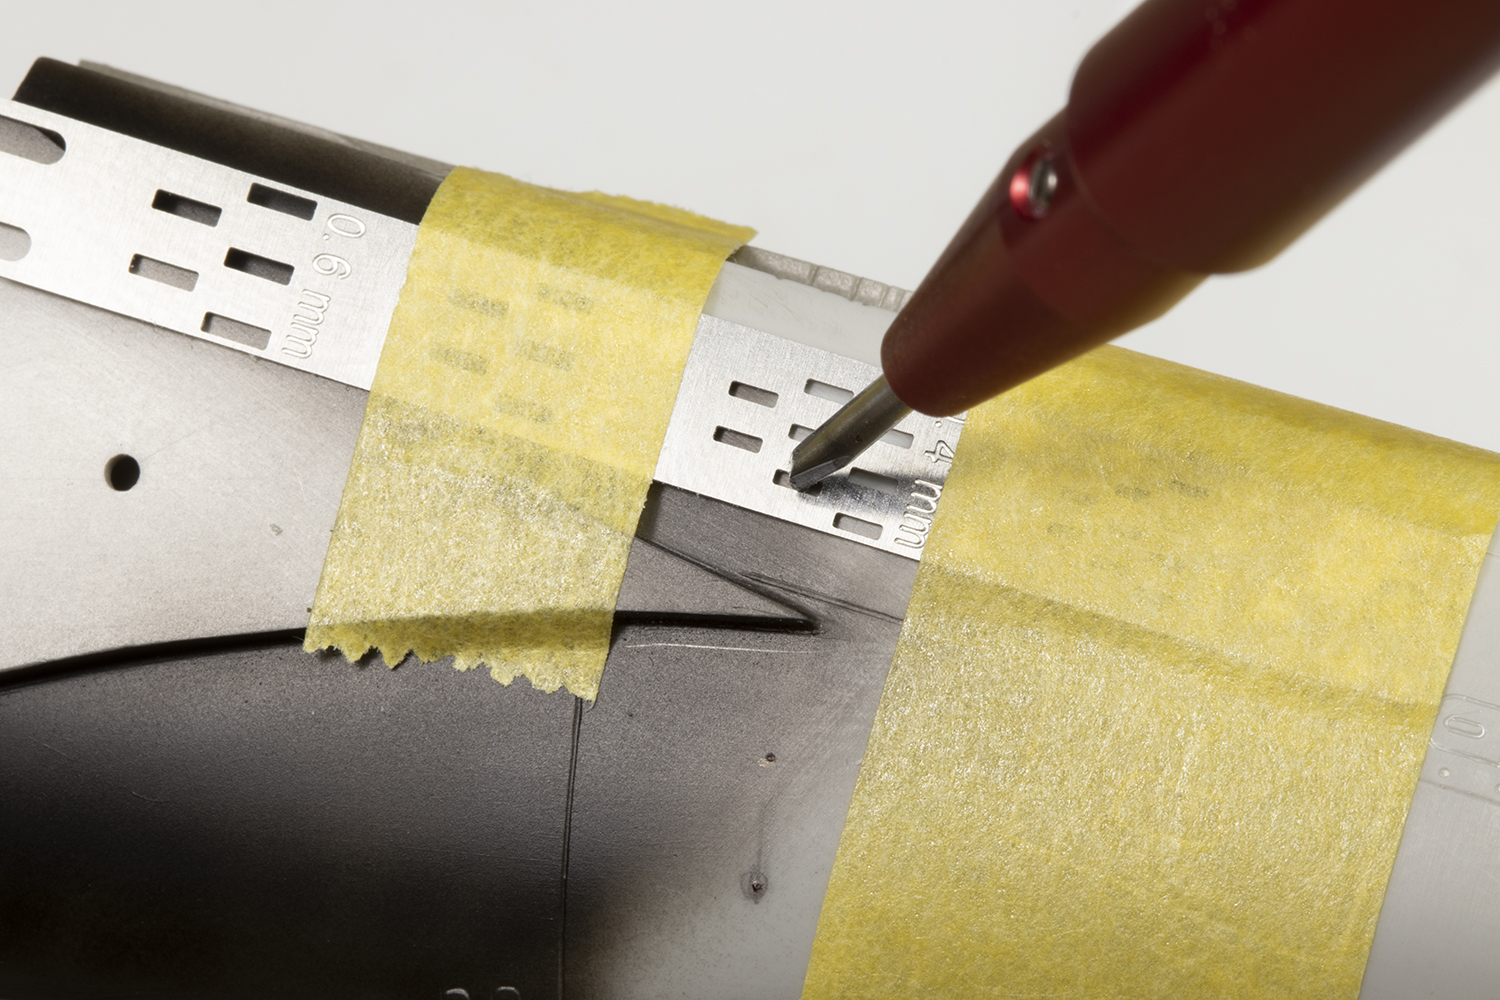
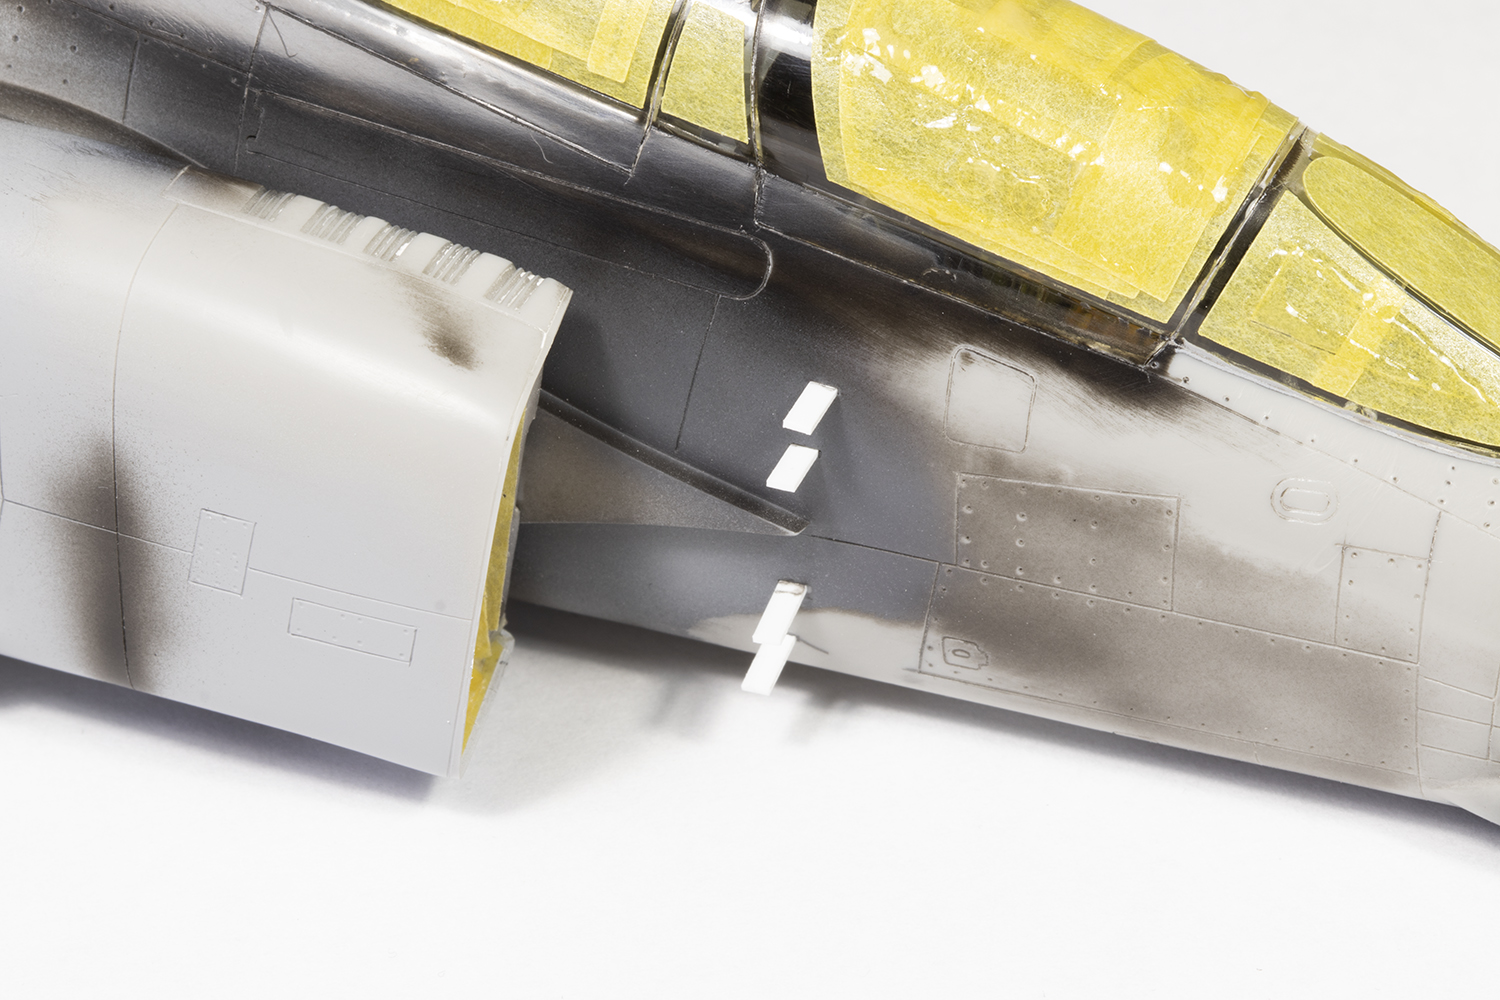
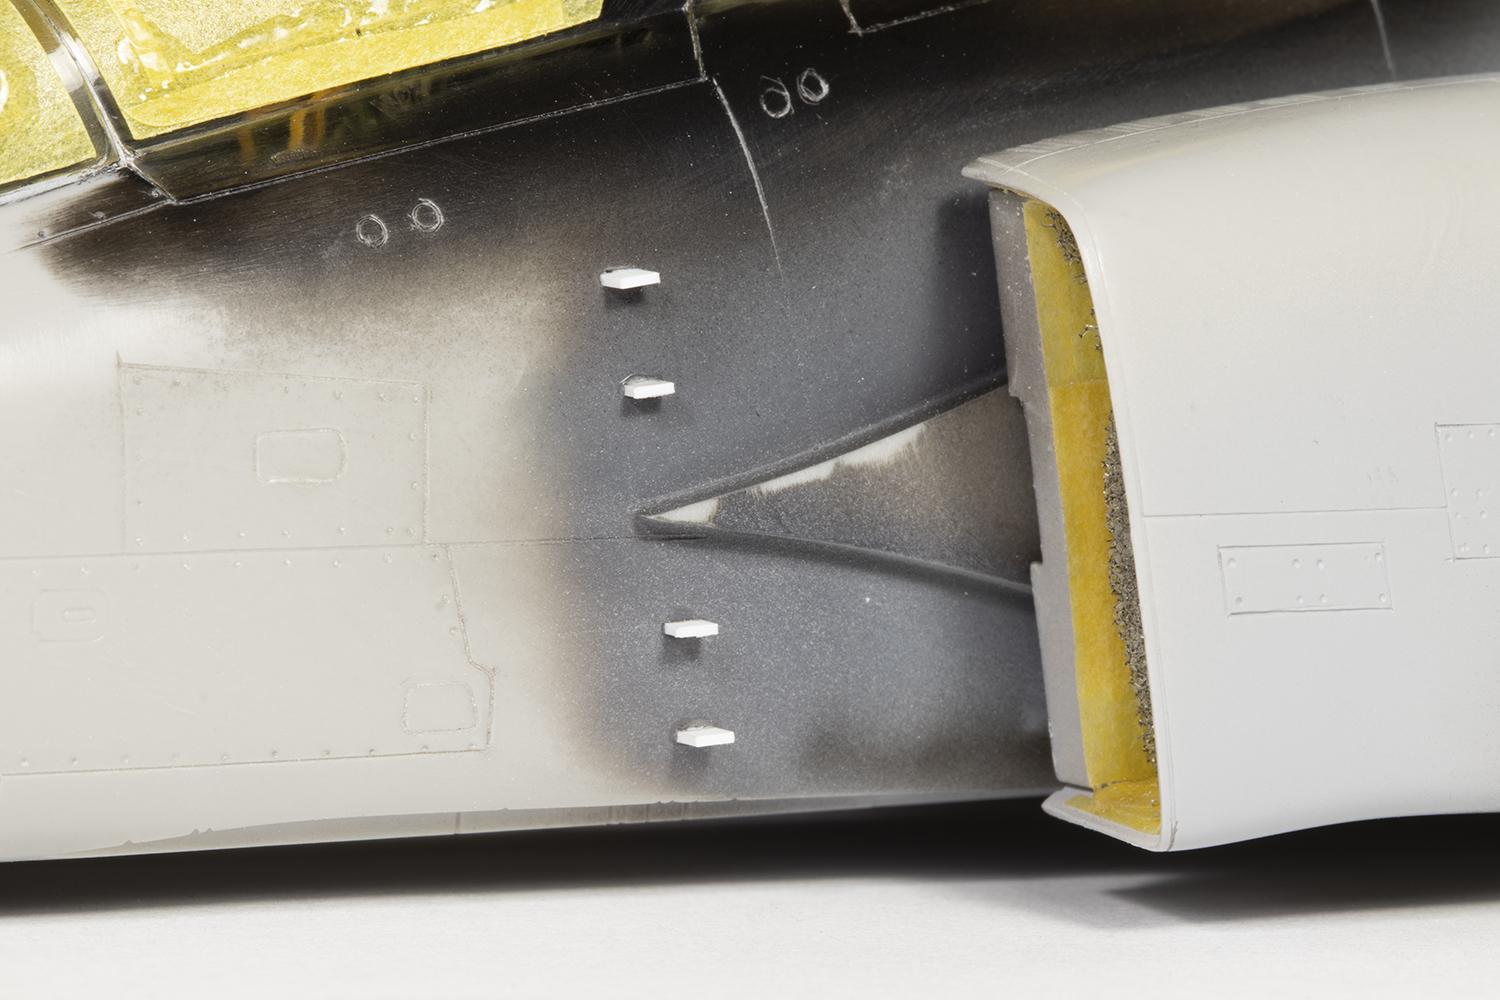
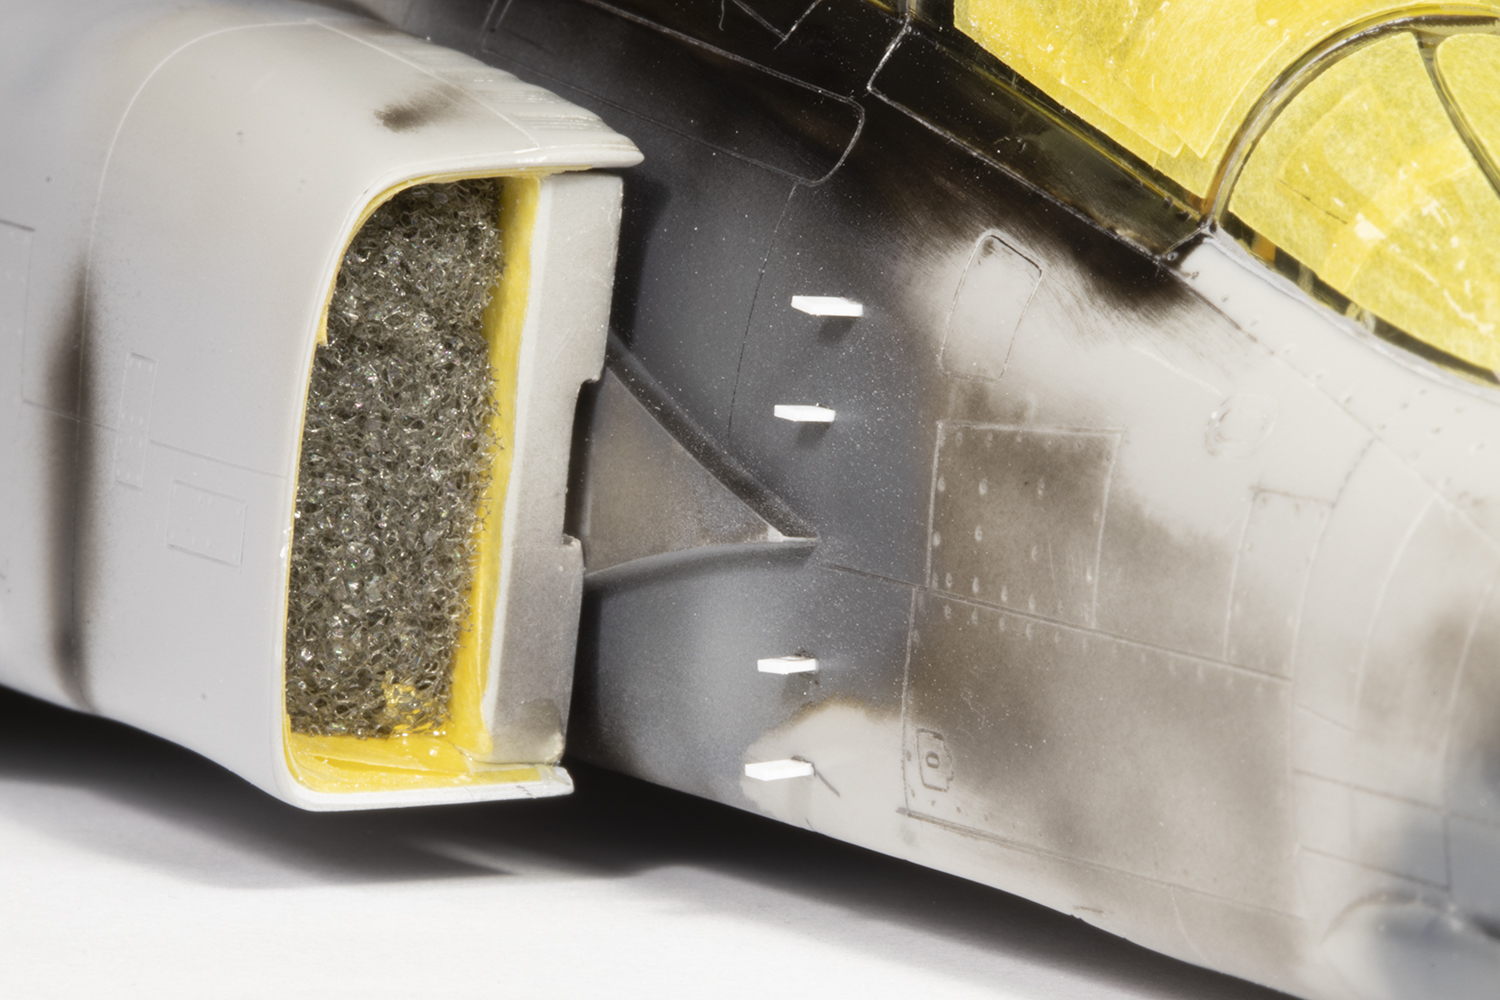
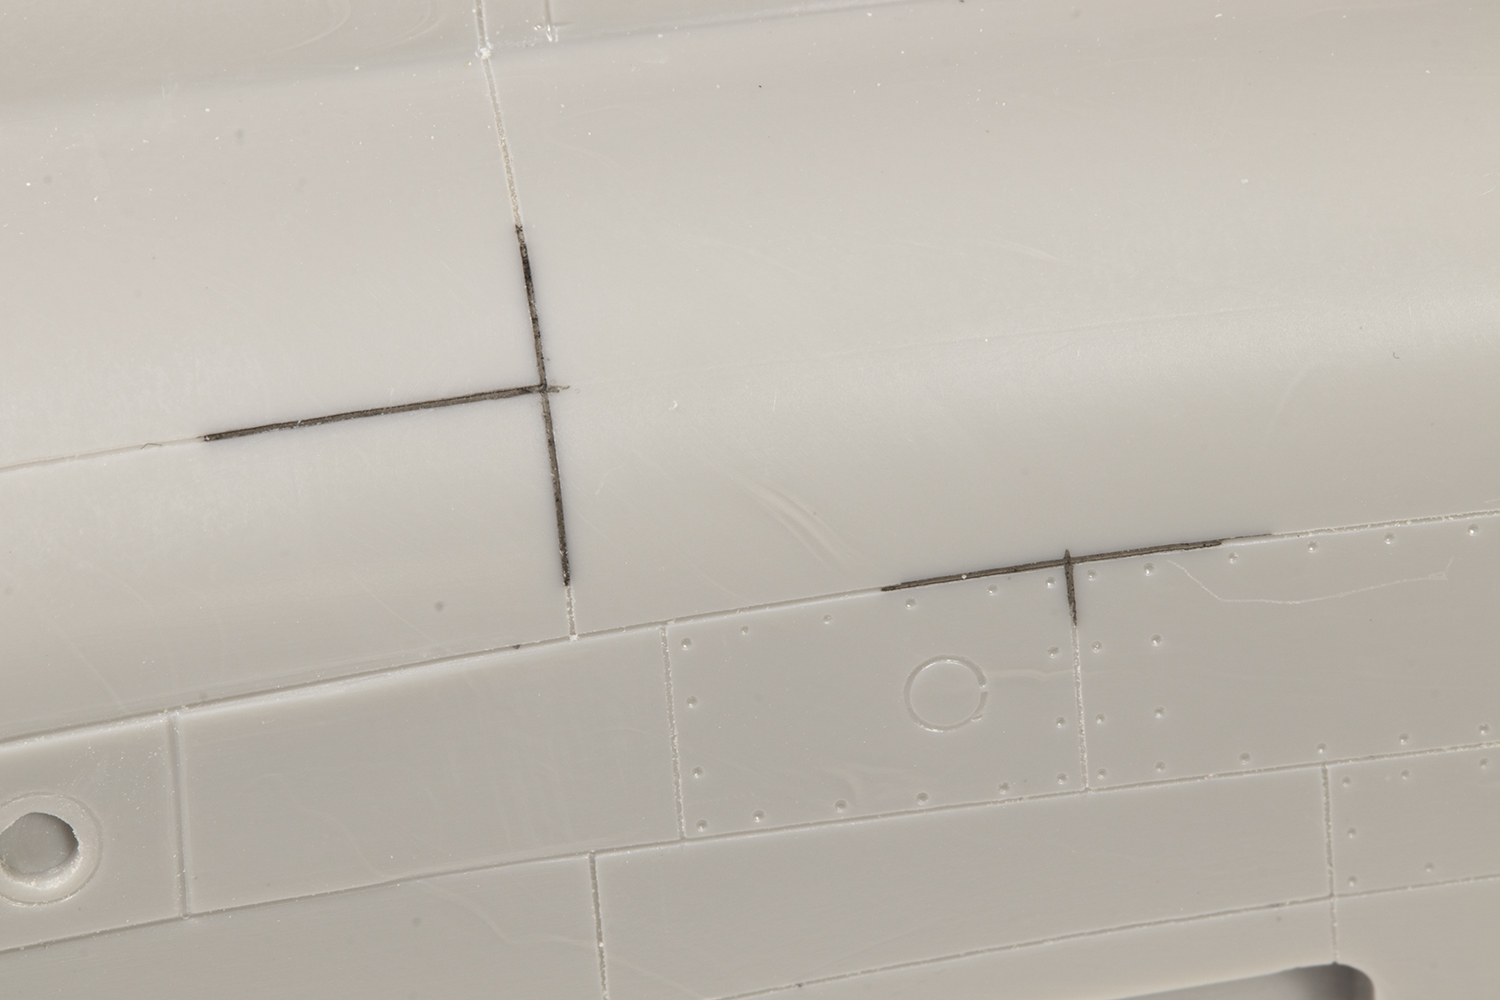
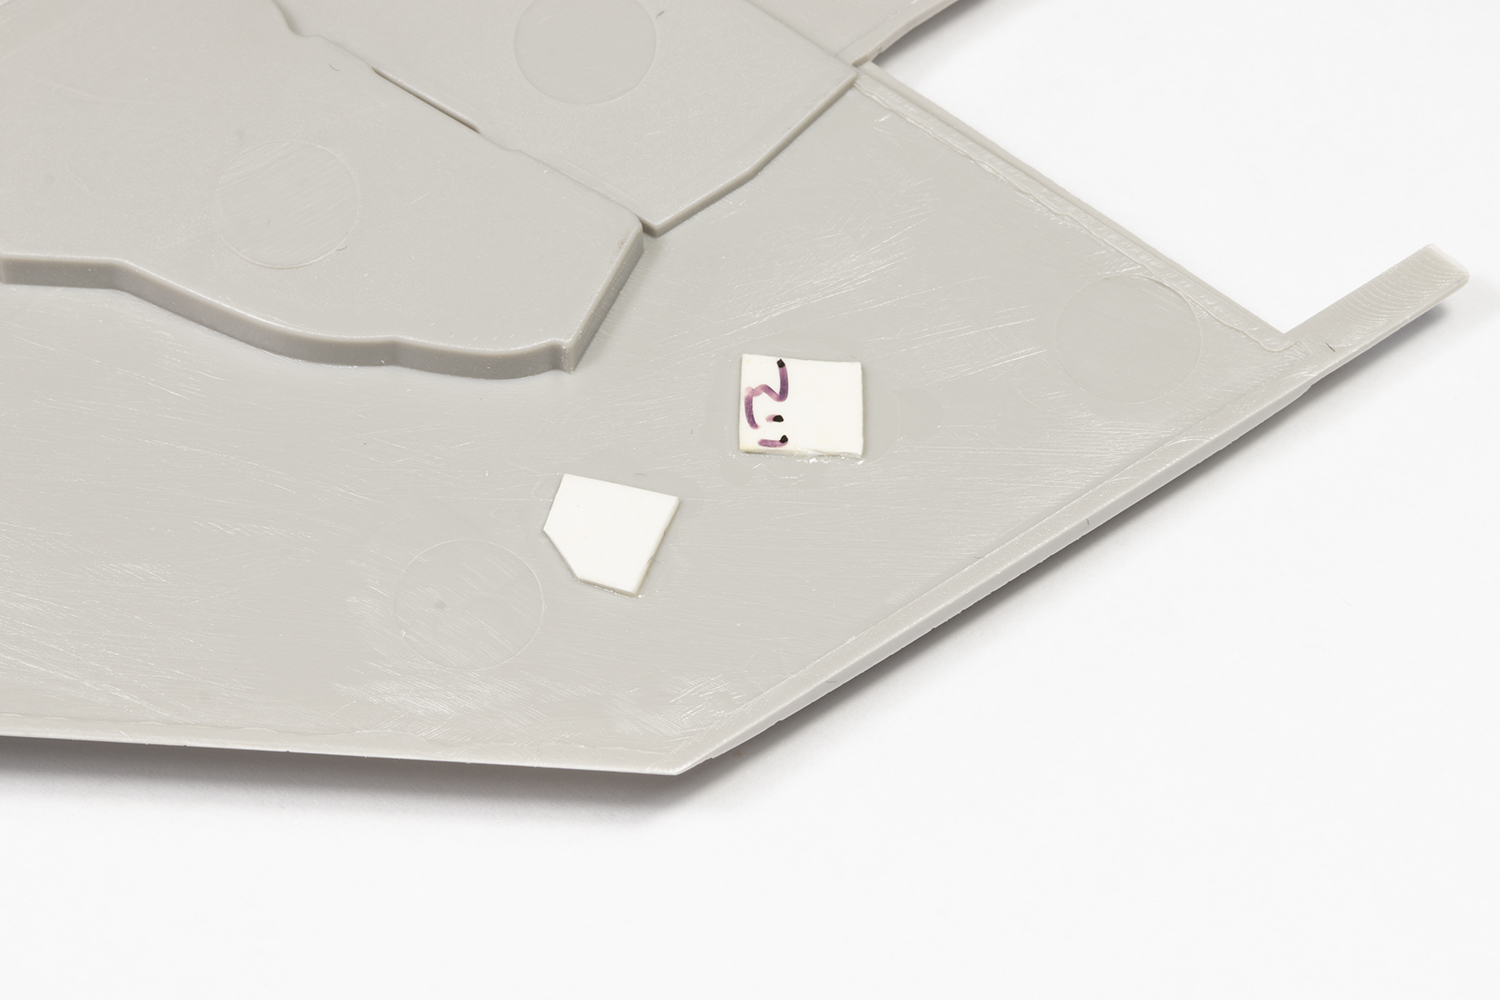
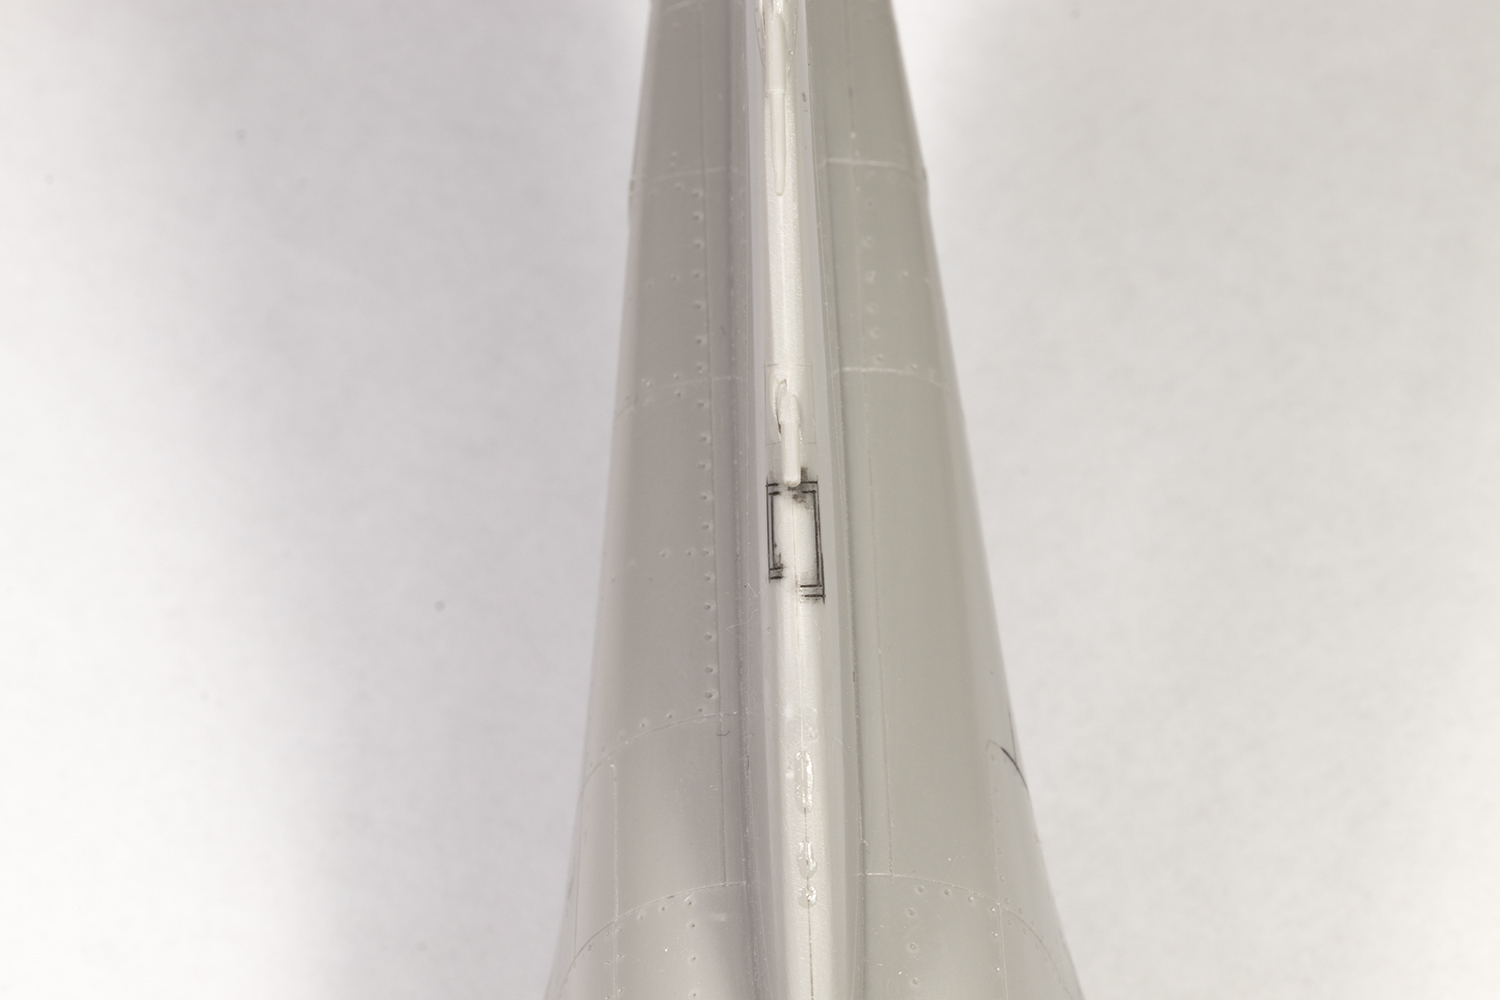
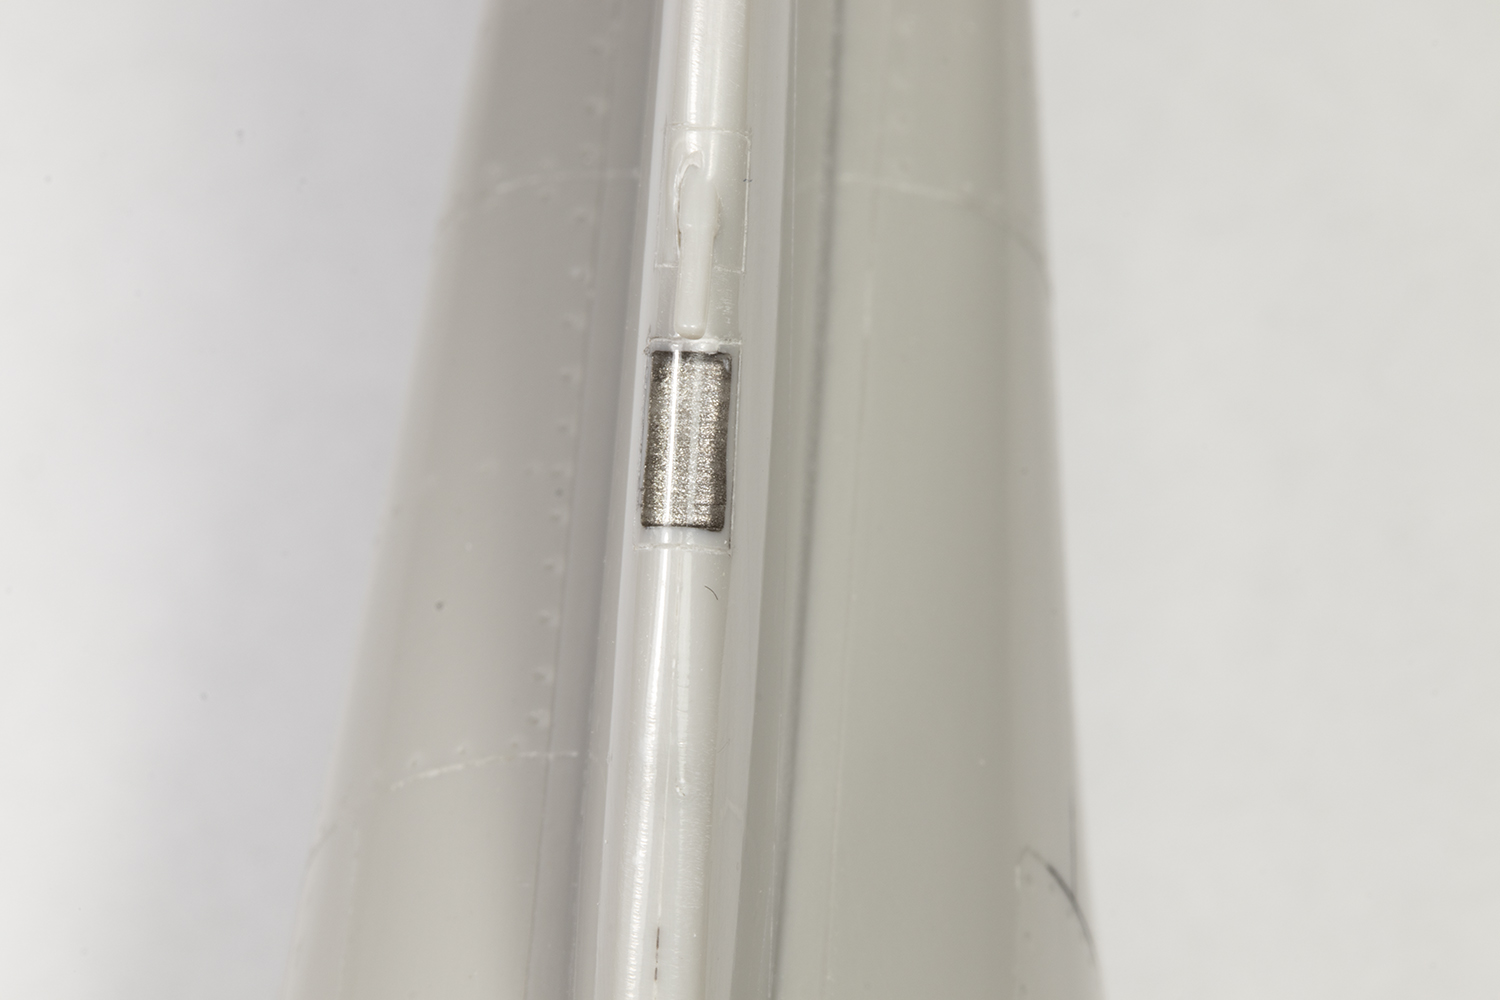
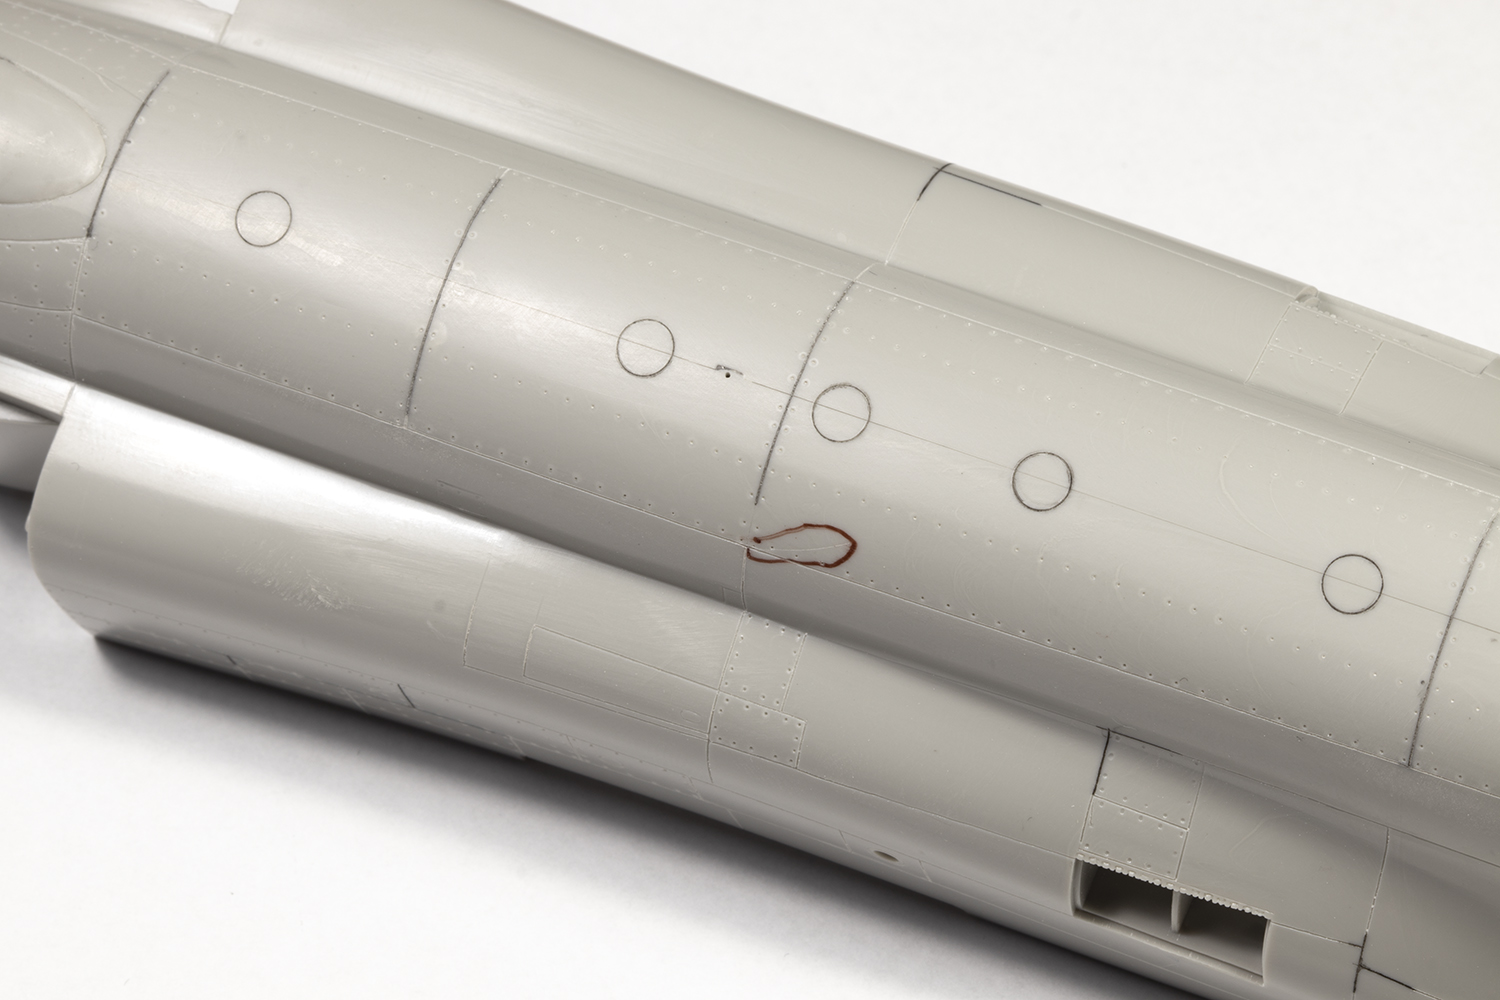
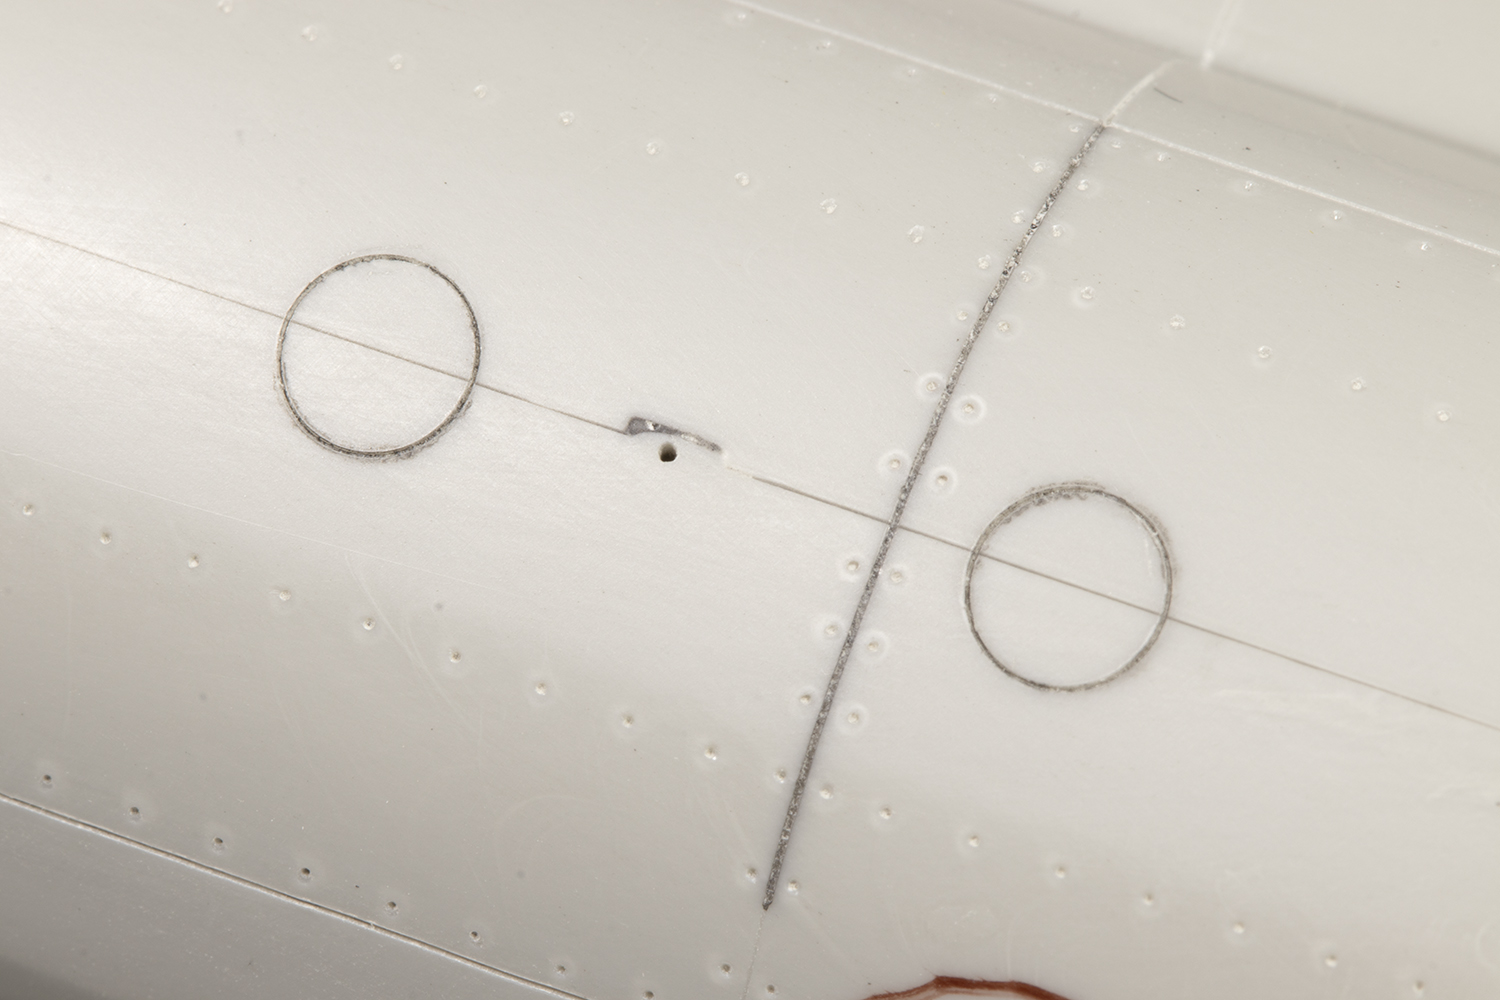
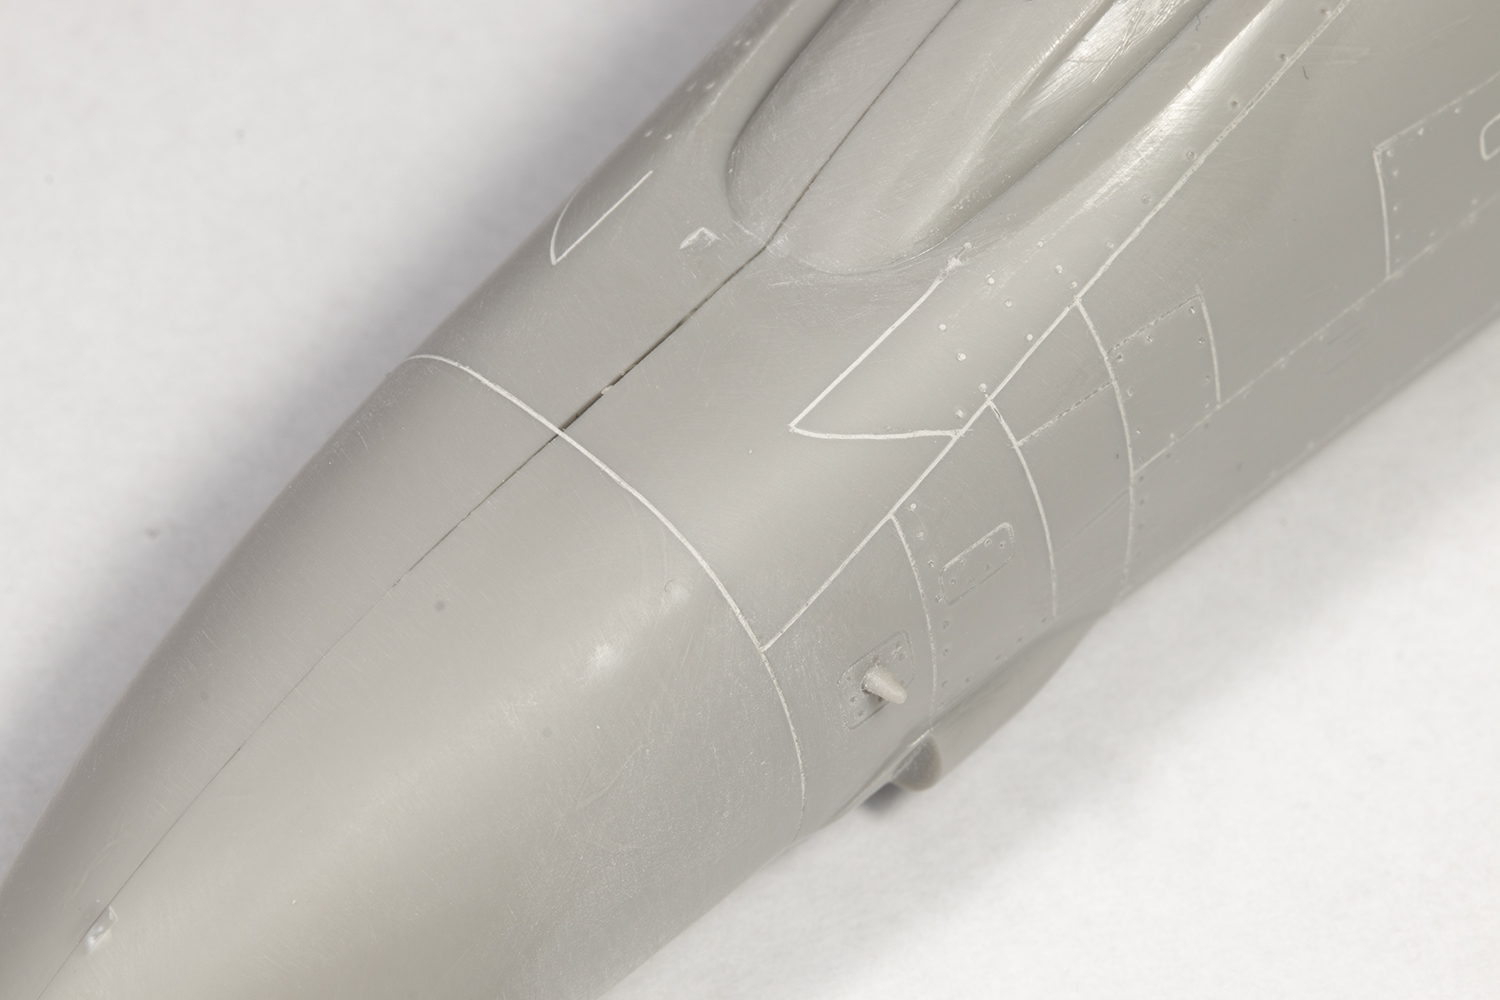
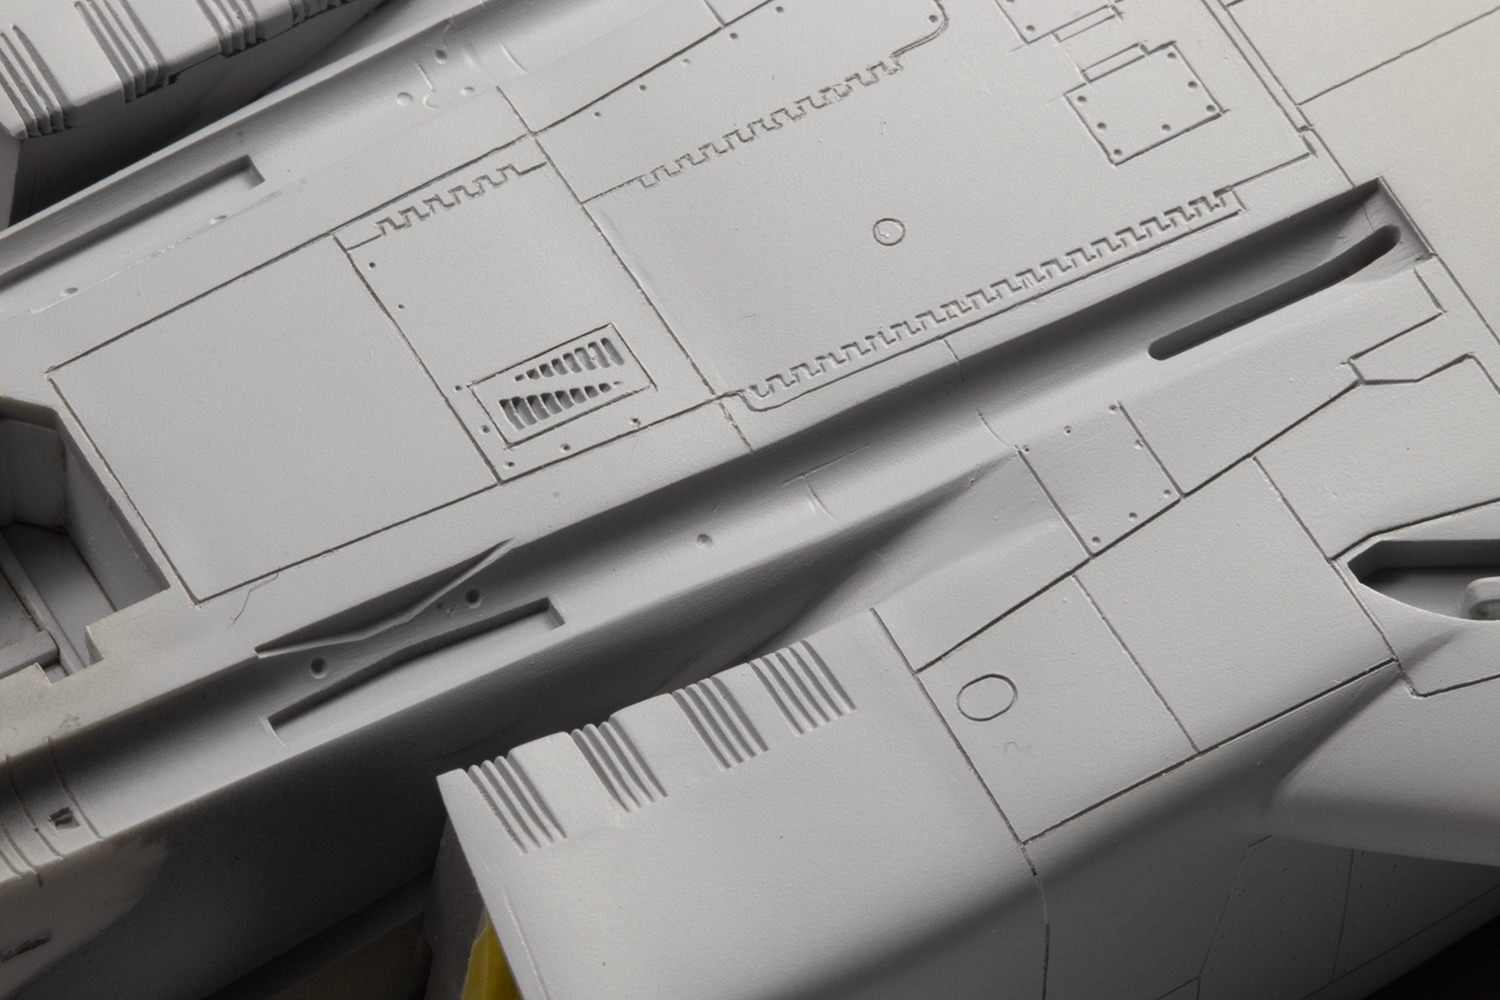
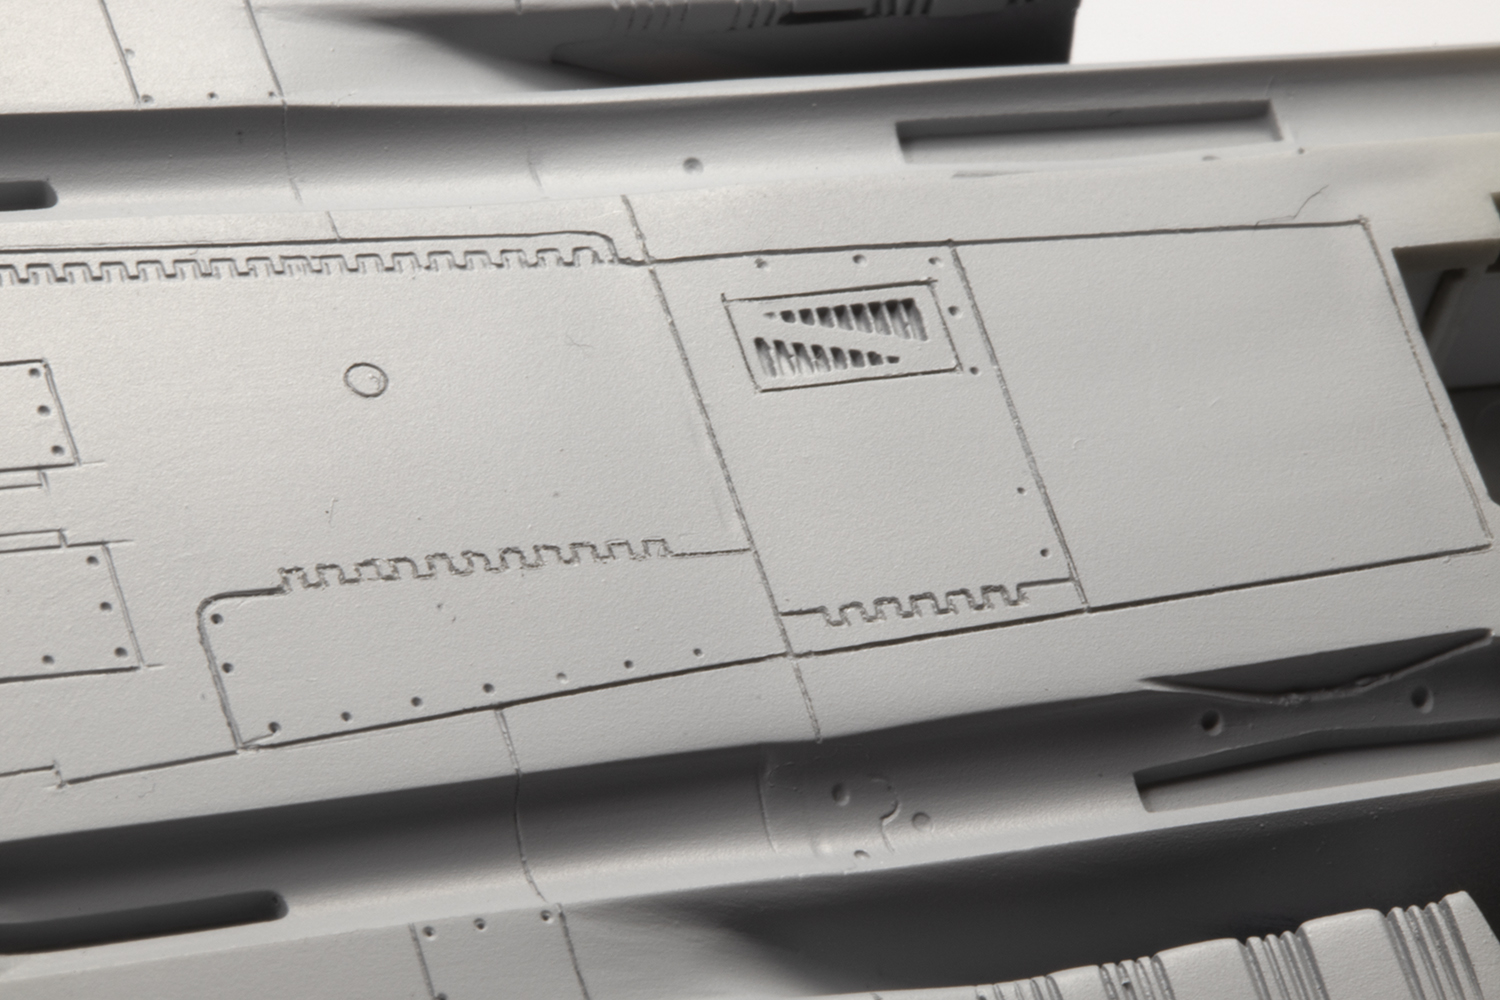
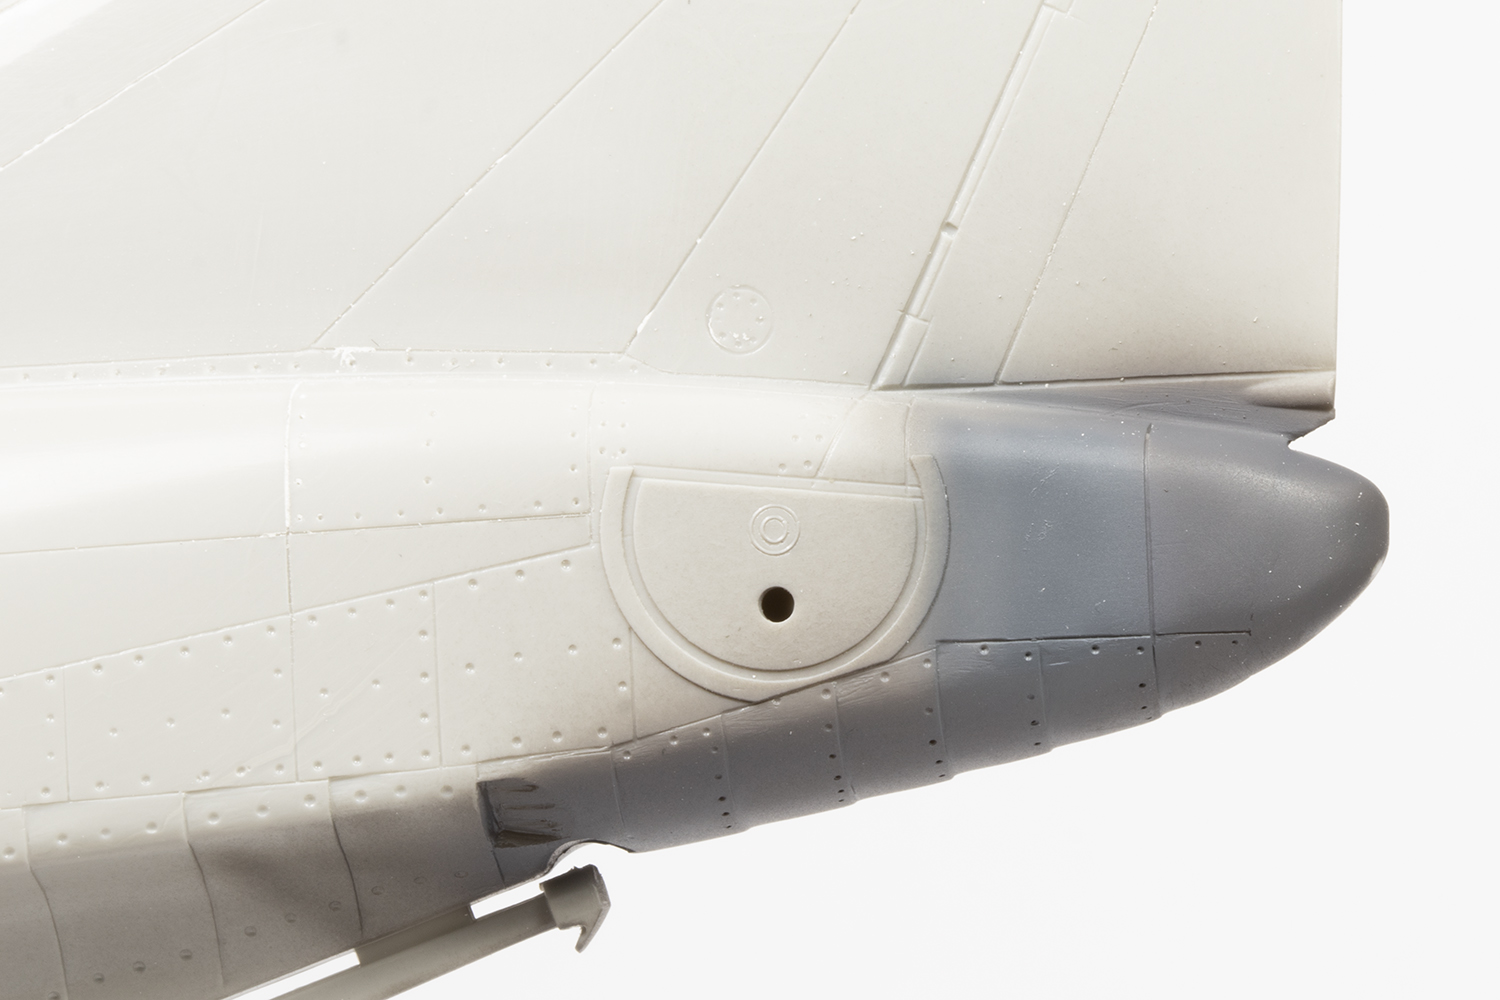
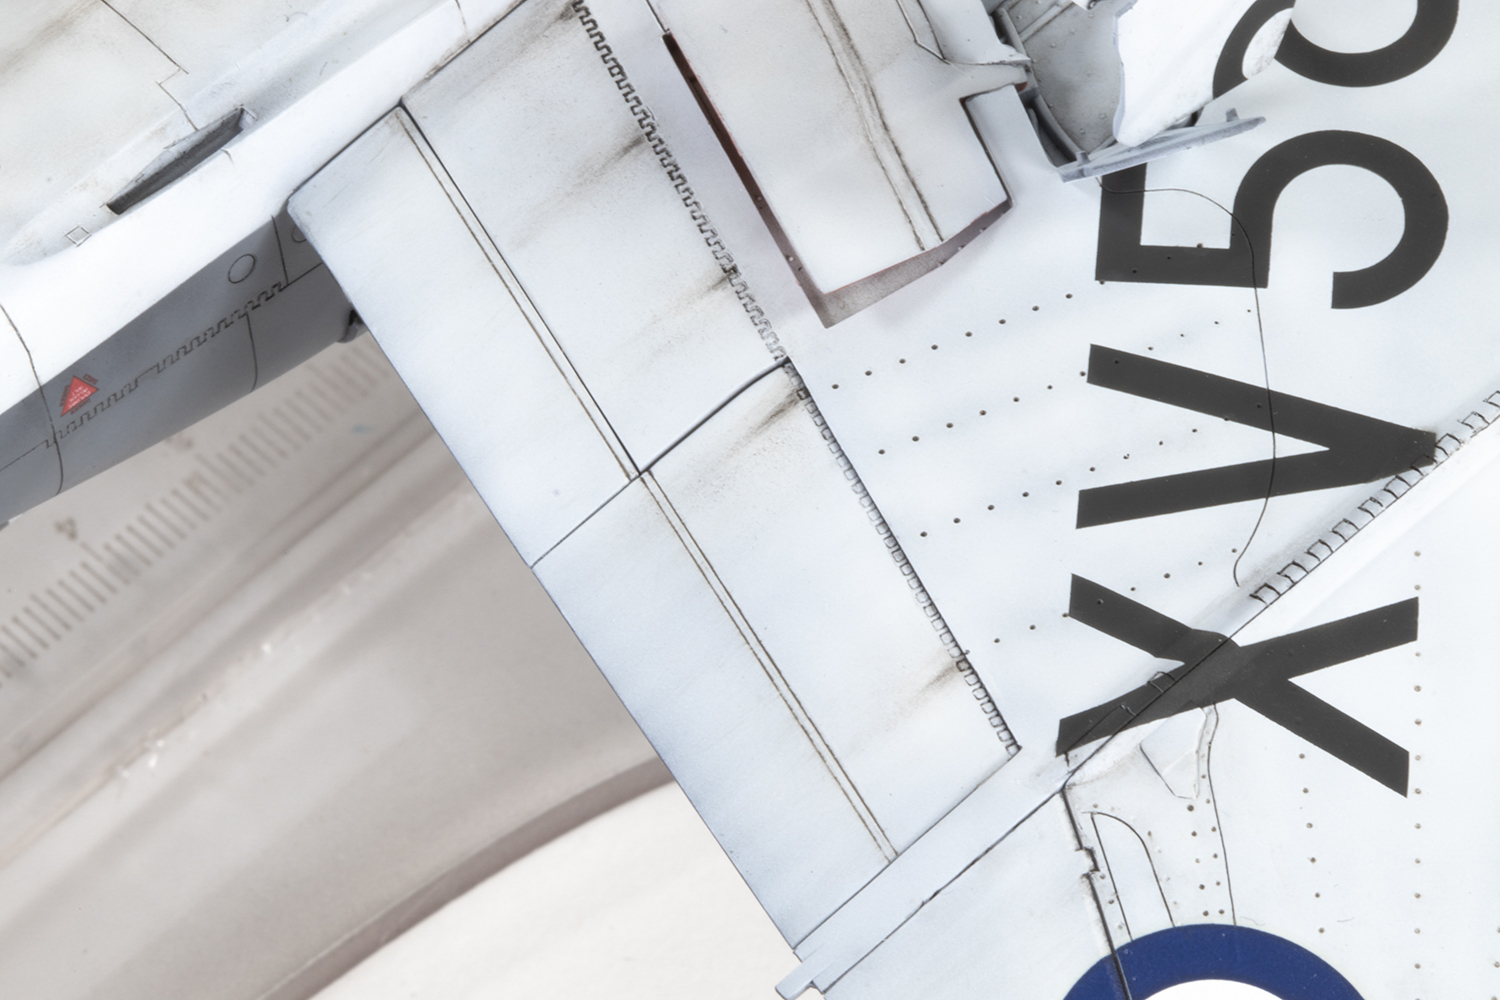
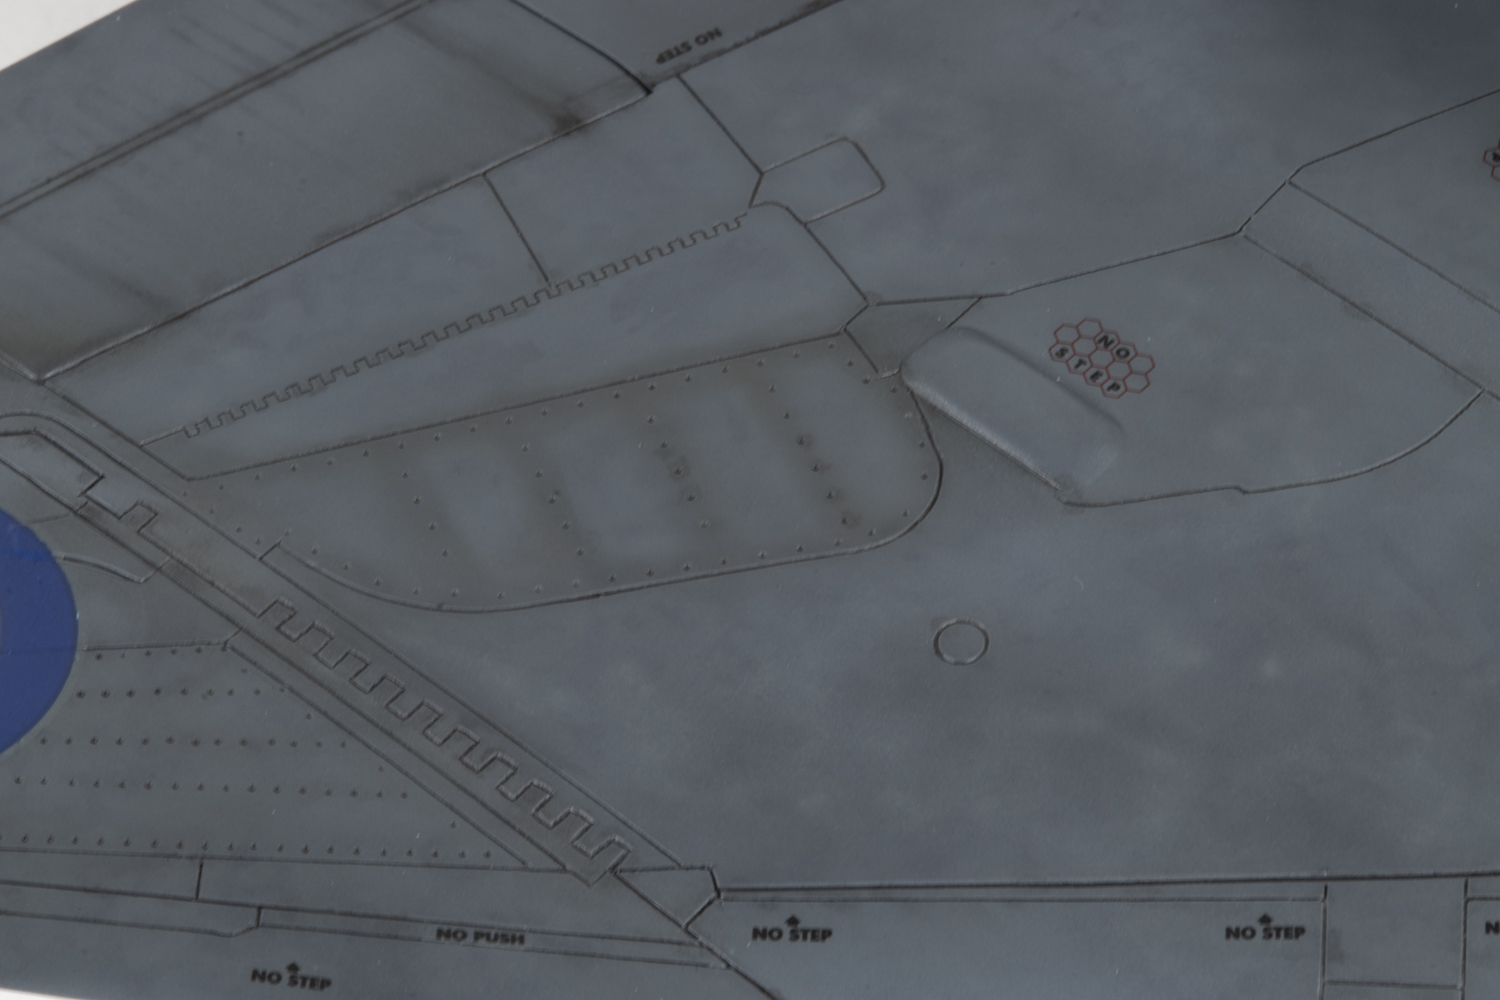
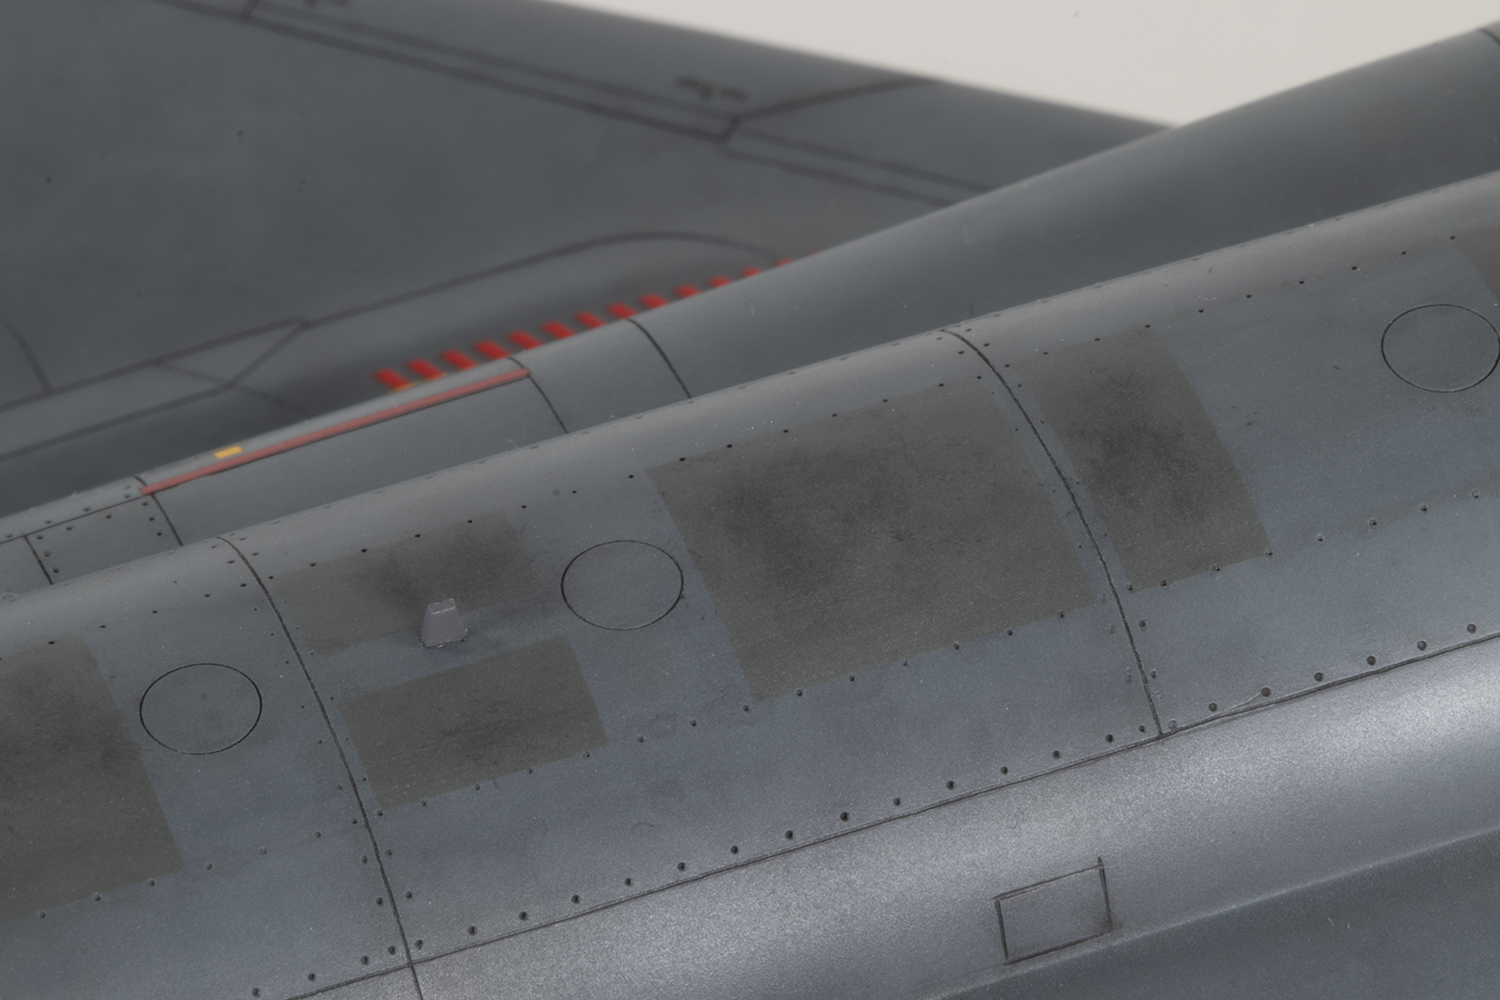
The moulded recessed detail has all kinds of flaws under magnification, and most were filled with some superglue, but in retrospect I wish I’d dealt with a few more of them. I deepened most of the panel lines with a scriber as they did tend to fade a bit and it helps when the wash is applied later. It also assists with retaining the detail in areas where there will be lots of sanding, such as where the intakes join the fuselage and the lower wing meets the front fuselage. Another Hasegawa simplification is the solid anti-collision beacon on the tail leading edge. Not only is it solid, but also massively mismatched over the join. It was a simple job to cut it out, fill the hole with clear UV resin, and then polish it to shape and clarity. Scribing the panel line around it was less simple.

Unlike more recent 1/48 kits of the F-4, Hasegawa split the fuselage in half conventionally, with the prominent seam down the centre needing to be eliminated. I strongly favour CA for construction, which doesn’t allow for finessing of the fit once the halves have been joined, and thus makes for more onerous clean up but with the benefit of a stable joint and easier seam removal. Inevitably, I obliterated all of the circular recessed detail along the spine and had to put it back in with an MRP scriber and a Hasegawa Tritool guide. I also removed the moulded in blade aerial and replaced it at the end with a more refined spare from an Academy kit. For rescribing my straight lines my new favourite tools are the scribers my MadWorks, available from JL Gunpla UK. These are super sharp and stable and made the job a joy. Well, almost.
Prior to making this kit I purchased ‘The FG.1 Phantom II in Royal Navy, Fleet Air Arm and A&AEE Service – Building the British Phantoms Volume One’ by Geoff Coughlin and published by KLP Publishing. This is an electronic-only publication and filled with interesting stuff, including the claim that FG.1 Phantoms did not have refuelling doors or probes fitted. I took to the forums to seek further information on this, as photos seemed to show otherwise. To their credit, KLP have corrected the error, and I went ahead and modelled the door closed. It sits proud, but was easy enough to sand flush.
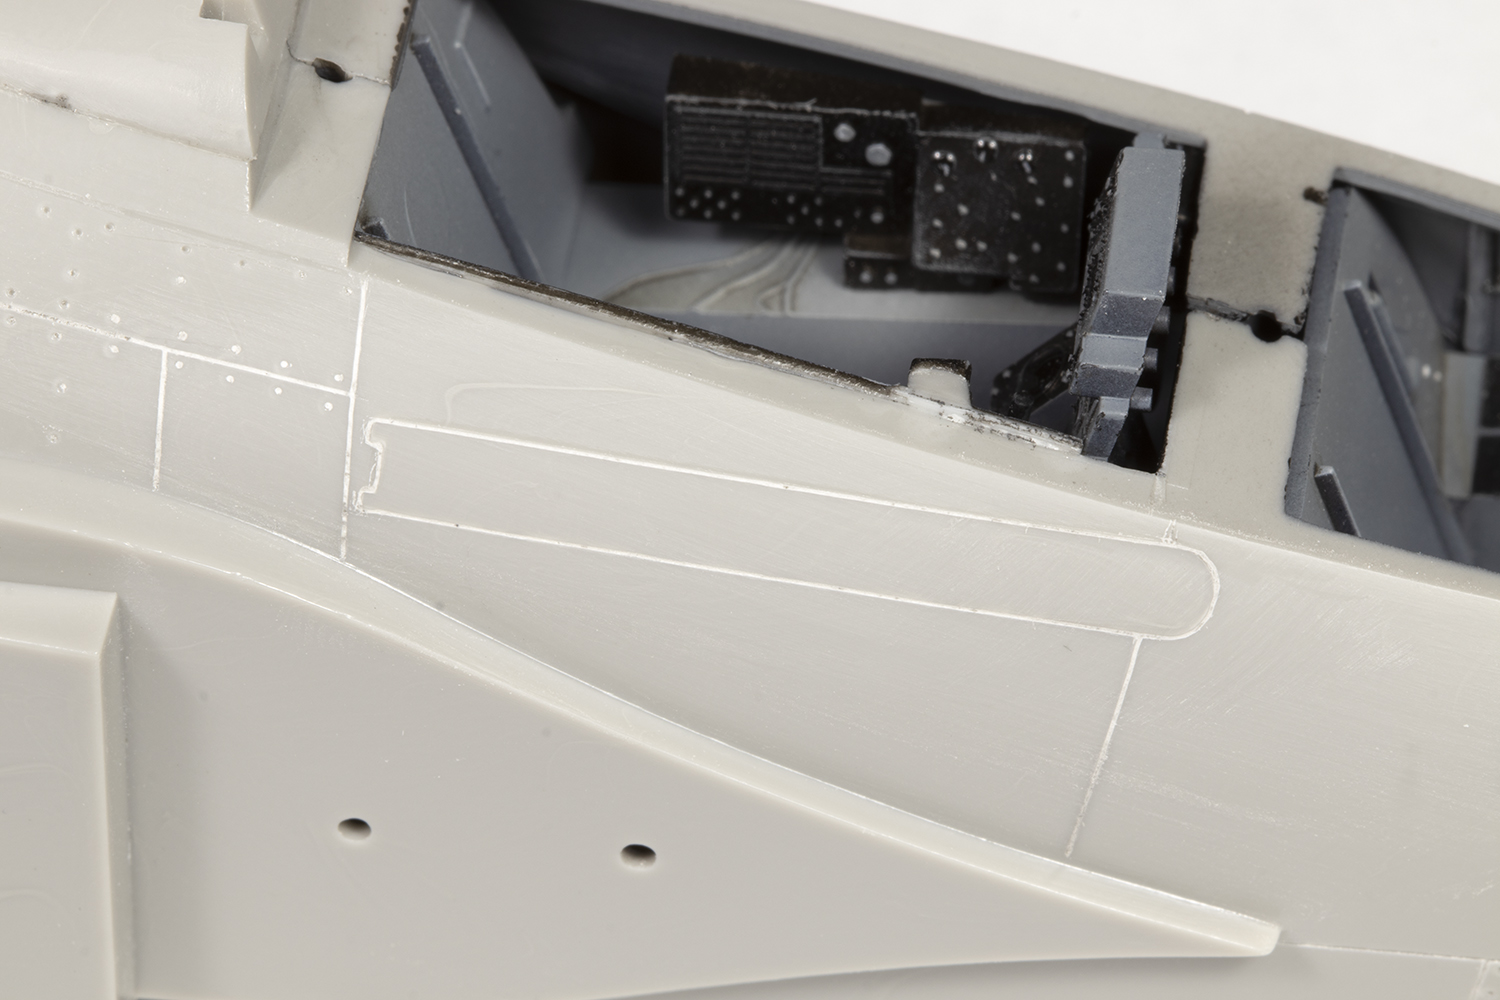
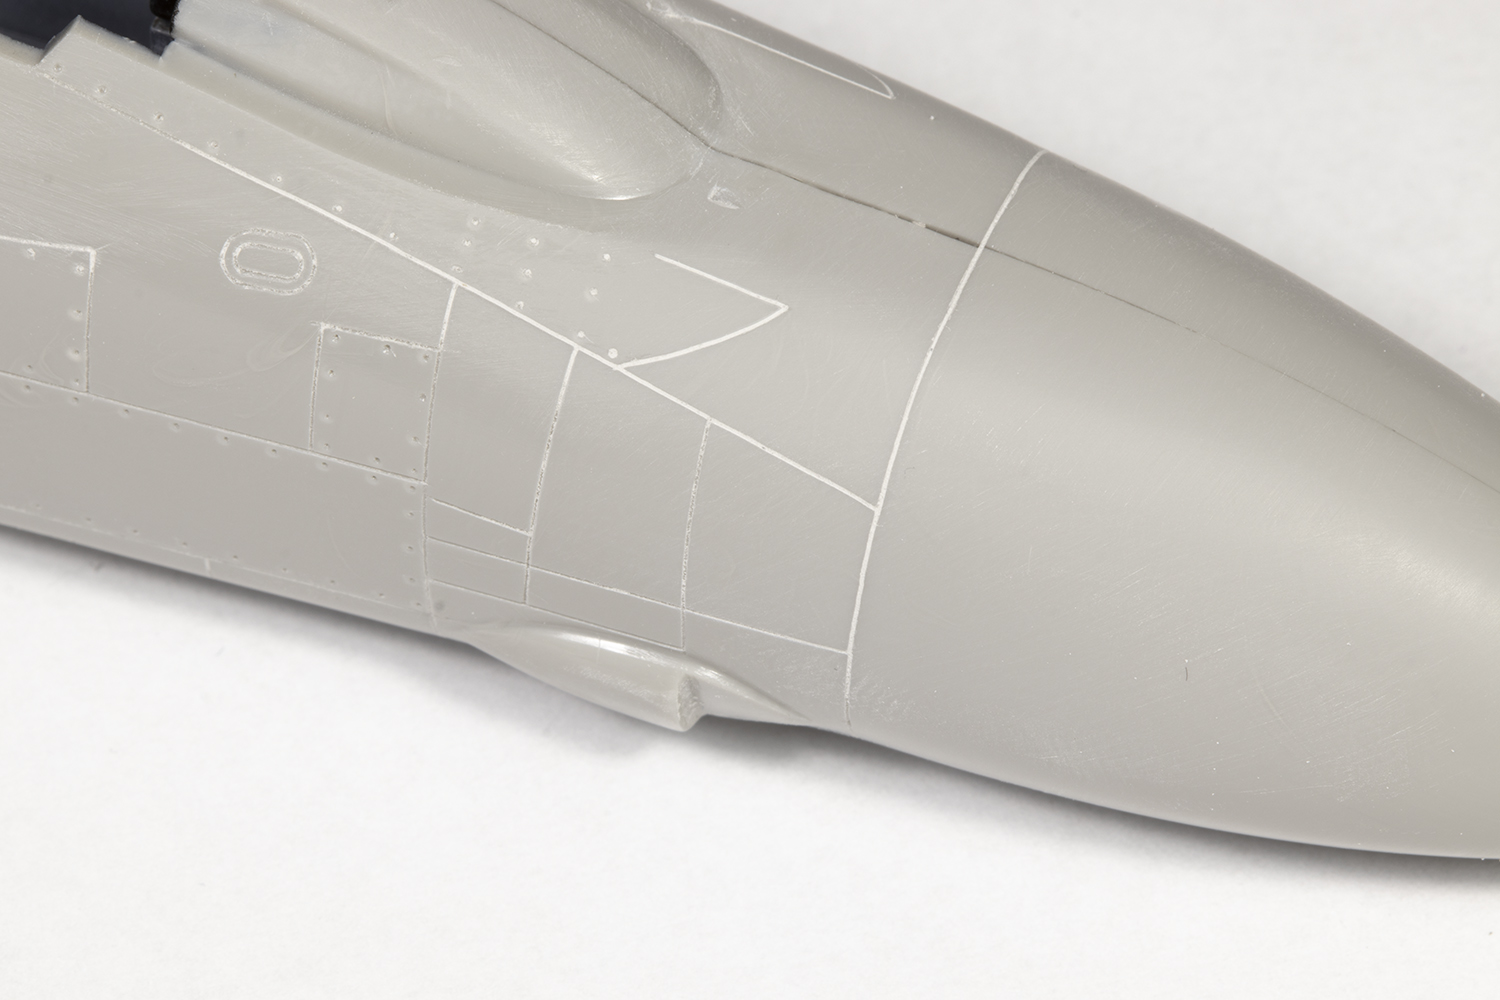
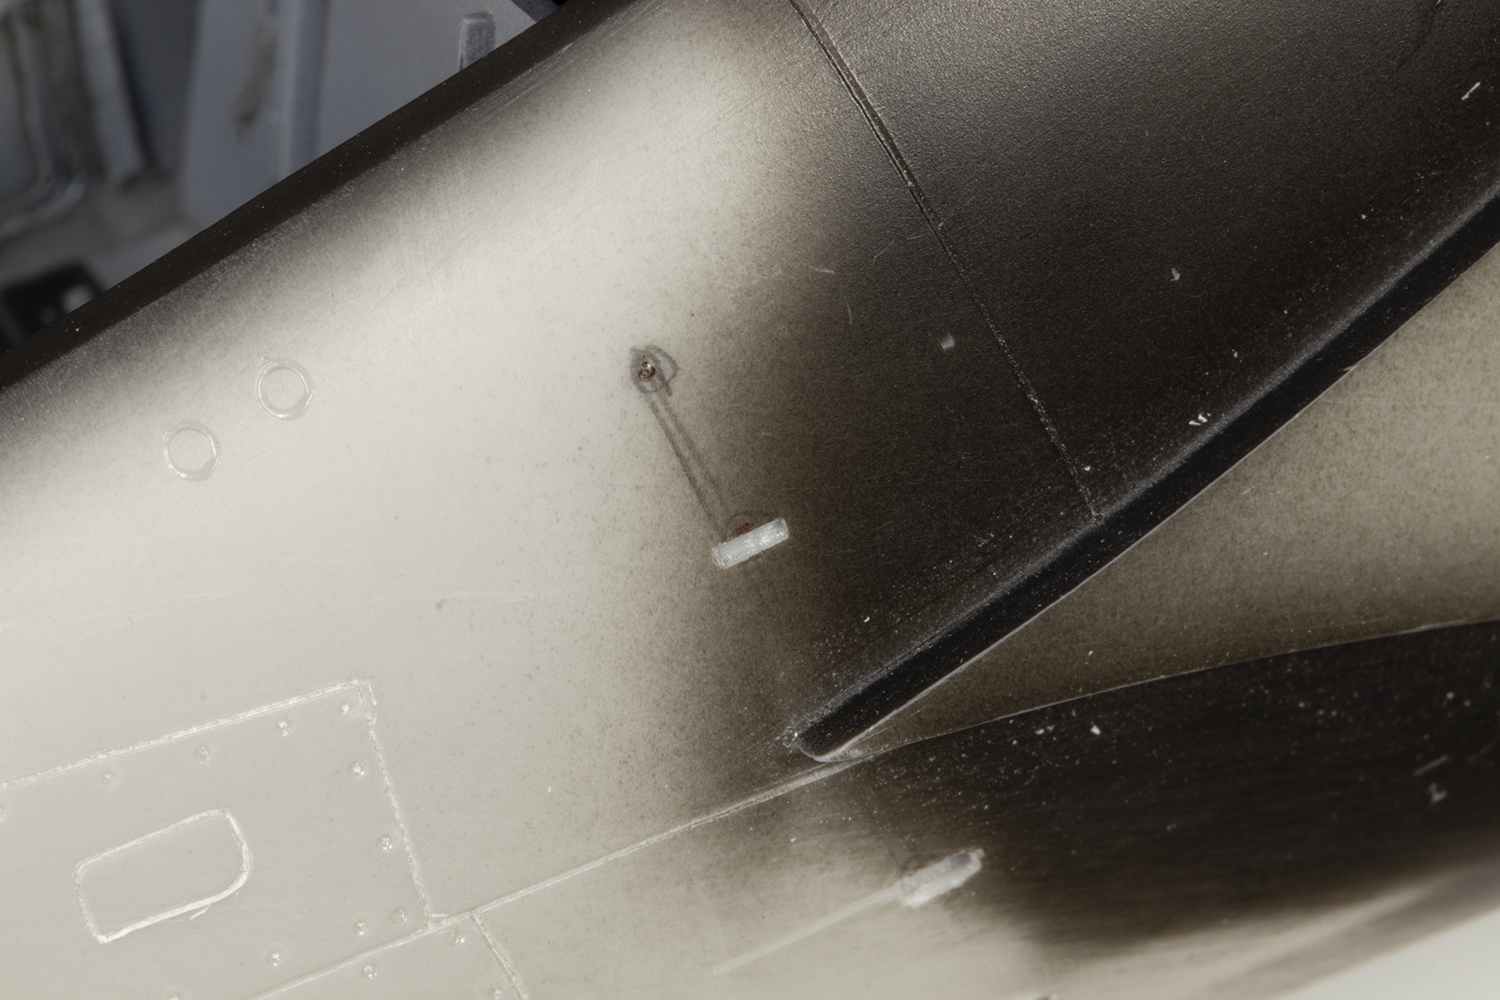
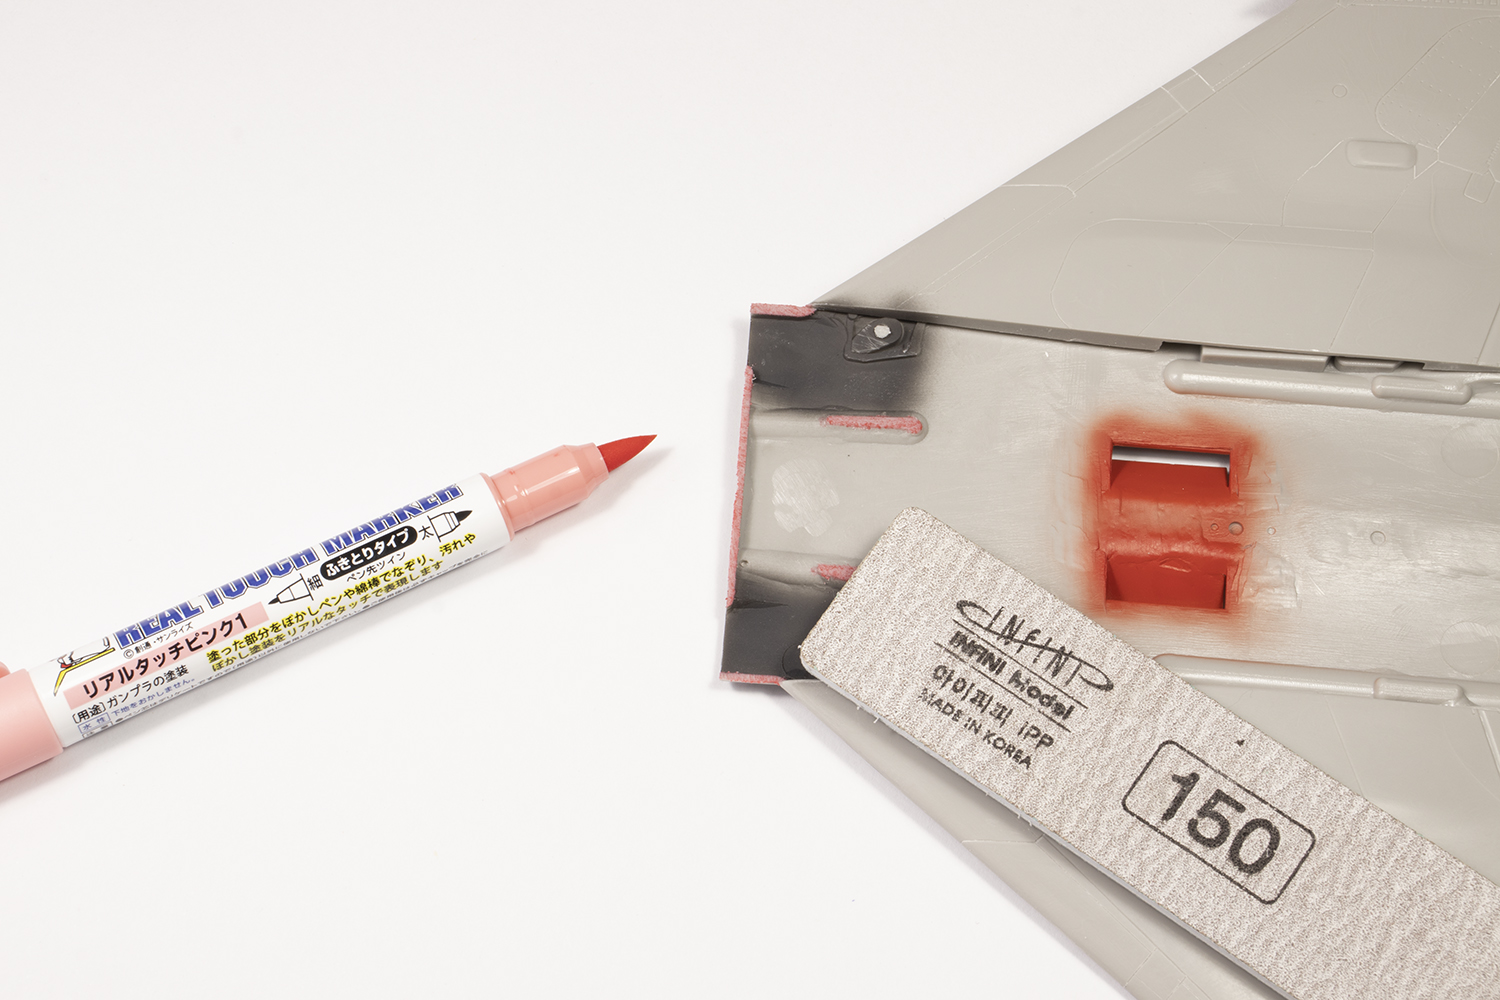
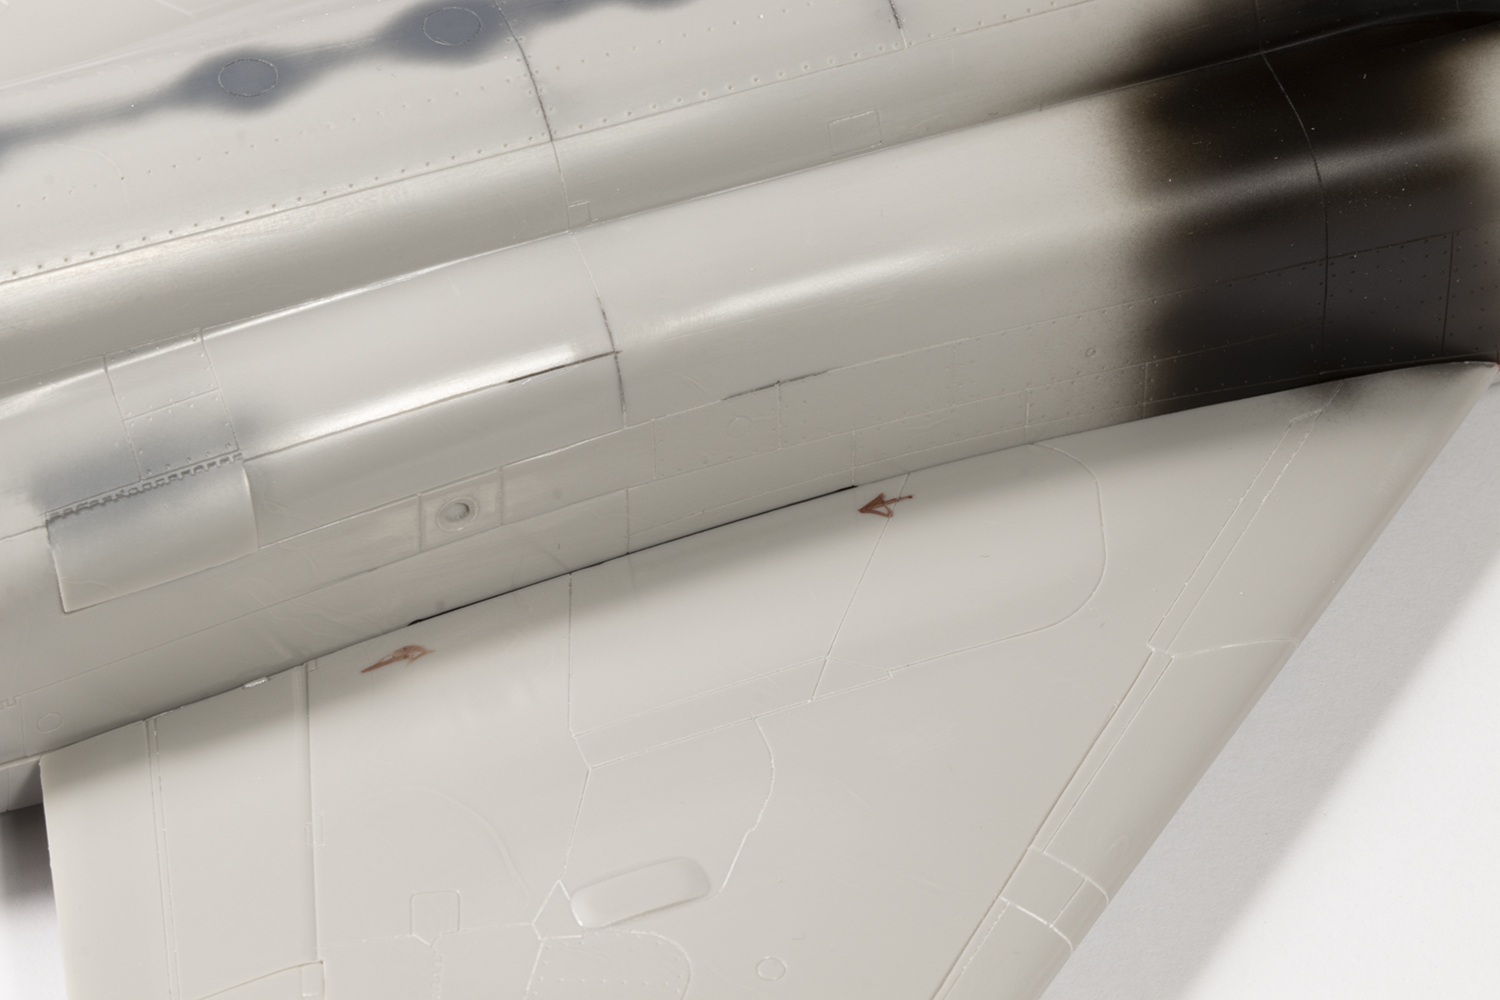
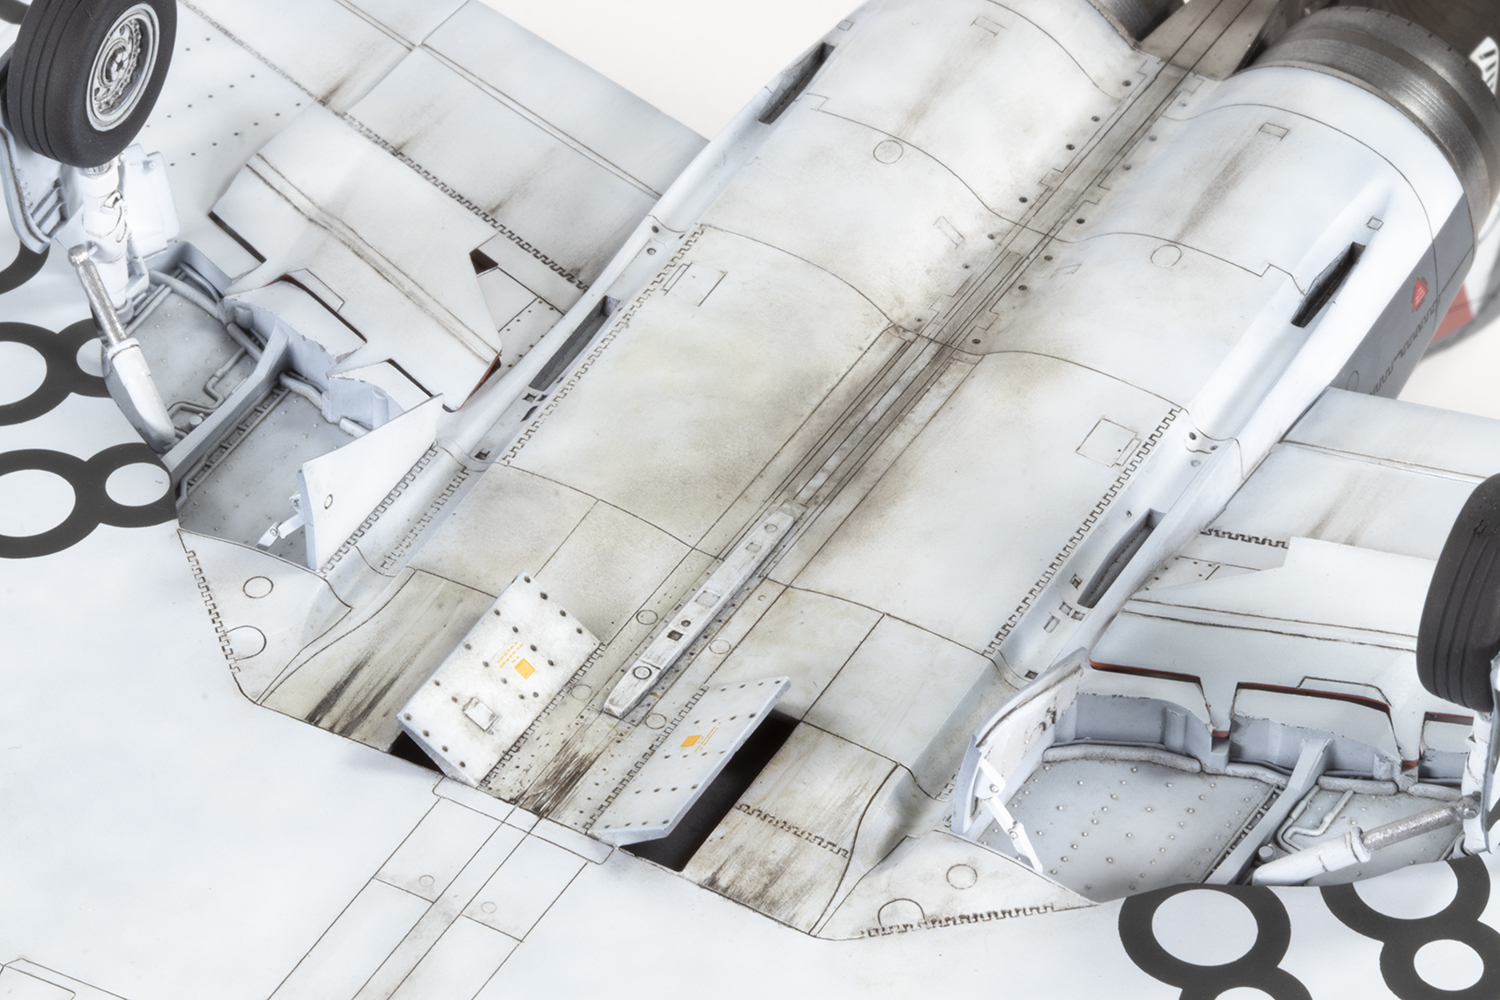
There are several areas of the Hasegawa kit where fit is problematic, which aficionados will be familiar with. One is the fit of the lower wing to the completed fuselage assembly, especially near the front end where there is a lot of surface detail to try and retain. As mentioned, deepening this prior to construction is a help, as is knocking down the high points on the inside face of the lower wing which interfere with the fit. I also used tape to limit where the filler is applied (CA plus VMS filler powder) and where sanding happens. With some careful rescribing using the aforementioned MadWorks scribers, I was pleasantly surprised with the final appearance. Also added were the missing lights under the intakes, represented in the kit with decals. I simply drilled a whole, painted it silver, added a dollop of clear UV resin, polished it and rescribed a circle around the clear part.

Two other problem areas are the intakes and the upper wing to fuselage joint. The former is really not that bad, and with sanding and rescribing, the intakes blend into the fuselage without much of an issue. The latter is a more inconsistent problem, and only manifested itself on this kit on the starboard side. More two-part polyester putty filled the void in the fuselage side to remove the gap when the wing was joined.
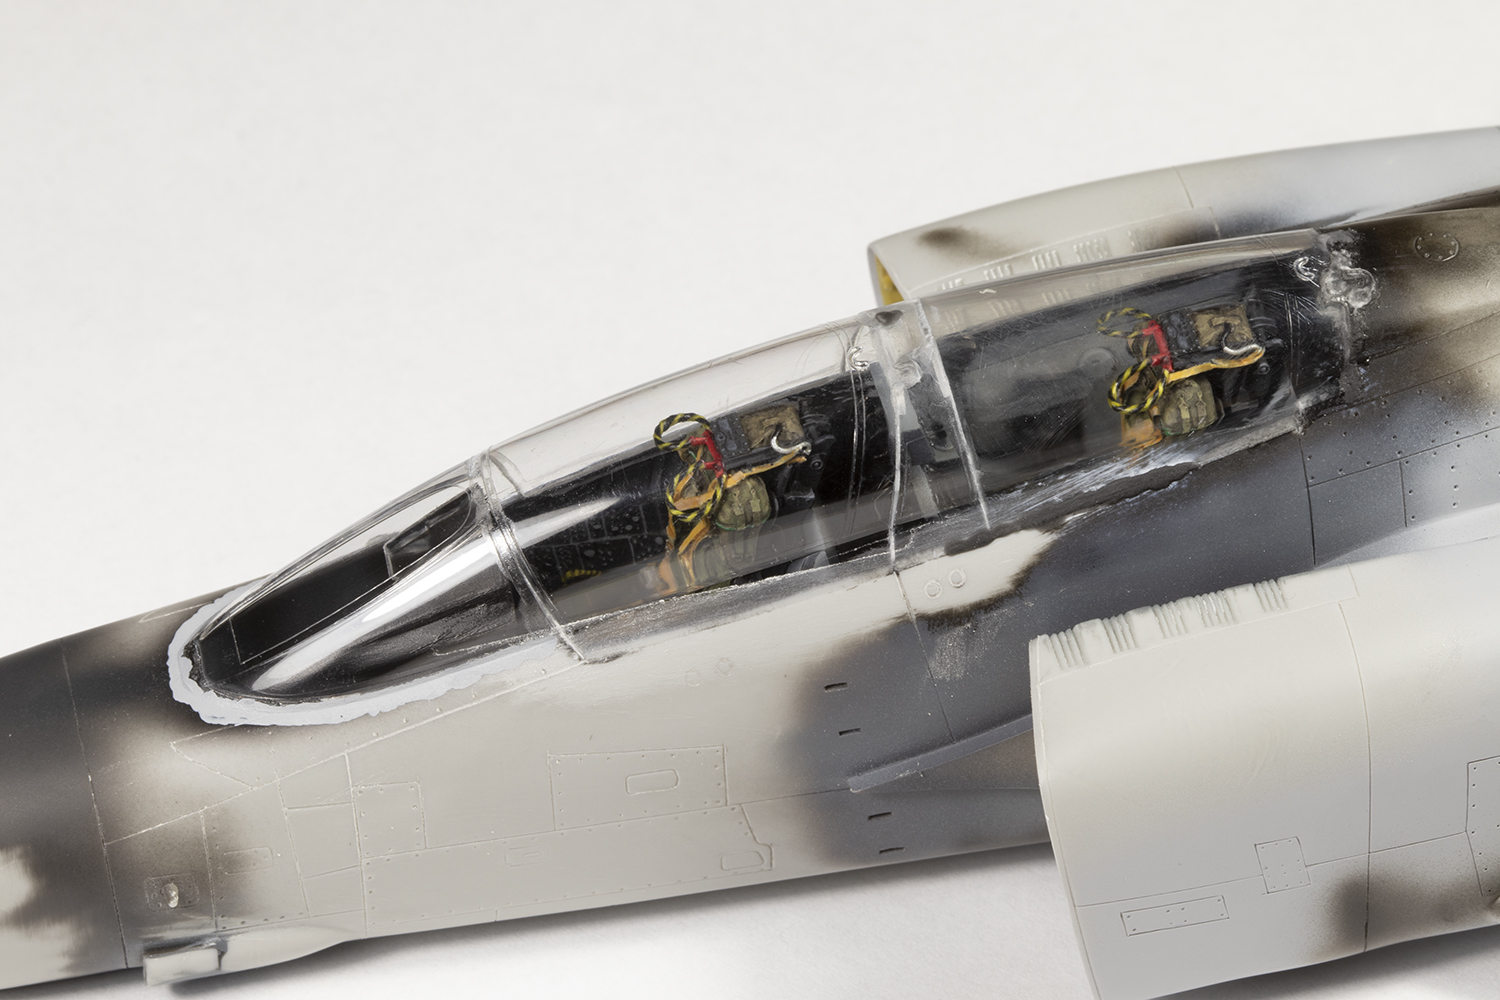
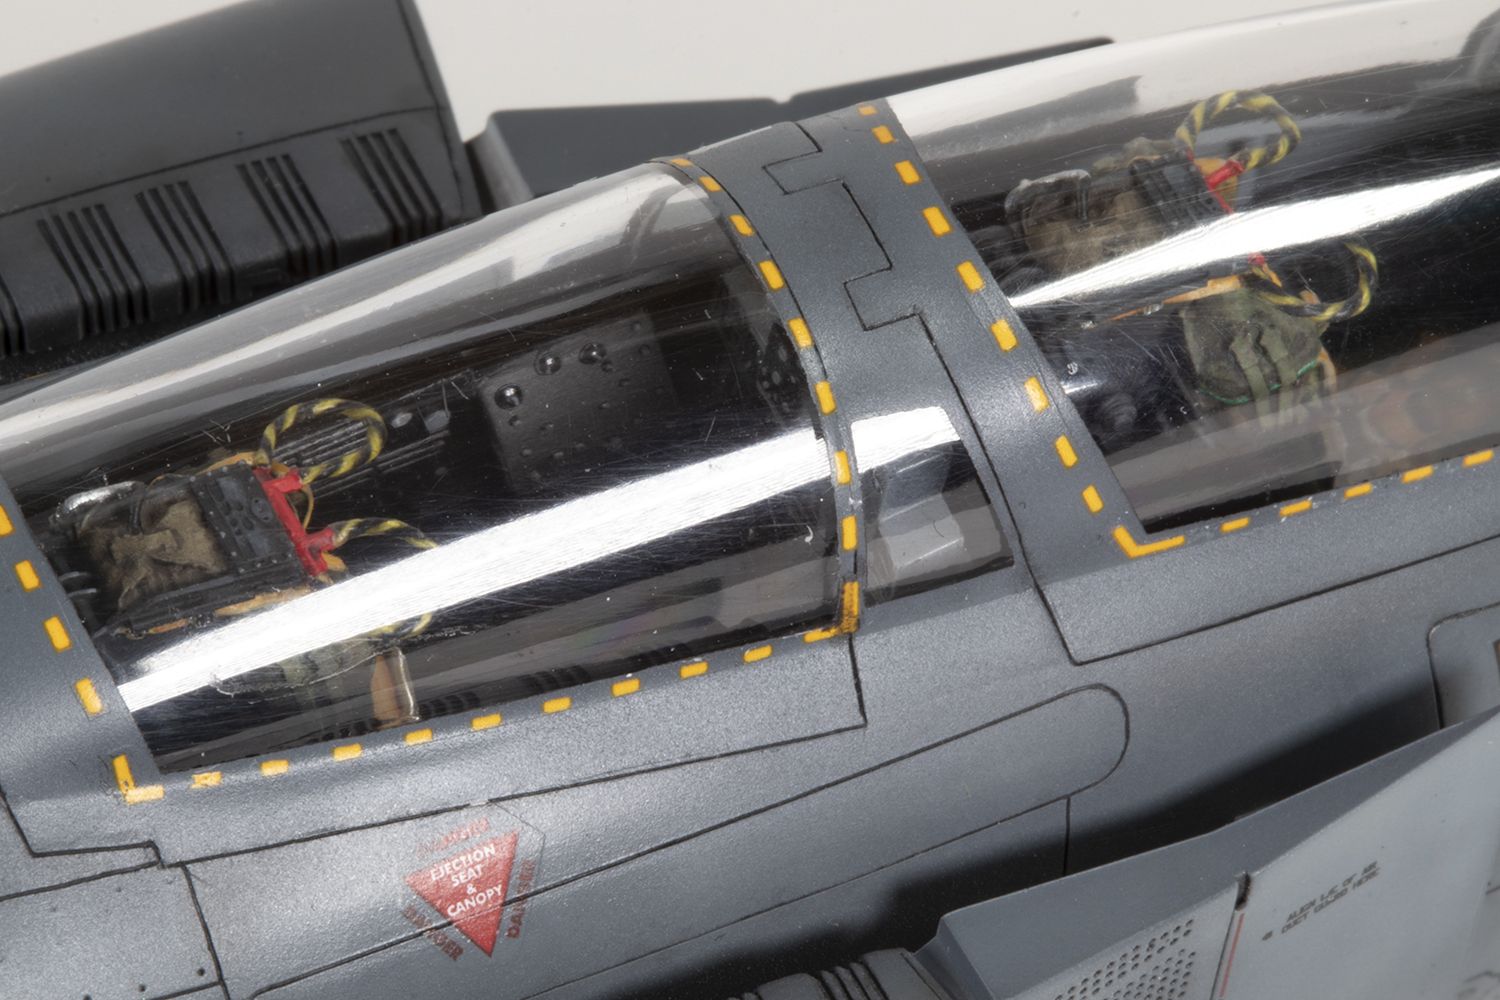
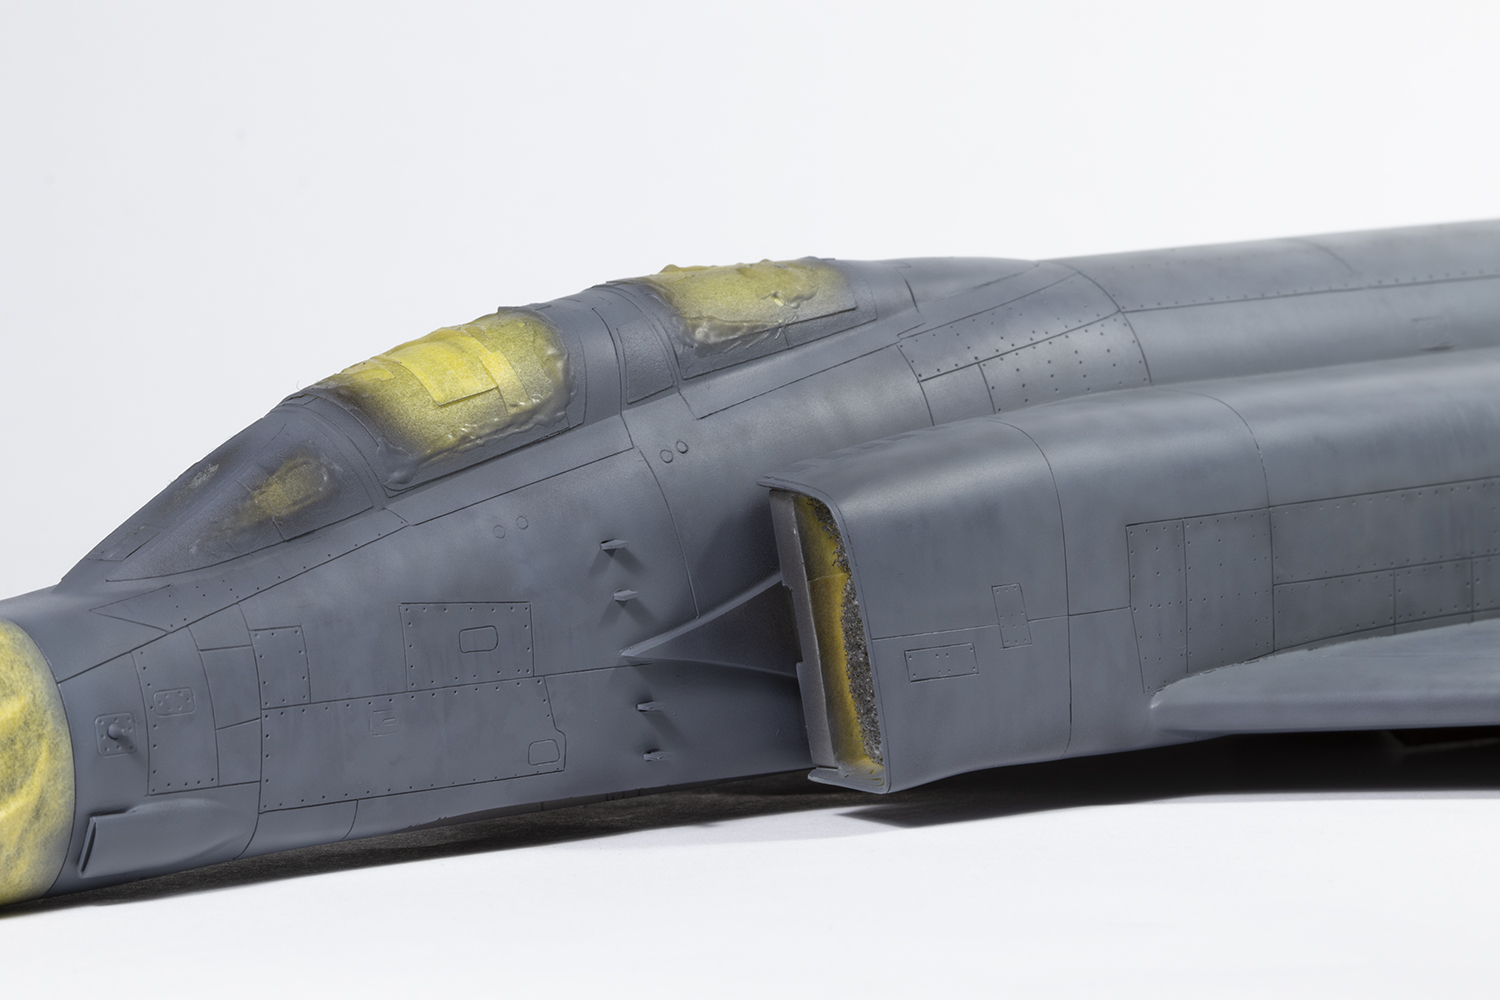
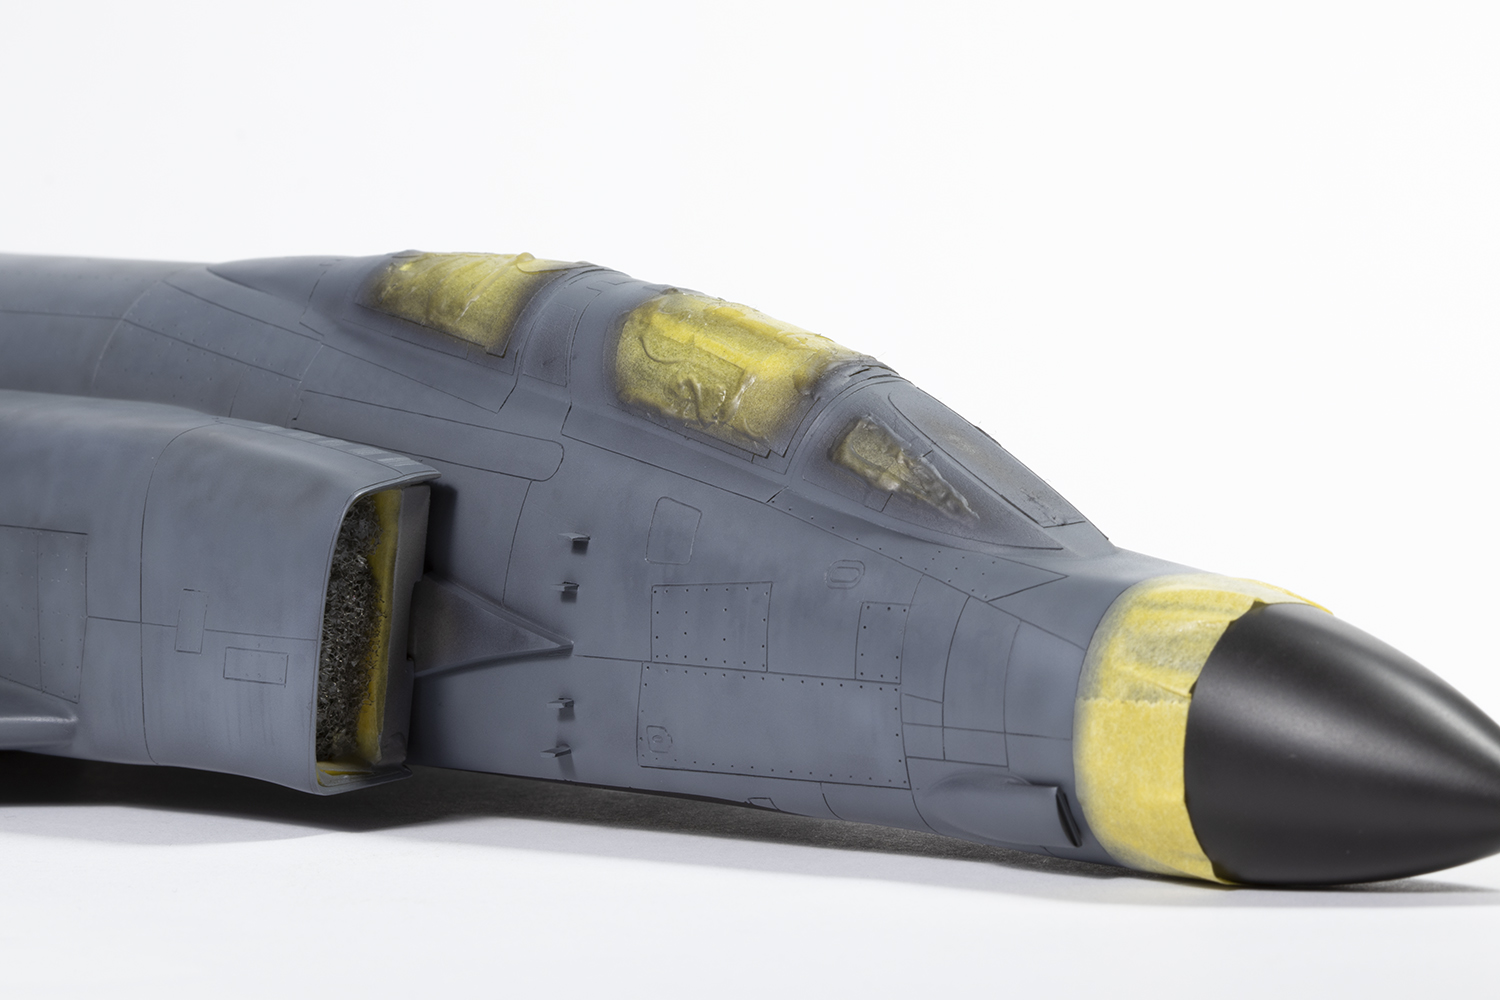
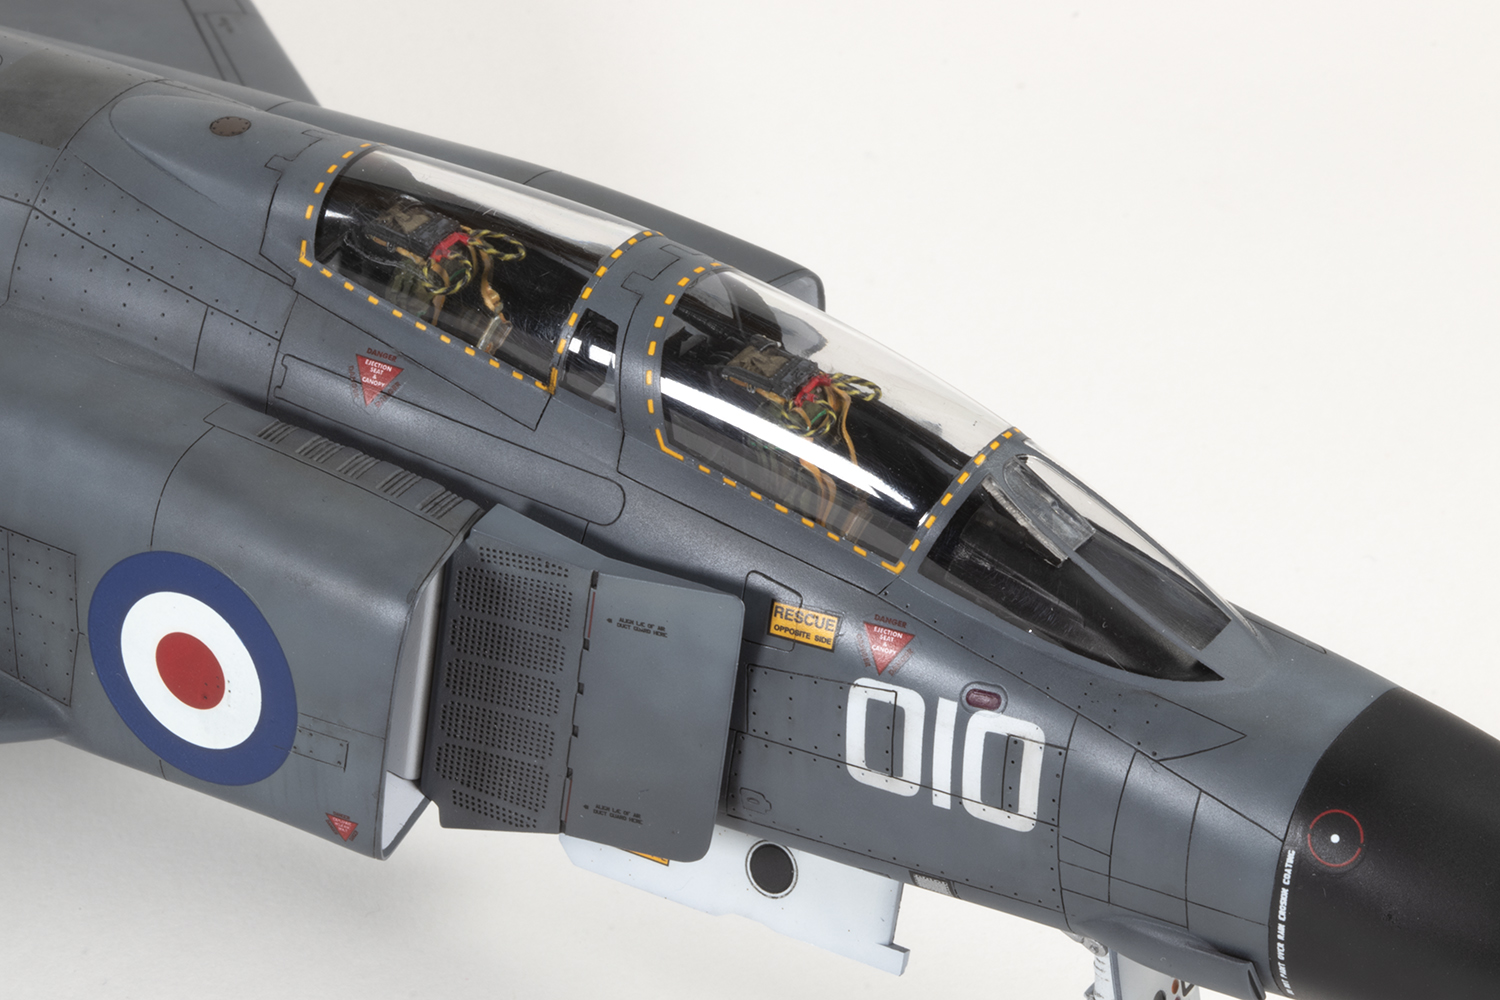
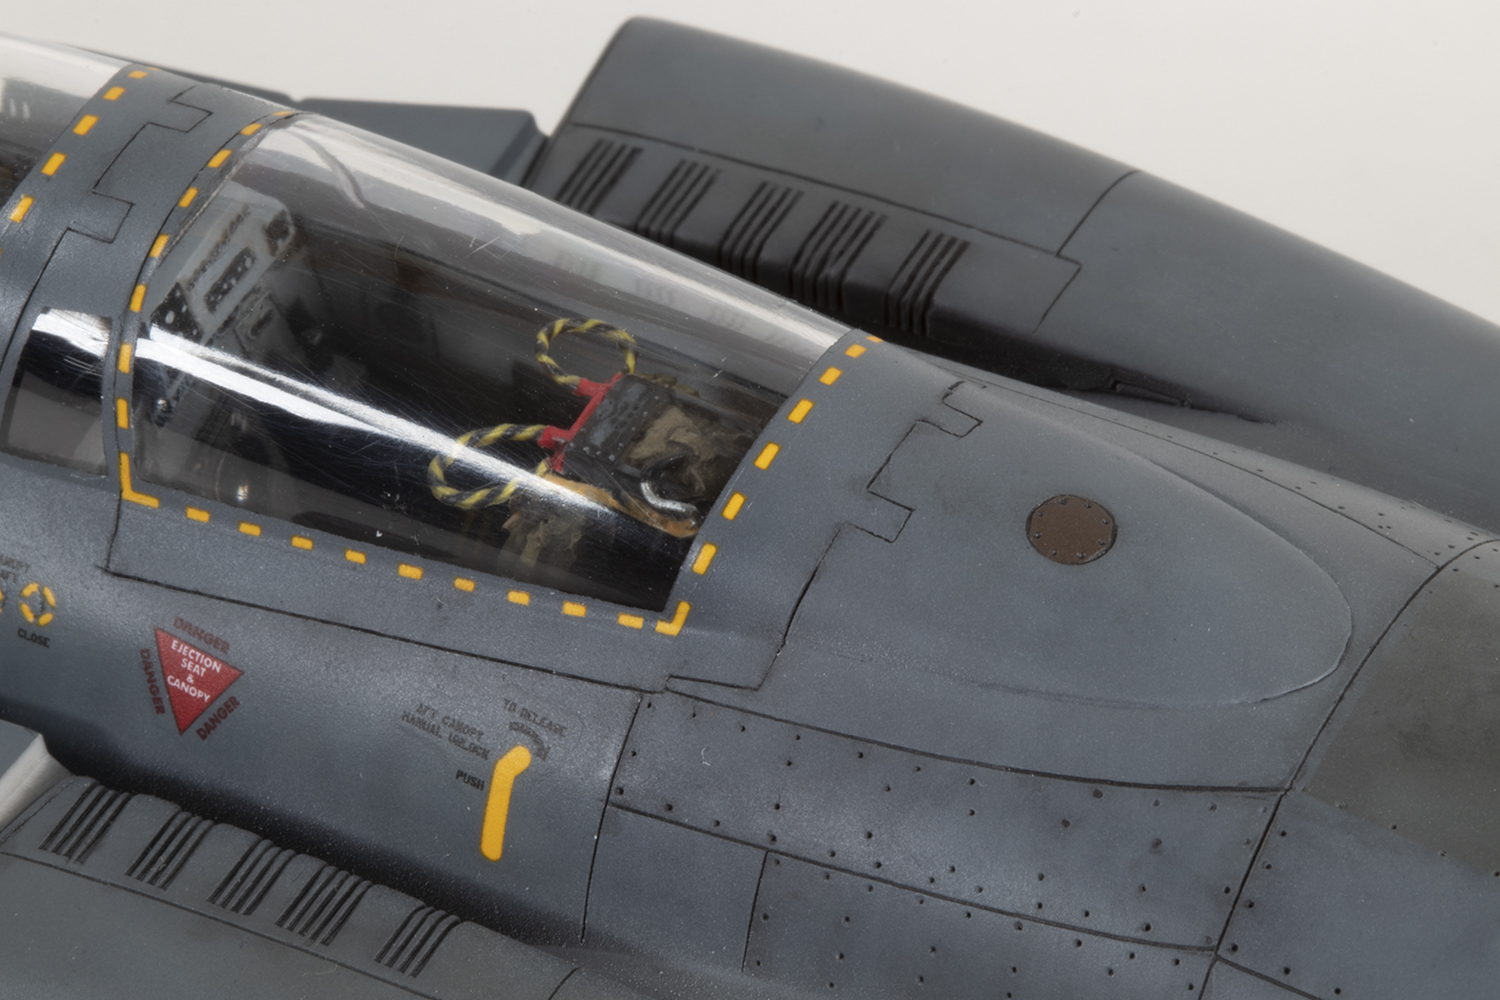
This brings us to the final construction challenge: the canopy. Prior to dealing with it I installed some spurious lead wiring behind the observer’s instrument panel to fill the chasm between the cockpits. I hate doing this at the best of times, and it’s pretty feeble given how busy this area is on the real thing, but I felt compelled to make a token effort. This boxing did not include a single piece canopy, and thus is made up of four parts. Fitting this closed illustrates possibly why many modellers elect to open canopies: even though I’ve done it many times, it’s a nightmare.
I chose to start at the rear and work forwards, attaching each clear part with Tamiya Extra Thin and letting it set before installing the next. The central arch is a poor natural fit, but can be gently spread by attaching one side and then the other. In the end, the fit to the fuselage was good, but the hinges were a mess. I thus decided to take the plunge and fill all the joints with superglue. To prevent fogging, I first plugged them with clear UV resin to stop fumes entering the cockpit. Without masking anything, I then sanded down all the filler and set about the really difficult task: rescribing all the shut lines. The clear plastic and complex shapes made this hard, but judicious use of some MadWorks scribing guide tape (basically a clear, thick rigid tape) and regular tape to mark the limits of each line produced a result better than I was expecting, especially around the hinges. The gap around the front windscreen was dealt with by means of many thin applications of Mr Surfacer 500 and careful sanding with fine grit abrasives. Clarity was restored with increasingly finer abrasive grits and then using the Tamiya Polishing Compounds applied in the correct order with cotton buffing wheels in a Proxxon motor tool.
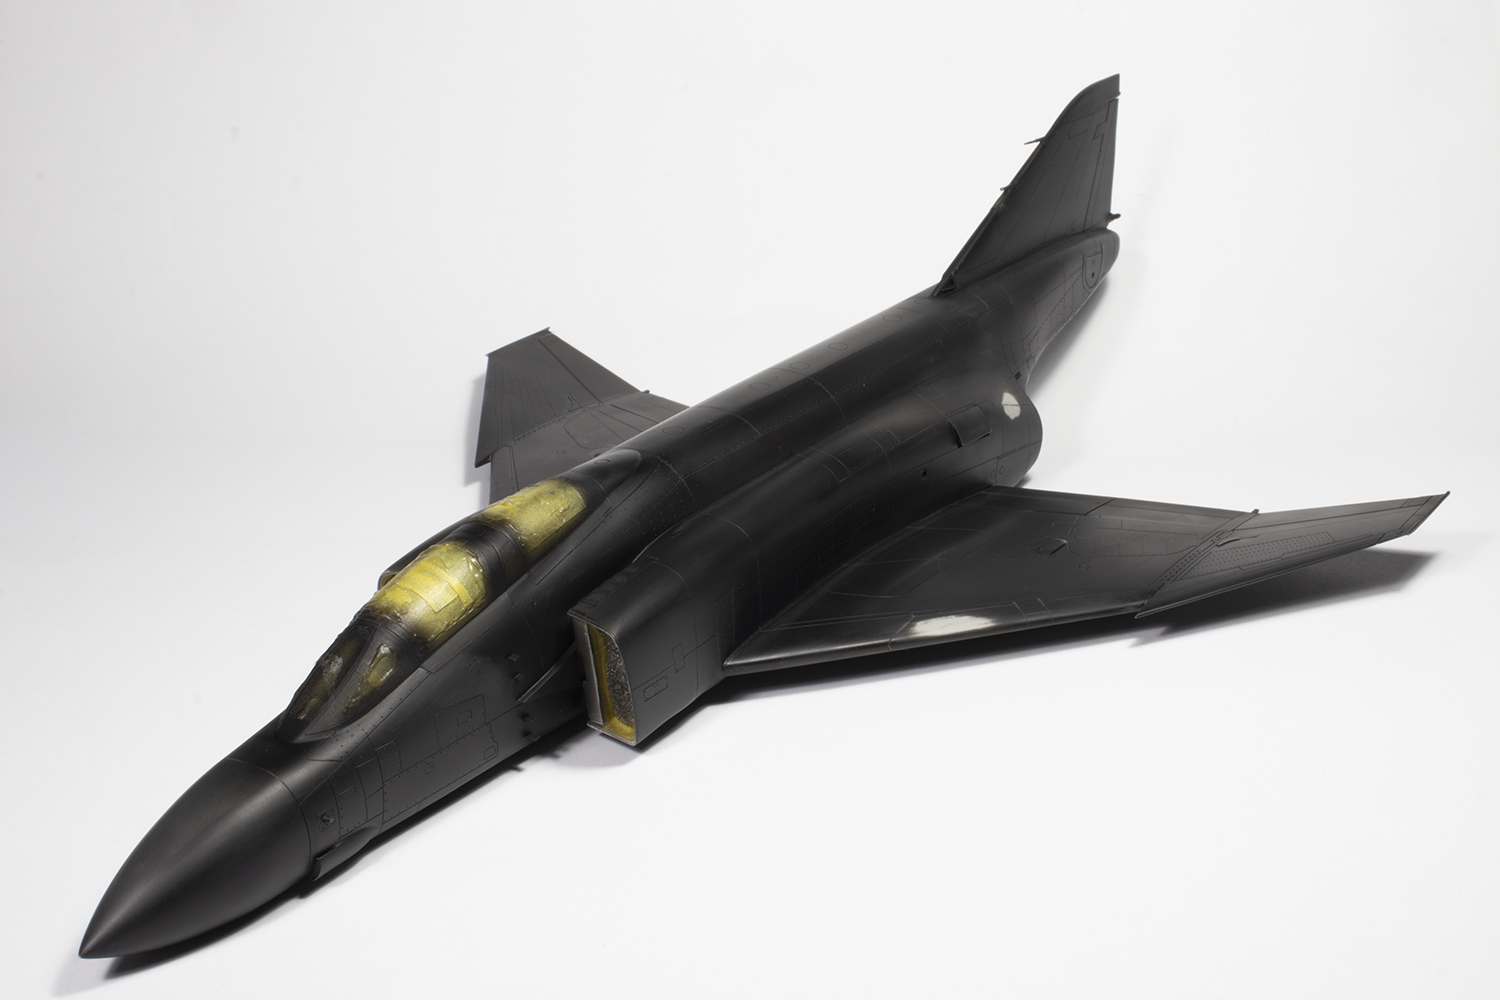
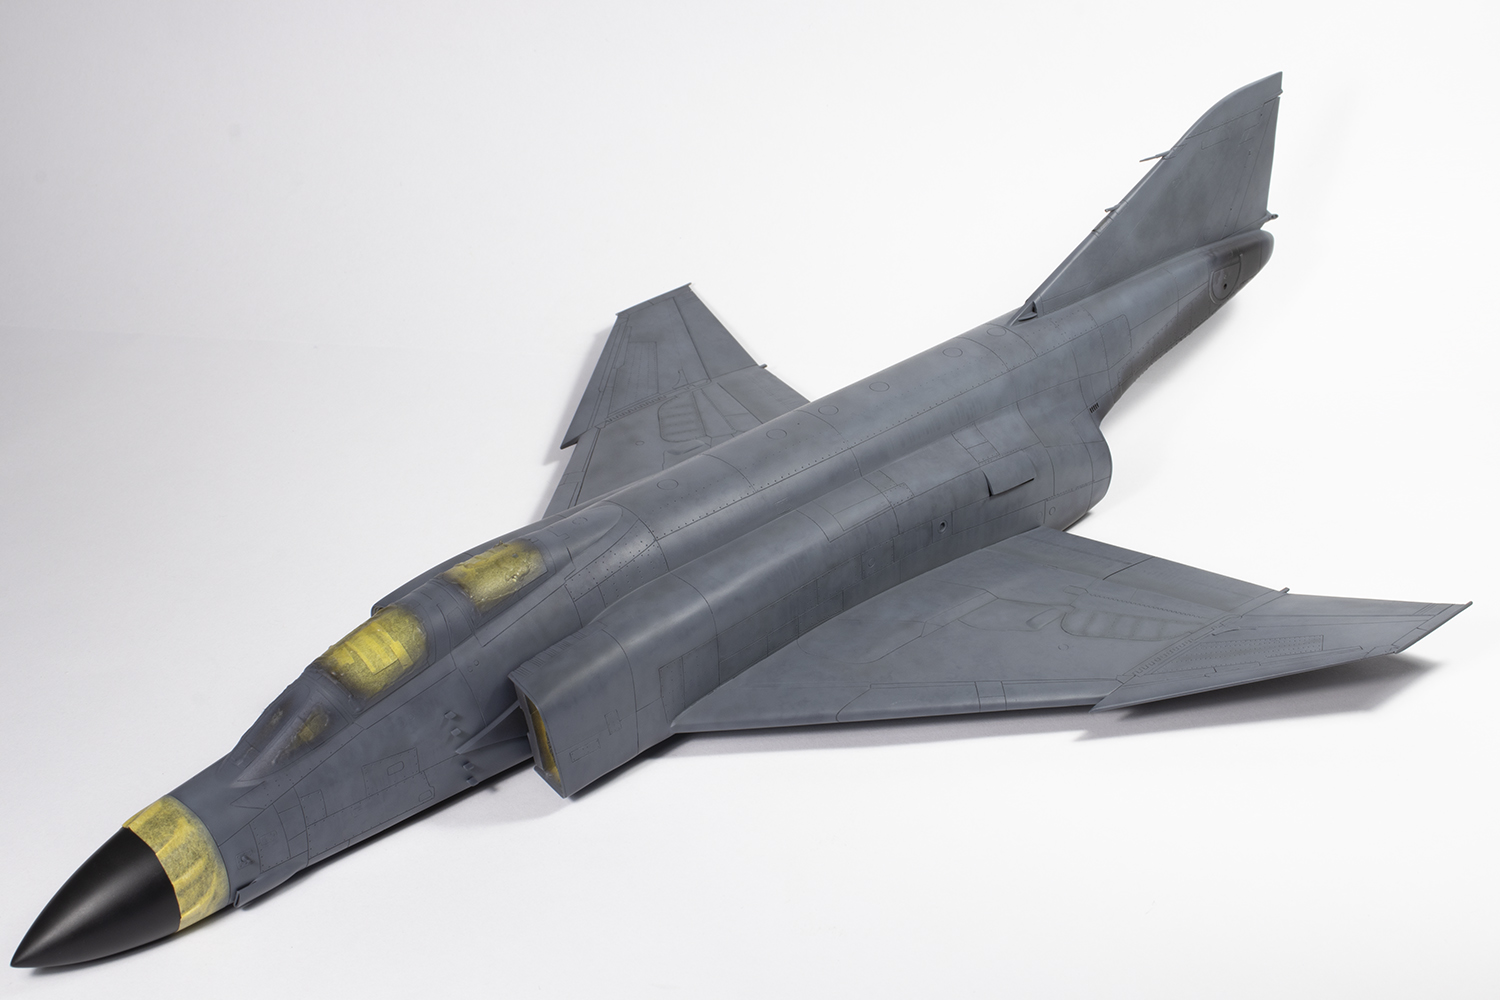
At the back of my mind throughout the project was the question of what colour to paint the Phantom. Extra Dark Sea Grey is the standard answer, but Paul Lucas in the July 2017 issue of SAM raises the possibility of Dark Sea Grey (if I’ve understood him correctly). So far, so controversial, but what I did know is that the Mr Color EDSG Buccaneer on my shelf is, in my opinion, way too dark, and I didn’t want my FG.1 in that colour. What to do?
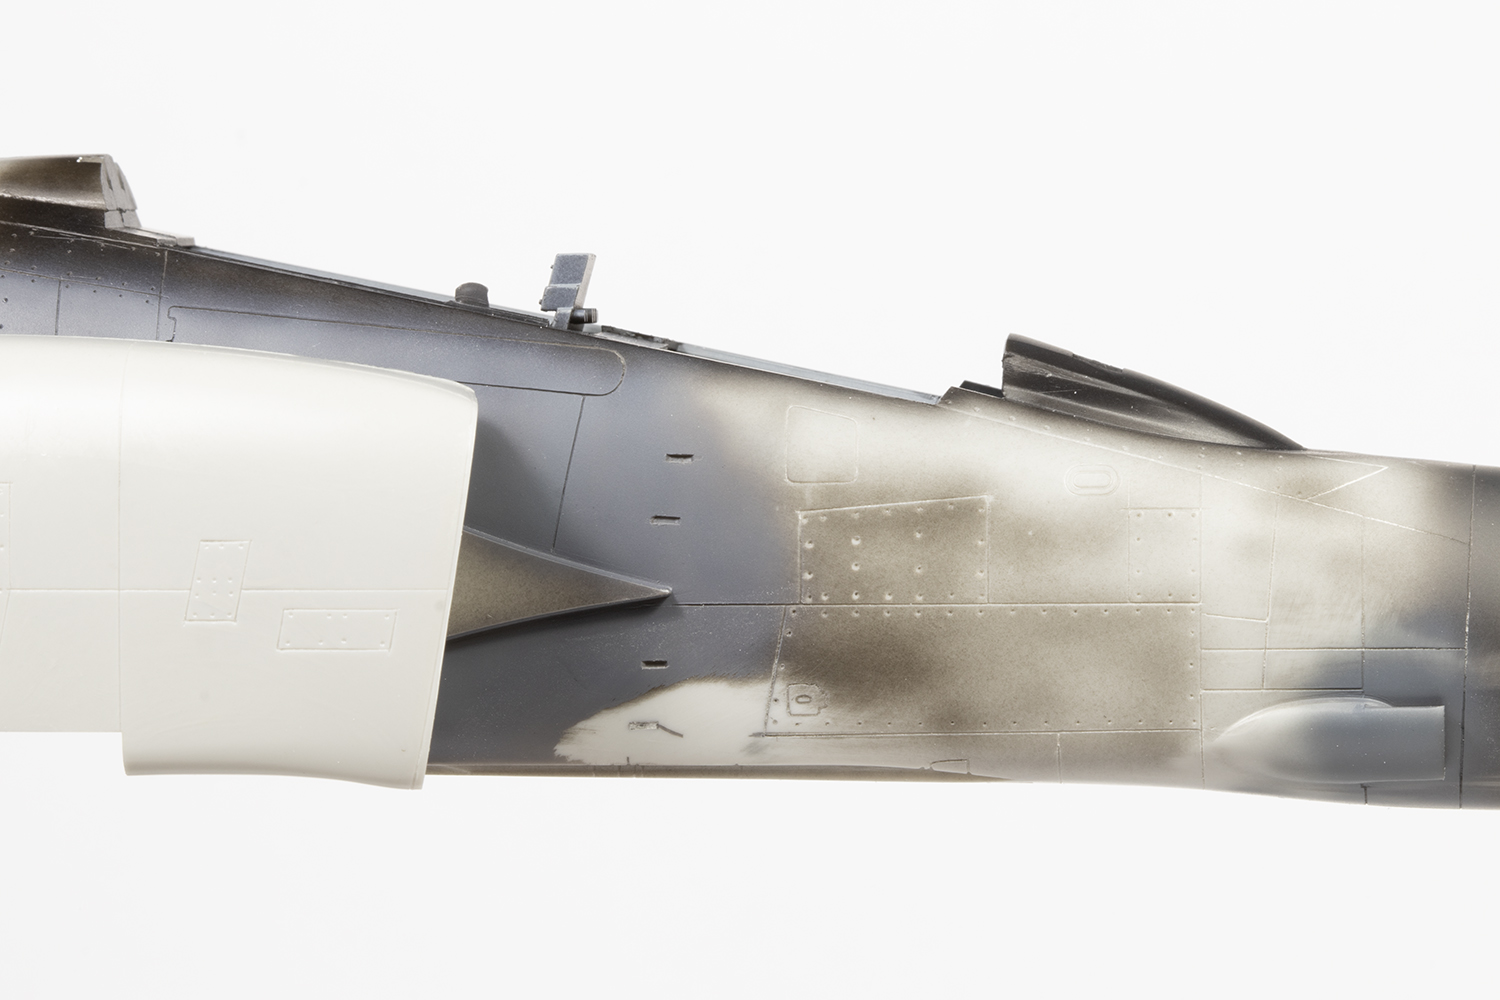
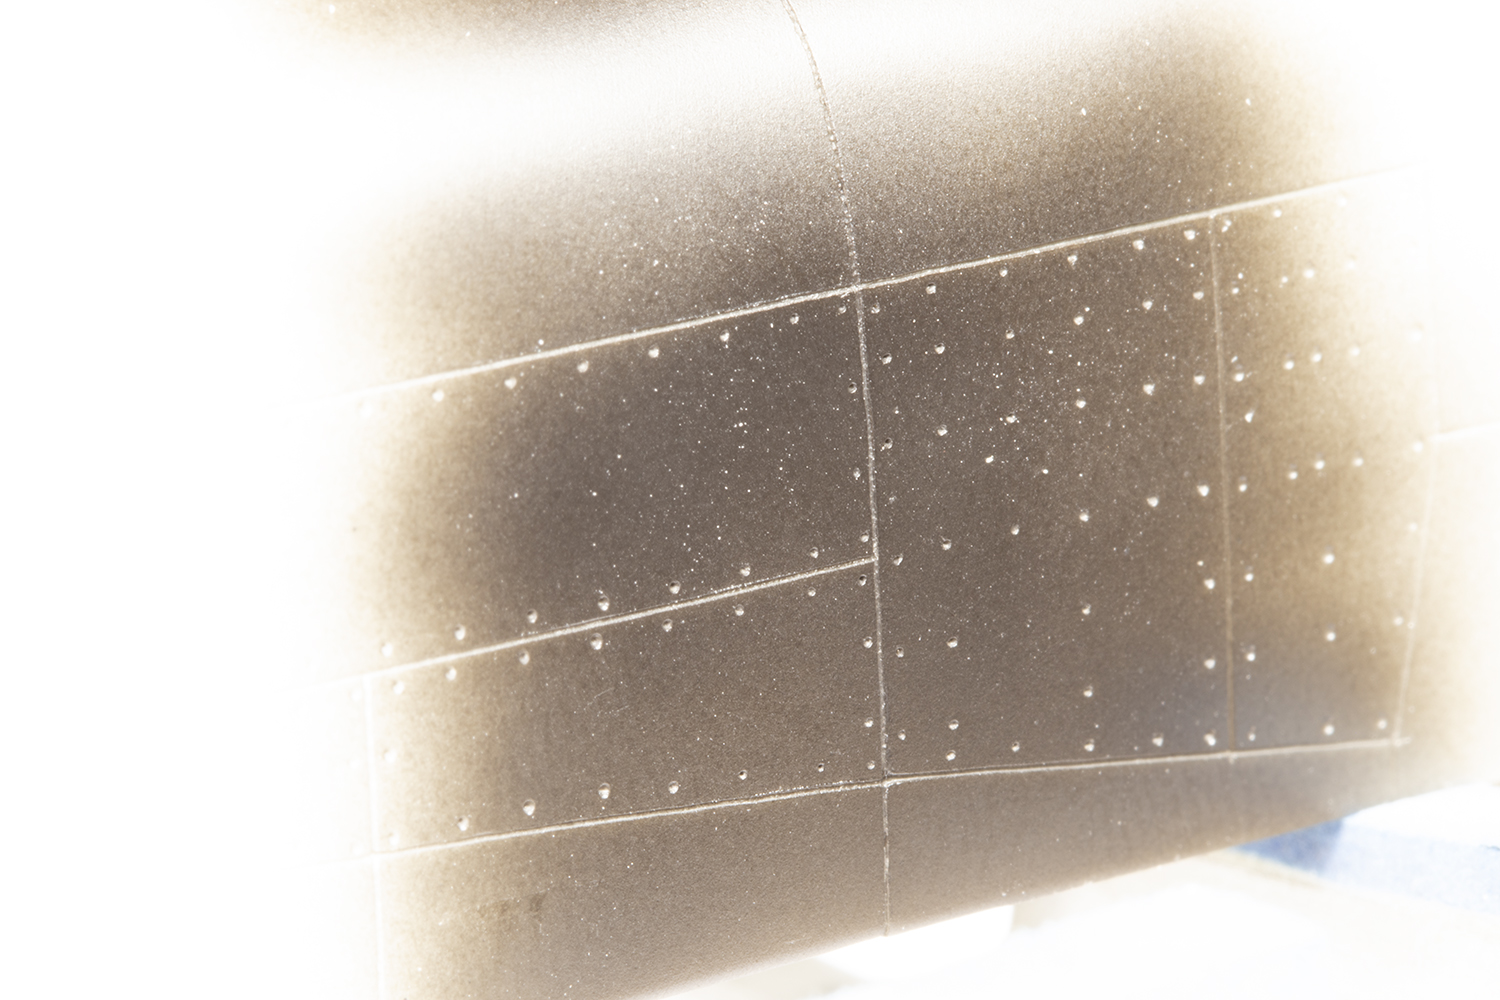
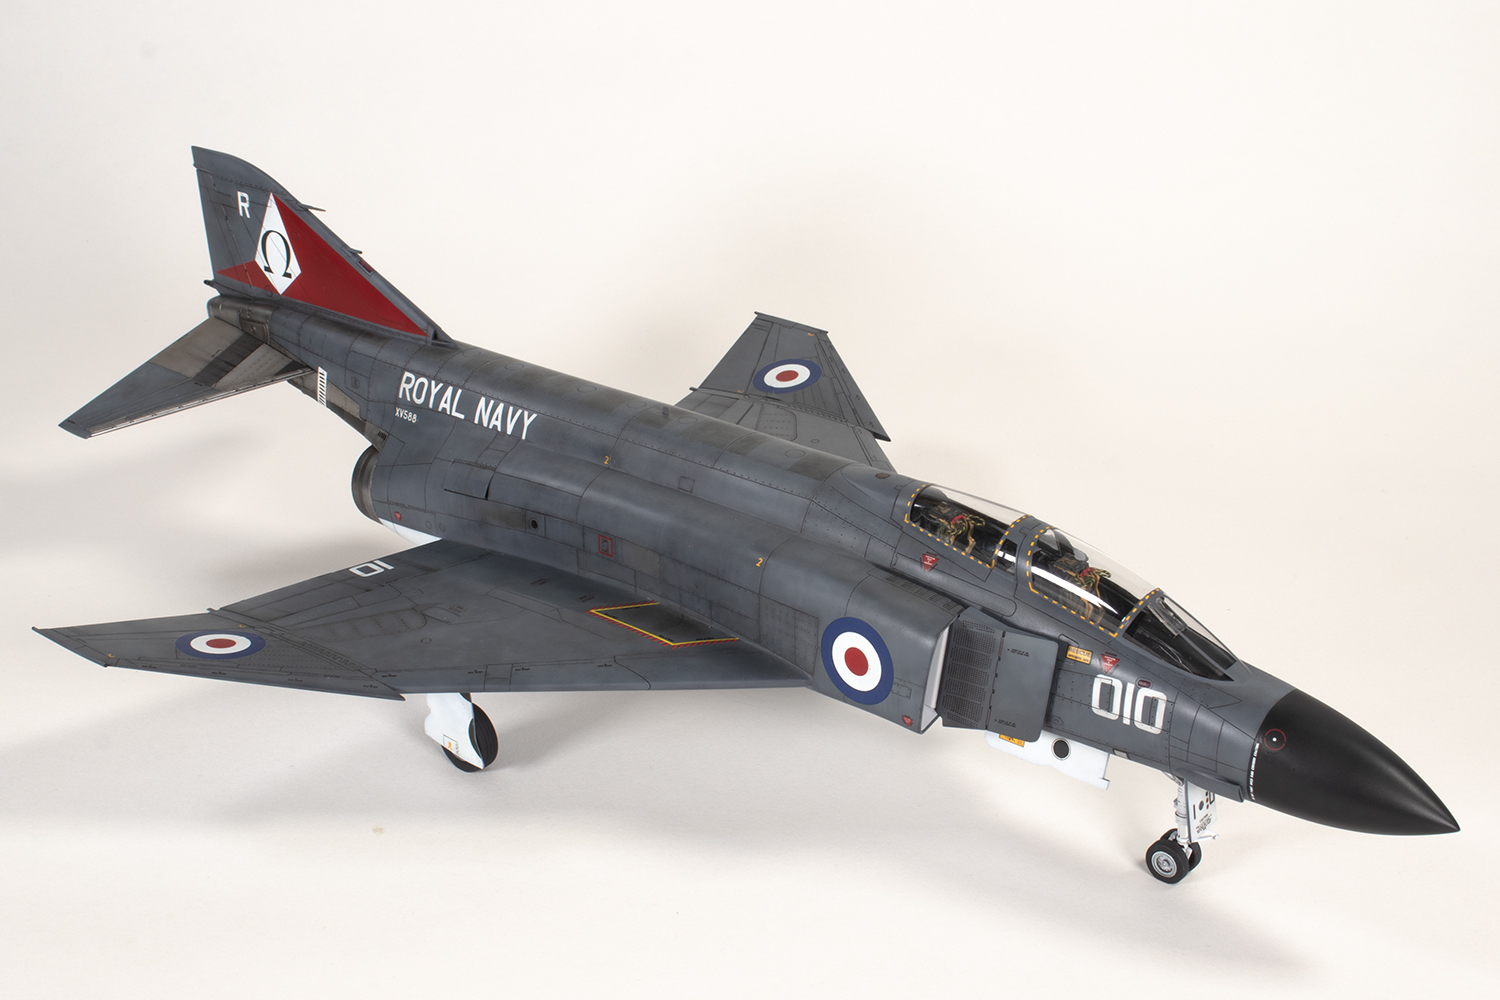
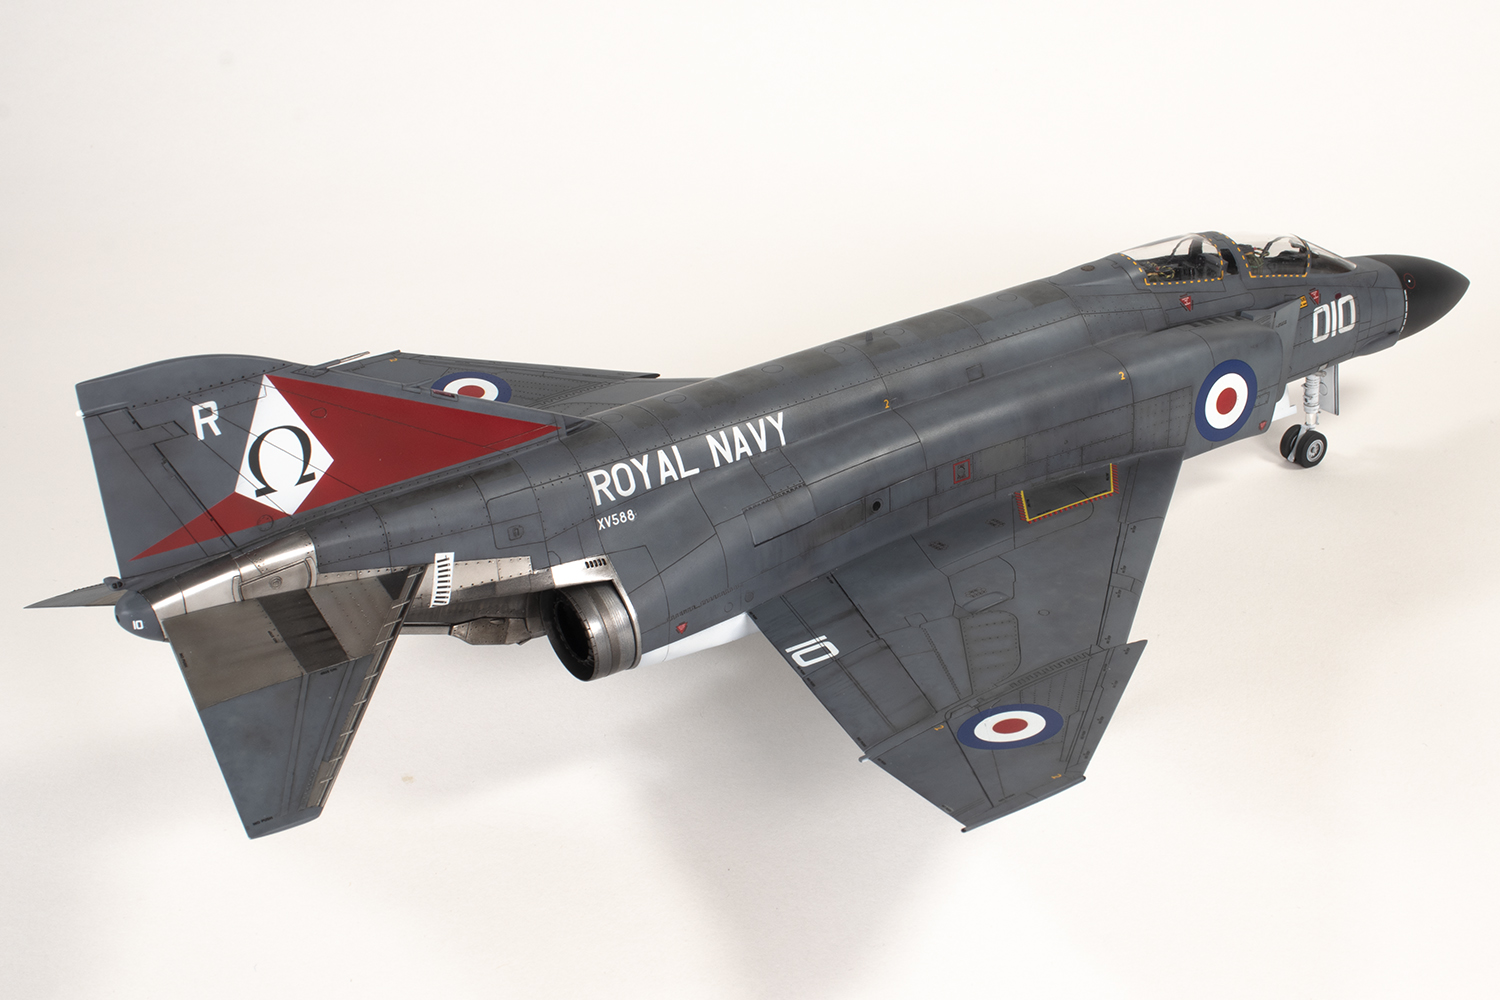
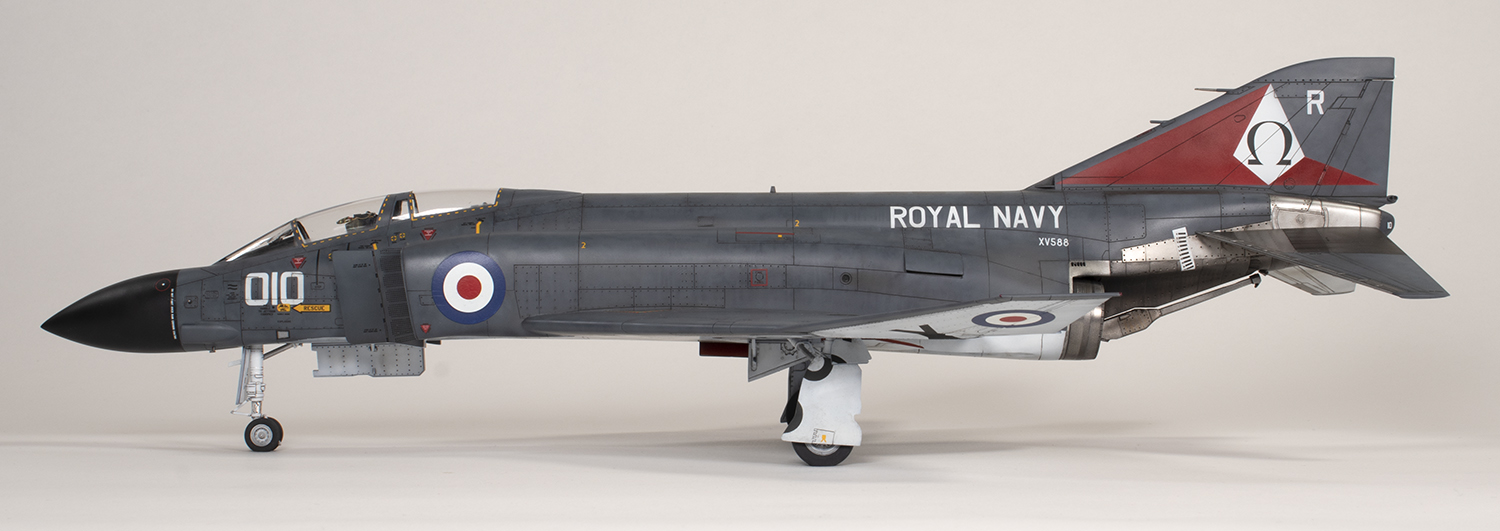
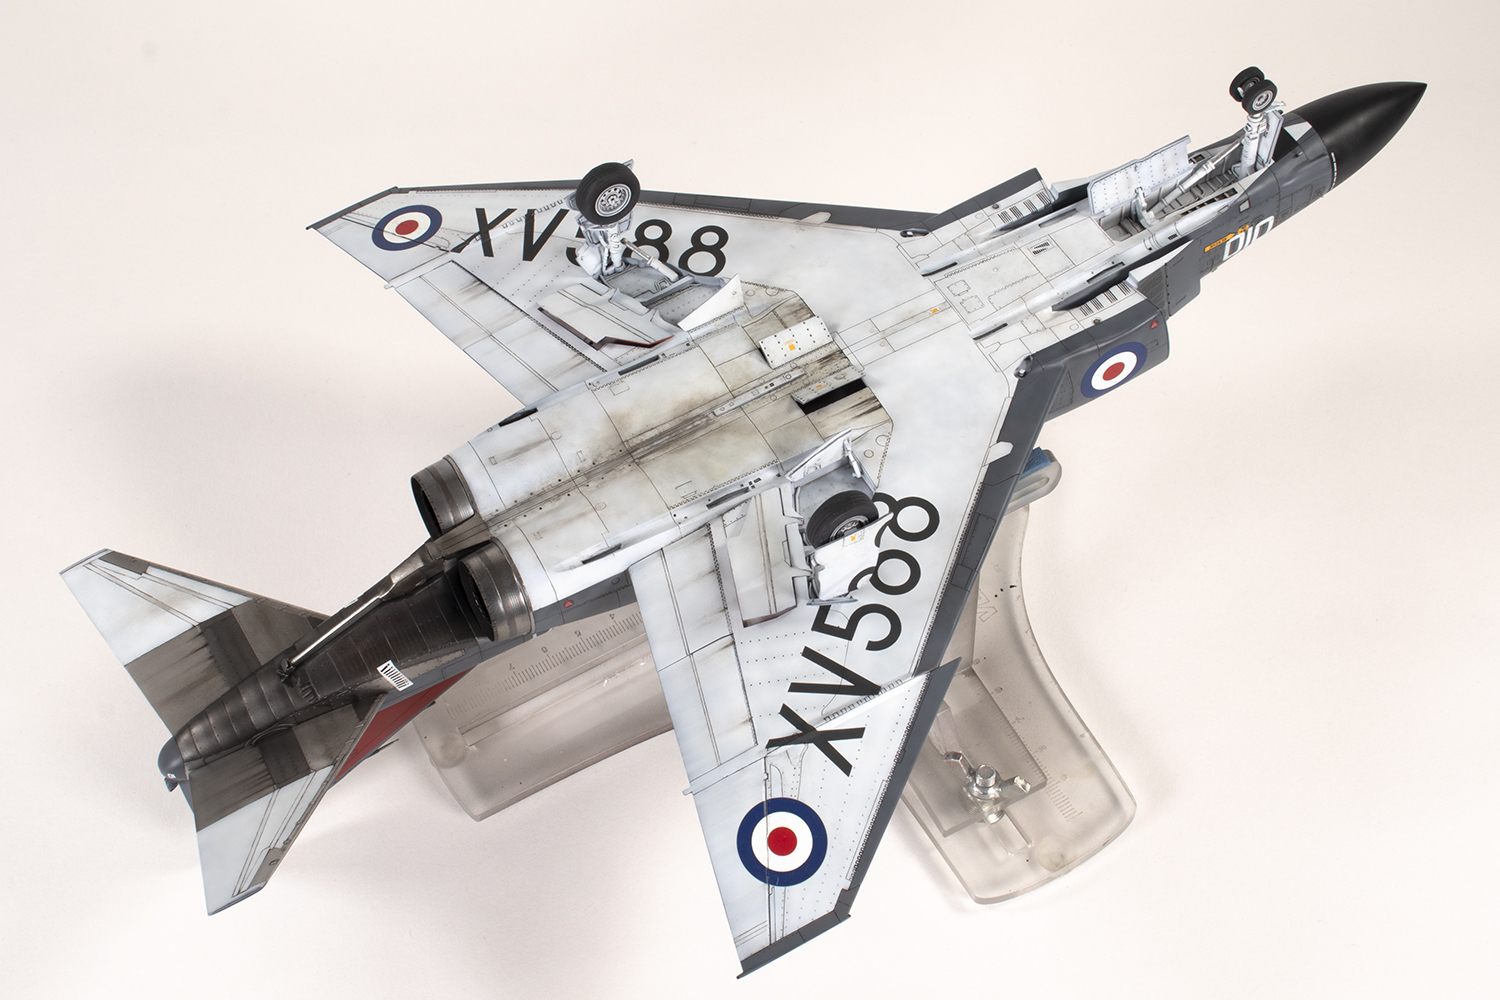
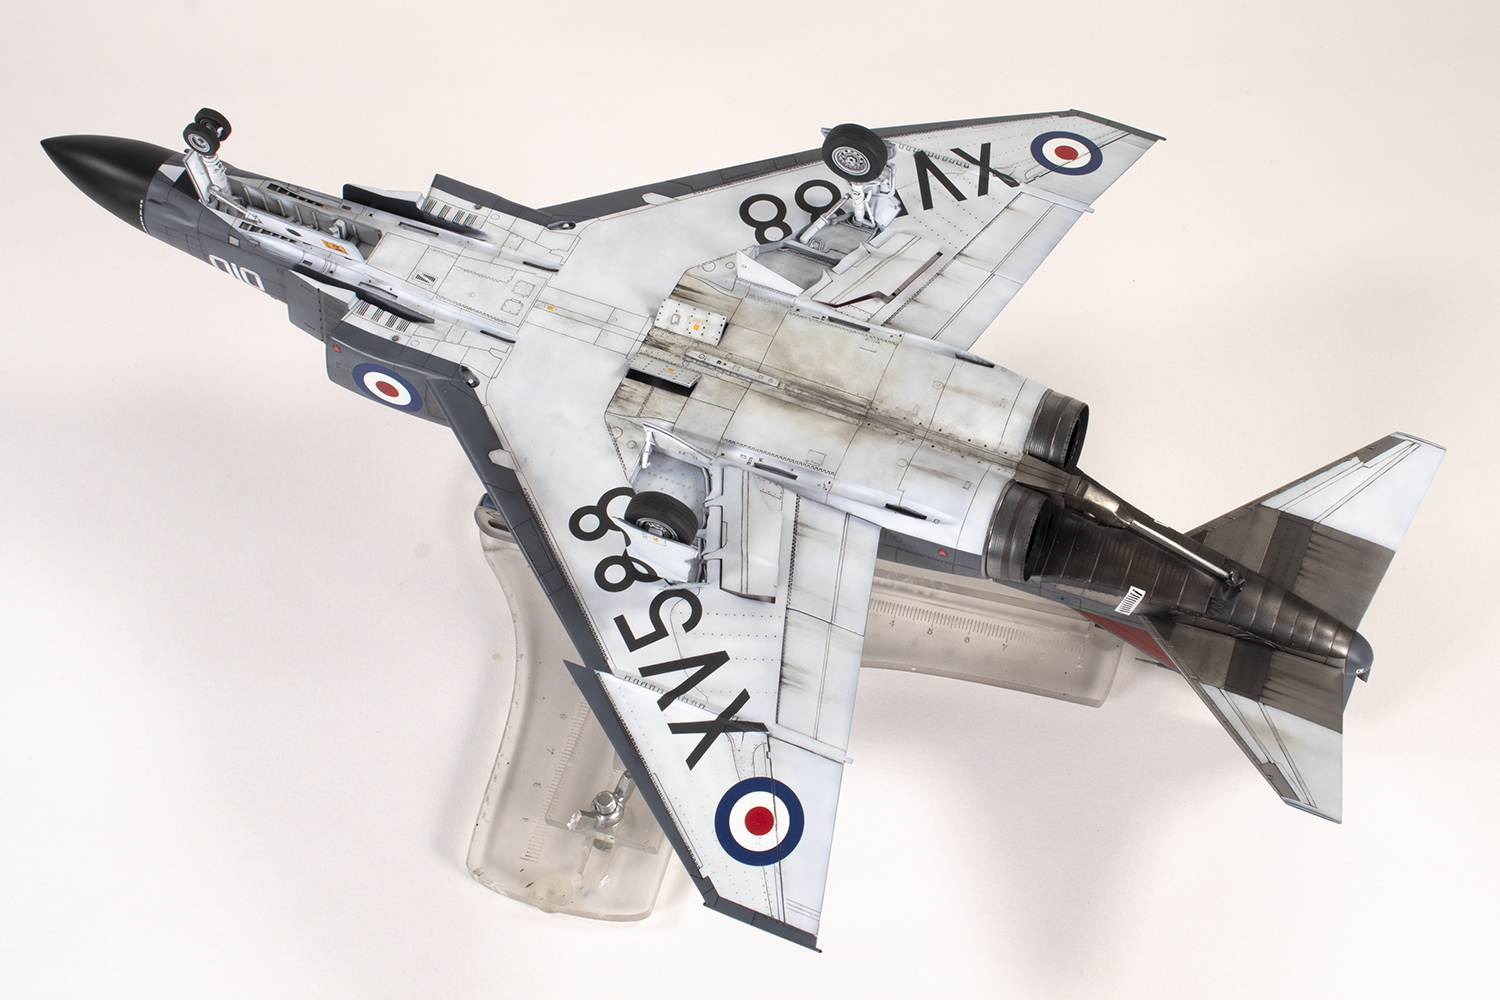
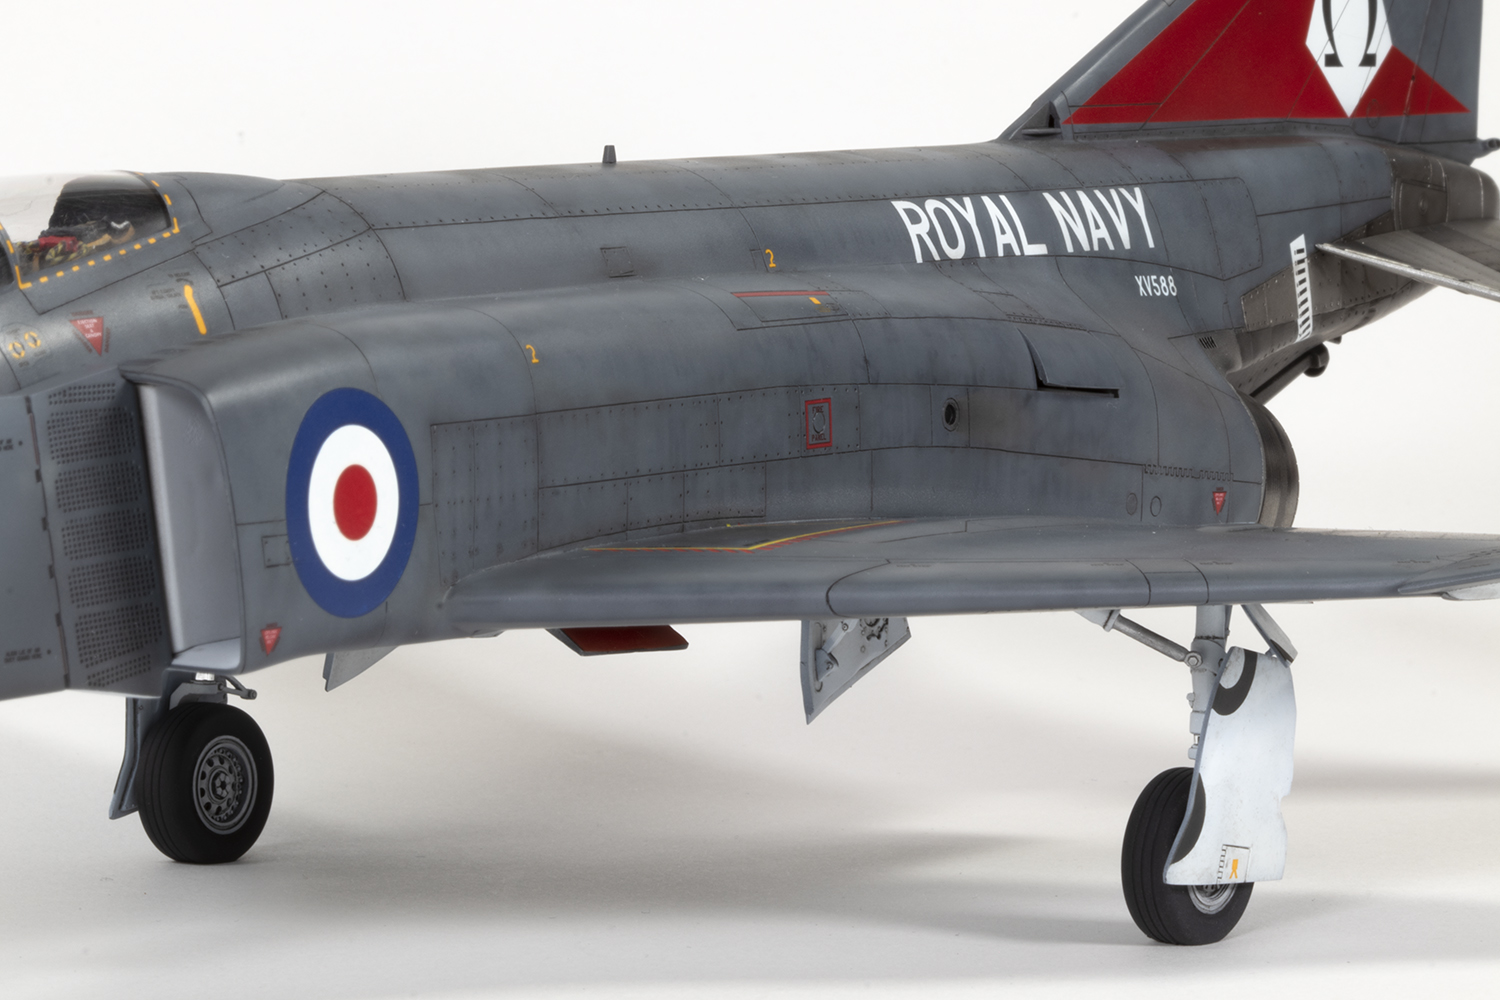
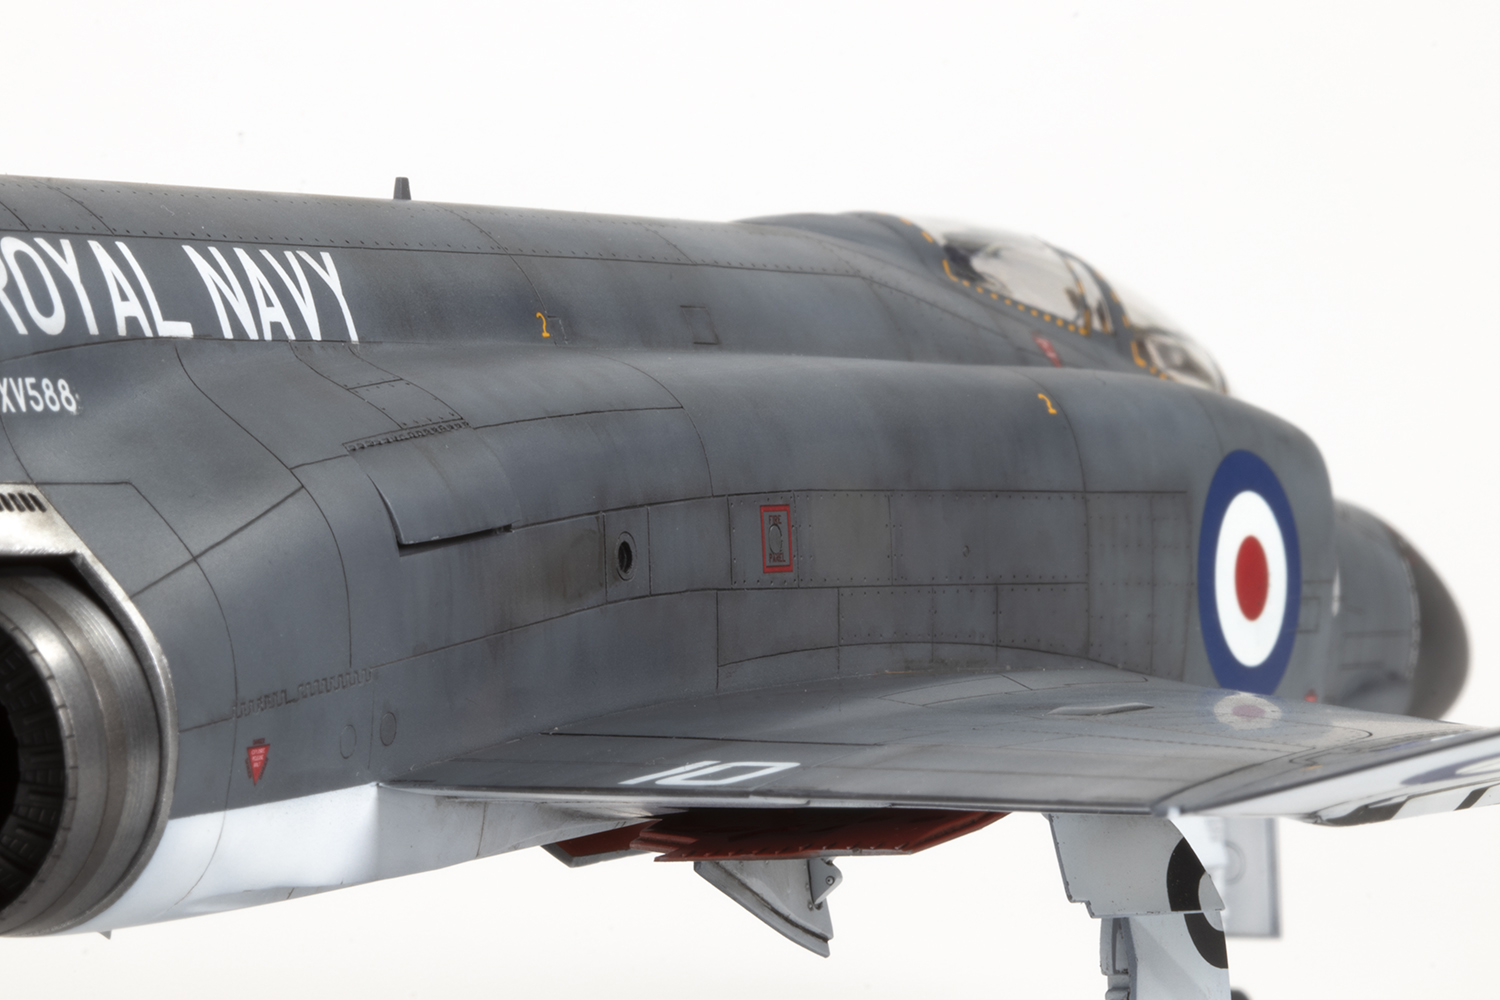
I decided to compare MRP EDSG with Mr Color DSG (C331). Surprisingly, these were very similar in tone and quite different in hue, the MRP colour being more blue and the Mr Color more violet. The MRP EDSG was much closer to what I was seeing in the photos and I used that, mottled over Mr Finishing Surfacer 1500 black as my base layer. Varying quantities of black and white were added to this to get some decent variation, along with other patches of the Mr Color DSG. This gave me a pleasing patchwork of colours similar to my primary reference, a beautiful photograph of XV588 taking off the Ark Royal in 1972.
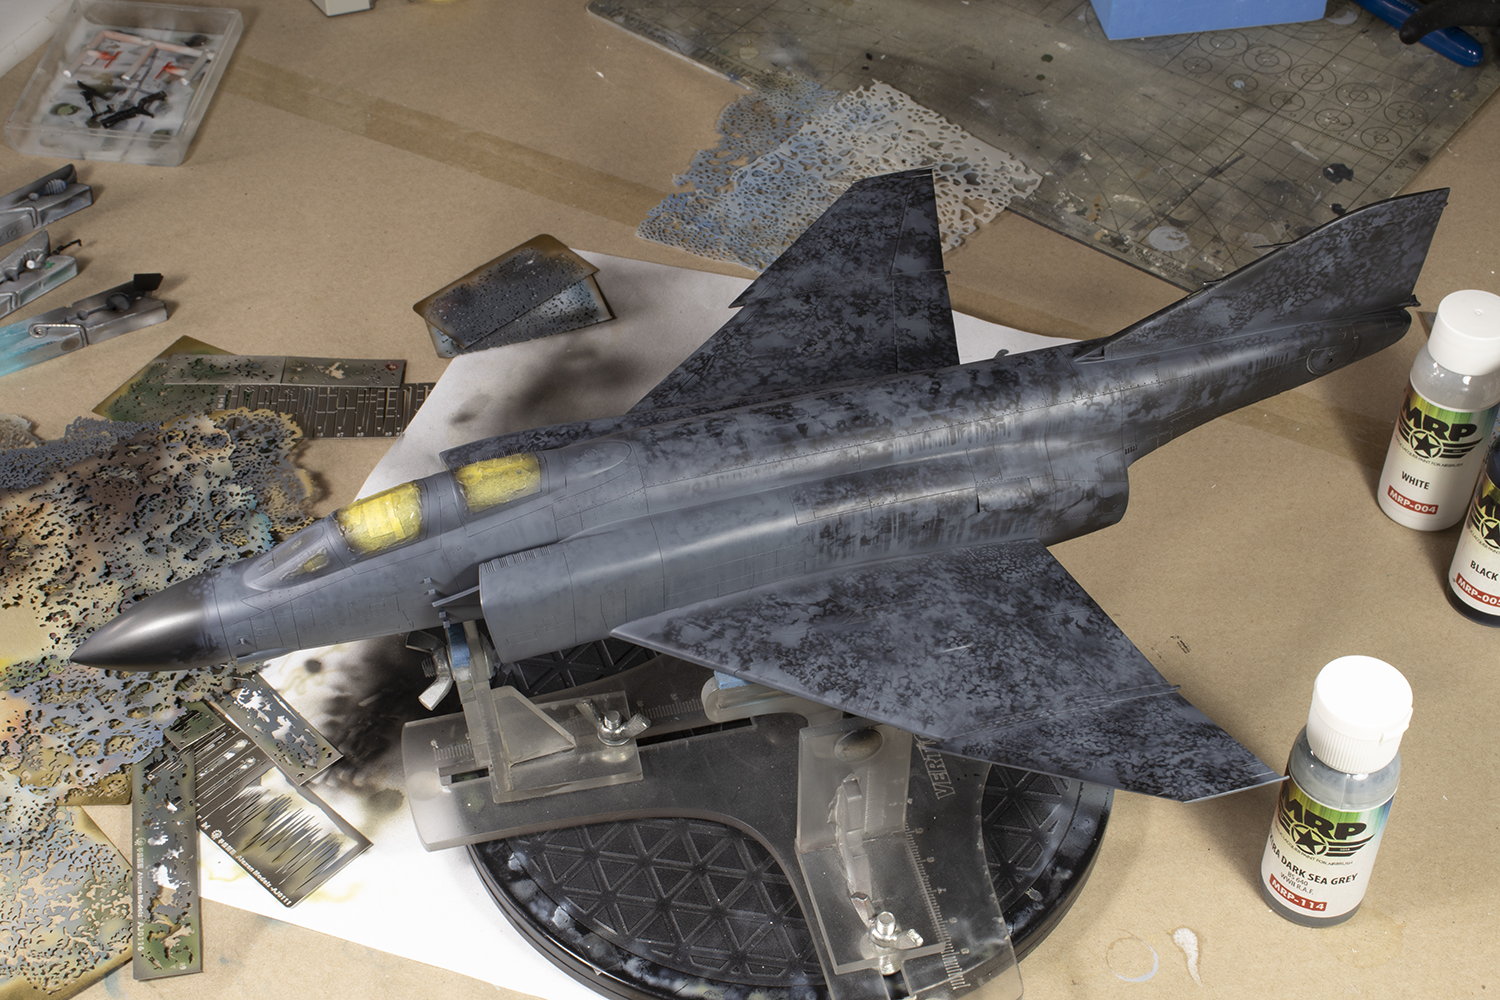
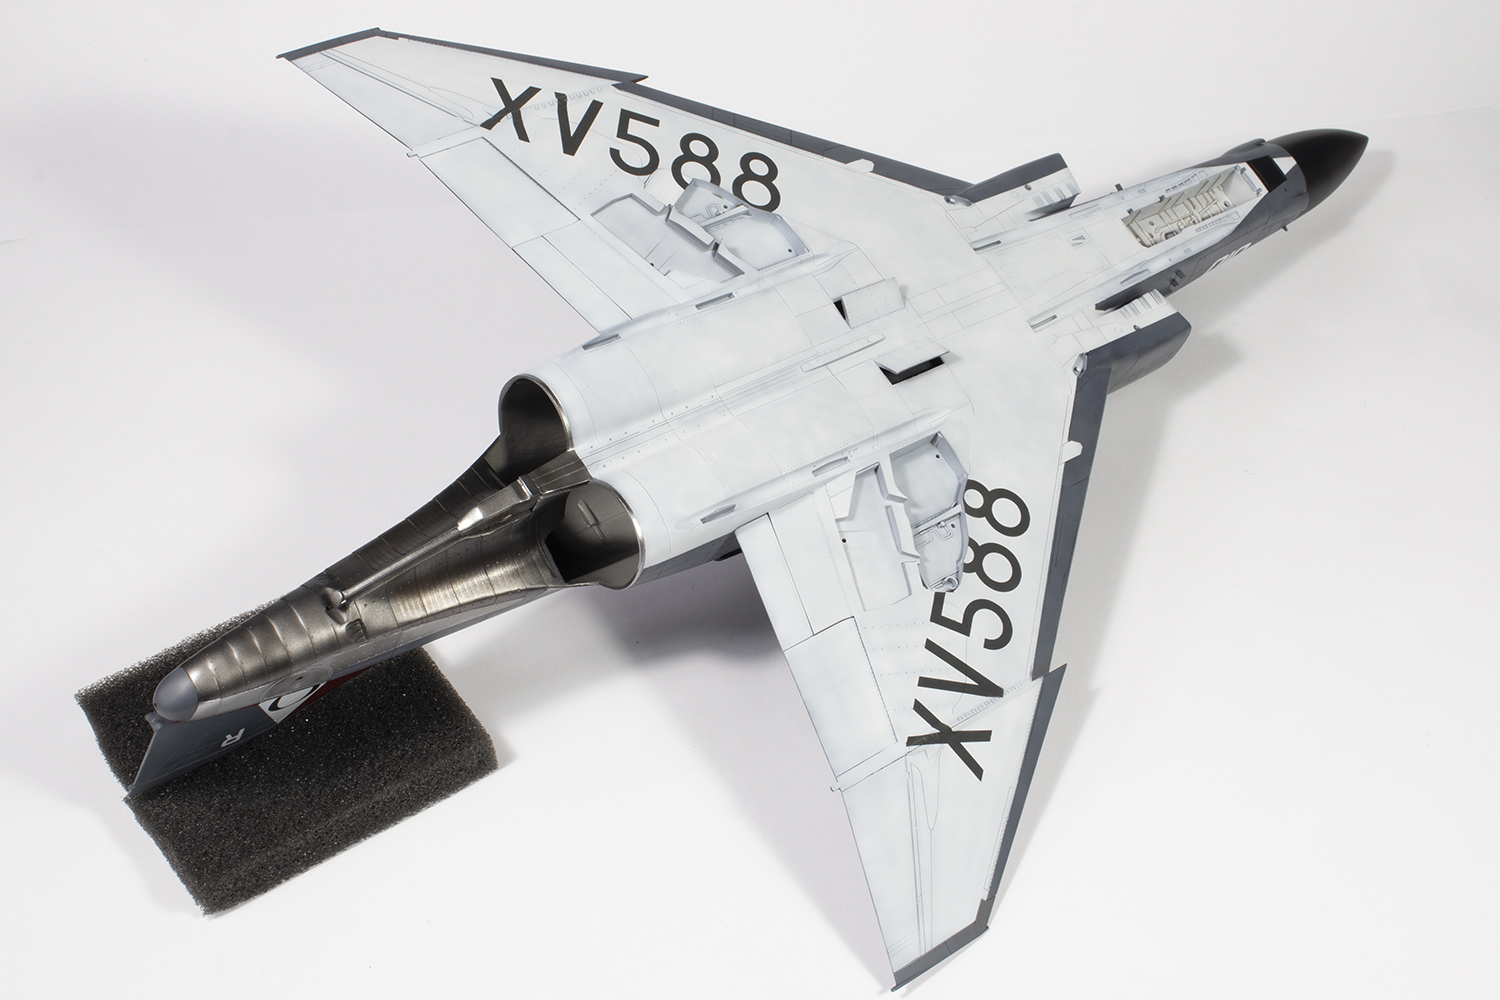
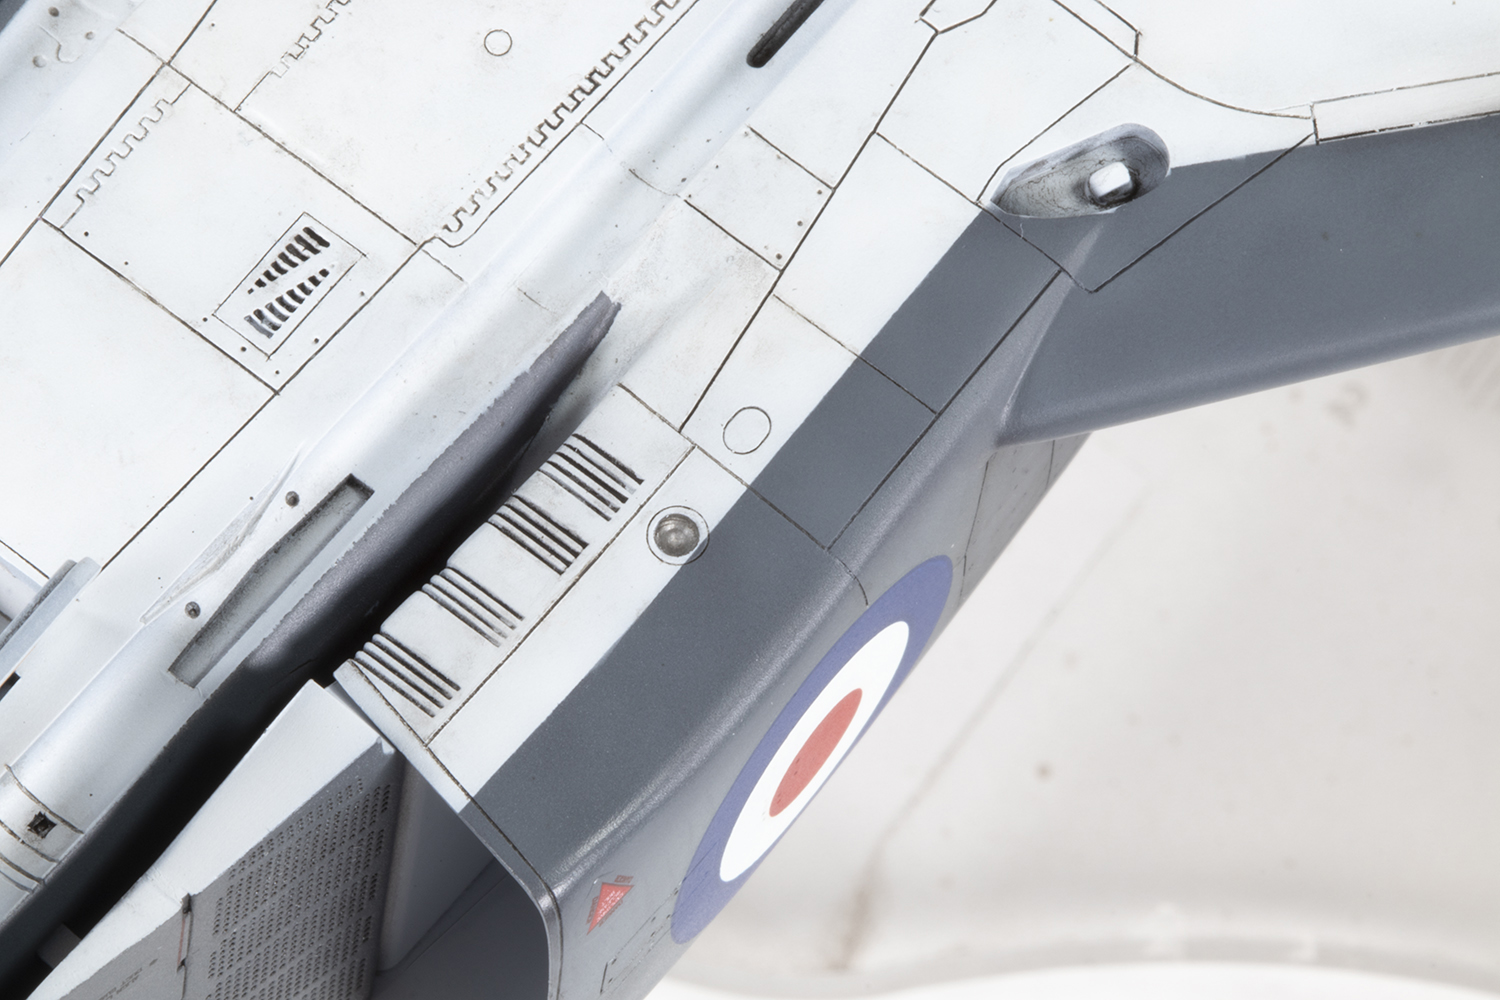
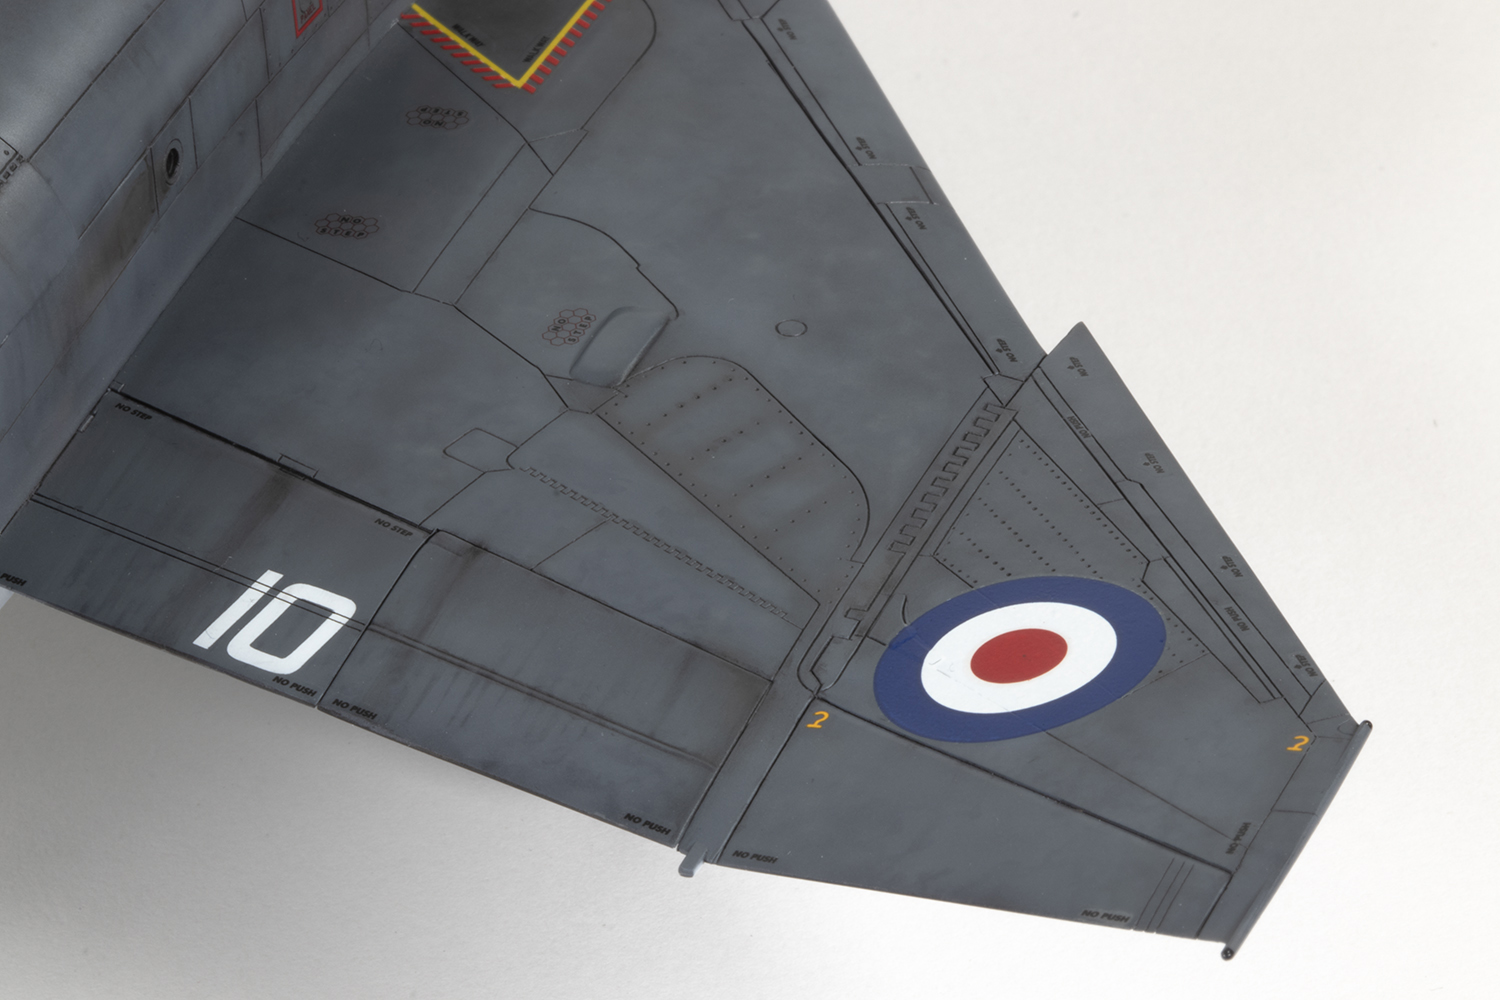
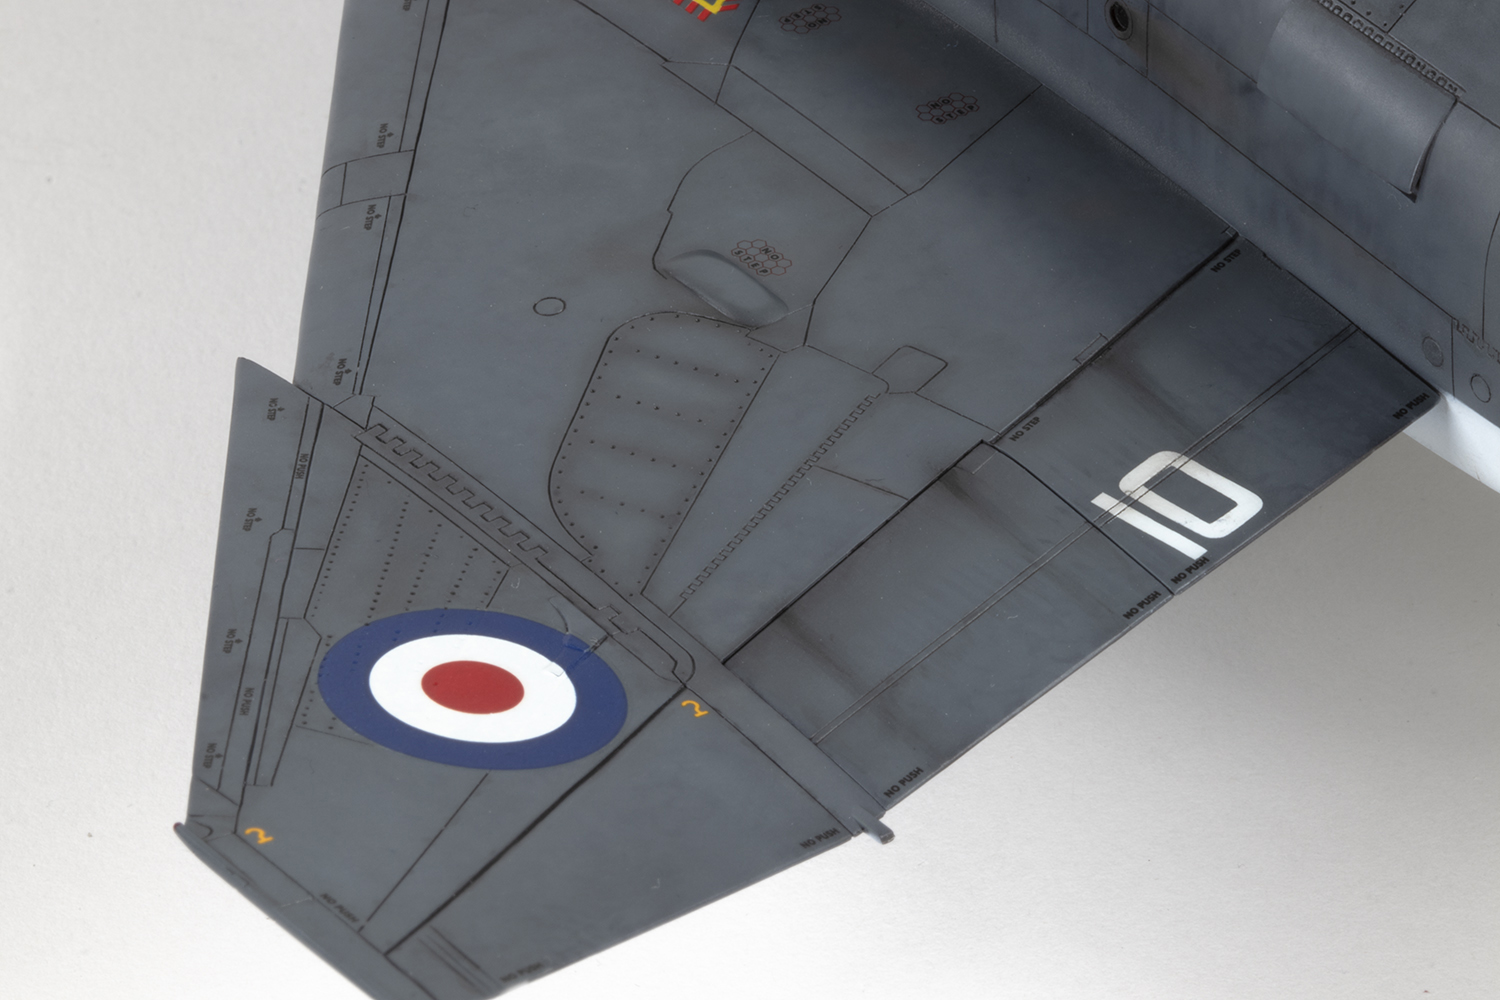
The undersides were various whites (MRP White, Mr Color Off White (C69) and Insignia White (C316)), also over a black base. Of course, as the project was drawing to a close I found some wonderful photos of the underside of RN Phantoms which revealed I’d got the demarcation between the grey and white wrong around the intakes and the wing leading edge. Hasegawa moulded some spurious panel lines where the inner pylons sit, which I had slavishly and incorrectly followed; the demarcation should be just a straight line.
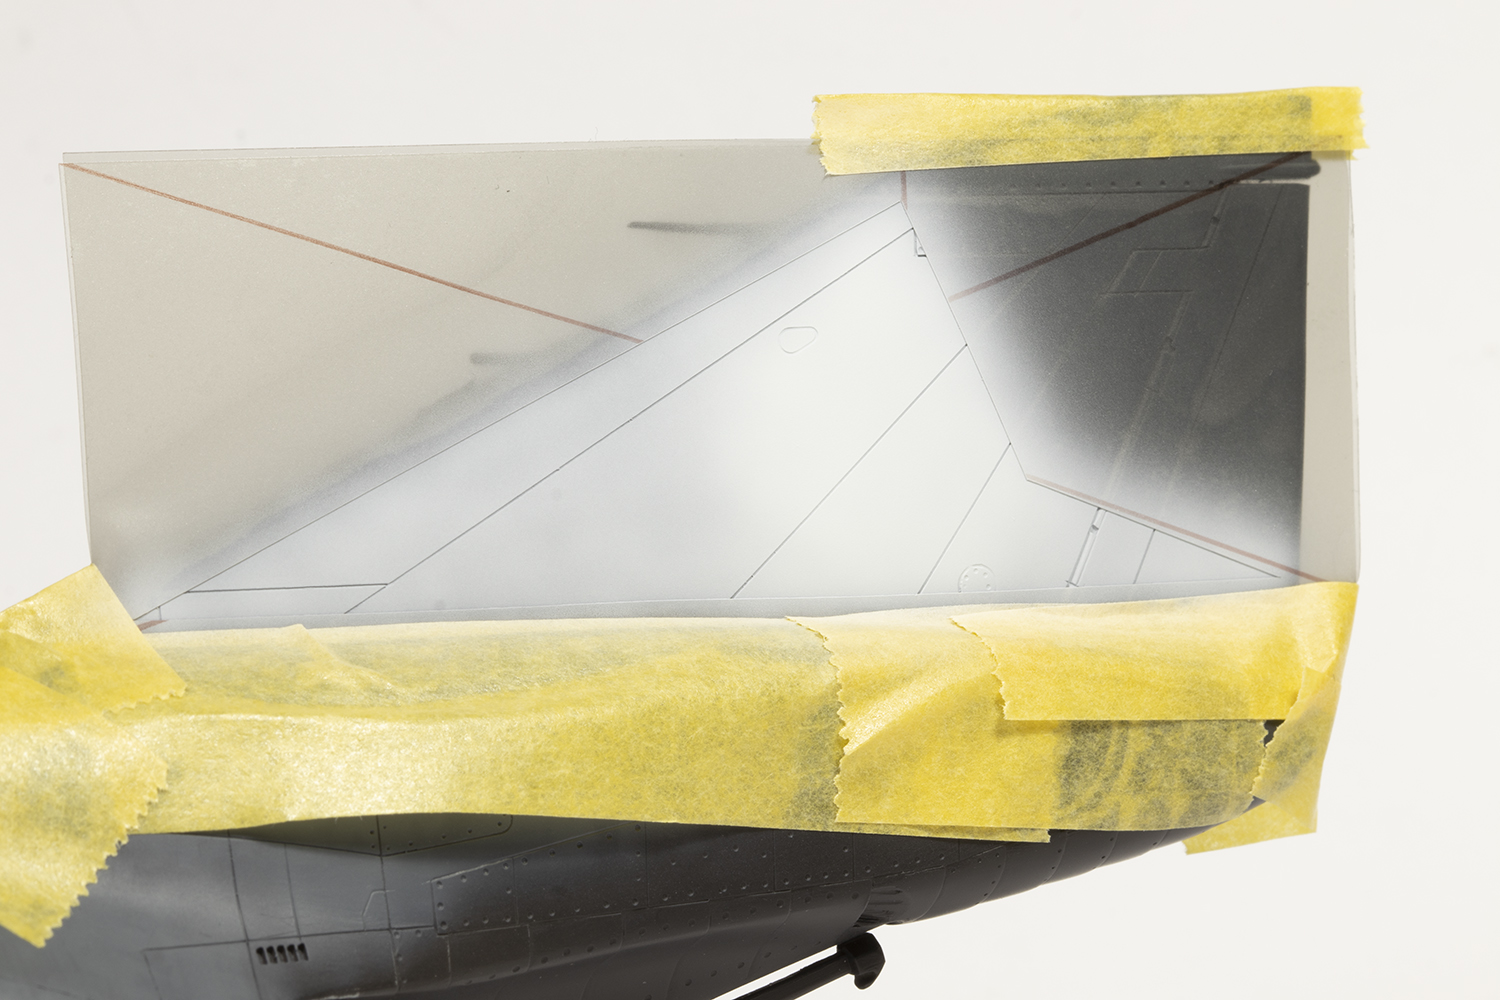
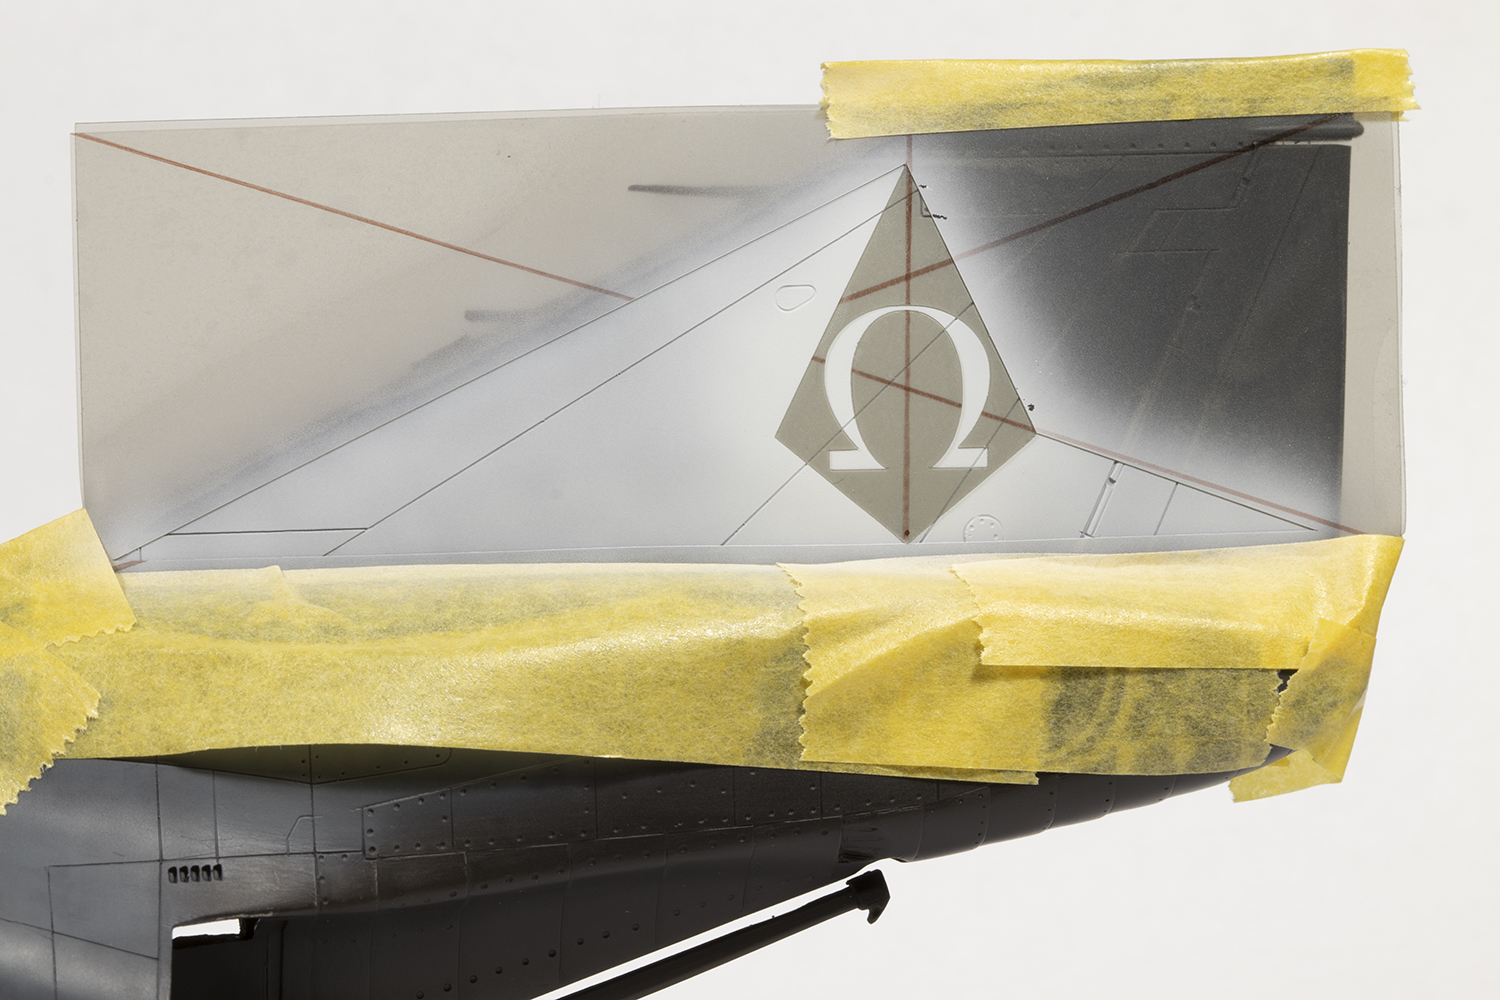
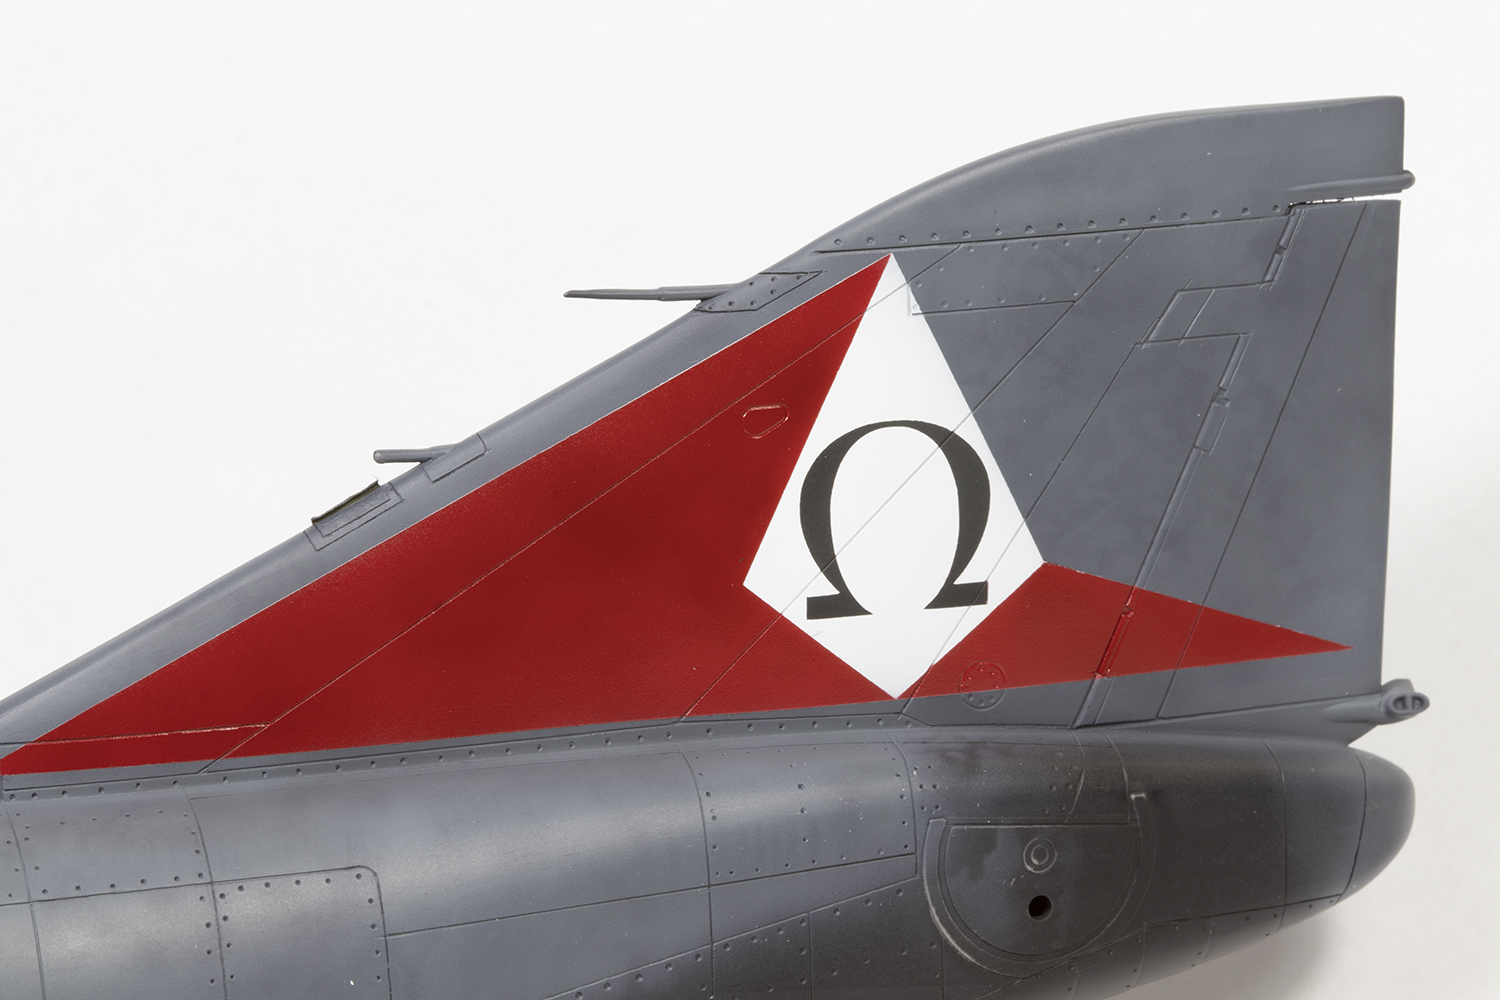
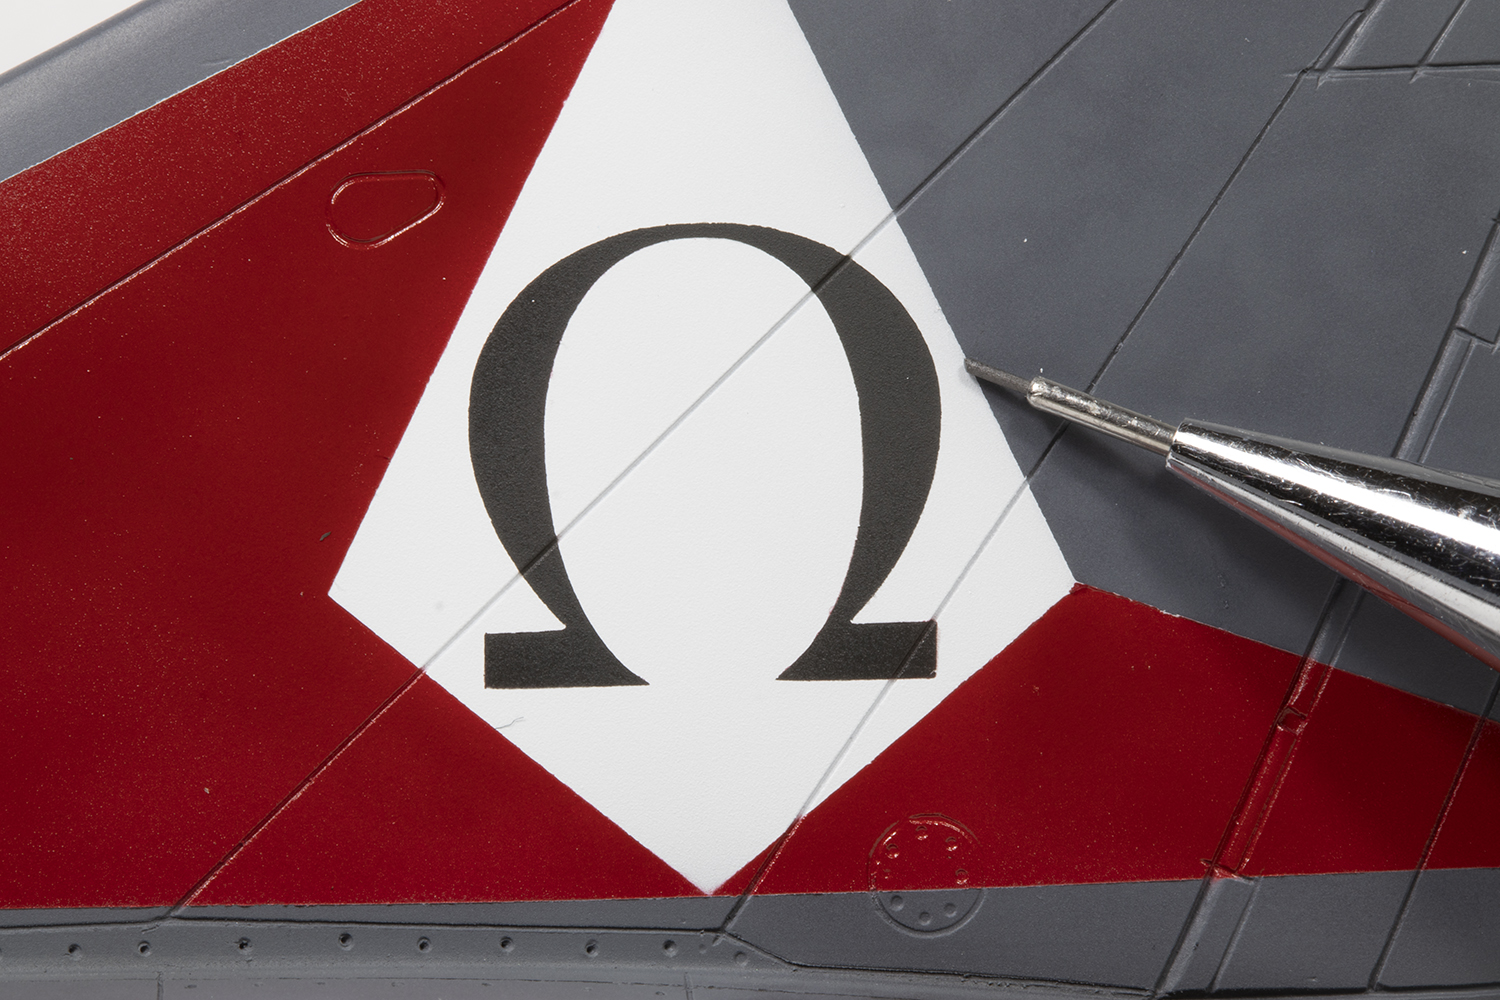
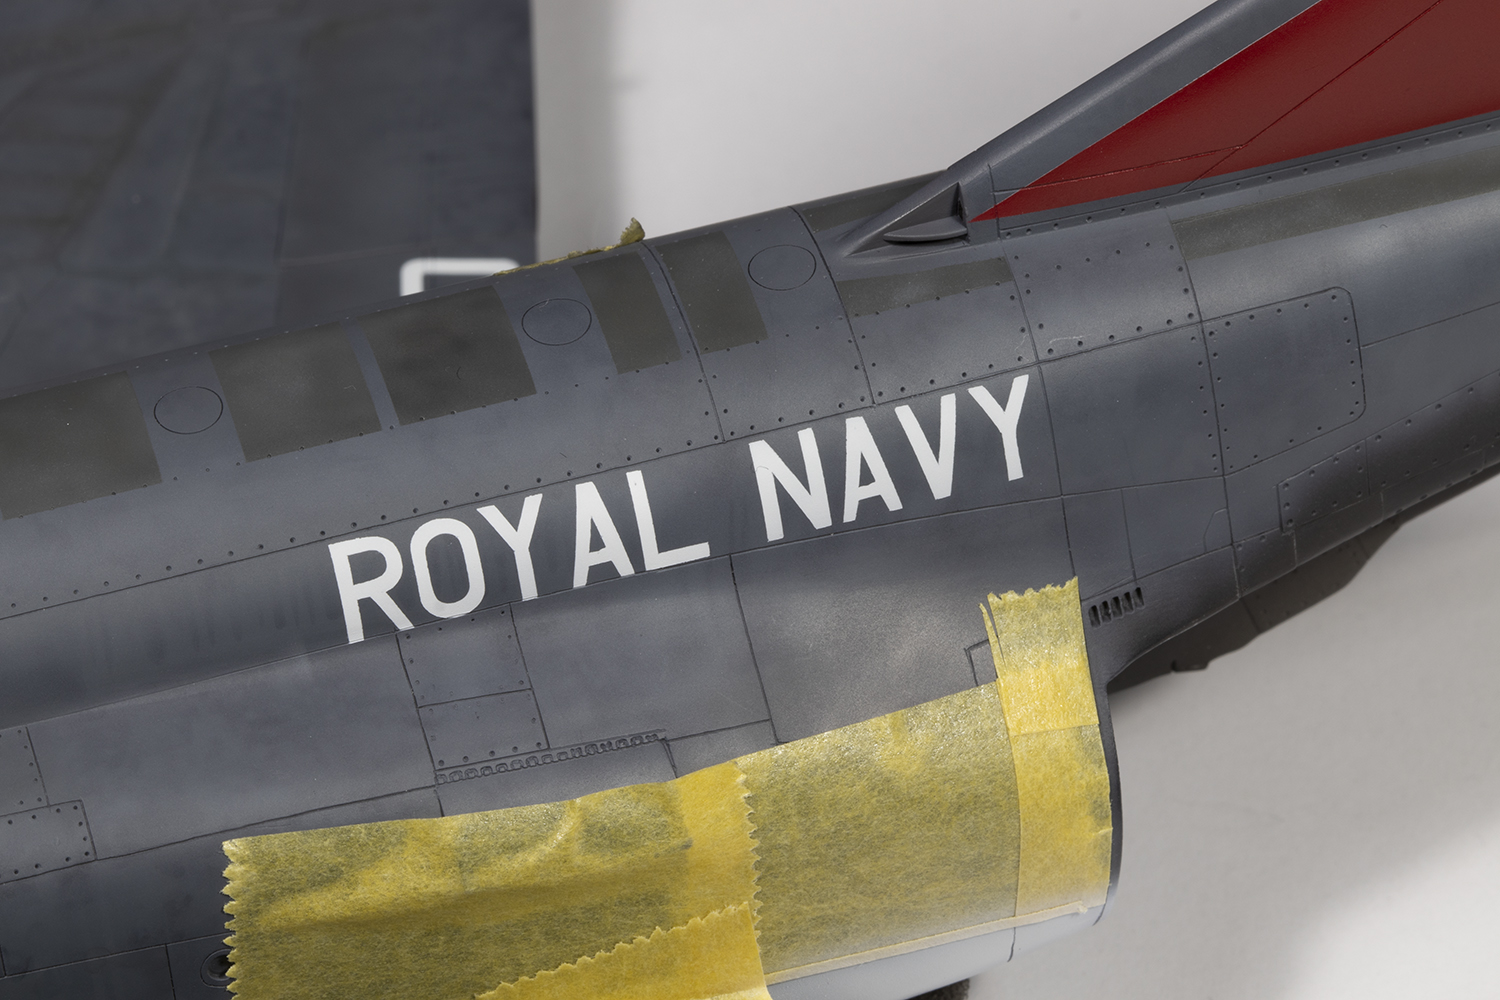
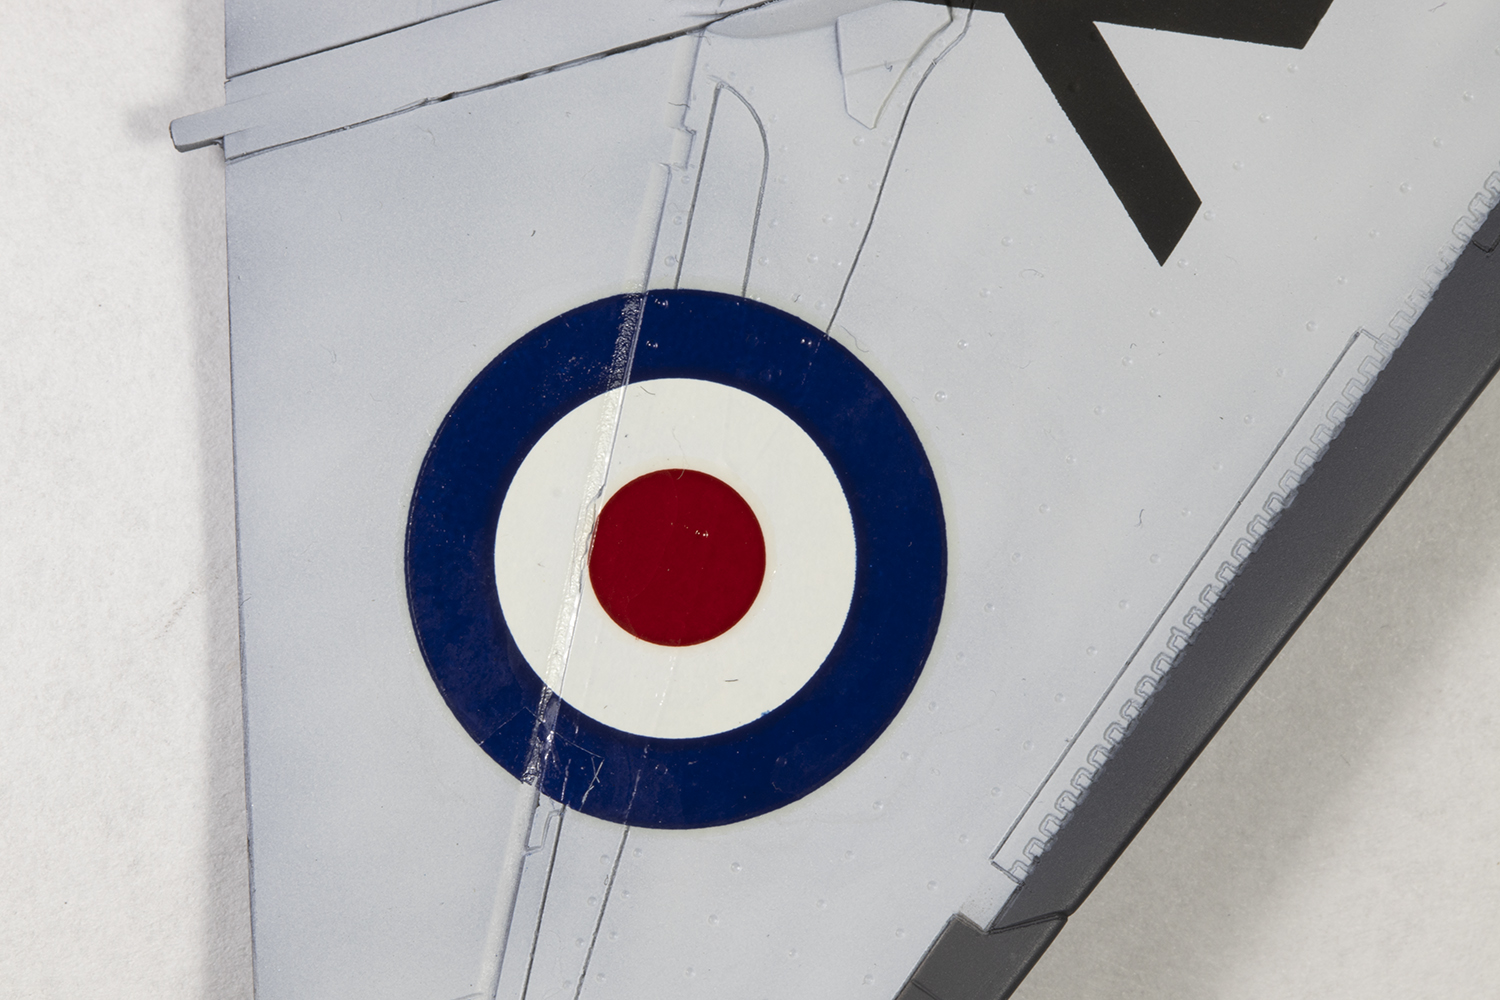
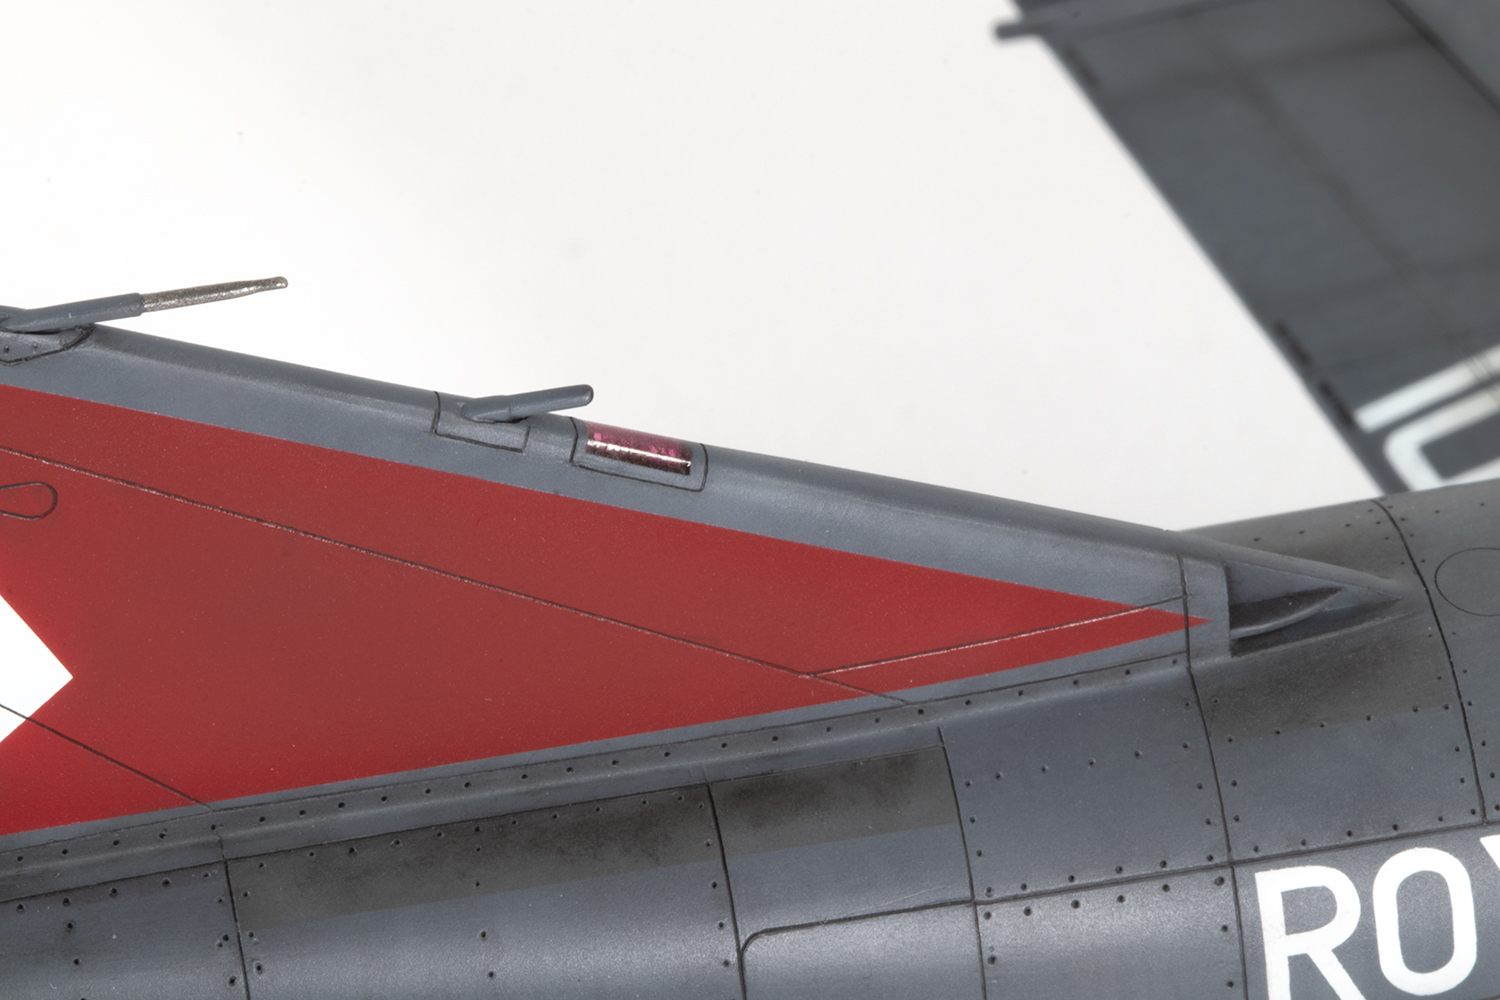
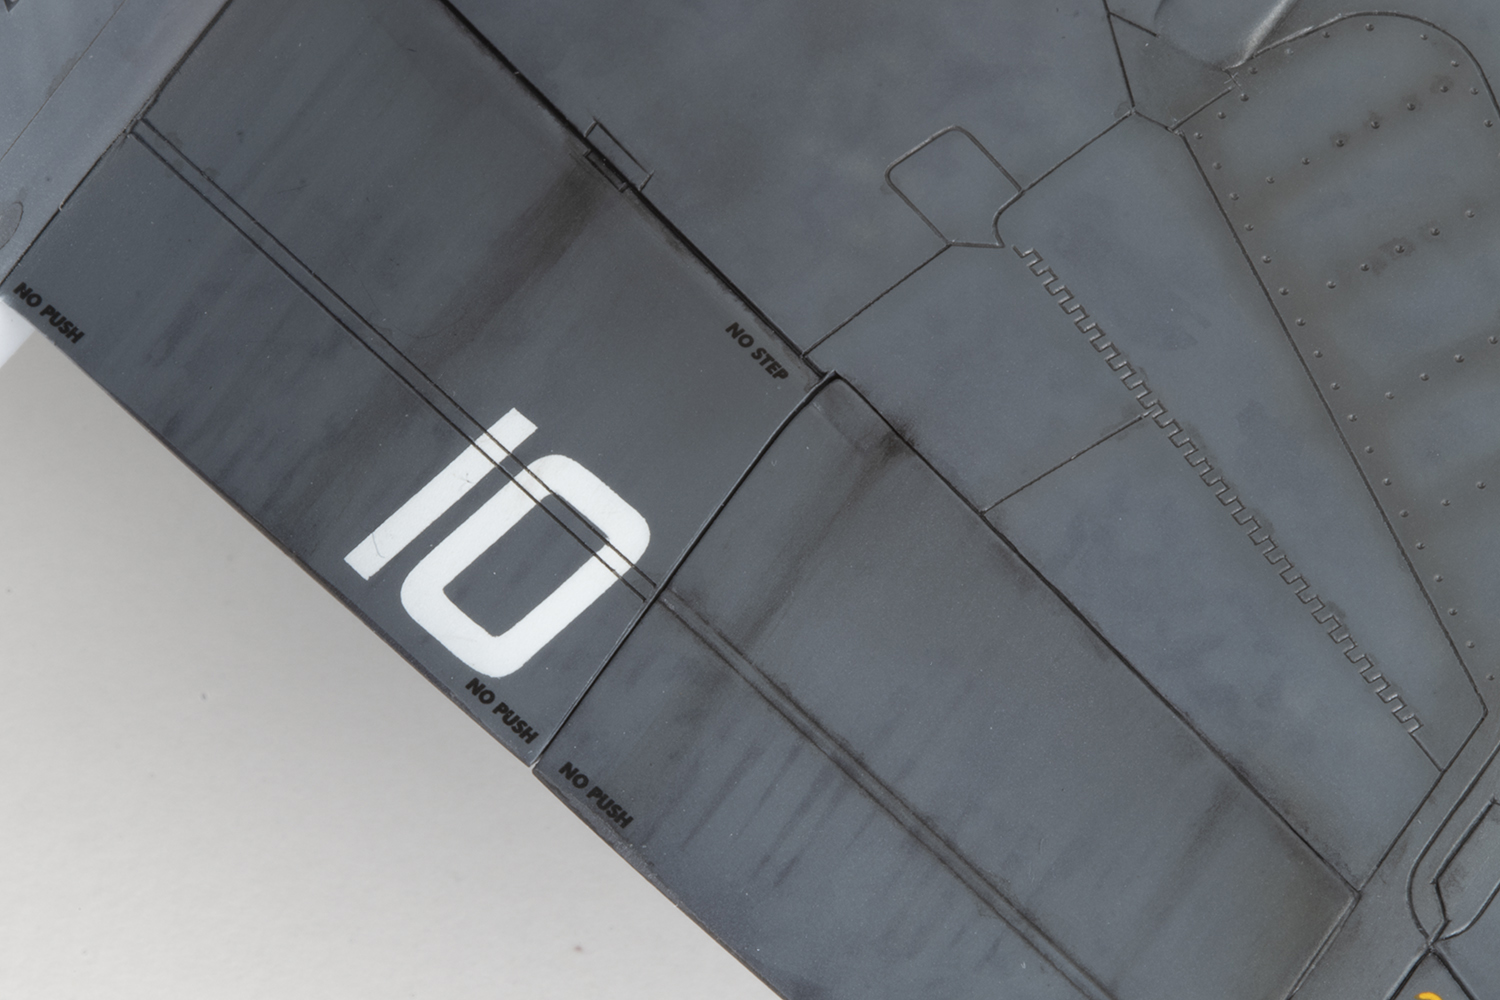
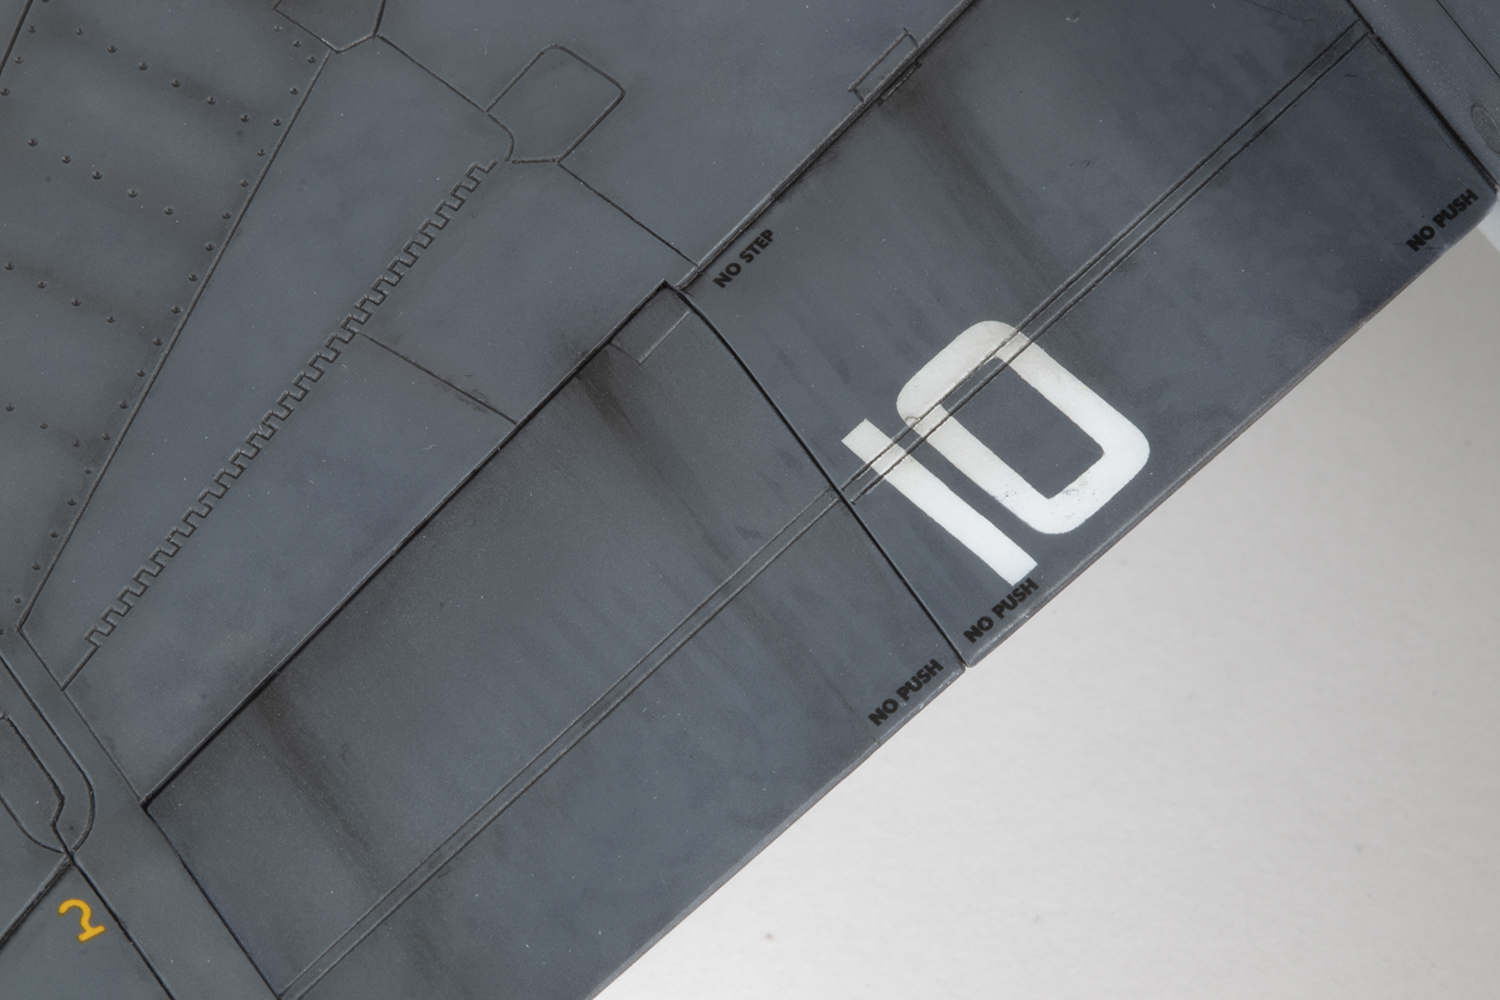
I decided I wanted to model XV588/010, which is not a decal option, but since I was going to paint most of the larger markings, making the change was easy. The decal sheet I had obtained was creased, which damaged a few of the markings, and this was a good excuse to create vinyl masks for the tail flashes, the ‘R’, ‘ROYAL NAVY’, ‘010’ and ’10’ markings. Doing this showed that Hasegawa had printed the tail flashes too big, so I proportionally shortened them by 3mm, and the ‘R’ was too tall, so I shortened it by 1mm. I simply traced the ROYAL NAVY legend, and therefore inadvertently recreated Hasegawa’s error in not getting the spacing between the Y and the A and the A and the V correct; they should ‘overlap’.
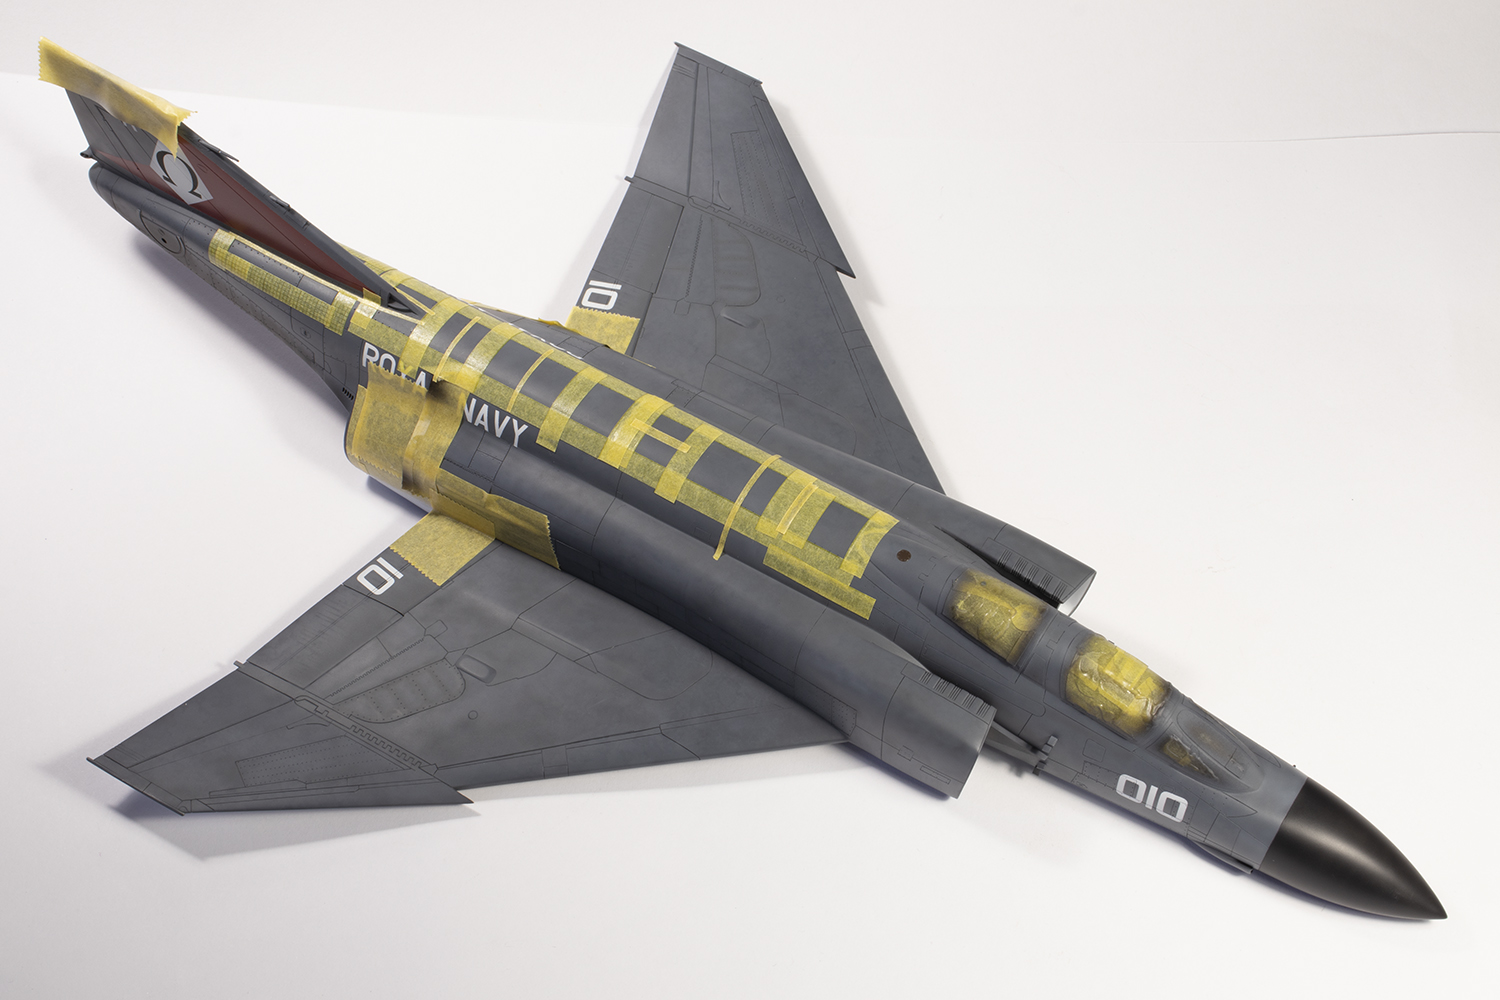
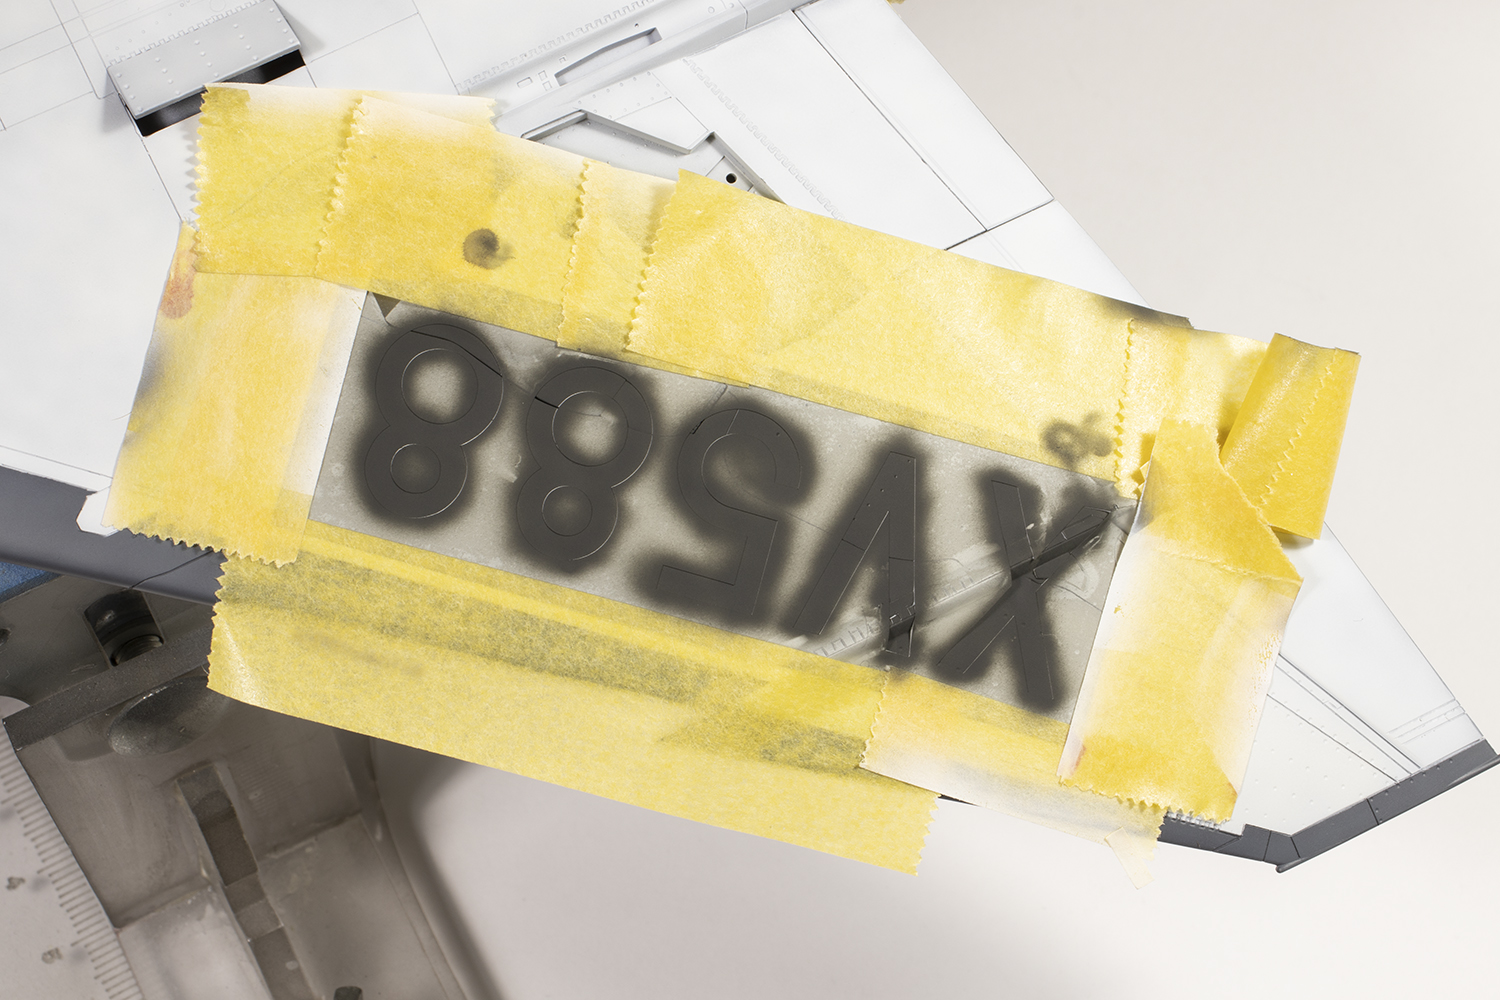
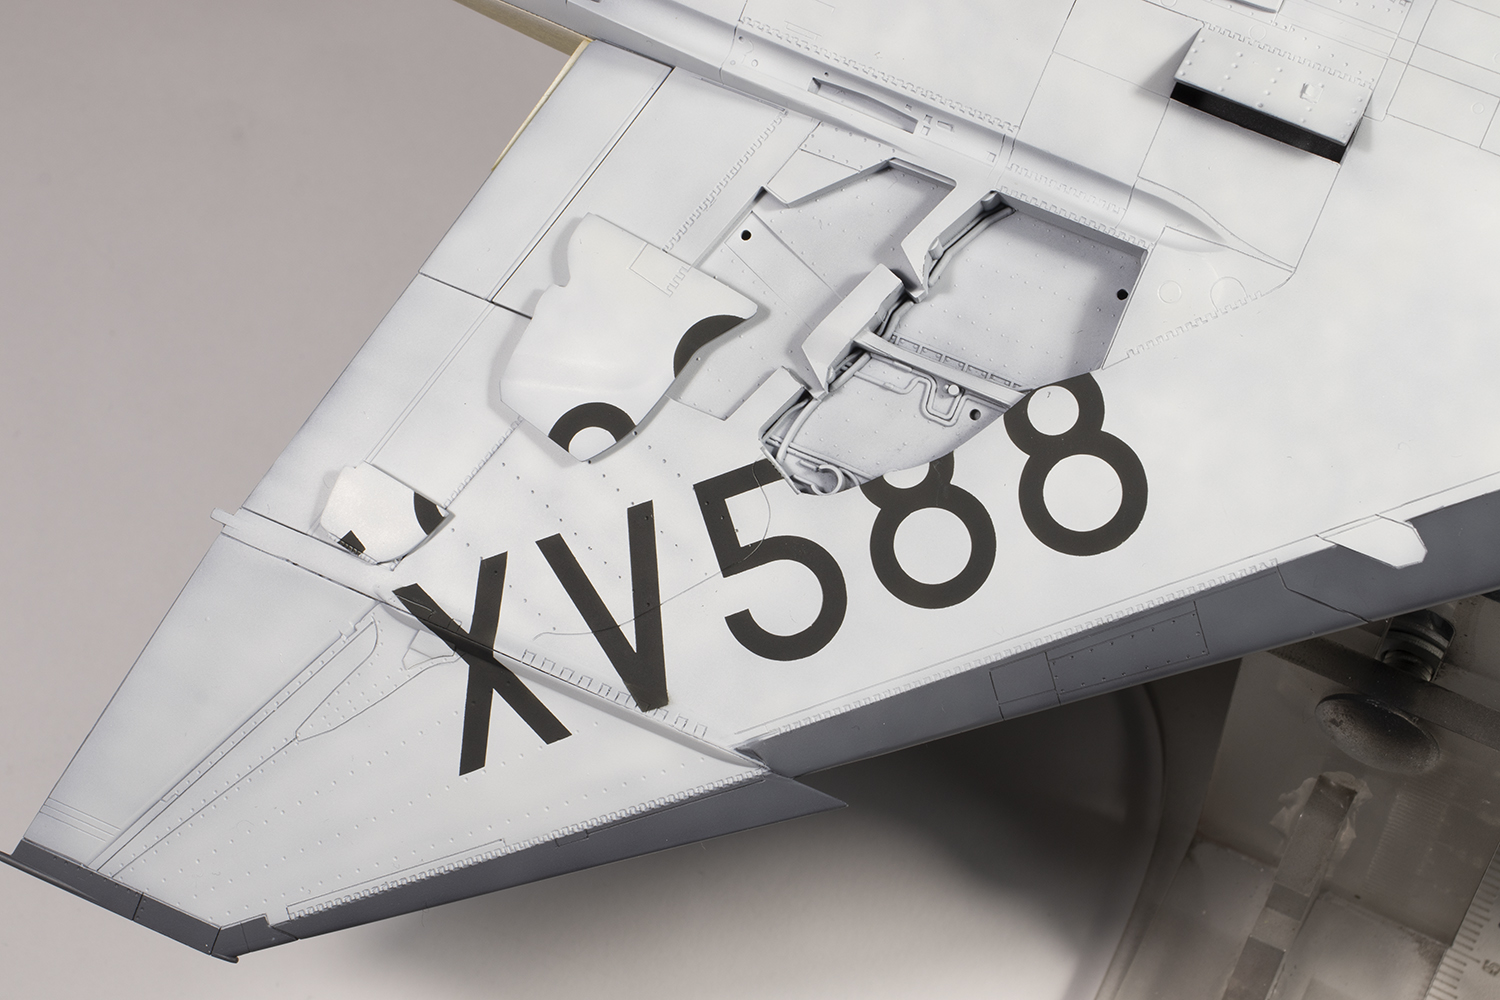
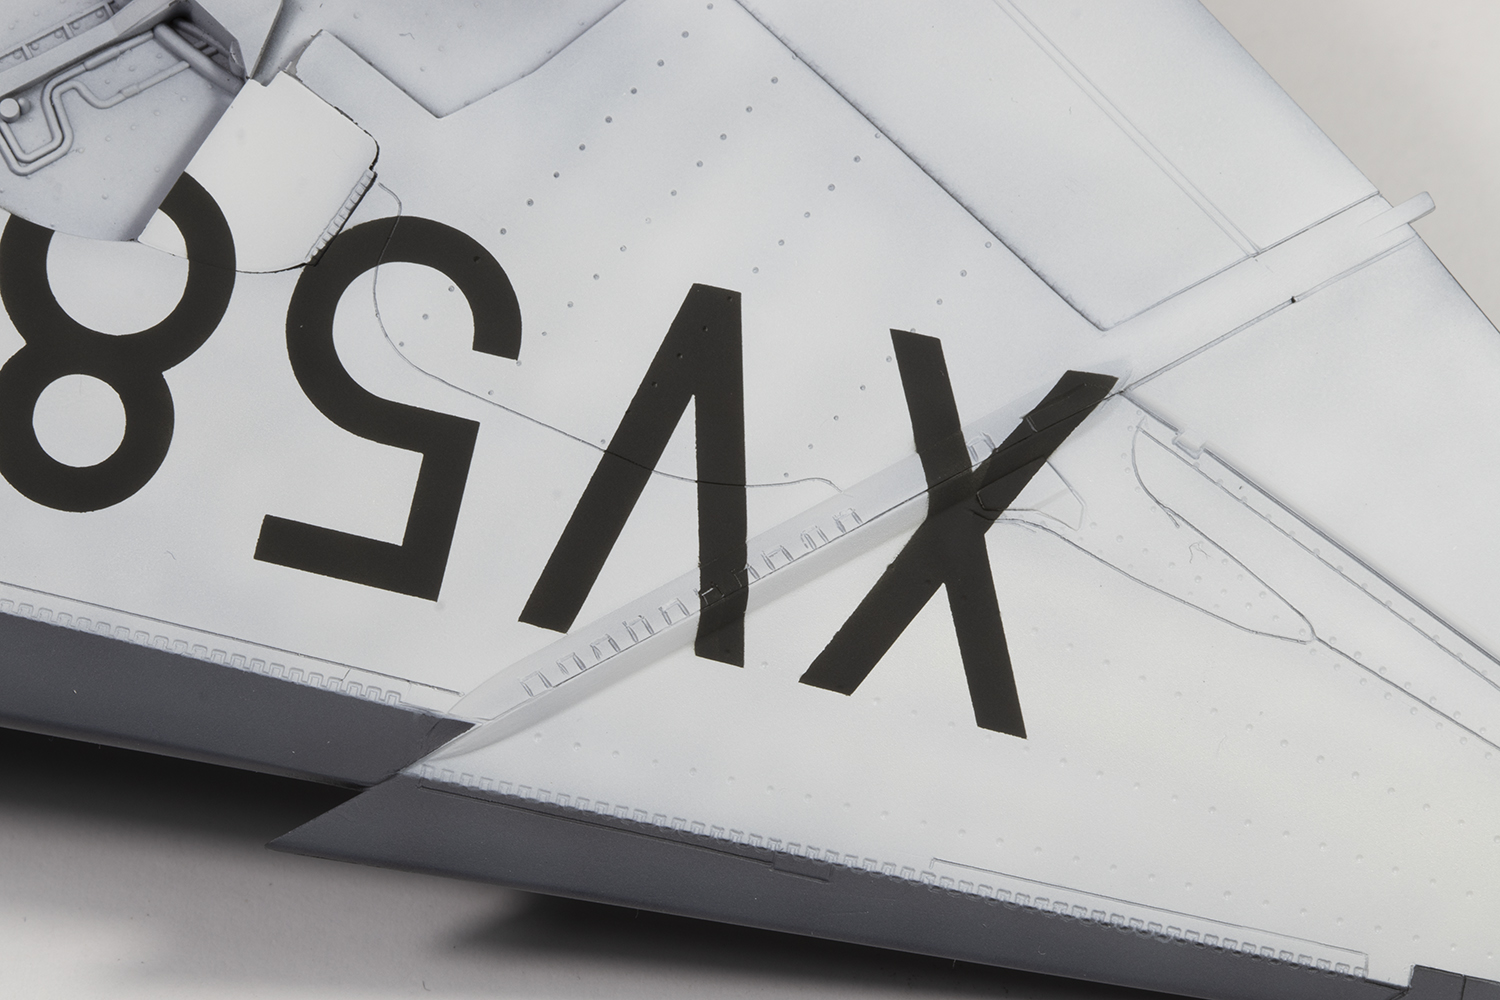
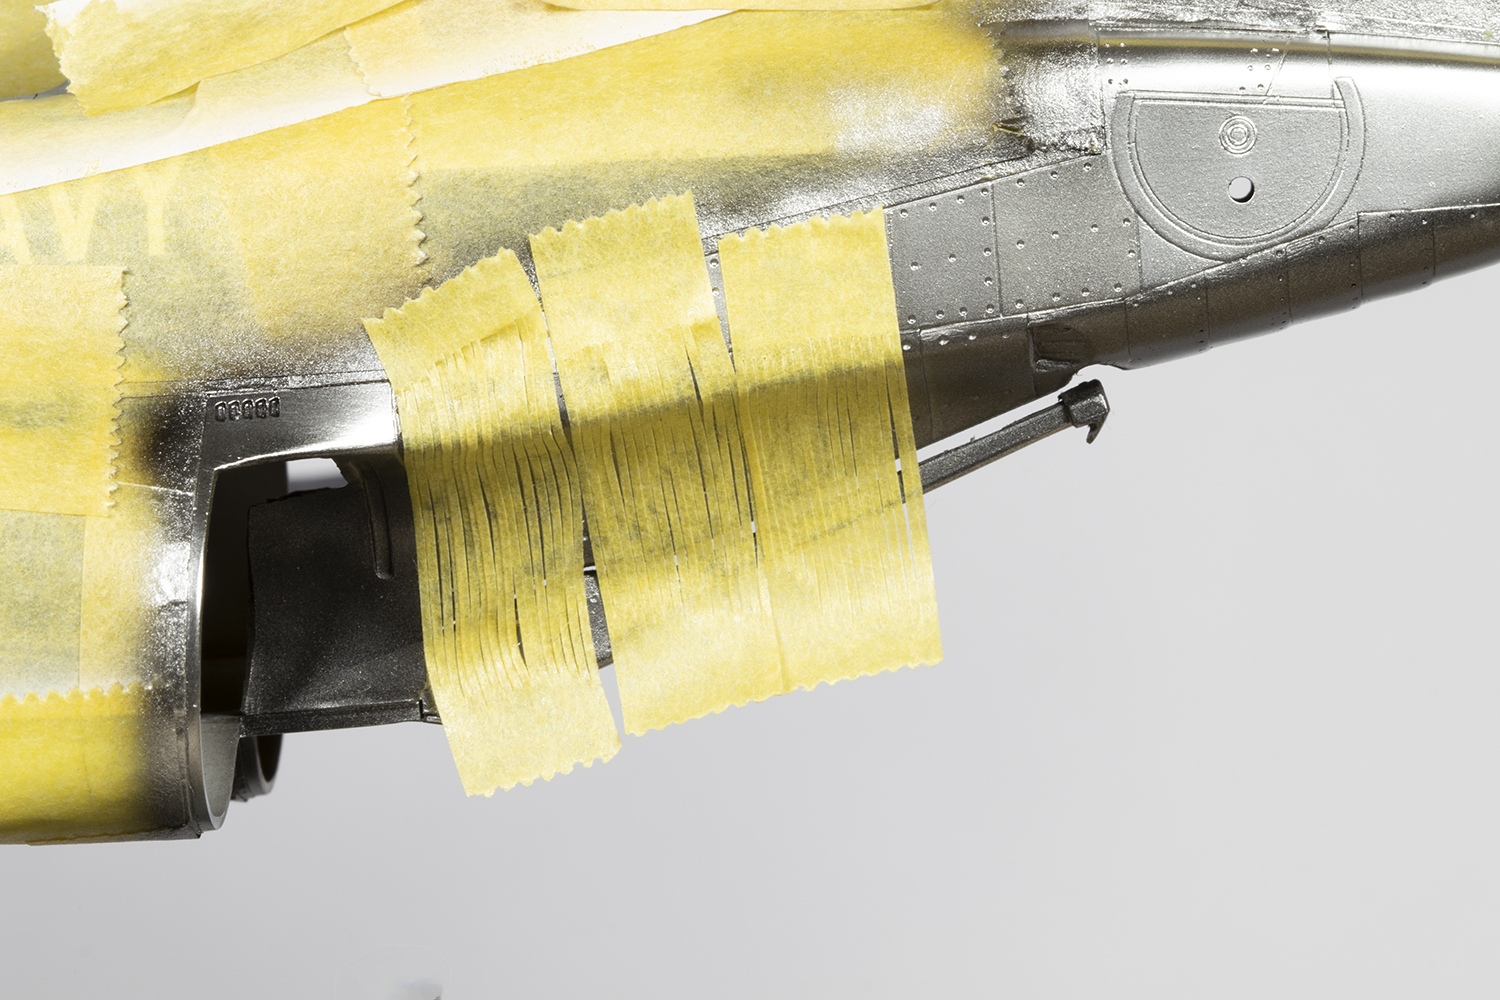
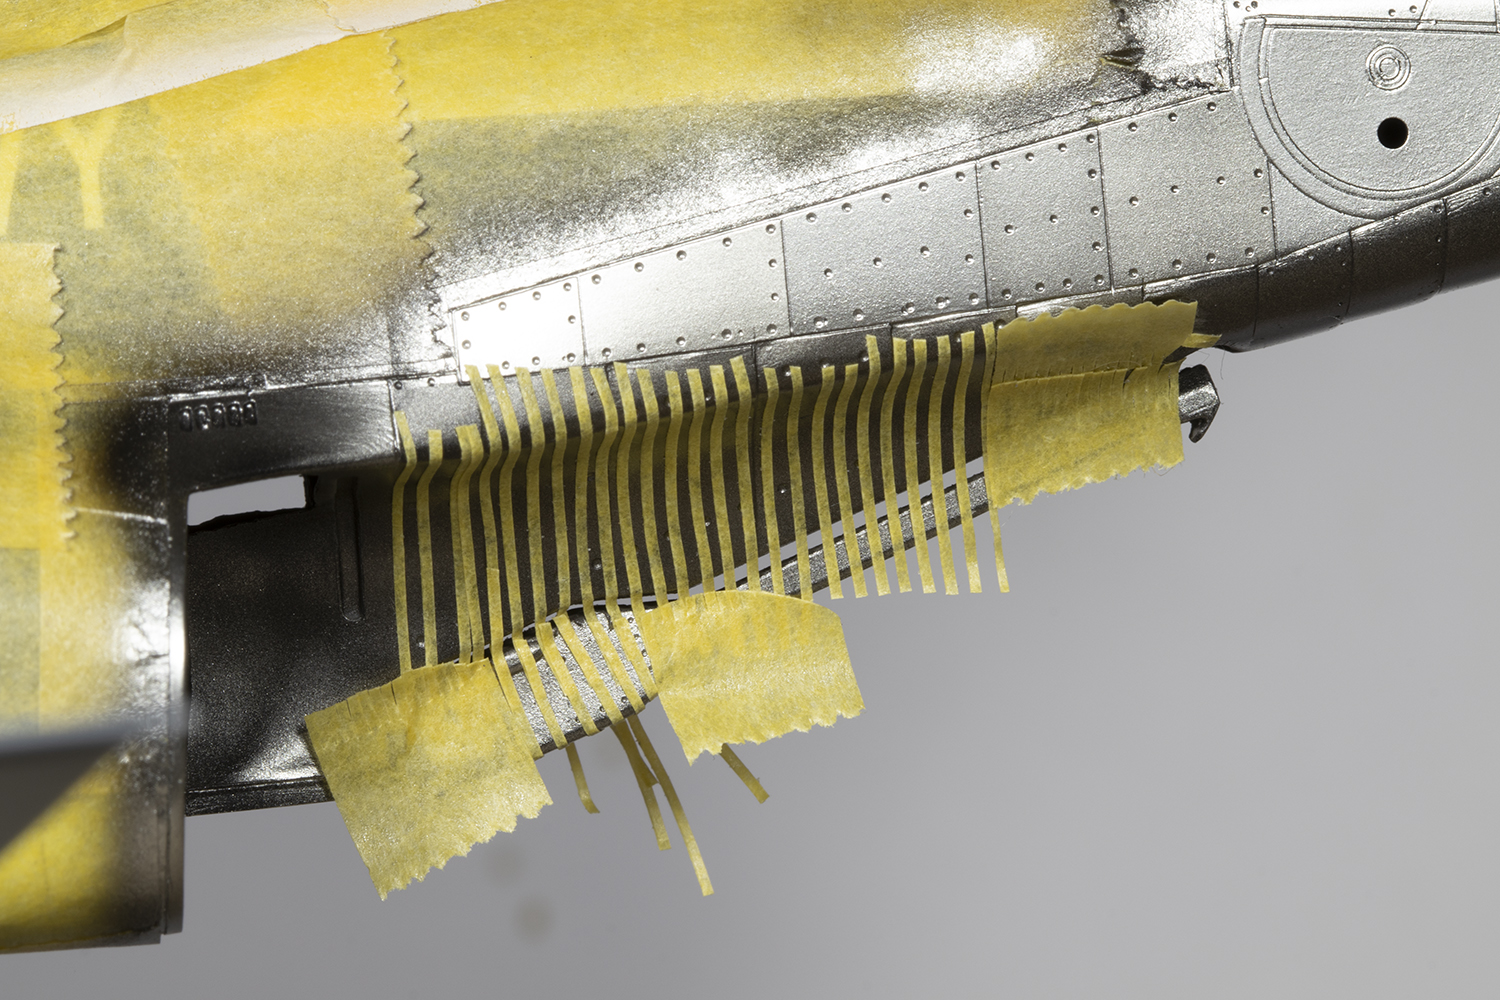
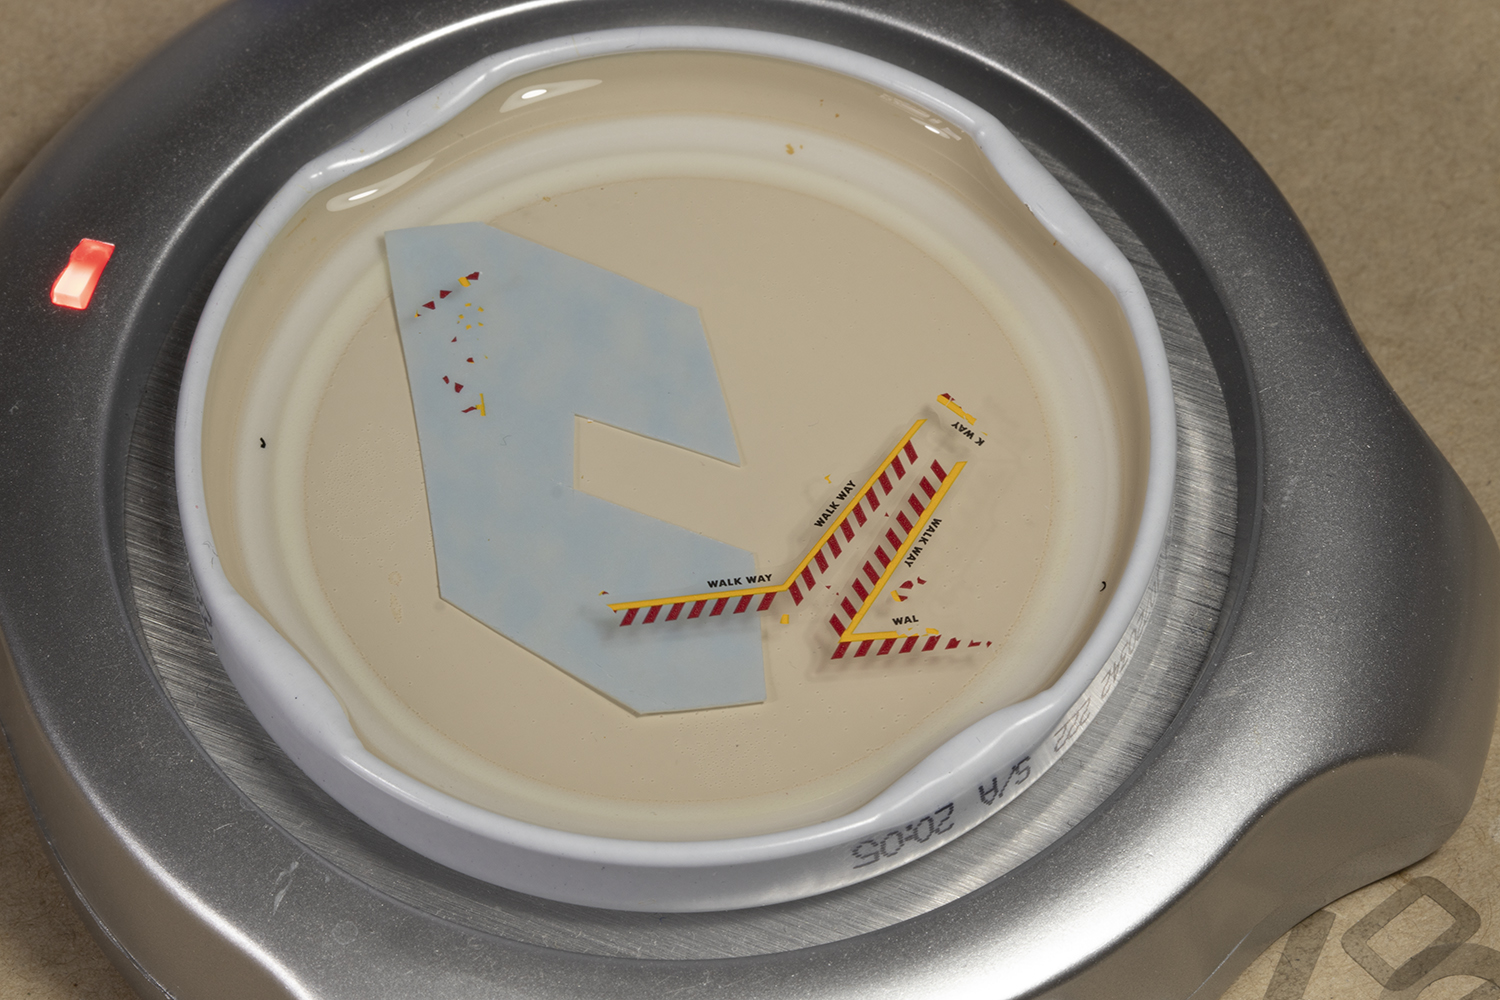
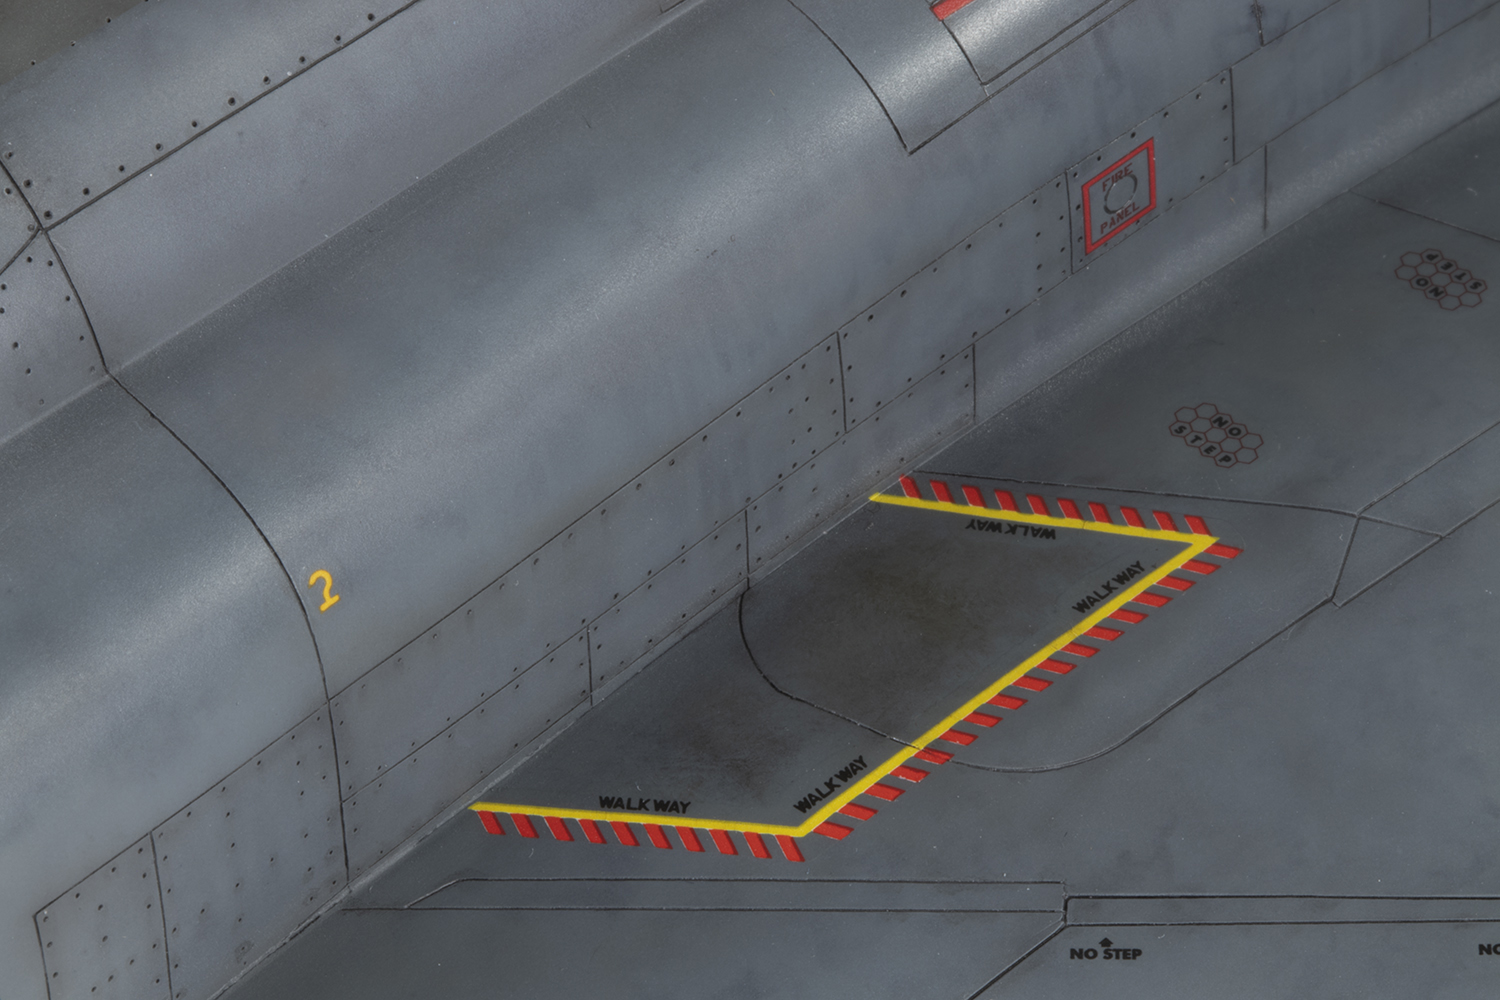
As I examined more photos, more variations and discrepancies came to light. The underwing serials were further aft on early machines, and overlapped the undercarriage doors. Getting the vinyl masks I made to conform around the wing fold was a challenge, and required very careful spraying with Tamiya XF-69 NATO Black whilst pinning down bits of the mask that wanted to lift with tweezers. Hasegawa provide walkway decals for the tops of the intakes, but I couldn’t see this in photos and simply masked and painted those along the top of the fuselage.


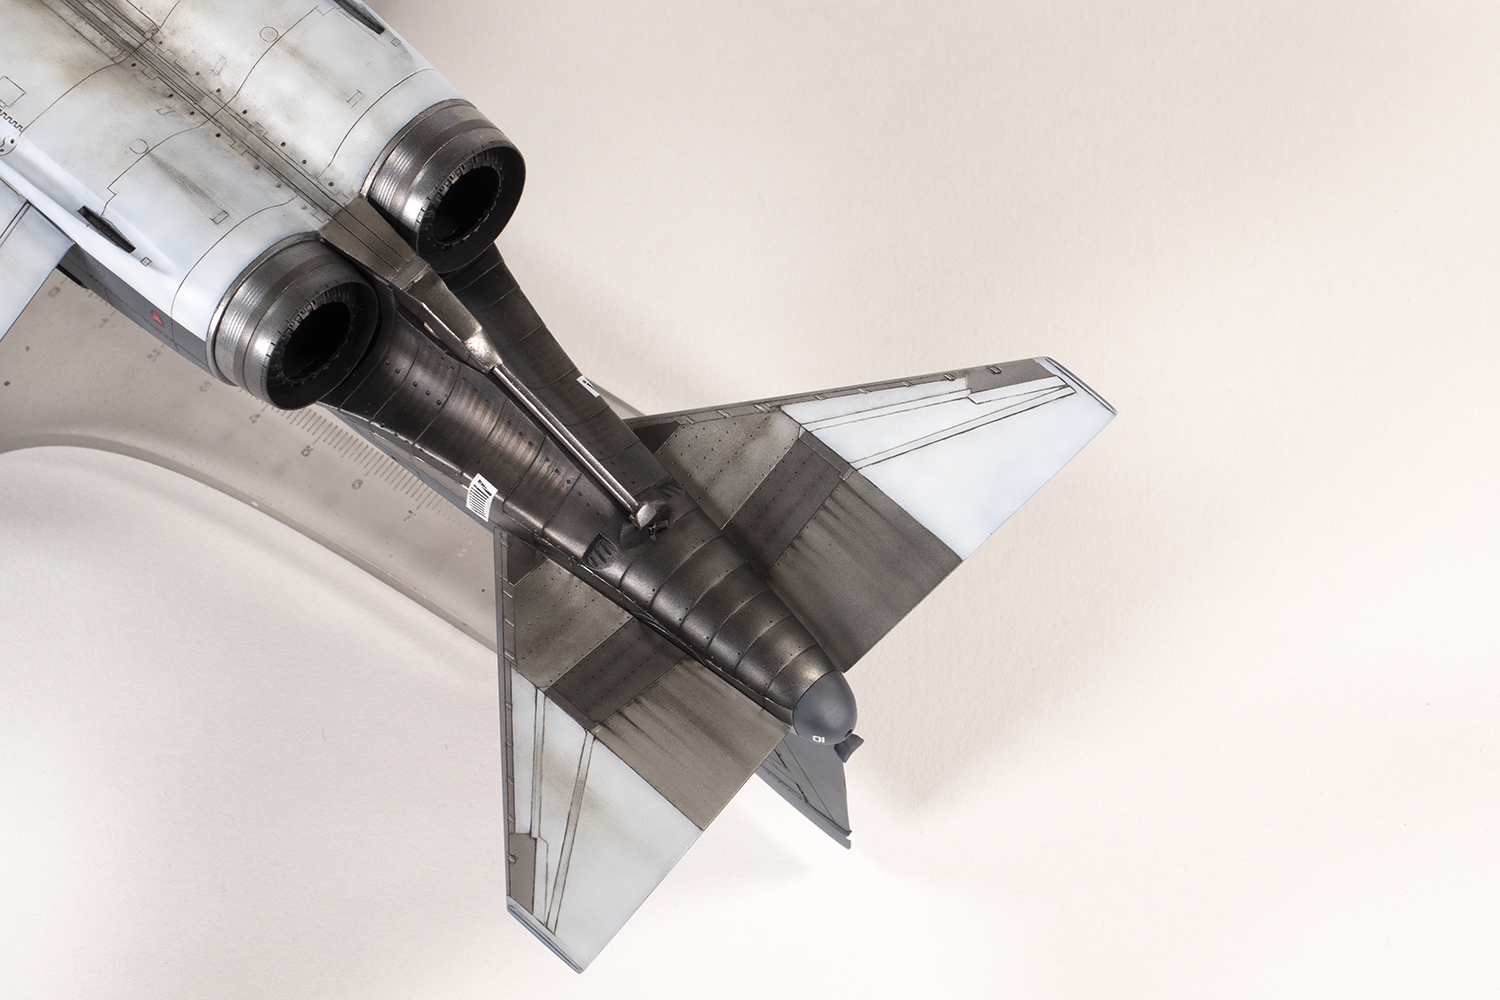
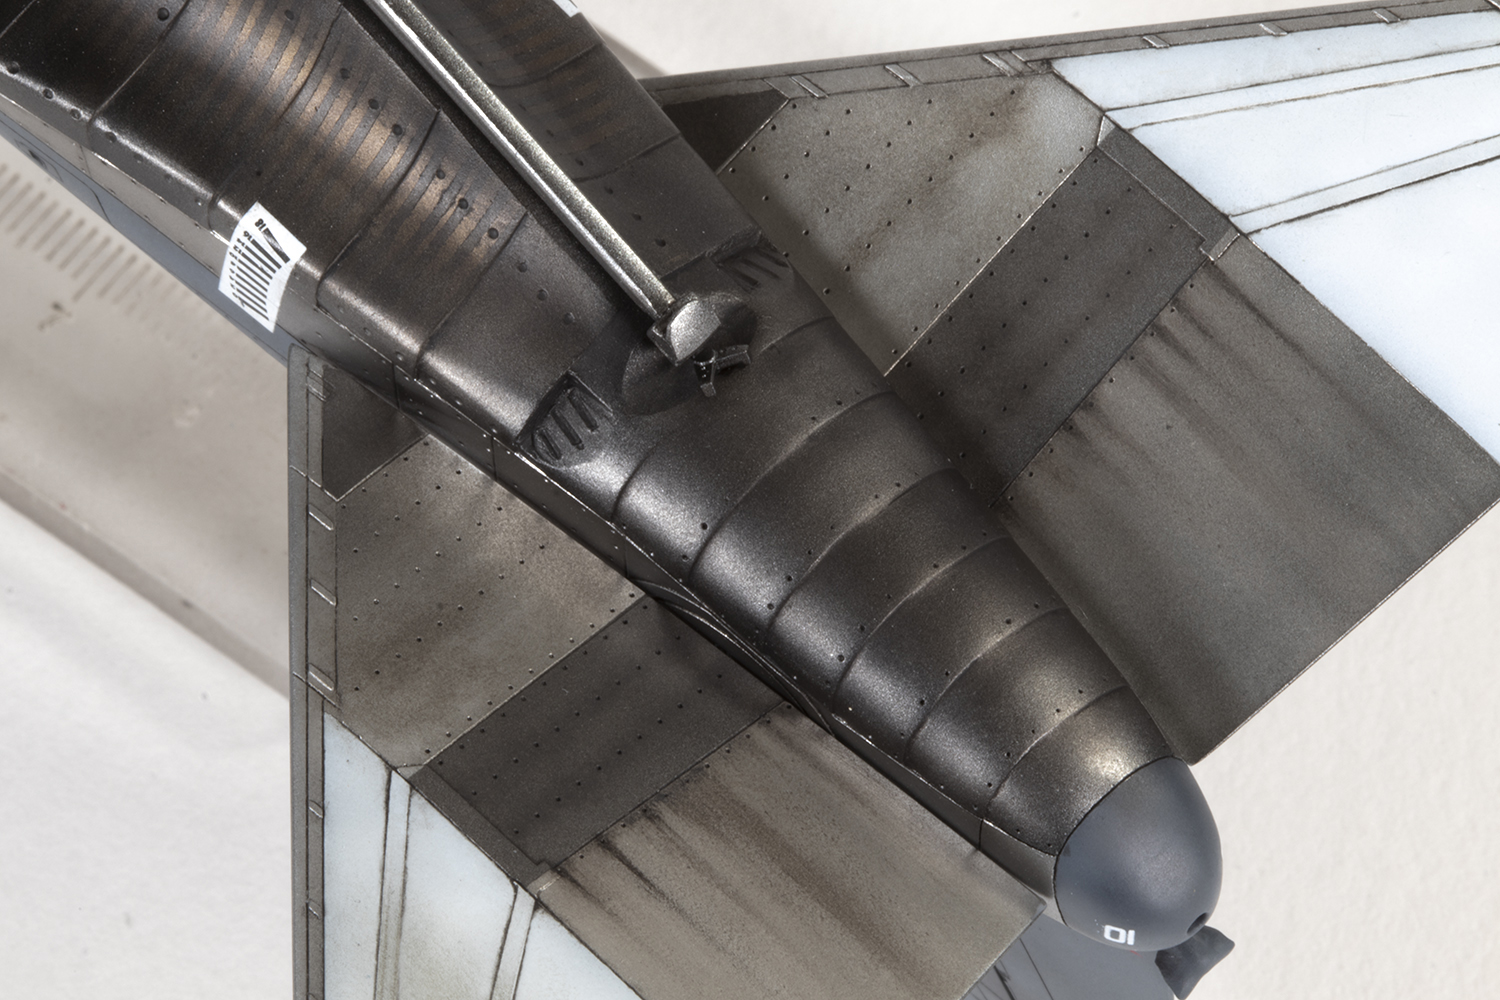
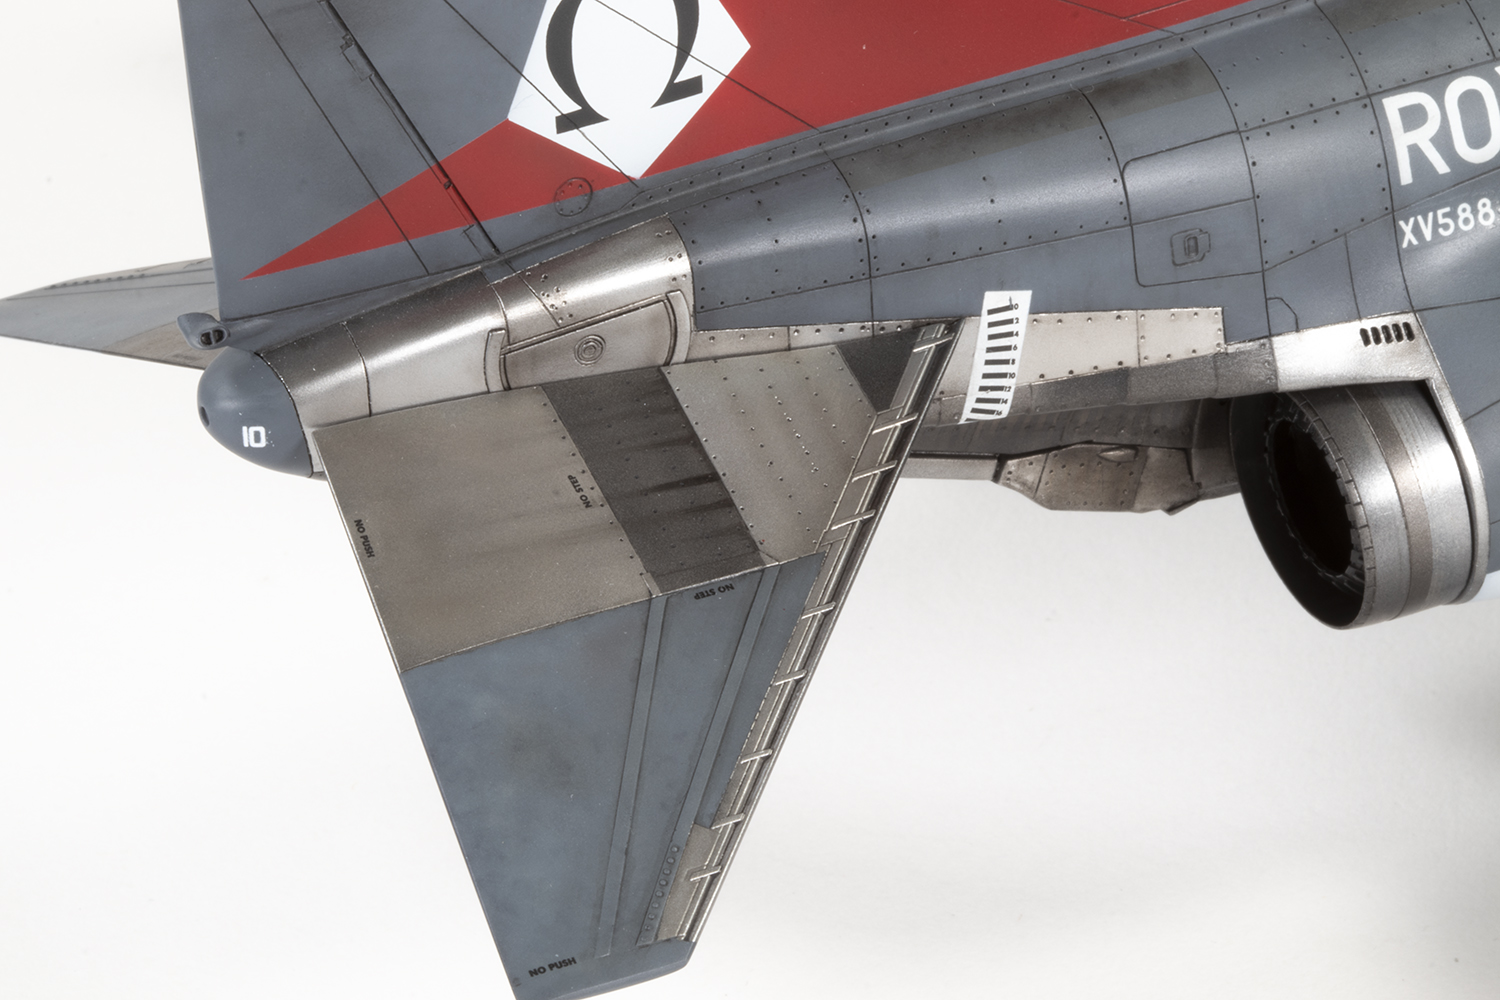
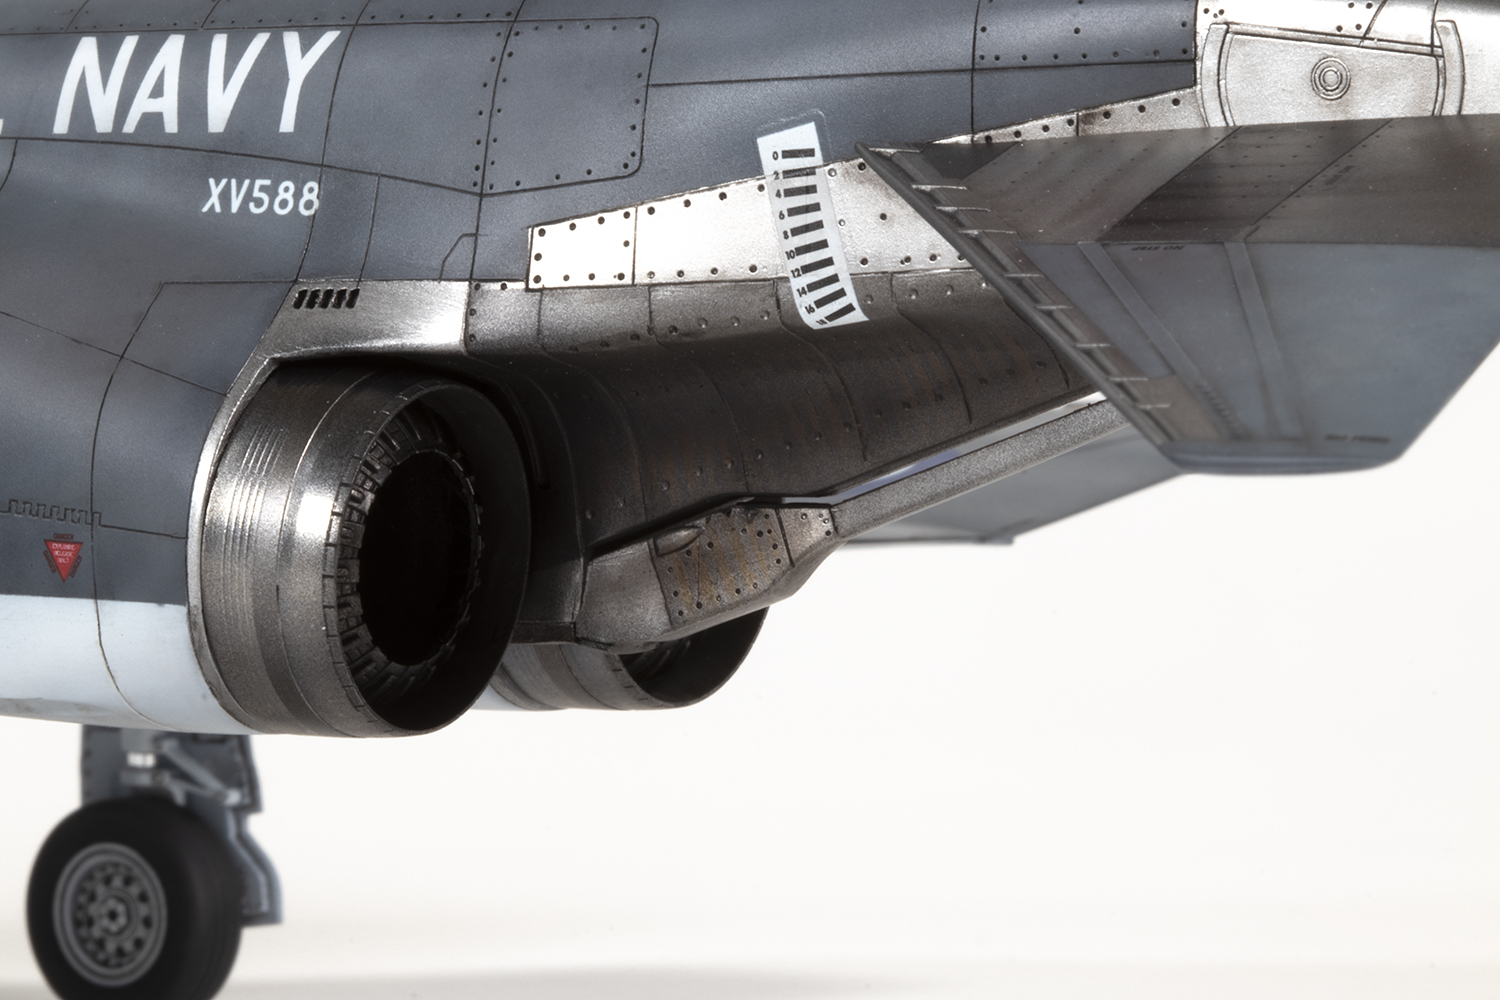
The metallic rear end of Phantom is a distinctive feature, but I’d always been ignorant of the subtle variations in colour, especially the vertical lines that appear along the keel behind the exhaust. For the first time I made an attempt to represent this, using thin strips of Tamiya tape and a brown pale burnt metal shade over the Alclad Steel. I didn’t get the colours right, and the stripes are too harsh, but I think it’s something I’ll try again on the two F-4s I’ll build later this year.

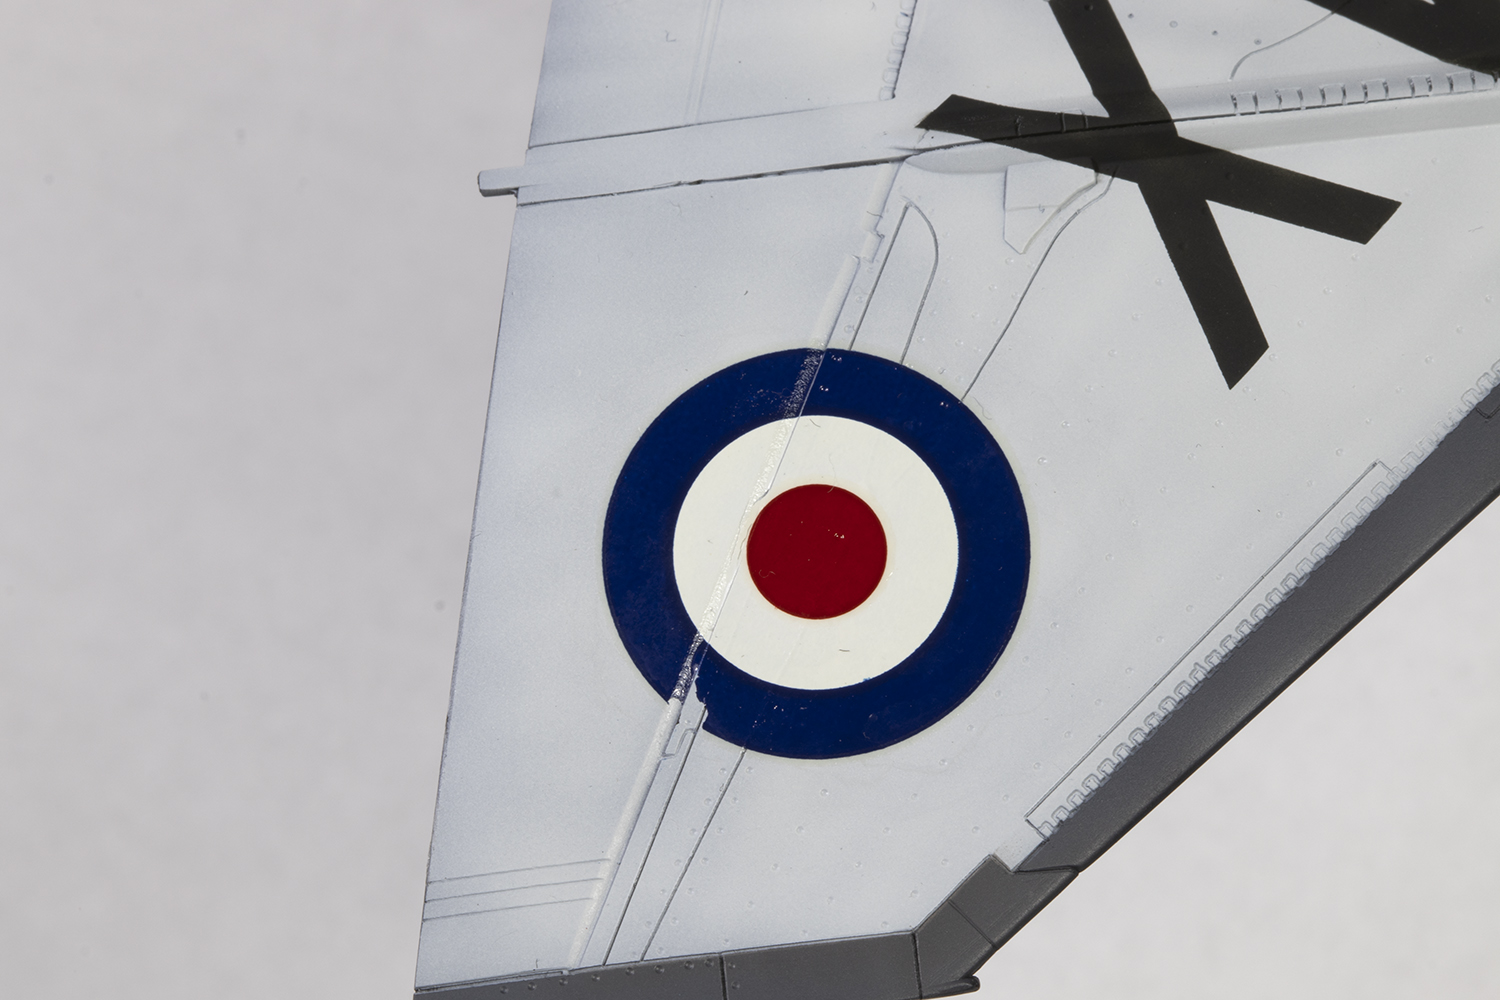
Whether to gloss or not prior to decalling is one of the major modelling controversies of our day, and I’ve landed squarely in the ‘no gloss’ camp simply because I hate spraying clear coats. As the aftermarket decal world has sadly neglected 892 NAS Phantoms, I was forced to use the Hasegawa stencils, which were far fewer in quantity than provided in the initial release of this kit (lots are obviously missing from the undersides), and some broke up in the water. Those that remained intact had the advantage of settling into the detail very well, and the disadvantage of being unbelievably thick. The roundels came from an old AeroMaster sheet and despite using Micro Sol, UMP Extra Strong, Daco Red and Mr Mark Softer, refused to budge. The fuselage serial was created by cutting up and rearranging Hasegawa decals, and the 10 on the tail cone is an inverted 01. It’s also too small.

The tonal variation I’d created with the paint was amplified with various shades of ABT502 oil paints worked directly into the paint, both thinned with AK Interactive Matt Effects Thinner as a wash, and neat from the tube. I know many won’t like it much; I do.
I made a cursory attempt to deal with the thick decal film by flooding them with Tamiya X-22 Clear Gloss and overcoating with VMS Satin Clear. This did not work, but resulted in a patchy not-too-glossy-not-too-matte finish which I was prepared to live with.
The end of a project was rushed, as usual, as impatience got the better of me. I installed the undercarriage, sans wheels, with Tamiya Extra Thin, and once set tried to add the airbrakes cracked open. I’ve never had a problem with these before, but they just wouldn’t fit, and as I was forcing one into place my hand slipped and I sheared off the starboard gear leg – not at the joint, but halfway up the leg! Superglue came to the rescue, but it’s still a bodge job. At least the tailplanes are way better than Hasegawa’s other F-4s and, in addition to being nicely detailed, are a plug fit without needing any glue.
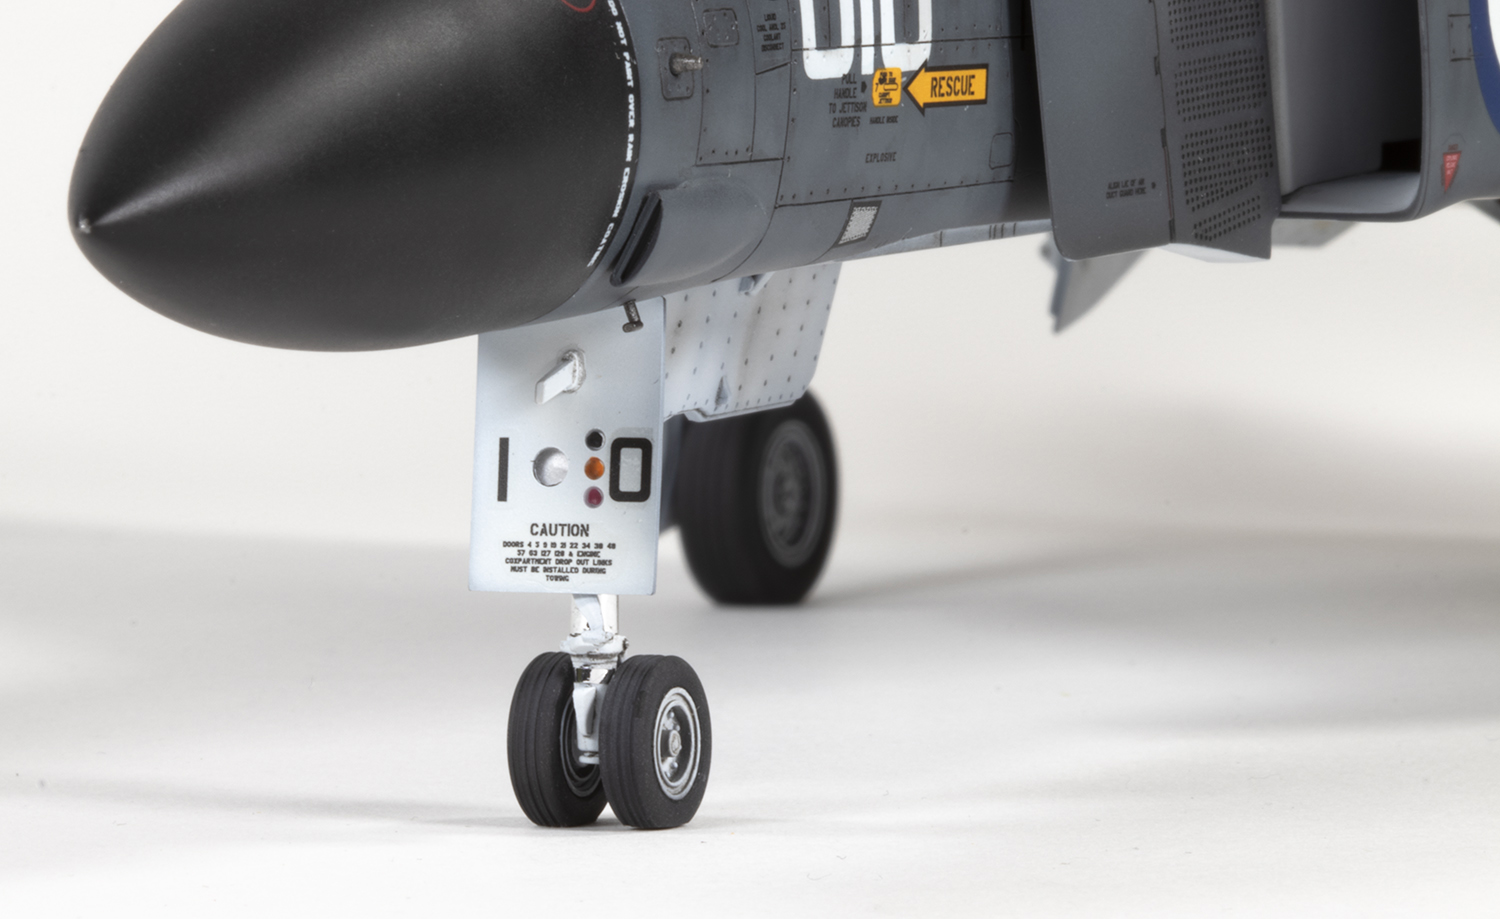
I used epoxy glue to attach the wheels and allow me set the flats flush to the surface, and when I was adding the gear doors realised the hubs to the main wheels should a dark colour, possibly black, and definitely not white. I couldn’t believe I’d missed this given how many photos I’d been poring over, and Hasegawa tell you to do it in the instructions! Oh well.
One last omission worth mentioning is that I sanded off the little barrier cutters moulded in front of the windscreen and nose gear well. I couldn’t think of a way of adding them back without it looking a mess, so they’re missing, but they could be removed from the real thing when not deployed on a carrier.
I had a lot of fun with this model, warts and all, and especially enjoyed painting the EDSG. As with all models, it has plenty of problems, but I’m glad I stuck with my original plan for an early RN airframe and I think the markings are fantastic. It’s a kit that’s ripe for a modern replacement, but in the meantime it’s not a bad place to start from.


Year bought: 2003 (Universal Models, Hong Kong)
Year built: 2023 (New Addington, Croydon)
Back to home.
