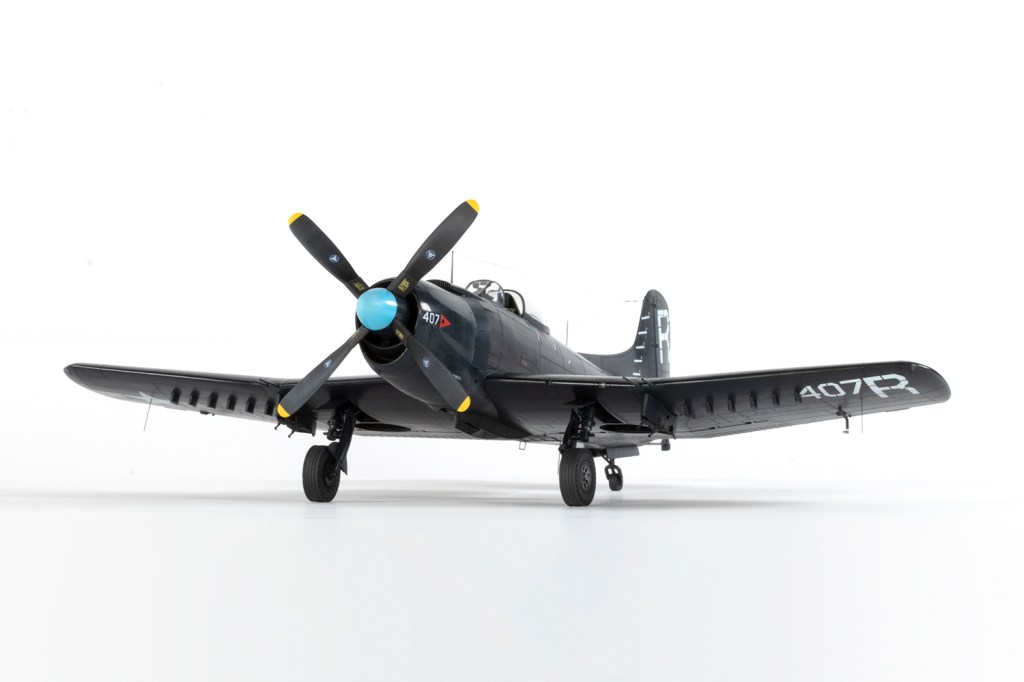
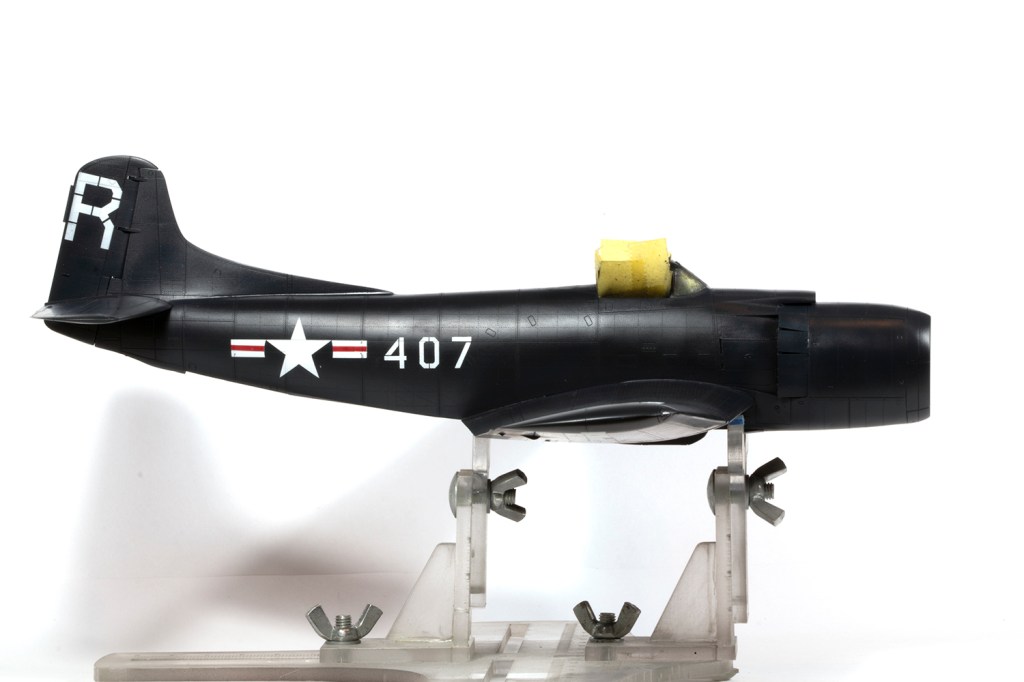
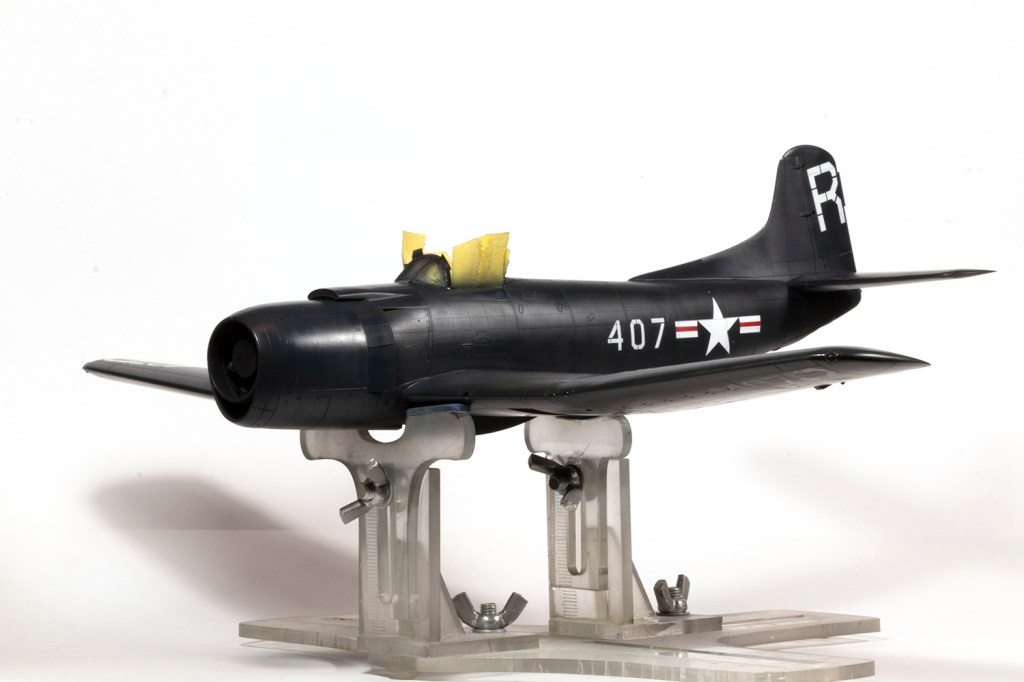
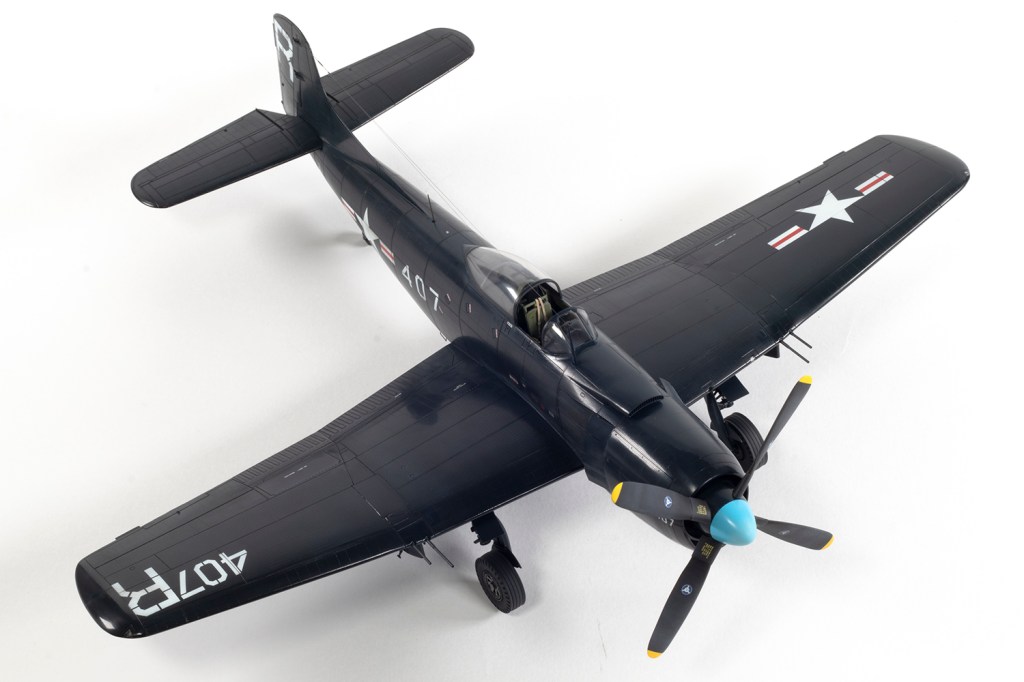
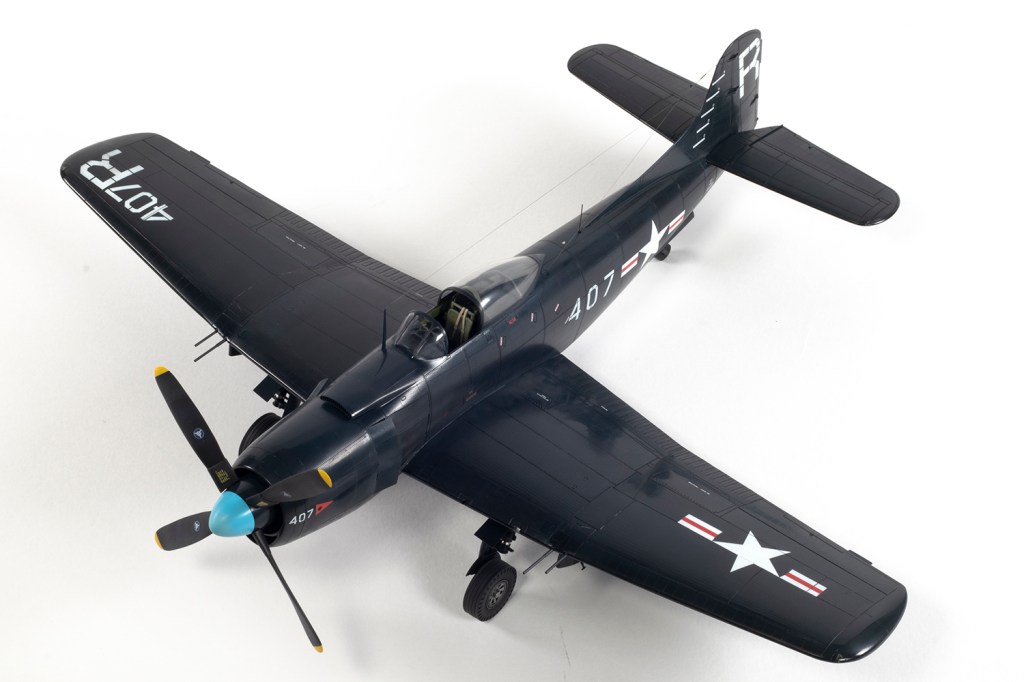
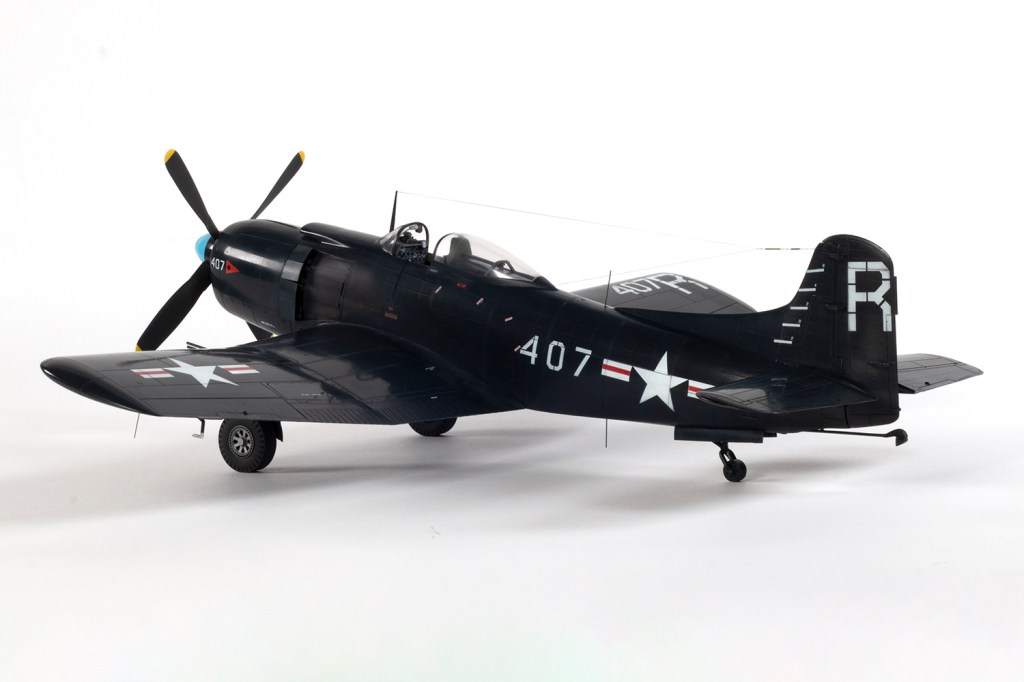
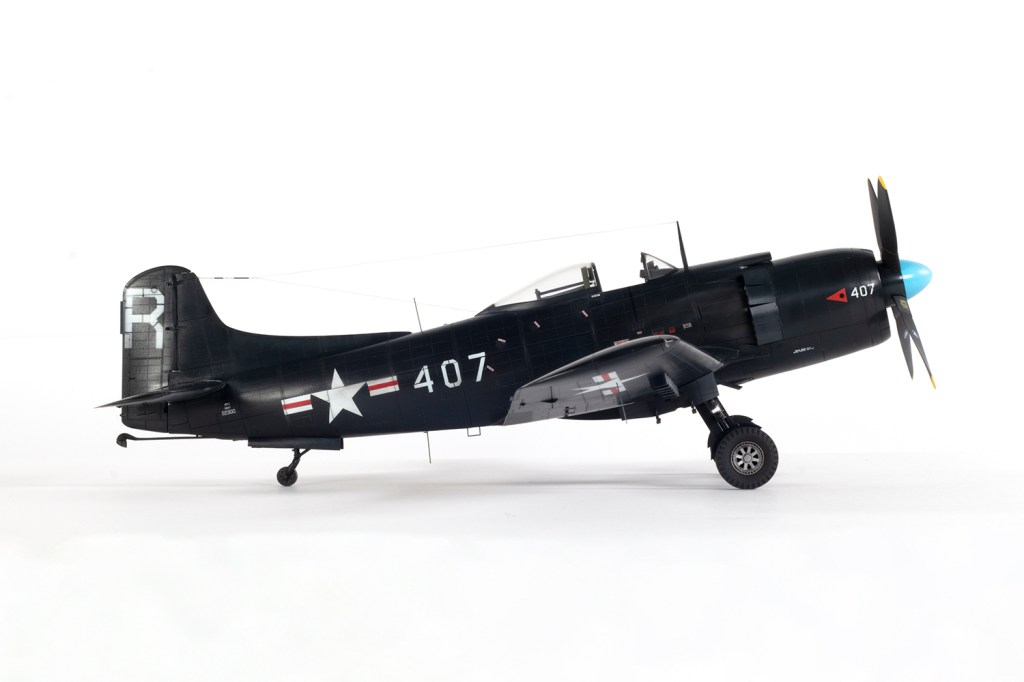
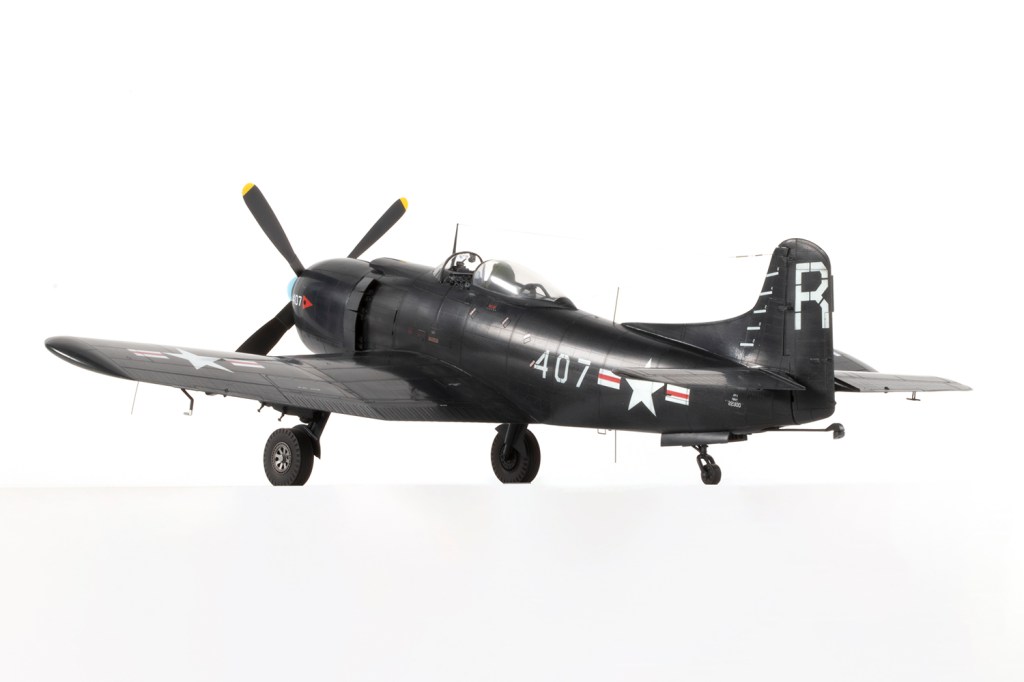
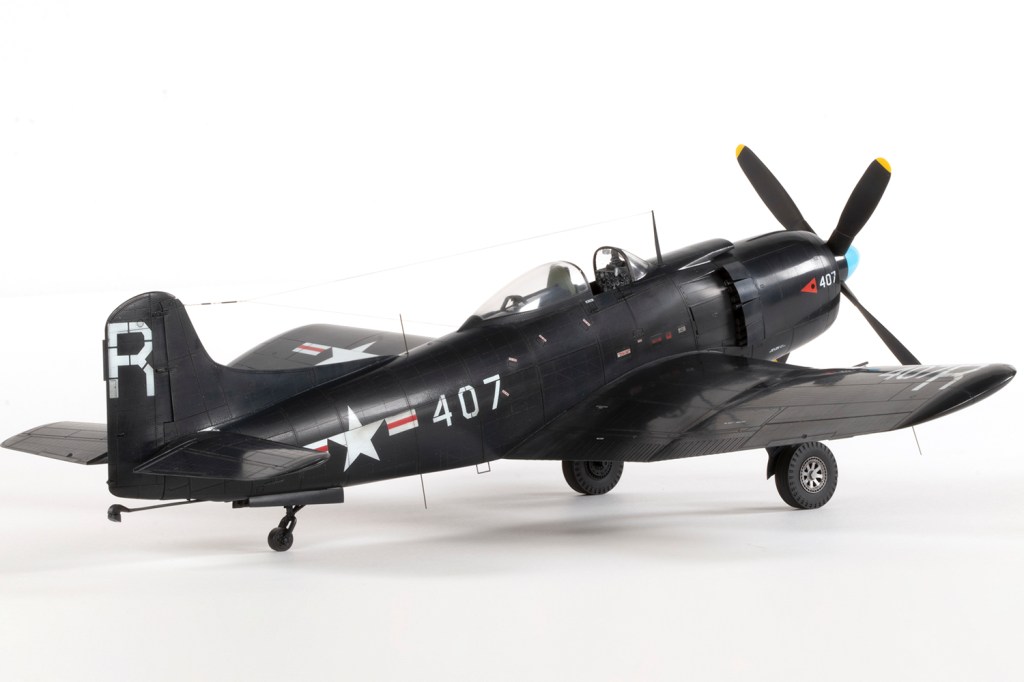
VA-174 ‘The Battering Rams’, US Navy, USS Kearsarge 1948
There are many aircraft one has given up hope of ever seeing produced in 1/48 scale in an accessible and relatively accurate form: the Vought F7U Cutlass, the McDonnell FH-1 Phantom, an AJ Savage, an F3D Skyknight, the T-37 Tweet and the Supermarine Swift. The list goes on. And definitely on that list was the Martin AM-1 Mauler.
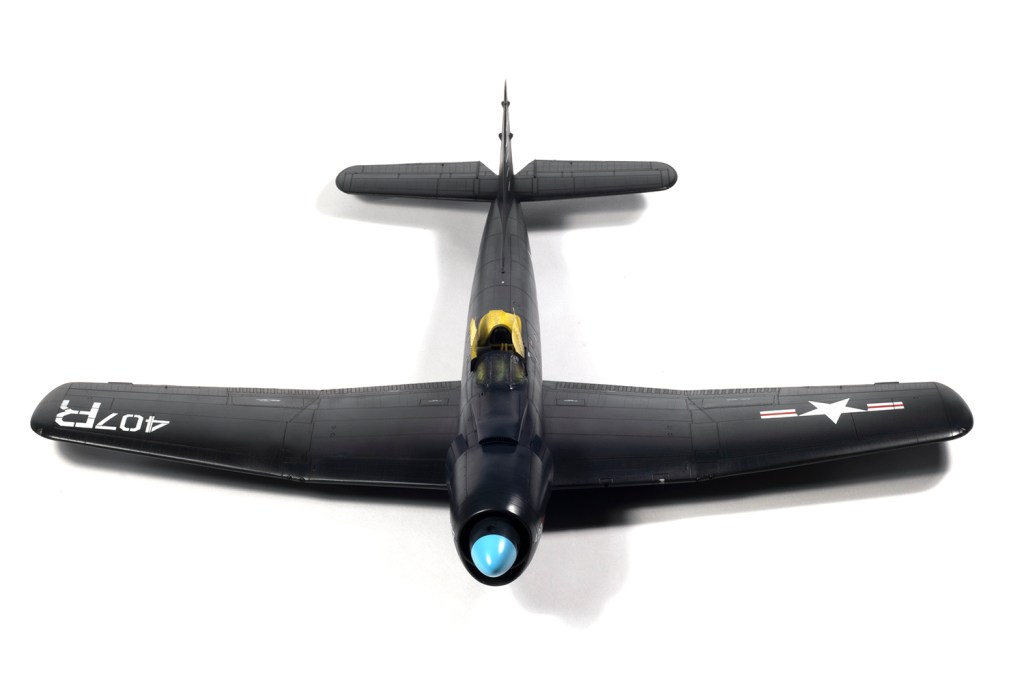
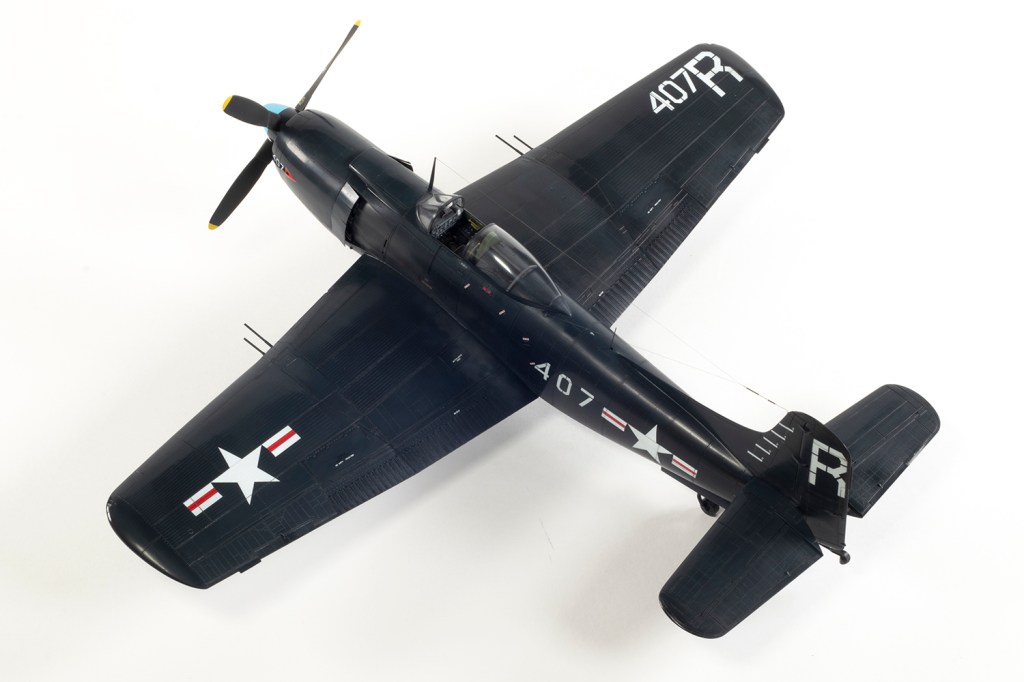
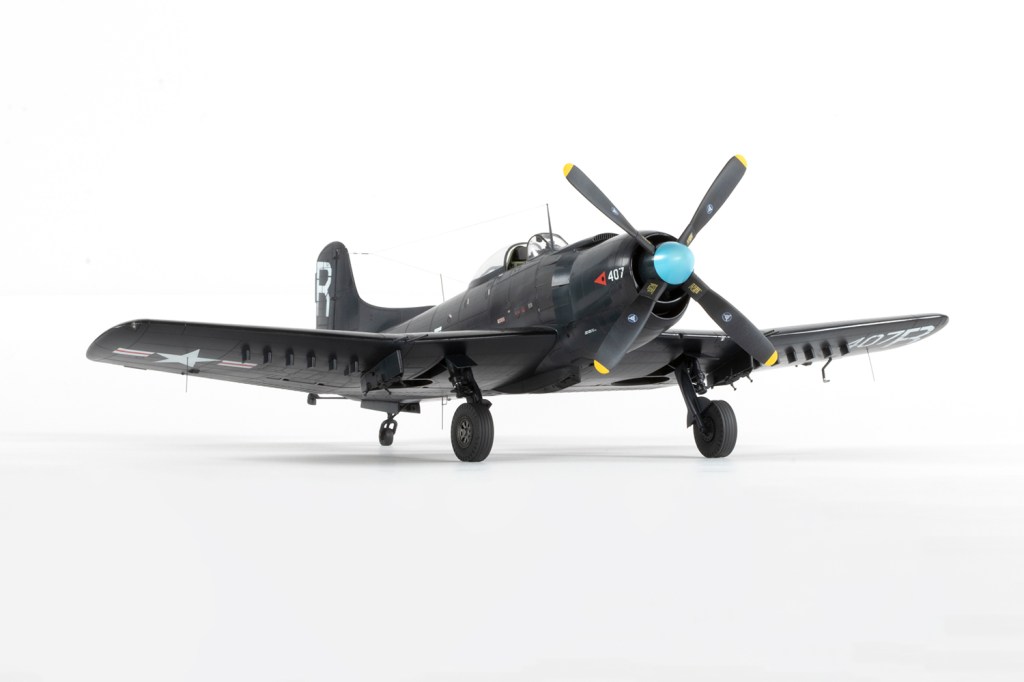
An absolute bruiser of an aircraft, the massive Mauler set an unofficial record for hauling the heaviest payload by a single-engine prop plane, and with a wing span approaching that of an A-6 and a massive chord, it’s a miracle the thing ever flew operationally off aircraft carriers. A miracle indeed, since it wasn’t very good at it and thus had a staggeringly brief career with only five squadrons between 1948 and 1950 before being packed off to the Reserves until 1953.
It was with some amazement, then, that I saw Halberd Models from Ukraine announce a 1/48 resin kit of the AM-1 towards the end of 2025, and as soon as it was ready I ordered one. It arrived a short while later, and whilst it was pretty expensive, it was also pretty mind blowing.
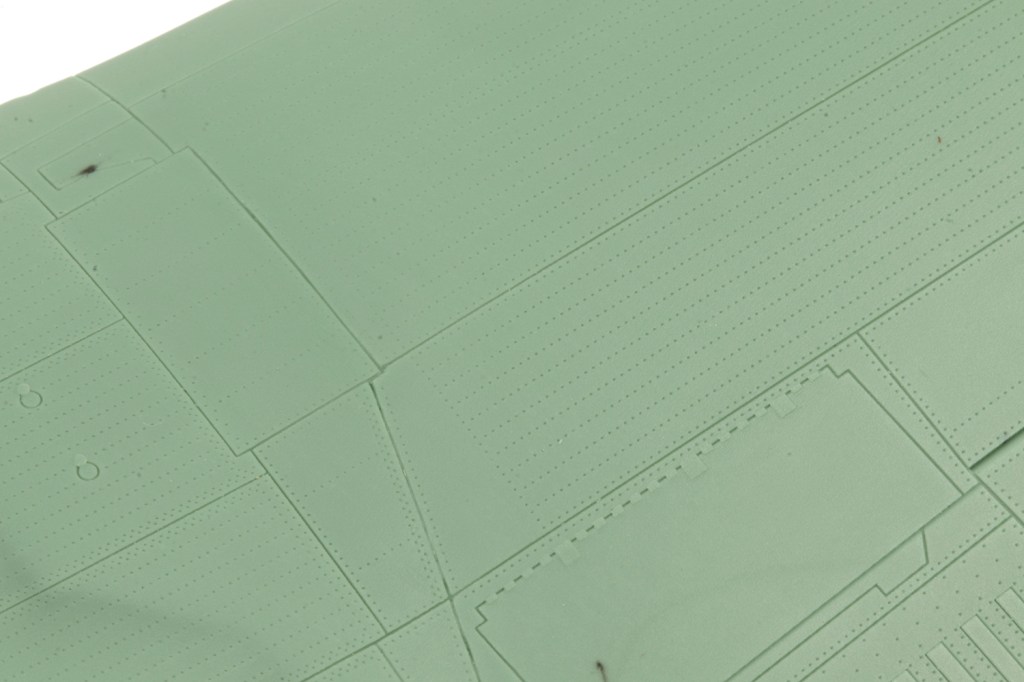
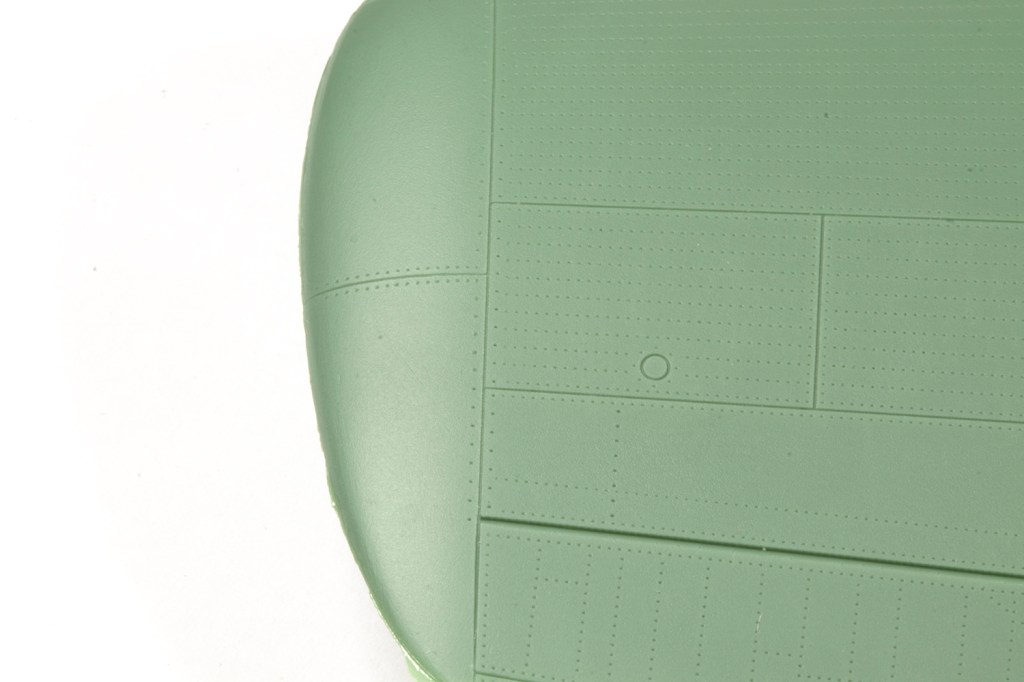
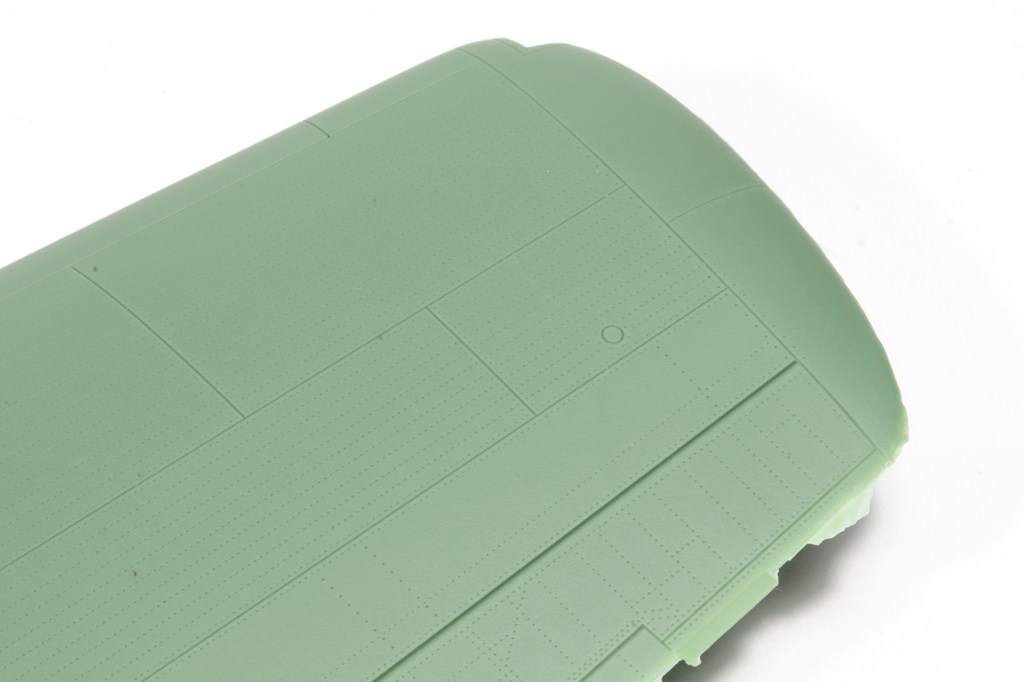
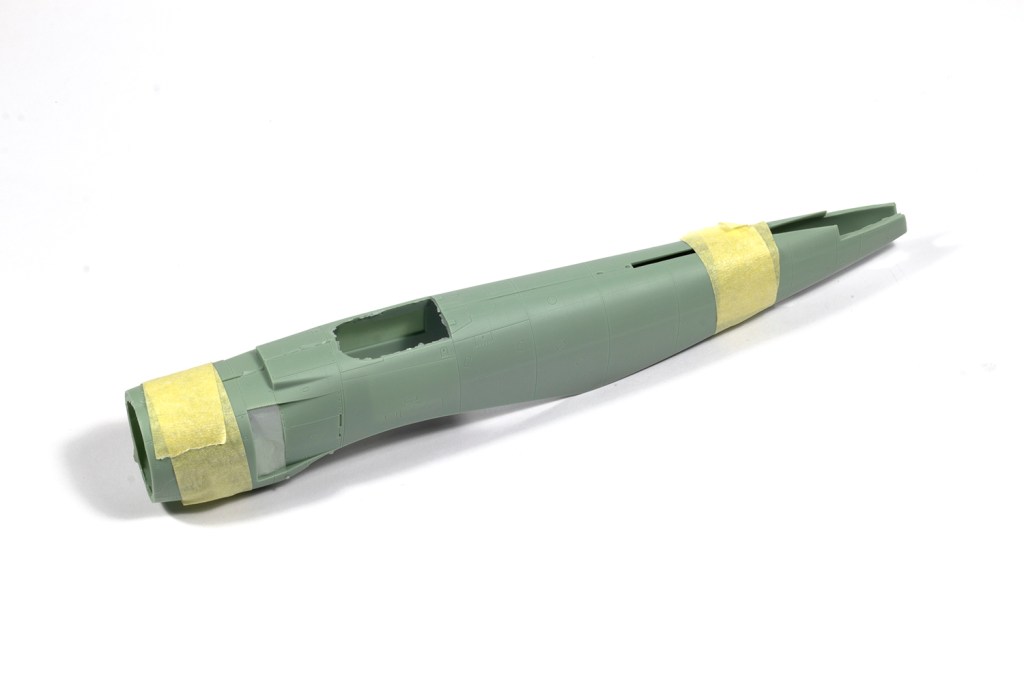
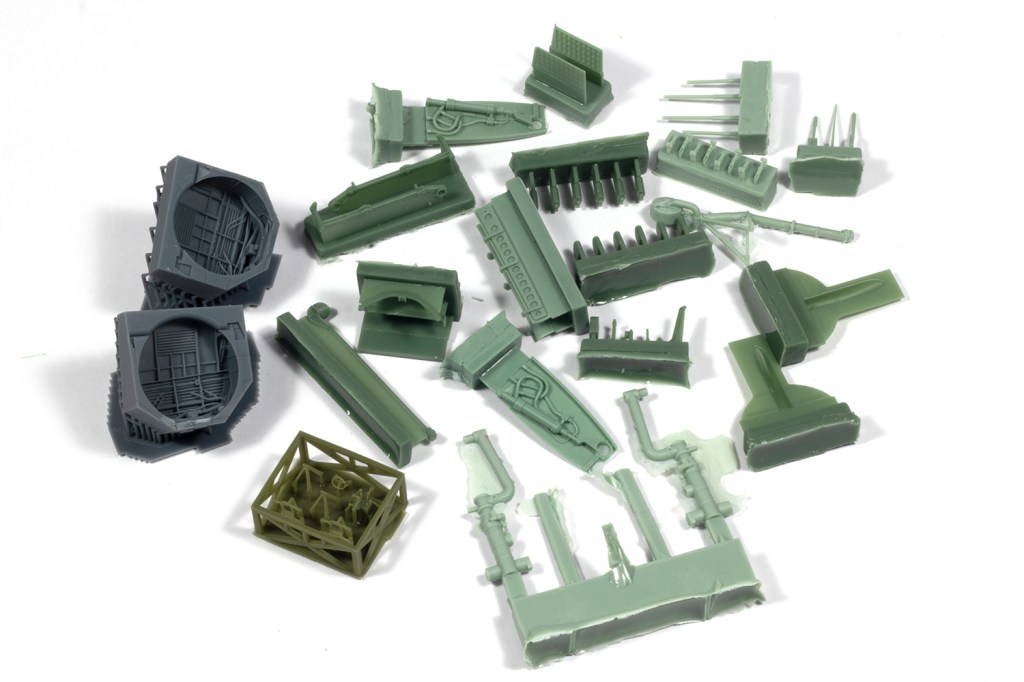
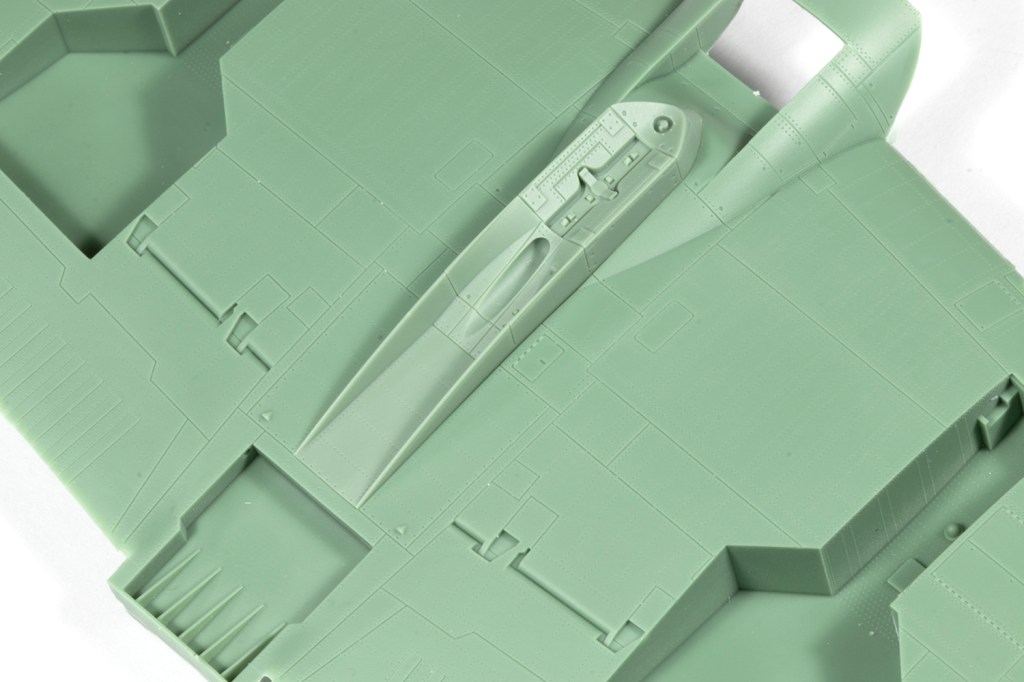
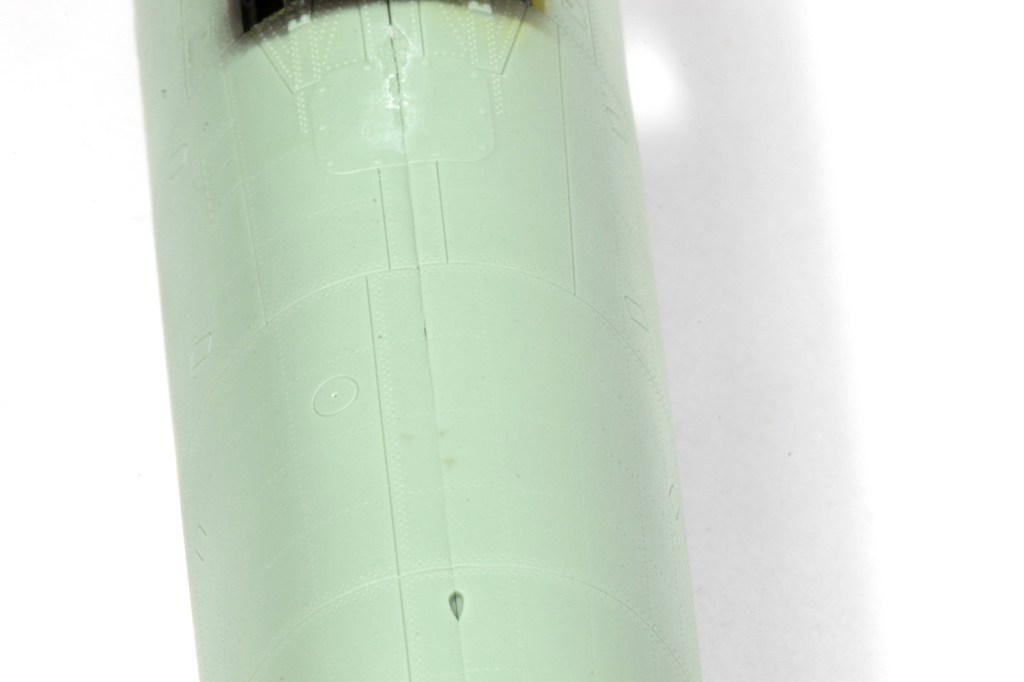
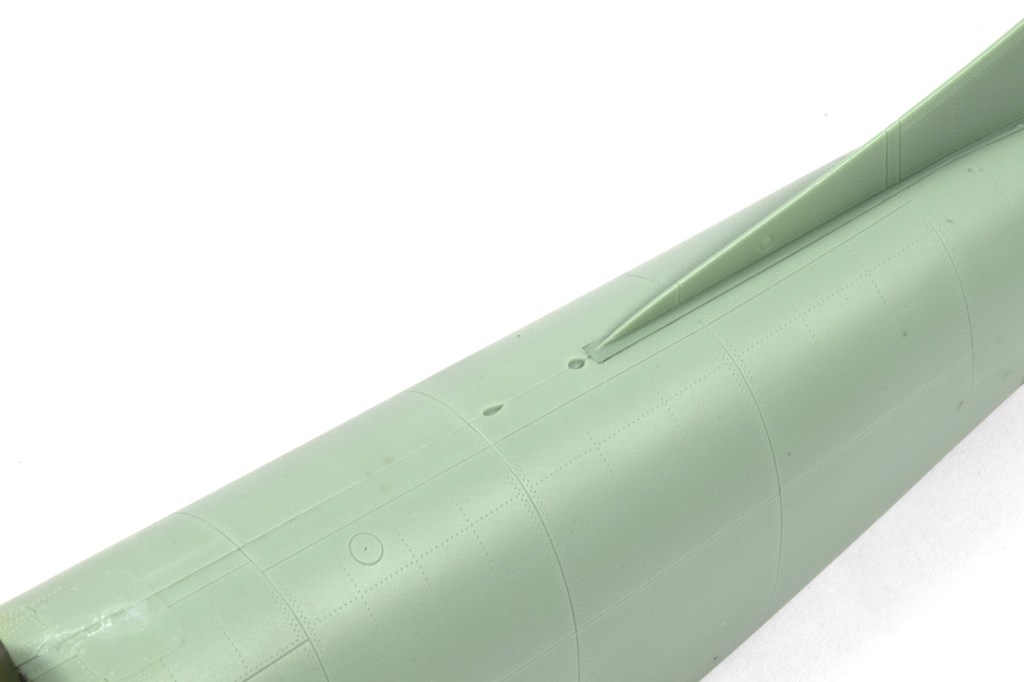
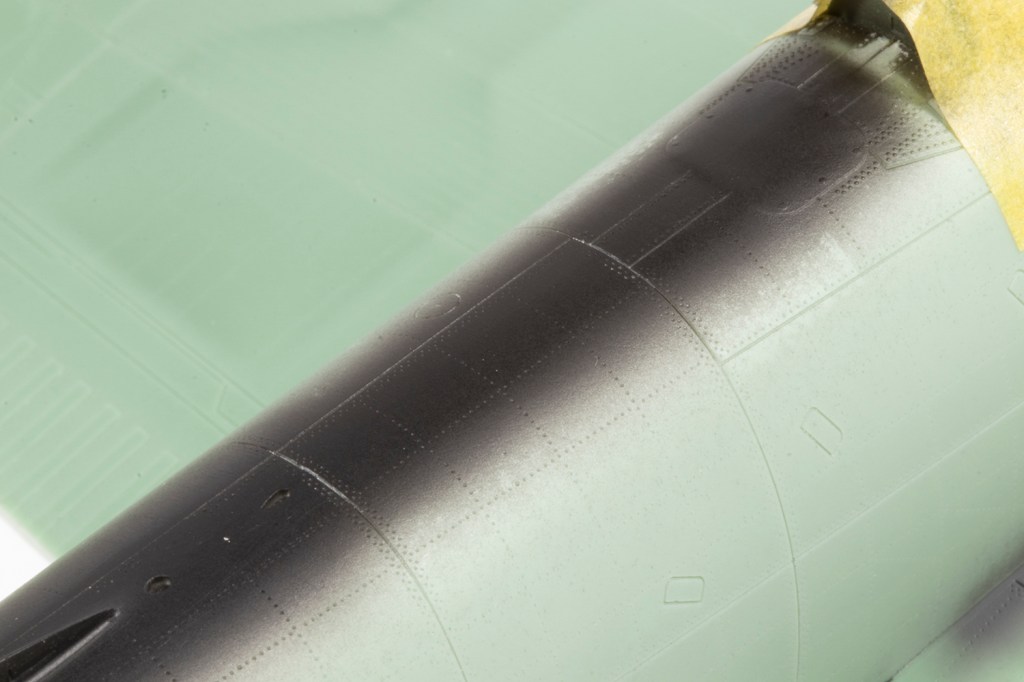
This is a proper old-skool resin kit, cast in a pale green resin with a small number of 3d printed parts, a sheet of plain PE, resin clear parts and a decal sheet by Decograph. The surface detail is among the best I have seen on any kit ever and I would genuinely love to know how they do it. The casting is flawless and flash is fairly limited and easy to remove. The main fuselage halves come taped together and feature decent locating pins. I added the box to the stash expecting to get round to it in about 2055.


However, the March Madness Group Build – organised by American award-winning modeller Justin Lentz and open to all and sundry on Facebook – provided an excellent opportunity to get cracking almost straightaway. The idea is to build a kit from start to finish within the month of March, and with no need for aftermarket, fewer seams to deal with and a very simple scheme, I reckoned I could get this done in four weeks, such was my confidence in the quality of the product.
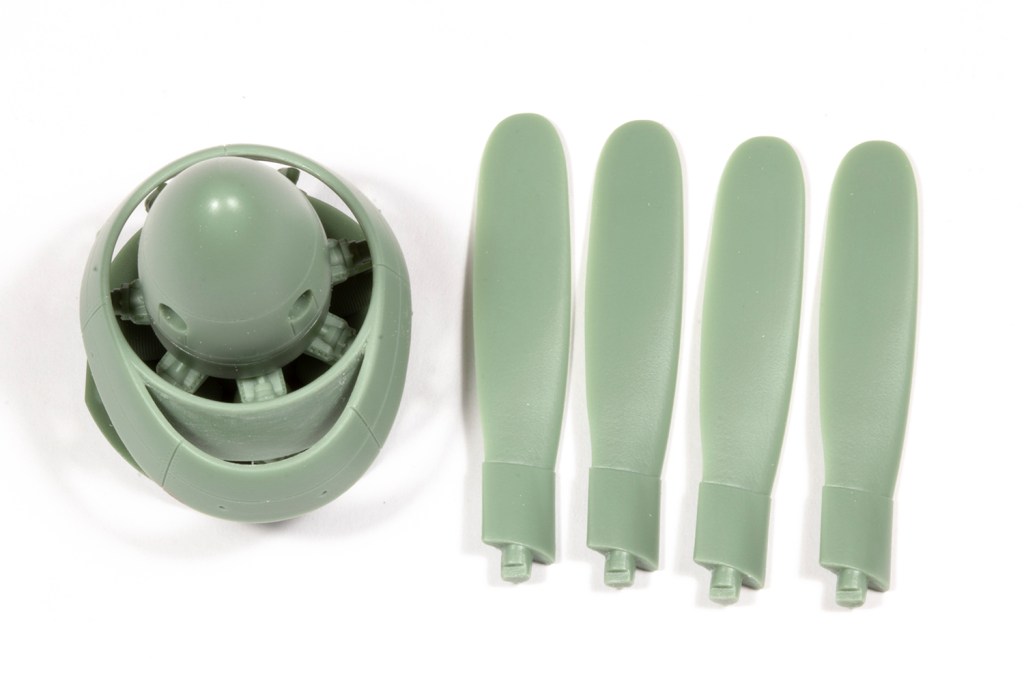
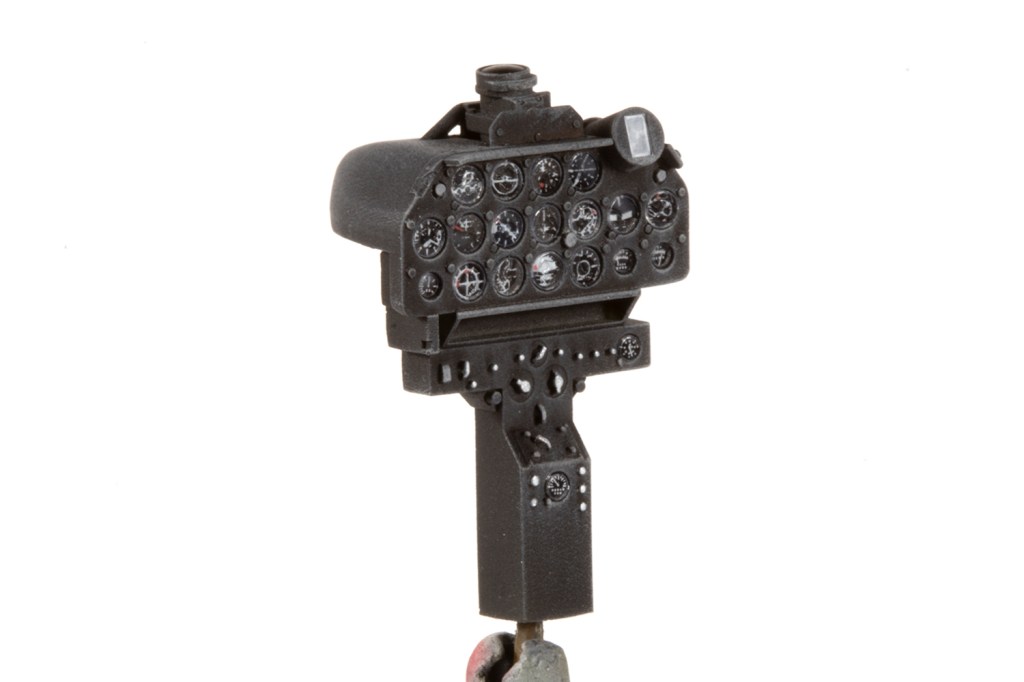
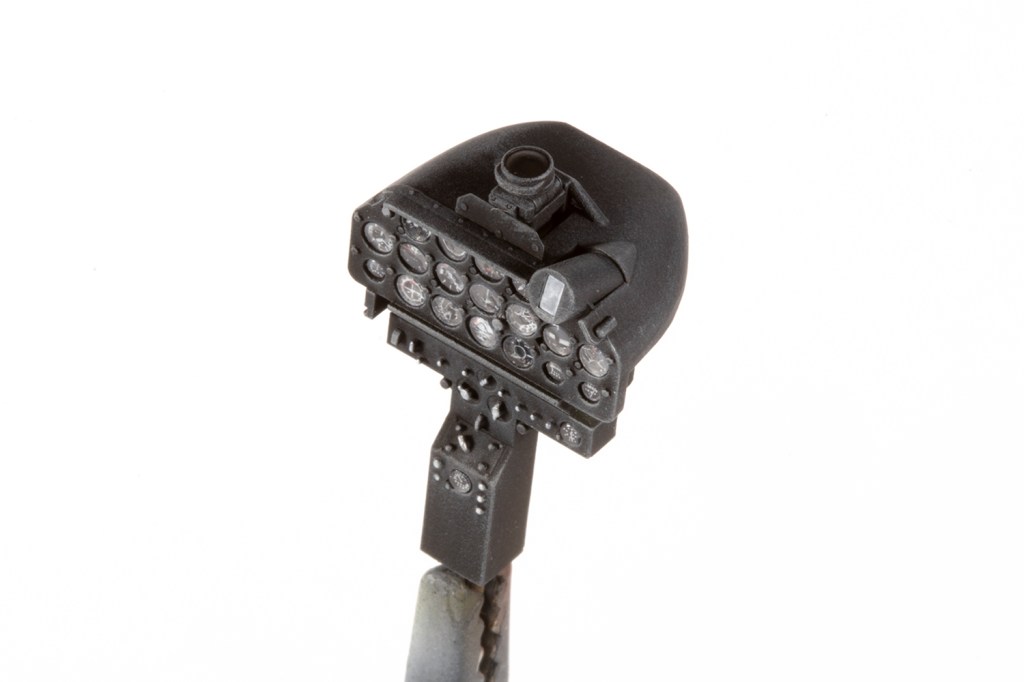
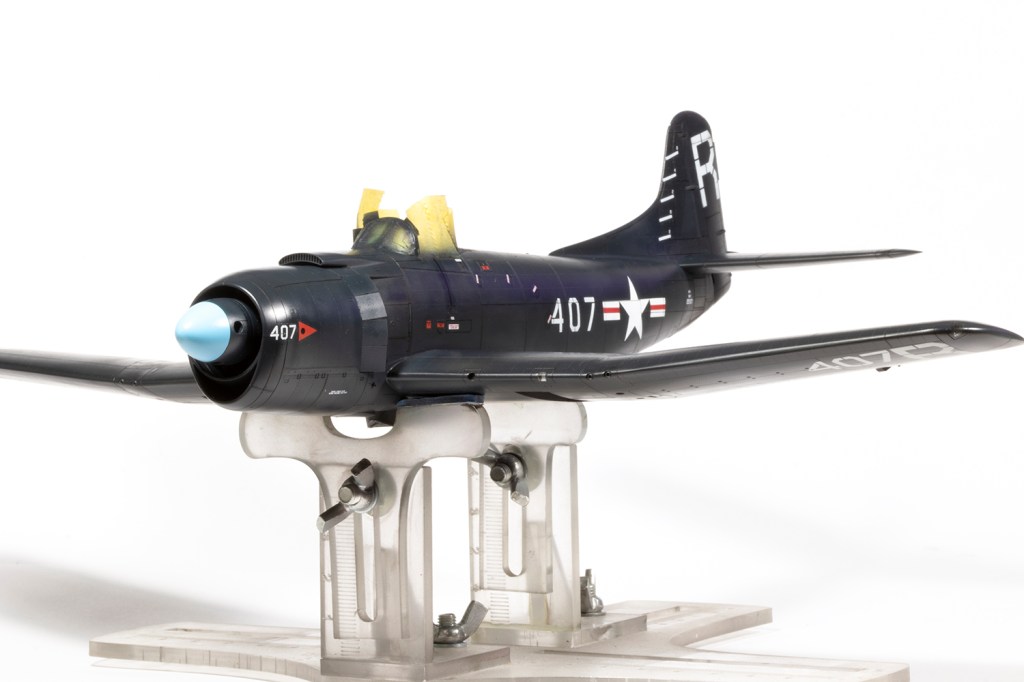
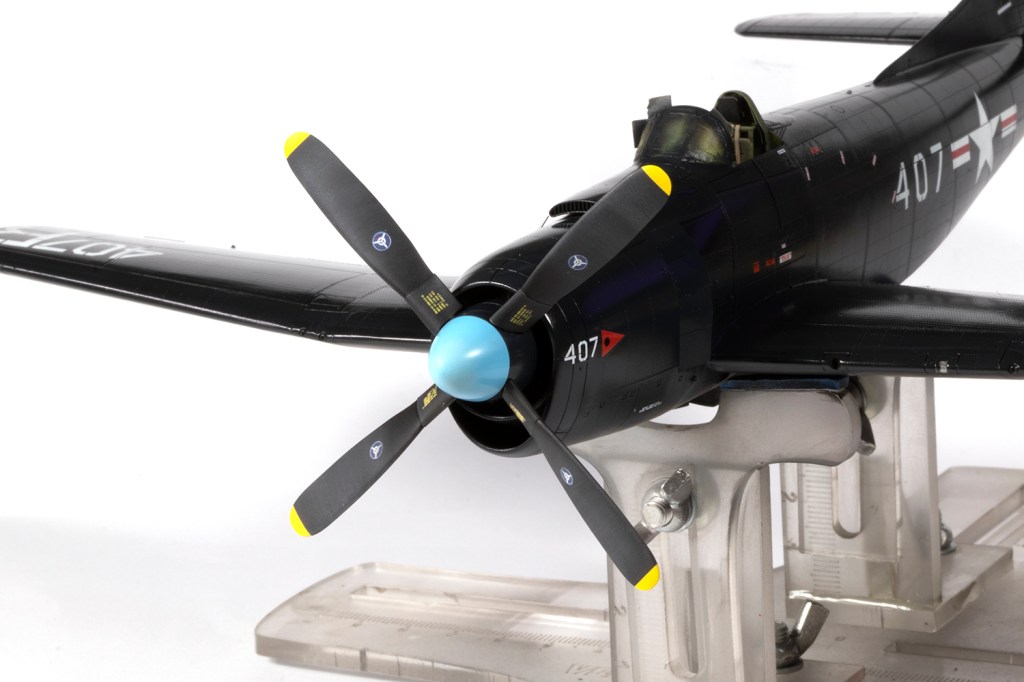
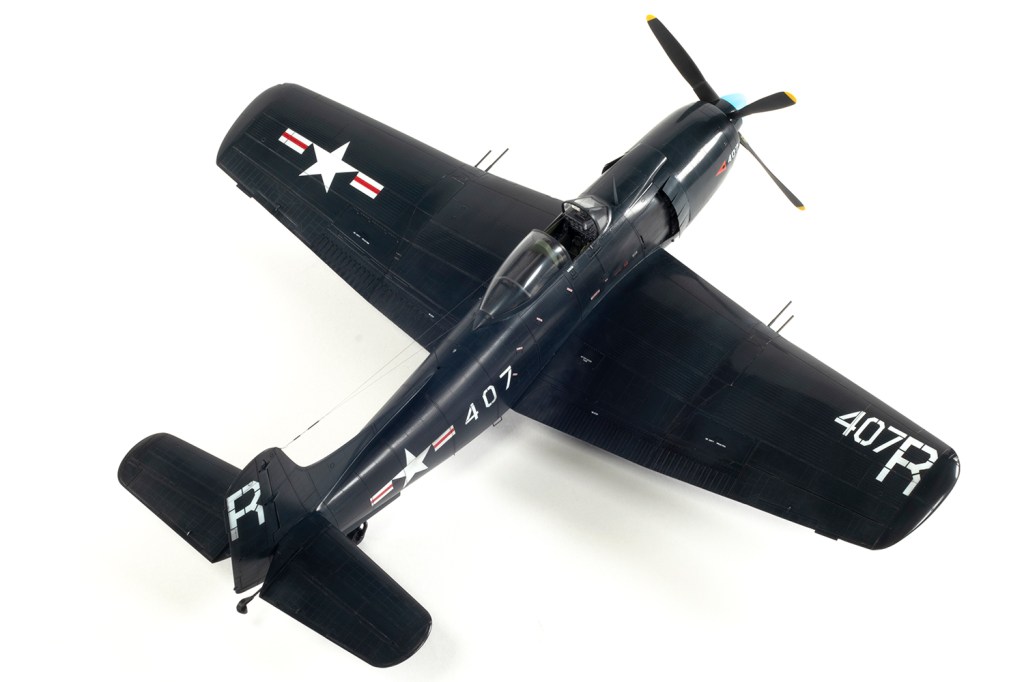
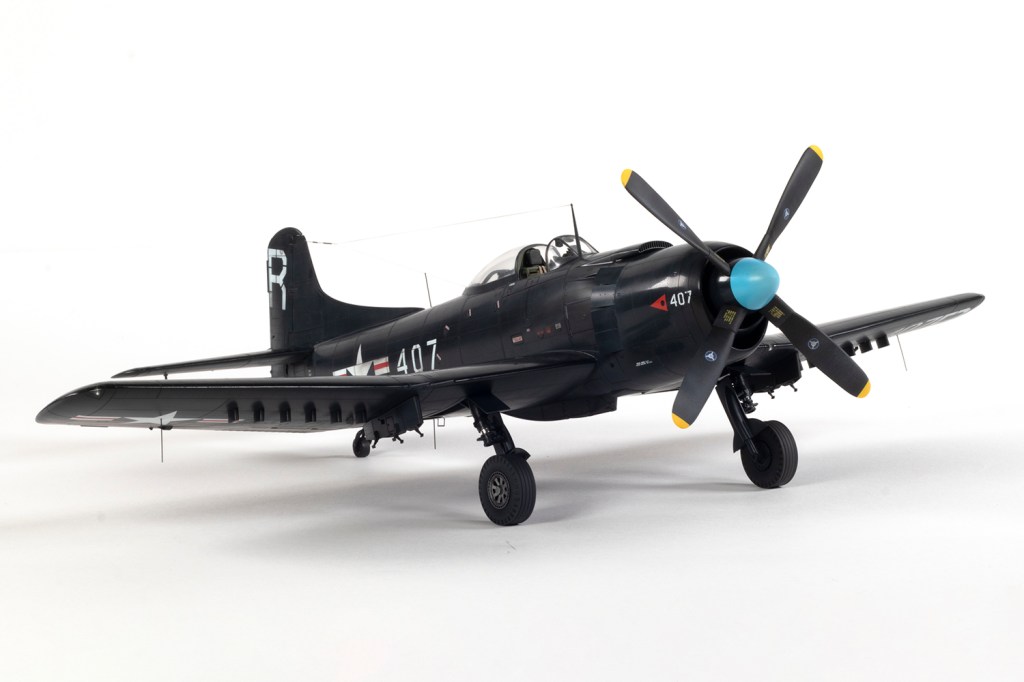
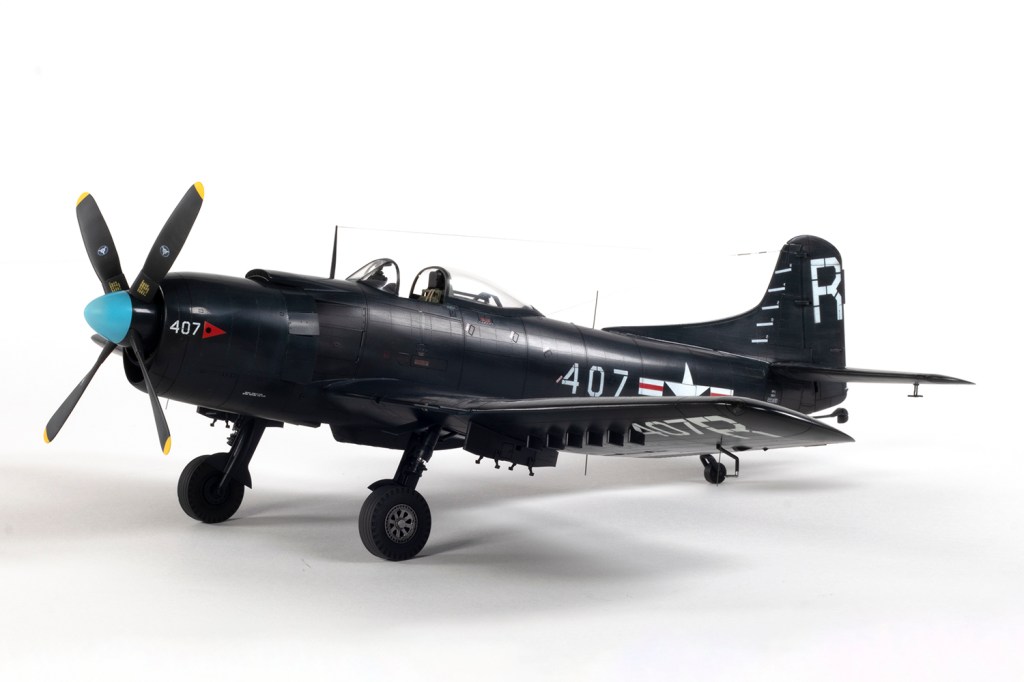
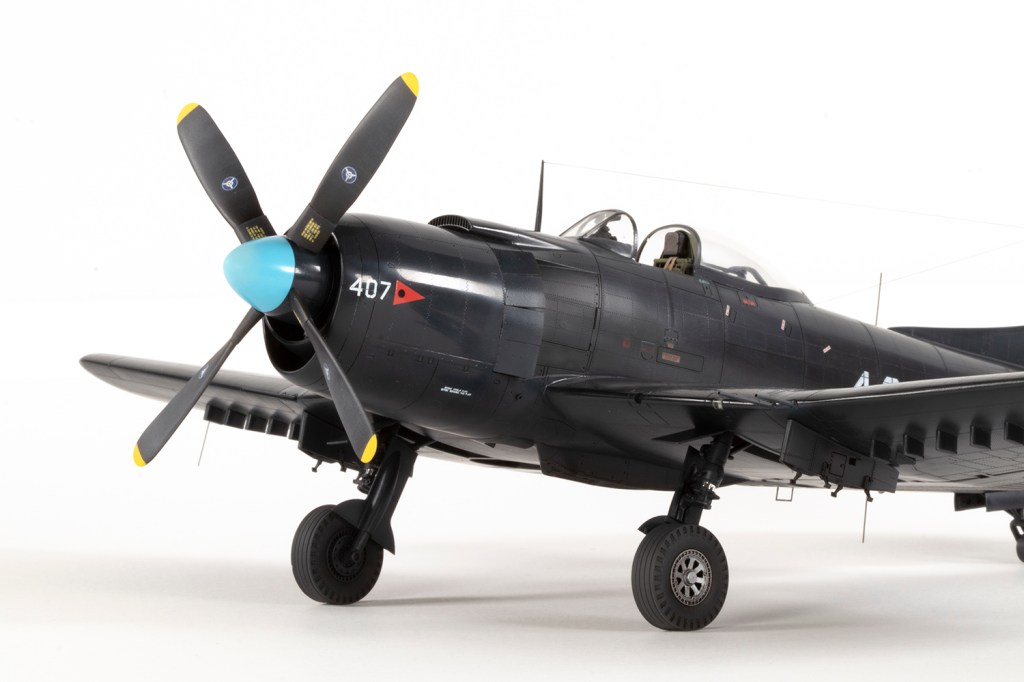
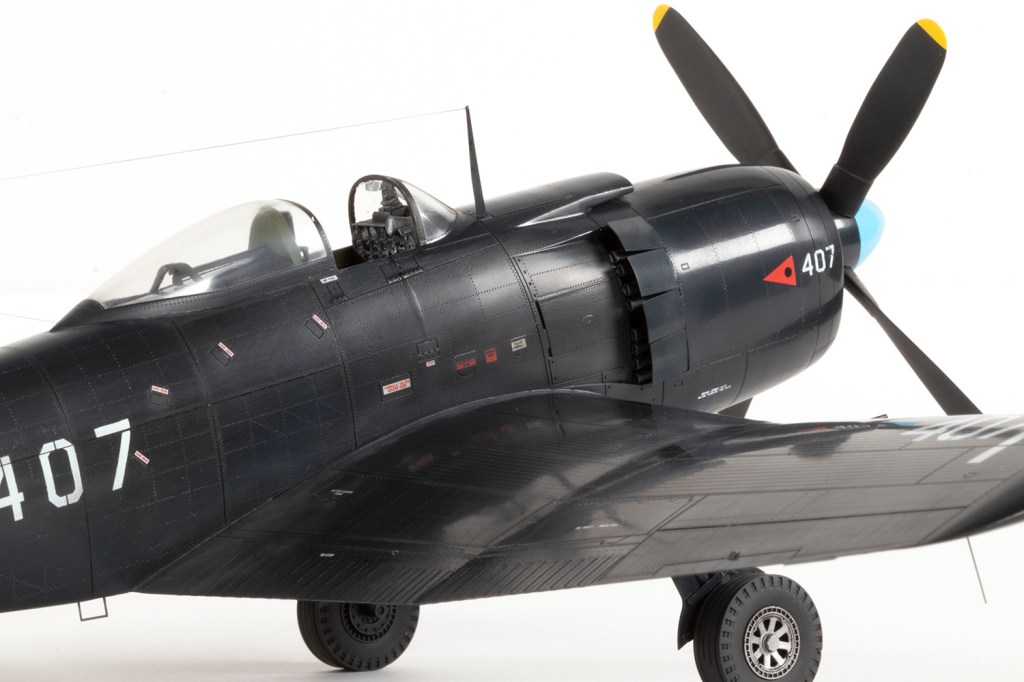
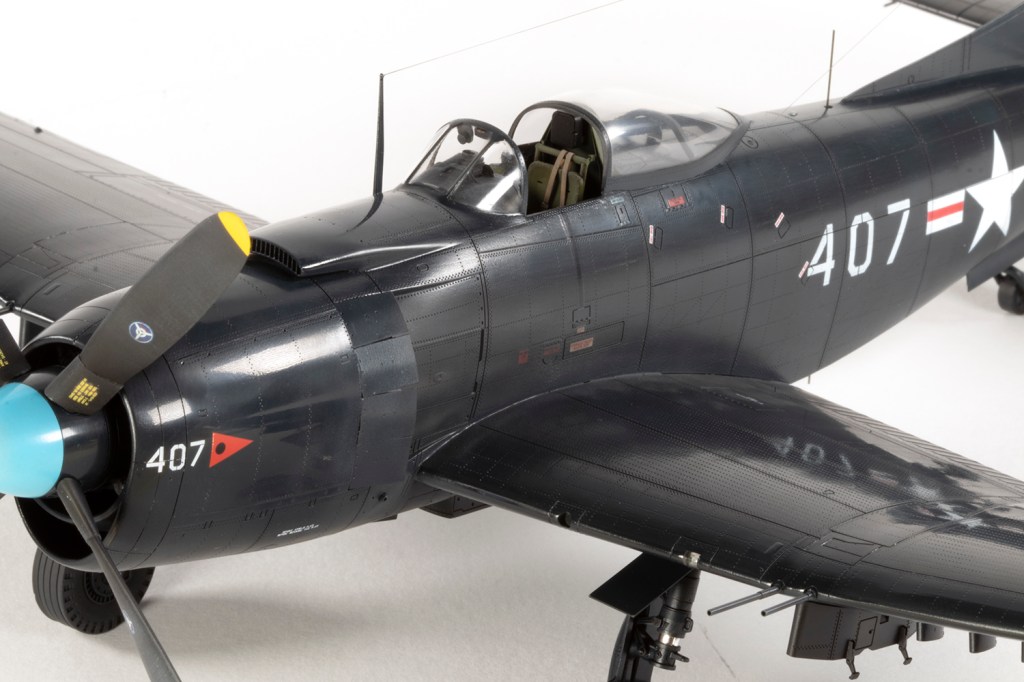
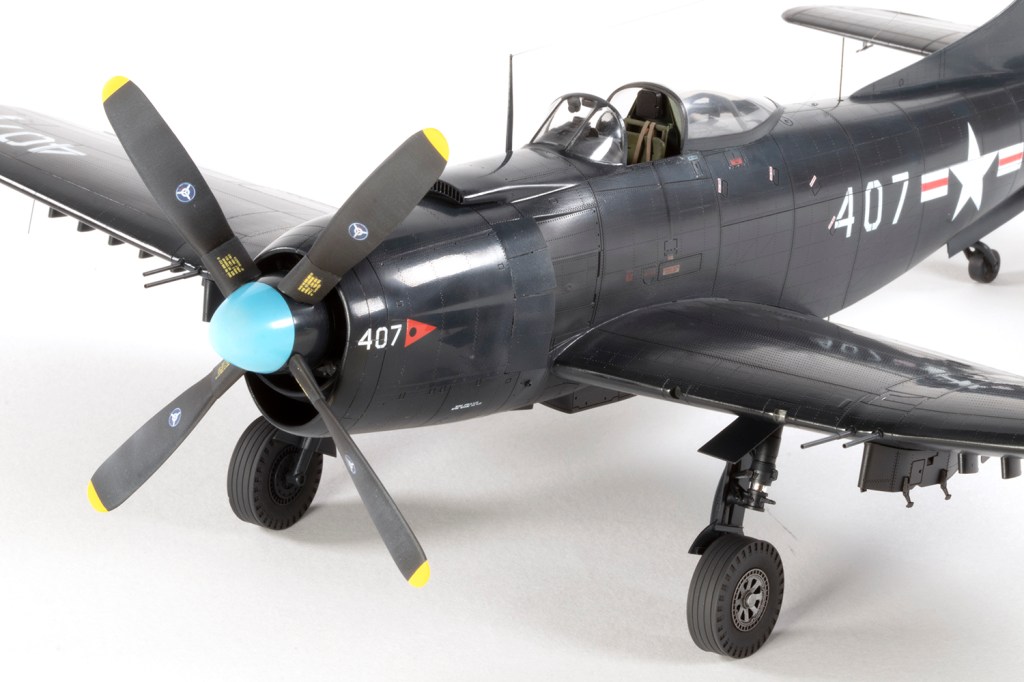
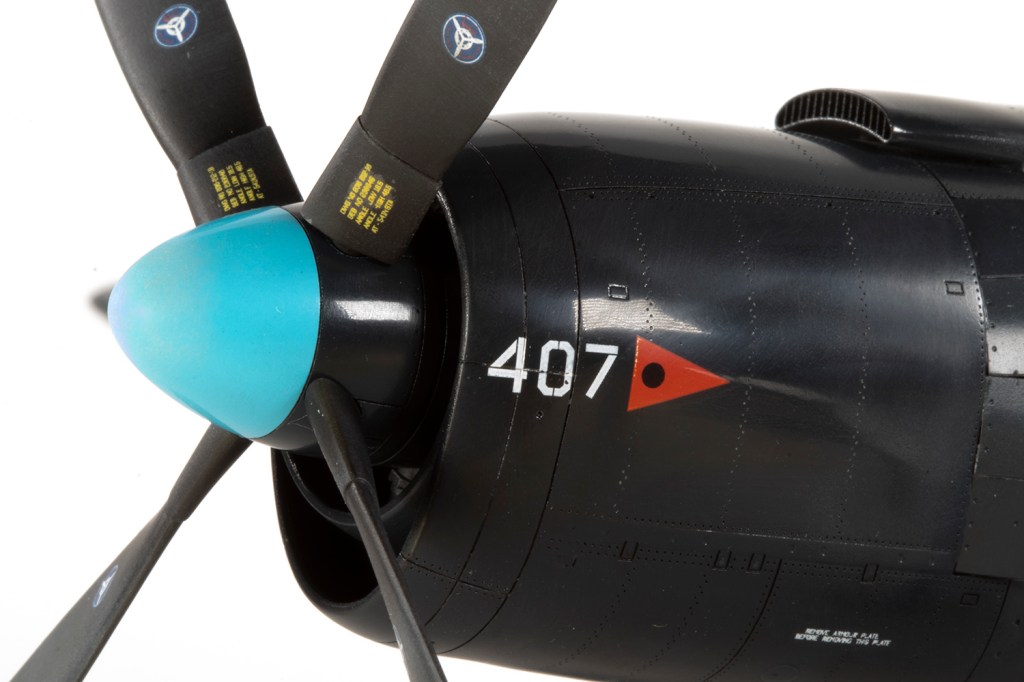
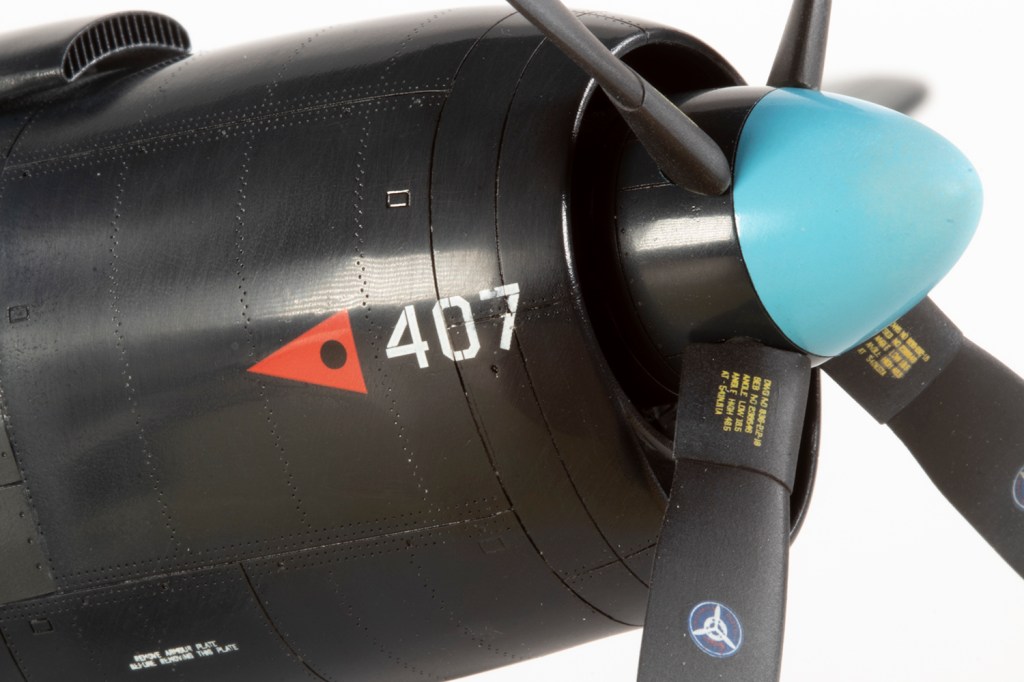
First I bought a book: Naval Fighters 111 in the Ginter series. This is not essential, but I did find it useful for various bits and pieces as the Halberd instructions are a little vague in places. It also instructed me on the surprising number of variations in the Mauler considering its brief life, and this was important. AM-1s were produced in two basic batches, and the latter received uncuffed Hamilton Standard props with squared off tips. Earlier aircraft had the Curtiss Electric cuffed prop you see in my model, since that’s the only option included in the kit. This ruled out making my preferred kit option, from VA-45, since that should have the HS propeller. Conversely, the Mauler gained a different instrument panel later in life, and Halberd provide this, making it inaccurate for the other kit option, from VA-174. I preferred an inaccurate instrument panel over an inaccurate prop; I suspect this combination was pretty common on US Naval Reserve Maulers as they were upgraded during overhaul, but (unsurprisingly) no one makes a suitable scheme.
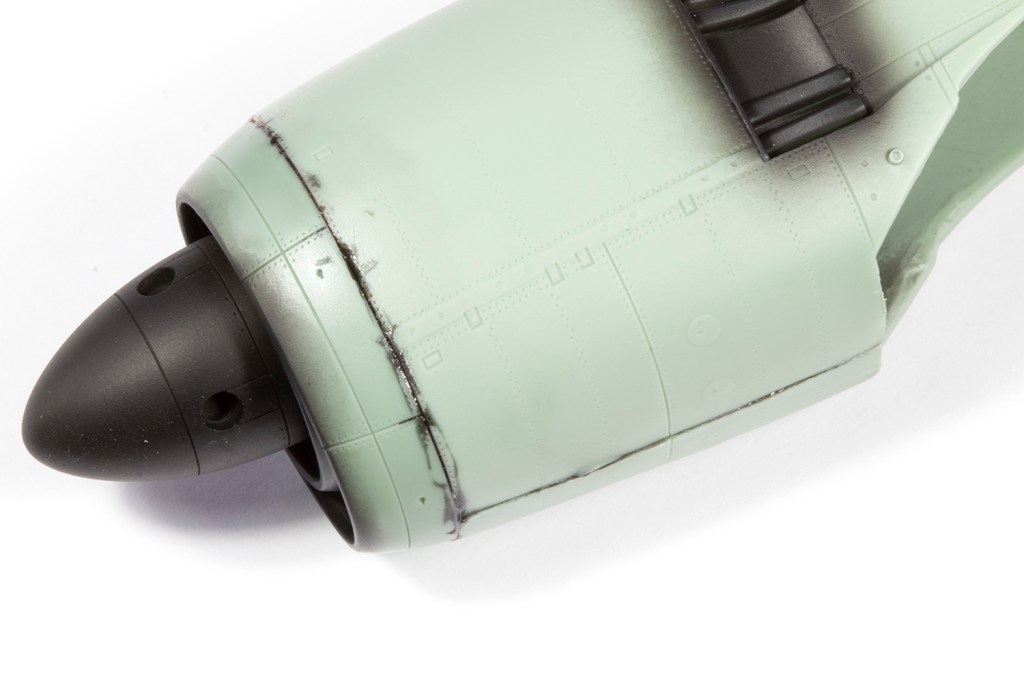
Having been deeply impressed by the quality of the kit parts, I was a little disappointed when dry-fitting them together. The fuselage halves came together to leave a concave depression along the seam line, and the nose cap did not appear to match the front fuselage at all. But fear not! After a lot of gentle clean up, test-fitting and some trimming of the locating pins, I realised that with pressure and patience, the fit was actually excellent, in general. I made it a habit to test fit everything multiple times, and as far ahead in the construction sequence as possible, and that allowed me to figure out how best to put this wonderful puzzle together.

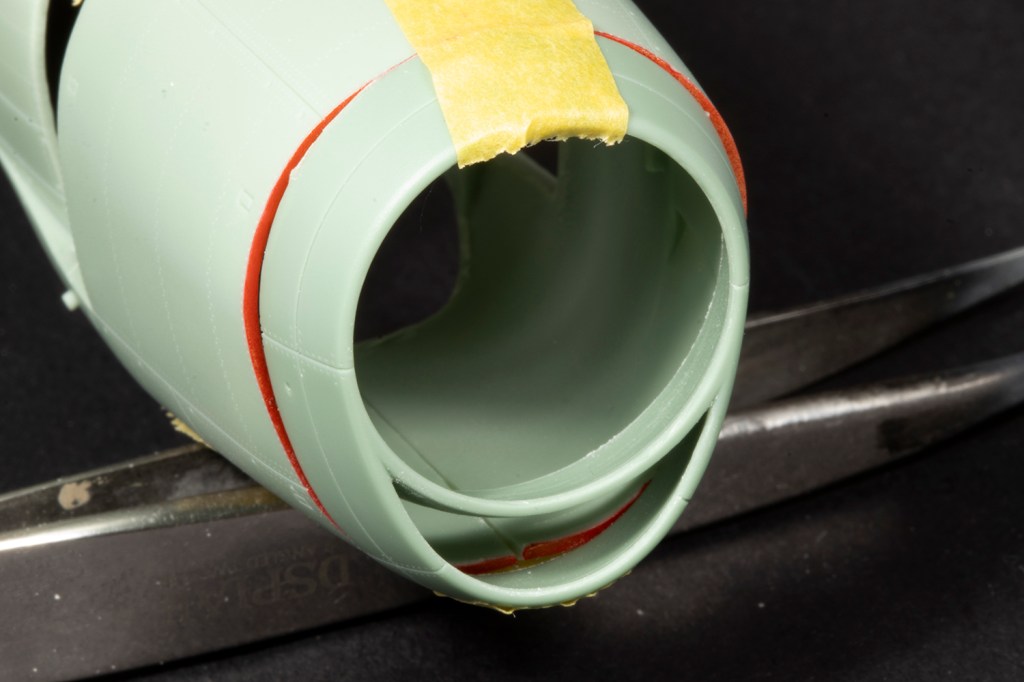
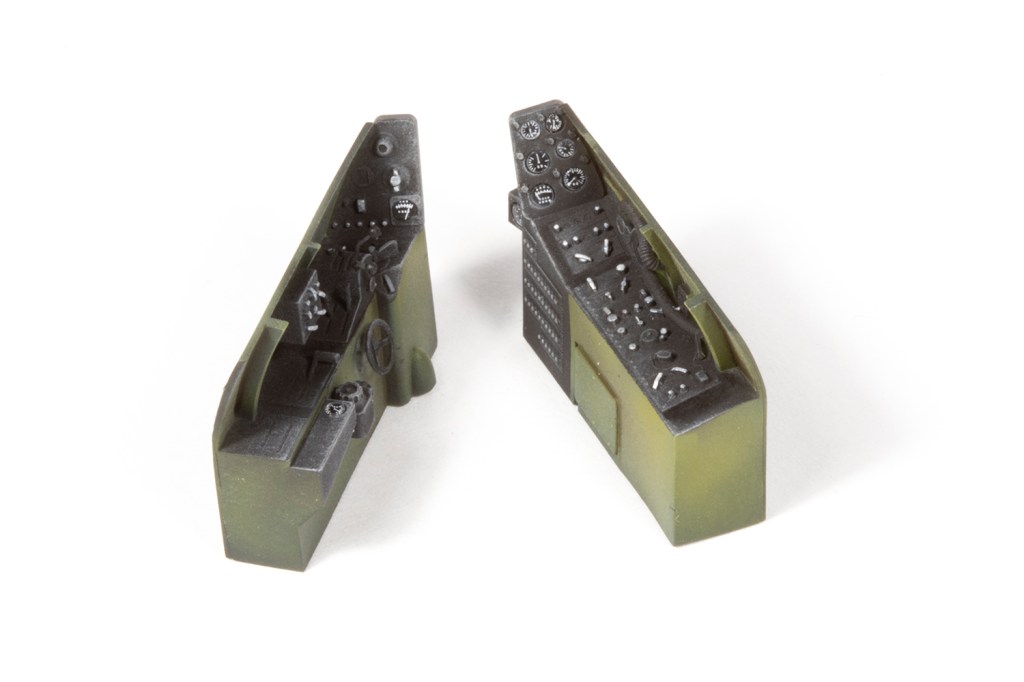
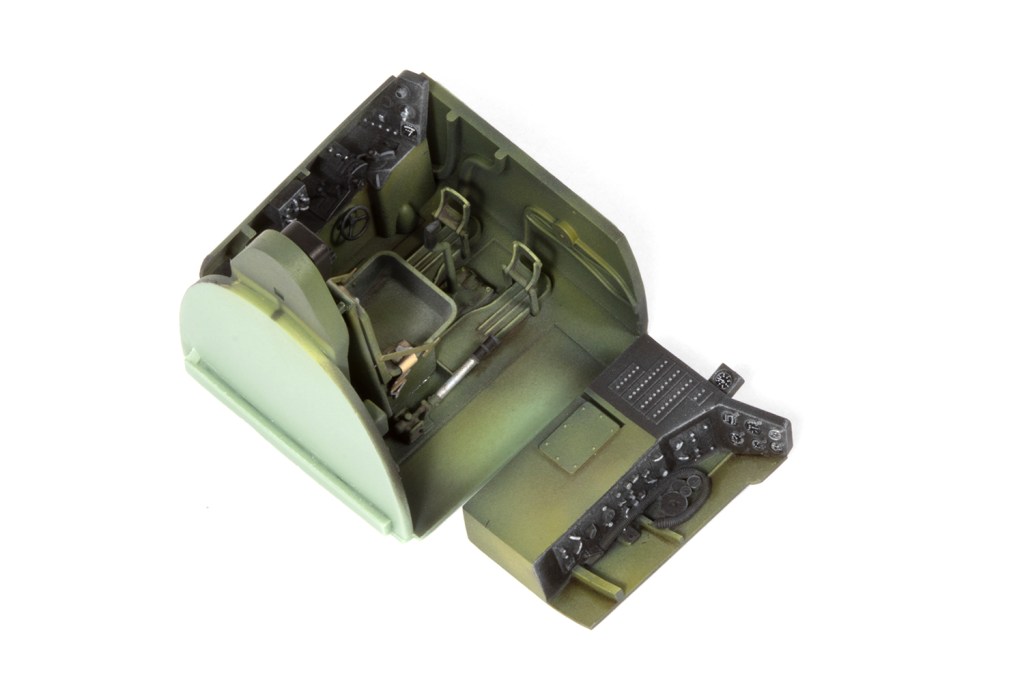
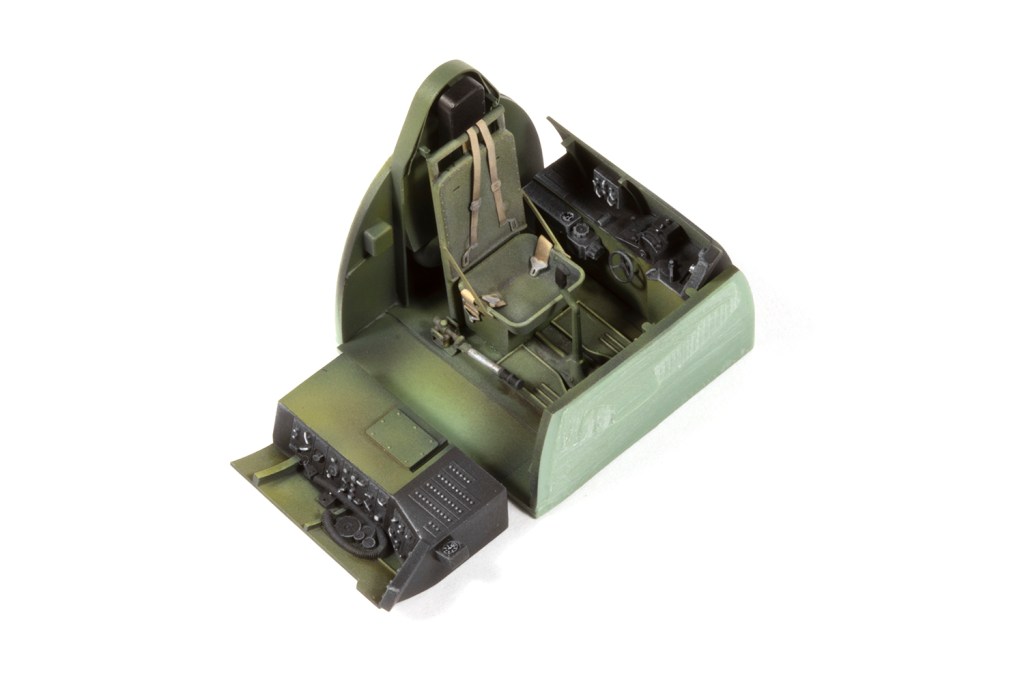
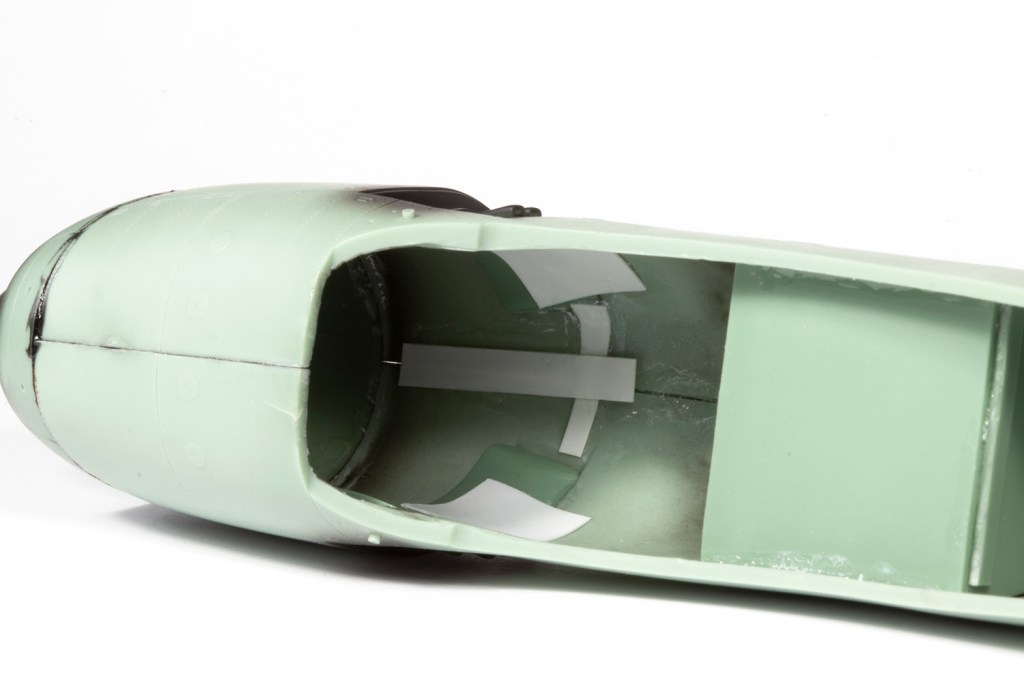
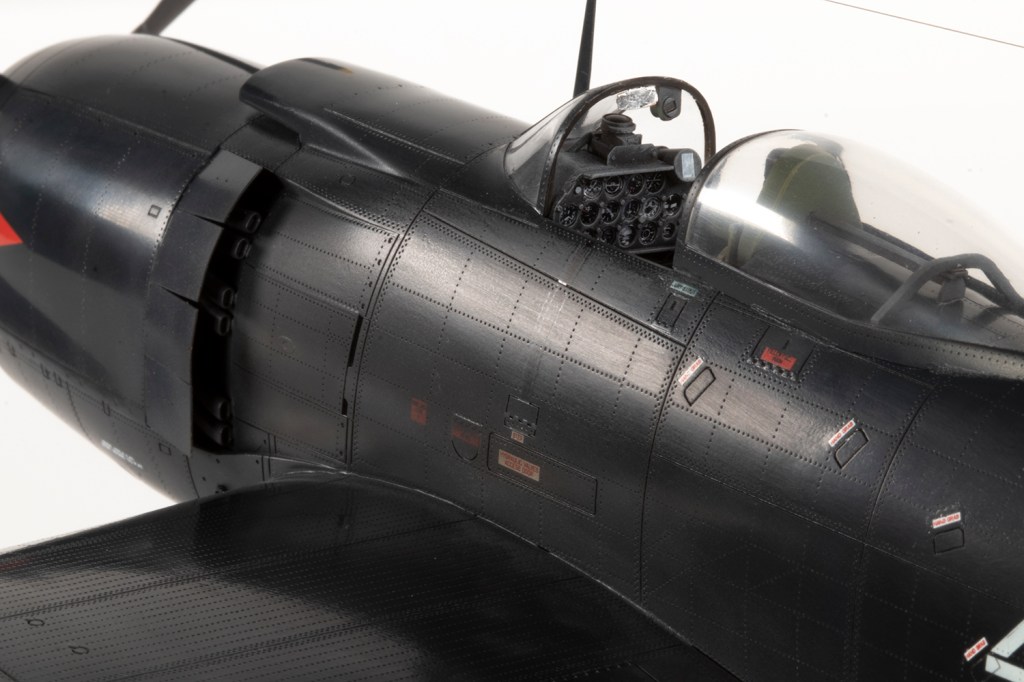
The cockpit is no exception. It fits very tightly into the moulded recesses, but don’t take this for granted and test fit, test fit, test fit. A lot of pressure needs to be applied to the fuselage halves, and I was worried about breaking the resin at various points, but it has all held thus far. The inserts containing the engine exhausts are the same: initially they appear to fit very badly, but spend some time with the parts and they eventually click into place. CA was used liberally to join parts, and I reinforced as much as I could from the inside with super glued plastic card.
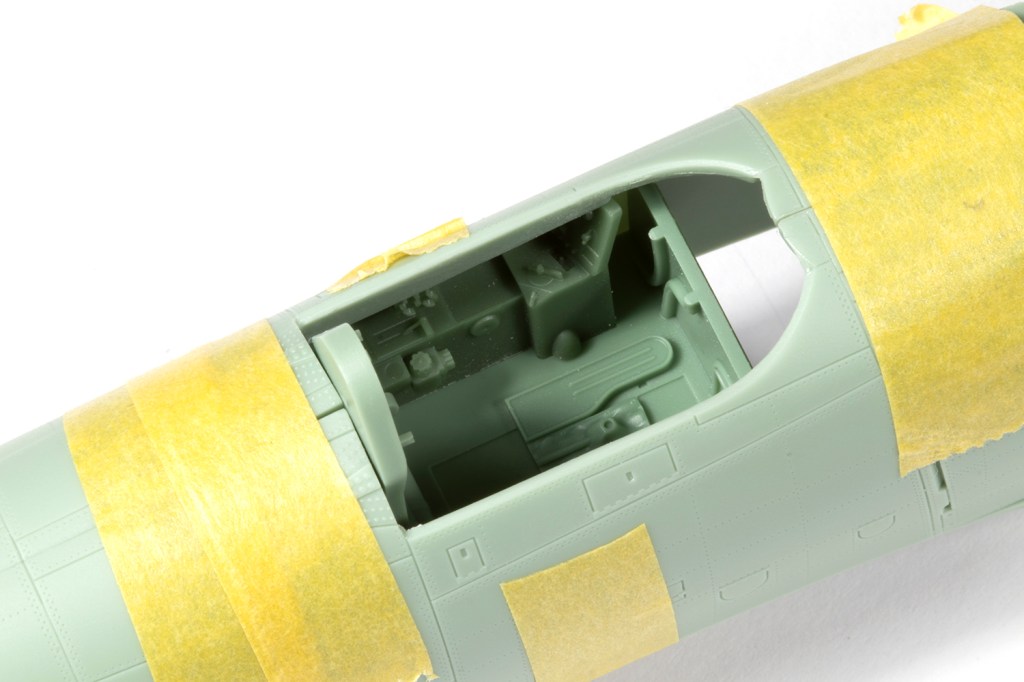


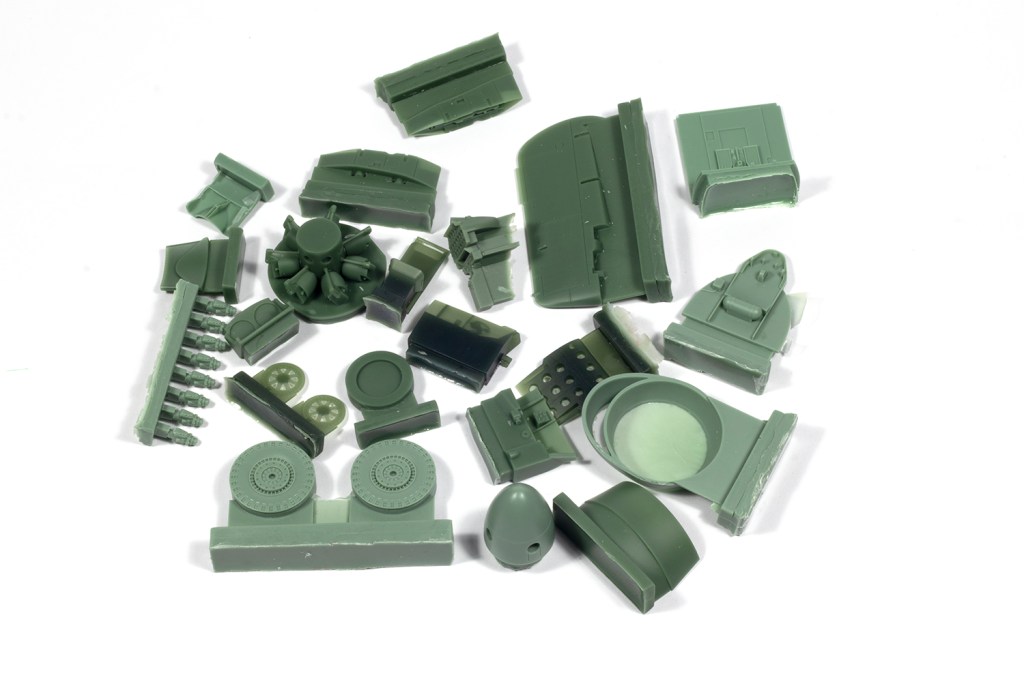
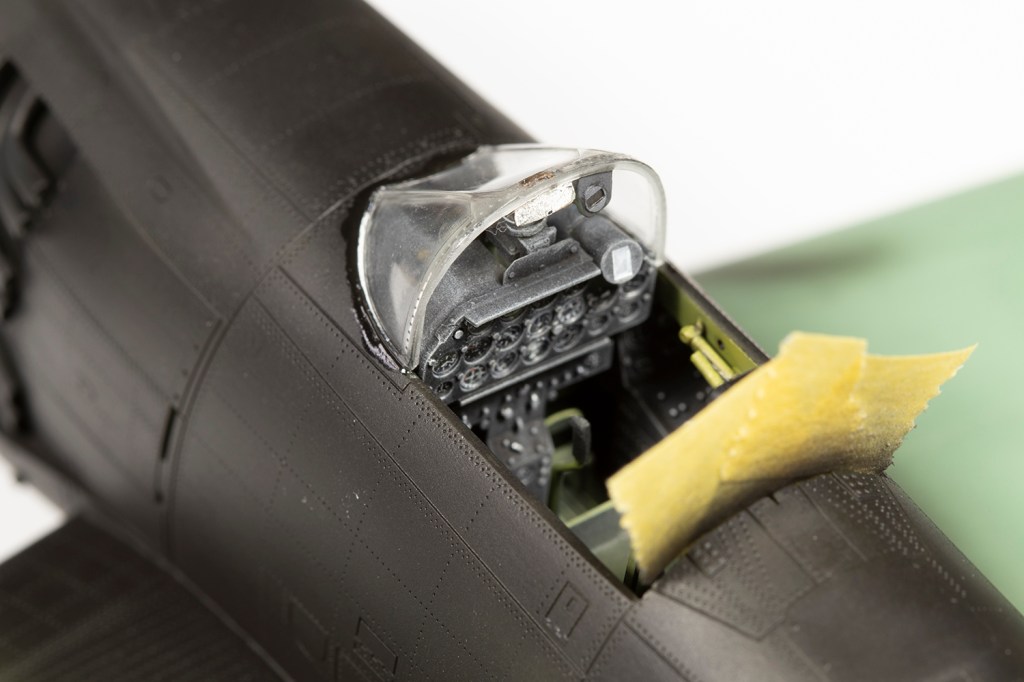
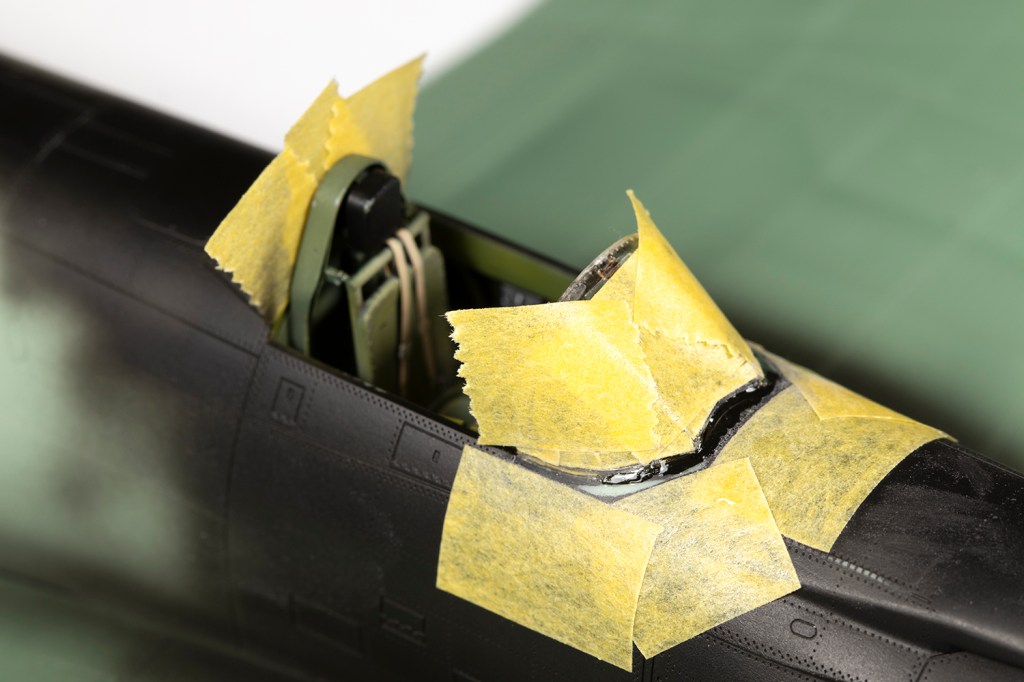
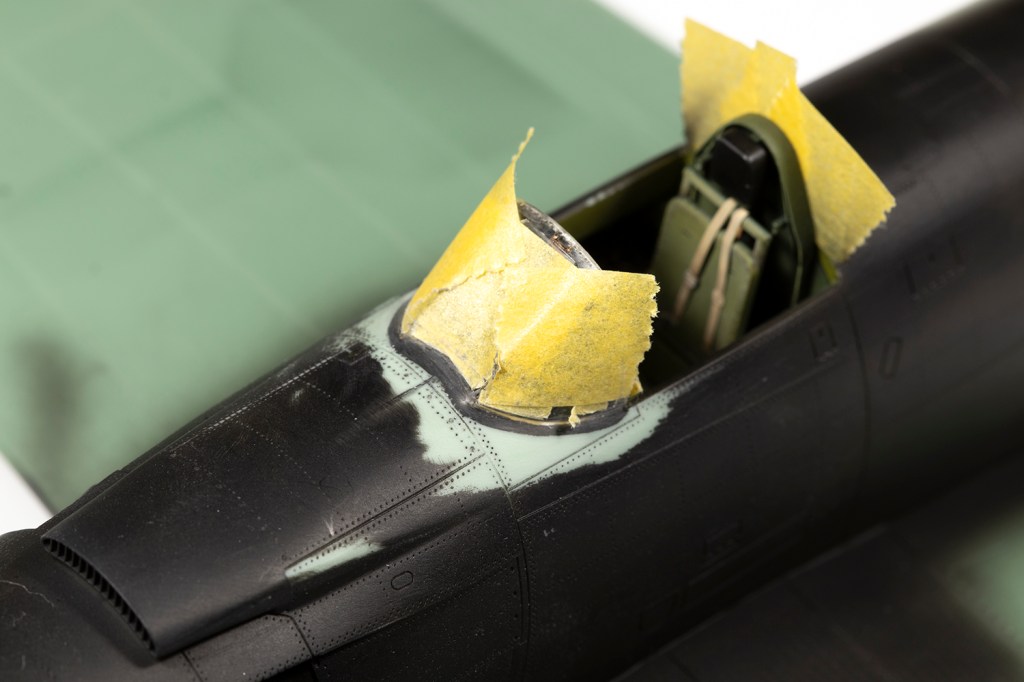
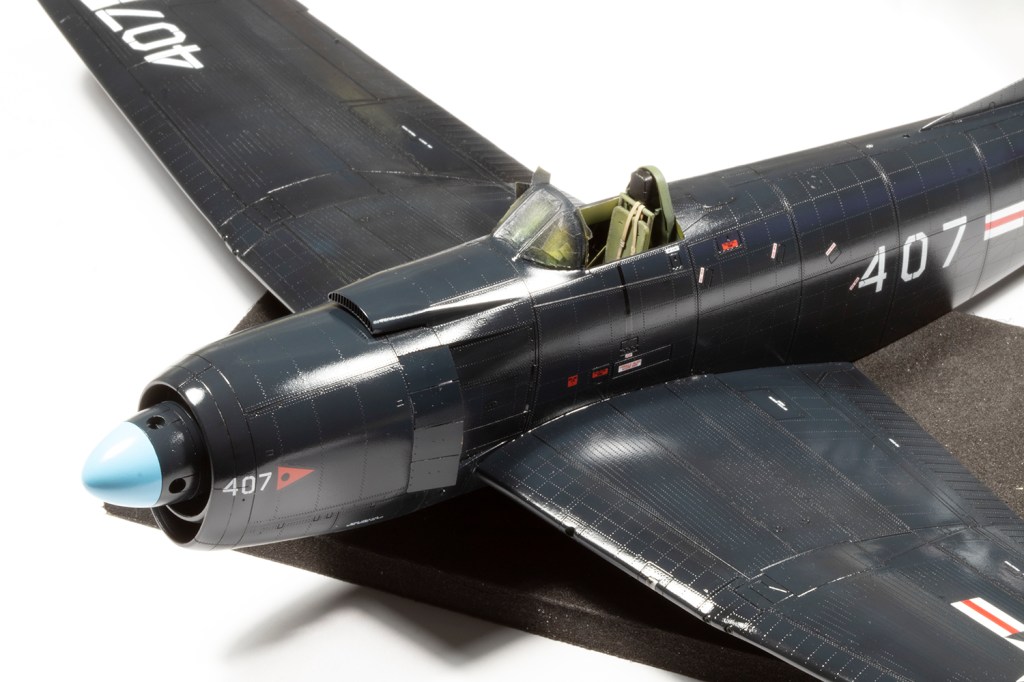
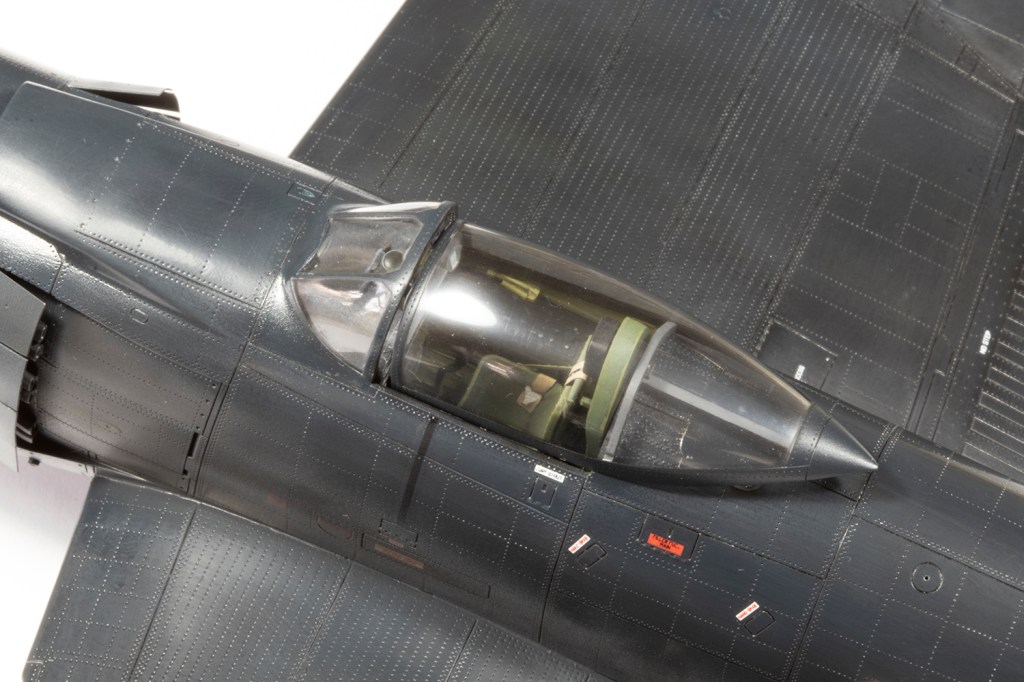
After I’d figured out how to put the cockpit together, I painted it. I’ve no idea what colour it should be – all the photos in the Ginter book are black and white – but it was clear the panels were darker than the sidewalls, floor and seat. I went with Mr Color 351 Zinc Chromate Green and black. Everything is gorgeous, except one of the PE belts is missing its buckles. Halberd also supply a small set of belts as 3d decals, which I ignored. The inaccurate instrument panel (for my airframe) is beautiful, and adorned with some decal dials from ANYZ and Airscale, each covered with a punched disc of acetate, it looked wonderful. Once done, I actually glued the cockpit tub in place before I got round to gluing the fuselage halves together.

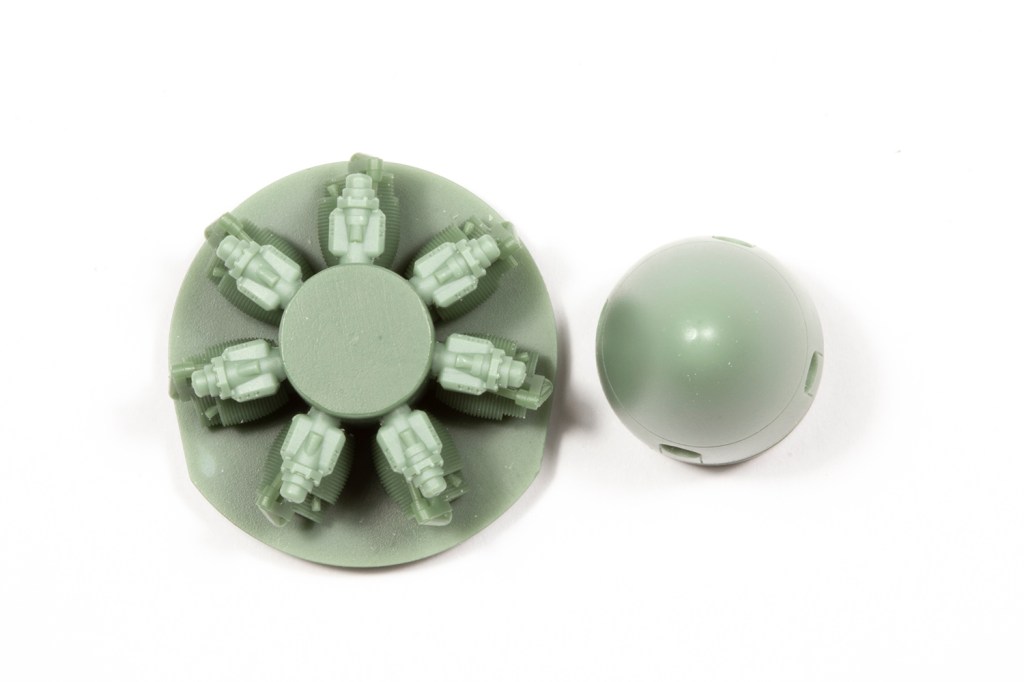
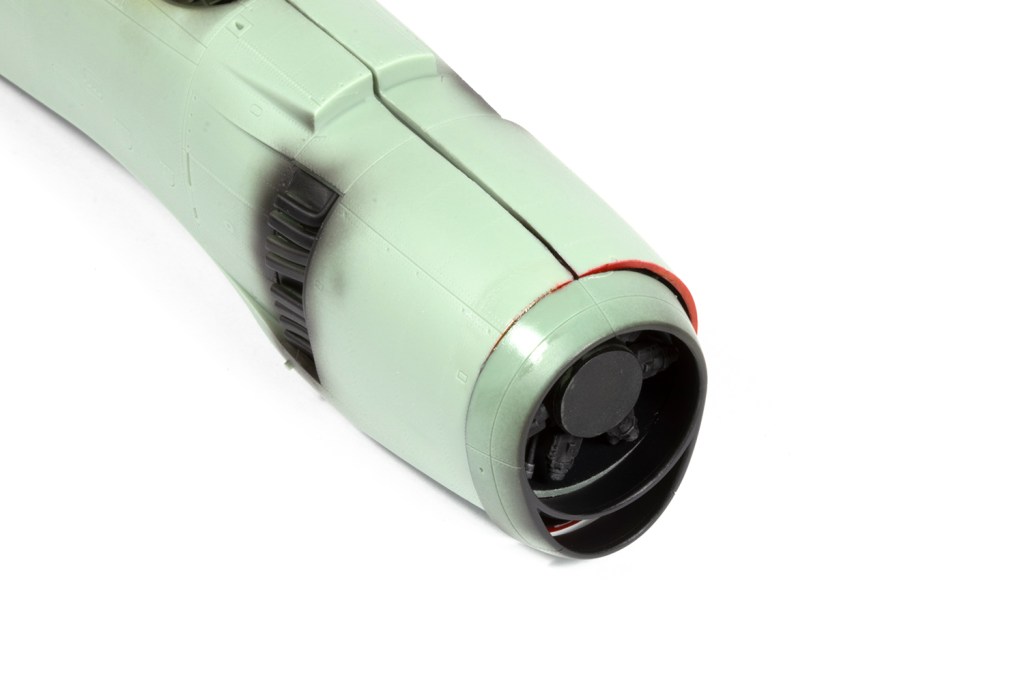
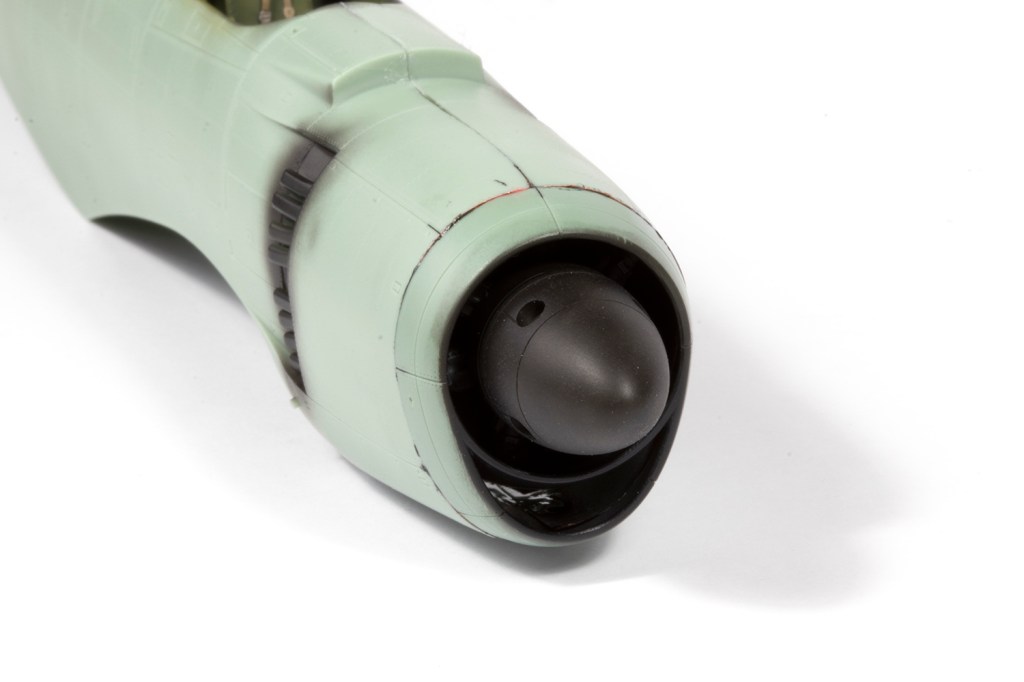
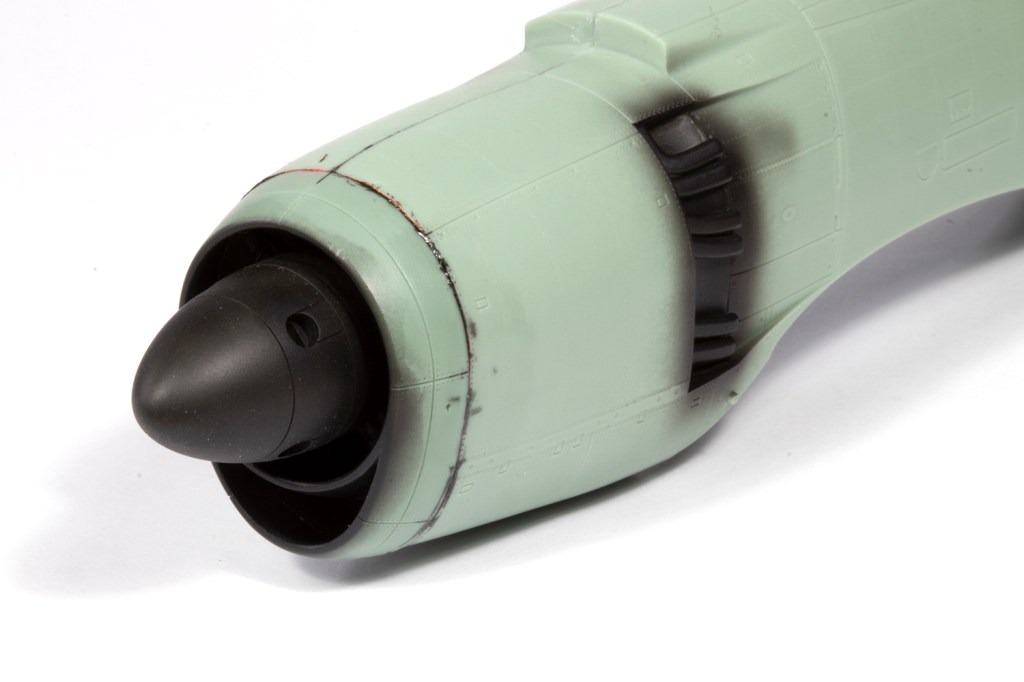
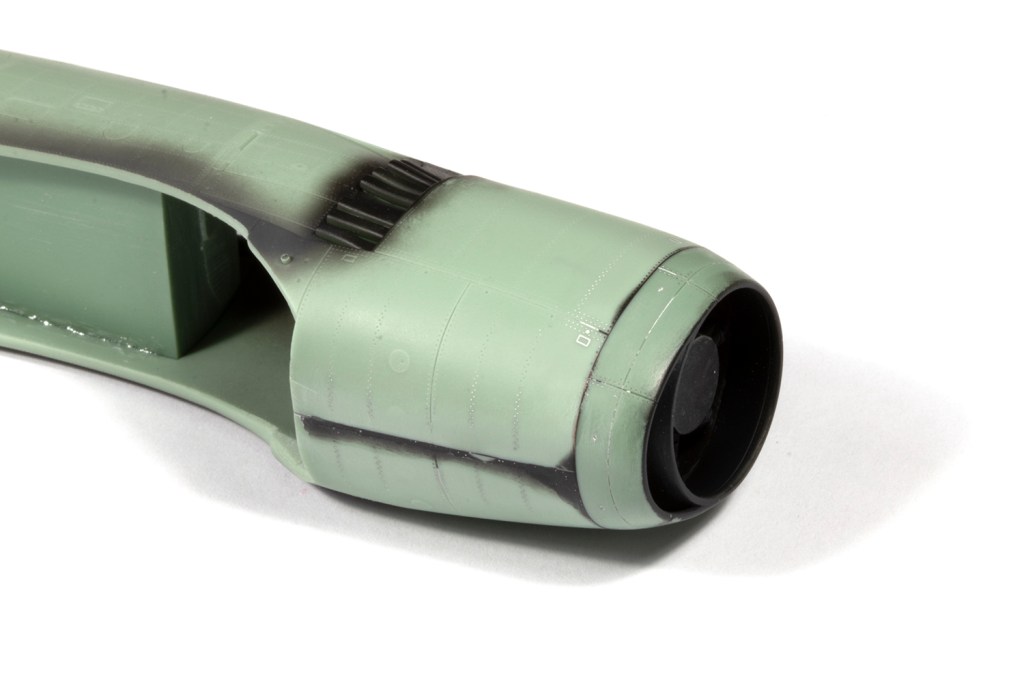
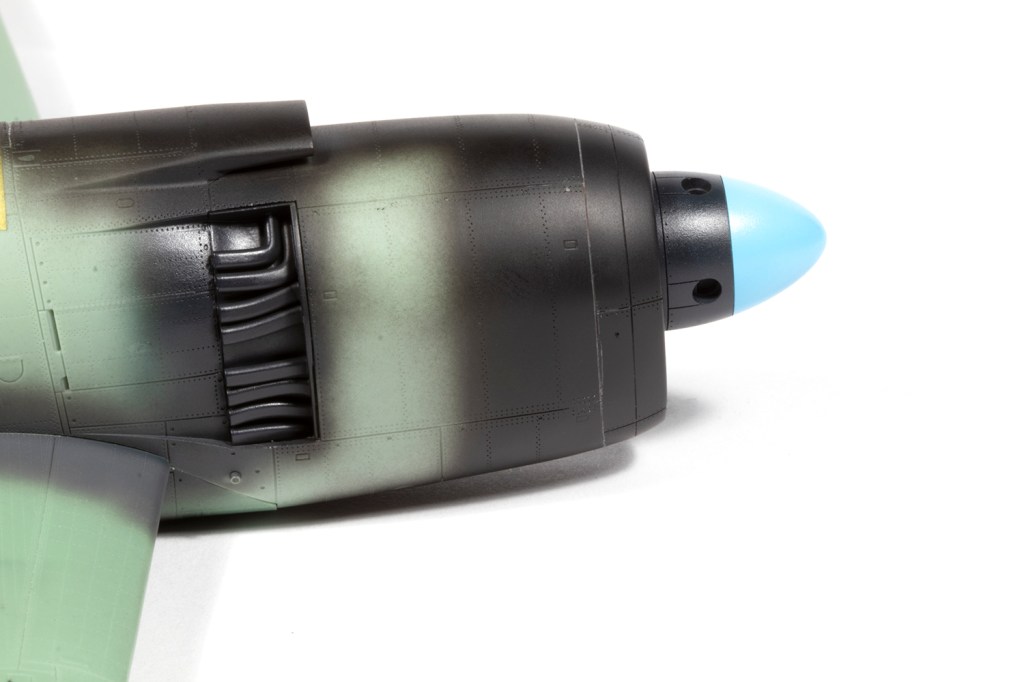
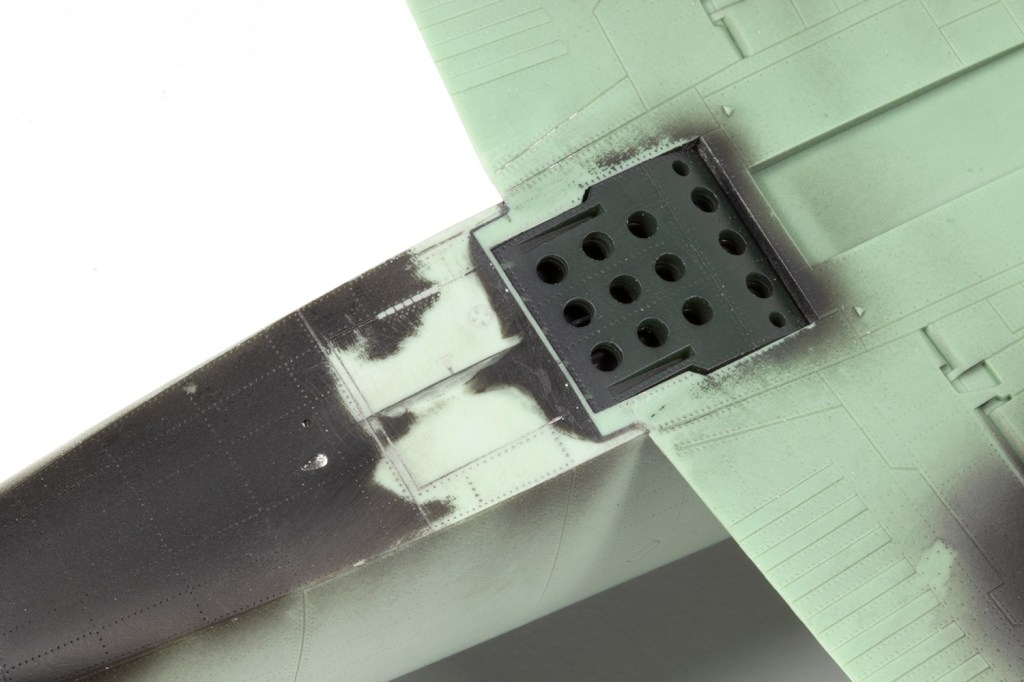
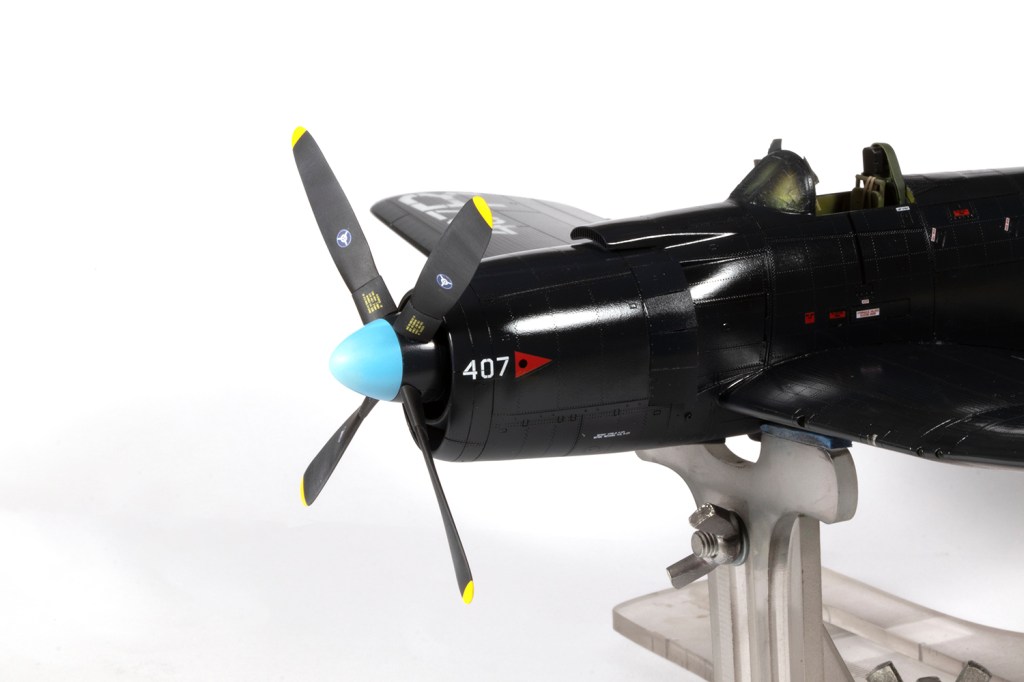
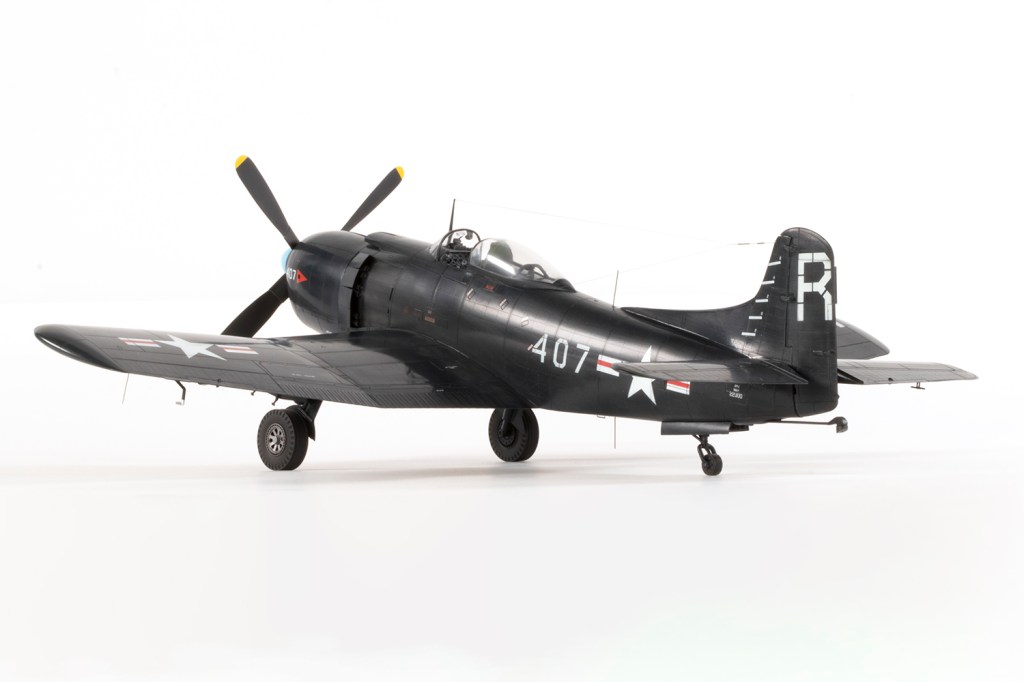
Leaving the front and rear fuselage ends unglued, I could then add the engine and tail hook roof. The former is fairly basic and doesn’t seem to bear much resemblance to reality, but it’s academic due to the massive spinner. If you want to modify the kit to one that flew without the spinner, you might want to consider a better-detailed engine. On the real thing the engine was canted a couple of degrees to starboard to counteract the engine torque, and this is subtly but faithfully recreated by Halberd.
With the fuselage front still unglued, I attached the nose cap to the upper right side. At first blush, the fit is awful, but if you take it a quadrant at a time and apply the right pressure in the right place, the fit becomes very good. In this manner I joined all the parts around the nose and ended up with much less seam work than I initially feared.
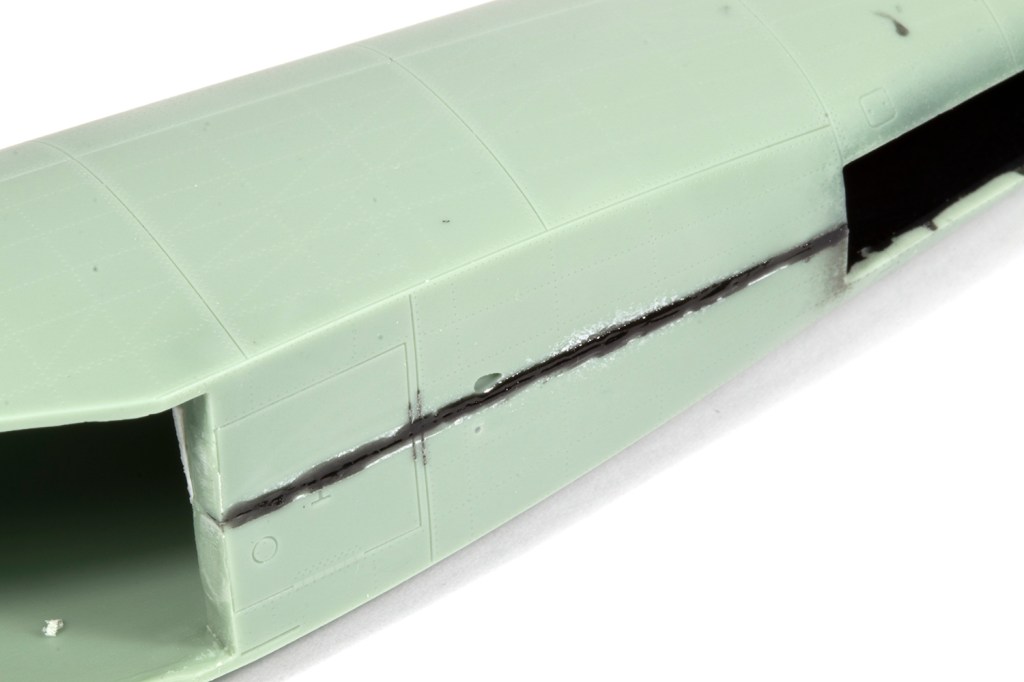
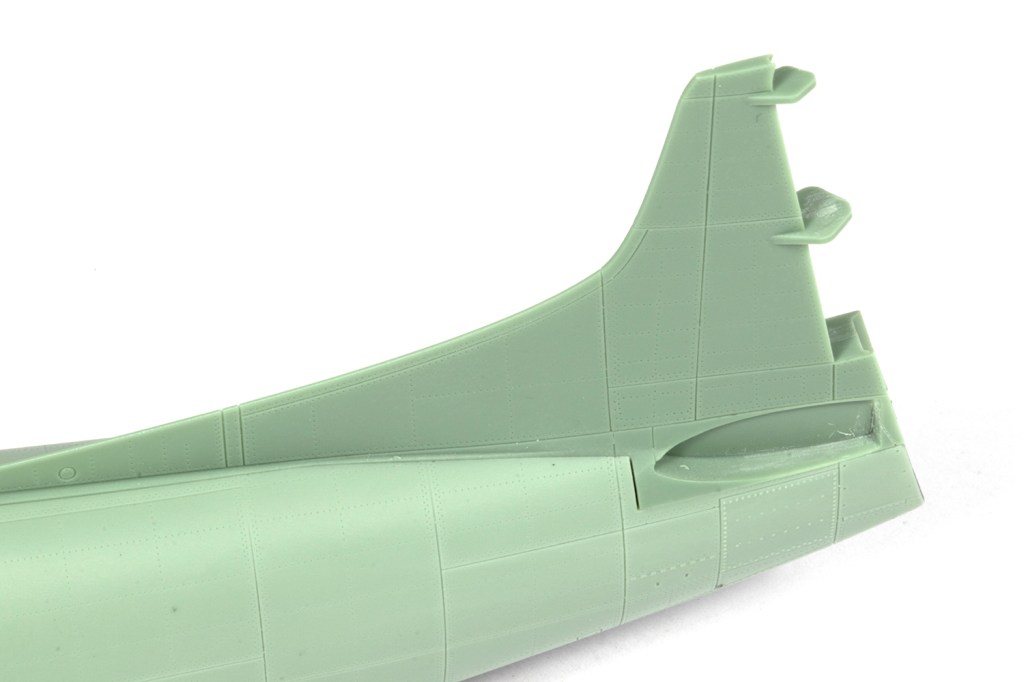
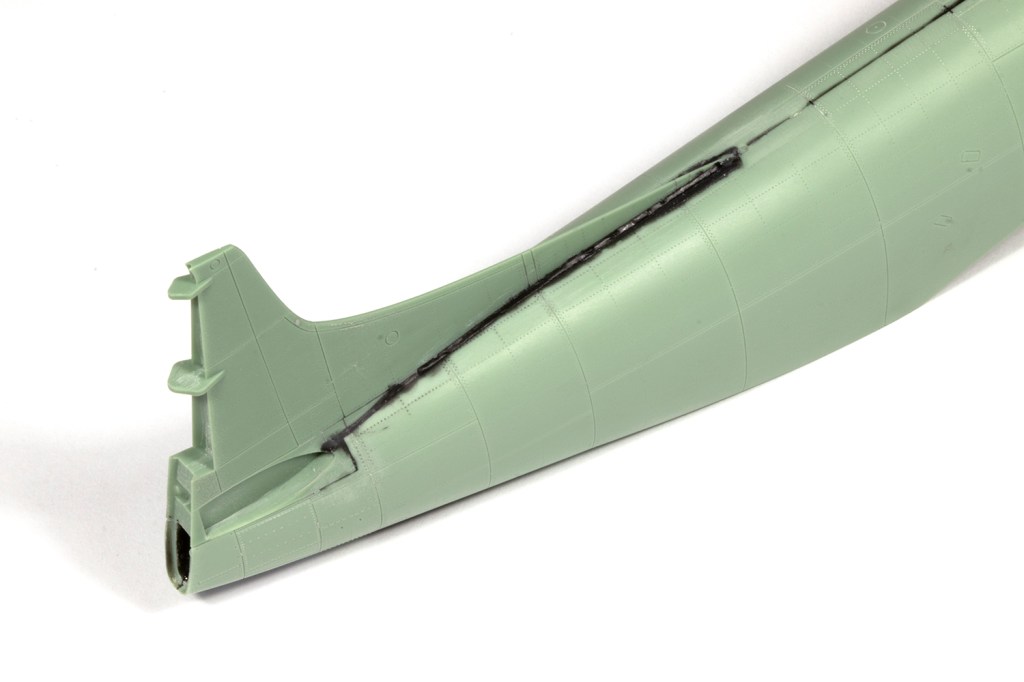
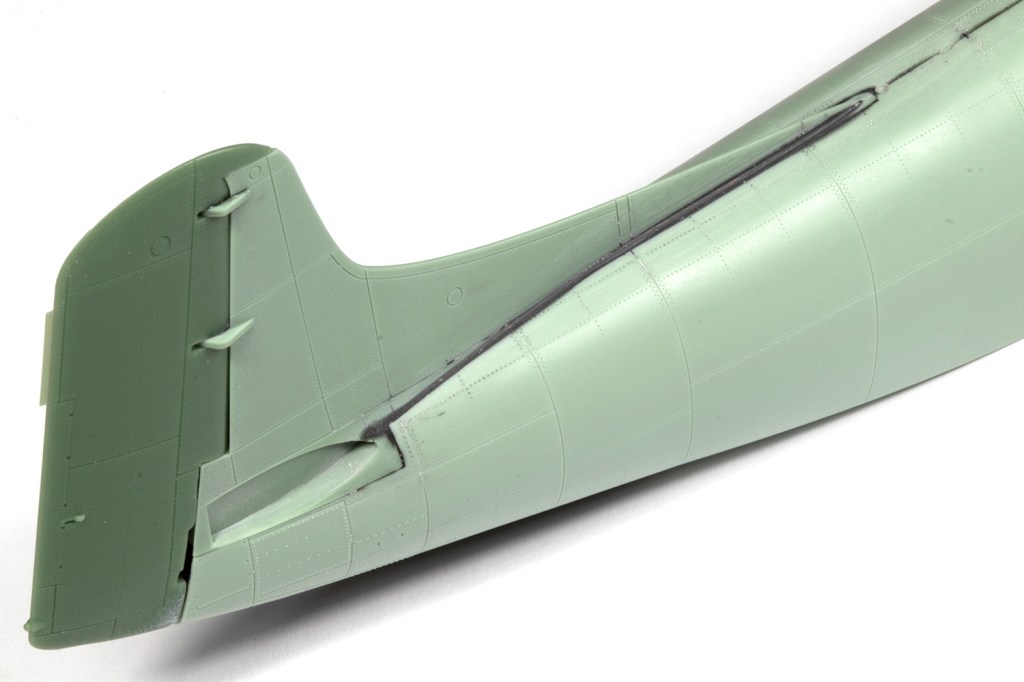
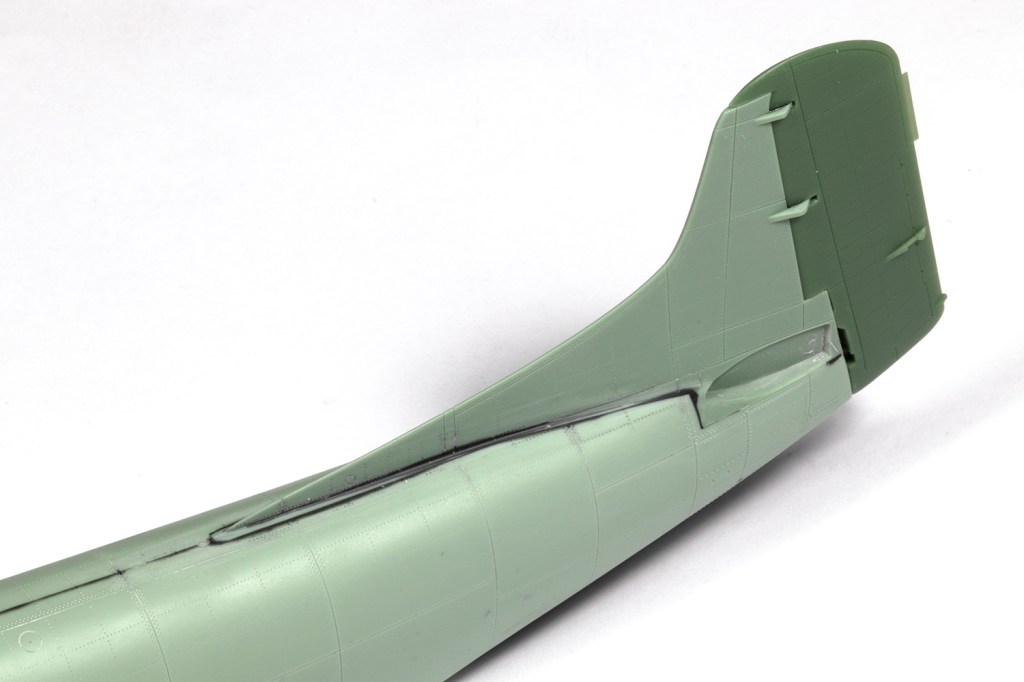
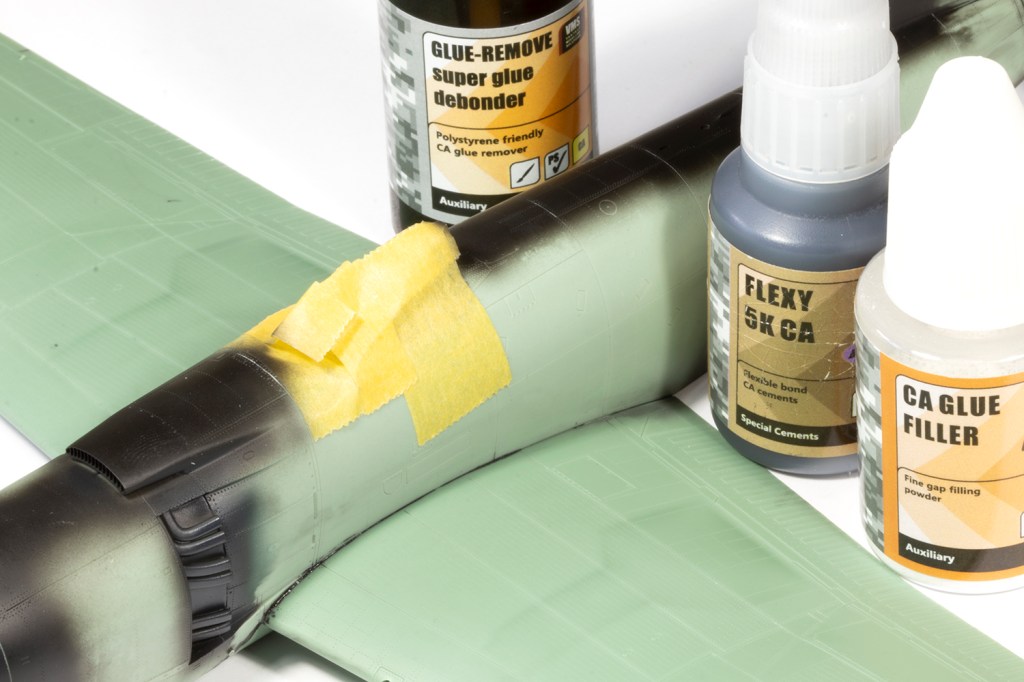
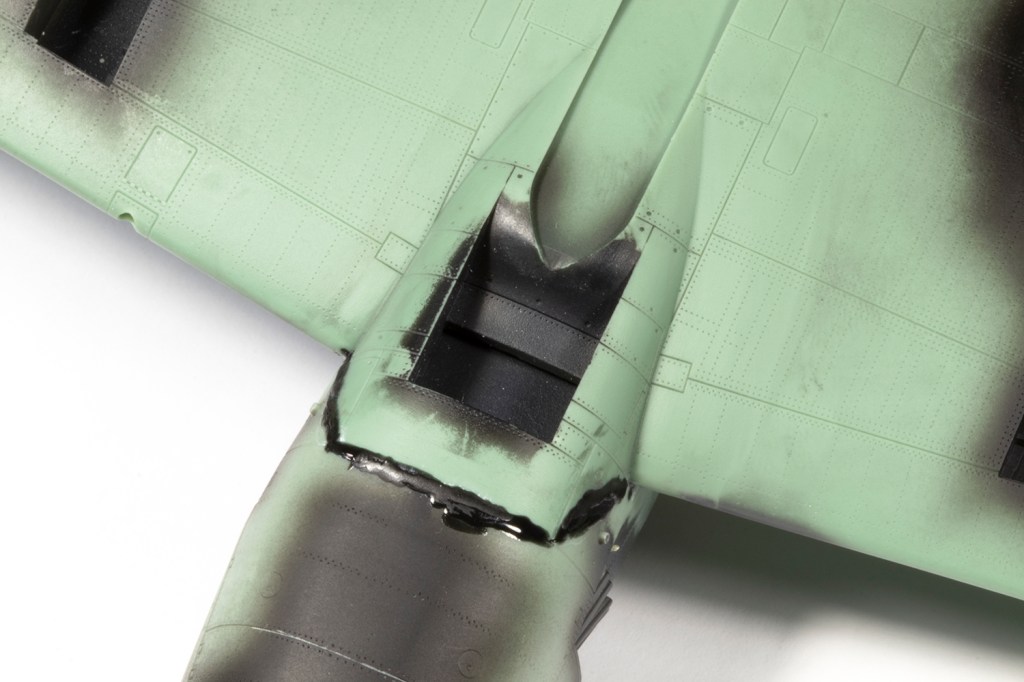
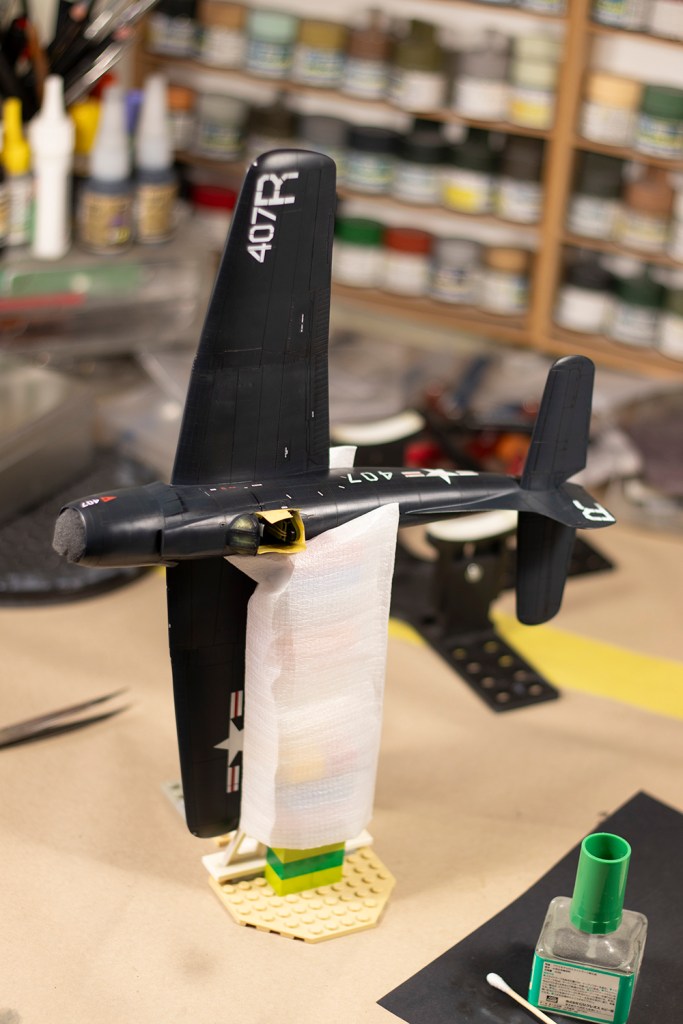
The same is true at the rear, although I couldn’t avoid some steps between the large single-piece vertical tail and the fuselage itself. Here I used VMS black CA mixed with their Glue Filler (which is a powder), and then removed the excess with VMS CA Debonder. I became a big fan of this product on this kit, but it’s tricky to use. CA sets quickly, and you need to catch it early if you want the debonder to actually remove excess glue. If the CA does set, leaving the debonder for ten minutes or so on the CA will make it easier to rub away with a cotton bud. It takes some getting used to, but it does work.
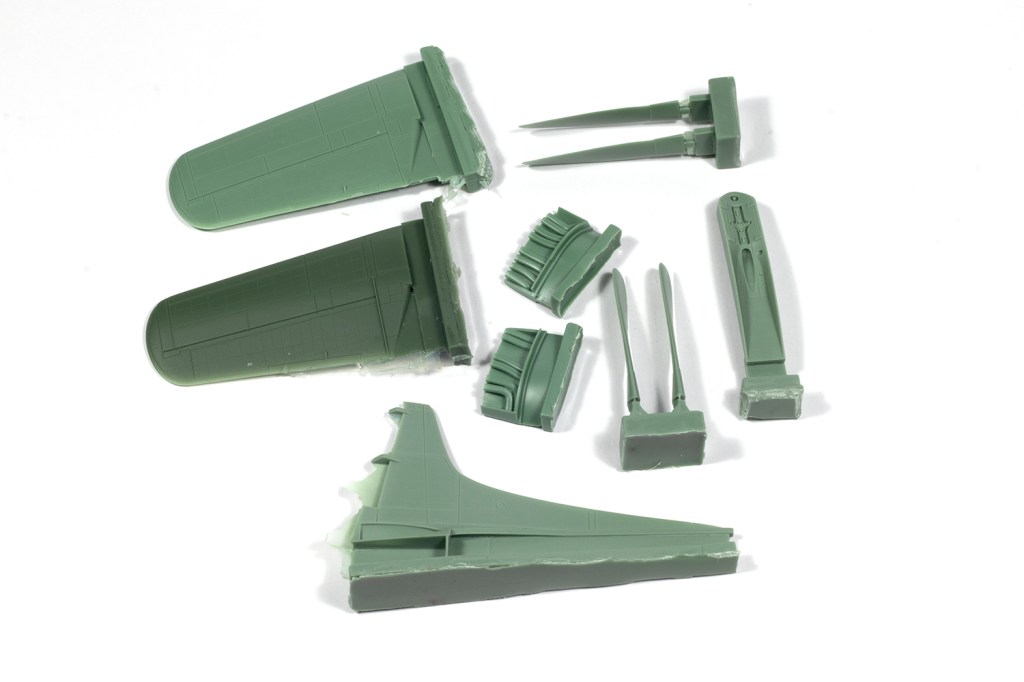
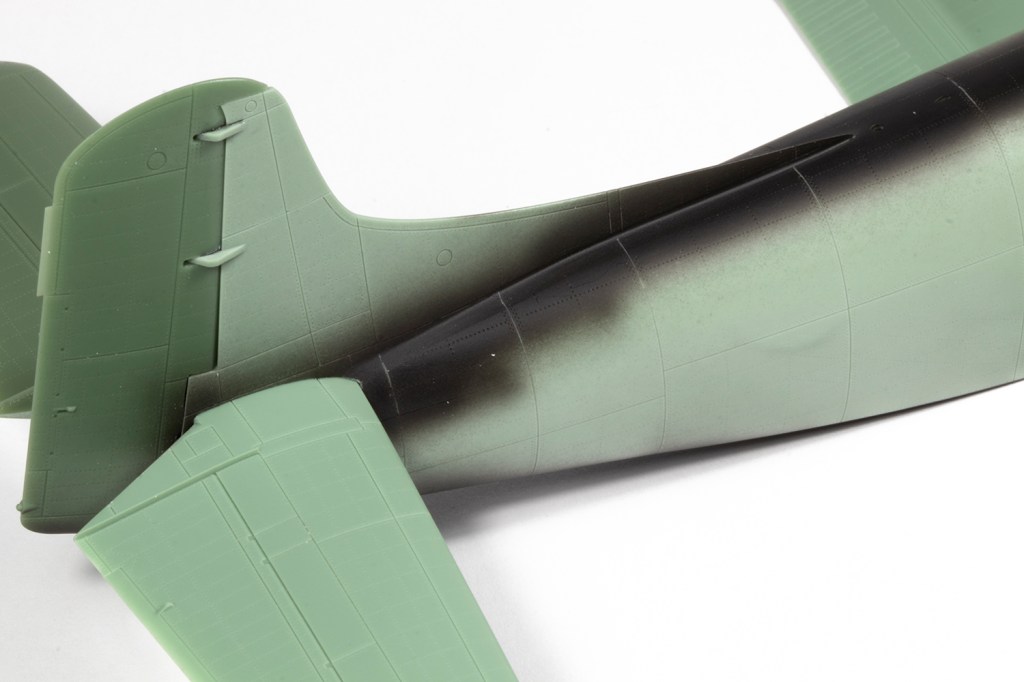
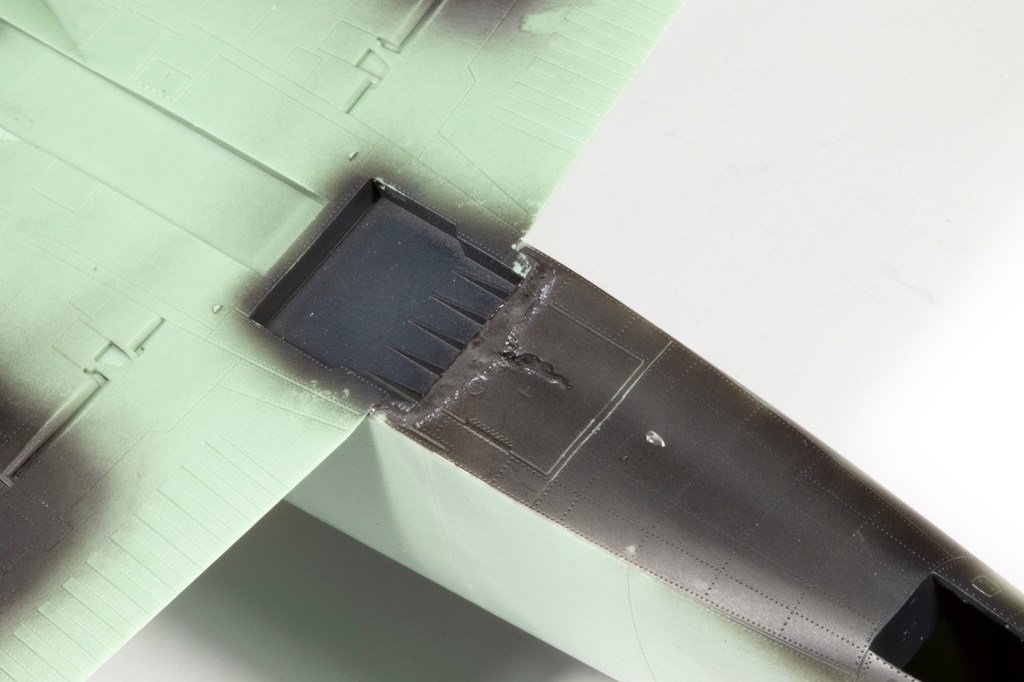
The horizontal tail planes are meant to slot into recesses in the vertical tail part, but I couldn’t do it without inducing some dihedral. They’re meant to be flat, so I gently scraped away some of the recess on the lower side, and they then fitted perfectly. The rudder also slots in place very nicely once cleaned up. Be very careful of trailing edges – they’re super thin and easy to break.
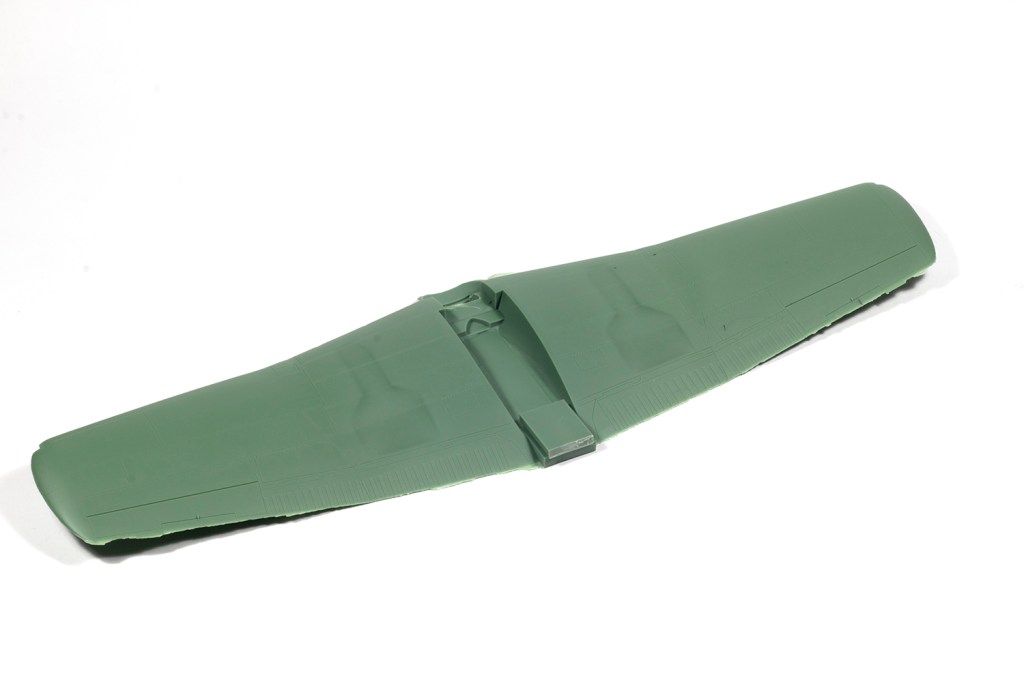
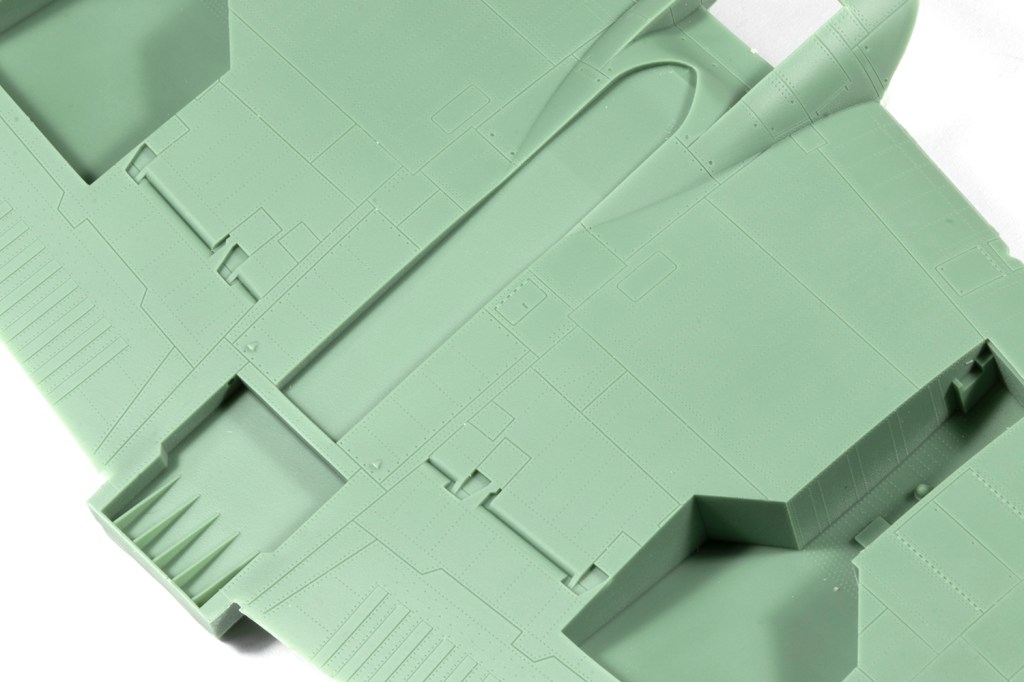
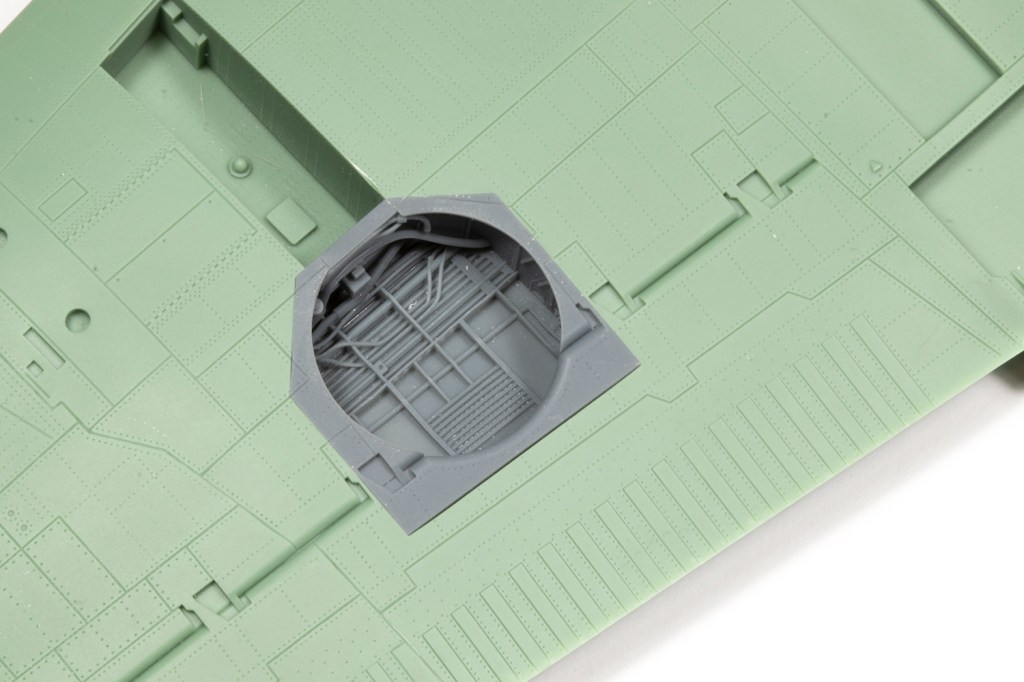
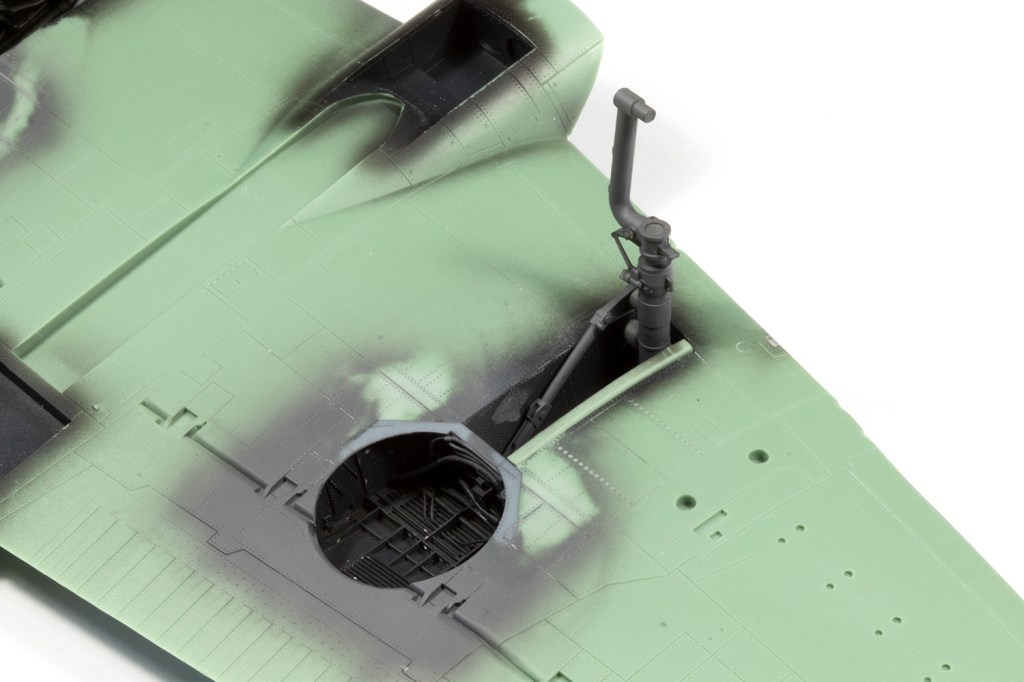
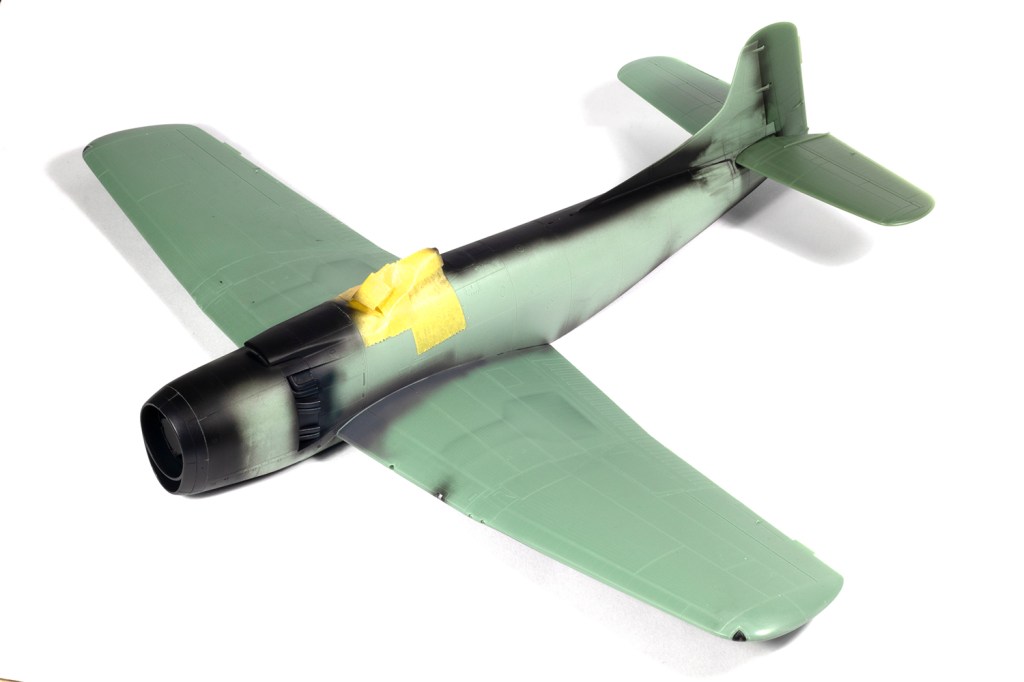
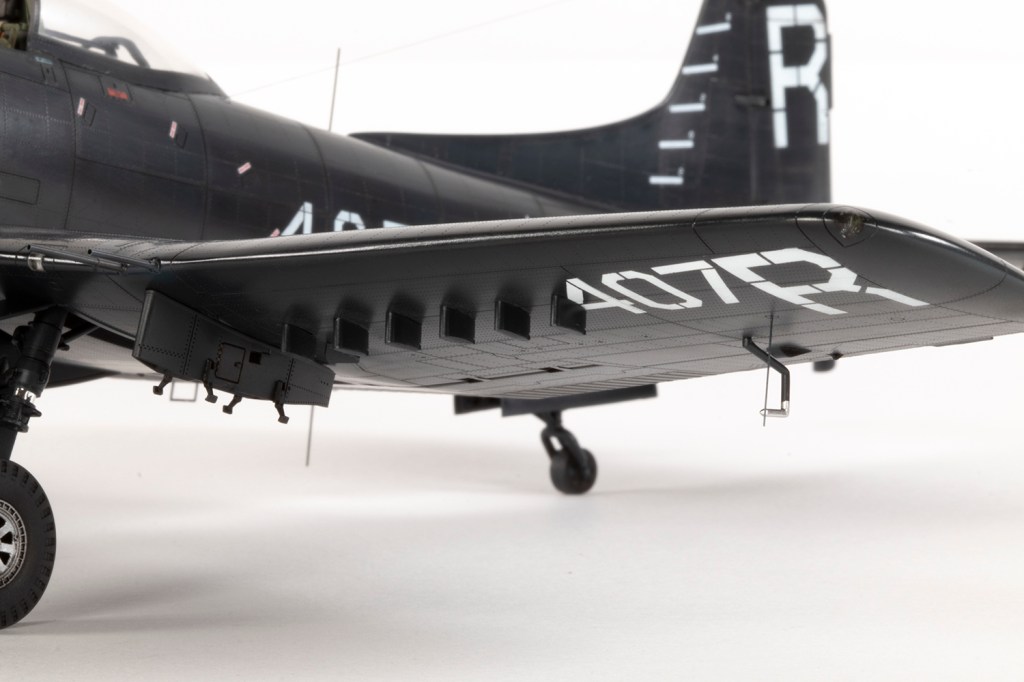
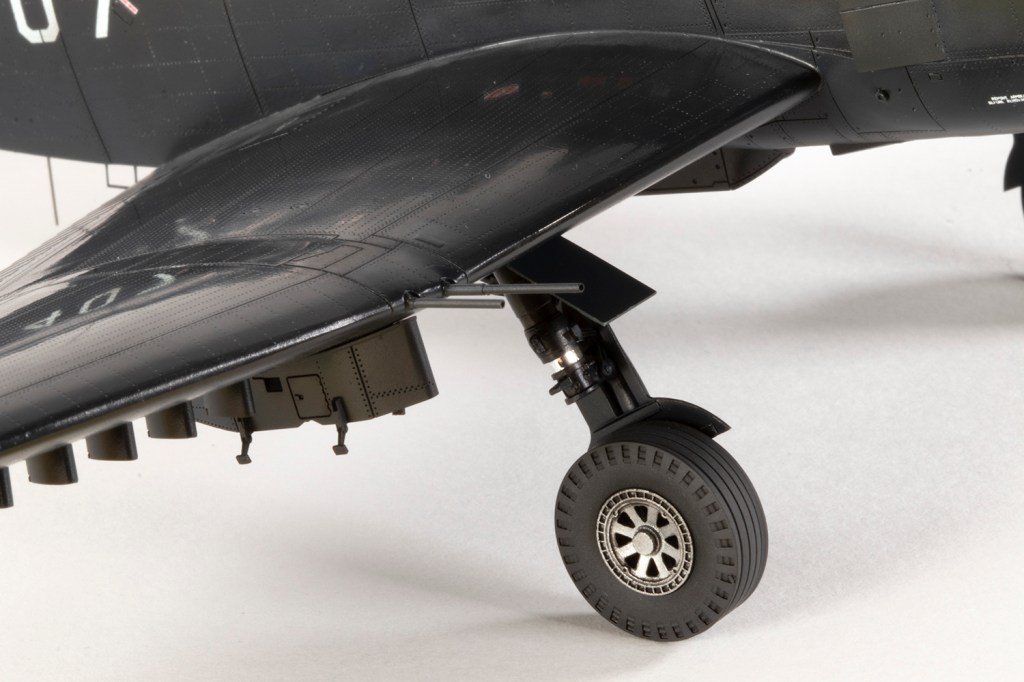
With the fuselage basically together, I tackled the wing. This is a truly enormous (and heavy) piece of resin, moulded as a single part. 3d printed wheel well inserts are provided, and they are a very tight fit, but they do go in and some filling around the edge is required. Separate wing tip lights are moulded in clear resin and I ignored the instructions to paint them red and blue as they looked clear to me in photos. The unique flap-airbrakes are moulded closed, but I was more than happy with that, and the wings cannot be folded.
The wing piece itself didn’t fit into the fuselage without some trimming at the front, but by doing this slowly it will slot in place. At the actual join of the wing and fuselage the seam is fantastic, but under the front and rear sections I did need filler and sanding. Because the surface detail is so beautiful this was a little tricky, and I have to confess that across several joins I could not replace the delicately moulded rivets. I must also mention the lovely ventral airbrake, which clicks in place and can be moved up and down. It’s the little things.
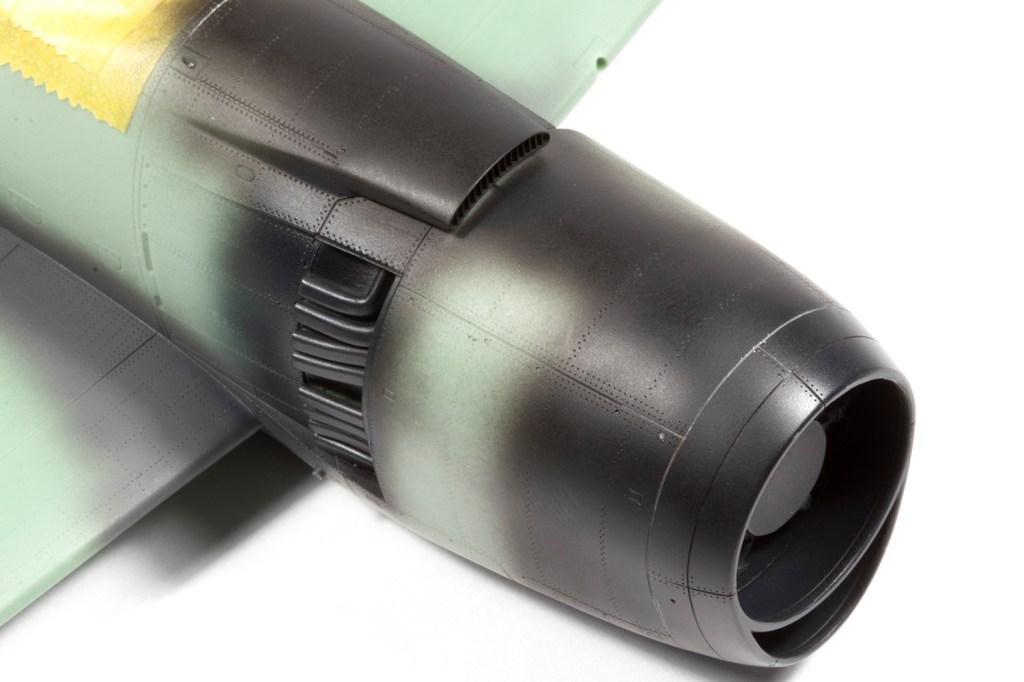
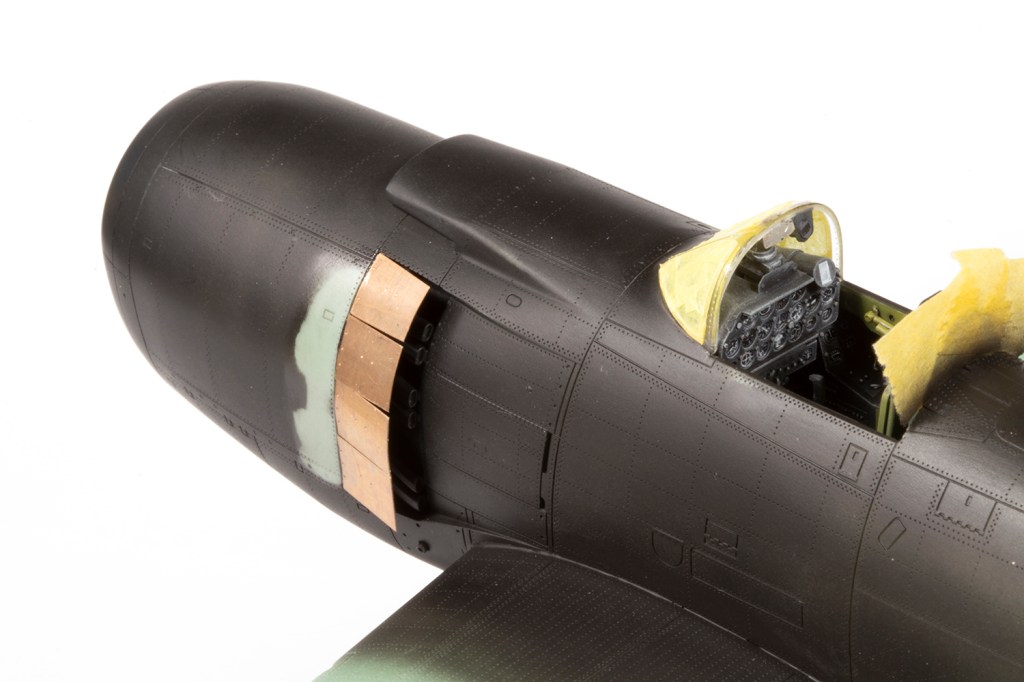
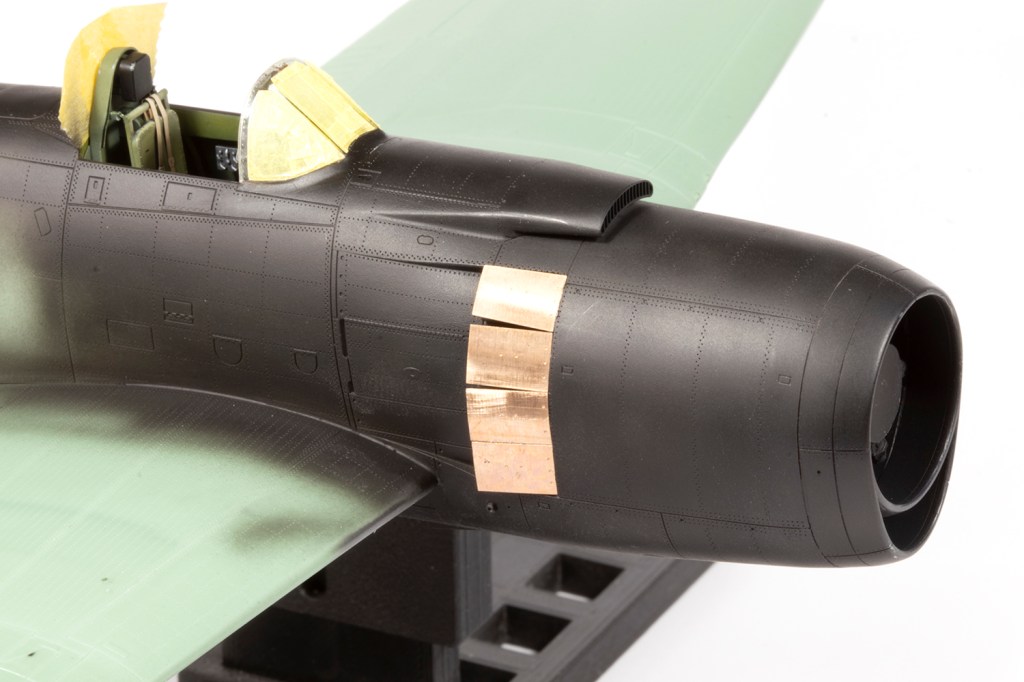
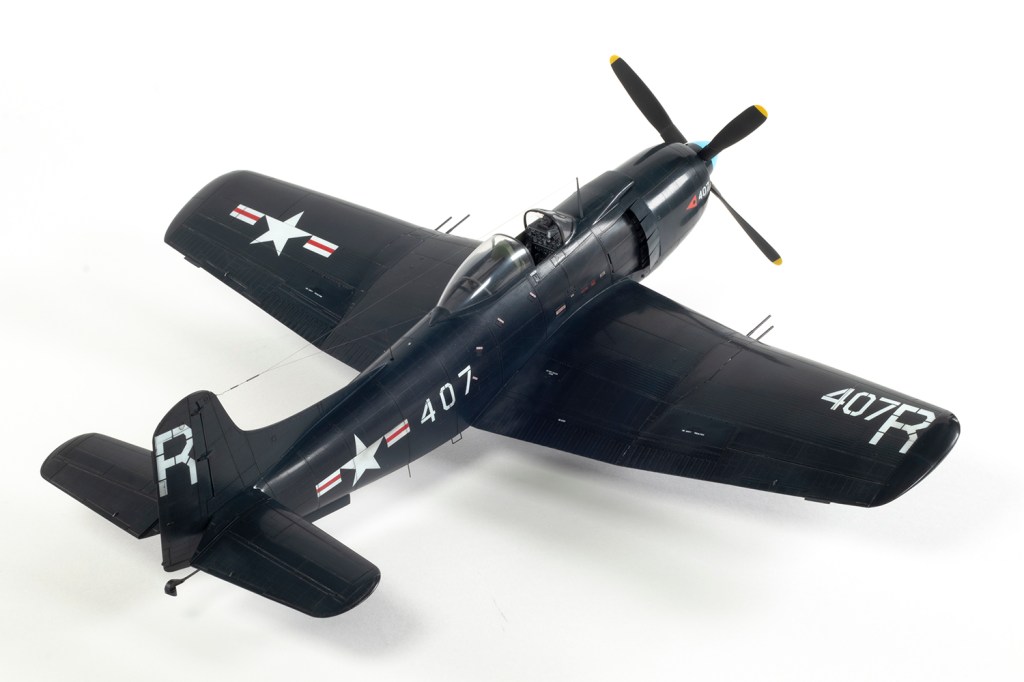
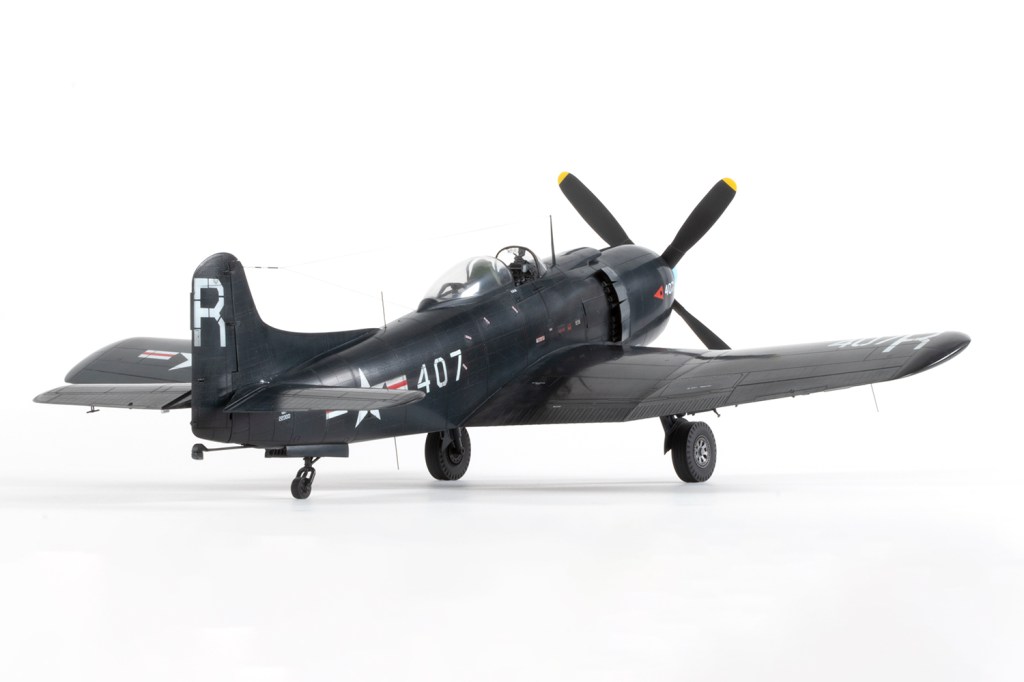
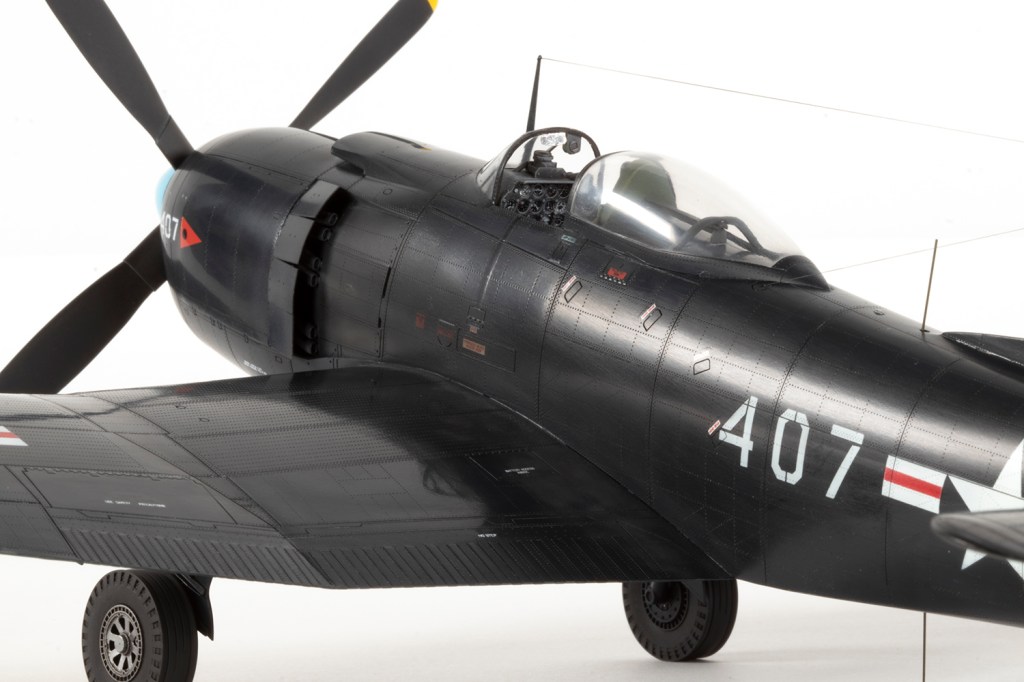
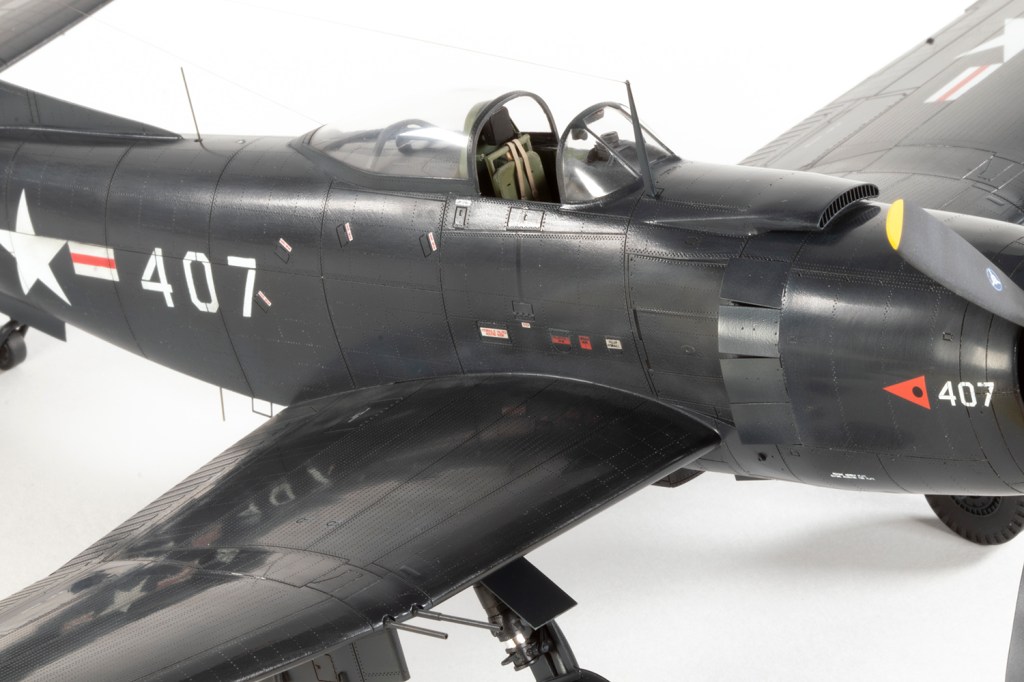
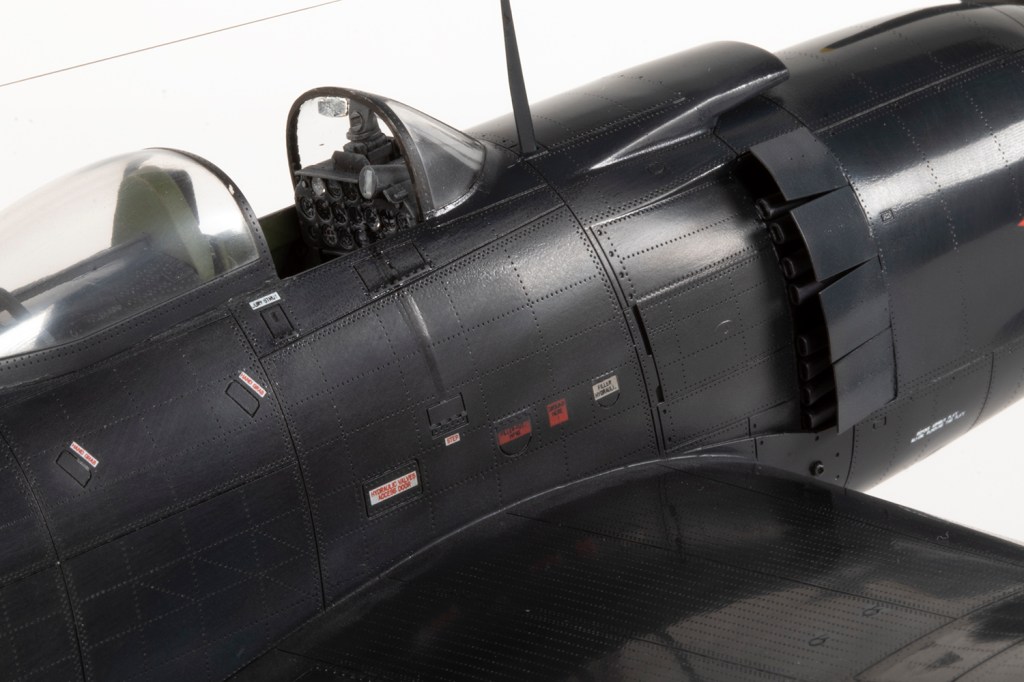
I’d noticed early on that the engine cowling flaps are provided as a single piece of PE to represent them in the closed position. I understand why Halberd did this, but in real life they were nearly always open, and bending that single piece of PE to match the curve of the fuselage did not look fun. I decided to separate the flaps, bend them suitably, and then add them in the open position. In general this worked well, but they are very fragile and a couple of them needed to be reattached as the project progressed. It also made accessing the exhaust pipes difficult during painting.
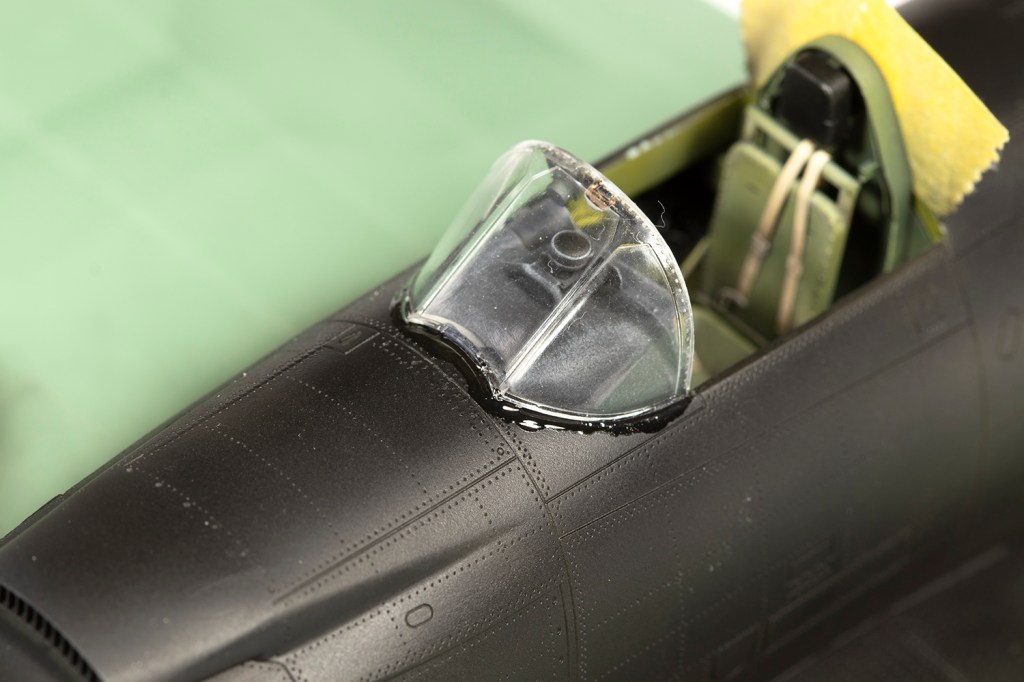
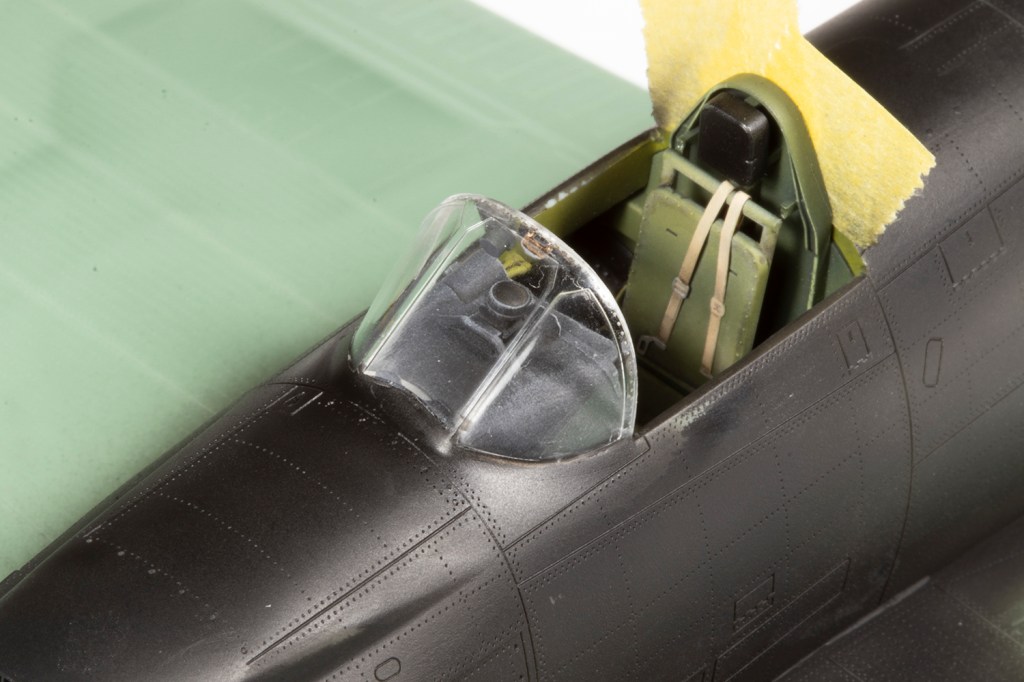
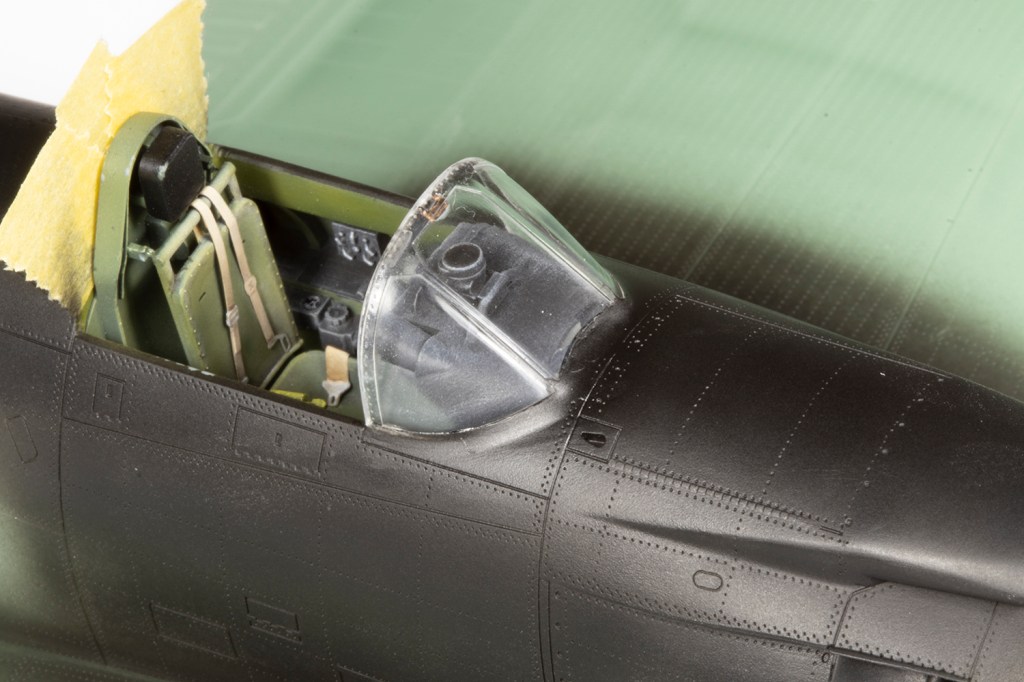
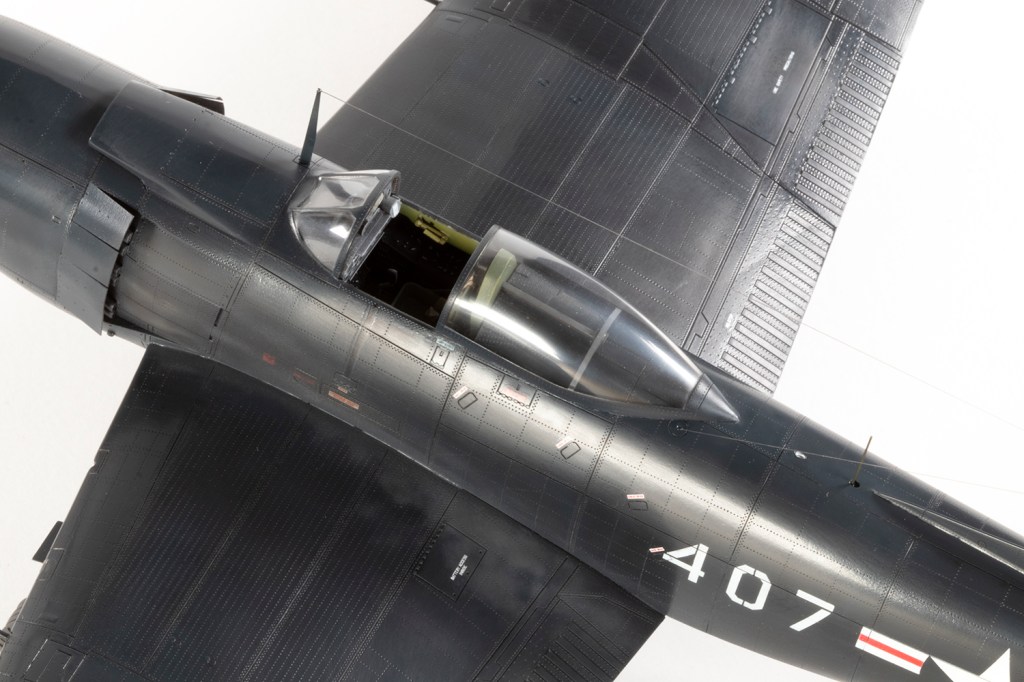
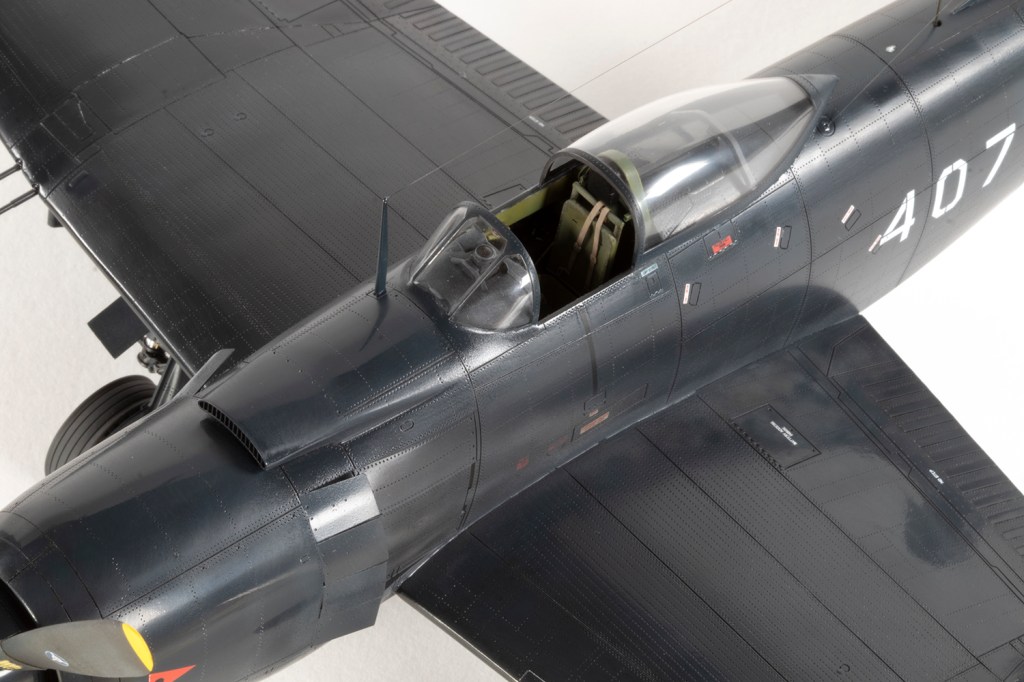
The last construction challenge was the canopy. Testing showed that, disappointingly, I would not be able to close the canopy. It’s too narrow and shallow to cover the seat and meet the cockpit sills. I was therefore going to have to break one of my modelling rules, and pose the canopy open. The windscreen also appears too narrow, but with some pressure, Deluxe Materials non-blooming CA and three hands (I wish!), it can be fitted accurately and just needs blending in with some more CA as filler. The clear resin is pretty flexible and robust, but one always does fear irreparable damage to clear parts.
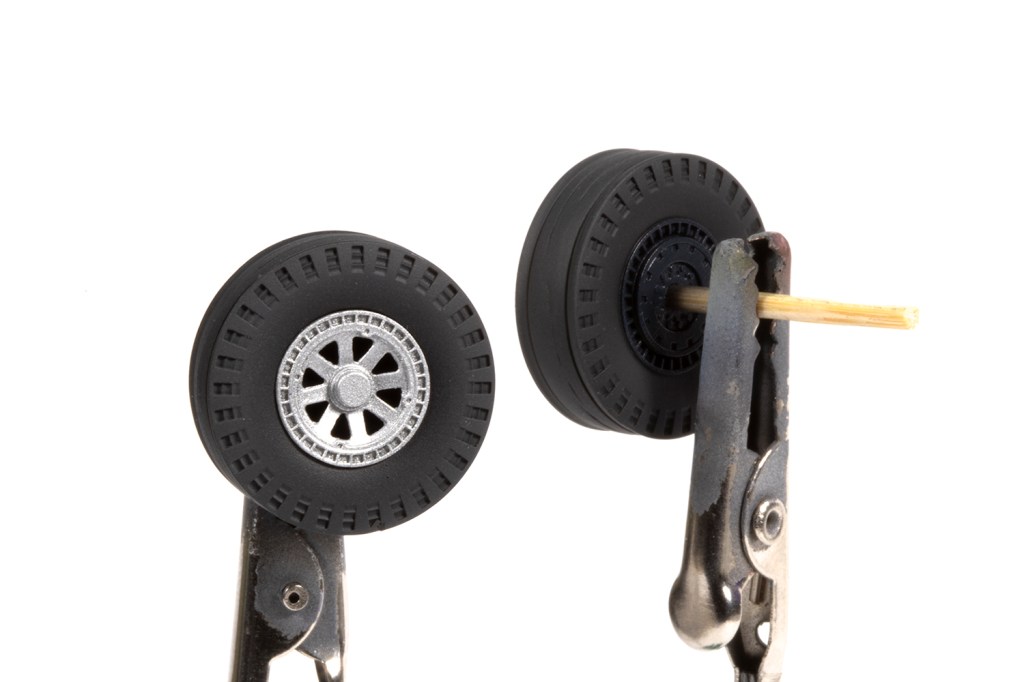
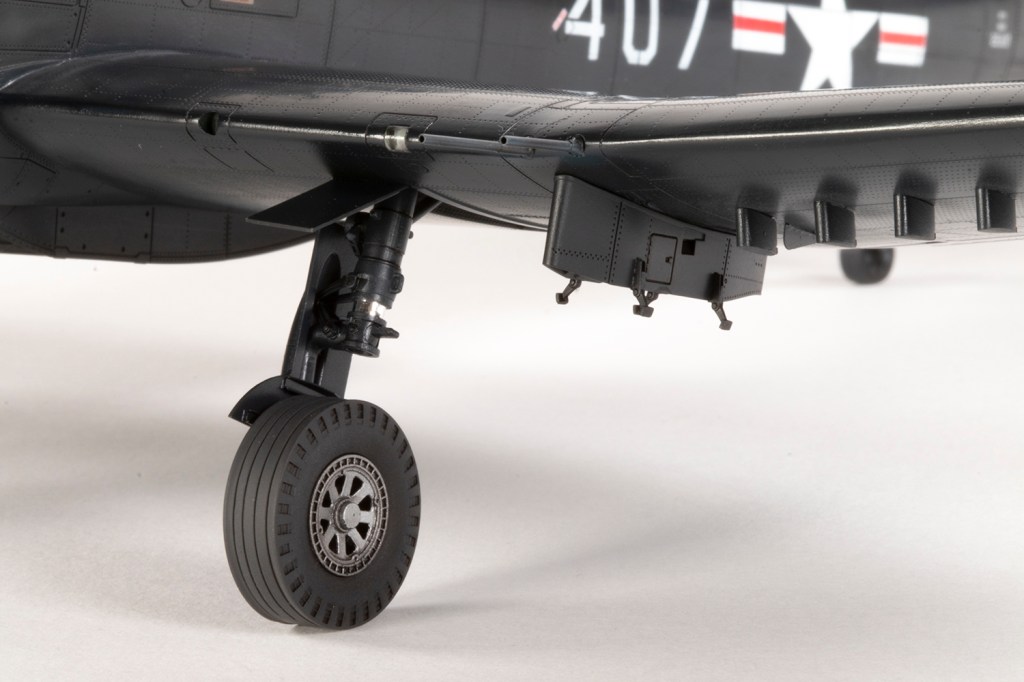
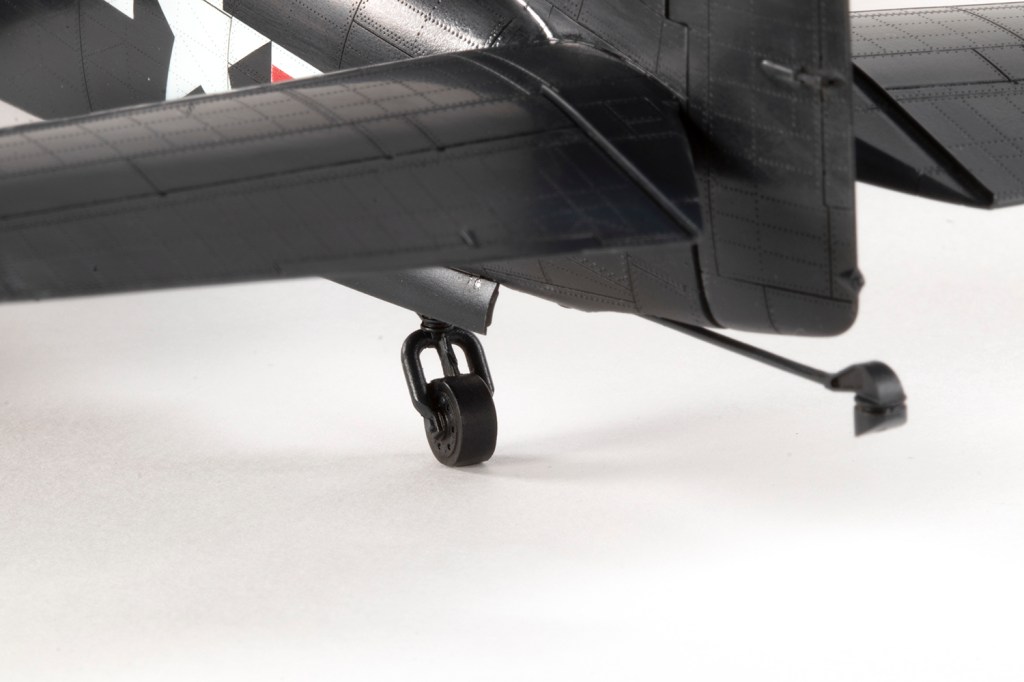
Alongside all this I worked on all the little bits and pieces. The undercarriage legs are impregnated with metal rods to assist with carrying the considerable weight of the model. There’s flash, but it’s minimal and easy to clean up, although the downside is that the tail wheel needs a non-prototypical wire to connect it to the leg; it’s well-hidden and a necessary evil. The main wheels come with separate hubs and are a work of art and the fit is flawless, making it easy to paint them aluminium and the tyre a dark grey. Everything is just so neat and fits so well it makes construction a real joy, whether it’s the perfect fit of the huge centreline pylon into the fuselage, or the way the intricately moulded sway braces click into the main wing pylons.
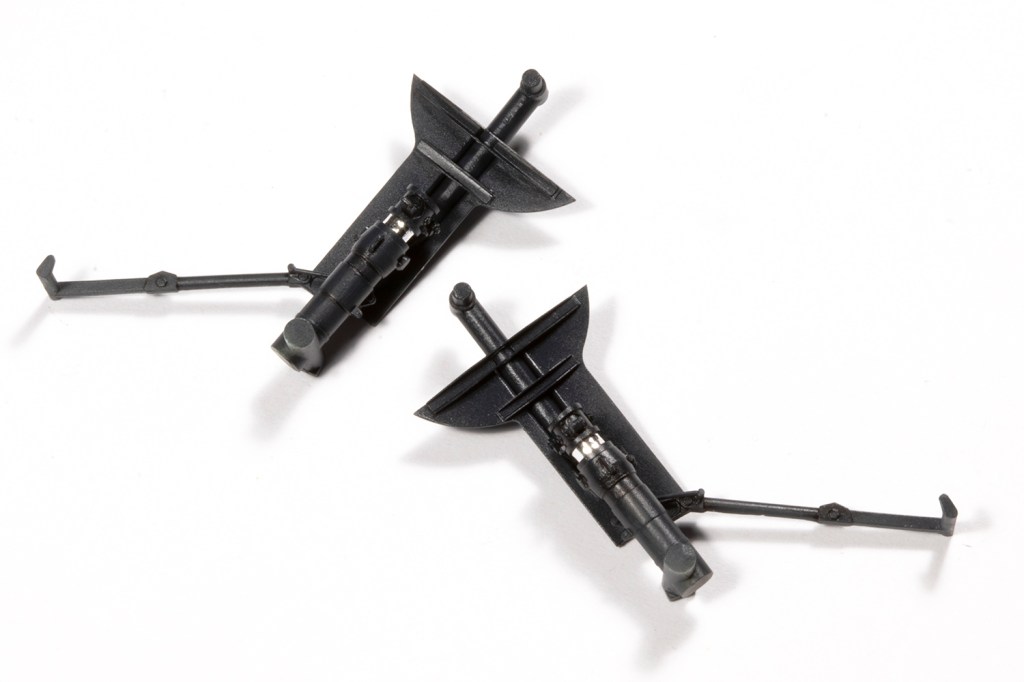
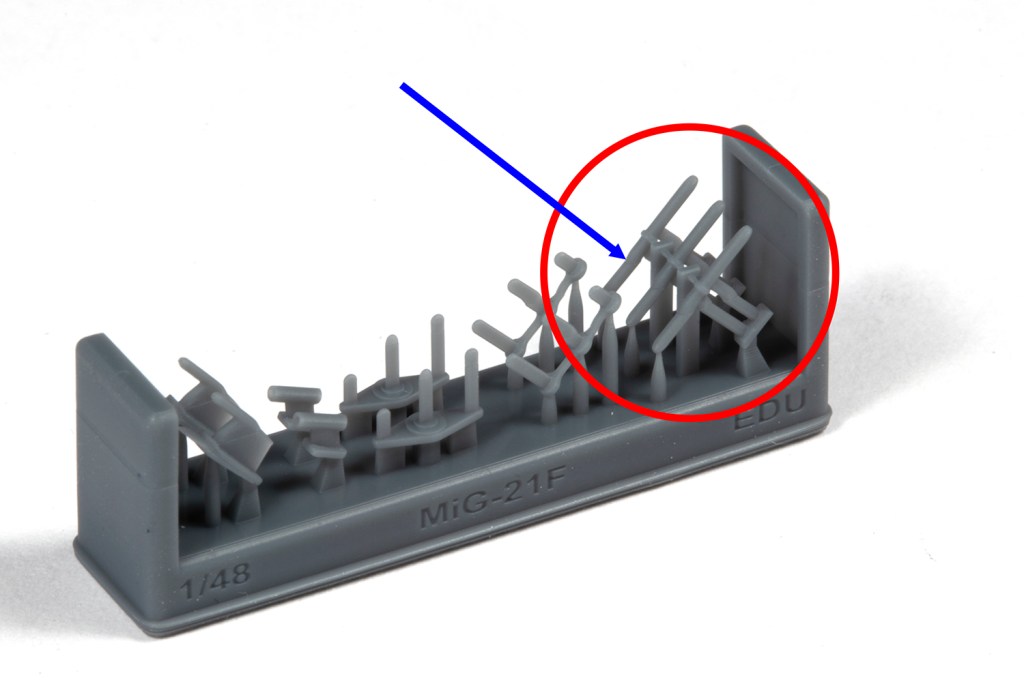
It’s not all good news though: the main undercarriage legs must be fitted at the same time as the sidewalls are slotted in. This leaves you with two choices: fit the gear early on and have to deal with it getting in the way, or add it at the end and touch up the paintwork around the sidewall lips. I went with the latter. Halberd also missed out the radio altimeter aerials under the tail planes. These ‘T’ shaped antennae are pretty common in mid-20th century aircraft, and can be sourced from a variety of places – in this instance, a Quickboost set for the MiG-21F. It’s an odd omission in such a complete kit.
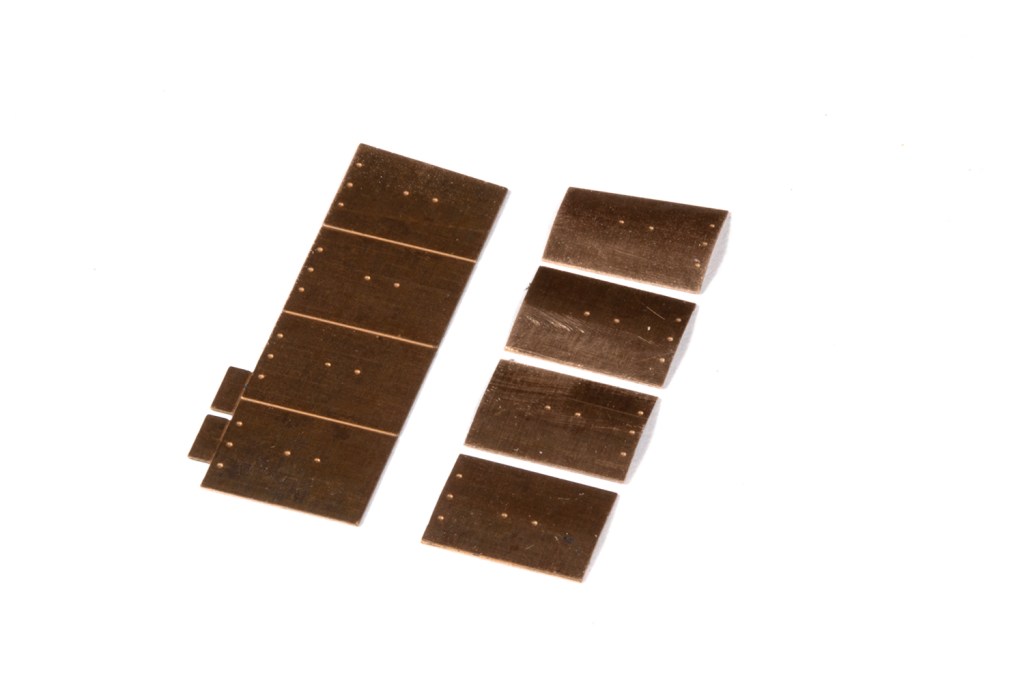
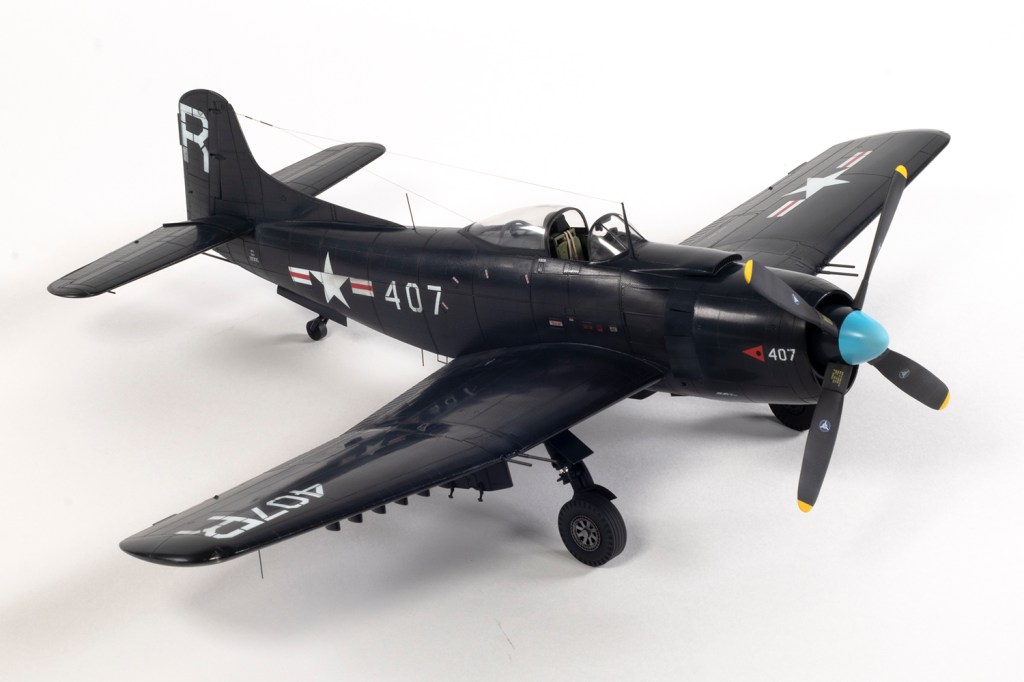
I also chose to replace the gun barrels with brass and nickel silver tubing. There’s nothing wrong with the kit parts, it’s just metal is more durable and definitely straight. 0.8mm tubing slots into the moulded holes perfectly.

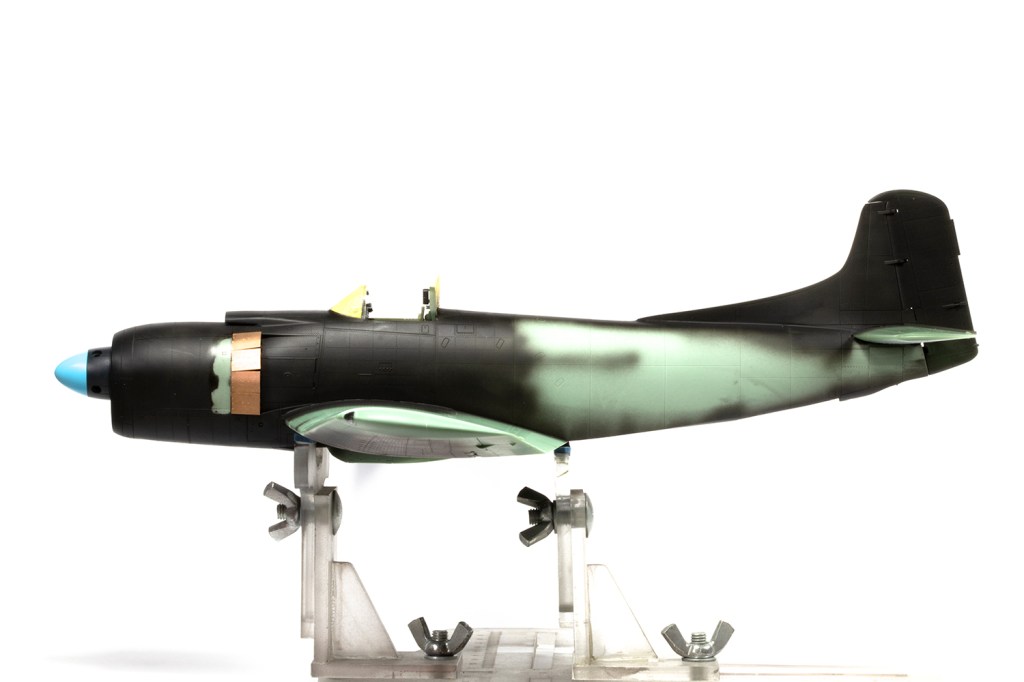
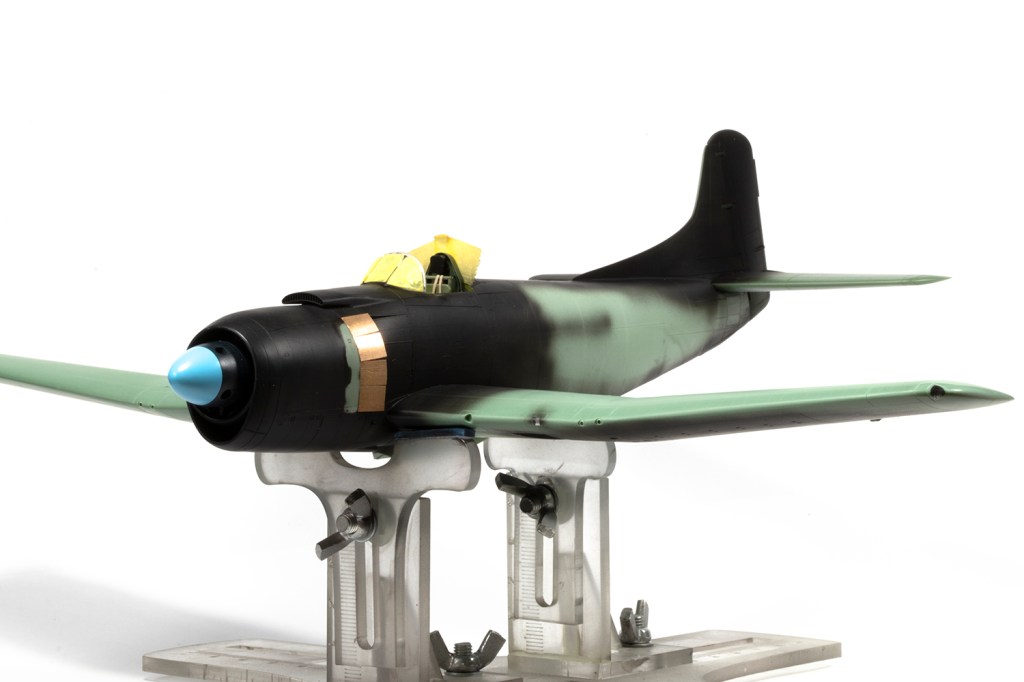
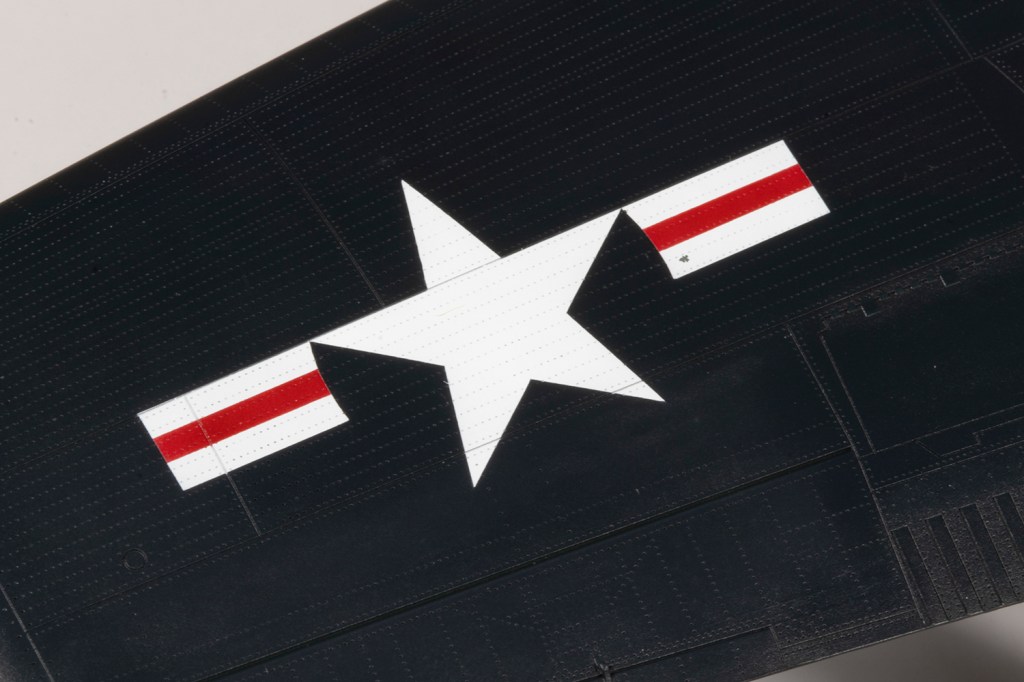
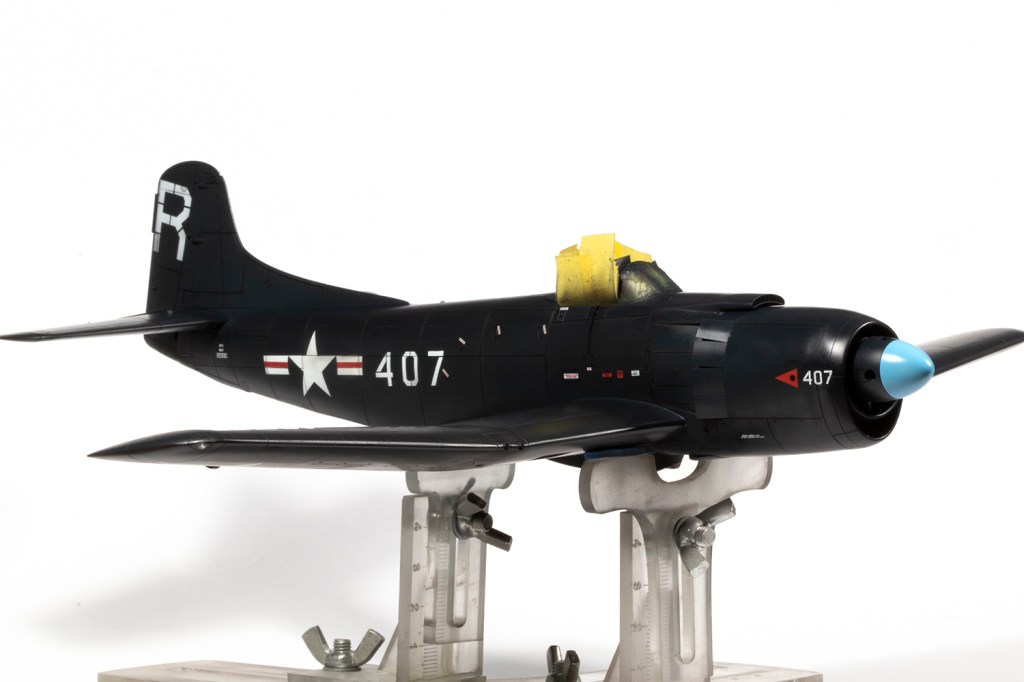
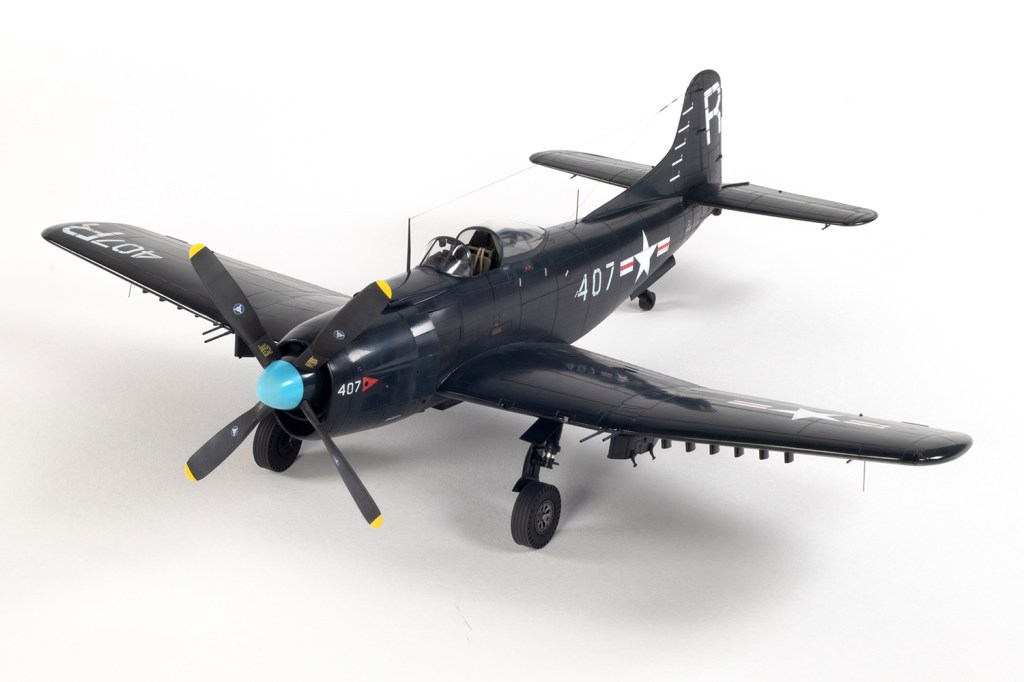
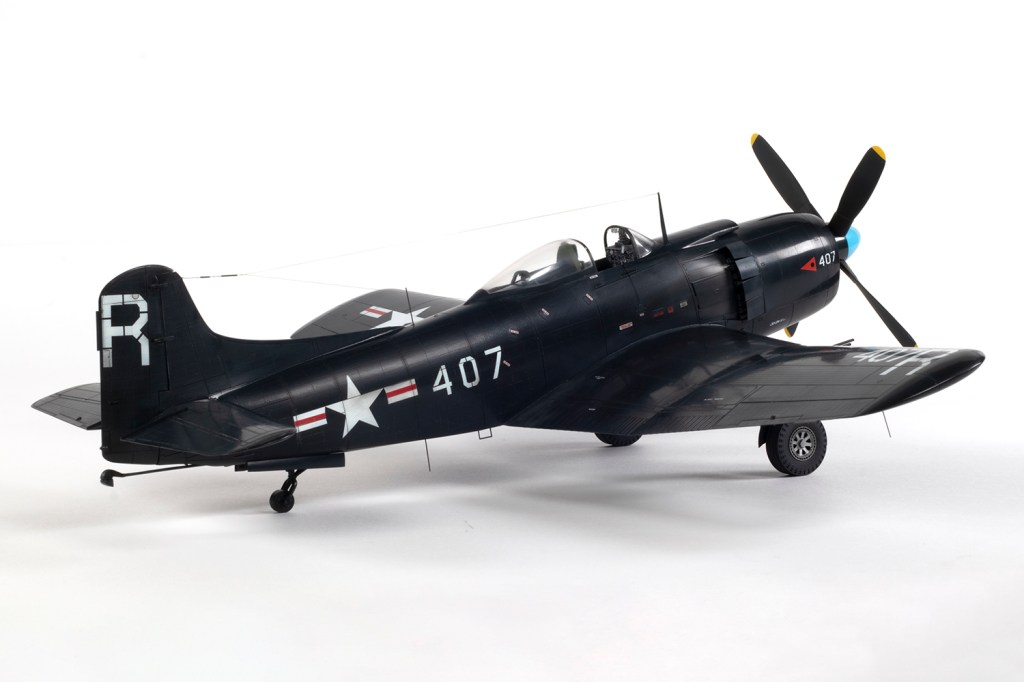
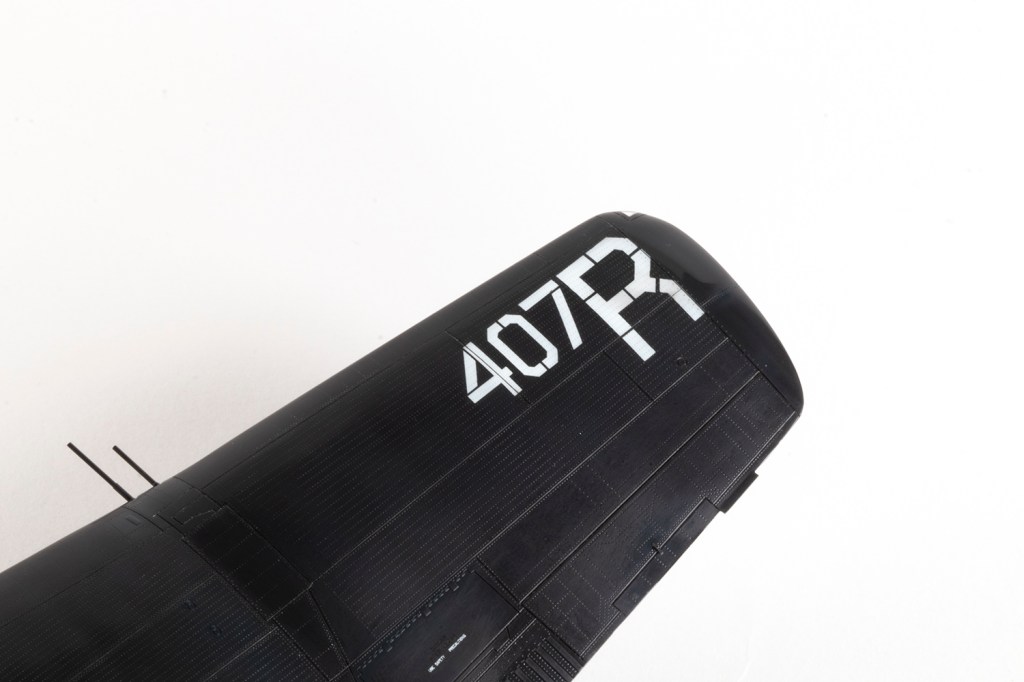
Once I had the main components together my thoughts turned to paint. The scheme is dead simple – Gloss Sea Blue, for which I like to use Mr Color 365 – but there were still questions. Profiles of VA-174 Maulers invariably show them with white spinners, which is a bit boring given Maulers flew with blue, red and green colours. The Ginter book claimed that in June 1948 the white spinners were painted ‘powder blue’, and since I was modelling an aircraft from December that year, that would be much more attractive to my eye than white. I’m still sceptical they weren’t white, but all the photos are black and white, so who’s to know? I’d also ignore the instructions to paint the tailhook in black and white stripes; it was Gloss Sea Blue on these aircraft.
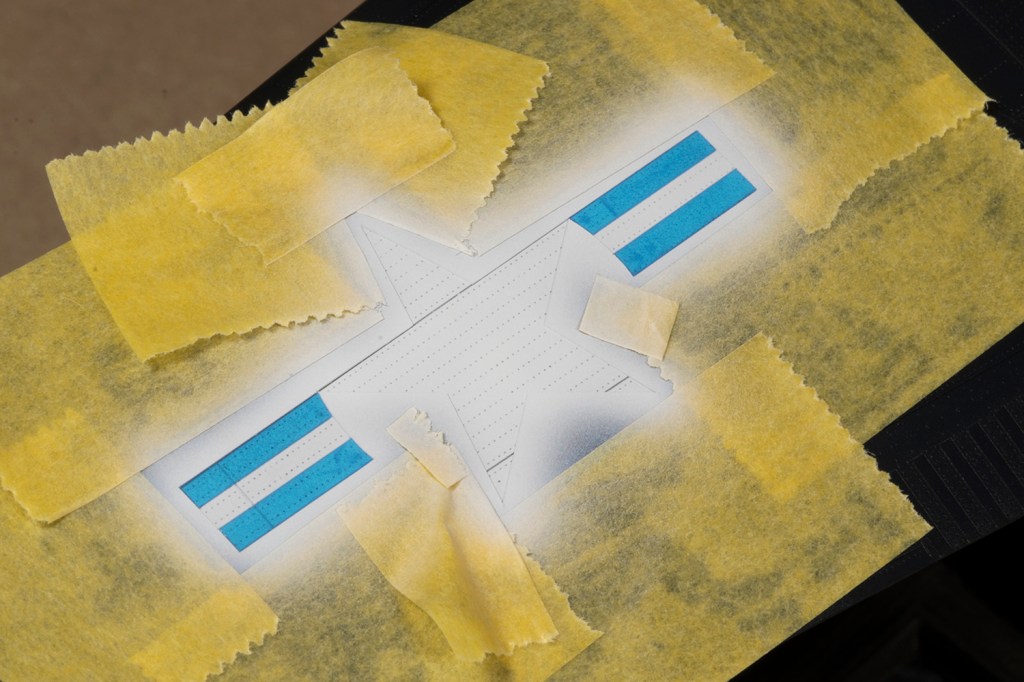
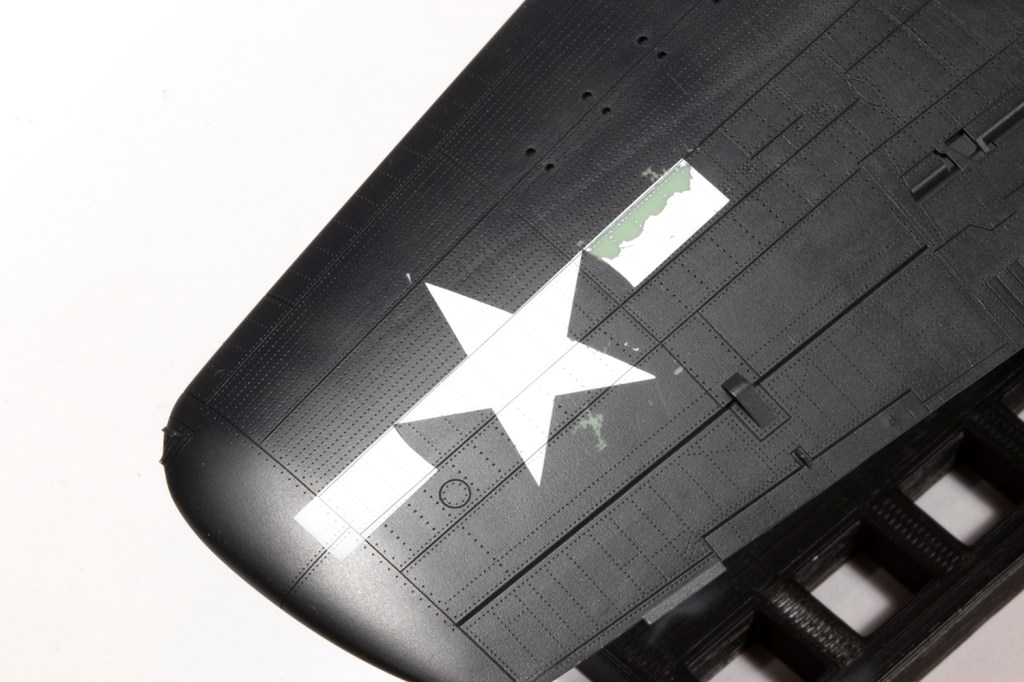
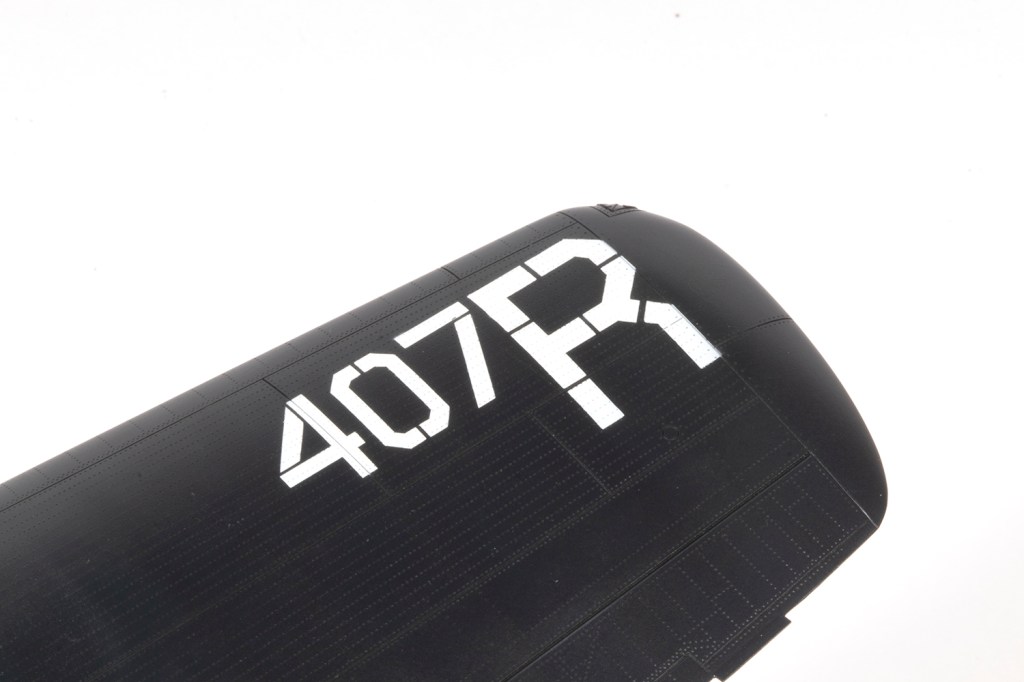
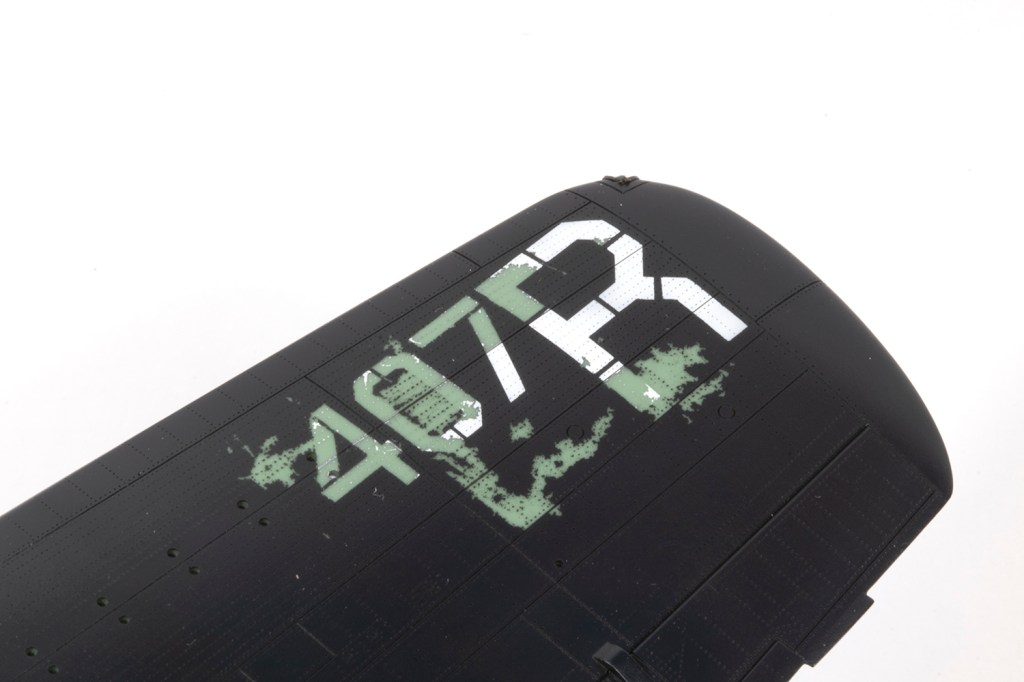
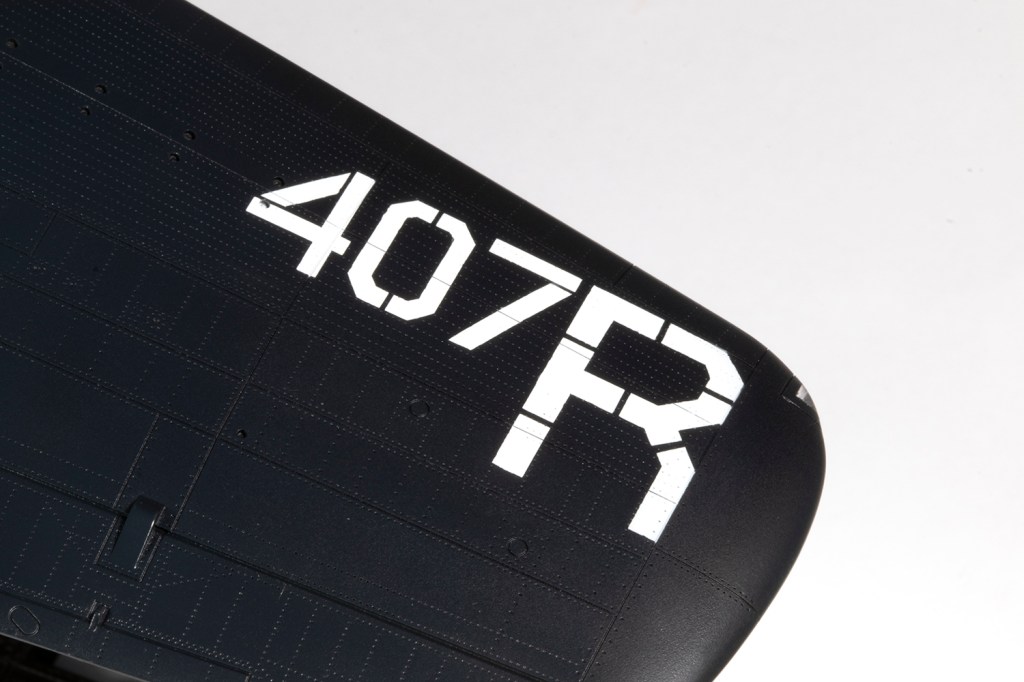
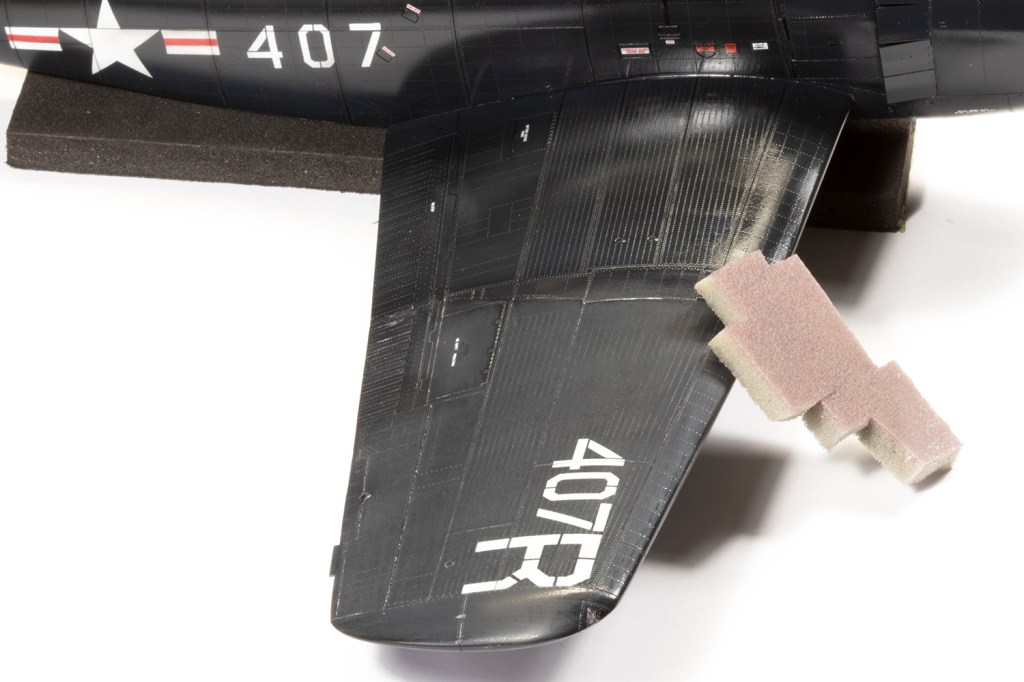
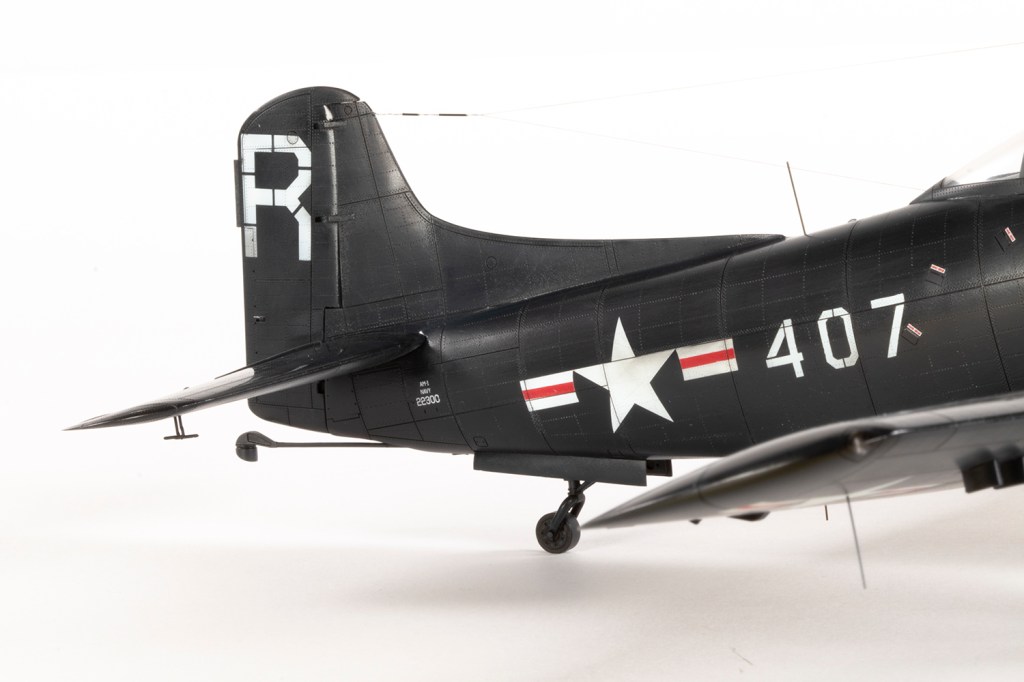
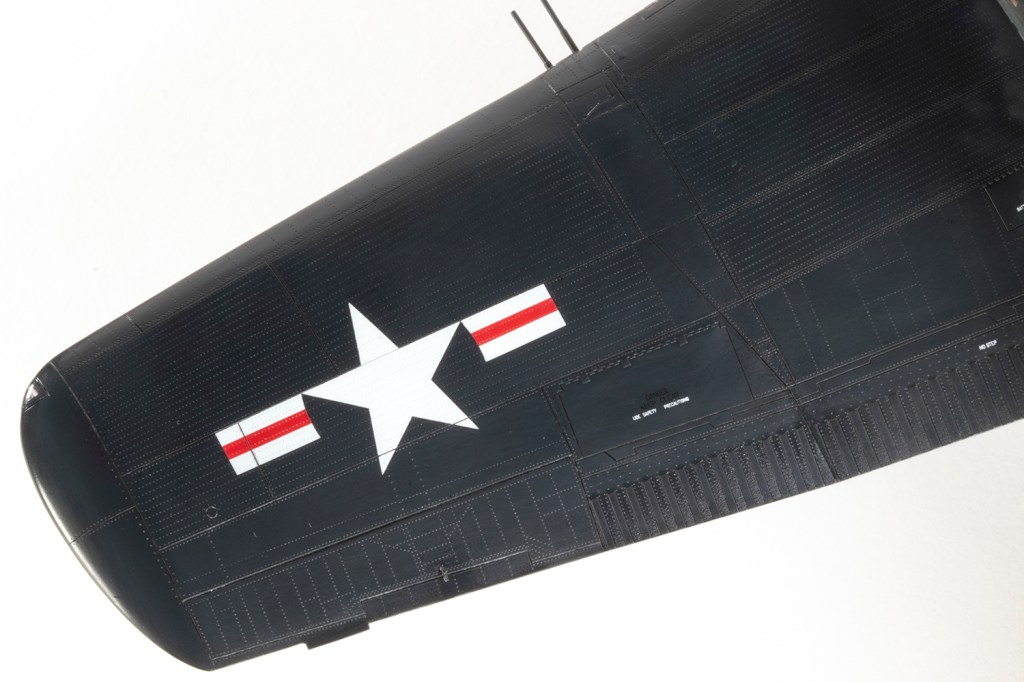
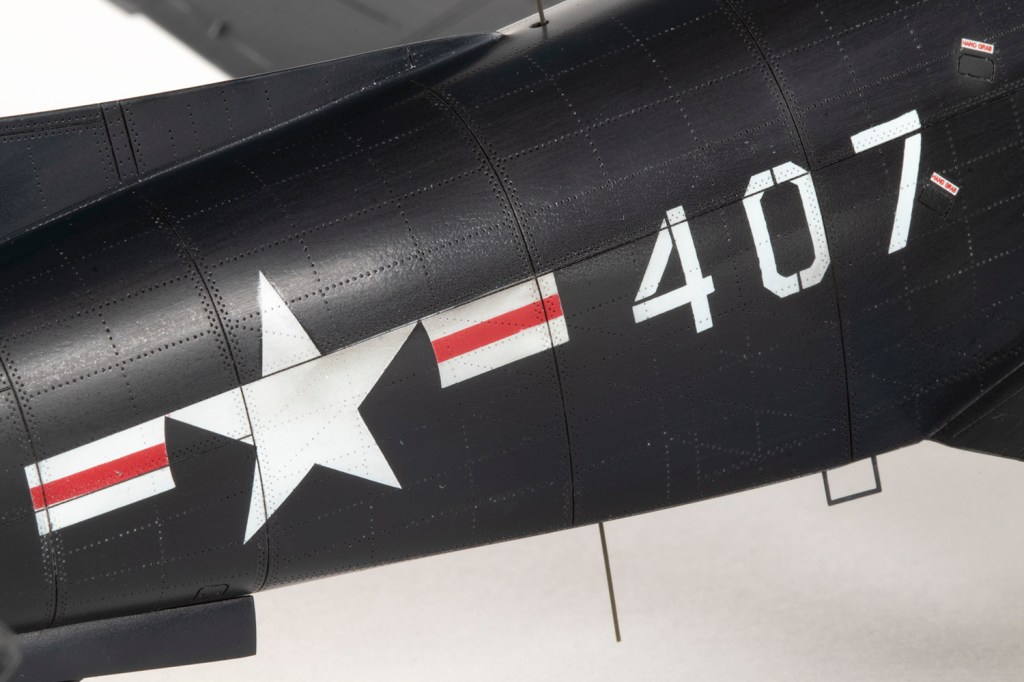
I also elected to mask and airbrush the national insignia and larger markings – the attractively slanted ‘R’ on the tail, ‘407’ and ‘407R’ codes. This allowed me to properly segment the ‘R’s (Halberd missed a bit out) and correct the bottom of the ‘7’s. Although I cleaned the resin pretty thoroughly with 99% IPA, and primed with Mr Finishing Surfacer 1500 Black, I did have some problems on the underside of the wings when removing the masks I’d made with my Silhouette cutter. I used Oramask 813 for the masks, which is a very stiff material suited to relatively flat surfaces, and I chose it because it retains its shape much better than the more flexible Oramask 810. The disadvantage is that the adhesive is very sticky, and I didn’t wait quite long enough for the Gloss Sea Blue to cure, so it lifted the paint. Thankfully, because lacquers do dry very quickly, it was easy to sand, reprime and paint the affected areas quite quickly, and applying fresh masks the following day left the model with no signs of any problems. The white is Tamiya XF-2 and the red on the stars and bars mixed with XF-7 Red and XF-64 Red Brown in an unknown ratio – I just fiddled about until I got something I was happy with.
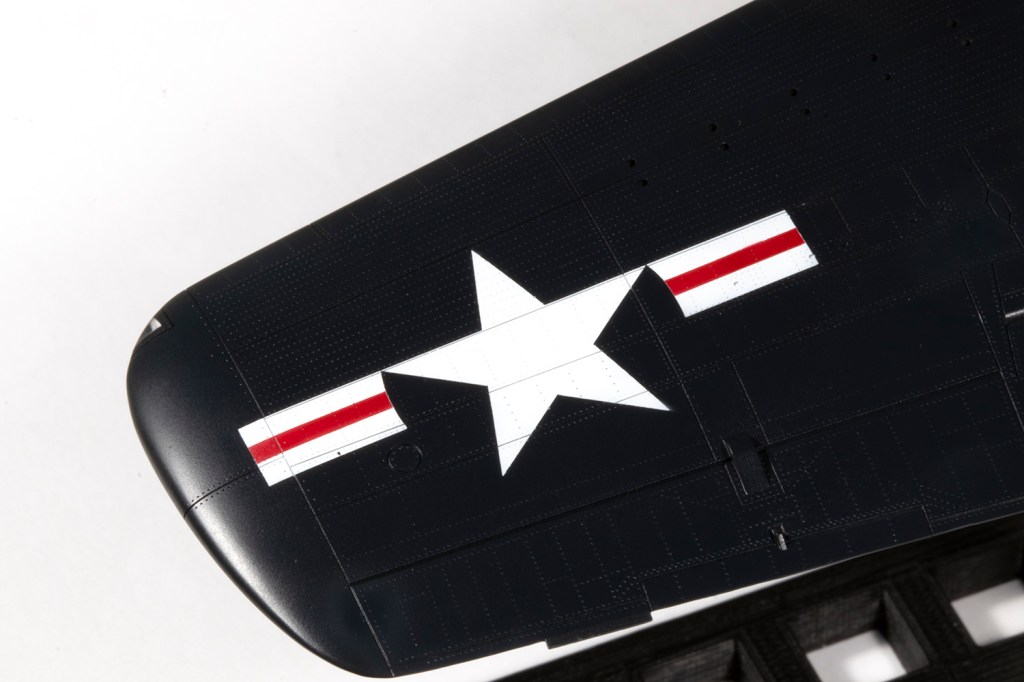
Once painted I had the patina to worry about. The clue is in the name – Gloss Sea Blue – but it’s very difficult to get the right level of shine on a 1/48 aircraft. In the past I’ve had luck with Mr Color GX100 Clear Gloss flatted with 2500 grit Infini sanders and polished with their 4000 grit buffers. I think this gives a suitably subdued gloss, although I’m sure many will consider it way too shiny. There’s no correct answer, and as with all things modelling, we have to live with our compromises. This worked quite well on the Mauler, but I had to be super careful around the slightly raised surface detail and those PE cowling flaps, and I’m not going to pretend there were no touch ups required. The other problem is the surface detail gets clogged with the sanding detritus. I didn’t bother doing all this on the undersides because life’s too short, and so that’s just native paint.
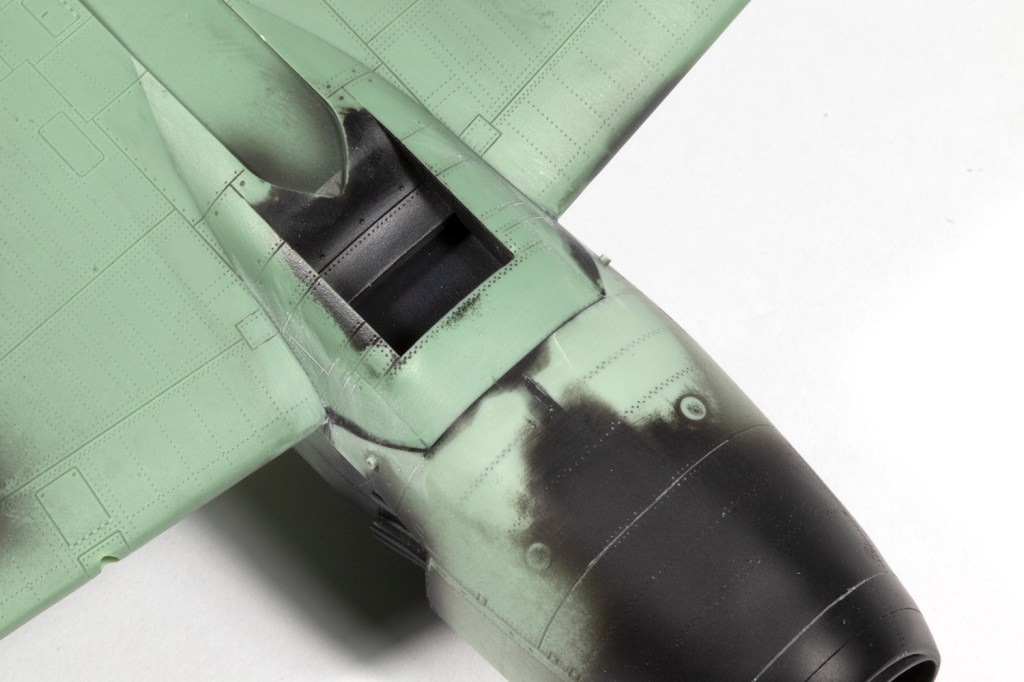
Contrasting with the glossy paint is the exhaust staining from the huge 28 cylinder Pratt & Whitney 4360 radial engine, which I attempted to replicate by airbrushing some Liquitex inks (a mix of black, white and raw umber) and MRP Exhaust. Photos show the wing roots could also get pretty dirty, even on carrier-based aircraft, and here I dabbed on some Abteilung 502 Cream Brown oil paint locked in place with MRP Flat Clear. If you fancy a more heavily weathered aircraft, US Naval Reserve Maulers showed pretty extensive exhaust staining that extended way down the fuselage.
Final construction was the usual stress (especially fitting the tail wheel doors), and I was very worried that the undercarriage wouldn’t hold, but thus far it has. There are several PE parts for under the wings, but I couldn’t see most of these on the images in the Ginter book, so only added part 1 on each side. Antennae wire is from Uschi van der Rosten fine rigging wire – resin part #74 as shown in the instructions (but not in the parts list) was not in the kit, so I just threaded the wire through a hole at this location. Halberd instruct the modeller to make the command aerial on the fuselage spine from 0.2mm rod; I used stretched sprue, and took the opportunity to use the same to make the homing aerials under the wings and rear fuselage.
I definitely did not expect to be able to add a 1/48 Mauler to my collection and so was further shocked when, halfway through this project, Modelsvit announced an injection-moulded kit of the same aircraft. What are the chances? The CAD looks good, with deployable flaps/airbrakes, but I’d be very surprised if it can match the Halberd Models kit for detail and surface finesse, although undoubtedly it will be a fraction of the price. No matter; building this kit was the perfect combination of challenge and enjoyment. Halberd have produced a work of art, and it was a privilege.


Year bought: 2025 (Halberd Models)
Year built: 2026 (New Addington, Croydon)
Back to home.
